CHAPTER 8
Manage apps
Users require applications for every task they perform; this includes editing documents, querying databases, and generating reports. Supporting the operation of applications is a critical part of the desktop support role, and you will encounter questions on the exam regarding app management. This chapter examines the different methods for presenting apps to the end user, and how those apps can be supported in Windows 10.
Skills in this chapter
![]() Skill 8.1: Deploy and manage RemoteApp apps
Skill 8.1: Deploy and manage RemoteApp apps
![]() Skill 8.2: Support desktop apps
Skill 8.2: Support desktop apps
Skill 8.1: Deploy and manage RemoteApp apps
Traditionally, support staff in IT departments deploy apps to users’ devices. This means that the app is physically present on a user’s device. However, you can also make apps available by using Remote Desktop Services. RemoteApp in Windows Server 2016 enables you to publish apps to users’ devices. These apps are presented as if they are installed locally, but run on the RD Session Host server. There are a number of advantages to using RemoteApp apps. These include:
![]() Supporting branch offices, where there is limited local IT support.
Supporting branch offices, where there is limited local IT support.
![]() Enabling users that want to access programs remotely.
Enabling users that want to access programs remotely.
![]() Providing the ability to deploy your line-of-business (LOB) apps to a variety of devices types and architectures.
Providing the ability to deploy your line-of-business (LOB) apps to a variety of devices types and architectures.
![]() Enabling “hot desking” workspaces, where users do not own their designated computers.
Enabling “hot desking” workspaces, where users do not own their designated computers.
![]() Being able to deploy multiple versions of an app.
Being able to deploy multiple versions of an app.
This section covers how to:
![]() Configure RemoteApp and Desktop Connections settings
Configure RemoteApp and Desktop Connections settings
![]() Configure Group Policy Objects (GPOs) for signed packages
Configure Group Policy Objects (GPOs) for signed packages
![]() Subscribe to the Desktop Connections feeds
Subscribe to the Desktop Connections feeds
![]() Support iOS and Android
Support iOS and Android
![]() Configure remote desktop web access for distribution
Configure remote desktop web access for distribution
Configure RemoteApp prerequisites
Before you can deploy RemoteApp apps, you must perform a number of procedures on your Windows Server 2016 server computer.
![]() Install the RD Session Host Role Service
Install the RD Session Host Role Service
![]() Install apps
Install apps
Note that the specifics of the process for deploying the required server roles might vary based on your organization’s specific requirements. To provide the necessary services for a small organization using a single RD Session Host Role server, use the following guidance.
Installing the RD Session Host role service
To install the RD Session Host role service (and any required services), sign in to your Windows Server 2016 server computer as a member of the local Administrators group. Open Server Manager, and then complete the following procedure:
In Server Manager, on the Dashboard, click Add roles and features.
Click Next, and then, on the Installation Type page, click Remote Desktop Services installation, and then click Next.
On the Select deployment type page, click Quick Start, as shown in Figure 8-1. This deployment option enables you to deploy Remote Desktop Services on a single server, and creates a collection and publishes RemoteApp apps. This option deploys the RD Connection Broker, RD Web Access, and RD Session Host role services to the same server.
On the Select deployment scenario page, click Session-Based Desktop Deployment.
On the Select A Server page, ensure that the local server is in the Selected list. Click Next.
On the Confirm Selections page, select the Restart The Destination Server Automatically If Required check box, and then click Deploy. The installation proceeds, as shown in Figure 8-2.
Restart your server computer and then sign in as a member of the local Administrators group. After you sign in, configuration completes without further intervention.


Install apps
After you have installed the Remote Desktop Session Host, you can install apps on the server. You install apps in a similar way that you do on a local desktop. For example, to make Microsoft Office 2016 available as a RemoteApp, install the app on the Remote Desktop Session Host computer.
To ensure that apps work properly on an RD Session Host, you must use Control Panel to install them. Use the following procedure:
Open Control Panel and click Programs.
On the Programs page, click Install Application On Remote Desktop, as shown in Figure 8-3.
In the Install Program From Floppy Disk Or CD-ROM dialog box, click Next.
Browse to the location of the setup file for the application. Select the installer, and click Next.
The app installation process starts. Follow the on-screen installation prompts to install the app.
After the app is installed, in the Finish Admin Install dialog box, click Finish.

After you have installed the apps that you want to make available to your users through Remote Desktop Services, you must publish the app. To do this, open Server Manager, and then complete the following procedure:
In Server Manager, click Remote Desktop Services.
In the Remote Desktop Services window, click the QuickSessionCollection node.
In the RemoteApp Programs section, click Tasks, and then click Publish RemoteApp Programs.
Scroll down and select the app that you just installed, as shown in Figure 8-5, and then click Next.
On the Confirmation page, click Publish.
When prompted, click Close. The newly published app is displayed in the RemoteApp Programs list.


Configure RemoteApp and Desktop Connections settings
RemoteApp and Desktop Connections enables you to provide specific RemoteApp apps to users. RemoteApp And Desktop Connections is enabled by default on a Windows 10 computer. To access RemoteApp and Desktop Connections:
Click Start, type RemoteApp and Desktop Connections.
Click RemoteApp And Desktop Connections. The RemoteApp And Desktop Connections window will appear, as shown in Figure 8-6.
Click Access RemoteApp and desktops.
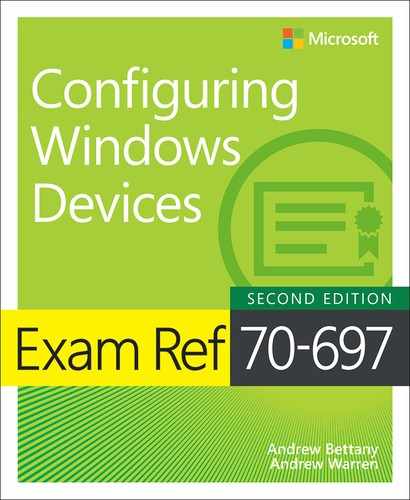
In the Access RemoteApp And Desktops Wizard, enter the connection URL to the server that hosts the apps, as shown in Figure 8-7, and click Next.
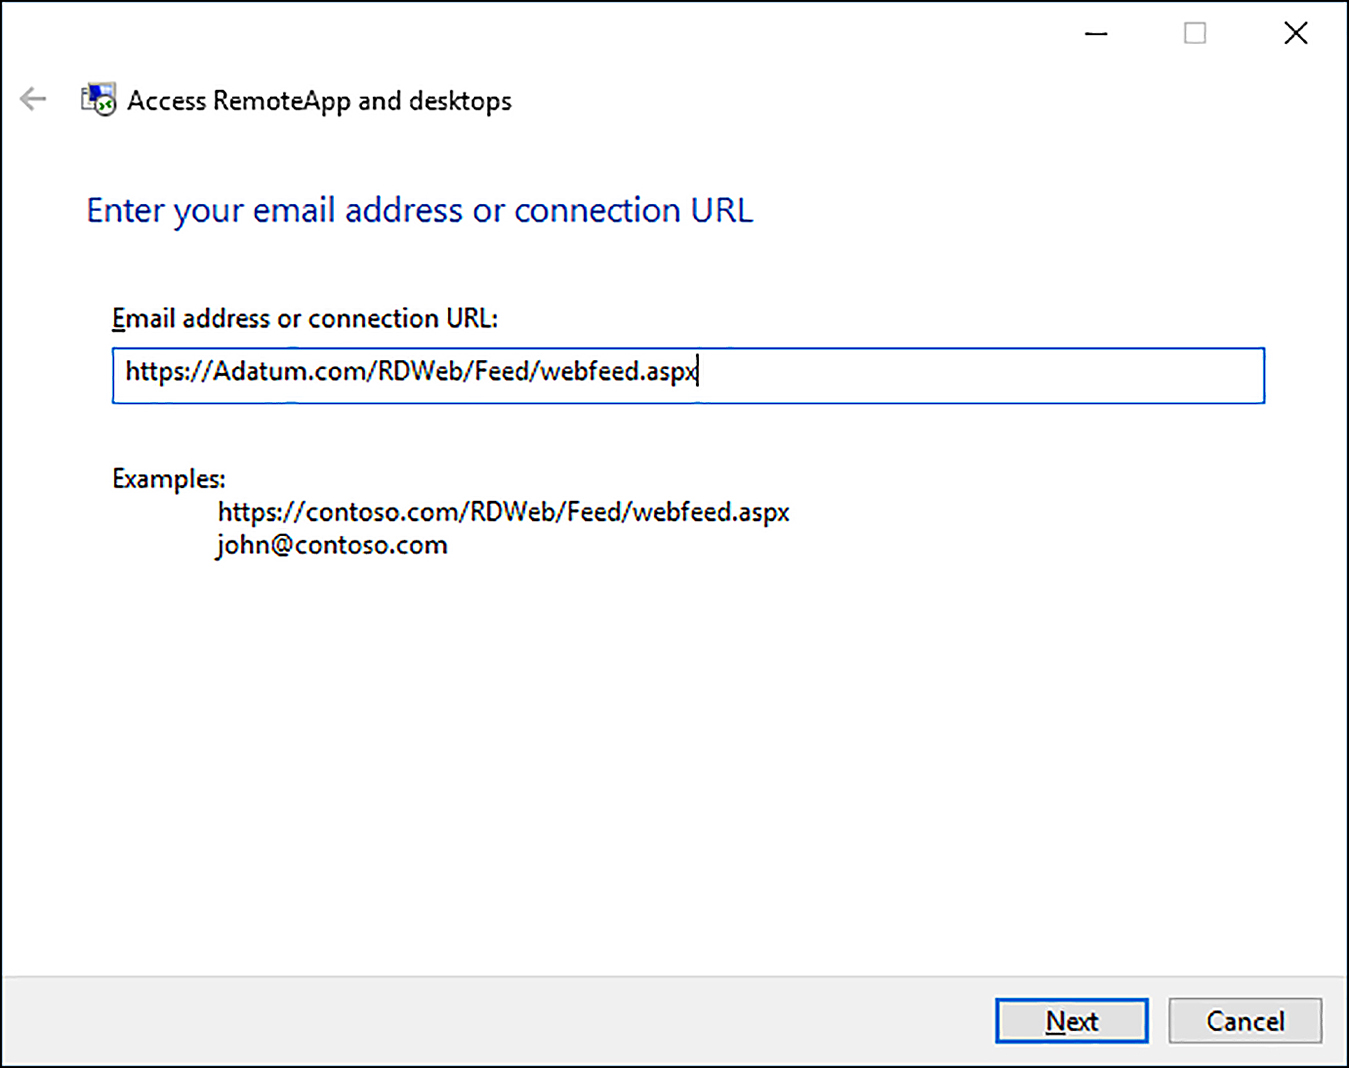
On the Ready To Set Up The Connection page, shown in Figure 8-8, click Next.
After the connection is successfully set up. As shown in Figure 8-9, the Finish page displays the URL used, and lists the number of available programs.


You can now access these programs from Start, as shown in Figure 8-10. They are listed as (Work Resources).

You can also check the configuration of your RemoteApp And Desktop Connections as shown in Figure 8-11.

Configure Group Policy Objects for signed packages
RemoteApp programs are typically digitally signed. To ensure that users can access RemoteApp programs that are digitally signed, you must configure client computers to recognize those programs as coming from a trusted publisher by using Group Policy.
In most cases, the Group Policy changes will be made to a domain-based Group Policy environment. You can do this by using the Group Policy Management console on a domain controller or another computer running the Remote Server Administration Tools connected to a domain controller.
The following Group Policy settings allow you to control the behavior of client computers when opening a digitally signed RDP file from RemoteApp. They are all found in Computer ConfigurationPoliciesAdministrative TemplatesWindows ComponentsRemote Desktop ServicesRemote Desktop Connection Client.
![]() Specify SHA1 thumbprints of certificates representing trusted RDP publishers.
Specify SHA1 thumbprints of certificates representing trusted RDP publishers.
![]() Allow RDP files from valid publishers and user’s default RDP settings.
Allow RDP files from valid publishers and user’s default RDP settings.
![]() Allow RDP files from unknown publishers.
Allow RDP files from unknown publishers.
Subscribe to the Desktop Connections feeds
To subscribe to additional Desktop Connections feed, do the following:
From Control Panel, open the RemoteApp And Desktop Connections window.
In the RemoteApp And Desktop Connections window, click Access RemoteApp And Desktops.
In the Connection URL box, type the URL for the connection that your administrator provided to you.
Click Next.
On the Ready To Set Up The Connection page, click Next.
After the connection is successfully set up, note the name of the connection, and then click Finish.
Close RemoteApp and Desktop Connections.
To access the connection, click Start, type RemoteApp and Desktop Connections, click RemoteApp And Desktop Connections, and then click the name of the connection (for example, Adatum).
The programs and remote desktops that are available as part of the connection are listed under the connection name. Click the program or remote desktop that you want to use.
Support iOS and Android
Clients always access RemoteApp programs by using the Remote Desktop Connection app. This app is included by default in Windows clients, so no additional installation is required. However, to support iOS and Android clients, you must install the Microsoft Remote Desktop app in order to access RemoteApp programs.
Install and configure Remote Desktop app on iOS
To install the Remote Desktop app on an iOS device, perform the following steps:
Open the App Store app on your iOS device.
Locate and install the Microsoft Remote Desktop app.
Open the Microsoft Remote Desktop app.
Tap the plus (+) icon and then select RemoteApp.
Enter the URL to the RemoteApp server.
Enter your Microsoft credentials associated with the RemoteApp deployment.
Select the invitations listed on the screen to accept the associated RemoteApp programs.
After accepting your invitations, the list of apps you have access to will be downloaded to your device and made available. Tap one of the apps to start using it.
Install and configure Remote Desktop app on Android
To install the Remote Desktop app on an Android device, perform the following steps:
Open the Play Store app on your Android device.
Locate the Microsoft Remote Desktop app.
Click the INSTALL button.
After the app has installed, open the Microsoft Remote Desktop app.
Tap the plus (+) icon and then select RemoteApp.
Enter the URL to the RemoteApp server.
Enter your Microsoft credentials associated with the RemoteApp deployment.
Select the invitations listed on the screen to accept the associated RemoteApp programs.
After accepting your invitations, the list of apps you have access to will be downloaded to your device and made available. Tap one of the apps to start using it.
Configure Remote Desktop Web access for distribution
Remote Desktop Web Access (RD Web Access) enables users to access applications through a special website. RD Web Access provides a secure way to present remote applications to users who do not wish to use a single device to access RemoteApp programs, or who need access from a web browser. A typical URL is https://rds.Adatum.com/RDWeb.
After they sign in, users can access a secure site, and establish a secure socket layer (SSL) session between the client and the RD Web Access server. After authentication, users see a list of any RemoteApp apps that they have permission to use, as shown in Figure 8-12.

Skill 8.2: Support desktop apps
Although Windows 10 supports a growing set of Microsoft Store apps, many organizations rely on traditional desktop apps to fulfill business needs and enable user productivity. A number of issues can arise while supporting desktop apps. For example, the desktop app might not be fully compatible with Windows 10. In this case, you can use the Application Compatibility tools to determine how widespread the problem is and learn how to fix it before proceeding with an organization-wide installation of Windows 10 or the application.
Other issues include the need to run two or more versions of an app side-by-side, and in these cases and similar scenarios, you might opt for technologies such as Hyper-V, RemoteApp, and AppV. You might also opt to run a problematic or noncompliant app virtually or remotely. Other options available for additional desktop app scenarios and functionality include User Experience Virtualization (UE-V) and Microsoft Intune (discussed in this section).
This section covers how to:
![]() Support desktop app compatibility by using Application Compatibility Tools
Support desktop app compatibility by using Application Compatibility Tools
![]() Support desktop application co-existence
Support desktop application co-existence
![]() Install and configure User Experience Virtualization
Install and configure User Experience Virtualization
![]() Deploy desktop apps by using Microsoft Intune
Deploy desktop apps by using Microsoft Intune
Support desktop app compatibility by using Application Compatibility Tools
The Application Compatibility Tools are included with the Windows Assessment and Deployment Toolkit (Windows ADK) and can be used to help you diagnose and fix application compatibility problems. The Application Compatibility Tools consists of two components: Compatibility Administrator and Standard User Analyzer.
Fix problems
When application compatibility problems are uncovered, you have to decide how you will deal with them. It might be time to move from a little-known office application suite to something more mainstream, such as Microsoft Office. It might be time to simply retire an application, or you might decide (and likely will in most cases) to fix the problem and continue to use the application. Fixing the problem can involve modifying the code or applying shims.
A common way to fix a compatibility issue is to alter the app code. Microsoft recommends this in preference to changing Registry settings or trying other potentially risky or short-term workarounds. Changing the code requires resources (like money and time) on the front end, but the result might be worth it. If altering the app code is not an option, or if you need a short-term workaround, another option to consider is to create a shim.
UNDERSTAND SHIMS
If you opt to use the Shim Infrastructure, you can apply the fix (shim) to a specific application and application version only. Shims you create remain independent of the core Windows functions.
Technically, Shim Infrastructure involves application programming interface (API) hooking; the shim redirects API calls from Windows to some other code, which is the shim itself. Windows manages and secures shims just as it would the original application code. Thus, you can’t use shims to work around security mechanisms already in place by the operating system, including User Account Control (UAC) prompts. You also can’t use a shim to fix kernel-mode code, specifically to fix issues with device drivers. Shims can fix compatibility issues and are often applied as the desired solutions to compatibility problems.
KNOW WHEN TO USE SHIMS
Deciding to use shims is a process like anything else. You must first decide whether the problem merits a shim and is worth the time it takes to create it. Here are a few reasons you might opt for a shim:
![]() The vendor who created the application is out of business and no updates are available. The source code isn’t available either, so shims are the only option.
The vendor who created the application is out of business and no updates are available. The source code isn’t available either, so shims are the only option.
![]() Your company created the application. If you don’t have the time available to rewrite the code, a shim is the next best alternative.
Your company created the application. If you don’t have the time available to rewrite the code, a shim is the next best alternative.
![]() The vendor is still in business, but has yet to create an update or fix. Alternatively, a company-created application can be modified in the future, but no immediate update is available. In these cases, a shim can work temporarily, until an update becomes available in the future.
The vendor is still in business, but has yet to create an update or fix. Alternatively, a company-created application can be modified in the future, but no immediate update is available. In these cases, a shim can work temporarily, until an update becomes available in the future.
USE COMPATIBILITY ADMINISTRATOR
One tool you might opt to use to resolve application compatibility issues is the Compatibility Administrator. This tool provides:
![]() Compatibility updates, compatibility modes, and AppHelp messages that you use to resolve specific compatibility issues.
Compatibility updates, compatibility modes, and AppHelp messages that you use to resolve specific compatibility issues.
![]() Tools that enable you to create your own customized compatibility updates, compatibility modes, AppHelp messages, and compatibility databases.
Tools that enable you to create your own customized compatibility updates, compatibility modes, AppHelp messages, and compatibility databases.
![]() A tool that you can use to query and search for installed compatibility updates on your organization’s computers.
A tool that you can use to query and search for installed compatibility updates on your organization’s computers.
To use this tool to fix an application compatibility issue, use the following:
Sign in to your computer where you installed the Windows ADK Application Compatibility Tools with a user account that belongs to the local Administrators group.
Click Start, expand Windows Kits, and then click Compatibility Administrator (64-bit). Note that there is also a 32-bit version available.
In the Compatibility Administrator (64-bit) – New Database (1) [Untitled_1]* dialog box, right-click New Database(1) [Untitled_1]*, and then click Rename.
Type an appropriate name for the database, as shown in Figure 8-13, and then press Enter.
In the Compatibility Administrator window, right-click your newly named database, click Create New, and then click Application Fix.
In the Create New Application Fix Wizard, in the Name Of The Program To Be Fixed text box, type the application name.
Click Browse, and in the Find Binary window, browse to the suspect application’s launch file, and then click Open.
In the Create New Application Fix Window, click Next.
On the Compatibility Modes page, shown in Figure 8-14, select the Run This Program In Compatibility Mode For check box, click the drop-down list box, and then select a suitable mode, if required.
Some older apps require that they run in administrative mode. If this is the case with your suspect app, in the Additional Compatibility Modes section, scroll down, select the RunAsAdmin check box, and then click Next.
On the Compatibility Fixes page, click Next.
On the Matching Information page, click Finish.
In the Compatibility Administrator window, shown in Figure 8-15, click Save.
In the Save Database window, browse to a suitable location, type a name in the File name box, and then click Save. The file has an .sdb extension.
Close the Compatibility Administrator window.


After you have created the fix, you can distribute the application fix, or shim, to your users. They can install it by running the following command:
Sdbinst C:Suspect_App_Fix.sdb
You can also distribute the fix by using a script, or with Group Policy Objects.
Support desktop application co-existence
You can further test and run applications on new operating systems by using technologies such as Hyper-V, RemoteApp, and App-V. Hyper-V lets you run applications on virtual machines (VMs) in a dedicated space that you can easily manage. RemoteApp lets you access applications remotely through Remote Desktop Services, and the apps themselves are housed and managed on network servers. App-V lets you virtualize applications so that you can use the applications side-by-side on the same system. All three options let you test applications in various scenarios before deployment. You can then make decisions based on what solution and environment works best in your enterprise.
Support Hyper-V
With Windows 10 Pro and Windows 10 Enterprise, you can create virtual machines that are housed inside a single operating system on a single computer. These virtual machines can run their own operating systems, and you can separate and secure them with virtual switches. A hypervisor keeps these “child” operating systems separate from the parent operating system.
This enables network administrators to combine multiple machines into one, which saves money, power consumption, resources, and space. In Windows 10, this technology is called Client Hyper-V and is a free element. With regard to supporting applications, you will install applications that you want to test in these environments to check compatibility, perhaps after shims or other updates are applied.
To use Hyper-V, you’ll need the following:
![]() Windows 10 Pro or Windows 10 Enterprise, 64-bit
Windows 10 Pro or Windows 10 Enterprise, 64-bit
![]() A processor with Second Level Address Translation (SLAT) support
A processor with Second Level Address Translation (SLAT) support
![]() 4 GB of RAM
4 GB of RAM
![]() BIOS-level hardware virtualization support
BIOS-level hardware virtualization support
If you have a compatible computer, you can create and configure a virtual machine.
You must first enable Hyper-V from Control Panel, however, under Programs And Features. Click Turn Windows Features On Or Off, locate Hyper-V, and select all related entries (see Figure 8-16). When it’s enabled, click OK and restart the computer. After restarting, you’ll have access to two new apps when you log on as an administrator: Hyper-V Manager and Hyper-V Virtual Machine Connection.

 EXAM TIP
You can enable Hyper-V in Windows PowerShell with the Enable-WindowsOptionalFeature -FeatureName Microsoft-Hyper-V -All command.
Understanding and supporting RemoteApp
Remote Desktop Services (RDS) lets you virtualize a computing session. You can opt to virtualize the entire desktop or, in this chapter, only individual applications. You use RemoteApp tools and technologies to virtualize applications. When you do, applications look and feel as though they’re running on the computer a user is sitting in front of, but in reality the app is being hosted elsewhere. As you might guess, this could be used to resolve compatibility problems with specific apps, as well as provide another means to test the apps before deployment. You can use RemoteApp with local apps, and they can be added to the Start screen.
RemoteApp programs are stored on an RD Session Host server; virtual desktops are hosted on an RD Virtualization Host server. These virtual environments can be accessed remotely from a configured client machine. The Windows server running the RDS role must have the following services configured and available:
![]() RD Session Host enables a server to host the desired applications (and perhaps full desktops). Users connect to this server to run the programs. Users also save files and access other network resources available on the server, as applicable.
RD Session Host enables a server to host the desired applications (and perhaps full desktops). Users connect to this server to run the programs. Users also save files and access other network resources available on the server, as applicable.
![]() RD Virtualization Host, with Hyper-V, hosts the virtual machines and makes them available to users as virtual desktops. These virtual desktops can be provided in a pool on a first-come, first-served basis, or you can assign a specific desktop to a specific user.
RD Virtualization Host, with Hyper-V, hosts the virtual machines and makes them available to users as virtual desktops. These virtual desktops can be provided in a pool on a first-come, first-served basis, or you can assign a specific desktop to a specific user.
![]() RD Web Access enables users to access RemoteApp and Desktop Connection through a web browser.
RD Web Access enables users to access RemoteApp and Desktop Connection through a web browser.
![]() RD Licensing is used to manage the RDS client access licenses. A license must exist for a user to connect to the RD Session Host server.
RD Licensing is used to manage the RDS client access licenses. A license must exist for a user to connect to the RD Session Host server.
![]() RD Gateway enables users to access the internal enterprise network remotely from an Internet-connected device such as a tablet or laptop.
RD Gateway enables users to access the internal enterprise network remotely from an Internet-connected device such as a tablet or laptop.
![]() RD Connection Broker helps manage session load balancing and reconnection. It also provides access to the RemoteApp programs and virtual desktops.
RD Connection Broker helps manage session load balancing and reconnection. It also provides access to the RemoteApp programs and virtual desktops.
Here are other reasons to use RDS:
![]() You can consolidate all apps to manage them more easily. When an app needs to be updated or otherwise serviced, you can perform the needed work on the RD Session Host server instead of on every client desktop.
You can consolidate all apps to manage them more easily. When an app needs to be updated or otherwise serviced, you can perform the needed work on the RD Session Host server instead of on every client desktop.
![]() You can simplify deployment when applications are difficult to manage, perhaps because they are updated often or prone to problems.
You can simplify deployment when applications are difficult to manage, perhaps because they are updated often or prone to problems.
![]() You can use fewer resources on client computers and simplify management by hosting rarely used applications.
You can use fewer resources on client computers and simplify management by hosting rarely used applications.
![]() You can allow access to company applications remotely, for instance, from home, from tablets or other limited hardware, or while traveling on business.
You can allow access to company applications remotely, for instance, from home, from tablets or other limited hardware, or while traveling on business.
Understand and support App-V
In some instances, you might need to run several applications side-by-side on a single computer. Doing so is generally okay, unless those applications conflict with one another. Such a conflict almost always occurs when you need to run multiple versions of the same application.
This could certainly happen and is common in testing environments. In other cases, applications simply don’t work well together. This might not have anything to do with versioning and could be caused by something completely different and difficult to diagnose. App-V helps you resolve these kinds of problems. Specifically, App-V lets you virtualize an application so that it remains independent of others, but can still live on the same machine without causing conflict.
Application virtualization, as you’ve already learned, can also mean that users can access an application that’s installed elsewhere from almost anywhere an Internet connection and compatible hardware can be used. Virtualization keeps applications off client machines, which means that the users’ computers remain “clean” and administrators can manage the apps centrally (rather than having to manage every client in the enterprise). After App-V is set up and configured for use, a Windows 10 Enterprise user can install App-V client software to access and use the desired applications. As with other virtualization technologies, the running apps appear to the user to be installed and running on their own machines.
EXAM TIP
As soon as apps are virtualized, authorized users can access them through the App-V client application. If more than one app is available, a list appears from which they can select. Administrators set the required limitations on users and the apps they can access.
You must perform plenty of steps before end users can access virtualized applications. Setting up the actual infrastructure is beyond the scope of this book and is best left to experienced network administrators, but you must understand the fundamental task sequence and the hardware, software, and services required.
USE MICROSOFT DESKTOP OPTIMIZATION PACK (MDOP)
App-V is available from Microsoft Desktop Optimization Pack (MDOP). MDOP is available as a subscription for Software Assurance (SA) customers, although you can download an evaluation to experiment with if you are an MSDN or TechNet subscriber. To work through this part of the chapter, you’ll need to download and install MDOP before continuing.
Specifically, you need these elements, which are all part of App-V Server:
![]() App-V Management Server for managing App-V
App-V Management Server for managing App-V
![]() App-V Publishing Server to host virtual applications
App-V Publishing Server to host virtual applications
![]() App-V Reporting Server to run and view applicable reports
App-V Reporting Server to run and view applicable reports
![]() App-V Reporting Database Server to work with database deployments and report management
App-V Reporting Database Server to work with database deployments and report management
Beyond the required software, the hardware must also meet minimum requirements. The computer on which MDOP is installed must have the following:
![]() Microsoft .NET Framework 4.5
Microsoft .NET Framework 4.5
![]() Windows PowerShell 3.0
Windows PowerShell 3.0
![]() Update for Windows KB2533623
Update for Windows KB2533623
Each element must also meet specific requirements. For example, the App-V client, Remote Desktop Services client, and the App-V server must all have the applicable Microsoft Visual C++ Redistributable Package installed. To see all requirements, refer to this article on TechNet at: http://technet.microsoft.com/en-us/library/jj713458.aspx.
INSTALL THE APP-V SEQUENCER AND GETTING READY FOR SEQUENCING
You should install MDOP and the App-V Sequencer on a 64-bit Windows 10 Enterprise computer. From the MDOP installation folder, navigate to App-V, Installers, 5.1 (or applicable version), and then run the setup program. As soon as it’s installed, obtain the installer files for the application that you want to sequence. Copy those files to the computer that’s running the sequencer. Create a new VM to use for the sequencing tasks, and make a backup copy of it before you start.
When you’re ready, locate the Microsoft Application Virtualization Sequencer from the All Apps section of the Start menu. Click to open.
You can now do the following:
![]() Create virtual packages that can be deployed to computers that run the App-V client.
Create virtual packages that can be deployed to computers that run the App-V client.
![]() Upgrade and edit configuration information for packages you’ve already created.
Upgrade and edit configuration information for packages you’ve already created.
![]() Convert virtual packages.
Convert virtual packages.
Creating a package also creates the following:
![]() An MSI file that you’ll use to install the virtual package on client computers.
An MSI file that you’ll use to install the virtual package on client computers.
![]() A Report.xml file that contains all issues, warnings, and errors that were discovered during sequencing (in case you need to troubleshoot the package).
A Report.xml file that contains all issues, warnings, and errors that were discovered during sequencing (in case you need to troubleshoot the package).
![]() An APPV file, which is the virtual application file.
An APPV file, which is the virtual application file.
![]() A deployment configuration file that regulates how the virtual application is deployed.
A deployment configuration file that regulates how the virtual application is deployed.
![]() A user configuration file that regulates how the virtual application runs.
A user configuration file that regulates how the virtual application runs.
SEQUENCE AN APPLICATION
You can create virtualized application packages for standard applications, add-ons or plugins, and middleware. Creating packages for standard applications is the most common and what is detailed here. The following steps create one of the simplest types of packages. They don’t configure every aspect available, including the option to stream the virtualized application; that experimentation is up to you. From the computer that has the sequencer installed, use these steps:
From the Start menu, type App-V, and in the results click Microsoft Application Virtualization Sequencer.
Click Create A New Virtual Application Package.
Select Create Package (Default), and then click Next.
Click Refresh and, if all problems are resolved, click Next.
Select the Standard Application (Default) check box, and then click Next.
Click Browse to find the installation file for the application. (If the application doesn’t have an associated installer file, select the Perform A Custom Installation check box, and then click Next. Continue as prompted.)
Type a name for the package.
Click Browse to find the Primary Virtual Application Directory. Navigate to the location where the file would be installed by default, perhaps C:ProgramFiles<application name>. Note that you are navigating to this in the VM you already created.
Click Next three times. At the Create A Basic Package Or Customize Further page, select Customize, and then click Next.
Click Next to bypass the option to run the program briefly.
Select Allow This Package To Run Only On The Following Operating Systems, and then select Windows 10 32-bit and Windows 10 64-bit. Notice the other options, such as the option to Allow The Package To Run On Any Operating System.
Click Next.
Click Create.
When the Package Completed page appears, click Close.
With the package created, you are now ready for deployment. You can deploy App-V packages by using an Electronic Software Distribution (ESD) solution. When you opt for an ESD, you eliminate the need for an App-V 5.1 management server, management database, and publishing server. Alternatively, you can use Windows PowerShell to deploy a virtualized application. You can also opt to install the virtual application on a single computer, deploy it through Group Policy, or use it with Configuration Manager.
Install and configure User Experience Virtualization
Users are more mobile than ever, and the trend will continue. Making the user experience the same no matter where the users log on whether it’s on a laptop, desktop, or tablet would be valuable to users and enhance productivity. Network administrators have been doing so for quite some time by incorporating roaming user profiles, making the user’s files and folders available offline, configuring syncing when a user reconnects to the network, and incorporating folder redirection. However, User Experience Virtualization (UE-V) provides a different approach to maintaining a consistent user experience.
Microsoft UE-V monitors the Windows operating system, monitors apps and application settings that are applied when users are at their computers, and captures those settings. The information is saved to a defined storage location such as a network share folder. (This data isn’t saved to OneDrive, a USB drive, or similar mechanism.) The settings are then applied to the different computers and devices assigned to the user. What is synchronized and what apps and applications are included is determined by the settings location templates that the network administrator creates and configures, in combination with what the applications’ developers make available for synchronization.
Here are a few additional things to understand about UE-V:
![]() A user can change personal settings from any device included in the UE-V synchronization group. Those changes will be applied to the other computers the next time the user logs on to them.
A user can change personal settings from any device included in the UE-V synchronization group. Those changes will be applied to the other computers the next time the user logs on to them.
![]() The user can use UE-V with a Windows 7 or newer computer. Applicable and compatible settings will sync automatically.
The user can use UE-V with a Windows 7 or newer computer. Applicable and compatible settings will sync automatically.
![]() Changes are saved to a file, and the file is synced on log on. Nothing is actually virtualized.
Changes are saved to a file, and the file is synced on log on. Nothing is actually virtualized.
![]() Application settings that can be synced can come from applications installed on the device, applications that are sequenced with App-V, and RemoteApp applications.
Application settings that can be synced can come from applications installed on the device, applications that are sequenced with App-V, and RemoteApp applications.
![]() Settings can be used as part of a recovery process when a machine is reimaged or reinstalled.
Settings can be used as part of a recovery process when a machine is reimaged or reinstalled.
![]() You can incorporate Windows PowerShell and windows management instrumentation (WMI) to configure and deploy UE-V agents. Refer to this article to learn more at: http://technet.microsoft.com/en-us/library/dn458904.aspx.
You can incorporate Windows PowerShell and windows management instrumentation (WMI) to configure and deploy UE-V agents. Refer to this article to learn more at: http://technet.microsoft.com/en-us/library/dn458904.aspx.
![]() UE-V includes application settings templates for various editions of Microsoft Office, Internet Explorer, Windows Accessories, desktop settings, ease of use settings, and more.
UE-V includes application settings templates for various editions of Microsoft Office, Internet Explorer, Windows Accessories, desktop settings, ease of use settings, and more.
EXAM TIP
You might see exam questions with answers that include App-V, Roaming Profiles, RemoteApp, UE-V, Microsoft Intune, and similar technologies that you’ll learn about in this chapter. These questions will include a specific scenario the user needs and that you want to provide (perhaps retrieving application settings from the cloud, with the ability to change those settings and sync them back as is possible with UE-V). You must be able to choose the ideal technology when you are asked to provide a specific option or feature for users.
Several elements must be in place for UE-V to work. A UE-V Agent must be used. This agent watches what changes and saves those changes as applicable. A settings package is also necessary to store the application and operating system settings and application template information. Finally, a UE-V Generator must exist where you can create your own custom templates. A lot of planning and resources are required to put this technology into place. A deployment includes the following:
Deploy the Settings Storage Location.
Deploy the UE-V Agent. (This is included in Windows 10).
Install the Group Policy templates.
Install the Agent Generator.
Deploy the Settings Template Catalog.
Deploy Settings Location Templates.
Administer UE-V and understand how to:
 Manage frequency of scheduled tasks. Restore application and Windows settings. Configure applicable Group Policy objects. Manage settings packages. Incorporate App-V applications. Incorporate Configuration Manager as applicable.
Deploy desktop apps by using Microsoft Intune
Not all companies have the money, time, or resources to set up and maintain an intricate server infrastructure, the ability or know-how to set up personal VMs, or the ability to set up a UE-V substructure to synchronize various user settings. Keeping applications off users’ desktops, especially with so many of them mobile and using multiple devices, can lighten the load required of network administrators (as well as support staff). This is where Microsoft Intune can provide significant benefits. Any size company can use Microsoft Intune to virtualize applications.
In this section you’ll review just enough about Microsoft Intune to understand what it is and how you can use it. With Microsoft Intune, a company can:
![]() Use a single web-based administrator console to manage computers and mobile devices via the cloud.
Use a single web-based administrator console to manage computers and mobile devices via the cloud.
![]() Simplify the management of various devices, including Windows laptops, desktops, tablets, and phones and even Apple iOS and Android devices.
Simplify the management of various devices, including Windows laptops, desktops, tablets, and phones and even Apple iOS and Android devices.
![]() Make following company guidelines easier by using the cloud to manage all devices.
Make following company guidelines easier by using the cloud to manage all devices.
![]() Download Microsoft Intune client software when necessary, using a Microsoft account and password, from the administration page. (Client software can be deployed in many ways, including manually, through Group Policy and by using Configuration Manager.)
Download Microsoft Intune client software when necessary, using a Microsoft account and password, from the administration page. (Client software can be deployed in many ways, including manually, through Group Policy and by using Configuration Manager.)
![]() Make software available to users, requiring all users to have the software or making it optional, while at the same time requiring no user interaction for installing it.
Make software available to users, requiring all users to have the software or making it optional, while at the same time requiring no user interaction for installing it.
![]() Make software available through the company portal so that Windows RT users can install applications as needed.
Make software available through the company portal so that Windows RT users can install applications as needed.
![]() Create, upload, publish, and deploy software packages; configure and manage security policies; manage inventory; and create inventory reports when combined with Configuration Manager.
Create, upload, publish, and deploy software packages; configure and manage security policies; manage inventory; and create inventory reports when combined with Configuration Manager.
Unlike most of what you’ve seen so far in this section, you can get a free 30-day trial of Microsoft Intune even if you don’t have a Software Assurance plan. After you set it up (and possibly install Microsoft Silverlight if you didn’t have it already), go to https://manage.microsoft.com, log on, and work through the setup processes. Your logon name should look something like [email protected]. Figure 8-17 shows the Microsoft Intune Administrator Console with System Overview selected.

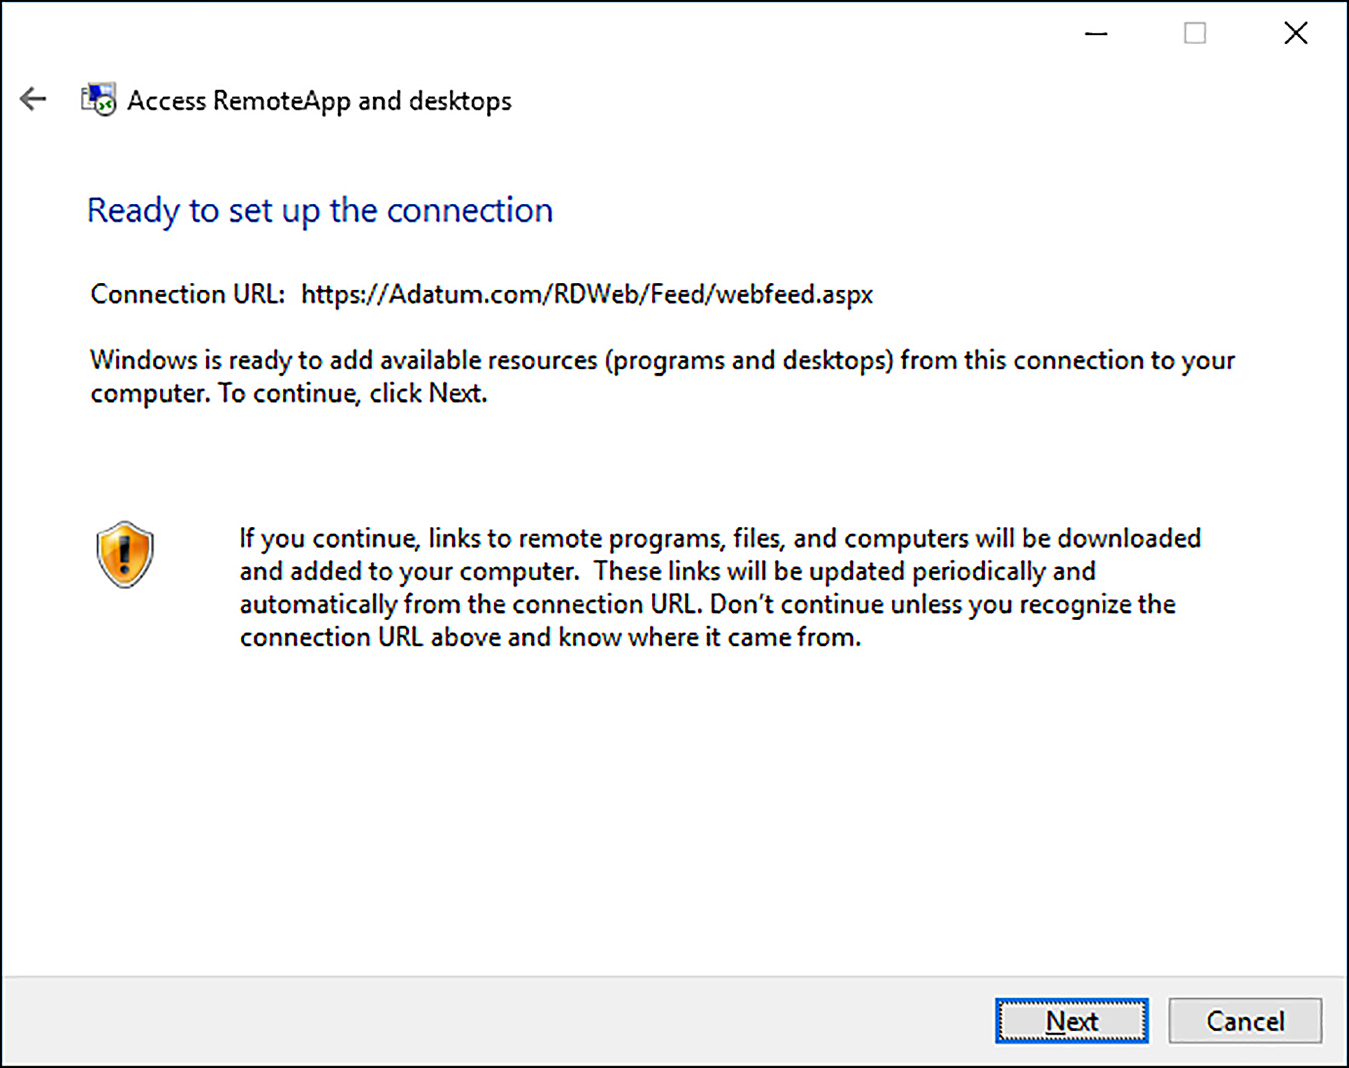
If you’ve set up a free trial of Microsoft Intune, you can find out about how to upload and distribute apps via Microsoft Intune, as shown in Figure 8-18, by reading Chapter 1, “Manage identity.”
Thought experiments
In these thought experiments, demonstrate your skills and knowledge of the topics covered in this chapter. You can find the answers to these thought experiments in the next section.
Scenario 1
Your organization must deploy an application to users in North America and India. You do not have application deployment tools in place for the India locations, and the application must be available to a group of users in North America who need to access the app from their Android smart phones.
How can you deploy this app to all users by using only one deployment method?
How will your Android users access the app?
Scenario 2
You have been commissioned by a large organization to help prepare for an enterprise-wide rollout of Windows 10. Company employees use a myriad of desktop applications, two of which were written by a developer who’s no longer in business. The company wants you to help test the applications to see whether they are or can be made compatible with Windows 10.
What tool will you choose to determine whether the applications in question are compatible?
What’s the first thing you must do when you begin to test the compatibility of an app with this tool?
You discover that the apps ran successfully on Windows XP when a user was signed in as an administrator. What must you do?
After creating a fix for the apps, how might the users install the fix?
Thought experiment answers
This section provides the solutions for the tasks included in the thought experiment.
Scenario 1
You can publish the app and use RemoteApp to make the app available to all users.
The Android users will need to download the Microsoft Remote Desktop app from the Google Play Store.
Scenario 2
The Compatibility Administrator.
Create a database.
Configure the Compatibility Mode to Windows XP and enable the RunAsAdmin option.
The users could be emailed the fix (an .sdb file), which they can install using the sdbinst.exe program.
Chapter summary
![]() RemoteApp allows you to publish apps to your users over multiple platforms.
RemoteApp allows you to publish apps to your users over multiple platforms.
![]() Group Policy can be used to configure how clients will respond to signed packages.
Group Policy can be used to configure how clients will respond to signed packages.
![]() You can use RemoteApp and Desktop Connections or RD Web Access to access RemoteApp programs.
You can use RemoteApp and Desktop Connections or RD Web Access to access RemoteApp programs.
![]() You can determine application compatibility and deal with problems that arise in many ways, including using the Application Compatibility Tools and creating shims.
You can determine application compatibility and deal with problems that arise in many ways, including using the Application Compatibility Tools and creating shims.
![]() Applications can coexist with others that would usually cause compatibility issues or simply aren’t compatible with the current operating system. The technologies to consider include Hyper-V, RemoteApp, and App-V. Each offers something unique and is used in specific circumstances to provide solutions.
Applications can coexist with others that would usually cause compatibility issues or simply aren’t compatible with the current operating system. The technologies to consider include Hyper-V, RemoteApp, and App-V. Each offers something unique and is used in specific circumstances to provide solutions.
![]() You can give users a consistent desktop and user experience with UE-V.
You can give users a consistent desktop and user experience with UE-V.
![]() You can use Microsoft Intune to host applications and manage computer inventory, even if you don’t have a server structure in place.
You can use Microsoft Intune to host applications and manage computer inventory, even if you don’t have a server structure in place.