CHAPTER 5
Configure storage
Configuring data storage requires the knowledge of both old and new technology. You need to be familiar with traditional local storage using hard drives, as well as newer cloud-based storage using services such as OneDrive for Business. You also need to consider distributed storage options such as using Distributed File System (DFS) to replicate data across WANs, as well as using Storage Spaces for local data resiliency.
Once you’ve decided how to store your data, you also need to consider how you can share data with others, safeguard it from theft, and protect it from unauthorized access.
Windows 10 provides extensive built-in support for both local and cloud-based storage. Windows 10 offers you a multitude of security-related choices for securing data while it is at rest either locally on OneDrive for Business, or when it is mobile on a removable drive. All storage must be both secure and accessible.
Skills in this chapter:
![]() Skill 5.1: Support data storage
Skill 5.1: Support data storage
![]() Skill 5.2: Support data security
Skill 5.2: Support data security
Skill 5.1: Support data storage
In this section we focus on understanding how the recent storage technologies work, because solutions that are new or offer additional capability are typically found on the exams. (Local and traditional storage and data security are covered later in this chapter.) Storage Spaces was introduced in Windows 8 and continues to provide software-based fault tolerance to users requiring resiliency for their data storage without needing to purchase additional hardware or RAID controllers.
Distributed File System (DFS) is not new and has been very useful in situations where available bandwidth has been a limiting factor. Although high speed Internet is fast becoming commonplace, good bandwidth is essential for many cloud-based services such as OneDrive for Business and Office 365. With improvements in infrastructure comes additional functionality available in DFS to take advantage of increased bandwidth.
This section covers how to:
![]() Support the DFS client
Support the DFS client
![]() Support Storage Spaces
Support Storage Spaces
![]() Support OneDrive
Support OneDrive
Distributed File System
Within a corporate environment, the traditional method of storing files is via a shared folder stored on a file server, which can then be accessed by multiple users with share access. Enabling accessible files across multiple geographic sites becomes challenging when using only shared folders. Therefore, you need to consider alternatives such as SharePoint Online, OneDrive for Business, or DFS. DFS has been available in various guises since Windows Server NT 4.0.
The replication aspect of DFS is referred to as DFS-R. DFS-R was first introduced in Windows Server 2003 R2 and offers the enterprise the ability to maintain file shares and keep them synchronized (or mirrored) across multiple geographic sites, such as across a WAN. The end users see a standard file share giving them a simplified logical shared folder; they do not need to be aware of the complex data replication and synchronization that operate as a service automatically in the background.
DFS, a server-based technology, is a role service installed by the server administrator. Although it is unlikely that you will be involved with the installation or configuration, you need to be aware of some benefits, features, and client-facing aspects of DFS. You are likely to come across DFS wherever there is a multi-site topology in place. It is quite common in large organizations for the underlying file server infrastructure to use DFS to share common files that might be required across the organization. For example, you might use DFS when using Windows Deployment Services (WDS) to share a set of common images that can be replicated across multiple sites. As an administrator, you can update any one of the files, and this update is pushed out using the DFS-R service.
DFS replication is optimized and uses differential compression and bandwidth controls to minimize the amount of data that is transmitted over a WAN link. This in turn minimizes the impact that the replication has on the network.
On smaller networks, administrators may opt to use alternatives such as OneDrive for Business, Windows PowerShell or scripting and scheduling Robust File Copy for Windows (Robocopy) to run their file sync and copying operations.
You need to be aware of the key terminology and basic tools when discussing DFS and DFS-R such as:
![]() DFS Namespaces (DFSN or DFS-N) A virtual view of the folder and subfolders that the administrator creates, which is presented to the user. The namespace server is a domain controller or member server that hosts a namespace.
DFS Namespaces (DFSN or DFS-N) A virtual view of the folder and subfolders that the administrator creates, which is presented to the user. The namespace server is a domain controller or member server that hosts a namespace.
![]() DFS Replication (DFSR or DFS-R) The process that is running behind the scenes and that detects changes to files stored within the DFS-N as well as replicates the changes at a block level, which is more efficient than copying the entire file.
DFS Replication (DFSR or DFS-R) The process that is running behind the scenes and that detects changes to files stored within the DFS-N as well as replicates the changes at a block level, which is more efficient than copying the entire file.
![]() Remote Differential Compression (RDC) The compression algorithm that detects changes in the files that need to be replicated.
Remote Differential Compression (RDC) The compression algorithm that detects changes in the files that need to be replicated.
![]() Link Target The destination object, usually a link to the resources. The format can be a Uniform Naming Convention (UNC) path, a shared folder, or another DFS path.
Link Target The destination object, usually a link to the resources. The format can be a Uniform Naming Convention (UNC) path, a shared folder, or another DFS path.
![]() Referral This relates to the hidden list of targets that are sent from DFS to the DFS client whenever a client accesses the root or a link in the DFS namespace.
Referral This relates to the hidden list of targets that are sent from DFS to the DFS client whenever a client accesses the root or a link in the DFS namespace.
![]() Link Referral Contains a list of link targets for a specific link.
Link Referral Contains a list of link targets for a specific link.
![]() Root Referral Contains a list of root targets for the DFS root selected.
Root Referral Contains a list of root targets for the DFS root selected.
![]() Referral cache Entries are stored within the cache of the targets that are available. Each entry has a Time to Live (TTL), which specifies how long the record can be relied upon until it expires and a new referral becomes necessary.
Referral cache Entries are stored within the cache of the targets that are available. Each entry has a Time to Live (TTL), which specifies how long the record can be relied upon until it expires and a new referral becomes necessary.
There are over 60 new PowerShell cmdlets for managing DFS-N and DFS-R. To view all of the cmdlets that are available, on a Windows Server use:
Get-Command -Module DFSR
A helpful cmdlet to test whether DFS-R is behaving as expected is the Write-DfsrHealthReport cmdlet, which generates a DFS Replication health report.
Using Windows PowerShell is the recommended method of managing DFS-R. The built-in legacy DFS-R administration tools do not provide support for many of the features first introduced in Windows Server 2012 R2, including configuring database cloning or configuring debug logging.
To manage a Windows server providing DFS services, you need to connect remotely, using the Remote Server Administration Tools (RSAT). The Windows 10 RSAT can be downloaded in 18 languages at: http://www.microsoft.com/download/details.aspx?id=45520. When installed, all of the RSAT tools are enabled by default.
Once DFS has been installed on Windows Server 2016, Windows 10 can then access the DFS namespace by using Windows 10 and map the DFS share to a network drive, or access the DFS share through the Universal Naming Convention (UNC) path in Windows Explorer.
If you prefer to use a command-line tool rather than PowerShell, you can use a range of tools such as Dfsradmin.exe, Dfscmd.exe, Dfsdiag.exe, or Dfsutil.exe after you have installed the RSAT DFS Management Tools to help you manage DFS.
Dfsutil.exe is the most popular DFS command-line tool. Additional switches available with Dfsutil.exe include:
![]() /Root Displays, creates, removes, imports, or exports namespace roots
/Root Displays, creates, removes, imports, or exports namespace roots
![]() /Link Displays, creates, removes, or moves folders (links)
/Link Displays, creates, removes, or moves folders (links)
![]() /Target Displays, creates, or modifies folder targets (link targets)
/Target Displays, creates, or modifies folder targets (link targets)
![]() /Property Displays or modifies a folder target or namespace server
/Property Displays or modifies a folder target or namespace server
![]() /Client Displays or modifies client information or registry keys
/Client Displays or modifies client information or registry keys
![]() /Server Displays or modifies namespace configuration on the server
/Server Displays or modifies namespace configuration on the server
![]() /Diag Enables you to perform diagnostics or view dfsdirs/dfspath
/Diag Enables you to perform diagnostics or view dfsdirs/dfspath
![]() /Domain Displays all domain-based namespaces in a domain
/Domain Displays all domain-based namespaces in a domain
![]() /Cache Enables you to view or flush the Domain, Referral, or Provider cache
/Cache Enables you to view or flush the Domain, Referral, or Provider cache
Sometimes if the DFS Namespace service (Dfssvc.exe) or DFS Replication (DFSRs.exe) service stops, it prevents replication from taking place. Often this happens during cycling of the server because the DFS service on initialization attempted to perform a complete check to verify the availability of all replicated folders. If that wasn’t possible due to bandwidth or WAN issues, the service might halt. Restarting the service or configuring the service to have a delayed start often solves the problem.
For the exam it might be wise to know what the client- side components are and how to change the amount of time that clients cache namespace root referrals. The DFS device driver is:
Dfsc.sys (%SystemRoot%System32DriversDfsc.sys)
The DFS client provider uses:
Ntlanman.dll. (\%SystemRoot%System32Ntlanman.dll)
To change the amount of time that clients cache namespace root referrals use these steps:
Click Start, then Administrative Tools, and then click DFS Management.
In the console tree, under the Namespaces node, right-click a namespace, and then click Properties.
On the Referrals tab, in the Cache duration text box, type the amount of time that clients cache namespace root referrals. The default setting is 300 seconds (five minutes).
To modify this setting by using Windows PowerShell, use:
Set-DfsnRoot TimeToLiveSec
The DFS service was significantly overhauled with the release of Windows Server 2012 R2 and the processes have been optimized to take advantage of the increased performance of networks, increased bandwidth capacity and speed as well as general server performance. DFRS is now able to process file-level replication in most cases without the need to stage the files. This is done by making a special temporary copy to a staging area, thus effectively processing replication tasks live. Windows client and server operating systems often share the same kernel and work well together. For the benefit of performance, reliability, security, and interoperability, it is better to match servers and client operating systems when possible.
Support Storage Spaces
First introduced in Windows 8 and Windows Server 2012, Storage Spaces provides a popular method of enabling you to add storage to your system and to pool existing drives without needing to purchase traditionally expensive Storage Area Network (SAN) devices. This is a great alternative to using RAID, SANs, and iSCSI at a fraction of the cost.
 EXAM TIP
If a question refers to the least expensive means of adding storage, remember that Storage Spaces is often the most economical option.
Within a Storage Space, you create a storage pool by adding disks. A storage pool can span multiple physical disks. Being able to add and remove disks from a pool as your capacity demand changes offers a great deal of flexibility. Once you create a Storage Space, the storage is represented as a number of virtual disks within the pool, which behave exactly like physical disks. The virtual disk is sometimes referred to as a Logical Unit Number (LUN), which is a term taken from the more expensive world of Storage Area Network protocols, which encapsulate SCSI, such as Fibre Channel or iSCSI.
To configure Storage Spaces, you need to first attach your storage, which can be a mix and match of type, size, and interface. And it can have internal and external drives, USB drives, Serial ATA (SATA), Serial Attached SCSI (SAS), and so forth. If you are looking for the best performance with a Storage Space, in terms of higher IOPS and IO throughput, you can also use SSD or NVMe (Non-Volatile Memory Express) drives. If you already have RAID technology enabled, you will need to de-activate RAID in order to be able to use Storage Spaces. While each new storage device added doesn’t necessarily need to be empty, the disk will be erased after it is added to the pool.
Storage Spaces enables users to configure volume-level resiliency, which helps to protect data while it’s stored in the storage pool. Traditional single disk drives offer no resiliency; if the drive fails, all the data is lost. Depending on how many drives the storage pool contains, you can configure either volume mirroring or parity-volume levels of redundancy. Storage Spaces recommends using the Resilient File System (ReFS), which is a new file system developed by Microsoft and introduced with Windows Server 2012. The file system offers new functionality and scalability and is self-repairing with built-in resiliency. ReFS supports many NTFS features, but is not currently a replacement for NTFS. When formatting volumes created within Storage Spaces, you can choose either NTFS or REFS depending on your needs.
For the exam, you need to understand the four types of redundancy that are offered in Storage Spaces as shown in Table 5-1.
TABLE 5-1 Windows offers four types of redundancy with Storage Spaces
Type |
Description |
Simple (none) |
No mirroring; data is lost if the drive fails. |
Two-way mirror |
Each volume in the pool is stored on at least two different physical drives, “mirroring” your data. You need to provide at least two drives to use a two-way mirror. |
Three-way mirror |
Each volume in the pool is stored on at least three different physical drives. This allows you to lose two drives. You need to provide at least five drives to use a three-way mirror. |
Parity |
At least three drives are required for parity. Data is stored on at least two different physical drives and the parity information is saved on another disk. This method uses less disk space but can be higher on disk I/O overhead when writing to disk as the parity information needs to be calculated. You need to provide at least three drives to use a parity storage space. |
After your drives are connected, follow these steps to configure Storage Spaces:
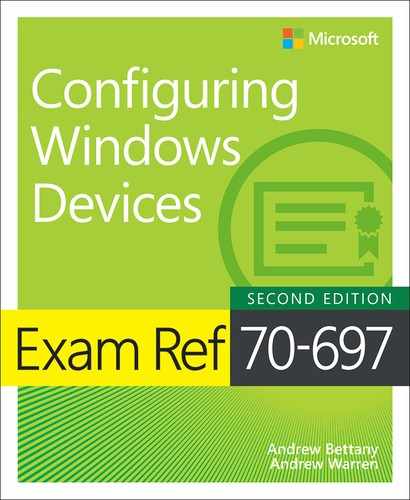
Click the Start button, select Settings, search for Storage Spaces in the search box, and then in Settings open Manage Storage Spaces.
Select Create A New Pool And Storage Space, as shown in Figure 5-1.
If requested, accept the UAC prompt.
Storage Spaces identifies available drives to create the storage pool. Select the drive you want to add, as shown in Figure 5-2 (all drives that are not formatted are automatically selected).
Click Create Pool.
Name the Storage Space and select the drive letter you want to use.
Depending on the type of resiliency you require, you might be able to format the Storage Space using either NTFS or REFS file system.
Use the drop-down list, as shown in Figure 5-3, to select the level of resiliency that you require.
Set the Size of the Storage Space. Note that a suggested size is provided, but you can amend this to be larger than the current capacity of the storage pool. I have amended this to 500 GB.
Click Create Storage Space.


Your storage pool is now created and is ready to use.
EXAM TIP
ReFS can only be selected when using mirrored drives and cannot be used for simple or parity resiliency types.
Setting the size of the Storage Space is often misunderstood. Storage Spaces allows you to specify a maximum size larger than the total amount of available physical drive space. This is known as thin provisioning, which enables you to provision space and then add drives as they are required at a later date. The system prompts you once the physical limit is reached to add more drives to the pool. You can also increase the maximum size of an existing storage space at a later stage. Alternatively, you can use fixed provisioning, which enables you to specify a hard limit for the size of the storage pool.
After you create a storage pool, it can be managed using the Manage Storage Spaces console. With the console you can create additional storage spaces, add drives, and delete or rename both the storage space and the name of each physical drive.
If one or more of the physical disks fails, Windows will alert the user and suggest that the failed drive be replaced so that resiliency can be restored.
As an example, if the computer that is hosting storage space in a two-way mirror configuration fails, it is entirely possible to take one of the physical disks and attach it to another computer, and that computer will be able to access the files.
In practice, the Storage Spaces mirrored resiliency can be quick, especially for write performance, quicker than motherboard RAID-1, whereas storage space parity is significantly slower than the hardware RAID-5 equivalent.
EXAM TIP
Storage Spaces is able to use the new ReFS file system that is built into Windows 10 and offers built-in resiliency that will automatically repair any file corruption that may occur. ReFS and Storage Spaces provide enhanced resiliency in the event of storage device failure.
To view disk usage, go to Settings, select Storage, and then select a Drive to see available disk space, as shown in Figure 5-4.

If you click the drive icon, the operating system will analyze and categorize the contents of the drive and display a summary as shown in Figure 5-5. You are further able to drill down to the actual files, which will ultimately be viewed within File Explorer.

In addition to the Windows 10 Graphical User Interface (GUI), you can also manage Storage Spaces using the following methods:
![]() Windows PowerShell
Windows PowerShell
![]() Windows Management Instrumentation (WMI)
Windows Management Instrumentation (WMI)
For server based operations, you can manage Storage Spaces using the following methods:
![]() Server Manager
Server Manager
![]() System Center Virtual Machine Manager
System Center Virtual Machine Manager
![]() Failover Cluster Manager
Failover Cluster Manager
Windows 10 includes several enhancements to the Storage Spaces feature, since it was first introduced in Windows 8. Using PowerShell, you can now force the optimization of drives in a storage pool to accommodate removed or additional drives and re-distribute data across the drives. The rebalancing process only works on simple and mirrored spaces.
Manage Storage Spaces using PowerShell
You can script the creation, repair and administration of Storage Spaces using built-in PowerShell cmdlets. Some of the Storage Spaces’ specific cmdlets that can be used are shown in Table 5-2.
TABLE 5-2 Storage Cmdlets in Windows PowerShell
Storage Cmdlets |
Description |
New-StoragePool |
Creates a new storage pool using a group of physical disks |
Add-PhysicalDisk |
Adds a physical disk to a storage pool for the creation of one or more VirtualDisk objects |
Get-StoragePool |
Gets a specific storage pool, or a set of StoragePool objects that are available |
Set-StoragePool |
Modifies the properties of the specified storage pool. |
Set-PhysicalDisk |
Sets the attributes on a specific physical disk. |
Get-VirtualDisk |
Returns a list of VirtualDisk objects that are available |
New-VirtualDisk |
Creates a new virtual disk in the specified storage pool. |
Repair-VirtualDisk |
Deletes an existing virtual disk and reclaims the used space for use by other virtual disks in the same storage pool. |
Optimize-StoragePool |
Rebalances a Storage Space configured as simple or mirrored, optimizing files based on disk space, disk size and file size. |
Update-StoragePool |
Used on pre Windows 10 storage pools to upgrade the storage pool metadata to enable new features and functionality. |
Remove-PhysicalDisk |
Removes a physical disk from a specified storage pool. |
Remove-StoragePool |
Deletes a storage pool and associated VirtualDisk objects |
To list all of the Storage cmdlets that are available, use the Get-Command –Module Storage cmdlet.
Support OneDrive
Windows 10 users can use OneDrive by signing into OneDrive with their Microsoft account. OneDrive provides users with reliable and robust cloud services that are used by millions of users across the world. What users see on their desktop or via the browser is just the client-facing presentation layer. Beneath the hood, OneDrive has several layers of complexity to ensure efficient file synchronization takes place that you will never see.
Microsoft has improved the level of security and encryption to protect customer data held on OneDrive. This upgrade has enabled Perfect Forward Secrecy (PFS) encryption support when accessing OneDrive through onedrive.live.com, the OneDrive mobile app, and the sync clients.
Find Help
For many users, the concept of cloud-based applications (and you could use the analogy that OneDrive is a cloud-based version of File Explorer, to your users) is still very new. They may need some help and training to become competent users of OneDrive. Microsoft provides comprehensive intelligent online help for OneDrive, as shown in Figure 5-6. You can search the help repository by typing a keyword, or question into the search box and then clicking the bulb icon.

Service availability
Microsoft Online Services runs on thousands of inter-connected servers in many datacenters across the globe. This is presented to you as the cloud. Since these are not local instances of a web app or service, running on your corporate servers, there is little or no maintenance for you to perform.
Although rare, there might be instances of service failure, even in the cloud, and this can lead to OneDrive not offering 100 percent uptime. You need to remember that cloud services offer excellent service availability, but the OneDrive service might be unavailable from time to time, a situation that could vary depending on your region.
Microsoft states in the Service Availability section of their Services Agreement that “they strive to keep the Services up and running; however, all online services suffer occasional disruptions and outages, and Microsoft is not liable for any disruption or loss you may suffer as a result. In the event of an outage, you may not be able to retrieve Your Content or Data that you’ve stored. We recommend that you regularly backup Your Content that you store on the Services or store using Third-Party Apps and Services.”
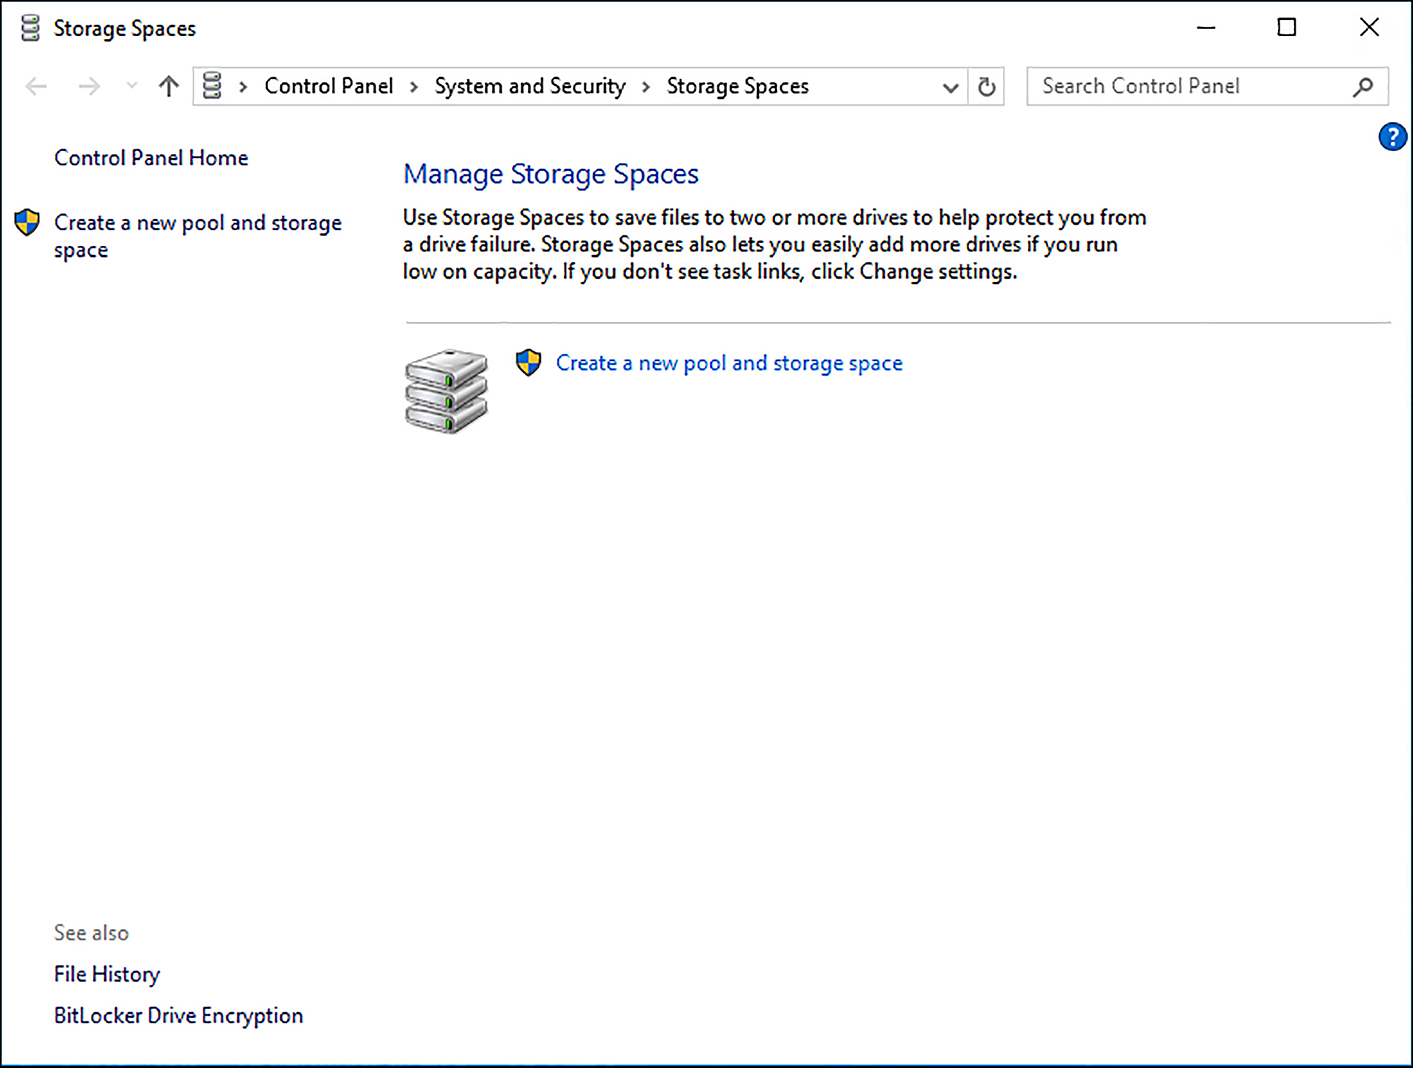
If you are experiencing connection issues and you do not experience them for other online services, check the Microsoft service status provided at https://portal.office.com/servicestatus, which will outline any issues with the availability of the end user services as shown in Figure 5-7.
If you have an Office 365 subscription, you can click the link at the bottom left of the Service status screen shown in Figure 5-7, or sign into the Office 365 and view the Service Health from the Admin Center. You will notice in Figure 5-8 that the Office 365 Service Health shows that all services are running, with the Office 365 Portal showing one advisory.

Recover files from OneDrive
When you delete a file within File Explorer, you are able to use the Recycle Bin to recover the file. OneDrive offers two methods of recovering files. These are:
![]() Undo
Undo
![]() Recycle Bin
Recycle Bin
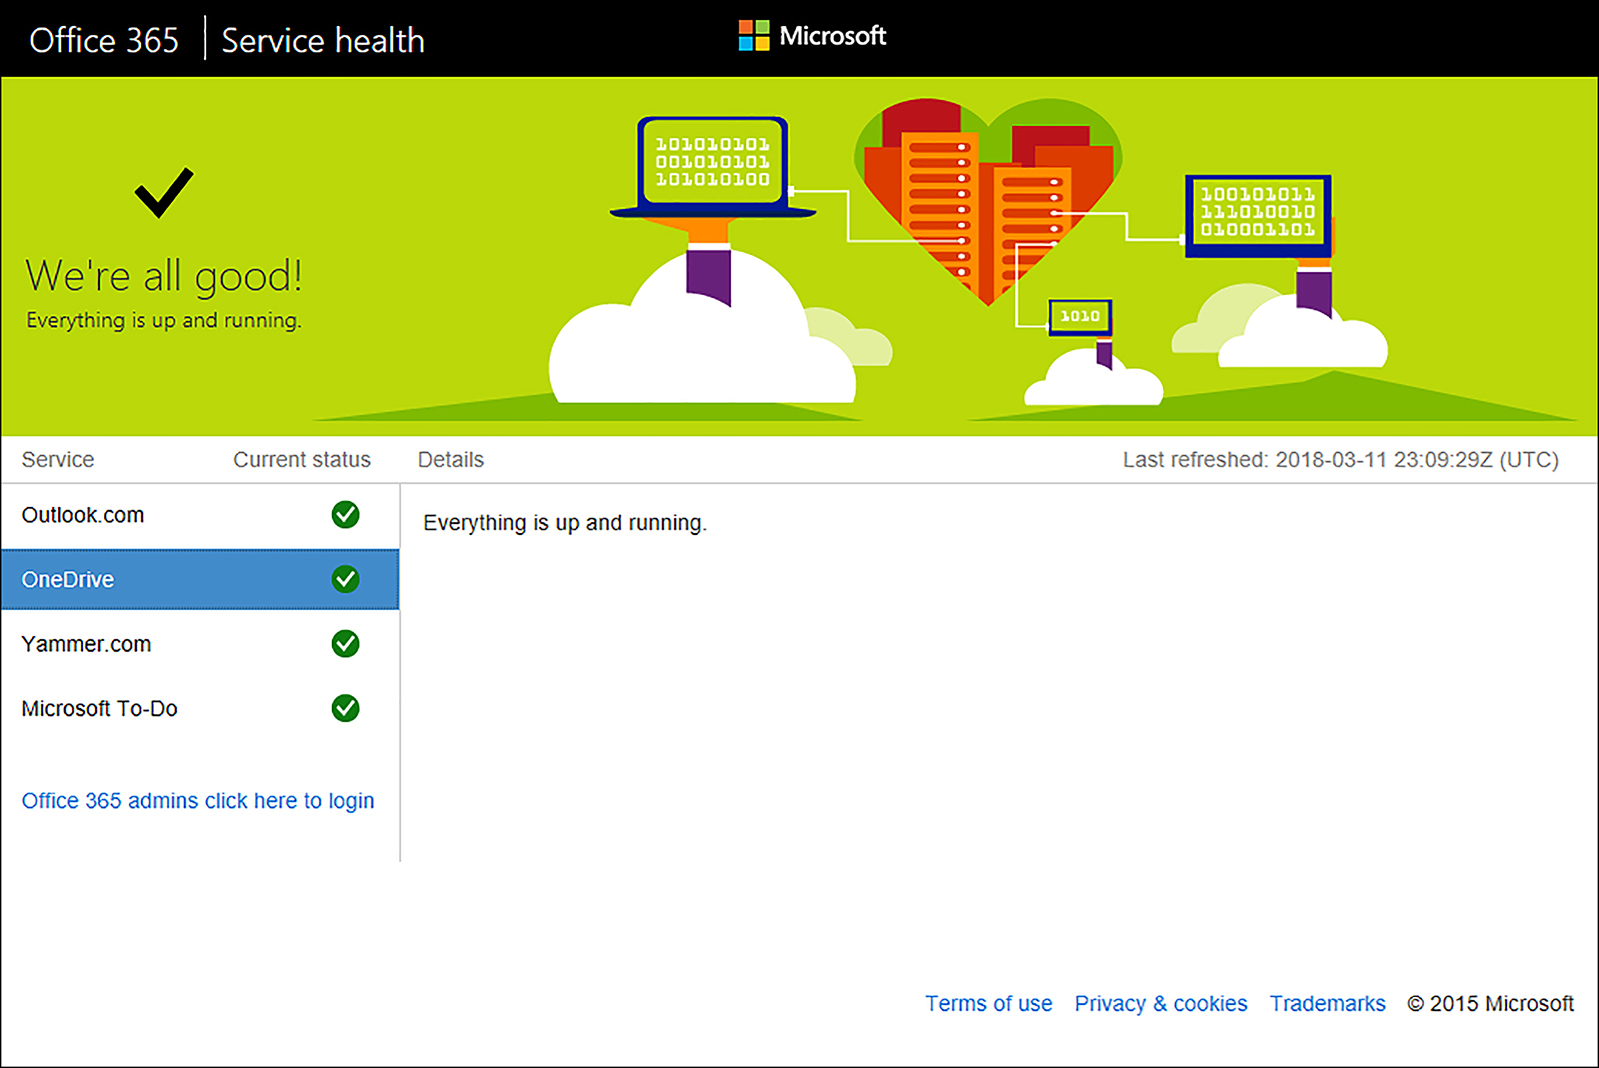
The Undo feature works as it does on an Office document. If you delete an object within OneDrive by selecting Delete on the context menu, the message shown in Figure 5-9 is displayed. The message includes the Undo button. Click the Undo button to cancel the deletion and the files will be restored. If you click anywhere else within OneDrive while the deletion progress bar is displayed, or if you do nothing for approximately 10 seconds, the message automatically closes. So, if you want to use the Undo button, you need to promptly click it!
When the file has been deleted, the item is moved to the Recycle Bin folder. The Recycle Bin offers functionality similar to what File Explorer offers. Click the Recycle Bin within OneDrive and all the files that have been deleted will be listed. With no files selected, the Restore item at the top offers you the option to Restore All Items.
Once you locate the files that need to be restored, you can then click the Restore menu item and the files will be recovered, as shown in Figure 5-10. If you click Delete within the Recycle Bin, you’ll be warned that the items will be permanently deleted.
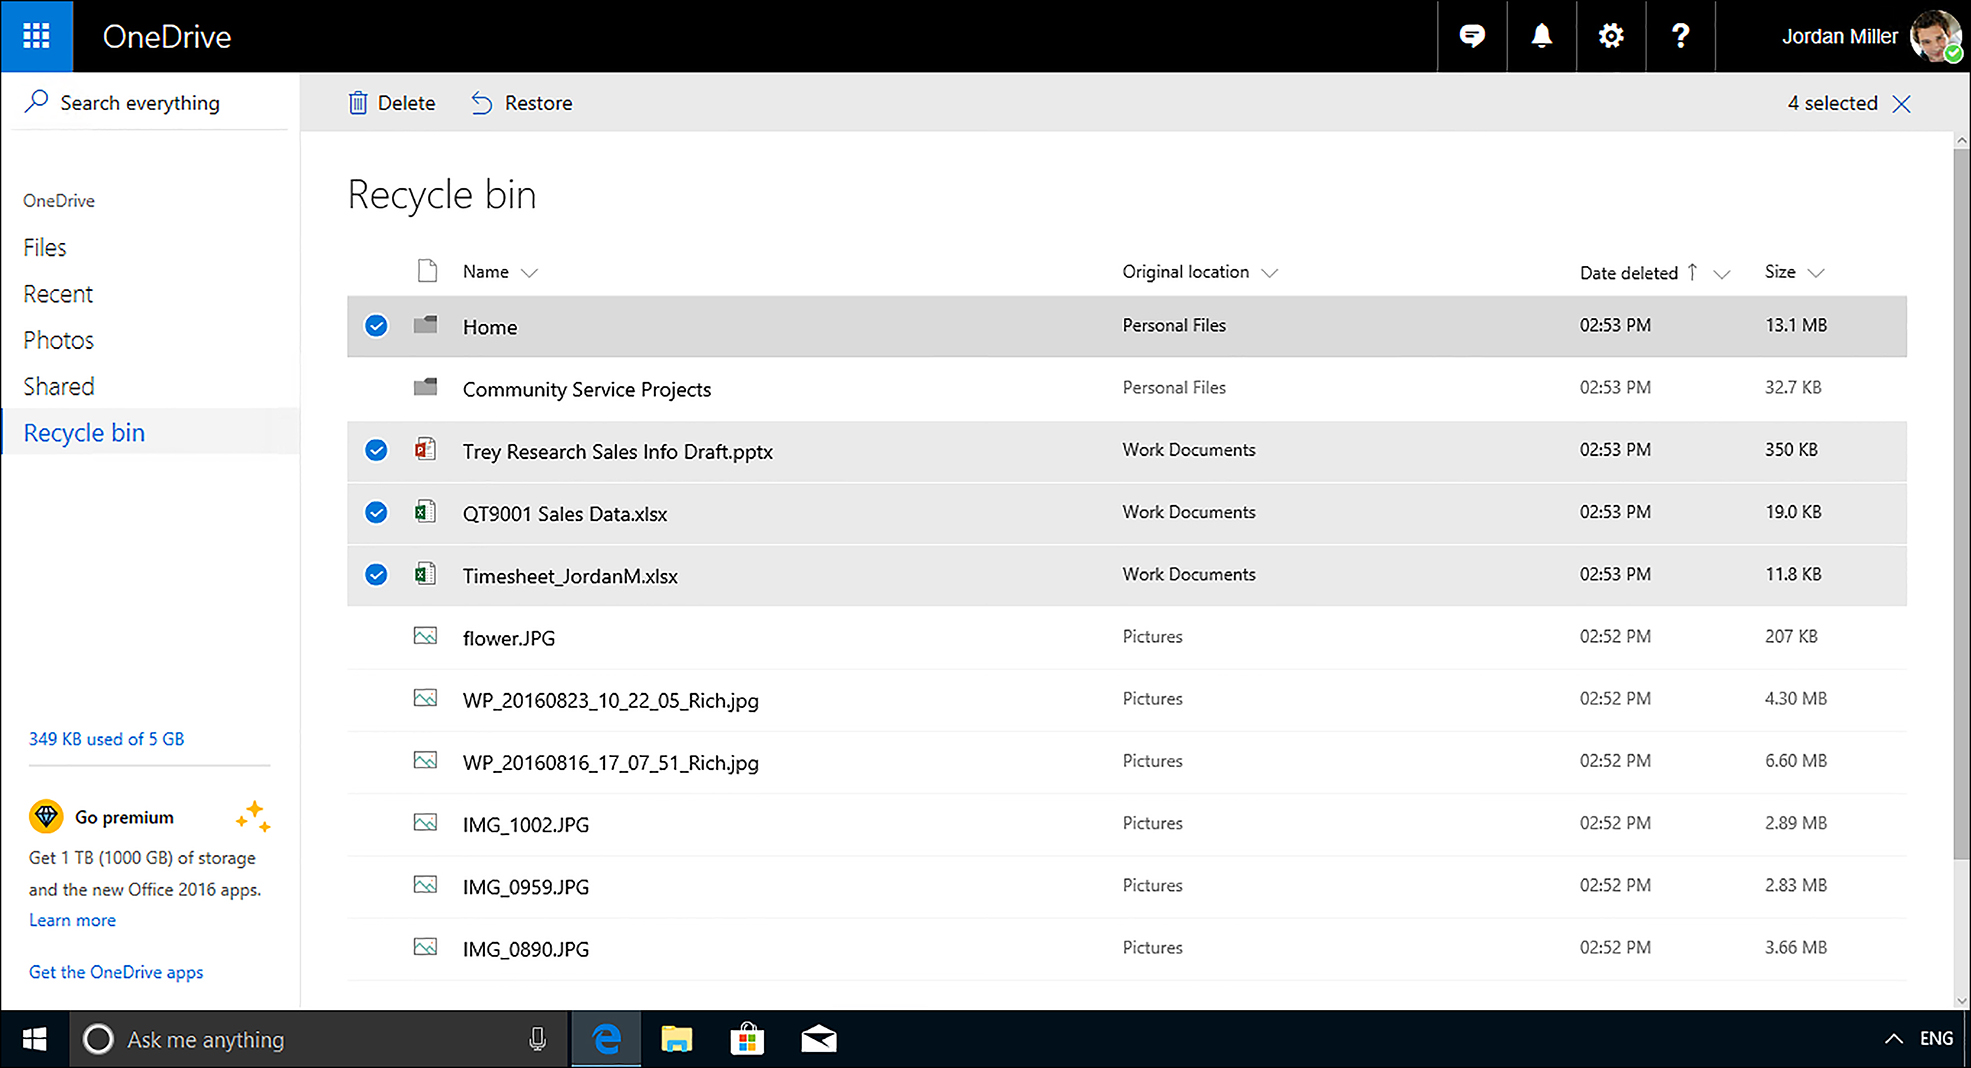
The Recycle Bin in OneDrive stores items for a minimum of three days and up to a maximum of 30 days, with the capacity of the Recycle Bin set to 10 percent of the total storage limit. If the Recycle Bin is full, old files that are less than 30 days old will also be deleted in order to make room for new items.
For work or school accounts, OneDrive is known as OneDrive for Business and is hosted on SharePoint Online servers. Items in the OneDrive for Business Recycle Bin are permanently deleted after 93 days on these accounts by default. OneDrive for Business is included as part of Microsoft 365 and Office 365 subscriptions and includes a much larger default storage capacity of 1 TB.
Skill 5.2: Support data security
You have stored your data and now you need to consider how to ensure it remains secure. This skill covers the security options available and reviews share permissions, NTFS file permissions and Dynamic Access Control (DAC), and the encryption options within NTFS using Encrypting File System (EFS).
With removable storage prevalent within many organizations, you’ll also review how to secure this type of storage media by using technologies such as BitLocker and BitLocker To Go, together with methods for enterprises to manage encryption.
This section covers many topics and gives more prominence to newer technologies such as DAC and BitLocker. You’ll need to ensure that your understanding of the basic Share and NTFS permissions is robust because this will be assumed within the exam.
This section covers how to:
![]() Manage permissions including Sharing, NTFS and Dynamic Access Control (DAC)
Manage permissions including Sharing, NTFS and Dynamic Access Control (DAC)
![]() Support Encrypting File System (EFS), including Data Recovery Agent
Support Encrypting File System (EFS), including Data Recovery Agent
![]() Control access to removable media
Control access to removable media
![]() Support BitLocker and BitLocker To Go, including Data Recovery Agent, and Microsoft BitLocker Administration and Monitoring (MBAM)
Support BitLocker and BitLocker To Go, including Data Recovery Agent, and Microsoft BitLocker Administration and Monitoring (MBAM)
Manage permissions including Sharing, NTFS and Dynamic Access Control
Only volumes that are formatted with NTFS or REFS are able to apply NTFS file and folder permissions in Windows 10. Thankfully, NTFS is the default file system used, the vast majority of businesses use NTFS on their Windows systems. Since NTFS was introduced there have been subtle improvements to NTFS technology, which has maintained its status as robust, reliable, and effective.
Whenever you are in an exam environment, you need to read the scenario very carefully to establish what role you have because this is crucial when determining what you can modify. As a system administrator you often make changes using administrative rights, which effectively means you have a “master-key” to all the NTFS locks in the organization. Whenever you are setting permissions, you need to always test to ensure that the outcome of your actions does not result in unexpected increases of privilege for another user.
Resolve NTFS permission issues
The type of security that can be configured on Windows 10 is determined by the file system in place. NTFS is the default underlying file system and it offers several security options, but you may also encounter removable drives or legacy systems that use FAT16, FAT32, or exFAT, which offer less security.
It has been several years since NTFS was established as the default file system of choice for all recent Windows client and server operating systems. NTFS file permissions offer administrators a very powerful tool for granting, controlling, auditing, and denying access to resources. Unlike share-level permissions, NTFS operates at the file level, which means NTFS permissions are applicable to resources shared over a network or accessed locally.
When troubleshooting resource access issues, you need to determine the following:
![]() Is the file system in NTFS?
Is the file system in NTFS?
![]() Are the files and folders being accessed locally or over the network?
Are the files and folders being accessed locally or over the network?
It is easy to test if the file system is using NTFS by checking to see if there is a security tab on the volume on which the resource resides, as shown in Figure 5-11. The Security tab relates to NTFS permissions.

NTFS permissions can be complex and sometimes difficult to manage, especially for a junior or inexperienced administrator. Often the most challenging environment is one in which a newly hired administrator has to adopt an enterprise, which has an existing problematic NTFS permission infrastructure in place that has very little documentation. Small changes required can sometimes have unintended consequences, which pose security risks. The role of the system administrator is to optimize data security, and also to make sure that data is accessible to the right users. If users are denied access to files to which they have rights or given access to privileged files, it is a major problem that needs immediate remediation.
NTFS permissions are cumulative, which means a user may have been given various group memberships as well as explicit permissions to resources that they are able to access. If a user has not been given any implicit or explicit permissions, they will not have access. If a combination of permissions for a resource has been set, you’ll need to calculate the cumulative effect of all permissions.
Faced with an issue resulting from lack of access or over privilege, you need to start troubleshooting the problem by determining the effective permissions for the files or folders in question. Establish the scope; for example, who does this problem affect, and is it confined to a single user or a group of users? Establishing the effective permissions will allow you to quickly determine permissions that apply and provide you with a starting point.
User-effective permissions are based on the total of all permissions that they have been granted or denied. Take special care to look for any Deny permissions because these are infrequently set, but when they are, they are very powerful because any explicit Deny permission will have precedence over Allow entries.
To view the effective permissions for a user or a group that has been set on a file or folder, follow these steps:
Open File Explorer, right-click the file or folder that is under review.
Click Properties, click the Security tab, and then click Advanced.
In the Advanced Security Settings For dialog box, click the Effective Access tab.
Click the Select A User link, and choose the appropriate user, group, or device that you want to view the effective permissions for.
Click OK.
Click View Effective Access, as shown in Figure 5-12. The effective permissions are displayed as required.
Click OK twice to close the dialog boxes.

EXAM TIP
The Share tab shown in Figure 5-12 will only be visible if you are viewing the effective permissions for a shared folder.
The Effective Access tool is very useful in resolving many access issues. However, there are a small number of special cases where the tool is limited. For example, where a user is also the original creator of the resource, they have the Creator Owner special identity, which is not reported by the Effective Access tool.
TroubleshootShare permission issues
Share permissions can cause many problems when troubleshooting access to files and folders. You need to remember that Share permissions work together with NTFS permissions and that the most restrictive permission will apply. Another common cause of confusion is that Share permissions only affect shared resources over the network.
If your file system is configured with FAT or FAT32, there is no option to configure NTFS permissions. If no Security tab is available in the resource Properties dialog box, we know that it cannot be formatted with NTFS, and the file system is likely to be FAT/FAT32, as shown in Figure 5-13.

If you need to confirm the file system in use, you can view the properties of the drive by following these steps:
Open File Explorer, right click the drive that is under review.
Click On the General tab view the File System.
Click OK to close the dialog box.
Combine NTFS and Share permissions
Within a corporate environment, administrators share files over the network, using Share permissions. If the volume is formatted with NTFS, there are likely to be NTFS permissions configured on the shared file as well. In order to fully understand the effects of these two sets of permissions, you will need to combine them.
When troubleshooting access, always look for the most restrictive permission that has been set and evaluate whether this is being applied. You can view the effective permissions if necessary. If the most restrictive permission is not being applied when the resource is being accessed, you need to determine the problem. Some other permission must be overlapping and affecting the resource–perhaps the user is a member of the administrators group, or another group that has full control permissions? You can also test what permissions are effective both at the local access level and also when accessing the resource over the network share.
Often the cause of many permission-based issues when troubleshooting file and folder access is that the Share permissions being applied on the share are too restrictive. It is preferable to use the more powerful NTFS permissions because these will be effective at all times, regardless of how they are accessed (over the network share or locally).
Dynamic Access Control
Dynamic Access Control (DAC) was first introduced in Windows Server 2012 and Windows 8. DAC enables Active Directory administrators to deploy a robust method of applying data governance across their file servers. The key improvement over NTFS permissions is that with DAC you can control and audit data access by providing the ability to set controls on files and folders based on conditions that you could pre-configure within your Active Directory. These conditions can be dynamic. An example of a condition is the physical location of the user. For instance, you may want to restrict access to confidential company data when a user is using a VPN connection, but allow them full access when they are using their computer in the office.
Additional options are available to you when configuring DAC such as the following:
![]() Central access policies and rules Rules can be created for groups, user claims, device claims, and resource properties. Rules protect resources and can be tightly controlled with conditional expressions, Access Control Entries (ACEs), and expressions.
Central access policies and rules Rules can be created for groups, user claims, device claims, and resource properties. Rules protect resources and can be tightly controlled with conditional expressions, Access Control Entries (ACEs), and expressions.
![]() Claims This is a single piece of information about an object, such as an Active Directory Domain Services (AD DS) attribute associated with a user, a computer, a device, or a resource. Multiple claims can be used to protect resources.
Claims This is a single piece of information about an object, such as an Active Directory Domain Services (AD DS) attribute associated with a user, a computer, a device, or a resource. Multiple claims can be used to protect resources.
![]() Expressions You can set conditions to control access management. These conditions include the state of the device, its location, and any groups that the object belongs to.
Expressions You can set conditions to control access management. These conditions include the state of the device, its location, and any groups that the object belongs to.
![]() Proposed permissions These permissions enable you to create a what-if scenario to test permissions before applying them.
Proposed permissions These permissions enable you to create a what-if scenario to test permissions before applying them.
The process is not enabled by default on the client side and you’ll need to turn on the feature by enabling Group Policy Objects, which are located at Computer ConfigurationAdministrative TemplatesSystemKerberos. In particular, you will need to use the Kerberos Client Support For Claims, Compound Authentication And Kerberos Armoring.
Support Encrypting File System
The built-in Encrypting File System (EFS) is a very powerful method of restricting access to files within a NTFS environment. Although EFS has been available since Windows 2000, very few organizations actually implement file and folder level encryption. Most organizations requiring encryption will use BitLocker Drive Encryption which encrypts complete drives Where EFS is utilized, most issues reported to the helpdesk relating to EFS often result from an over enthusiastic member of staff encrypting some of their own files. By default, they have permission to encrypt their own files because they have the Creator Owner special identity.
The best way to ensure that EFS is not inadvertently used, potentially causing problems later, is to implement some or all of the following measures:
![]() Stand-alone computers that are not domain-joined should backup their encryption keys to ensure they can be used for recovery later.
Stand-alone computers that are not domain-joined should backup their encryption keys to ensure they can be used for recovery later.
![]() Explain the usage criteria of EFS in the staff handbook / policy.
Explain the usage criteria of EFS in the staff handbook / policy.
![]() IT staff training relating to the use of EFS and potential implications of unauthorized usage.
IT staff training relating to the use of EFS and potential implications of unauthorized usage.
![]() Planning and documenting of where and by whom EFS will be applied.
Planning and documenting of where and by whom EFS will be applied.
![]() Sufficient restrictions placed across the domain to prevent unauthorized use of EFS.
Sufficient restrictions placed across the domain to prevent unauthorized use of EFS.
![]() Implementation of an EFS Data Recovery Agent (DRA) so that if EFS is misused then an Administrator can recover any encrypted files.
Implementation of an EFS Data Recovery Agent (DRA) so that if EFS is misused then an Administrator can recover any encrypted files.
![]() Implement employee-leaving procedures and scan for encrypted files to ensure all encrypted files are decrypted or ownership transferred.
Implement employee-leaving procedures and scan for encrypted files to ensure all encrypted files are decrypted or ownership transferred.
![]() Disable rather than delete user accounts for a fixed time period in case the user account needs to be reactivated in order to remove EFS from corporate resources.
Disable rather than delete user accounts for a fixed time period in case the user account needs to be reactivated in order to remove EFS from corporate resources.
It’s necessary to ensure that selected users and members of IT departments appreciate that EFS is an extremely secure method of protecting files and often this level of protection is not necessary. Only the original file owner who applied the encryption is able to access the file and remove the encryption.
If an organization does not have a DRA in place, this needs to be created as soon as possible because this will enable subsequent files encrypted with EFS to be decrypted by the DRA should this be necessary.
The process for creating a DRA certificate in Windows 10 for a device that is not domain joined, is as follows:
Open a PowerShell windows, or a command prompt window (this does not require administrative privilege).
Navigate to the location where you want to store your DRA certificate.
Type cipher /r: file name and press Enter.
Provide a password to protect the DRA certificate (this can be null).
To install the DRA so that a user can use the DRA, follow these steps:
Sign in with the user credentials of the user for whom you want to create access to the DRA.
In the search box, type secpol.msc and press Enter.
In the left pane of Local Security Policy, double-click Public Key Policies, right-click Encrypting File System, and then click Add Data Recovery Agent.
In the Add Recovery Agent Wizard, click Next.
Browse to the location of the DRA recovery certificate (it will have a .cer file extension).
Select the certificate, and then click Open.
When you are asked if you want to install the certificate, click Yes, Next, and then click Finish.
In the right pane of Local Security Policy, scroll across and note that the Intended Purposes for the certificate is File Recovery.
Open a Command Prompt window and type gpupdate, and press Enter to update Group Policy.
Once the DRA has been created, all EFS encrypted files can be recovered by the DRA.
The encrypted files that are already encrypted are not automatically updated and cannot be recovered by the DRA unless they are opened and closed by the resource owner so that the DRA can update the file, or by using cipher.exe /u.
Troubleshoot Encrypting File System
When users report that they are unable to use EFS to encrypt files, you need to verify that all of the four statements are correct:
![]() A recovery agent policy has been defined, which prevents the use of EFS unless a DRA has been created.
A recovery agent policy has been defined, which prevents the use of EFS unless a DRA has been created.
![]() The file volume is NTFS; EFS is only supported on NTFS.
The file volume is NTFS; EFS is only supported on NTFS.
![]() The file is not compressed. NTFS allows files to be encrypted or compressed, not both.
The file is not compressed. NTFS allows files to be encrypted or compressed, not both.
![]() You have Write access to the file. You need to be able to save the encrypted file.
You have Write access to the file. You need to be able to save the encrypted file.
Other examples of helpdesk EFS issues include the following scenarios and possible answers:
![]() I can’t open files I have encrypted Only users with the correct EFS certificate and private key for the file can open EFS-protected files. Has the user account been deleted/recreated since the file was created? Use a DRA to recover the file and have the user encrypt the file again.
I can’t open files I have encrypted Only users with the correct EFS certificate and private key for the file can open EFS-protected files. Has the user account been deleted/recreated since the file was created? Use a DRA to recover the file and have the user encrypt the file again.
![]() Will I get a warning that I will lose the EFS protection on my file when I copy my file a FAT32 USB drive? There is no warning if the user has the necessary NTFS permissions to move or copy the file, then Windows will carry out the operation without error or warning.
Will I get a warning that I will lose the EFS protection on my file when I copy my file a FAT32 USB drive? There is no warning if the user has the necessary NTFS permissions to move or copy the file, then Windows will carry out the operation without error or warning.
![]() I saved a file which is protected using Windows Information Protection (WIP) to a FAT32 USB drive. The file looks like it is encrypted using EFS. Is this correct? WIP is supported in Windows 10 to protect files. Protected files look and behave like EFS files, but they do not use EFS. The file is an encrypted PFILE which stores the Enterprise Data Protection metadata, which can be stored on a FAT32 drive.
I saved a file which is protected using Windows Information Protection (WIP) to a FAT32 USB drive. The file looks like it is encrypted using EFS. Is this correct? WIP is supported in Windows 10 to protect files. Protected files look and behave like EFS files, but they do not use EFS. The file is an encrypted PFILE which stores the Enterprise Data Protection metadata, which can be stored on a FAT32 drive.
![]() I can’t open an EFS file after upgrading from a previous version of Windows You can still recover the files by importing the EFS certificate and key from your old computer into your new computer.
I can’t open an EFS file after upgrading from a previous version of Windows You can still recover the files by importing the EFS certificate and key from your old computer into your new computer.
![]() My anti-virus check program runs but I get “Access Denied” error messages An anti-virus check program can only read your encrypted files. If the device is a shared computer and other users have encrypted files on the hard disk, the anti-virus tool will not be able to access these files. Other users need to perform a virus check for files by signing in on the device.
My anti-virus check program runs but I get “Access Denied” error messages An anti-virus check program can only read your encrypted files. If the device is a shared computer and other users have encrypted files on the hard disk, the anti-virus tool will not be able to access these files. Other users need to perform a virus check for files by signing in on the device.
Controlling access to removable media
USB flash drives are very popular and versatile. Rapid technological improvements have resulted in increases in USB drive capacity, enabling users to carry a huge amount of information in their pockets. While having easy access to this data can be very convenient to the user, it is also a major worry for IT Managers and Data Controllers, because of the risk of corporate data loss. For example, leaving a USB flash drive on a train or plugged into a guest PC can result in significant data leakage.
In addition to USB drives, users can also copy corporate (or private) data to CDs, DVDs, external hard drives, and memory cards. While these media may be smaller in capacity when compared to a USB drive, a DVD can still contain millions of records from a database. Managers will need to decide on policies that determine which users within an organization may use these kinds of devices. Some employees need to use portable drives, but most don’t.
You can restrict the use of devices in several ways by using Group Policy. One way is to block all removable data drives. Another is to restrict the use of removable drives to a specific make and model (hardware ID), and another option is to ensure that all removable drives are encrypted. Windows 10 provides a feature called BitLocker To Go which can encrypt removable drives.
For the exam, you should review the available policies with the following section of Group Policy: Computer ConfigurationAdministrative TemplatesSystemRemovable Storage Access.
To access Removable Storage Access policies, follow these steps:
Launch Group Policy Editor (gpedit.msc).
Navigate to Computer ConfigurationAdministrative TemplatesSystemRemovable Storage Access.
Review the available GPOs, paying particular attention to the All Removable Storage classes: Deny all access policy.
Another popular method is to restrict writing to devices that have a specific hardware ID by preventing Windows from installing the device driver whenever a USB flash drive is inserted. GPO settings that restrict devices can be located in the following section of Group Policy: Computer ConfigurationAdministrative TemplatesSystemDevice InstallationDevice Installation Restrictions.
Conversely, a company might purchase a specific type of USB flash drive and issue them to executives. You can use a GPO setting that enables Device Installation for these users, based on the hardware ID of the device. Review the GPO setting Allow Installation Of Devices That Match Any Of These Device IDs, which enables you to specify the hardware ID of a removable drive, and can be found by using Device Manager on a machine that already has the hardware items installed. Within Device Manager, locate the device, right-click the particular item, select Properties, and then select Details. On the Details tab, choose Hardware Ids from the Property drop-down list. Right-click the specific value and select Copy. This value needs to be pasted in the GPO setting.
To require that users write data to BitLocker-protected storage (covered later in this chapter), you enable the GPO Deny Write Access To Drives Not Protected By BitLocker, which is located in Computer ConfigurationAdministrative TemplatesWindows Components BitLocker Drive EncryptionRemovable Data Drives. When applying a GPO to your local machine, you can either restart the device or run gpupdate /force to apply the updated GPOs to your system.
Support BitLocker and BitLocker To Go
BitLocker Drive Encryption enables you to encrypt an entire hard disk, which can be the Windows operating system drive or a data drive. The Windows 10 Pro, Enterprise, and Education editions support BitLocker in both x86 and x64-bit varieties.
Many modern computers now ship with a Trusted Platform Module (TPM), which a microchip that is used to securely store cryptographic information, such as the encryption keys that BitLocker uses. BitLocker supports versions 1.2 and 2.0 of the TPM specification and information contained on the TPM is more secure from external software attacks and physical theft. If a device has been tampered with, such as a hard drive removed from the original computer, BitLocker will prevent the drive from being unlocked. BitLocker will seek remediation from the user by entering BitLocker recovery mode and requiring the user to enter a 48-digit recovery key. While a TPM is the most secure option, BitLocker technology can also be used on devices without a TPM, by configuring a GPO to require that BitLocker obtains the required cryptographic information from a USB flash drive. This information must be presented to unlock the volume.
A portable version of BitLocker, BitLocker To Go, aimed at protecting removable USB devices, uses the same technology as BitLocker Drive Encryption, but does not require use of a TPM. BitLocker To Go can protect flash drives, Secure Digital (SD) cards, removable hard disks formatted with NTFS, Fat16, FAT32, or exFat file systems. To unlock a protected drive, the user must input a password or a smart card with a PIN to unlock the drive. For frequent users of BitLocker To Go, encrypted drives can be configured to be unlocked automatically when inserted on specific computers.
To assist with the management of BitLocker for corporate clients, Microsoft provides a management tool called Microsoft BitLocker Administration And Monitoring (MBAM), which is available as part of the Microsoft Desktop Optimization Pack (MDOP), a suite of utilities for customers with an active Microsoft Software Assurance license agreement.
Using BitLocker
BitLocker offers users several protection options. Administrators can choose which type of protection users should adopt to unlock a BitLocker encrypted drive. BitLocker supports multifactor authentication for operating system drives, allowing you to require additional authentication such as adding a smart card or a USB drive with a startup key on it, or requiring a PIN on start up. These are called key protectors.
BitLocker offers multiple key protectors that can be used to unlock a protected system. The BitLocker authentication methods are as follows:
![]() TPM + startup PIN + startup key This is the most secure combination. The encryption key is stored on the TPM chip. The user might find this option cumbersome because this requires multiple authentication tasks.
TPM + startup PIN + startup key This is the most secure combination. The encryption key is stored on the TPM chip. The user might find this option cumbersome because this requires multiple authentication tasks.
![]() TPM + startup key The encryption key is stored on the TPM chip. The user needs to insert a USB flash drive that contains a startup key.
TPM + startup key The encryption key is stored on the TPM chip. The user needs to insert a USB flash drive that contains a startup key.
![]() TPM + startup PIN The encryption key is stored on the TPM chip. The user needs to enter a PIN to unlock the device.
TPM + startup PIN The encryption key is stored on the TPM chip. The user needs to enter a PIN to unlock the device.
![]() Startup key only The user needs to insert a USB flash drive with the startup key on it. The device doesn’t need to have a TPM chip. The BIOS must support access to the USB flash drive before the operating system loads.
Startup key only The user needs to insert a USB flash drive with the startup key on it. The device doesn’t need to have a TPM chip. The BIOS must support access to the USB flash drive before the operating system loads.
![]() TPM only The encryption key is stored on the TPM chip, and no user action is required.
TPM only The encryption key is stored on the TPM chip, and no user action is required.
When the BitLocker encrypted drive is in recovery mode, you can also unlock the drive by using either the recovery password or recovery key.
![]() Recovery password This is a 48-digit number typed on a regular keyboard, or by using the function keys (F1-F10) to input the numbers.
Recovery password This is a 48-digit number typed on a regular keyboard, or by using the function keys (F1-F10) to input the numbers.
![]() Recovery key This is an encryption key created when the BitLocker is first employed and is for recovering data encrypted on a BitLocker volume. Often the encryption key is stored on removable media.
Recovery key This is an encryption key created when the BitLocker is first employed and is for recovering data encrypted on a BitLocker volume. Often the encryption key is stored on removable media.
Because the TPM chip together with BitLocker protects the hard drive, administrators can also configure BitLocker to operate without additional unlock steps, so long as the device (and TPM) recognize the drive then it will be unlocked.
With BitLocker enabled, the drive is no longer susceptible to data theft. On an unprotected system, simply removing the drive from the PC and attaching it as a slave to another PC allows the data to be read, bypassing all NTFS security.
EXAM TIP
Administrators can fine-tune within Group Policy the settings for BitLocker and you would do well to review the available GPOs in detail because they are likely to appear on the exam. Review the GPOs located in Computer ConfigurationPoliciesAdministrative TemplatesWindows ComponentsBitLocker Drive Encryption.
You need to also learn which versions of Windows 10 support BitLocker, the supported TPM versions, and how to tell whether your computer has a TPM.
To configure BitLocker on Windows 10 with a TPM, follow these steps:
Type BitLocker into the Start menu and then select Manage BitLocker.
On the BitLocker Drive Encryption page, click Turn On BitLocker on the operating system volume. Accept UAC if prompted.
The BitLocker Drive Encryption Wizard then requires you to take a backup of the BitLocker recovery key. This can be saved to your Microsoft account, to a USB flash drive, to a file, or in printed form.
On the Encrypt The Selected Disk Volume page, confirm that the Run BitLocker System Check check box is selected, and then click Continue.
Click Restart Now. The computer restarts and BitLocker verifies whether the computer is BitLocker-compatible and ready for encryption.
The drive will now be encrypted. Although the drive is immediately protected, the individual files will need to be encrypted and this can take a while, depending on the capacity of the drive
To discover whether your device has a TPM, type TPM.msc in the search bar and review the TPM Microsoft Management Console (MMC), as shown in Figure 5-14. If you believe you have a TPM chip, you may want to ensure that it is enabled in either the BIOS or Unified Extensible Firmware Interface (UEFI) settings.

By default, a modern Windows device such as a Surface Pro will contain a TPM, and BitLocker Drive Encryption will be already enabled when shipped. When the user signs onto the device for the first time with a Microsoft account, the recovery key is saved to their Microsoft account. A user viewing the TPM Management On local Computer MMC, shown in Figure 5-14, might be confused by the TPM owner password, what it is, and where it is stored. You need to know that BitLocker is able to initialize the TPM and create a TPM owner password, which will be automatically saved in the same location as the BitLocker recovery password. In a corporate environment, administrators need to ensure that the TPM owner password, which can be saved to a file, is set and stored safely away from the local computer. The TPM owner password is useful if you are locked out of the TPM, or if you need to reset or disable the TPM.
If a TPM isn’t found, click Cancel on the BitLocker Drive Encryption, and follow the displayed instructions to configure the Require Additional Authentication At Startup GPO located in Computer ConfigurationAdministrative TemplatesWindows ComponentsBitLocker Drive EncryptionOperating System Drives. Enable this GPO and select the Allow BitLocker Without A Compatible TPM check box, as shown in Figure 5-15.

Within Control Panel, BitLocker administrators can manage, encrypt, and decrypt fixed data drives and backup recovery keys. Standard users can change the PIN or password on operating system drives.
A new GPO called Computer ConfigurationPoliciesAdministrative TemplatesWindows ComponentsBitLocker Drive EncryptionOperating System DrivesConfigure Pre-boot Recovery Message And URL, included with Windows 10, enables an administrator to configure a custom recovery message and to replace the existing URL that is displayed on the pre-boot recovery screen when the operating system drive is locked.
Upgrade a BitLocker-enabled computer
BitLocker is designed to protect your computer from pre-boot changes, such as updating the BIOS. If you upgrade your computer, for example, with a BIOS firmware upgrade, this can cause the TPM to perceive it is under attack. In order to prevent Windows 10 from entering BitLocker recovery mode, it’s recommended that some precautions are taken while upgrading a BitLocker-enabled computer. Prior to updating the BIOS, you should carry out the following steps:
Temporarily suspend BitLocker by opening the BitLocker Drive Encryption in Control Panel and select Suspend Protection on the operating system drive, placing it in disabled mode.
Upgrade the system or the BIOS.
Turn BitLocker on again by opening BitLocker Drive Encryption in Control Panel and select Resume Protection on the operating system drive.
Forcing BitLocker into disabled mode keeps the data encrypted, and the volume master key is now encrypted with a clear key. The availability of this unencrypted key disables the data protection that BitLocker offers, but it ensures that subsequent computer startups succeed without further user input. After the BIOS upgrade, you need to re-enable BitLocker so that the unencrypted key is erased from the disk and BitLocker protection is functional again. The encryption key will be resealed with the new key that has been regenerated to incorporate new values of the measured components that changed as a part of the upgrade.
Move a BitLocker-encrypted drive to another computer
Moving a BitLocker-encrypted drive to another BitLocker-enabled computer requires that you turn off BitLocker temporarily (by using the Suspend Protection option). After the move is complete you need to re-enable BitLocker, which will then resume BitLocker protection.
The PowerShell command for suspending BitLocker encryption is:
Suspend-BitLocker -MountPoint "C:"
Sometimes a system change can cause the BitLocker system integrity check on the operating system drive to fail. This prevents the TPM from releasing the BitLocker key to decrypt the protected operating system drive and requires the user to enter into recovery mode.
![]() Moving the BitLocker-protected drive to a new computer.
Moving the BitLocker-protected drive to a new computer.
![]() Installing a new motherboard with a new TPM.
Installing a new motherboard with a new TPM.
![]() Turning off, disabling, or clearing the TPM.
Turning off, disabling, or clearing the TPM.
![]() Making changes to any boot configuration settings.
Making changes to any boot configuration settings.
![]() Making changes to the BIOS, UEFI firmware, master boot record, boot sector, boot manager, option ROM, or other early boot components or boot configuration data.
Making changes to the BIOS, UEFI firmware, master boot record, boot sector, boot manager, option ROM, or other early boot components or boot configuration data.
Configure BitLocker using command-line tools
Administrators can also manage BitLocker Drive Encryption using the command-line tool Manage-bde.exe or by using the Command Prompt, PowerShell and WMI. Managing recovery keys is discussed later.
There are 20 parameters that can be used with Manage-bde to turn on or turn off BitLocker, specify how drives are unlocked, and to update recovery methods. Table 5-3 displays the most used parameters.
TABLE 5-3 Manage bde parameters
Parameter |
Description |
Manage-bde -status |
Provides information about all drives on the computer, whether or not they are BitLocker-protected. |
Manage-bde on |
This encrypts the drive and turns on BitLocker. Use the UsedSpaceOnly switch to set the encryption mode to Used Space Only encryption. |
Manage-bde -off |
This decrypts the drive and turns off BitLocker. All key protectors are removed when decryption is complete. |
Manage-bde -pause & Manage-bde -resume |
Use with a drive letter to pause or resume encryption or decryption. |
Manage-bde -lock & manage-bde -unlock |
Use with a drive letter to lock and unlock access to BitLocker-protected data. |
Manage-bde -autounlock |
Manages automatic unlocking of a data drive |
Manage-bde -protectors |
Manages protection methods for the encryption key. |
Manage-bde -changepassword |
Modifies the password for a data drive. |
Manage-bde -changepin |
Modifies the PIN for an operating system drive. |
Manage-bde - forcerecovery |
Forces a BitLocker-protected drive into recovery mode on restart. |
Manage-bde -changekey |
Modifies the startup key for an operating system drive. |
Manage-bde WipeFreeSpace |
Wipes the free space on a drive. |
Manage-bde -help or -h |
Displays complete Help at the command prompt. |
Windows 10 offers built-in support for 13 BitLocker PowerShell cmdlets, as listed in Table 5-4. You can also use Get-help <BitLocker cmdlet>, such as Get-Help Enable BitLocker examples.
TABLE 5-4 BitLocker PowerShell cmdlets
Cmdlet |
Description |
Add-BitLockerKeyProtector |
Adds a key protector for a BitLocker volume |
Backup-BitLockerKeyProtector |
Saves a key protector for a BitLocker volume in AD DS |
Clear-BitLockerAutoUnlock |
Removes BitLocker automatic unlocking keys |
Disable-BitLocker |
Disables BitLocker encryption for a volume |
Disable-BitLockerAutoUnlock |
Disables automatic unlocking for a BitLocker volume |
Enable-BitLocker |
Enables encryption for a BitLocker volume |
Enable-BitLockerAutoUnlock |
Enables automatic unlocking for a BitLocker volume |
Get-BitLockerVolume |
Gets information about volumes that BitLocker can protect |
Lock-BitLocker |
Prevents access to encrypted data on a BitLocker volume |
Remove-BitLockerKeyProtector |
Removes a key protector for a BitLocker volume |
Resume-BitLocker |
Restores BitLocker encryption for the specified volume |
Suspend-BitLocker |
Suspends BitLocker encryption for the specified volume |
Unlock-BitLocker |
Restores access to data on a BitLocker volume |
Using PowerShell, you can obtain very detailed information from systems, including status, key protectors used, encryption method, and type. If you run the Get-BitLockerVolume > fl cmdlet to provide information about an encrypted drive without first unlocking the drive, the amount of information obtained will be restricted. To compare the information obtained when the command is run on the same drive, when unlocked and locked drive, see Figure 5-16.

Configure BitLocker To Go
For users of Windows 10 Pro, Windows 10 Enterprise, and Windows 10 Education, BitLocker To Go enables the encryption of removable USB devices, using BitLocker technology. These devices can be flash drives, Secure Digital (SD) cards, or removable hard disks formatted with NTFS, Fat16, FAT32, or exFat. All users can protect their removable drive by using the same BitLocker Drive Encryption Control Panel used before.
To create a BitLocker To Go drive, insert a removable drive and select Turn BitLocker On. If the option to encrypt the drive is not available, you need to check to ensure you are using a supported version of Windows, and that the feature has not been disabled by Group Policy.
Just as when you encrypt a fixed drive, when you select the Turn On BitLocker menu option for a removable drive, you need to also specify how you want to unlock the removable drive. You can select one of the following methods:
![]() A recovery password or passphrase (this complexity can be set within Group Policy)
A recovery password or passphrase (this complexity can be set within Group Policy)
![]() A smart card
A smart card
![]() Always auto-unlock this device on this PC
Always auto-unlock this device on this PC
The last option is very useful for users who frequently use removable drives because it reduces the likelihood of frustration from entering the password every time they use their removable drives. If the removable drive is used on other devices once the user unlocks the removable drive, it can also be configured to auto-unlock if required.
Standard users can turn on, turn off, or change configurations of BitLocker on removable data drives. They are also able to change their own password for encrypted drives via BitLocker Drive Encryption in Control Panel. However, if a user loses or forgets the password for the data or removable drive, you need to have access to the BitLocker recovery key to recover the data and unlock the drive.
EXAM TIP
It is important to remember that a TPM is not required for BitLocker To Go. The encryption keys are secured by the use of a password or passphrase, or smart card, and not by a TPM.
The following GPOs are available within the BitLocker To Go settings found at Computer ConfigurationPoliciesAdministrative TemplatesWindows ComponentsBitLocker Drive EncryptionRemovable Data Drives:
![]() Control use of BitLocker on removable drives
Control use of BitLocker on removable drives
![]() Configure use of smart cards on removable data drives
Configure use of smart cards on removable data drives
![]() Deny Write access to removable drives not protected by BitLocker
Deny Write access to removable drives not protected by BitLocker
![]() Configure use of hardware-based encryption for removable data drives
Configure use of hardware-based encryption for removable data drives
![]() Enforce drive-encryption type on removable data drives
Enforce drive-encryption type on removable data drives
![]() Allow access to BitLocker-protected removable data drives from earlier versions of Windows
Allow access to BitLocker-protected removable data drives from earlier versions of Windows
![]() Configure use of passwords for removable data drives
Configure use of passwords for removable data drives
![]() Choose how BitLocker-protected removable data drives can be recovered
Choose how BitLocker-protected removable data drives can be recovered
Users of Windows 10 Home cannot encrypt removable data drives, but they can access BitLocker To Go enabled data drives if they provide the correct recovery password, passphrase, or smart card.
Configure startup key storage and recovery options
You know that without access to the encryption key contained in the TPM or stored in the startup key, you are unable to unlock a BitLocker-encrypted drive.
You need to ensure that you’re familiar with BitLocker-related terminology:
![]() Recovery password and recovery key When you first configure BitLocker it will create a recovery key and prompt you to store it safely. You’ll need to provide this recovery key if the TPM is unable to validate that the drive hasn’t been tampered with or if the startup key, password, or pin have not been supplied during boot time.
Recovery password and recovery key When you first configure BitLocker it will create a recovery key and prompt you to store it safely. You’ll need to provide this recovery key if the TPM is unable to validate that the drive hasn’t been tampered with or if the startup key, password, or pin have not been supplied during boot time.
![]() Password A password or passphrase is created to protect fixed, removable, and operating system drives with or without a TPM. The password length can be set in Group Policy and can consist of eight to 255 characters.
Password A password or passphrase is created to protect fixed, removable, and operating system drives with or without a TPM. The password length can be set in Group Policy and can consist of eight to 255 characters.
![]() PIN When you use a TPM you can configure BitLocker with a PIN that the user must type during the initial startup of the device to allow Windows 10 to start. The PIN can consist of between four to 20 digits and the length can be set in the Configure Minimum PIN Length For Startup Group Policy setting.
PIN When you use a TPM you can configure BitLocker with a PIN that the user must type during the initial startup of the device to allow Windows 10 to start. The PIN can consist of between four to 20 digits and the length can be set in the Configure Minimum PIN Length For Startup Group Policy setting.
![]() Enhanced PIN Enables administrators to force the use of a complex PIN, just like a password or passphrase (including spaces), by configuring the Allow Enhanced PINs For Startup GPO setting. This policy is applied when you turn on BitLocker and is configurable only for operating system drives.
Enhanced PIN Enables administrators to force the use of a complex PIN, just like a password or passphrase (including spaces), by configuring the Allow Enhanced PINs For Startup GPO setting. This policy is applied when you turn on BitLocker and is configurable only for operating system drives.
![]() Startup key This is stored on a USB flash drive and can be used with or without a TPM. To use this method of unlock, the USB flash drive must be inserted every time the computer starts. The USB flash drive can be formatted by using NTFS, FAT, or FAT32.
Startup key This is stored on a USB flash drive and can be used with or without a TPM. To use this method of unlock, the USB flash drive must be inserted every time the computer starts. The USB flash drive can be formatted by using NTFS, FAT, or FAT32.
![]() TPM Lockout By default, TPM 2.0 will lock the user out for two hours whenever the TPM is under attack (TPM 1.2 lockout duration varied by manufacturer).
TPM Lockout By default, TPM 2.0 will lock the user out for two hours whenever the TPM is under attack (TPM 1.2 lockout duration varied by manufacturer).
Within an enterprise environment, workstations are often required to be patched during non-working hours. One of the automated methods of doing this would be to use System Center Configuration Manager by using a process such as Wake-on-LAN (WoL). However, if BitLocker was configured, the system would wait until a startup key or PIN was entered, and would potentially miss the update.
To overcome this shortcoming, the process of validating and unlocking a drive can be made automatic by enabling a server feature called BitLocker Network Unlock. By verifying the existence of a trusted key that’s provided to the workstation by a Windows Deployment Services server on the network, the machine will continue to boot while it is connected to the corporate network.
There are several requirements for this functionality:
![]() The computer must have UEFI firmware and UEFI DHCP capability.
The computer must have UEFI firmware and UEFI DHCP capability.
![]() Any UEFI Compatibility Support Modules (CSM)/Legacy modes must be disabled.
Any UEFI Compatibility Support Modules (CSM)/Legacy modes must be disabled.
![]() The BitLocker Network Unlock feature must be installed on a Windows Deployment Server.
The BitLocker Network Unlock feature must be installed on a Windows Deployment Server.
![]() A separate DHCP server needs to be available to provide an IP address.
A separate DHCP server needs to be available to provide an IP address.
![]() The client computer must be running Windows 8 or newer.
The client computer must be running Windows 8 or newer.
![]() Certificates for the public/private key pairing must be configured.
Certificates for the public/private key pairing must be configured.
![]() Group Policy settings to configure Network Unlock as a secondary authentication method on the client need to be configured.
Group Policy settings to configure Network Unlock as a secondary authentication method on the client need to be configured.
Understand BitLocker and BitLocker To Go data recovery
You need to support users who have devices that will not boot into Windows due to BitLocker issues during boot time. There are several situations where BitLocker, BitLocker To Go or Device Encryption will immediately reboot and enter into BitLocker recovery mode due to a perceived threat to the system such as one of the following:
![]() Repeatedly failing to provide the startup password
Repeatedly failing to provide the startup password
![]() Changing the startup boot order to boot another drive in advance of the hard drive
Changing the startup boot order to boot another drive in advance of the hard drive
![]() Changing the NTFS partition table such as creating, deleting, or resizing a primary partition
Changing the NTFS partition table such as creating, deleting, or resizing a primary partition
![]() Entering the PIN incorrectly too many times so that the anti-hammering logic of the TPM is activated
Entering the PIN incorrectly too many times so that the anti-hammering logic of the TPM is activated
![]() Turning off, disabling, deactivating, or clearing the TPM
Turning off, disabling, deactivating, or clearing the TPM
![]() Upgrading critical early startup components, such as a BIOS or UEFI firmware upgrade, causing the related boot measurements to change
Upgrading critical early startup components, such as a BIOS or UEFI firmware upgrade, causing the related boot measurements to change
![]() Adding or removing hardware; for example, inserting a new motherboard or video card into the computer
Adding or removing hardware; for example, inserting a new motherboard or video card into the computer
You can also force a BitLocker-protected device into recovery mode by pressing the F8 or F10 key during the boot process.
When the device has entered the BitLocker recovery mode, you need to recover the drive by using one of these methods:
![]() Supply the 48-digit recovery password.
Supply the 48-digit recovery password.
![]() Use a DRA to unlock the drive.
Use a DRA to unlock the drive.
![]() Allow a domain administrator to obtain the recovery password from AD DS.
Allow a domain administrator to obtain the recovery password from AD DS.
![]() Run a script to reset the password, using PowerShell or VBScript, which can extract the key package from AD DS.
Run a script to reset the password, using PowerShell or VBScript, which can extract the key package from AD DS.
For home and small-business users, the BitLocker recovery key is stored in their Microsoft account at https://onedrive.live.com/recoverykey. You will need to use the keyboard number or function keys to enter the number to unlock the drive. Once the operating system has started, users can then recreate a new startup key, otherwise the BitLocker recovery mode will remain in place.
For corporate users, there are several settings that can be configured in Group Policy that will define the recovery methods that require Windows to save BitLocker recovery information to AD DS. These GPOs found in the subfolders of Computer ConfigurationAdministrative TemplatesWindows ComponentsBitLocker Drive Encryption are as follows:
![]() Choose how BitLocker-protected operating system drives can be recovered
Choose how BitLocker-protected operating system drives can be recovered
![]() Choose how BitLocker-protected fixed drives can be recovered
Choose how BitLocker-protected fixed drives can be recovered
![]() Choose how BitLocker-protected removable drives can be recovered
Choose how BitLocker-protected removable drives can be recovered
For each of these GPOs, you can also enable the Do Not Enable BitLocker Until Recovery Information Is Stored In AD DS check box to keep users from enabling BitLocker unless the device is connected to the domain and the backup of BitLocker recovery information to AD DS has succeeded.
Once BitLocker recovery information has been saved in AD DS, this can be used to restore access to a BitLocker-protected drive by using the Manage-bde command-line tool introduced earlier.
You may be familiar with the Remote Server Administration Tools (RSAT) that you can install onto your client PC to remotely manage your servers. If you are a domain administrator, or have been delegated permissions by a domain administrator, you can use the BitLocker Recovery Password Viewer that is included in the RSAT. This tool allows you to locate and view BitLocker Drive Encryption recovery passwords which are stored in AD DS. Once the tool has connected to AD DS, you can view the computer object’s properties to view the BitLocker recovery password and then use it to recover the PC.
Understand Microsoft BitLocker Administration and Monitoring
You have seen how in small and medium-sized organizations, Windows 10 Pro, Windows 10 Enterprise and Windows 10 Education editions can be managed by using Group Policy to force the centralization of BitLocker recovery keys in AD DS. In a large enterprise environment where there may be tens of thousands of devices that are required to be managed, Microsoft provides a tool called Microsoft BitLocker Administration and Monitoring 2.5 SP1 (MBAM), which performs the following management tasks:
![]() Deployment and recovery of encryption keys
Deployment and recovery of encryption keys
![]() Centralized compliance monitoring and reporting of individual computers or even of the enterprise itself
Centralized compliance monitoring and reporting of individual computers or even of the enterprise itself
![]() Automates the provisioning of encrypting volumes on client computers across the enterprise
Automates the provisioning of encrypting volumes on client computers across the enterprise
![]() Reduces the workload on the Help Desk to assist end users with BitLocker PIN and recovery key requests
Reduces the workload on the Help Desk to assist end users with BitLocker PIN and recovery key requests
![]() Support for encrypted drives, including a self-service portal for users to recover encrypted devices independently
Support for encrypted drives, including a self-service portal for users to recover encrypted devices independently
![]() Audit access to recover key information
Audit access to recover key information
![]() Enforcement of organizational BitLocker policies
Enforcement of organizational BitLocker policies
MBAM is available as part of the Microsoft Desktop Optimization Pack (MDOP), which is included as a benefit to Microsoft Software Assurance customers as part of Microsoft Volume Licensing. MBAM offers helpdesk operators and administrators a GUI to manage BitLocker for domain joined devices and offers many features including reporting on the encryption status of computers within the whole enterprise, and easy access to recovery key information when users are locked out of their devices.
MBAM is composed of the following components:
![]() Administration and Monitoring Server Hosts the management console and monitors web services; enables the audit of activities, compliance, and status; enables the management of hardware capability and access to the BitLocker recovery keys.
Administration and Monitoring Server Hosts the management console and monitors web services; enables the audit of activities, compliance, and status; enables the management of hardware capability and access to the BitLocker recovery keys.
![]() Compliance and Audit Database Holds compliance information for MBAM clients, which can be parsed for reporting functions.
Compliance and Audit Database Holds compliance information for MBAM clients, which can be parsed for reporting functions.
![]() Recovery and Hardware Database MBAM clients provide recovery and hardware information that is obtained from the centralized database.
Recovery and Hardware Database MBAM clients provide recovery and hardware information that is obtained from the centralized database.
![]() Compliance and Audit Reports Enables the generation of different reports to monitor BitLocker usage and compliance activities, and MBAM reports that can be viewed from the Management console or from SQL Server Services (SSRS).
Compliance and Audit Reports Enables the generation of different reports to monitor BitLocker usage and compliance activities, and MBAM reports that can be viewed from the Management console or from SQL Server Services (SSRS).
![]() Group Policy Template Enables administrators to deploy MBAM GPO settings for configuring BitLocker drive encryption.
Group Policy Template Enables administrators to deploy MBAM GPO settings for configuring BitLocker drive encryption.
![]() MBAM Client Agent This uses Group Policy to enforce encryption settings; collects recovery keys, recovery, and hardware information from MBAM clients, and passes compliance data to the reporting system. The MBAM client software can be installed on Windows 7 (Enterprise/Ultimate Editions), Windows 8 (Professional/Enterprise Editions), and Windows 10 (Pro/Enterprise Editions). Clients must have a TPM v 1.2 or higher chip, which must be enabled in the BIOS.
MBAM Client Agent This uses Group Policy to enforce encryption settings; collects recovery keys, recovery, and hardware information from MBAM clients, and passes compliance data to the reporting system. The MBAM client software can be installed on Windows 7 (Enterprise/Ultimate Editions), Windows 8 (Professional/Enterprise Editions), and Windows 10 (Pro/Enterprise Editions). Clients must have a TPM v 1.2 or higher chip, which must be enabled in the BIOS.
MBAM 2.5 SP1 is the current version and offers administrators the following features:
![]() Support is available for managing Windows 7, Windows 8, Windows 10, Windows To Go, and removable storage devices.
Support is available for managing Windows 7, Windows 8, Windows 10, Windows To Go, and removable storage devices.
![]() Integration with Microsoft System Center Configuration Manager.
Integration with Microsoft System Center Configuration Manager.
![]() Support for Microsoft SQL Server 2014.
Support for Microsoft SQL Server 2014.
![]() BitLocker pre-provisioning with Windows PE includes the use of Used Disk Space Only (Manage-bde on <drive letter>).
BitLocker pre-provisioning with Windows PE includes the use of Used Disk Space Only (Manage-bde on <drive letter>).
![]() Ability to enforce encryption policies on operating system and fixed data drives.
Ability to enforce encryption policies on operating system and fixed data drives.
![]() Ability to provide a URL in the BitLocker Drive Encryption Wizard to point to your security policy.
Ability to provide a URL in the BitLocker Drive Encryption Wizard to point to your security policy.
![]() Support for Federal Information Processing Standard (FIPS)-compliant recovery keys on devices with Windows 8.1 and Windows 10 operating systems.
Support for Federal Information Processing Standard (FIPS)-compliant recovery keys on devices with Windows 8.1 and Windows 10 operating systems.
![]() Support for high-availability deployments.
Support for high-availability deployments.
![]() Additional Windows PowerShell cmdlets for configuring MBAM server features.
Additional Windows PowerShell cmdlets for configuring MBAM server features.
![]() MBAM can take ownership of the TPM and initialize it without requiring a restart.
MBAM can take ownership of the TPM and initialize it without requiring a restart.
![]() Devices left in Protection Suspended mode automatically resume protection after restart.
Devices left in Protection Suspended mode automatically resume protection after restart.
![]() Windows 10 operating system drives can be protected with the Password Protector.
Windows 10 operating system drives can be protected with the Password Protector.
![]() You can deploy MBAM with less infrastructure, but with the ability to scale 200,000 managed devices with just two servers.
You can deploy MBAM with less infrastructure, but with the ability to scale 200,000 managed devices with just two servers.
MBAM 2.5 SP1 offers the following improvements for image deployment over previous versions, as listed in Table 5-5.
TABLE 5-5 New functionality to enable BitLocker during imaging
Image Deployment |
New functionality |
Process |
Completely written in PowerShell, compatible with PowerShell v2 Easy to use with MDT, SCCM, or standalone |
Volume Support |
Supports OS volumes with TPM Protector Fixed data drive support Support for pre-provisioned drives Immediate prompt for PIN after imaging |
Reporting |
Immediate compliance reporting TPM OwnerAuth parameter escrowed TPM OwnerAuth available outside of WinPE |
Error Handling |
Robust error handling Improved logging |
An example of a suggested stand-alone topology infrastructure utilizing MBAM without SCCM is shown in Figure 5-17.

Thought experiments
In these thought experiments, demonstrate your skills and knowledge of the topics covered in this chapter. You can find the answers to these thought experiments in the next section.
Scenario 1
You want to re-use some hard drives that you have and create a Storage Space with them. You have four disks, each disk is 500 GB in capacity, but two of them have 200 GB of data that you want to keep. You want to configure them to offer fault tolerance so that if any one disk fails, you do not lose any data. You do not need to use all of the available disks as part of the Storage Spaces solution. Answer the following questions about how you should set up Storage Spaces.
Which types of resiliency could you choose: simple, mirrored, three-way mirror, or parity?
How many of the four disks would you use?
How will you ensure that the data on the two drives will not be lost?
Scenario 2
You are the new IT Manager for your organization and you cannot find any documentation relating to the current file structure or Share & NTFS permissions on the File Server. A manager has also asked you to create a new shared folder, which needs to be shared to only him and his secretary.
Answer the following questions regarding how you would set this up.
Discuss how you will undertake the documentation deficit.
What types of issues could result that relate to the current level of NTFS security?
After provisioning the new share, how can you test the access before advising the manager that the new share is ready for deployment?
Thought experiment answers
This section provides the solutions for the tasks included in the thought experiment.
Scenario 1
You could create a Storage Pool and choose to use either a two-way mirror or a parity Storage Pool with the four drives.
Answers may vary but you can add additional drives to increase the size of a Storage Pool, therefore you can utilize all four drives.
You should label the disks carefully to ensure you do not accidentally use the incorrect disk because all drives that are added to the Storage Pool will be formatted, and the data will be deleted. You should use the two blank disks to create a new Storage Pool and provision a new Storage Disk, which is a two-way mirror with the two blank disk drives, and then back up the 200 GB data onto this new Storage Pool. You can add the remaining drives to the Storage Pool once the data transfer has completed.
Scenario 2
You should undertake a thorough audit of the users, groups, and shares available and document the file structure in place. During the audit you will get to know the system and better understand the logical structure that has been deployed. Make a note of any anomalies that you come across and review these with management.
You need to immediately inform senior management that there is no documentation in place and explain that this is a security concern and could result in data leakage and unauthorized data access.
You need to test the robustness of the new share to ensure that NTFS and Share permissions produce the desired outcome. This can be achieved by auditing the users and groups using the NTFS Effective Access feature so that you are able to view and evaluate effective permissions on selected resources without the physical requirement to sign on as each user.
Chapter summary
![]() DFS is a powerful server feature that distributes shared folders within a domain environment to ensure that users are able to access and save files on shared resources that are efficiently replicated to chosen geographic locations while conserving bandwidth and providing reliable data availability.
DFS is a powerful server feature that distributes shared folders within a domain environment to ensure that users are able to access and save files on shared resources that are efficiently replicated to chosen geographic locations while conserving bandwidth and providing reliable data availability.
![]() Storage Spaces lets you use unused storage disk drives, including SATA, SAS, and USB drives, and combine the drive capacity to create a virtual disk for storing data. It’s used on Windows 10 clients and servers, and enables users to benefit from an “easy to expand storage” facility and optional data redundancy with fault tolerance without the typical high cost of ownership that a traditional SAN facility would incur.
Storage Spaces lets you use unused storage disk drives, including SATA, SAS, and USB drives, and combine the drive capacity to create a virtual disk for storing data. It’s used on Windows 10 clients and servers, and enables users to benefit from an “easy to expand storage” facility and optional data redundancy with fault tolerance without the typical high cost of ownership that a traditional SAN facility would incur.
![]() Storage Spaces can be forcibly optimized using the Optimize-StoragePool PowerShell cmdlet, which is useful following disks being added or removed.
Storage Spaces can be forcibly optimized using the Optimize-StoragePool PowerShell cmdlet, which is useful following disks being added or removed.
![]() By using a Microsoft account, users can access their private “always available” cloud storage facility called OneDrive in which they can store files, folders, pictures, and other content. OneDrive is integrated and synchronized with Windows 10. Users’ control which files and folders are made available locally and can also share them externally. Users can take advantage of 5 GB free storage and easy-to-use file recovery and online help.
By using a Microsoft account, users can access their private “always available” cloud storage facility called OneDrive in which they can store files, folders, pictures, and other content. OneDrive is integrated and synchronized with Windows 10. Users’ control which files and folders are made available locally and can also share them externally. Users can take advantage of 5 GB free storage and easy-to-use file recovery and online help.
![]() NTFS Permissions work at the file and folder level, offering robust file security and enable files and folders to be either compressed or encrypted.
NTFS Permissions work at the file and folder level, offering robust file security and enable files and folders to be either compressed or encrypted.
![]() The Effective Access tool enables you to view and evaluate permissions given to users and groups on a specific resource stored on a NTFS-formatted volume.
The Effective Access tool enables you to view and evaluate permissions given to users and groups on a specific resource stored on a NTFS-formatted volume.
![]() Share permissions only apply for file access to shares over the network. The three Share permissions are: Read, Change, and Full Control.
Share permissions only apply for file access to shares over the network. The three Share permissions are: Read, Change, and Full Control.
![]() DAC provides administrators the ability to apply permissions and restrictions based conditionally on rules and policies, such as whether the user is accessing the network via a VPN, or using a laptop.
DAC provides administrators the ability to apply permissions and restrictions based conditionally on rules and policies, such as whether the user is accessing the network via a VPN, or using a laptop.
![]() Encryption File System (EFS) is a very strong method of protecting data from unauthorized access should a device or data drive be compromised. Prior to using EFS in a domain environment, it is recommended that a DRA is created. CertMgr and Cipher.exe are two tools you can use to back up and recover your EFS-encrypted files.
Encryption File System (EFS) is a very strong method of protecting data from unauthorized access should a device or data drive be compromised. Prior to using EFS in a domain environment, it is recommended that a DRA is created. CertMgr and Cipher.exe are two tools you can use to back up and recover your EFS-encrypted files.
![]() BitLocker Drive Encryption enables full disk volume encryption and uses a TPM to store the startup key. BitLocker will enter a recovery mode if the drive or TPM have been compromised, forcing the user to enter a 48-digit recovery key.
BitLocker Drive Encryption enables full disk volume encryption and uses a TPM to store the startup key. BitLocker will enter a recovery mode if the drive or TPM have been compromised, forcing the user to enter a 48-digit recovery key.
![]() Group Policy enables you to configure settings for controlling how removable storage is to be used within an organization, such as enforcing BitLocker To Go on all removable data drives.
Group Policy enables you to configure settings for controlling how removable storage is to be used within an organization, such as enforcing BitLocker To Go on all removable data drives.
![]() The BitLocker Recovery Password Viewer included in the Remote Server Administration Tools (RSAT) allows you to search for and find BitLocker recovery keys for devices.
The BitLocker Recovery Password Viewer included in the Remote Server Administration Tools (RSAT) allows you to search for and find BitLocker recovery keys for devices.
![]() MBAM is an enterprise tool, available with the Microsoft Desktop Optimization Pack for Software Assurance customers, which provides useful key management, deployment, and recovery features for administrators and users using BitLocker Drive Encryption.
MBAM is an enterprise tool, available with the Microsoft Desktop Optimization Pack for Software Assurance customers, which provides useful key management, deployment, and recovery features for administrators and users using BitLocker Drive Encryption.