
Filters and Add-ons
Working with Plug-ins in Vegas
Several third-party manufacturers have stepped up to Vegas and have written plug-ins for the product. The tools that come with Vegas provide a wide variety of additional expressions and emotions for editors in Vegas; however, these plug-ins give editors far more arrows for their bows, as well as a feel that the Vegas plug-ins don’t come with. Pixelan Software, BorisFX, Red Giant, RM Tools, Panopticum, and DebugMode have released powerful new tools for Vegas, and demos of some of these products are found on the DVD in the back of this book.
Pixelan SpiceMASTER 2
Pixelan, long famous for their plug-ins for Avid, Adobe, Pinnacle, Media 100, Ulead, and other fine editing products, created the SpiceMASTER plug-in several years ago. Often mistakenly thought to be just a transition tool, this plug-in provides tremendous power to users. This tool has 500 BMPs alone that can be used as backgrounds, foregrounds, masks, and more. Combine this feature with other tools, and all of a sudden, there are millions of possibilities.

5.1 Spice explosion with Bump Map applied over Generated Media makes a very realistic solar flare.
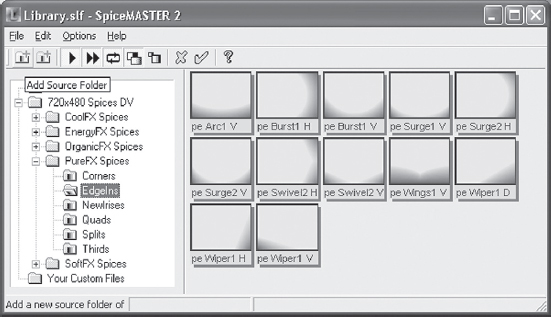
Installing SpiceMASTER takes only a few minutes. Five hundred Spices provide the backbone of how images are manipulated, and the Spices are automatically installed to a folder that you can find quickly and easily. When working with Vegas and DV, load only the DV/720 × 480 Spices (for NTSC) and 720 × 576 (for PAL), as the other sizes will be of little use in Vegas. (If other applications are used, loading other Spice sizes might be of benefit.)
After installing the SpiceMASTER application, open Vegas and insert a video track, placing two events on a track with a crossfade.
In the Transitions tab, select the Pixelan SpiceMASTER 2 plug-in. Drag it to the transition between the two events, or right-click the crossfade and choose Pixelan SpiceMASTER 2, and a dialog box opens. This dialog can be confusing to first-time users. The dialog box instructs users to disable the Sync Cursor button in the Vegas keyframe timeline.
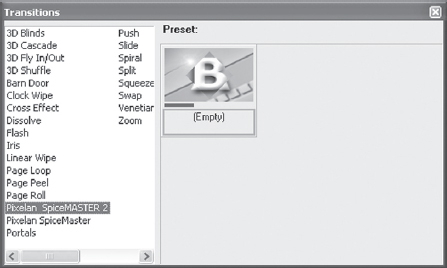
5.2 Locate SpiceMASTER 2 in the Transitions tab.
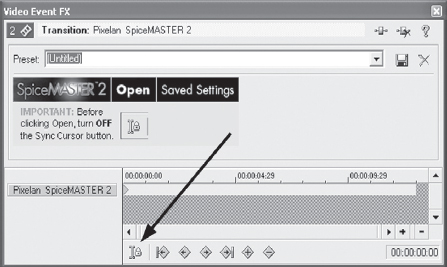
5.3 Disable the Sync Cursor button in the Vegas keyframe timeline.
The Sync Cursor button must be disabled in order to use some of the more powerful features of SpiceMASTER. SpiceMASTER 2 has its own keyframe timeline that allows for a level of control that the Vegas keyframe timeline cannot allow on its own.
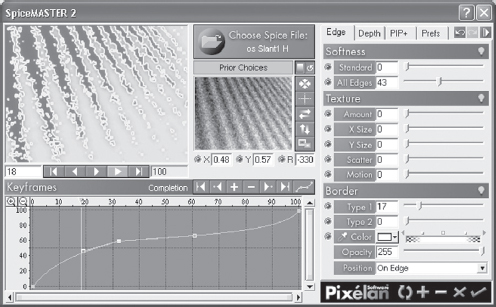
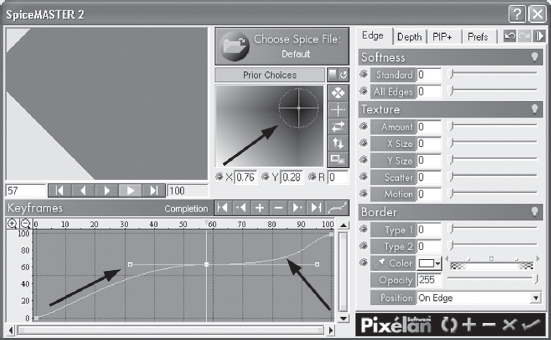
The first window that opens shows the keyframing area, Preview window, the Choose Spice File button, and controls for how the Spices behave and appear.
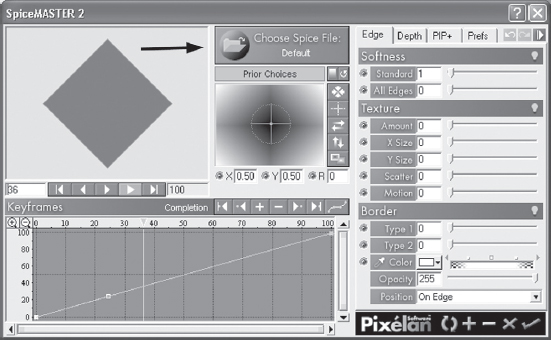
5.4 Main SpiceMASTER 2 window with the keyframing area to the lower left, the Preview window in the upper left, and the control panel to the right.
The Keyframe window is where the velocity or attack/release of the Spices are controlled. The keyframer controls every aspect of how a Spice behaves, based on user input. SpiceMASTER has added a Bezier curve control that allows the user to smooth or ramp keyframes. The keyframer allows images to be brought in and out with a Spice, to be frozen, and even to be reversed. The line in the keyframer is a linear indicator of how the Spice will flow from start to finish. In the case of a transition, the keyframe controls the outgoing event, with Spice behavior on the left and the incoming event controlled on the right. Where the Spice falls in the center and how it behaves is entirely up to the user, who can slide the curve to satisfaction. A line from 0 on the left to 100 percent on the right and without a curve represents a traditional, straight transition. A line shaped like the line shown in Figure 5.5 creates a slow outgoing transition with a slight hold in the middle of the transition and a rapid curve to the new event at the end. With the two events on the timeline and a SpiceMASTER 2 transition inserted, click the Choose Spice File button, which opens the menu of Spices from which you can choose. Spices are animated in the Library, demonstrating how the motion of the effect will appear in the transition. Select a Spice. The effect is shown in outline in the SpiceMASTER’s Preview widow
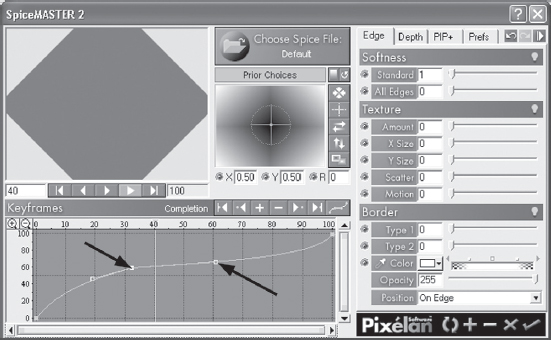
5.5 Notice the keyframes holding a curve, controlling how the Spice flows between two events.
5.6 Spices are animated and will display their action in the Chooser window.
Just below the preview image is a Transport bar. This bar has a Play button that can be used to play the built-in preview or to show how the keyframe points are controlling the effect. This option saves time by allowing users to see how a Spice transition will flow in real time. At the same time as adjustments are being made to the keyframes in the keyframing tool, the Vegas Preview window can also be active, showing in real time what adjustments are being made to the transition and Spice behavior.
5.7 A selected Spice displayed in the Preview window.
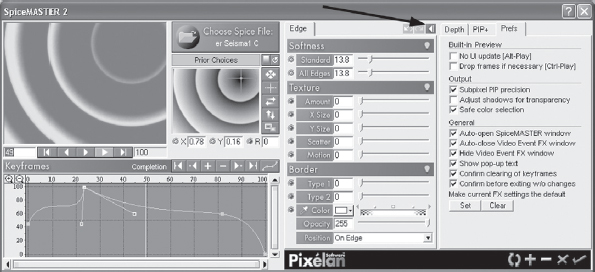
5.8 Click the Dual Pane button to see all controls in the SpiceMASTER 2 interface.
The keyframer takes a bit of adjustment for Vegas users familiar only with Vegas’ keyframing techniques. The concept of keyframing in SpiceMASTER, however, is exactly the same as Vegas, minus the sync cursor capability. Users will find the keyframer in SpiceMASTER more capable and very fast to use. The cursor bar in the keyframer allows scrubbing in the keyframe window in order to see exact points in the behavior of the Spice il.
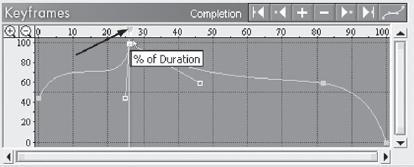
5.9 Above the keyframe tool is a cursor that can be scrubbed across the keyframer, allowing for frame-by-frame adjustment of keyframes.
Using the mouse or cursor, grab the top of the cursor bar in the keyframer and scrub across the timeline. Notice how in both the Vegas Preview window and in the SpiceMASTER Preview window, changes are seen as the cursor bar rolls over time. This ability allows keyframe points to be set to exact moments in time. Stop the cursor in the keyframer where a desired change should be made. Adjust for softness, adjust for color or transparency, or just adjust the curve. A new keyframe is inserted. When the new keyframe is inserted, observe the small Bezier curve indicator that appears to the right and left of the keyframe. This small line is what controls the Bezier curve properties of the keyframe. Raising the line upward causes the keyframe to adjust the image rapidly, while lowering the curve slows down the keyframe’s adjustments to the image, depending on whether the event is the incoming or outgoing event.
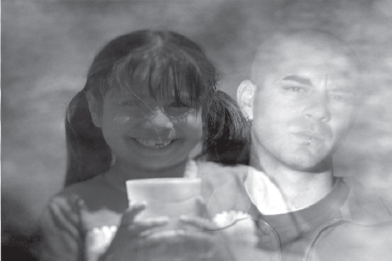
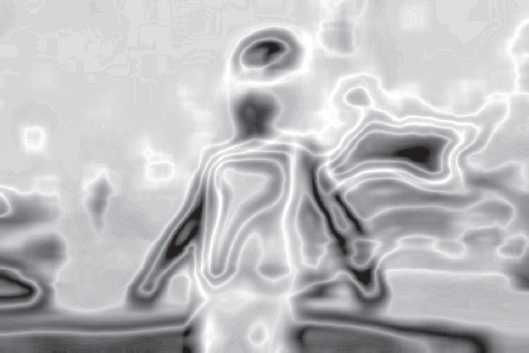
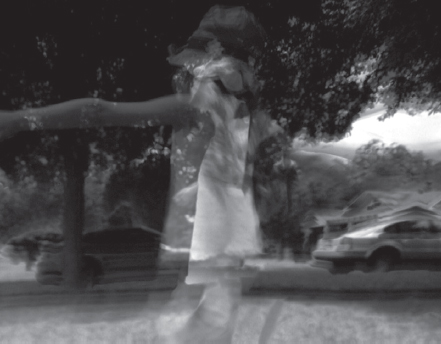
5.10 Changing the Bezier points in a file, coupled with the use of a Climactic Spice, gives a sense of foreboding in this image overlay. Using a standard overlay without a Spice would be too sharp or clear and would not have the “mysterious” nature of this image.
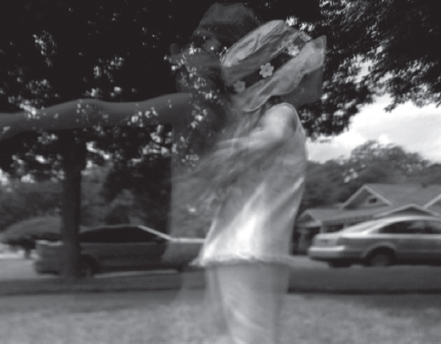
5.11 Bezier curves control the velocity and depth of the incoming event’s transparency, coupled with the moving position of the transition. Transition appears slowly in the upper-right corner, moving to the center, with a rapid slide to fully opaque in the last frames of the transition. These Bezier curves function in a similar manner to the Bezier masking tools found in Vegas’s Pan/Crop function.

5.12 Image appearing from the upper-right corner as displayed in the previous example.
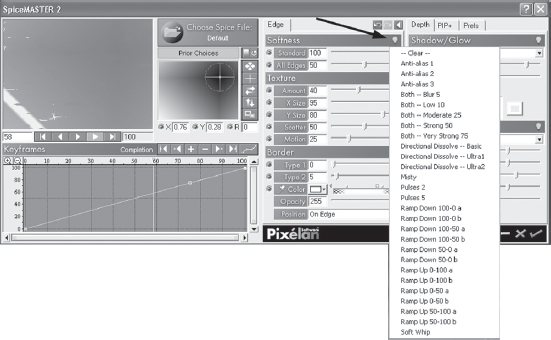
Nearly every aspect of the SpiceMASTER interface has a built-in preset that can be mixed with other presets to give deep functionality and a unique transition between events. Using a softness preset coupled with a texture preset presents more than 1,000 possibilities alone, and all five of the control panes contain dozens of presets in addition to any random manual adjustments you might wish to make. To reach the presets, select the Light Bulb icon found on each control pane.
5.13 Each control pane contains a series of presets for users starting out. Personal presets can also be saved.
The true magic behind how Spices function is the ability to make Spices more organic and rich in motion and depth, in addition to allowing editors more creative inspiration. SpiceMASTER and accompanying Spices are not simply transitions. The Spices can be used as filters or as associates to filters in Vegas that create extremely deep and creative images and effects over text, still photos, video, or generated media. Combined with bump or height mapping, the compositing tools found in Vegas take on even greater power and opportunity for creative flow.
Inserting a Spice as an effect or filter is as simple as dragging the SpiceMASTER effect from the Video FX tab and dropping it on an upper event. (You’ll need two tracks; otherwise, the Spice will be flowing over the default solid color background.) This process is useful as a means of showing an event via a created mask, for creating a virtual transition, or for moving a Spice over an event as if it were an event on a separate track. The angle, opacity, softness, and so much more can be controlled in the SpiceMASTER tool, but possibilities are virtually without limit. Colors can be applied to borders with one color on the outside border and a second color on the inside border, with varying opacities for each border setting. Keyframes can be applied to change the opacity or color of the borders, or simple presets can be applied.

5.14 Same transition as in Figure 5.12, with a texture and softness preset applied.
Spices can be added to an unlimited number of tracks. One creative opportunity is to place three or more tracks of video on the timeline, with different Spices flowing over each track. Shift different Spices around to find what best displays all tracks as a deep composite. Spices make incredible masks that can be inverted, softened, position-whifted, and more.

5.15 Combining a Spice with a Cookie Cutter Mask and a Spherize filter creates the appearance of a super fish-eye lens coming out of a fog-like mist.
Spices can also be used directly on masks, creating beautiful flowing titles or other masked information. Using multiple Spices on multiple masks and events allows for even greater creativity. In the next example, the image flows from one Spice to another without one Spice interfering with the flow of another. One Spice is applied to the mask/letters, while a second Spice is applied to the generated events, acting as a child to the parent. The background event also contains a Spice masking a still of camera lenses in a very subtle background motion.
Extremely soft, subtle transitions or filter flows can be created; in fact, far too many to list in this book. The tips and tricks presented here were intended to whet your appetite.
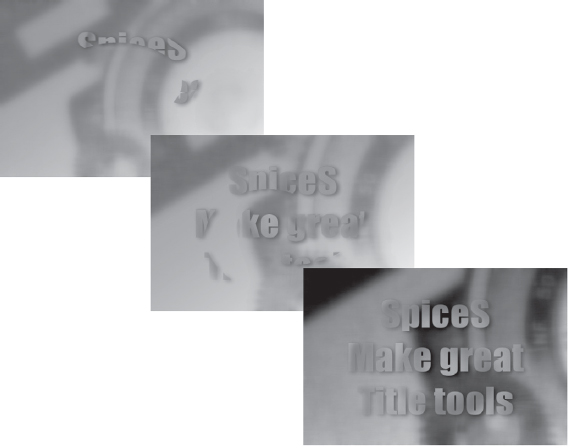
5.16 Using multiple Spices presents exceptionally deep titling opportunities.
![]() Tip
Tip
The SpiceMASTER 2 projects seen in the previous examples can be found on the disc in the back of this book, in spices.veg.
SpiceFILTERS, also from Pixelan, open many, many doors in Vegas. Five primary filter tools are available: ChromaWarp, FlowTexture, NewNoise, StepMotion, and StepTime. If there was one set of plug-ins that I think all Vegas users should own, this is the set.
The ChromaWarp plug-in is a color-shifting plug-in that displaces pixels over time or over color space. Psychedelics, inversions of colors, additive or subtractive tints, or even complex color correction can be performed with the ChromaWrap plug-in.
5.17 ChromaWarp can be used to create a psychedelic among many other user-adjustable settings. This plug-in can be used to quickly simulate an infrared heat signature, a negative film image, or other color-based effects.
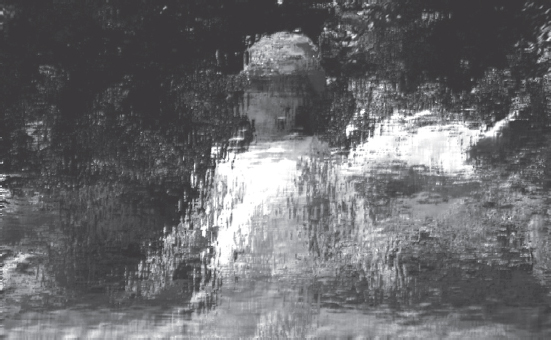
The FlowTexture plug-in uses Spices from SpiceMASTER or other graphic files to create textures with displacement mapping. Extremely complex textures, bump maps, displacement maps, and rippling effects can be created with this effect. Coupled with other effects, the possibilities are essentially endless. This plug-in is great for flowing over titles, creating motion backgrounds, or for creating unique visual images. The next example provides the appearance of a Monet-style painting over video using the Moderate Displacement preset and some minor adjustment using the Seepl Spice.
The NewNoise plug-in is used for creating film noise, color streaks, random color patterns, and grain effects among other effects that are noise or granular based. The streaking on the screen in Figure 5.19 is just one of the many presets in the NewNoise plugin.
5.18 A stipling-style painting is simple to achieve with the FlowTexture plug-in.
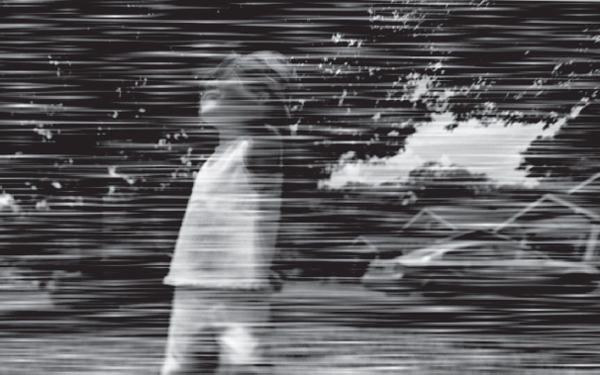
5.19 Streaks preview in real time with the NewNoise plug-in. Reduced opacity and a slight blur create the illusion of high-speed motion while an event is playing at normal speed.
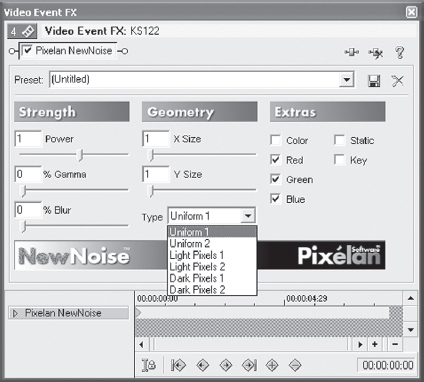
5.20 Properties of the SpiceFILTERS are adjustable and have tremendous options. All filters have several presets in addition to adjustable parameters.
The StepMotion plug-in is similar to an audio time delay or reverb, creating visual echoes of the event. Dark or light pixels can be selected for delay, either via preset or manually adjusted parameters. No wedding videographer should be without this filter; when applied to a bride with a flowing wedding dress, the filter creates a beautiful effect of dream-like motion. Applied to motion graphics, such as the echo rings found on the DVD in this book, applied to the sweep hand of a clock, or to another motion over the top of reasonably still backgrounds, the filter creates a stunning effect. Try using this filter on bullets or other fast-moving images on a screen to give a new look to an old image. Images can be frozen in time, ghosted, and echoed.
The StepTime plug-in can also provide ghosting, but more importantly, low-frame rates can be simulated, in addition to strobing, stop action, and more. Using keyframes, various strobe and stop motion effects can be blended or keyed to other clips, music beats, or other effects. By using the key parameter and a strobe, events underlying the event with a strobe on it can be revealed, creating a timed alpha revealing any underlying events without needing to composite them together. This feature is powerful for titles or for creating a dream sequence in which two different images are required to set up the feeling of alternating perspectives. One powerful effect is to take the same image on two tracks, reverse the lower track, and apply a strobe with a key. At the mid-point, the two images come together and then fly apart again. This same technique can be used to create a stunning effect by copying a track and desaturating the lower track so it is black and white, while the strobe on the event above is in color. This process creates a strobe between the black and white event and the color event.
SpiceFILTERS open many doors to creativity, color enhancement/correction, and special effects. Have fun with the demo version on the DVD!
5.21 The StepMotion plug-in acts like a video version of an audio delay. Added to high motion, it provides amazing effects.

5.22 Using a key and a strobe, events can be composited without using a parent/child, with opacity creating a unique good against evil effect. To add some softness to one or the other, add a StepMotion filter to one or the other event in the adjust, or overlay, mode.
5.23 Blend the strobe with a black-and-white image beneath to create color strobing over a monochrome image. The SpiceFILTERS are powerful, effective, and inexpensive.
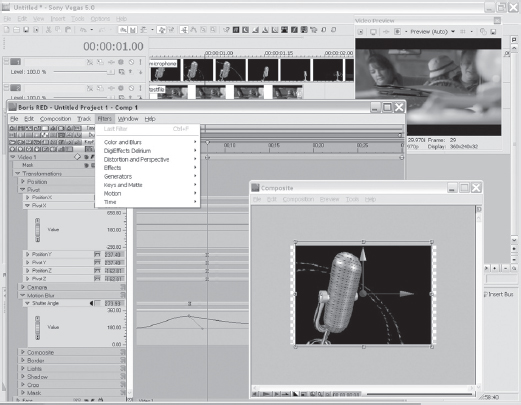
5.24 Boris RED Vegas.
BorisFX makes a series of compositing, titling, and special effects tools for a wide variety of NLEs, in addition to providing a stand-alone product. Boris FX has released Boris Red and Boris Graffiti for Vegas. Graffiti LE is bundled with Vegas, giving users an upgrade path to the full version of Graffiti or Red. Figure 5.24 shows the Boris RED interface working within Vegas. Boris RED is both a Vegas transition and filter, with a surface generator (or what Boris terms a synthetic importer) in the works. BorisFX is very aware of the workflow that Vegas offers users and molds their development around this. Within Vegas, users can both apply a Boris effect to the timeline and preview it in the same manner they are accustomed to with other Vegas filters. After the effect is applied, users can launch the Boris user interface from the native Vegas FX Property page, create their effect, and upon closing, automatically import the Boris effect into the Vegas timeline.
From this point, whenever the Vegas cursor is scrubbed across the Boris effect in the Vegas Timeline, users can view the Boris frames natively in the Vegas Preview window. Instant Boris FX by Chris Vadnais is an outstanding resource for those wanting to learn the Boris Interface inside Sony Vegas.
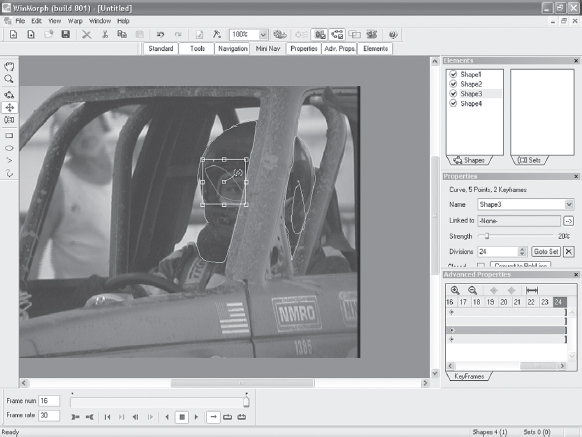
5.25 Drawing morph and warp characteristics can be done with built-in shapes or freehand drawings in the WinMorph workspace.
The DebugMode products that work under Vegas are the result of the work of Satish Kumar, a software programmer who also enjoys Vegas. These plug-ins bring new capabilities to Vegas not otherwise possible with X-Y-Z plane adjustment to create multidimensional imagery.
The WinMorph plug-in allows images similar to those seen in the smash hit movie The Matrix, wherein the subject freezes and the background spins around the subject, or similar to the Michael Jackson music video Black and White, wherein one face morphs into another with different parts of the image changing at different times. Warps of specific sections in the event, whether a still image or video image, can be created with shifting space based on shapes drawn in the WinMorph main workspace. WinMorph is included on the DVD in this book, complete with tutorials on how to use it to create some of these effects.
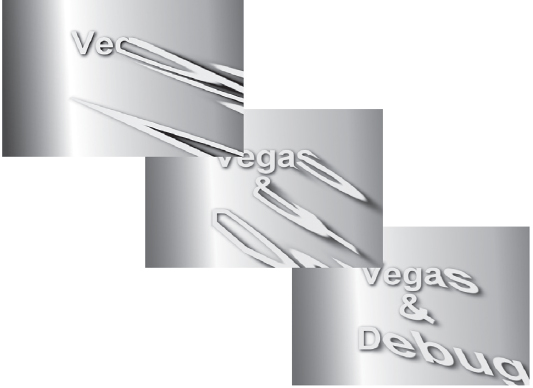
The Plug-inPac filters offer similar attributes to WinMorph in that shapes can be rapidly shifted in three dimensions and moved on various X-Y-Z planes and aspect ratios. Three Plug-inPac filters are available: PixelStretch, Shatter3D, and 3D LE.
PixelStretch allows pixels at a defined space to be shifted, stretched, and pulled into unbelievable shapes. Laser beams can be created from letters, faces distorted, and, when combined with other plug-ins, amazing images can be quickly created. Like the Pixelan plug-in tools, the Plug-inPac tools can unleash incredible creativity.
As its name implies, the Shatter3D plug-in creates the image of shattered glass or other fragile material. The number and size of the shards or shattered pieces are controlled by the parametes of the plug-in.
5.26 PixelStretch stretches a defined area of pixels, keyframable over time.
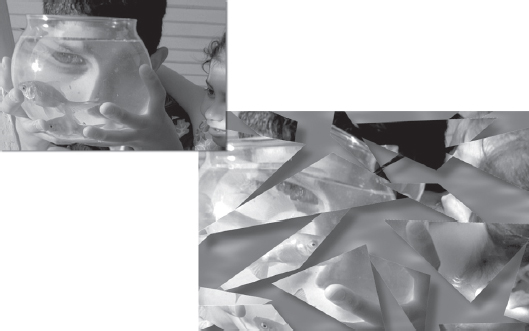
5.27 Shattered images can be very complex with the shatter 3D plug-in.
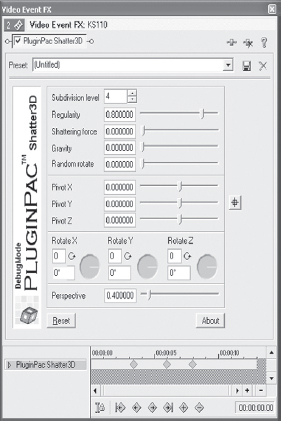
5.28 The Shatter 3D plug-in controls. Although Vegas has terrific 3D tools, some users might find the Debug Mode tools more controllable and intuitive..
The images from the PluginPac examples can be found in the debugfiles.veg files on the disc in the back of this book.
The parameters of the Shatter3D plug-in allow The The parameters of the Shatter 3D plug-in allow images to be simple or deep, with keyframe ability over time. Shattering images can be reversed in the middle of an event, allowing an image to be shattered and restored during an event. The plug-in has controls to simulate the amount of force with which the image is struck, the angles of the shards as they fly across the screen, the angle at which the shards are viewed, the rotation of the shards, and the perspective/depth of focus.
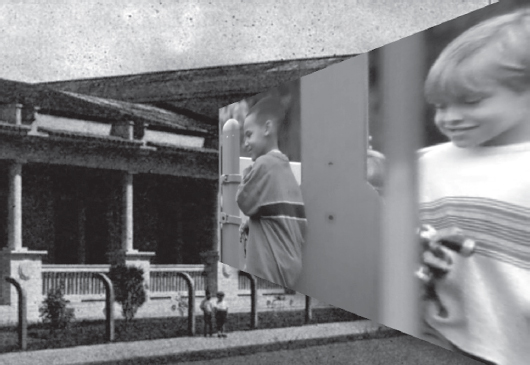
The 3D LE plug-in is fantastic for creating 3D images that fold together and move apart with varying angles and depths and for creating trapezoids and multiplane angles. These can be combined with shadow and glow from the Track Motion tool and used as transitions or event flybys. This tool is also great for creating the ubiquitous Star Wars titling effect.
![]() Tip
Tip
More tutorials and information on the Pixelan and DebugMode plug-ins are available at www.pixelan.com and www.DebugMode.com. The tutorials for WinMorph on the disc in this book are courtesy of Satish.
5.29 A 3D transition flies in to lock to one side of the screen before closing like a door.

5.30 Trapezoidal screens created with the 3D LE PluginPac are fast and simple to do.

5.31 The Panopticum LensPro plug-in offers wonderful effects. It’s a slow rendering plug-in; be sure to check the auto-update box. Frames and lens effects are beautiful, and well worth the wait. No other plug-in currently offers these effects. “Visit http://www.panopticum.com for more information on the Engraver and the LensPro plugins for Vegas.

5.32 The Magic Bullet plug-in installs with Vegas and is a great tool, albeit a slow renderer. Similar looks may be achieved with Zenoté plug-ins. Magic Bullet’s Film Looks plug for Vegas does not allow any control over the parameters of the plug-in.
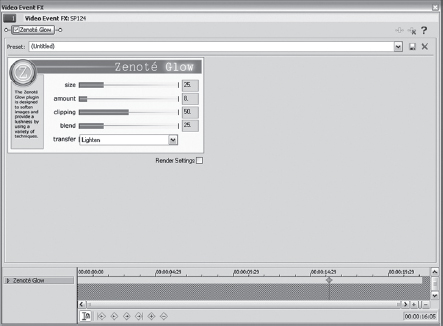
5.33 The Zenoté plug-in suite is fantastic for getting a good film look, cleaning up noisy DV files, adding blur, or jitter to an image. The Zenoté plug-ins are not heavy on the processor and allow for very fast real-time previews, and render very fast. Visit http://www.zenote.com for more information on these fine plugin tools for Vegas.