


Setting Up a Studio
Choose your workspace to match your style. Some people like to stand to allow free arm movement; others sit at a table for more precise work; and some prefer to sit in an oversized chair. Select an easel, table, or lap desk to hold your paper while you work. And wherever you do work, you will need good lighting, such as a floor lamp, desk light, or clamp-on light. As an artist, you may prefer to use a “natural” or “daylight” bulb, which mimics sunlight and is easy on your eyes. To avoid blocking the light with your body or hand—if you are right-handed—place the light to your left and above your work; left-handed artists, position your lamp to the right and above.

Drafting or Drawing Table You can angle these tabletops for comfort. If space is short, get a folding table.

Lap Desk A laptop board with an attached pillow allows you to put your feet up, lean back, and draw.
Easel An easel will hold your work upright, so you can work standing or sitting.


Sketchbooks and Tracing Paper
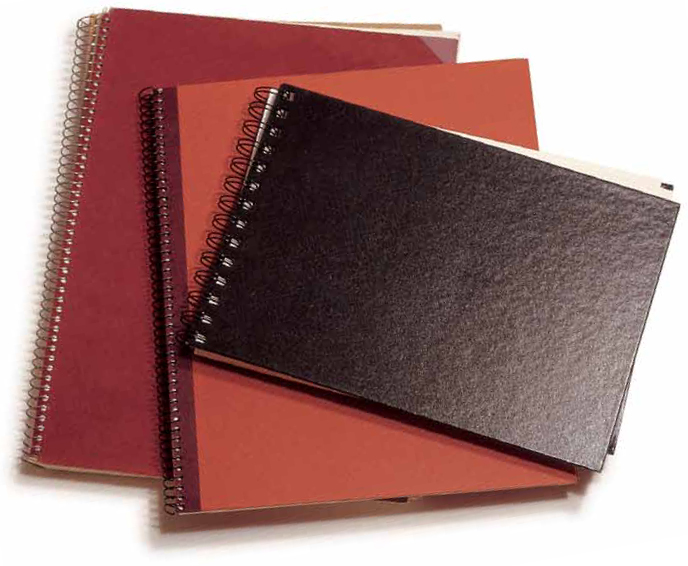
Sketchbooks
There are all kinds of sketchbooks available, but spiral-bound varieties are great because they lie flat when opened. Sketchbooks come in a variety of sizes, from 6" × 9" to 11" × 14". Stay clear of books with thin paper; denser papers are better able to handle washes of color without bleeding through or warping the paper.


Sketching on Location
One of the great advantages of keeping a sketchbook is that it’s small enough to go with you anywhere—from outdoor flower markets to historical buildings! No matter where you are or what you’re surrounded by, you have before you a wonderful opportunity to sketch—and don’t feel as if you have to wait for the perfect image to begin sketching.
Outdoor sketching requires a different kind of preparation than indoor sketching does. For example, you need to pay attention to the time of day and the weather to be sure you’ll have plenty of natural light; between 8:30 and 11:30 in the morning are ideal times to sketch outdoors.
When you arrive, on location, walk around for at least 10 minutes to get a sense of the area. When something captures your interest, take notice of how the sun’s position will change the scene during the day. If the focal point of the subject will likely be shrouded in shadow, it won’t make a good subject.
Take written notes or make pencil marks on your sketch to record the placement of shadows before they change. If you’re planning to turn the sketch into a full painting later, it’s a good idea to record information about the time of day, weather conditions, people you meet, and so on—anything that will help you remember!

Drawing and Painting Surfaces
The surface on which you draw or paint (also called the “support”) will always influence the quality of your final artwork. Subtleties in texture, the vibrance of the paint, and the length of your art’s life are just a few things tied up in the support. Before you make a trip to the art store for supplies, check out this overview of paper and canvas.
Drawing Paper
Paper can vary in weight (thickness), tone (surface color), and texture. It’s a good idea to start out with smooth, plain white paper so you can easily see and control your strokes. Then check out other options. Paper with a rough texture (also called “tooth”) is ideal for charcoal and pastel—and it may even appeal to graphite artists drawn to bold, broken strokes. Note that using acid-free, archival paper will increase the lifespan of your art by preventing it from yellowing and becoming brittle.

Watercolor Paper
This paper is coated with a layer of sizing, which helps the surface absorb the paint slowly. A variety of textures exist on the market, notably hot-press (smooth), cold-press (textured), and rough (just what it sounds like). Watercolor paper is also labeled by weight. A common beginner paper is 140-lb paper, which is thick enough not to buckle or warp excessively under the moisture of paint.

Canvas
Pre-primed and stretched canvas, which is available at arts and crafts stores, is the best way to go for acrylic and oil painting. This canvas is stretched taut over a wood frame and coated with acrylic gesso—a white primer that provides an ideal surface for holding paint. Without it, the canvas may awkwardly absorb the paint or become damaged when exposed to the harsh solvents (as used in oil painting). Also, gesso’s bright white color helps the layers of paint above it glow.

Smooth paper

Medium paper

Rough paper

More Painting Surfaces
Painting surfaces, also called “substrates,” have different textures and lend a special effect to your work.
Canvas Paper
This is commercially prepared paper that simulates canvas texture and weave but is available in pad form. It does not require priming and is less expensive than actual canvas—perfect for practicing new techniques.
Cardboard and Mat Boards
These are wonderful surfaces for painting because they are economical, lightweight, and readily available. Many framers will freely give their leftover mat boards scraps if you ask. These surfaces require two coats of gesso before using.
Papers and Boards
Many artists paint on watercolor paper, print-making papers (used with inks and printing presses), and Bristol board (available in pads). You can use these surfaces either primed or unprimed. To minimize the buckling and warping of papers, you can tape the sides down to a stable surface, wet the entire paper, and let it dry completely. This “pre-stretches” the paper so that it will retain its flat quality when you paint on it. Another way to minimize buckling is to prime both the front and back of the paper with one or two coats of gesso; then let it dry before beginning your painting.
Hardboard and Panels
Many artists paint on smooth, hard, inflexible surfaces, such as hardwood (oak, cedar, birch, walnut, etc.); medium density fiberboard (MDF) such as Masonite; and plywood. These must be primed with two or three coats of an acrylic polymer medium because they contain resins and impurities that can leech up into your painting and cause noticeable discolorations—called Support Induced Discoloration (SID)—especially if you are using transparent gels and mediums.
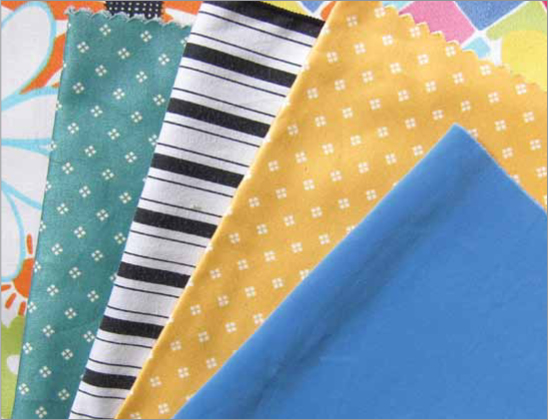
Fabrics
Rather than painting on a white canvas or paper, use any fabric as a starting point for creating a painting. Add paint, gels, and pastes just the way you would if working on canvas. Use several coats of an acrylic polymer medium to prime, if desired.


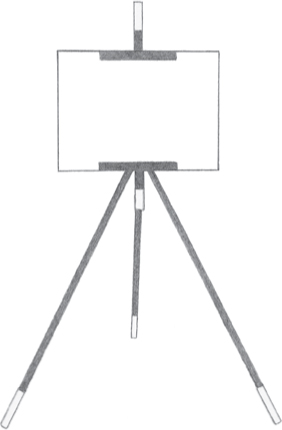
Easels
Life-sized paintings require large canvases, which in turn require a solid, secure, upright easel. The easel can be wall-mounted or freestanding. For painting on site, such as outdoors or in a client’s home or office, use a portable easel.
An easel is a structure made to hold your support in place while you paint. Most easels hold your support upright vertically, but some, such as French easels or box easels, are adjustable so that you can tilt the surface to different angles when necessary. Portable easels are lightweight and collapsible, making them ideal for painting on location or taking into the studio; tabletop easels are often a more comfortable choice, as you can sit while you paint. When painting in watercolor, it’s usually best to paint on a flat surface so the paint doesn’t run or drip quite so much. In this case, you may want to consider a painting board, which is any flat, stiff surface used to support your painting. Popular choices for painting boards include hardboard, wood, and Plexiglas®. Many boards have carrying handles, and some come with clips that will hold your paper in place.

Tilting the paper Some artists prefer a tabletop easel so they can tilt their paper up, causing the paint to run down the page instead of collecting into puddles on flat paper. If you don’t have an easel, try propping up your painting surface with a few books.

French Easel This all-in-one easel has three adjustable-length legs that fold up into a box. This box, which carries like a vertical briefcase, also holds painting materials and canvas.

Light Studio Easel Lighter easels like this one are best for smaller works and for viewing reference photographs while painting. If you are handy or know of someone who is, you can easily make this type of easel at home.

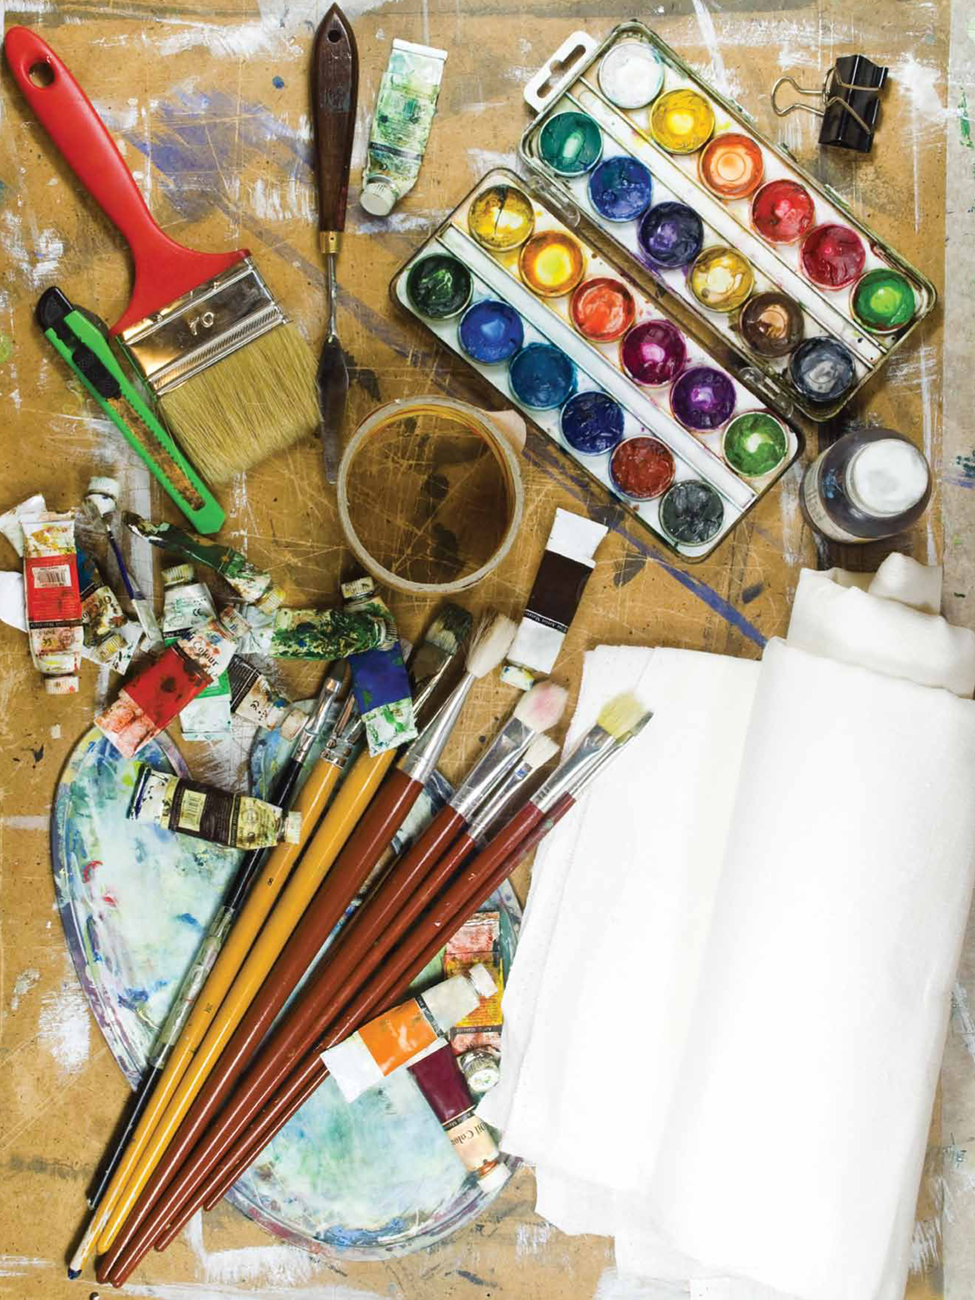
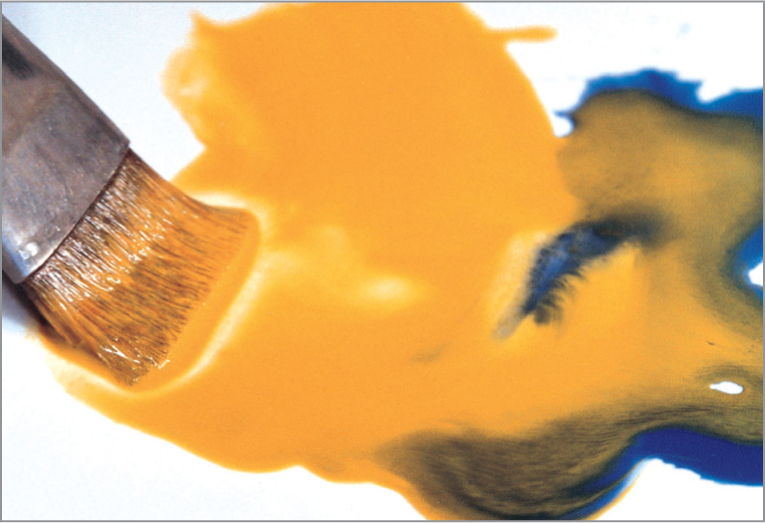
Brushes
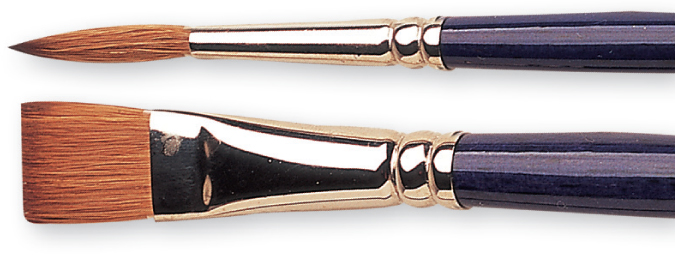
Rounds
The round brush is a good choice for delicate work because the tip gradually tapers to a fine point that becomes even finer when wet. Capable of producing a variety of strokes, the round can be manipulated by changing both the pressure on the brush and the consistency of the paint. Use firm pressure for wide lines and light pressure for thin lines. Or paint fine details by pressing lightly and using the very tip of the brush. It’s a good idea to start out with three round brushes—one large, one medium, and one small. Rounds are available in sizes ranging from 1/6” to 3/8”.


Flat Stamping To create textured patterns, like that of feathers, hold a round brush flat against the painting surface and press the tip of the brush down in a stamping motion.
Filberts
The uniquely shaped filbert brush has a curved tip that comes to a fine point capable of producing very thin lines. The stiffness of the brush, coupled with its unique curve, allows you to create a number of interesting textures. The bristles are highly absorbent and can hold large amounts of paint. Filberts are similar to flat brushes, but they have distinctly rounded tips that are ideal for creating texture.

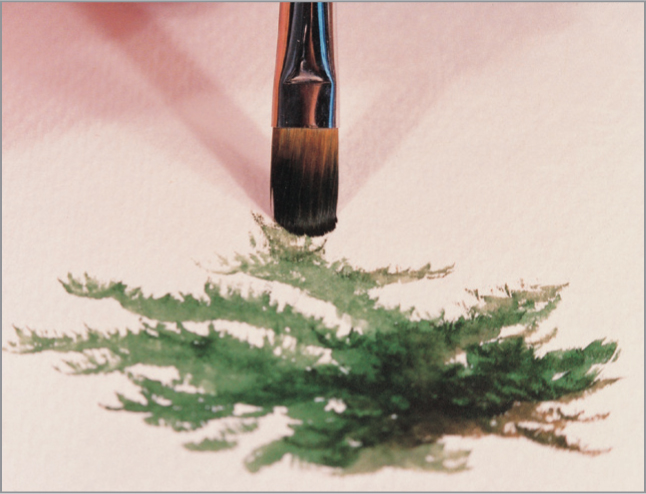
Creating Texture Use the curve of the filbert, changing angles often, to produce a number of textures, such as the foliage here.
Flats
A flat brush will help you apply flat and graded washes and backgrounds. The length of hair in a flat brush is usually one-and-a-half times the width of the ferrule, creating a flexible brush that bends easily. The flat brush is capable of creating both soft blends and delicate glazes. Use this brush to gently layer one color over another or to create long pulls of color. A flat brush’s long bristles hold a lot of paint, so you don’t have to make multiple trips back to your palette.


Pulling Color The flexible flat brush, which provides good control, is capable of making long pulls of color such as these blades of grass.
Specialty Brushes
In addition to rounds and flats, there are other brushes available for just about every purpose imaginable, including creating textured patterns, such as feathers and fur, or painting extremely fine details, such as eyelashes or animal whiskers.

Liner Brushes Liner brushes are thin brushes with bristles that taper to an extremely fine point.

Fan Brushes Designed in the shape of a fan, these brushes can be used to create the appearance of trees, animal fur, and feathers.

Sweeping Strokes Load a fan brush with heavily diluted paint and pull it over a dry area using short, sweeping strokes to create wispy, hairlike patterns.

Controlled Lines You can use a liner brush to paint long, thin blades of grass or to sign your painting.

Brush Bristles and Care
Synthetic-Hair Brushes
Synthetic brushes are made of nylon or other non-animal products that mimic the qualities of natural hair; they are preferred for use with acrylic paint. The slick bristles of synthetic brushes help the paint slide off easily onto the painting surface. And because paint is easily removed from the bristles, cleanup is more convenient than it is when working with natural-hair brushes. Synthetic brushes come in all shapes and sizes—from thin, delicate bristles that resemble the natural-hair sable brush to thicker, stiffer brushes that imitate the hog-haired bristle brush.

Building a Collection Many artists use solely synthetic brushes (shown here), but some artists prefer a selection of both natural and synthetic brushes. With experience, you will develop your own preferences.
Bristle Brushes
Bristle brushes are a type of natural brush most often used in oil painting. Made with white hog bristles, these stiff, wiry brushes are good for creating patterns and textures or for lifting out color.

Bristle Brushes Each individual bristle is naturally “flagged” (or split), so that the ends of the bristles hold more paint—every split bristle acts as a miniature paintbrush.
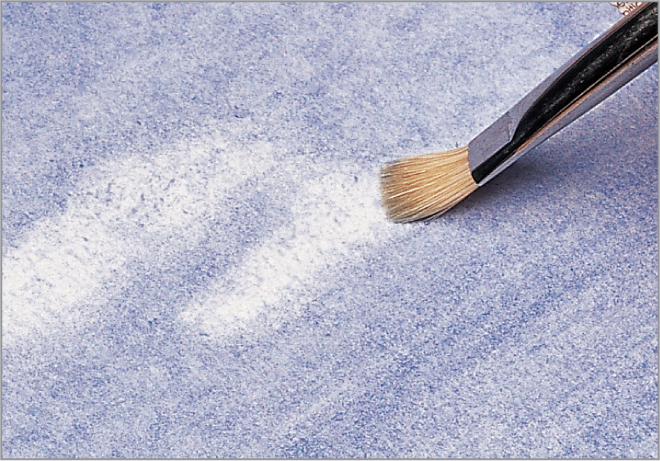
Removing Color Bristle brushes can also be used to remove wet color from the painting surface; scrub the tip of the brush over recently applied paint.
Soft-Hair Brushes
Soft-hair brushes are made from the hair of a variety of different animals, including horses, squirrels, oxen, badgers, monkeys, and even skunks. Pure red sable paintbrushes—cut from the hairs of the tail of the kolinsky (a type of mink native to Siberia)—are considered the best type of brush.
Natural-hair Brushes have resilient bristles and can absorb an ample amount of paint, allowing precision and control.
Loading the Brush This flat natural-hair brush is capable of holding large loads of color for washes or for mixing.
Brush Care
Your brushes will last a long time if you care for them properly. During a painting session, keep the bristles of your unused brushes submerged in clear water—but don’t submerge the wooden handle. And never leave the brushes standing in water between sessions. Also, never let a brush sit with paint in its bristles, even during a painting session. And when you finish a painting session, be sure to thoroughly clean your brushes.

Cleaning Your Brushes To properly clean your brushes without damaging their delicate hairs or bristles, first rinse the brush in cool water; then use paper towels to wipe off as much paint as possible. (Always pull straight away from the bristles—never pull sideways.) Then, using a mild soap or shampoo and cool water, gently rub the bristles in the palm of your hand (as shown) to loosen any remaining paint. Rinse thoroughly and blot with a paper towel. Finally reshape the bristles with your fingers and lay the brush flat on a paper towel to dry.

Storing Your Brushes Keep dry brushes standing upright in a jar—you will ruin your brushes if you leave the hairs or bristles standing in water. You also can store brushes in cylindrical containers, which are useful for carrying outdoors. But make sure the container is kept upright, or the bristles might get bent.

Palette Knives and Other Implements
Palette knives, which are used for mixing paint colors, can also be used to apply paint to your surface. Many artists create paintings using only palette knives; they apply the paint as if they are frosting a cake. This will result in a thicker, richer application of paint and produces a very different look than a paintbrush does.
Metal palette knives with a diamond shape and point at the tip allow artists to create fine lines and details, such as branches, sailboat masts, telephone lines, and so on. They are also useful for mixing paint, and you can clean them with one wipe of a towel.
Listed below are additional tools you can use to apply paint.
• Sponges
• Foam brushes
• Putty knives
• Cardboard strips
• Rubber stamps
• Toothbrushes
• Feathers
• Hair-color bottle applicators
• Eye droppers
• Cake decorating materials
