
Chapter 6: Printer Tips
Multicolumn Output Without Layout
Adding Background Images and Watermark Effects
Adding Metadata to Your PDF Documents
Creating Secured PDF Documents
Specifying the Initial PDF Page View
The printer destination is actually a family of destinations that can output PDF, Postscript, or PCL. Most people probably use the PDF destination the most, but the tricks discussed here will work with most of the output types unless otherwise noted.
Multicolumn Output without Layout
If you just want to have multiple columns in our printed output, you don’t need to use ODS’s layout features; a simple COLUMNS= option may be all that you are looking for. The basic syntax for using COLUMNS= is shown below.
ODS PDF COLUMNS = integer;
As you can see, it’s quite simple. Here is a small test case.
ODS PDF COLUMNS=3;
PROC PRINT DATA=sashelp.cars NOOBS;
VAR make model;
RUN;
ODS PDF CLOSE;
Figure 6.1 shows the output from the code above.
Figure 6.1: Multicolumn output using COLUMNS=

There is no technical limit to the number of columns you can have, but you will have to keep it to a low enough number for your tables to fit the available space where the columns are equally divided on the page.
Page Breaks and Orientation
ODS PDF gives you a lot of control over page breaks and page orientation. Page breaks are normally controlled by procedures, but ODS PDF lets you override the procedure behavior. In addition, ODS PDF allows you to control page orientation on a page-by-page basis. These techniques are covered in the following sections.
Changing Page Orientation
Controlling the page orientation has been possible for some time now. However, in SAS 9.3, you can change the orientation after each procedure. The option to change orientation is available on the system OPTIONS statement rather than the ODS PDF statement. The syntax is:
OPTIONS ORIENTATION = PORTRAIT | LANDSCAPE ;
Changing the orientation between procedures is simply a matter of interspersing the procedure code with the OPTIONS ORIENTATION= option. Here is a simple example.
OPTIONS ORIENTATION=PORTRAIT;
ODS PDF;
PROC PRINT DATA=sashelp.class;
RUN;
OPTIONS ORIENTATION=LANDSCAPE;
ODS SELECT variables;
PROC CONTENTS DATA=sashelp.class;
RUN;
OPTIONS ORIENTATION=PORTRAIT;
PROC MEANS DATA=sashelp.class;
VAR AGE HEIGHT WEIGHT;
RUN;
ODS PDF CLOSE;
Figure 6.2 shows the output from the code above. It’s scrolled down so you can see parts of all three pages in the window.
Figure 6.2: Changing page orientation within a file

Controlling Page Breaks
By default, procedures control page breaks. There is generally a page break before each procedure, but they can also be inserted by procedures under various situations. Depending on how many page breaks you get, you can end up with many unneeded pages in your output because of the extra white space after procedures. You also may want to insert your own page breaks rather than the ones chosen by your procedures. If you want to eliminate some of this extra white space or insert page breaks manually, you can use the STARTPAGE= option.
The STARTPAGE= option takes three values: YES, NO, and NOW. YES is the default and allows page breaks to happen in their natural places. NO indicates that you do not want any of the page breaks indicated by the procedures. NOW is the value that you would use to invoke a manual page break.
Since you already know what STARTPAGE=YES looks like (it is the default), we’ll look at some output with STARTPAGE=NO.
ODS PDF STARTPAGE=NO;
PROC PRINT DATA=sashelp.class(OBS=2);
RUN;
PROC PRINT DATA=sashelp.cars(OBS=2);
VAR make model type msrp invoice;
RUN;
PROC PRINT DATA=sashelp.shoes(OBS=2);
RUN;
ODS PDF CLOSE;
Figure 6.3 shows the output.
Figure 6.3: Suppressing page breaks with STARTPAGE=NO

Let’s do the same report, but add a manual page break with STARTPAGE=NOW.
ODS PDF STARTPAGE=NO;
PROC PRINT DATA=sashelp.class(OBS=2);
RUN;
PROC PRINT DATA=sashelp.cars(OBS=2);
VAR make model type msrp invoice;
RUN;
ODS PDF STARTPAGE=NOW;
PROC PRINT DATA=sashelp.shoes(OBS=2);
RUN;
ODS PDF CLOSE;
Figure 6.4 shows the output for this code.
Figure 6.4: Manual page breaks using STARTPAGE=NOW

Note that when you suppress page breaks between tables, you also suppress the titles and footnotes that may have appeared there since it is the page break itself that causes those to be printed.
Styles in ODS PDF
Each ODS destination has its own techniques that you can do with styles. This section covers some of the ODS PDF specific techniques.
Using CSS-based Styles
This tip is included because most people assume that the CSSSTYLE= option works only with HTML, because CSS is typically considered a “web technology.” However, in ODS CSS is simply another syntax for style attributes. The CSS selector syntax may have been written with HTML and XML in mind, but you can find a parallel in ODS (see “Displaying ODS’s Document Object Model” in Style Tips).
Using the ODS DOM, we can create CSS selectors that apply to areas in PDF exactly as we would in HTML. Most of the elements and structures in the ODS PDF DOM are the same as in the ODS HTML DOM as well, so that makes it even easier. Here is the same CSS code used in the “Creating a Simple CSS Style” tip.
.body {
font: 11pt arial;
background-color: white;
color: black;
}
.systemtitle, .systemfooter {
font: bold 13pt arial;
color: #0000bd;
}
.table, .data, .header, .rowheader, .footer, .rowfooter {
border-spacing: 0;
border-collapse: collapse;
border: 1px solid #5e5e5e;
font: 11pt arial;
color: black;
padding: 7px;
}
.header, .rowheader, .footer, .rowfooter {
font-size: 12pt;
font-weight: bold;
color: #0000bd;
background-color: #d4d4d4;
}
We can use this just as easily with ODS PDF as we can with ODS HTML using the CSSSTYLE= option.
ODS PDF CSSSTYLE='mystyle.css';
PROC PRINT DATA=sashelp.class(OBS=6);
RUN;
ODS PDF CLOSE;
Figure 6.5 shows the output.
Figure 6.5: Using CSSSTYLE= with ODS PDF
You may have noticed that the date and page number aren’t styled nicely. That’s because there wasn’t a section for dates or page numbers in the CSS above. We can easily add those.
.pageno, .bodydate {
font: italic 8pt arial;
}
Figure 6.6 shows the new output.
Figure 6.6: ODS PDF output with styled date and page number
Another option for making sure that everything gets a font is described in the “Setting a Global Font for the Printer Destinations” tip in Style Tips.
Installing Custom Fonts
If you install a new font in your system after you install SAS, it might not be available to the printer destinations immediately. To register your fonts with SAS, you would use PROC FONTREG. On Windows, the process is quite simple: you invoke the following to reload all of the fonts in your system.
PROC FONTREG MODE=ALL;
FONTPATH 'c:windowsfonts';
RUN;
This code assumes that your system fonts directory is c:windowsfonts. If you don’t know the path to your system fonts directory, you can alternatively submit this code.
PROC FONTREG MODE=ALL;
FONTPATH “%SYSGET(SYSTEMROOT)fonts”;
RUN;
The %SYSGET(SYSTEMROOT) macro call will look up the location of the system directory. For environments other than Windows, you would use either the TRUETYPE or TYPE1 statements in place of the FONTPATH statement, depending on the formats of your fonts.
PROC FONTREG MODE=ALL;
TRUETYPE '/path/to/my/fonts';
RUN;
Once PROC FONTREG has been run, you should be able to use your new fonts in the ODS printer destinations.
Adding Background Images and Watermark Effects
Background images can be added to a document to add interest to your reports or to create a watermark effect. Using background images is especially effective when combined with RGBA colors (discussed in the Style Tips chapter). To add a background image to a document, you use the Body style element in your style template. Since we only want to change one style attribute, inheriting from the default printer style is generally the easiest way to make the addition.
PROC TEMPLATE;
DEFINE STYLE MyStyle;
PARENT = styles.pearl;
CLASS Body /
BACKGROUNDIMAGE = 'bgimage.jpg'
;
END;
RUN;
Now we reference that style on our STYLE= statement. Here is an example.
ODS PDF STYLE=MyStyle;
PROC PRINT DATA=sashelp.class(OBS=6);
RUN;
ODS PDF CLOSE;
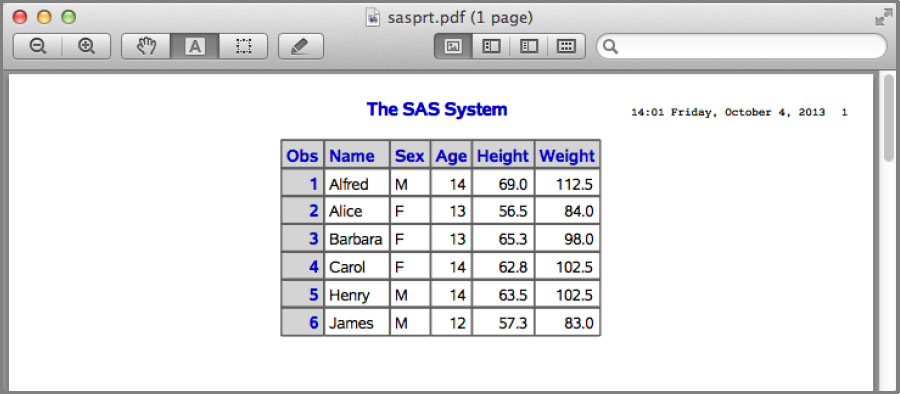
Figure 6.7 shows the output.
Figure 6.7: Background image on the document

You’ll notice that the table itself is opaque, so you can’t see the entire image in the background. However, if you change the colors in the table to RGBA colors, you can set the transparency of the colors to have the background image show through. In this case, our job is pretty simple. The data cells, header cells, and system title just have white backgrounds. Here is the new style using RGBA colors to set transparency.
PROC TEMPLATE;
DEFINE STYLE MyStyle;
PARENT = styles.pearl;
CLASS Body /
BACKGROUNDIMAGE = 'bgimage.jpg'
;
/* make this completely transparent */
CLASS SystemTitle /
BACKGROUNDCOLOR = RGBAffffff00
;
/* make these semi-transparent */
CLASS Data, Header, RowHeader /
BACKGROUNDCOLOR = RGBAffffffd0
;
END;
RUN;
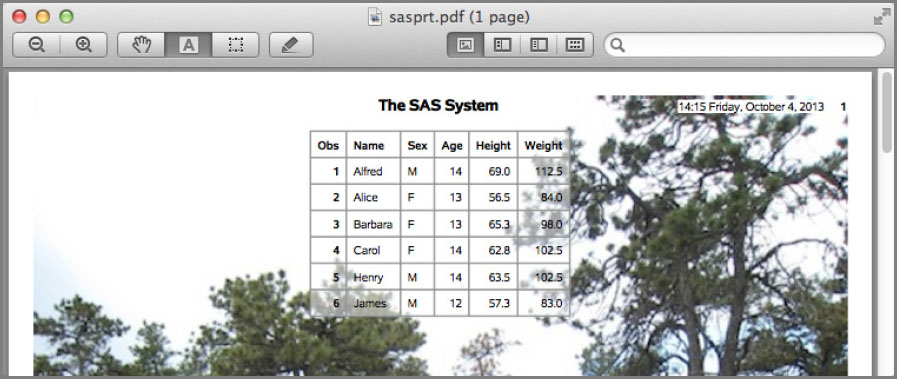
Figure 6.8 shows the output running the same report as before. For more information on RGBA colors, see “Using RGBA Colors” in the Style Tips chapter.
Figure 6.8: RGBA colors on cells with a document background image
Creating Bitmaps of Tables
Normally when we think of tables, we assume that the application or device with which we are going to view them will support rendering of tables. And in most cases, that’s true. However, what if you didn’t want the application to render the table natively? Maybe you want to use the table that is rendered by SAS in another document, but you still want it to look like a table that is rendered by SAS. You can accomplish this task by using the ODS PRINTER destination.
The printer destination can do more than PDF and Postscript. It can write to any of the universal printer devices supported by SAS, which includes some bitmapped formats (GIF, PNG). To use them, you use the PRINTERPATH= option on the system OPTIONS statement; although as of SAS 9.4 this feature was still pre-production Here is the basic syntax.
OPTIONS PRINTERPATH = ( printer-type fileref );
The value of PRINTERPATH consists of two parts: the universal printer type to use and a fileref for the output file. We are going to do an example of creating a PNG formatted image. Here is our code.
FILENAME pngfile 'mytable.png';
OPTIONS PRINTERPATH=(PNG pngfile) NONUMBER NODATE;
/* delete titles and footnotes so we just get a table */
TITLE;
FOOTNOTE;
ODS PRINTER;
PROC PRINT DATA=sashelp.class;
RUN;
ODS PRINTER CLOSE;
After running this code, our table will be in a file called mytable.png. Figure 6.9 shows the output file.
Figure 6.9: Bitmapped image of a table

To make the image contain only the table, you could adjust the margins down and make the page size match up to the table. However, the easier way would probably be to use a third-party image tool to automatically crop out the surrounding white space.
Adding Metadata to Your PDF Documents
Metadata in PDF documents consists of attributes like author, title, subject, and keywords. These values don’t show up in the document, but they are embedded in the document’s properties. They can be useful to track documents in file management systems that support searches based on the metadata fields. These properties can be viewed in Adobe Reader in the dialog invoked by the File => Properties… menu selection.
Setting document metadata is straightforward. You use the AUTHOR=, KEYWORDS=, SUBJECT=, and TITLE= options. Each one takes a quoted string. Here is an example.
ODS PDF AUTHOR='John Doe'
KEYWORDS='statistics students age'
SUBJECT='Demographic information for students'
TITLE='Current Student Information';
PROC PRINT DATA=sashelp.class;
RUN;
ODS PDF CLOSE;
As mentioned previously, we won’t see the fields visually in the document. We must go to File => Properties… to see them. Figure 6.10 shows the dialog in Adobe Reader displaying the metadata from the code above.
Figure 6.10: Adobe Reader’s Document Properties dialog

Creating Secured PDF Documents
Some areas of business require documents to be securable. However, most document types don’t have built-in ways of making them secure. They typically depend on hard drive encryption or using some type of software container that supports security. PDF, on the other hand, does have options for securing documents.
There are many options available to SAS customers for securing PDF documents, but the primary ones are OPTIONS PDFPASSWORD= and OPTIONS PDFSECURITY=. You’ll note that these are system options, not ODS PDF options. This means that they will be applied to every ODS PDF document until they are turned off.
The first option, PDFPASSWORD, sets up to two passwords. The syntax is as follows.
OPTIONS PDFPASSWORD = ( OPEN='password'
OWNER='password' );
The OPEN password allows read access to the file. The OWNER password allows full read-write access to it. Each password can be specified by itself, or both can be set. The only requirement is that, if both are used, they can’t be set to the same value.
In addition to the PDFPASSWORD option, you must also specify the PDFSECURITY= system option. This option takes the values HIGH, LOW, and NONE. LOW security uses 40-bit encryption. HIGH security uses 128-bit encryption. Your choice depends on support in your viewing application and/or increase in file size (128-bit encryption will cause larger files than 40-bit encryption).
Note that both PDFPASSWORD= and PDFSECURITY= must be set in order for password protection on the document to be enabled. Here is a typical OPTIONS statement for setting up password protected PDF files.
OPTIONS PDFSECURITY = HIGH
PDFPASSWORD = ( OPEN = 'jury13spoon'
OWNER = 'candy#run' );
Once invoked, the above statement will cause all PDF documents generated by ODS to be 128-bit encrypted. The read access password is jury13spoon, and the read-write access is candy#run.
There are other system options that affect PDF document access as well. The PDFCOPY= option allows you to specify whether or not copying of content in a PDF document is allowed. See SAS Base documentation such as SAS System Options: Reference for more information about other PDF options.
Specifying the Initial PDF Page View
In addition to PDF security, as discussed in the last tip, there is a system option that allows you to set the initial page view of PDF documents. The option is called PDFPAGEVIEW=, and the values are DEFAULT, ACTUAL, FITPAGE, FITWIDTH, and FULLSCREEN. ACTUAL sets the view setting to 100%. FITPAGE ensures that one full page is visible. FITWIDTH sets the view such that the width of the page spans the entire window. FULLSCREEN causes the document to open in full screen mode.
Here is an example.
OPTIONS PDFPAGEVIEW=ACTUAL;
ODS PDF;
PROC PRINT DATA=sashelp.class;
RUN;
ODS PDF CLOSE;
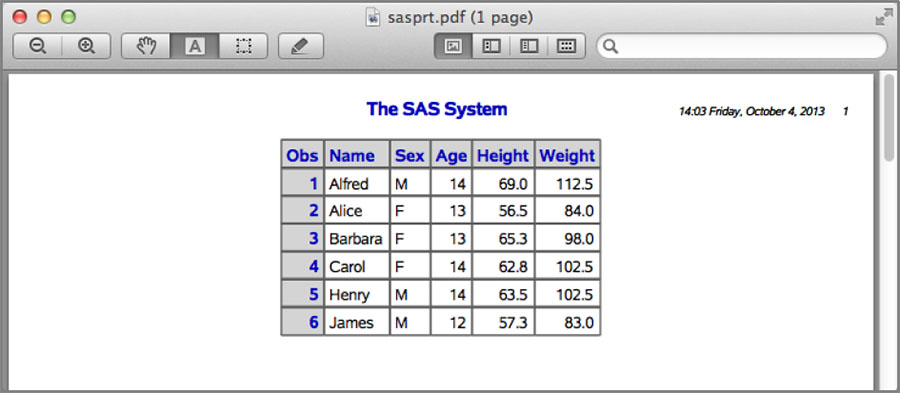
When opened in Adobe Reader, the output looks like Figure 6.11.
Figure 6.11: ODS PDF with PDFPAFEVIEW set to ACTUAL

If we change the value of PDFPAGEVIEW= to FITPAGE, we get the output shown in Figure 6.12.
Figure 6.12: ODS PDF with PDFPAFEVIEW set to FITPAGE
