
Chapter 15. Troubleshooting peripheral devices
This chapter covers
- Analyzing system hardware profiles
- Managing kernel modules to administer hardware devices
- Managing kernel settings to solve hardware boot conflicts
- Using CUPS to manage and troubleshoot printers
The connection between clicking a mouse button and seeing something happen on your screen is complicated. In simple terms, you need some kind of software process that’ll shuttle data back and forth between the mouse and the computer, between the computer and the software that’s running on it, and between the software and the screen.
More than just data transmission, you’ll also need a way to translate the data between the mouse that knows only the tabletop on which it sits and software that knows only zeros and ones. Multiply that by thousands of device models and throw in the many connection types (PCI, SATA, USB, serial), and you’ve got yourself quite a stew cooking away in your PC.
Given the complexity of the whole thing, it’s a wonder that it all works as reliably as it does. In this chapter, you’re going to learn how to deal with those times that it doesn’t...like when the marketing team is waiting for you to activate the webcam so their virtual meeting can begin. Or when their WiFi won’t let them connect in the first place. To do all that magic, you’ll need to understand how Linux sees your peripheral devices and how you can guide the Linux kernel to take a shy device under its wing and care for it. Because we care about all of our devices.
15.1. Identifying attached devices
Webcam plugged in but not broadcasting your smiling face across the internet? Printer not printing? WiFi adapter not adapting (or whatever it is that they do)?
Before you invest too much time and energy working to activate hardware devices, you must first accept the sad truth that an operating system (OS) might sometimes fail to even recognize some of its attached hardware. The first thing you’ll do if a newly plugged in device doesn’t seem to work is confirm that Linux knows its there. That’ll keep you busy for the next couple of pages. If you run the diagnostics I’m about to show you and there’s still no sign of life, consider the possibility that
- The device is incompatible with your hardware or with Linux.
- The device is damaged or faulty.
- The hardware interface or cable is damaged or faulty.
- The system needs a reboot.
- You’re having a bad day.
Once they’re talking to each other, I’ll show you how to use kernel modules so Linux and your device can team up to get some work done for you. We’ll begin by looking at your hardware through the eyes of Linux. In fact, this whole “find out if Linux recognizes the device you just plugged in” business isn’t entirely new. You’ll remember how you used lsblk back in chapter 6 to discover attached block devices. Well, lsblk has some cousins: lsusb lists any USB devices Linux is aware of, and, as you saw in the last chapter, lspci will do the same for PCI devices. Here’s an example:
$ lsusb
Bus 005 Device 001: ID 1d6b:0001 Linux Foundation 1.1 root hub
Bus 002 Device 001: ID 1d6b:0002 Linux Foundation 2.0 root hub
Bus 001 Device 008: ID 04f9:0249
    Brother Industries, Ltd                                                1
Bus 001 Device 007: ID 413c:2005 Dell Computer Corp. RT7D50 Keyboard
Bus 001 Device 006: ID 046d:081a Logitech, Inc.                            2
Bus 001 Device 005: ID b58e:9e84 Blue Microphones Yeti Stereo Microphone
Bus 001 Device 004: ID 1a40:0101
    Terminus Technology Inc. Hub                                           3
Bus 001 Device 002: ID 148f:5372
    Ralink Technology, Corp. RT5372 Wireless Adapter                       4
Bus 003 Device 002: ID 093a:2510 Pixart Imaging, Inc. Optical Mouse
Chapter 14 is also where you saw the grand old patriarch of the ls family, lshw. When run with root permissions, lshw prints a complete hardware profile of your system. The first thing you’ll notice is that lshw has an awful lot to say about every piece of your hardware. One way to tame that beast is to convert the output to an easy-to-read .html file that you can view in your web browser. The -html argument does that. Clicking the filename in a GUI file manager like Nautilus should load it into your default browser. Here’s how:
# lshw -html > lshw-output.html
Remember how we used lshw -class network in the last chapter to restrict the output to only network-related content? That trick will work for other data subsets, too. For instance, lshw -c memory displays detailed information about all types of memory used by your system (including RAM, BIOS firmware, and cache); -c, as you may have guessed, works as a quicker alternative to -class. In addition to those, lshw -c storage displays information on SATA and SCSI interfaces, -c multimedia covers audio and video devices, and -c cpu tells you everything you ever wanted to know about the CPU plugged into your motherboard. That’s how you can nicely consume lshw information. But how should you use it?
Here’s a common scenario. Suppose you’re considering adding extra RAM to a system—perhaps the metrics you gathered back in chapter 13 suggest you’re running low. You’ll need to know how much you’ve already got and what kind of RAM it is, not to mention what motherboard you’re using so you can research how may RAM slots are available and what their maximum capacity is.
OK. So RAM isn’t exactly a peripheral device, but it works well as an example of the kind of hardware discovery that’s possible. And hardware discovery should always be your first step when troubleshooting problems with your hardware.
By way of illustration, lshw shows me that my motherboard has four RAM slots, two of which are currently occupied by 4 GB A-Data DDR3 1600 memory modules. Because you should avoid installing mismatched memory modules on a single system, this tells me exactly what kind of RAM I should purchase to fill those two empty slots and double my capacity.
I should point out that I have no immediate plans to upgrade my workstation. And why should I? The modest hardware profile I’ve already got allows me to run multiple VMs while editing and/or encoding a small handful of videos (using Kdenlive), and all while keeping at least one web browser busy with more than a dozen open tabs. And the computer I built from the ground up for less than $300 performs significantly better than the $1,000+ rigs used by many of my colleagues. What’s the difference? Those poor souls are feeding their resource-hungry Windows and macOS operating systems while I’m using fast and efficient Linux. Take that.
What if your device is recognized by Linux but it still isn’t active? Perhaps there’s an appropriate kernel module out there waiting to be loaded.
15.2. Managing peripherals with Linux kernel modules
Linux manages hardware peripherals using kernel modules. Here’s how that works.
A running Linux kernel is one of those things you don’t want to upset. After all, the kernel is the software that drives everything your computer does. Considering how many details have to be simultaneously managed on a live system, it’s better to leave the kernel to do its job with as few distractions as possible. But if it’s impossible to make even small changes to the compute environment without rebooting the whole system, then plugging in a new webcam or printer could cause a painful disruption to your workflow. Having to reboot each time you add a device to get the system to recognize it is hardly efficient.
To create an effective balance between the opposing virtues of stability and usability, Linux isolates the kernel itself, but lets you add specific functionality on the fly through loadable kernel modules (LKMs). Looking at figure 15.1, you can think of a module as a piece of software that tells the kernel where to find a device and what to do with it. In turn, the kernel makes the device available to users and processes and oversees its operation.
Figure 15.1. Kernel modules act as translators between devices and the Linux kernel.

There’s nothing stopping you from writing your own module to support a device exactly the way you’d like it, but why bother? The Linux module library is already so robust that there’s usually no need to roll out your own. And the vast majority of the time, Linux will automatically load a new device’s module without you even knowing it.
Still, there’ll be times when for some reason it doesn’t happen by itself. (You don’t want to leave that hiring manager impatiently waiting too long for your smiling face to join the video conference job interview.) To help things along, you’ll want to understand a bit more about kernel modules and, in particular, how to find the actual module that will run your peripheral, and then how to manually activate it.
15.2.1. Finding kernel modules
By accepted convention, modules are files with a .ko (kernel object) extension that live beneath the /lib/modules/ directory. Before you navigate all the way down to those files, however, you’ll probably have to make a choice. Because you’re given the option at boot time of loading one from a list of releases, the specific software needed to support your choice (including the kernel modules) has to exist somewhere. Well, /lib/modules/ is one of those somewheres. And that’s where you’ll find directories filled with the modules for each available Linux kernel release, like these:
$ ls /lib/modules
4.4.0-101-generic
4.4.0-103-generic
4.4.0-104-generic
In my case, the active kernel is the version with the highest release number (4.4.0-104-generic), but there’s no guarantee that’ll be the same for you (kernels are frequently updated). If you’re going to be doing some work with modules that you’d like to use on a live system, you’ll need to be sure you’ve got the right directory tree.
Good news: there’s a reliable trick. Rather than identifying the directory by name and hoping you’ll get the right one, use the system variable that always points to the name of the active kernel. You can invoke that variable using uname -r (the -r specifies the kernel release number from within the system information that would normally be displayed):
$ uname -r
4.4.0-104-generic
With that information, you can incorporate uname into your file system references using a process known as command substitution. To navigate to the right directory, for instance, you’d add it to /lib/modules. To tell Linux that “uname” itself isn’t a file system location, enclose the uname part in back ticks, like this:
$ ls /lib/modules/`uname -r`
build   modules.alias        modules.dep      modules.softdep
initrd  modules.alias.bin    modules.dep.bin  modules.symbols
kernel  modules.builtin      modules.devname  modules.symbols.bin
misc    modules.builtin.bin  modules.order    vdso
You’ll find most of the modules themselves organized within their own subdirectories beneath the kernel/ directory. Take a few minutes now to browse through those directories to get an idea of how things are arranged and what’s available. The filenames usually give you a good idea of what you’re looking at:
$ ls /lib/modules/`uname -r`/kernel
arch  crypto  drivers  fs  kernel  lib  mm
    net  sound  ubuntu  virt  zfs                1
- 1 The busiest of the subdirectories listed here is kernel, beneath which you can find modules for hundreds of devices.
That’s one way to locate kernel modules, actually the quick and dirty way to go about it. But it’s not the only one. If you want to get the complete set, you can list all currently loaded modules along with some basic information using lsmod. The first column is the module name, followed by the file size and number, and then names of other modules on which each is dependent:
$ lsmod
[...]
vboxdrv               454656  3 vboxnetadp,vboxnetflt,vboxpci   1
rt2x00usb              24576  1 rt2800usb                       1
rt2800lib              94208  1 rt2800usb                       1
[...]
- 1 This small sampling of the results shows modules related to VirtualBox and my USB WiFi adapter.
How many is too many? Well, let’s run lsmod once again, but this time piping the output to wc -l to get a count of the lines:
$ lsmod | wc -l
113
Those are the loaded modules. How many are available in total? Running modprobe -c and counting the lines will give us that number:
$ modprobe -c | wc -l
33350
33,350 available modules? Looks like someone’s been working hard over the years to provide us with the software to run our physical devices.
Note
On some systems you might encounter customized modules that are referenced either with their own unique entries in the /etc/modules file or as a configuration file saved to /etc/modules-load.d/. The odds are that such modules are the product of local development projects, perhaps involving cutting-edge experiments. Either way, it’s good to have some idea of what it is you’re looking at.
That’s how you find modules. Your next job is to figure out how to manually load an inactive module if, for some reason, it didn’t happen on its own.
15.2.2. Manually loading kernel modules
Before you can load a kernel module, logic dictates that you’ll have to confirm it exists. And before you can do that, you’ll need to know what it’s called. Getting that part might sometimes require equal parts magic and luck, and some help from online documentation authors.
I’ll illustrate the process by describing a problem I ran into some time back. One fine day, for a reason that still escapes me, the WiFi interface on a laptop stopped working. Just like that. Perhaps a software update knocked it out. Who knows? I ran lshw -c network and was treated to this very strange information:
network UNCLAIMED
    AR9485 Wireless Network Adapter
Linux recognized the interface (the Atheros AR9485) but listed it as unclaimed. Well, as they say, “When the going gets tough, the tough search the internet.” I ran a search for “atheros ar9 linux module” and, after sifting through pages and pages of 5 and even 10-year-old results advising me to either write my own module or just give up, I finally discovered that with Ubuntu 16.04, at least, a working module existed. Its name: ath9k.
Yes! The battle’s as good as won! Adding a module to the kernel is a lot easier than it sounds. To double check that it’s available, you can run find against the modules’ directory tree, specify -type f to tell Linux you’re looking for a file, and then add the string ath9k along with a glob asterisk to include all filenames that start with your string:
$ find /lib/modules/$(uname -r) -type f -name ath9k* /lib/modules/4.4.0-97-generic/kernel/drivers/net/wireless/ath/ath9k/ath9k_common.ko /lib/modules/4.4.0-97-generic/kernel/drivers/net/wireless/ath/ath9k/ath9k.ko /lib/modules/4.4.0-97-generic/kernel/drivers/net/wireless/ath/ath9k/ath9k_htc.ko /lib/modules/4.4.0-97-generic/kernel/drivers/net/wireless/ath/ath9k/ath9k_hw.ko
Just one more step, loading the module:
# modprobe ath9k
That’s it. No reboots. No fuss.
One more example to show you how to work with active modules that have become corrupted. There was a time when using my Logitech webcam with a particular piece of software would make the camera inaccessible to any other programs until the next system boot. Sometimes I needed to open the camera in a different application and didn’t have the time to shut down and start up again. (I run a lot of applications, and getting them all in place after booting takes some time.)
Because this module was presumably active, using lsmod to search for the word video gave me a hint about the name of the relevant module. In fact, it was better than a hint—the only module described with the word video was uvcvideo, as you can see in the following:
$ lsmod | grep video uvcvideo 90112 0 videobuf2_vmalloc 16384 1 uvcvideo videobuf2_v4l2 28672 1 uvcvideo videobuf2_core 36864 2 uvcvideo,videobuf2_v4l2 videodev 176128 4 uvcvideo,v4l2_common,videobuf2_core,
There was probably something I could have controlled, for what was causing the crash; and, I guess, I could have dug a bit deeper to see if I couldn’t fix things the right way. But you know how it is: sometimes you don’t care about the theory and just want your device working. So I used rmmod to kill the uvcvideo module and modprobe to start it up again all nice and fresh:
# rmmod uvcvideo
# modprobe uvcvideo
Again: no reboots. No stubborn blood stains.
15.3. Manually managing kernel parameters at boot time
Because we’re talking about the kernel anyway, now would be a good time to have a serious chat about kernel parameters. You know, the chat we’ve been putting off for a while because kernel parameters sounds scary. Well, they are scary: getting them wrong can leave your computer at least temporarily unbootable. And spelling counts.
Why make trouble in the first place? Because sometimes your kernel’s default boot configuration won’t work for what you’re doing, and the only way to fix it is to change the way the kernel boots.
There are two ways to pass custom parameters to the kernel at boot time. One involves editing the GRUB menu item during the boot process, and the other, editing the /etc/default/grub configuration file on a running system for the changes to take effect the next time you start up. To illustrate each of those approaches, I’ll use two practical use-case scenarios. You’ll have to continue reading to find out what those are.
15.3.1. Passing parameters at boot time
I’m not sure how common a problem this is, but it’ll do nicely as a teaching example. Some unfortunate individuals find it impossible to properly shut down or reboot Linux, experiencing an unwanted system freeze each time. Adding a simple kernel parameter will sometimes solve the issue. Here’s how it’s done.
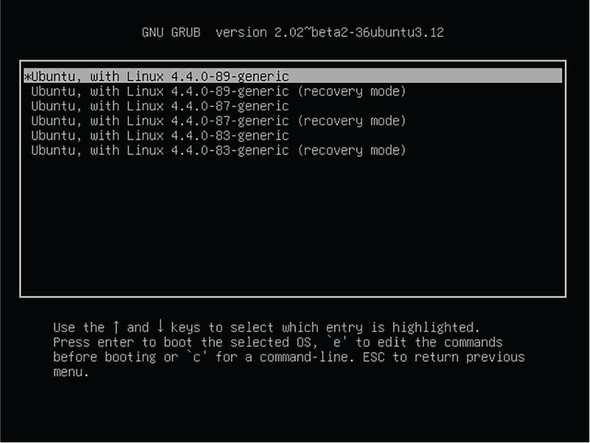
With the Linux release you want to boot selected in the GRUB menu (see figure 15.2), press the e key, and you’ll be taken to an editing screen. There you’ll be able to use the regular cursor and text keys to navigate and then edit the contents.
Figure 15.2. The main GRUB menu displaying the multiple Linux kernels available for loading
Scroll down until you reach the Linux entry highlighted in figure 15.3. In this example, after wrapping to the next line, that entry ends with ro. (Don’t worry if yours is different.) Then add reboot=bios to the end of the line and press Ctrl-x to accept the changes and boot. If that doesn’t fix the shutdown problem, you can try again using reboot=pci instead of reboot=bios.
Figure 15.3. The Linux line that shows boot parameters, pointing GRUB to the location of a Linux image

Bear in mind that this edit will not be permanent. After the next boot, the GRUB settings will once again be controlled by configuration files in the file system. To find out how to make changes that will persist through boots, keep reading.
15.3.2. Passing parameters via the file system
OK, how about this one? There might be times when you want to boot a desktop machine without its GUI. Perhaps some elements of the GUI itself aren’t loading properly, and you need a clean, reliable shell session to troubleshoot. Well waddya know, you can set the default run level to 3 (multiuser, nongraphical mode) through GRUB.
Note
A run level is a setting that defines the Linux system state for a particular session. Choosing between run levels 0–6 determines what services should be available, ranging from a full, graphic, multiuser system to no services at all (meaning, shut down).
Open the /etc/default/grub file, and find the GRUB_CMDLINE_LINUX_DEFAULT line. It often comes with a couple of parameters and looks something like this:
GRUB_CMDLINE_LINUX_DEFAULT="quiet splash"
Add systemd.unit=runlevel3.target to the end of the line so it looks like the following. (quiet splash doesn’t interest us one way or the other; it controls what you see on your screen as you boot.)
GRUB_CMDLINE_LINUX_DEFAULT="quiet splash systemd.unit=runlevel3.target"
Run update-grub on Ubuntu or grub2-mkconfig on CentOS for the changes to take effect. The next time you boot your computer, you’ll be dropped into a command-line shell. Once you’re done with your troubleshooting, you can remove systemd.unit=runlevel3.target from /etc/default/grub, again update GRUB, and reboot.
15.4. Managing printers
Ready for a shock? Make sure you’re sitting down. I’m going to advise you to pass over a perfectly good command-line tool in favor of its GUI equivalent. The command-line tool? lp. Complete with its updated engine under the hood, lp is still around, and it can certainly do some interesting things. But trust me, if one of the office printers you support disappears from the network, you’re not going to be opening up a command line to troubleshoot. These days it’s all Common UNIX Printing System (CUPS), all the time. But before we go there, I’ll give you a couple of lp commands that might come in handy.
15.4.1. Basics of lp
Suppose there’s a file on a remote computer that needs printing. You know it’s not much fun to launch LibreOffice over a remote X session, right? Wouldn’t it be nice to do it through a simple, fast, and reliable SSH shell? Say no more. Use lpq to list available printers (along with the current job queue):
$ lpq
Brother-DCP-7060D is ready
no entries
Then use lp to print the file. If there’s more than one printer on the system, you’ll also need to specify the printer you’d like to use. Here’s an example:
$ lp -d Brother-DCP-7060D /home/user/myfile.pdf
Don’t want to print right away? Schedule it for later. The -H schedule setting always uses UTC time rather than local:
$ lp -H 11:30 -d Brother-DCP-7060D /home/user/myfile.pdf
15.4.2. Managing printers using CUPS
Once upon a time, before purchasing a printer to use with a Linux system, you’d need careful and time-consuming research to make sure it was compatible. If it was, you’d often need to download and install the appropriate driver and then manually install the printer through the OS. When it worked, it was cause for celebration. Three things have happened over the past years to make Linux printing a lot better:
- The CUPS modular printing system has been adopted by many, if not all, Linux distributions to manage printers and printing. Believe it or not, CUPS is managed on behalf of the community by Apple. As you’ll soon see, the CUPS interface greatly simplifies administration and troubleshooting and is quite reliable.
- The major printer manufacturers now generally provide Linux drivers. They’re not always perfect, but they’re workable. This means that, these days, nearly any modern printer can be deployed with Linux computers. Still, it can’t hurt to take a quick look at an online resource like https://help.ubuntu.com/community/Printers.
- Starting with release 17.04, Ubuntu now offers driverless printing. This means any accessible local or networked printers will automatically be added to CUPS without any setup required.
At any rate, you access the CUPS interface through your browser, pointing it to port 631 on your own machine (localhost:631). The Administration tab (visible in figure 15.4) contains straightforward links to manage finding, securing, scheduling, and tracking all available printers.
Figure 15.4. The CUPS browser interface that, by default, is available via port 631 on any Linux computer running CUPS

You can even manage groups of printers in a class to allow effective use of multiple devices. This can be a great way to organize resources to ensure, for instance, more expensive color printing is only used for high-priority jobs and draft documents are forced to print on cheaper, lower-quality printers.
CUPS handles all the dirty administration details invisibly. Should you need to detach a particular printer from one computer (or network subnet, if it’s a network printer) and attach it to another, you’ll only need to make the relevant changes within the CUPS interface on the host computer. The appropriate routing information will be automatically updated across the network within a minute or two.
CUPS knows which printers are available because, by default, printers connected to any computer running CUPS will broadcast their existence to all others on the network. This, along with many other configuration settings, can be controlled by the /etc/cups/cupsd.conf file.
Listing 15.1. A section of the /etc/cups/cupsd.conf configuration file
LogLevel warn
PageLogFormat
MaxLogSize 0
# Allow remote access
Port 631                                        1
Listen /var/run/cups/cups.sock
# Share local printers on the local network.
Browsing On
BrowseLocalProtocols dnssd
DefaultAuthType Basic
WebInterface Yes                                2
[...]
- 1 You can change the network port used by CUPS.
- 2 You can block access to the web interface altogether should security considerations require it.
If CUPS doesn’t recognize one of your printers, there are a few things to try even before searching the internet (using the name of your printer and the word linux):
- Check for error messages. Running systemctl status cups is a good way to view the most recent alerts.
- Run lsusb (assuming it’s a USB printer) and/or lpinfo -v from the command line to confirm that the system sees your printer.
- Make sure there are no duplicate or outdated entries in the /etc/cups/printers .conf file. If there are, shut down CUPS (systemctl stop cups), save a copy of the original file, and then remove any old entries. Start CUPS again, and try adding the printer from the browser interface.
- Make sure that the <Policy default> section of the /etc/cups/cupsd.conf file doesn’t have any overly restrictive settings that might be blocking legitimate requests.
Summary
- The visibility and insight into your hardware profile provided by Linux tools like lshw should be used in all hardware upgrades and repair decisions.
- The Linux kernel is isolated from system activity to protect it from destabilizing changes, but kernel modules can safely provide hardware devices with dynamic access to kernel resources.
- The Linux kernel can be modified by adding parameters at boot time, either by editing configuration files or through the GRUB menu.
- CUPS provides an interface to closely administer printers across a network.
Key terms
- A kernel module is software that defines the attributes of a hardware device for the benefit of the Linux kernel.
- A kernel parameter is an argument that’s added to the kernel at runtime to control system behavior.
Security best practices
Use the /etc/cups/cupsd.conf file to control network access to your printers.
Command-line review
- lshw -c memory (or lshw -class memory) displays the memory section of a system’s hardware profile.
- ls /lib/modules/`uname -r` lists the contents of the directory under /lib/modules/ containing modules for your current, active kernel.
- lsmod lists all active modules.
- modprobe -c lists all available modules.
- find /lib/modules/$(uname -r) -type f -name ath9k* searches for a file among the available kernel modules with a name starting with ath9k.
- modprobe ath9k loads the specified module into the kernel.
- GRUB_CMDLINE_LINUX_DEFAULT="systemd.unit=runlevel3.target" (in the /etc/default/grub file) loads Linux as a multiuser, nongraphic session.
- lp -H 11:30 -d Brother-DCP-7060D /home/user/myfile.pdf schedules a print job to the Brother printer at 11:30 UTC.
Test yourself
What’s the best way to easily visualize your computer’s complete hardware profile?
- lsmod
- lshw -class memory
- lshw -html > lshw-output.html
- modprobe -C
What’s the best way to reference the file system location containing the active kernel modules?
- /lib/kernel/uname -a
- /lib/modules/name -r
- /usr/modules/uname -r
- /lib/modules/uname -r
Which of the following commands will deactivate a kernel module?
- delmod uvcvideo
- rmmod uvcvideo
- modprobe -d uvcvideo
- rmmod -r uvcvideo
You need to pass a parameter to the Linux kernel that will be effective immediately and permanently. What are the steps you should take?
- Edit the linux line in the Edit menu of the GRUB menu at boot time, save the file using Ctrl-x, and boot.
- Add the parameter to the /etc/default/grub file, update GRUB, and then reboot.
- Upgrade GRUB from the command line, reboot, add the parameter to the linux line in the Edit menu of the GRUB menu at boot time, save the file using Ctrl-x, and boot.
- Reboot, upgrade GRUB from the command line, and add the parameter to the /etc/default/grub file.
Which of the following commands will schedule a print job for half past ten?
- lpd 10:30 -d Brother-DCP-7060D /home/user/myfile.pdf
- lpq -h 10:30 -d Brother-DCP-7060D /home/user/myfile.pdf
- lp -T 10:30 -d Brother-DCP-7060D /home/user/myfile.pdf
- lp -H 10:30 -d Brother-DCP-7060D /home/user/myfile.pdf
Answer key
c
d
b
b
d