HOW WE SEE & INTERPRET
In the first chapter we concentrated on the simple act of making marks on the page—marks that are intended to represent three-dimensional objects on a flat piece of paper. As we prepare to transition to more difficult and complex subjects, such as still life and architecture, we need to understand and analyze what exactly we see, and how best to apply that scene to the drawing surface. This chapter will demonstrate some simple, yet effective, techniques that artists have employed for hundreds of years that can help the artist organize and understand a complex scene in a logical way. The information on the picture plane—measuring, eye level, and visual spatial interpretation—will be discussed at length throughout the chapters in this book.
Proportion & Size Relationships
The Picture Plane
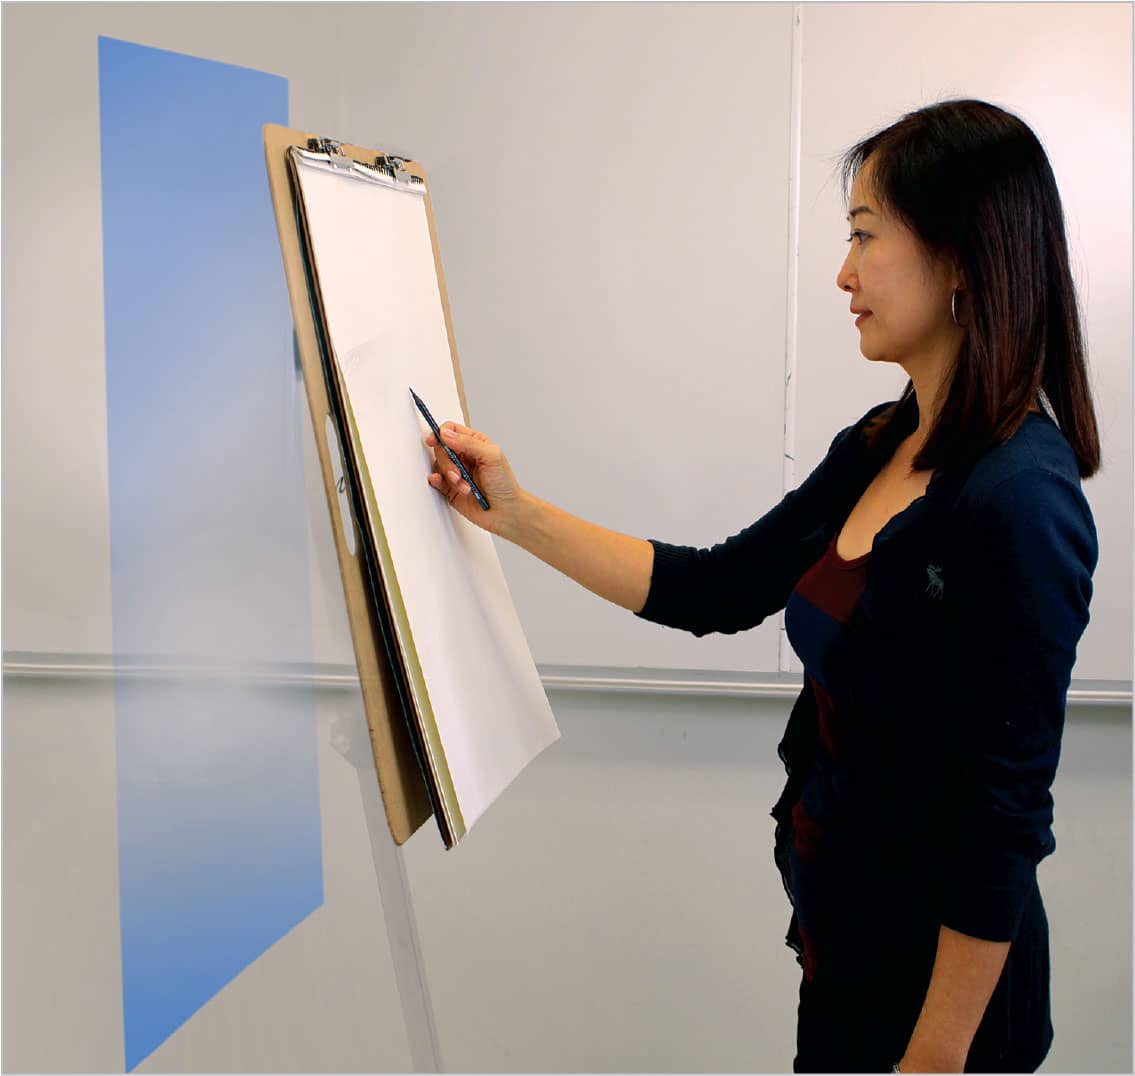
In considering the way we see and re-interpret objects in space, the first concept to understand involves the picture plane. The picture plane is an imaginary glass window that stands parallel to the viewer (the artist) and between the viewer and the subject. This imaginary plane is meant to represent the flat surface that the artist is drawing on (the paper surface). In an ideal theoretical situation, the artist would be able to trace the subject directly onto the glass window. In reality, there are ways for the artist to make use of this imaginary window to transfer the subjects seen through it onto the paper surface.
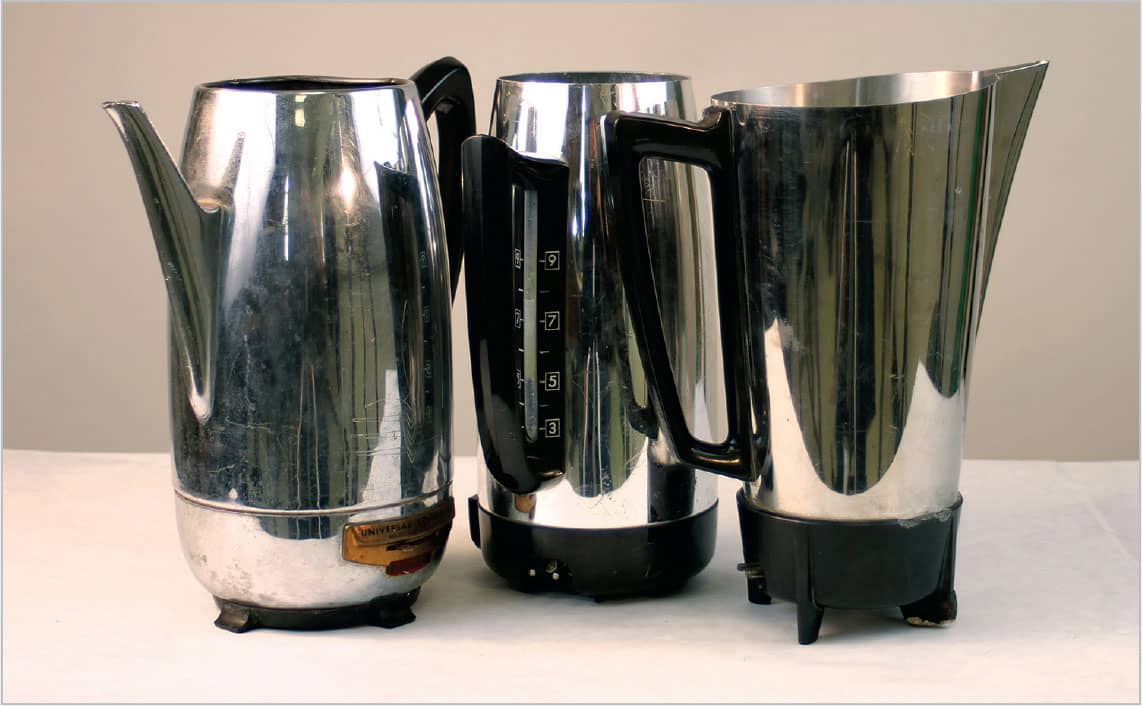
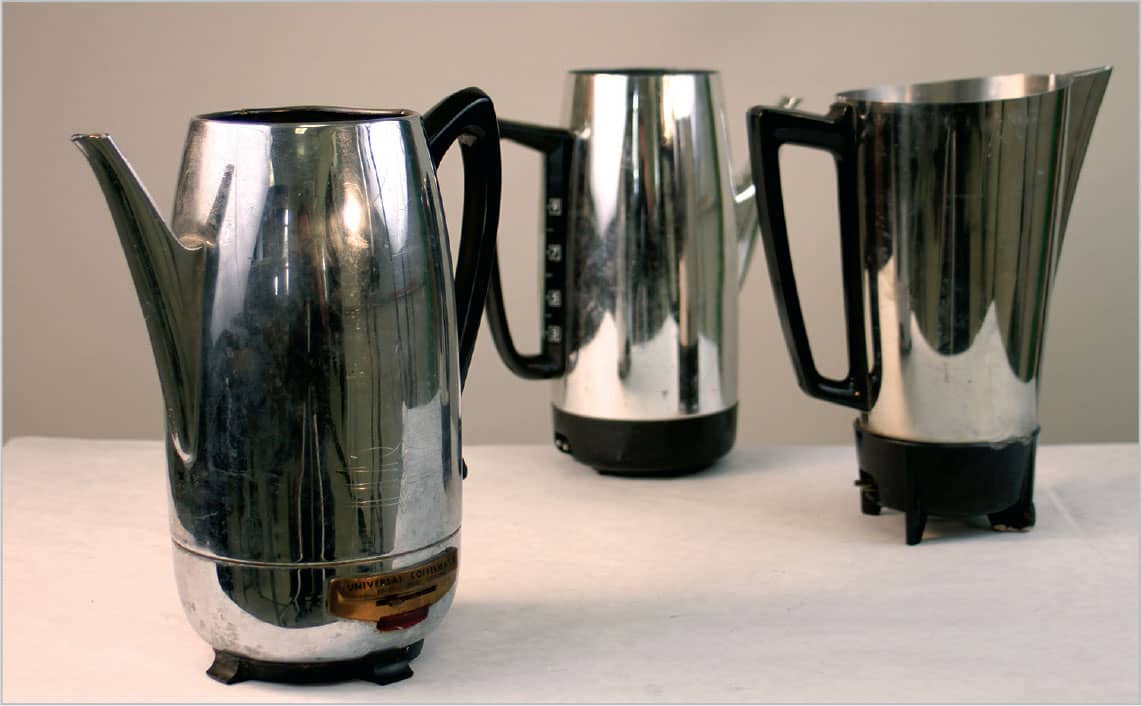
These coffeepots are very close to each other, sitting on the ground plane at about the same horizontal depth, approximately midway from the picture plane to the back of the ground plane.
Space and Depth
When viewing objects sitting on a flat ground plane in close proximity to each other, such as the coffeepots below left, we can easily see that the objects are of similar size. When the far left pot is moved toward the picture plane and the center pot is moved toward the back of the ground plane, there is the illusion of a change in the size of the pots (below right).
Consider the picture plane (blue rectangle) as an imaginary “window” parallel to the drawing surface. We see what we are drawing through this imaginary window.
The left pot is now the largest in relation to the other two and is near the bottom of the picture plane. The center pot’s base is now the highest of all three within the picture plane. The top rims of all three pots are still relatively level with each other, when viewed horizontally across the picture plane. This relates to how we perceive cylindrical tops that are close to eye level.
As we move the objects around the ground plane, we can see the “changes” that occur in their relative size—though we know that the objects are all physically the same size. This illusion is the result of a visual interpretation called diminution, a hierarchy or size relationship caused by an increase in space between the objects, making objects of similar size look smaller as they move away from the picture plane.
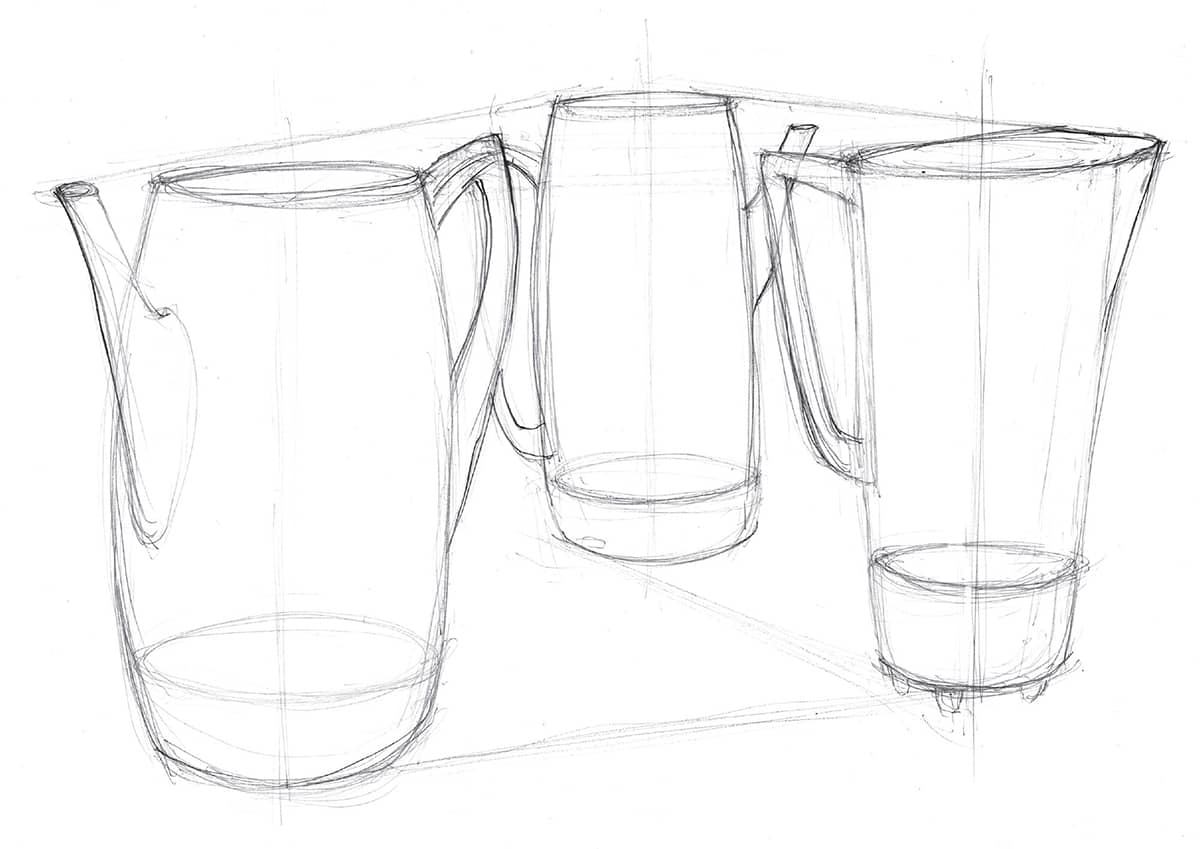
Most people recognize this intuitively, but it is important to note how size diminution appears to the artist through the picture plane. The three coffeepots above are at the artist’s eye level. We know this because we can still see the tops of the pots, and even just a bit down into them. As the pots advance toward the viewer, the tops appear lower on the picture plane, but the overall heights appear taller, and the widths seem wider. The pot closest to the viewer is the largest, and its base is the lowest on the picture plane. This consistently happens when objects are viewed from above or below eye level.
Eye Level
Eye level, also called the “horizon line,” is an imaginary horizontal line that corresponds to the precise location of the viewer’s eyes and what is seen when the viewer looks directly ahead, without tilting the head up or down. It’s important to realize that the artist may move their head up or down to view an object or objects; this is called “line of vision.” Even as the artist’s head moves up and down, however, the eye level stays the same.
Imagine being at the ocean, where the horizon line (eye level) is easily seen. If there is an airplane traveling from the horizon toward us, we watch it get closer by raising our line of vision until it is directly above us. We have not brought the ocean edge (horizon line) up to where the plane is flying—it stays at the eye level, where it belongs. This is how the eye level and picture plane work together.
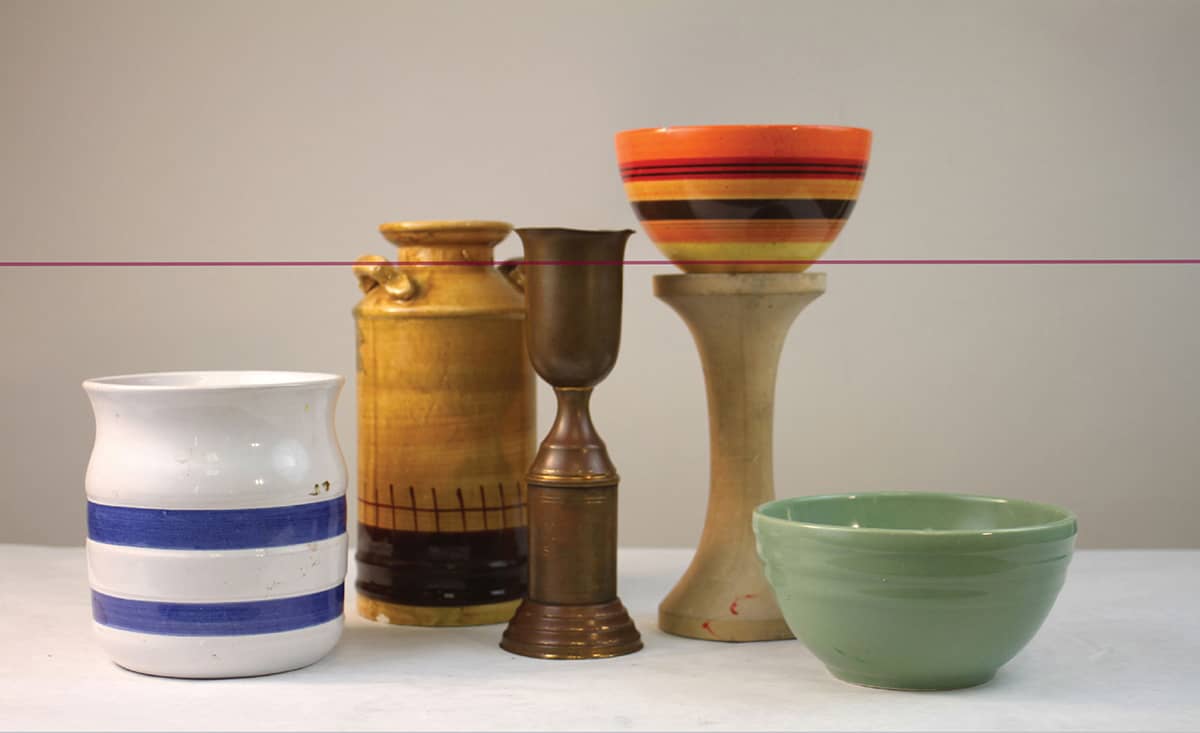
For a visual explanation of eye level we’ll use this set of pots, of different shapes and sizes. Eye level is located somewhere between and within the height range of the objects, as the viewer is able to see the inside top of the objects that are below eye level, but not of those above eye level. Notice that the bases of all the objects seem to be in similar locations across the ground plane.

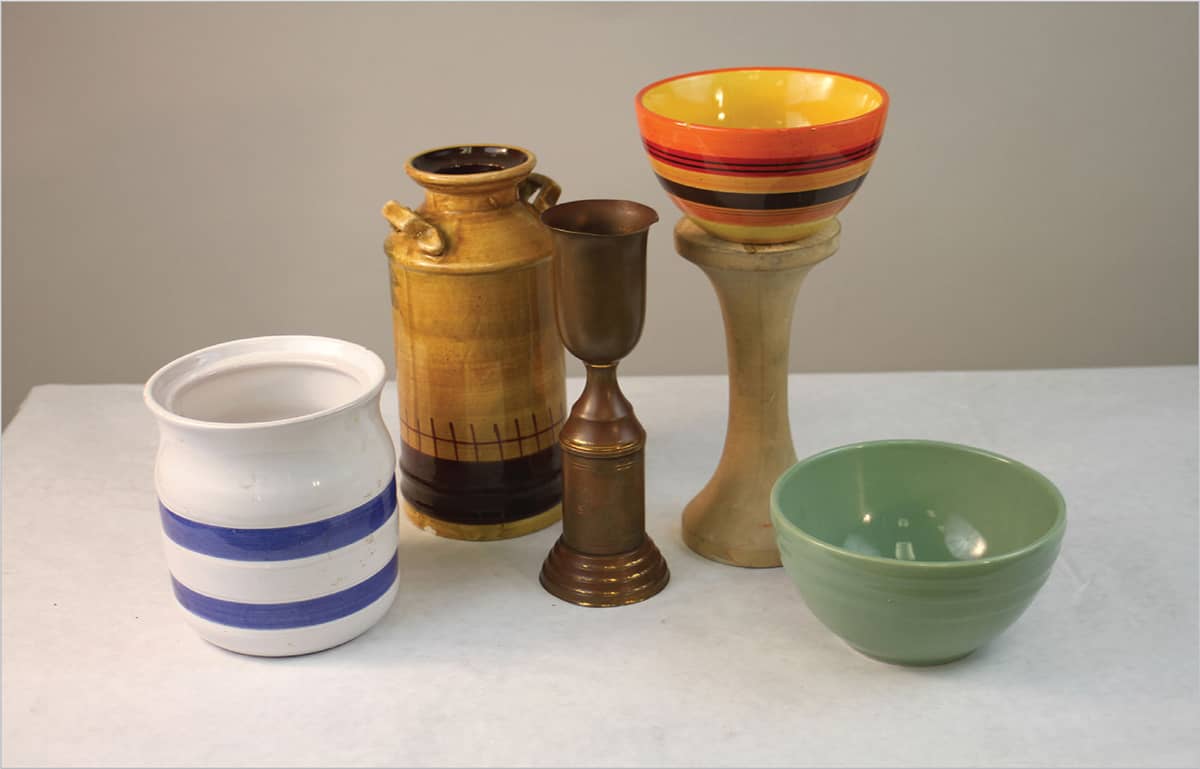
Now the viewer’s eye level is above the level of the pots, and it is much easier to see inside all of them. The differences in orientation across the ground plane are more apparent, as is the space that each pot’s “footprint” occupies.
In this third picture, the eye level is higher and completely out of the image. The given space between each object is more apparent. Note that the objects nearest to the bottom of the picture plane are the closest to the viewer. This type of overhead view for a group of objects makes it easier to understand the objects’ hierarchy of sizes through diminution, as well as the phenomena of overlapping forms, which also helps us understand which form is in front of another.
Other Uses for the Picture Plane
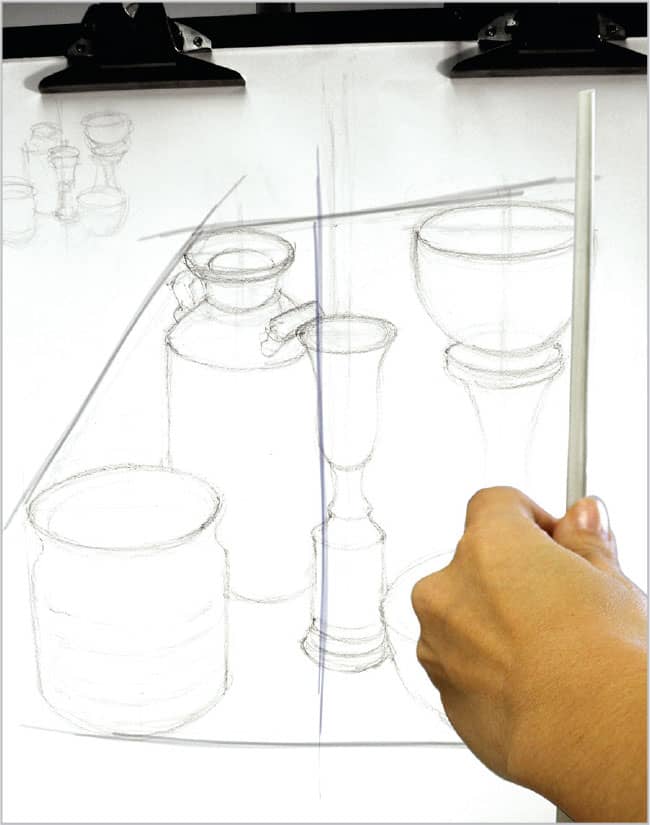
When attempting to compose a still life on the drawing surface, it is helpful to use a straight tool, such as another pencil or, in this case, a long chopstick. A good starting point is to use the chopstick to gauge overall implied angles that the objects present to each other within the context of the composition.

A chopstick is helpful, when used as a viewing tool against the picture plane, in understanding how objects are perceived in relation to one another. Remember to keep the chopstick parallel to the imaginary picture plane.
As you view these angles, it’s imperative to keep the chopstick parallel with the picture plane (A). The chopstick can be easily rotated around the imaginary plane, as long as this rule is followed. This way any angles of coincidence can be seen in the still life and applied to the drawing surface, as long as that surface is parallel with the picture plane (B, C).
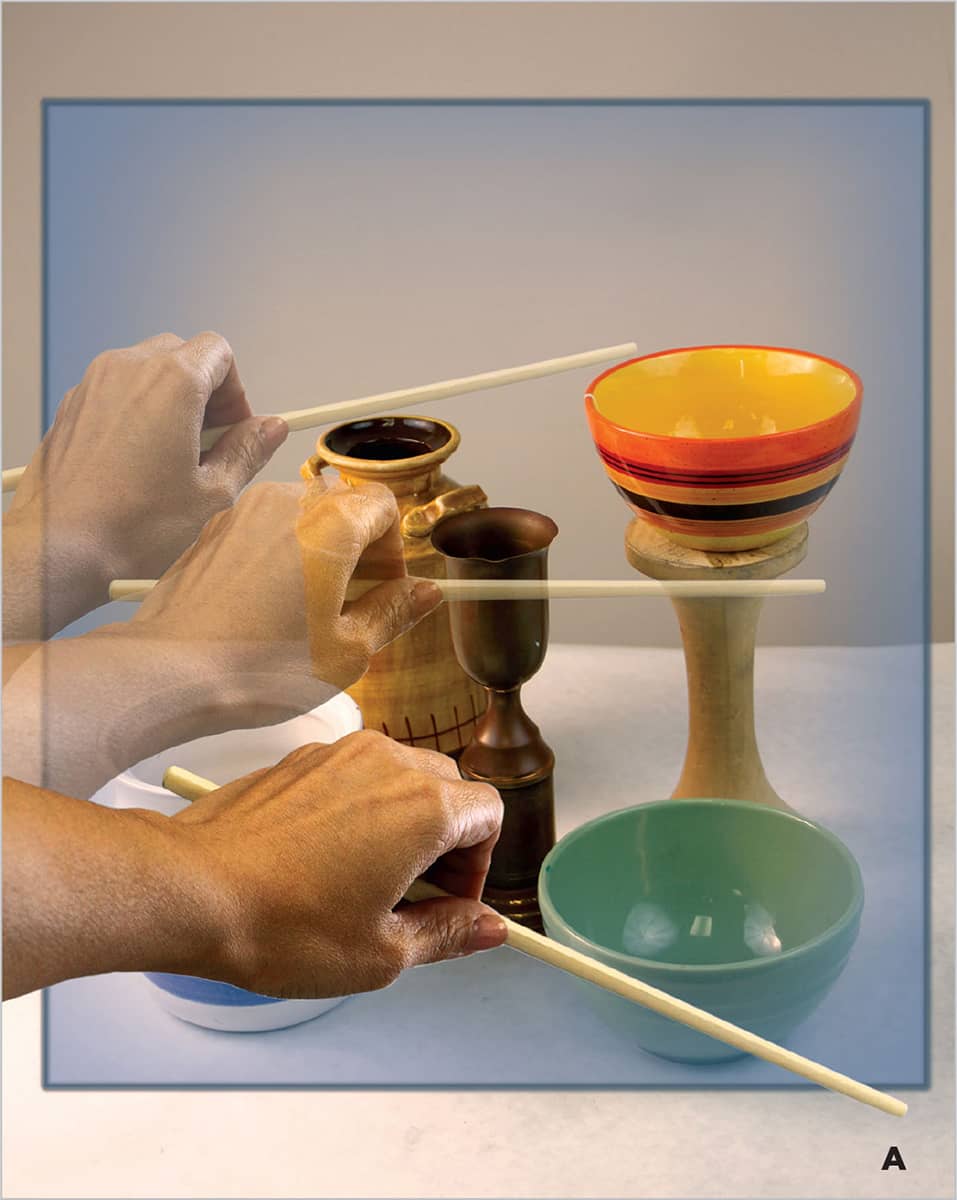
Rotate the chopstick to observe the imaginary angles that objects have in relation to each other when viewed through the picture plane.
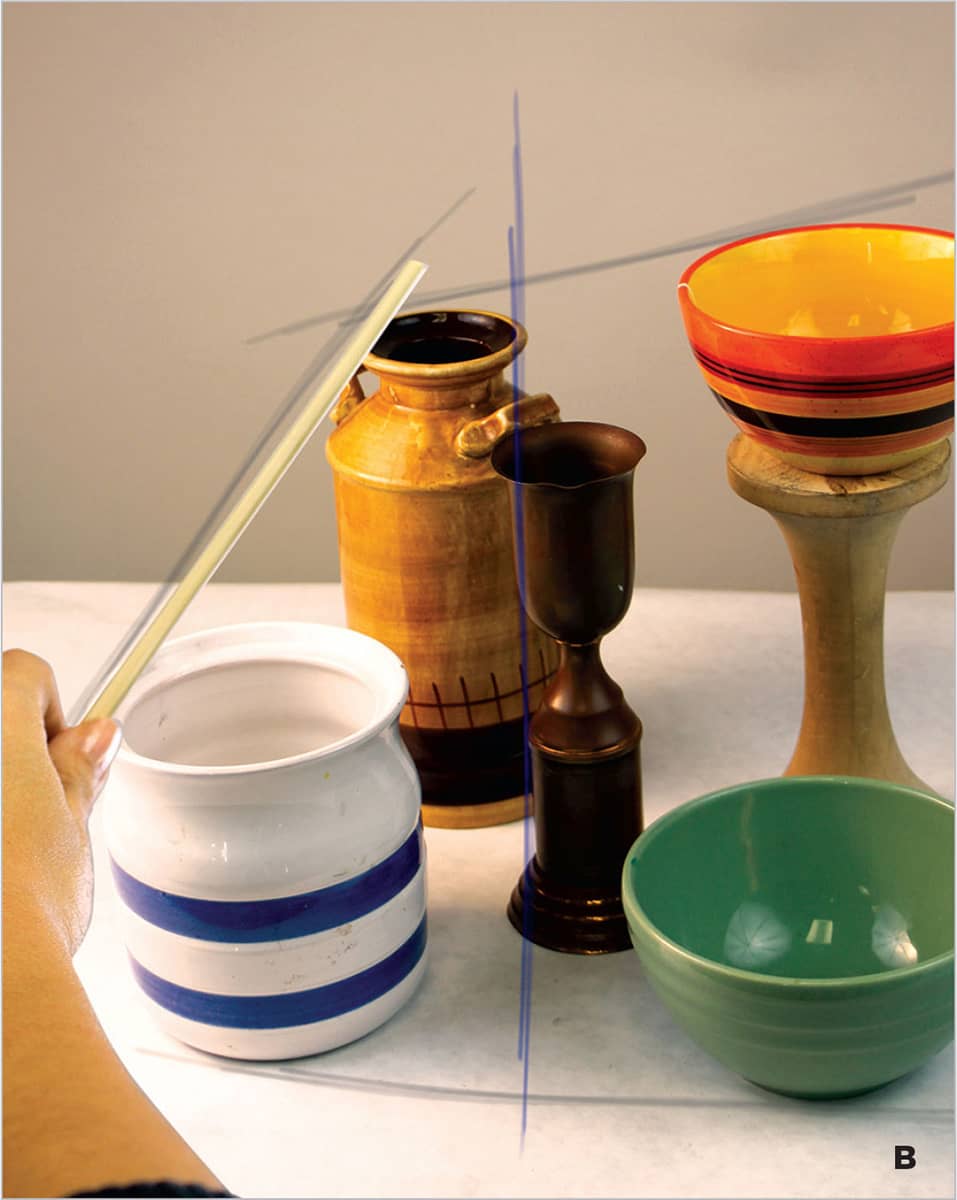
These imaginary angular relationships can be recorded as lightly sketched lines in an overall preliminary, gestural blocked-in sketch.

Lightly sketch the same angles seen in the still life on the drawing surface in order to check the accuracy of the objects’ placement in relation to their location on the picture plane.
Symmetry of Form
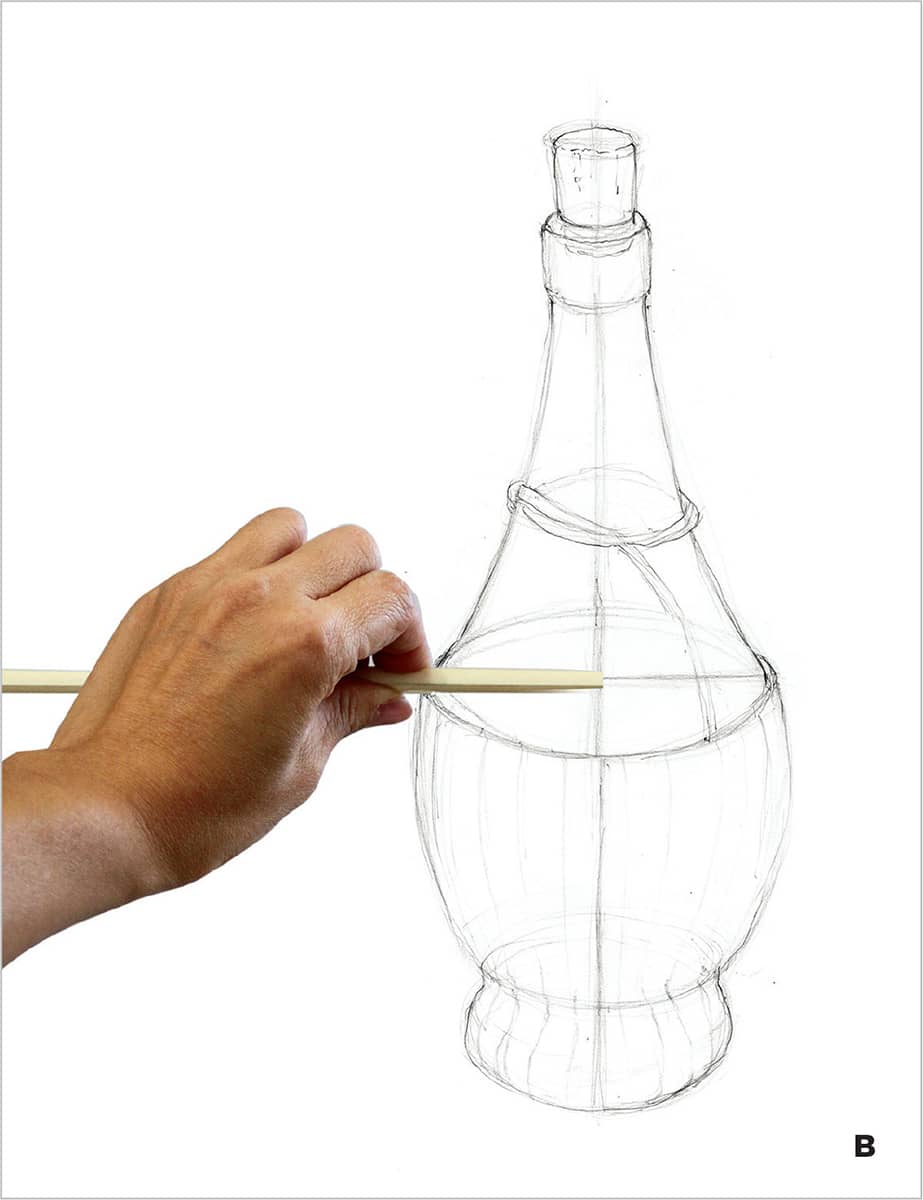
Symmetry refers to the similarity of form across a midline, also called an “axis.” In a symmetrical object like this bottle, this means that each side of the bottle is the same, separated by a common midline (the axis), here called a major axis.
The axis is an invisible vertical line that runs directly through the object from top to base. Seeing the axis makes it much easier to draw any kind of symmetrical object.
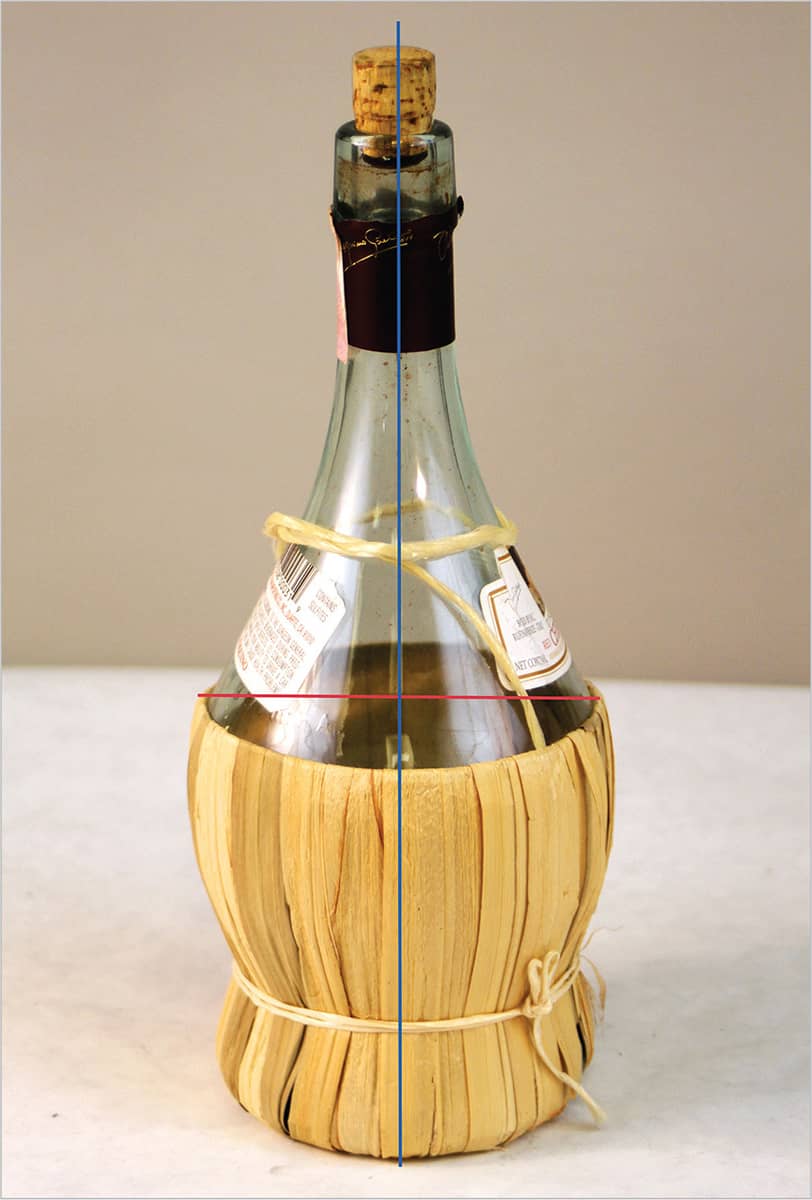
This bottle has an identical structure on both sides of its midline (blue), and is therefore a symmetrical object. The red line representing the width of the bottle is equal on both sides of the midline.
After finishing the light gesture drawing, and before moving on to a stronger, more refined drawing, use the chopstick to gauge accuracy and spacing on both sides of the midline axis (A).
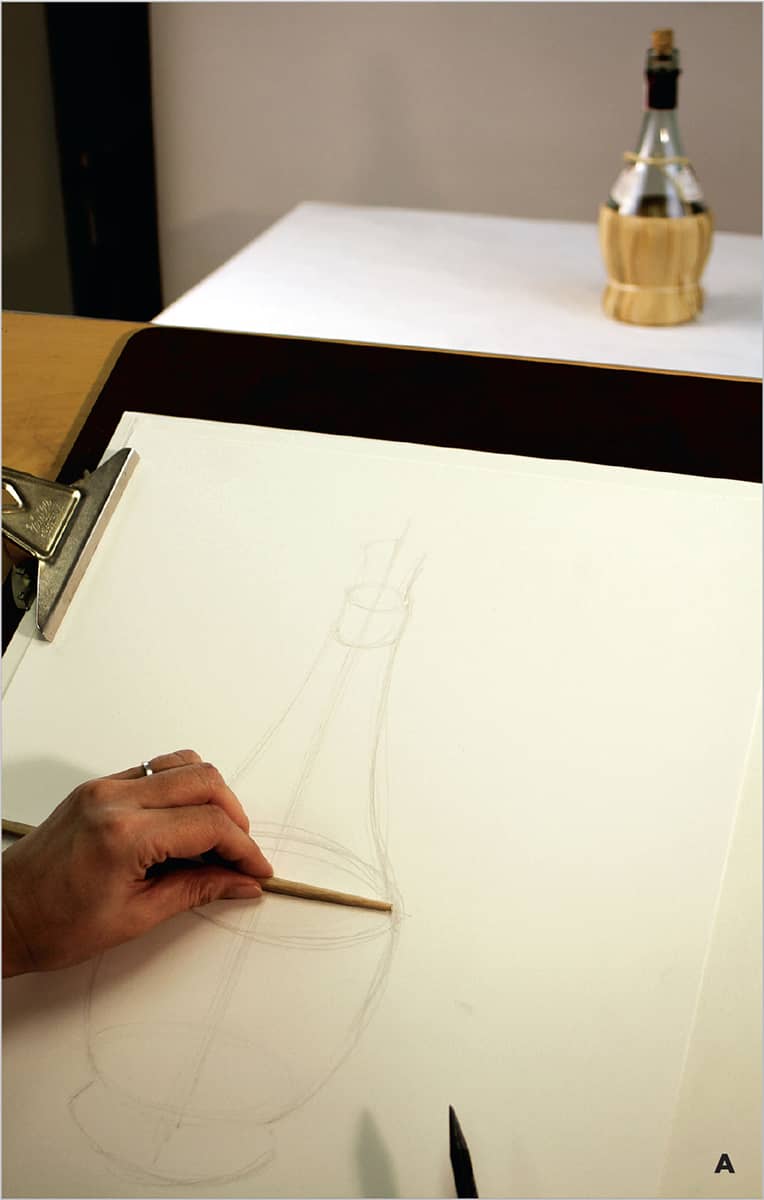
Use a chopstick to check the accuracy of the drawing on both sides of the midline.
Do this at several points along the vertical length of the axis until you are satisfied that the entire object is symmetrical (B, C). If there are any instances where the symmetry is wrong, it’s easy make corrections to the light drawing.
To measure the object, place the end of the chopstick at the object’s midline axis and hold the chopstick with thumb and forefinger placed at the left edge of the object. This constitutes one unit of measurement.

Without changing your finger placement, move the chopstick laterally so that your thumb and forefinger are at the midline; the end of the chopstick is now on the object’s right side. If both measurements are the same, the object is symmetrical across this dimension.
Units of Measurement
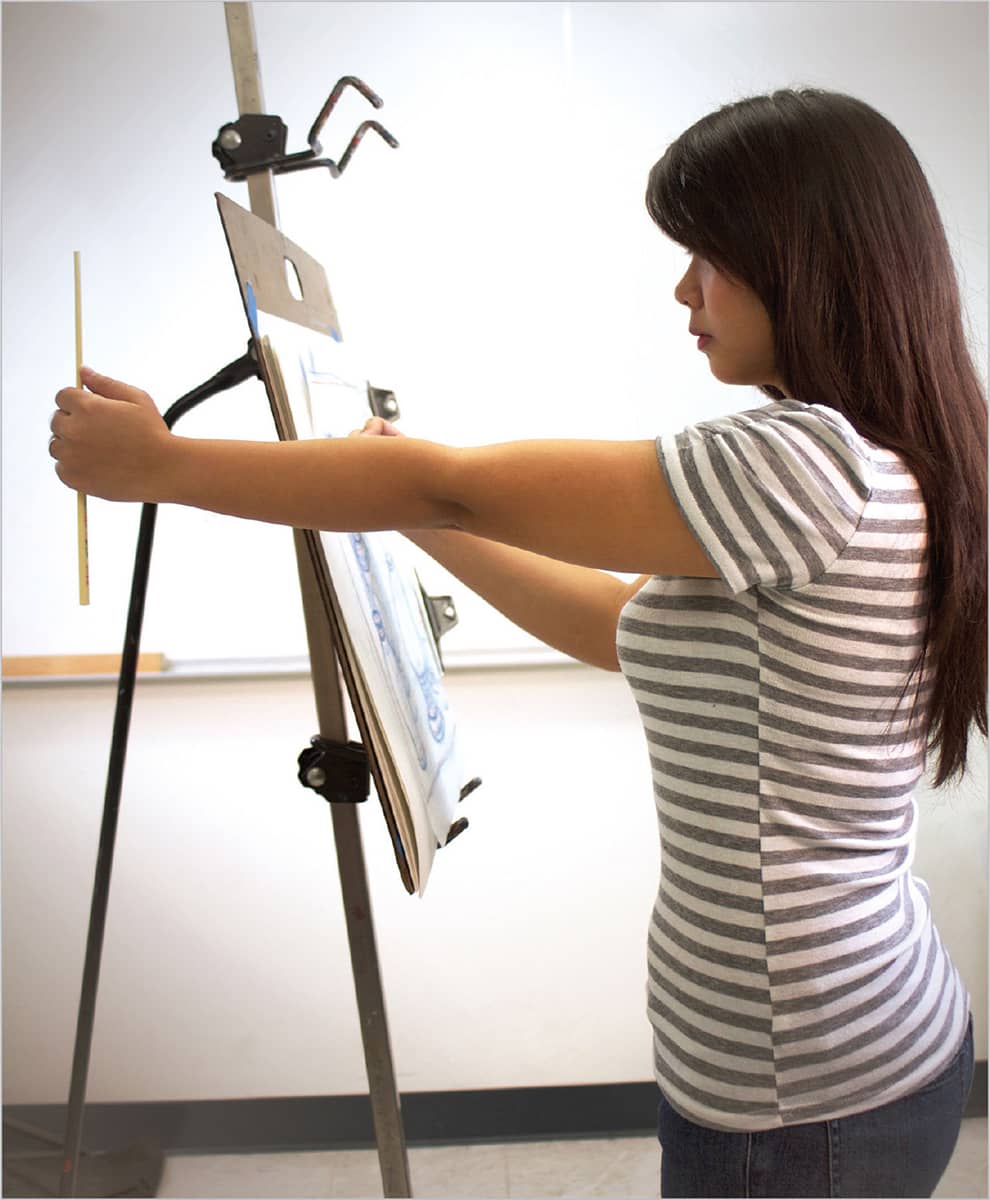
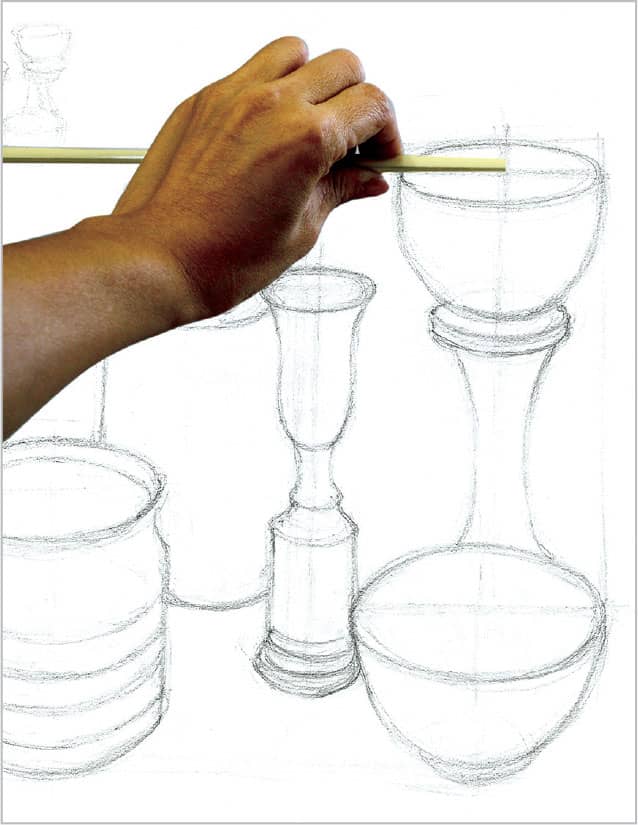
The chopstick can be very useful in finding accurate measurements of objects and proportional relationships between objects in a still life. It’s important to remember that the arm must always be straight and parallel to the picture plane when measuring an object. This way any object’s height or width can be used in comparison to any other height, width, or distance in the still life.
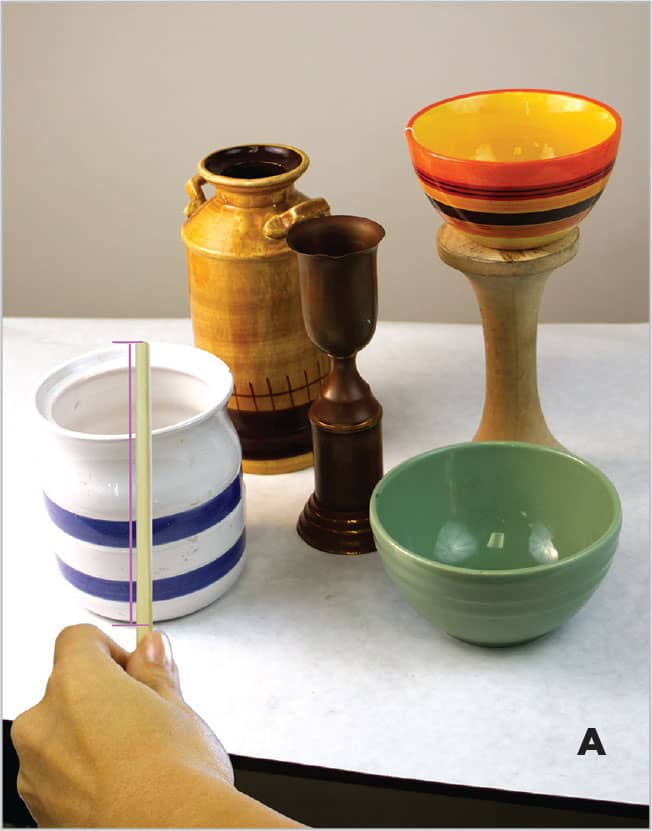
In this still life, we’re focusing on the pot with the blue stripes in order to find a unit of measurement to use as a baseline proportion. The thumb and forefinger are placed on the chopstick at the base of the object, while the tip of the chopstick is placed at top of the object (A, B). This is the unit of measurement that can be used to ascertain the objects’ relative sizes or the relative distance from one object to another (C). This should be done after the objects are lightly blocked in during the overall gesture sketch, before any refinement or detail is added. At this stage, any necessary corrections to size and placement can still be easily made.
The chopstick can be used to obtain a unit of measurement that the artist can use against other objects and spaces between objects. A good object to use for this unit of measurement is something simple and close to a squared form.
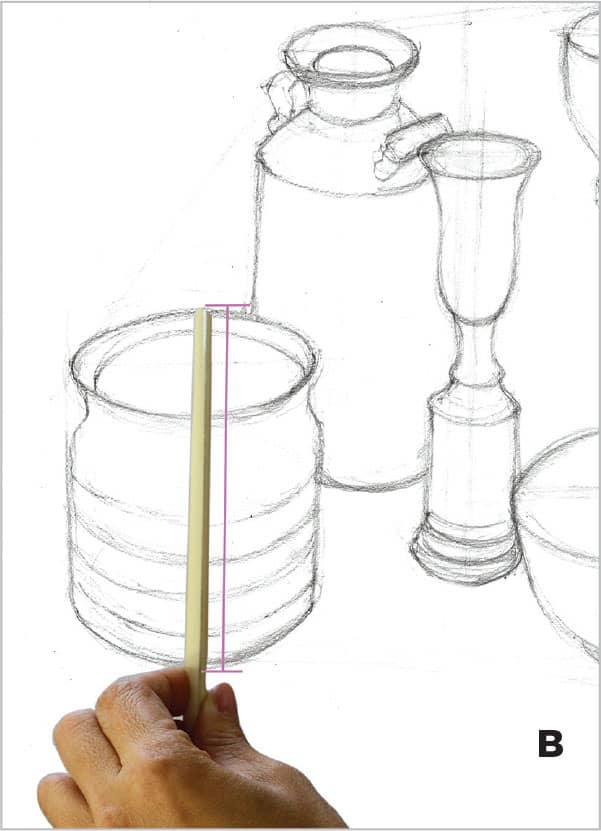
After an initial, light blocked-in gesture sketch of the entire still life, the artist uses the chopstick to find the unit of measurement.

Within this still life there are several objects that are similar to the basic unit of measurement and some that are double the unit of measurement. The same can be said for the spaces between objects.
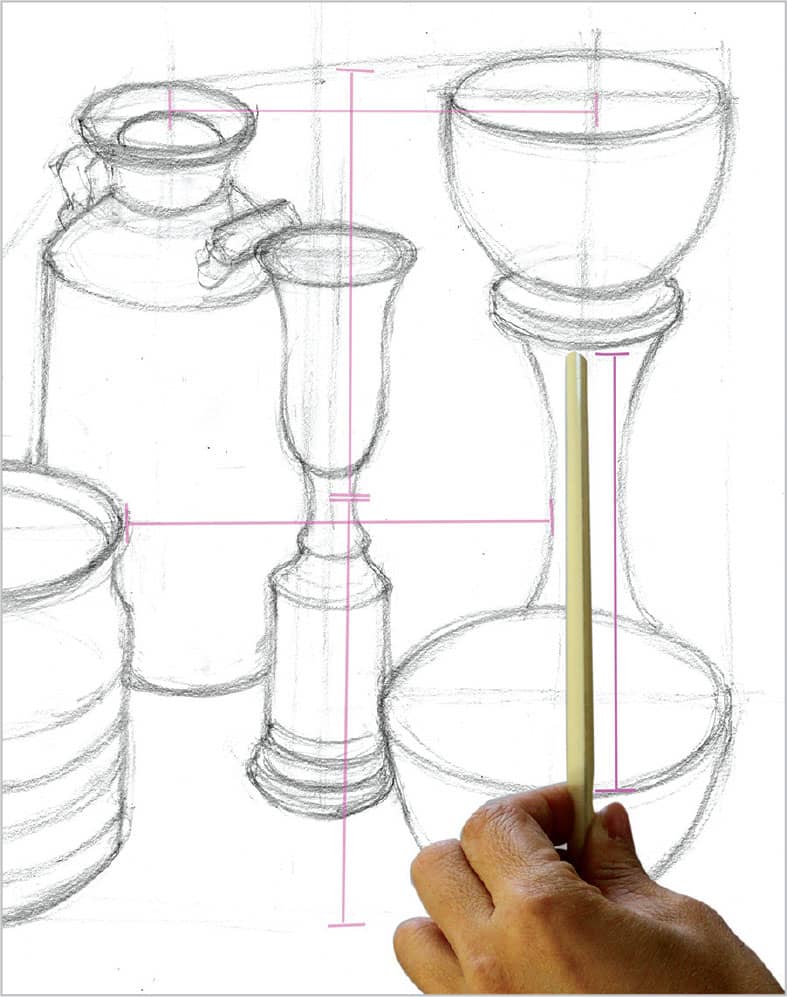
Bringing It All Together
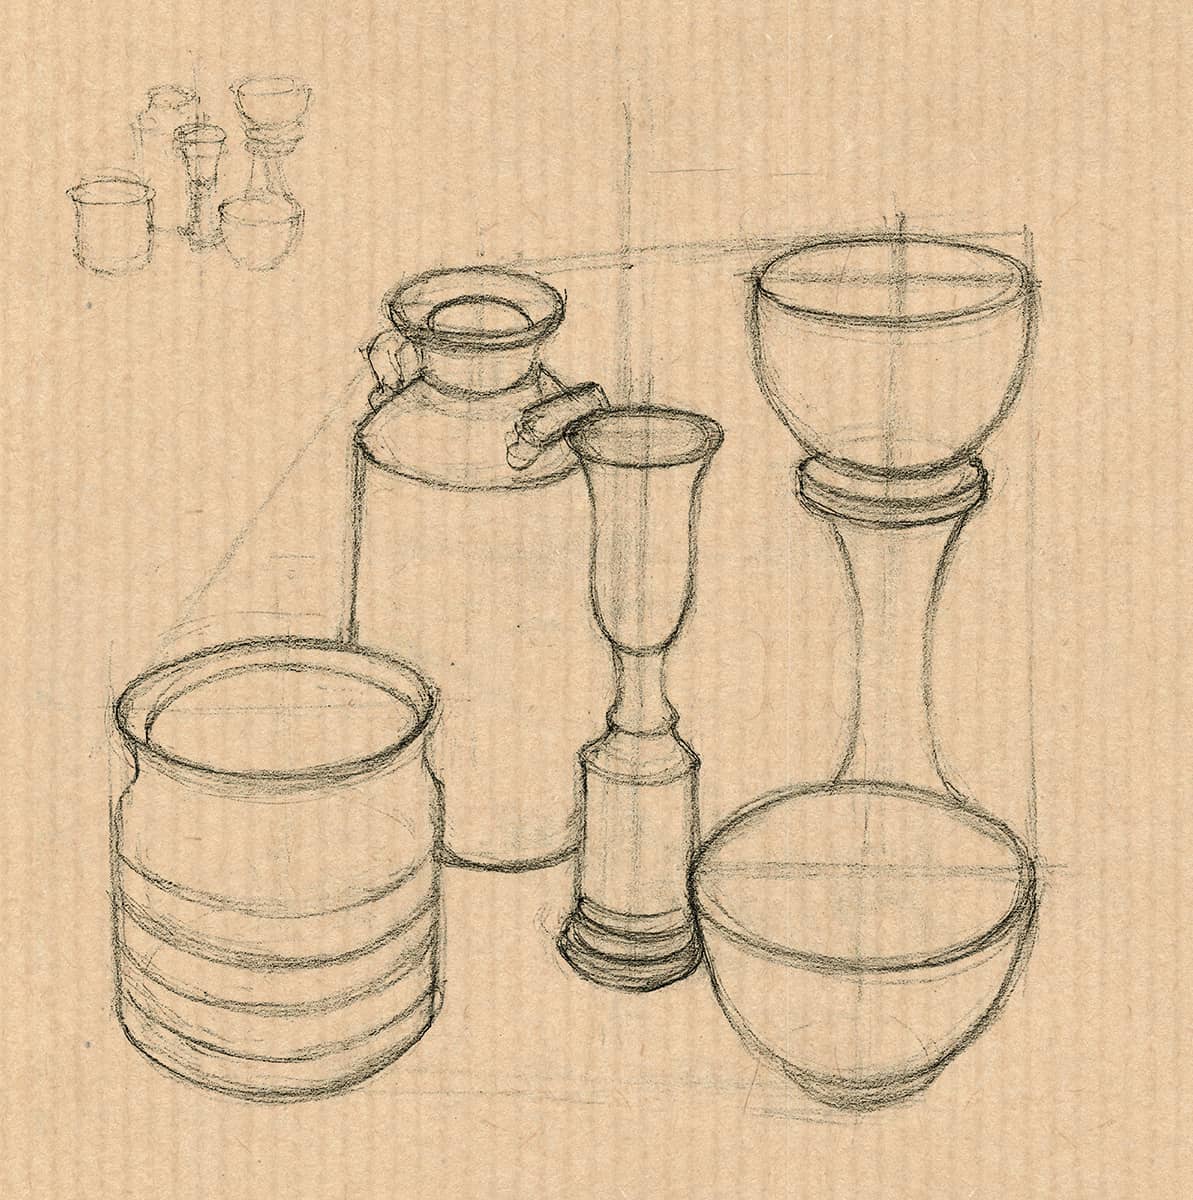
In this still life, the angles corresponding to the heights and locations of each object are determined with the aid of a chopstick kept parallel to the picture plane. The angles are then sketched onto the light, blocked-in gesture drawing of the still life.
The unit of measurement for the striped pot is applied to several objects and distances for comparison, and the midline of each symmetrical object is sketched and used to verify the accuracy. and integrity of each form.
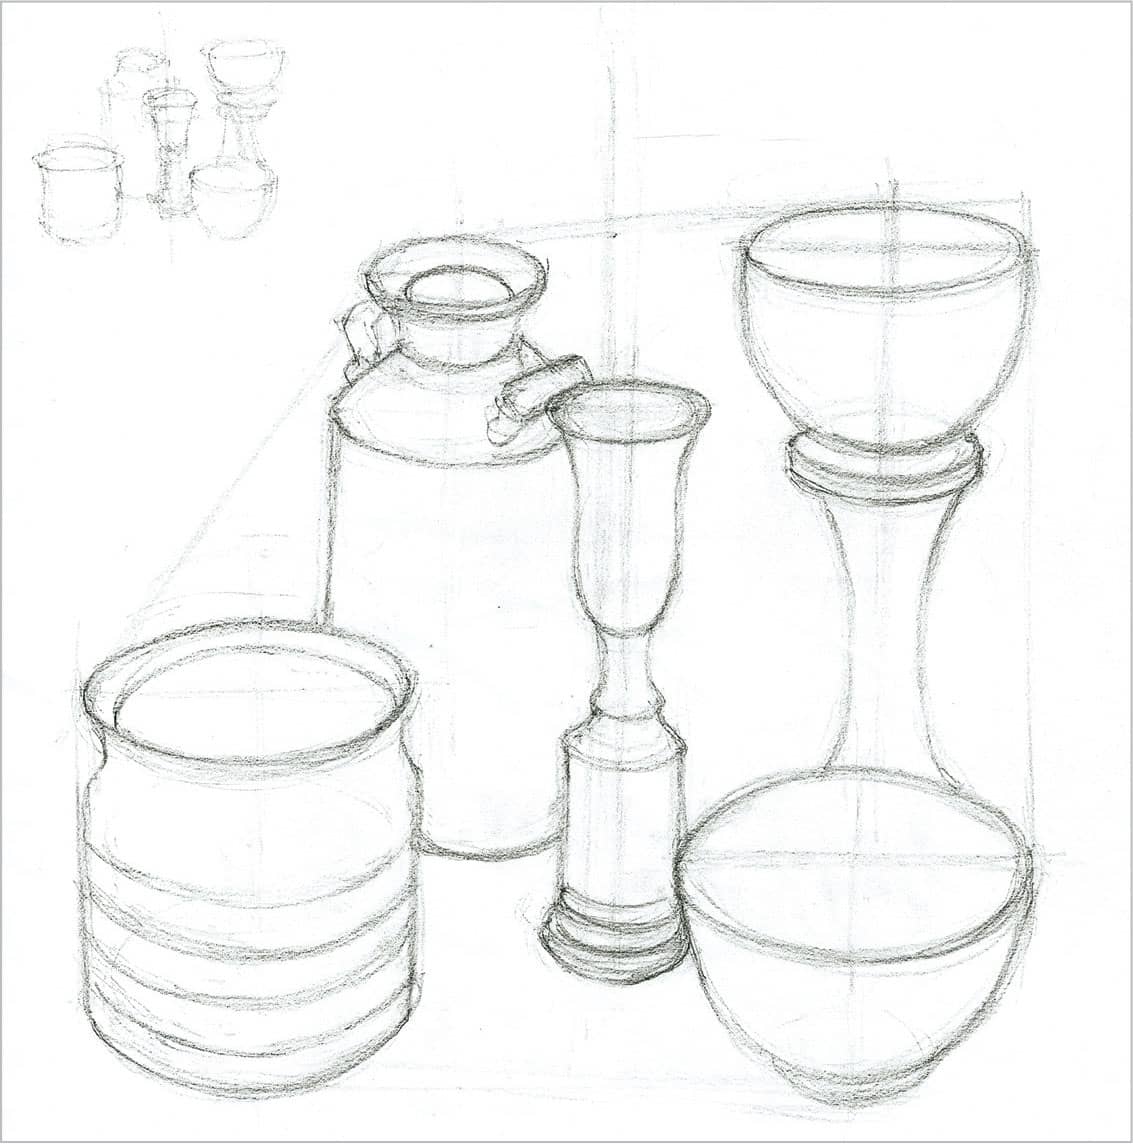
The final sketch is shown here with a small initial thumbnail sketch at top left that can be created prior to starting the large sketch. The thumbnail sketch is normally accomplished in 5 to 10 minutes and can aid in the initial placement of objects within the still life in the larger drawing.