
Android proposes a custom plugin for the Eclipse IDE named Android Development Tools (ADT). It accelerates the capabilities of Eclipse and quickly provides you with the option to start up a new Android project, including a simulator. The ADT plugin for Eclipse is an integrated environment in which you can build, debug, and test Android-native applications. The Android SDK provides the tools and APIs that are required to develop an application on the Android platform by using Java programming language.
The initial step is to download the Android SDK, which is not present with IBM Worklight Studio and must be downloaded from http://developer.android.com/sdk/index.html.
Decompress the downloaded Android SDK file and copy the folder to the location where you store SDKs or other development-related files.
To install the Android Development Tools (ADT) plugin for Eclipse, use the following steps:
- Start Eclipse and navigate to Help | Install New Software. This opens the Available Software window.
- To add, download, and install the ADT plugin, click on Add to open the Add Repository dialog. Please enter the name
ADT Pluginin the Name field and the plugin's locationhttps://dl-ssl.google.com/android/eclipse/in the Location field, as shown in the following screenshot: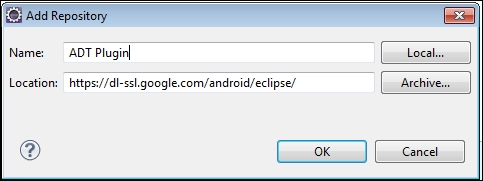
- Then click on OK. The button will start loading and then it shows the ADT plugin features available to install from the Available Software window. Check the Developer Tools checkbox and click on Next.
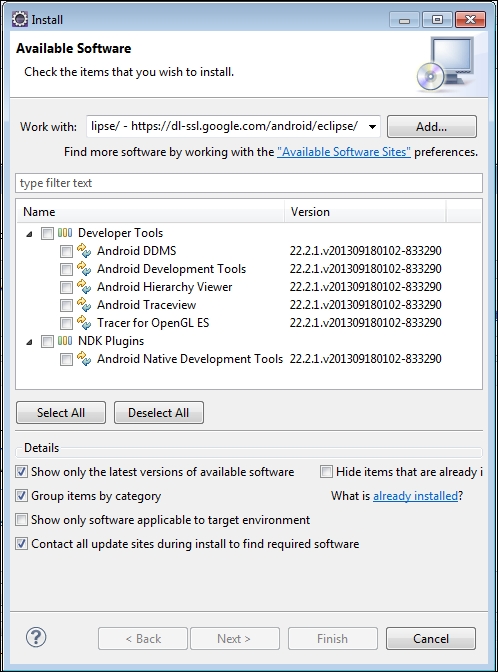
Android ADK plugin installation
- Complete the installation wizard and accept the default settings.
- You must restart Eclipse in order to make the changes work.
- After Eclipse is restarted, if it prompts a warning for an Android SDK, click on Open Preferences on the warning message dialog to open the preference window. Select Android from the left panel, and now on the right panel, click on the Browse SDK Location path and select the
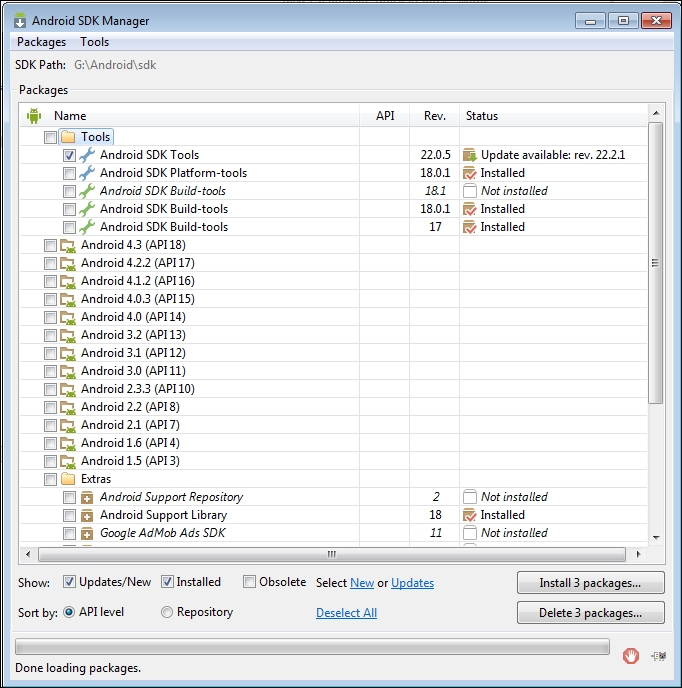
android SDKfolder. Click on OK to resolve this warning. - In the Android SDK Manager window (see the following screenshot), select Android SDK Platform-tools and Android Support Library, and select specific Android versions to test your application.
- Once you've finished selecting what you require, click on Install. This will start the installation process in a few steps. Once the installation completes, click on the close icon to close the Android SDK Manager window.
To configure an Android virtual device, use the following steps:
- Within Eclipse, navigate to Window | Android Virtual Device Manager from the menu.
- Clicking on New will open a dialog where you create a new Android Virtual Device (AVD). Give the AVD a name, such as
GNexusAVD, as shown in following screenshot:
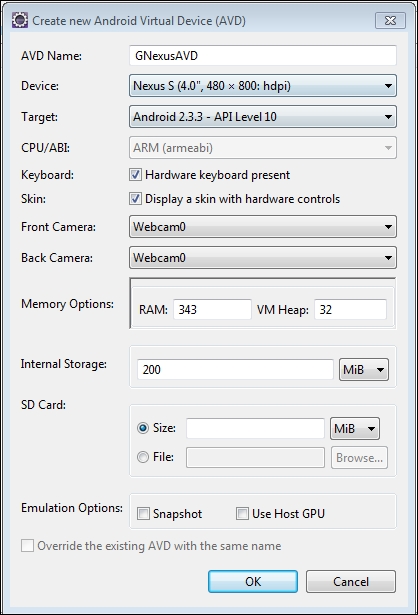
The new Android Virtual Device is now ready for use to test and run the application. If additional devices are needed, repeat the preceding steps.