The Rich Page Editor provides an interface for the development of mobile applications. This interface comprises easily editable HTML files and can be added to the Dojo and jQuery widgets. It is commonly used for multitabbed editors, which show multiple page views of different representations of an HTML page. There are three components—Source, Design, and Split views—in Rich Page Editor with which you can view and work with your files or page.
Every view in Rich Page Editor works in conjunction with several other tools that can be used to show in the web page previews. The source view component helps you to view its interface with the source code directly. Besides this, the view contains Mobile, Palette, Outline, and Properties views as a source for user interface.
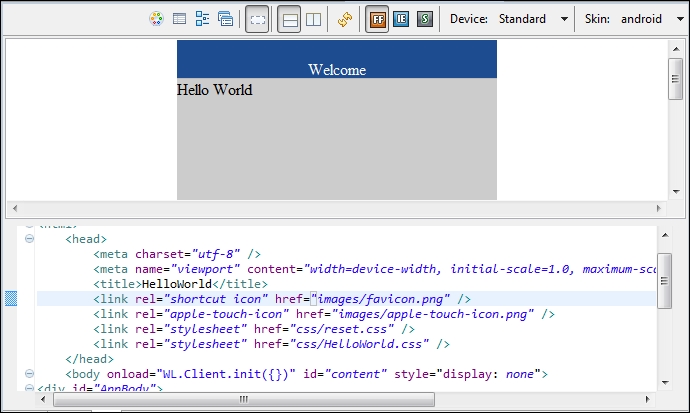
Split view shows both the interface and the source code on the same page to help you visualize your changes as you make them. You can split the view horizontally or vertically. The following screenshot shows our first designed page in Split view:
Design view provides the functionality of a WYSIWYG environment. It helps to create and edit files while you're viewing your source code and the actual interface reflects every single change. It provides complete visual interaction to the developer with its feature that allows dragging-and-dropping items and components from palettes and enterprise explorer views. These tabular enhancements have features for device selection as well, which provides a holistic view for device specification and skins you created for every environment. This preview holds compatibilities as browser, so if anyone needs to testify any mobile web application then it can be highly recommended for it. Whereas, device selects the size of any specified mobile to view and to have the effects related to size. Skin selection allows you to use your defined view for Android, iPhone, or Blackberry. By selecting the particular skin, you can switch to another device-specific style view to modify the layout and appearance of the page.
Once we are done with verifying the page layout and text in RPE, it is ready to test on different mobile platforms by using the Adding Environment feature of IBM Worklight Studio.
We have covered IBM Worklight Studio features and what they offer developers. It's time to see how this tool and plugin will make your life even easier. The cross-platform development feature is a great deal to implement. It provides you with the means to achieve cross-development environment without any hurdles and with just a few clicks within its efficient interface. In Chapter 5, Adding an Adapter, we will cover this topic in detail for other environments as well.
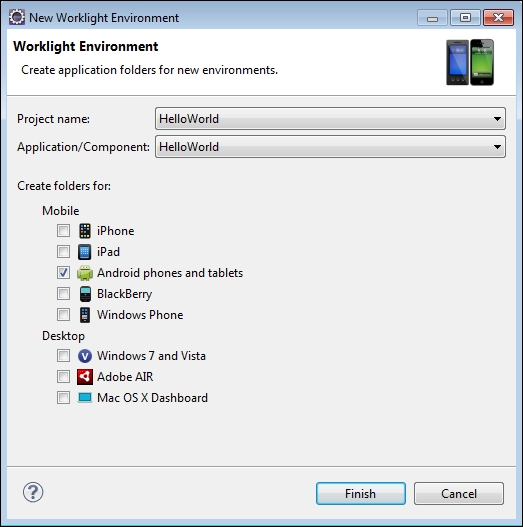
To add an environment for Android, iPhone, or any other platform, right-click on the Apps folder next to the adapters and navigate to New | Worklight Environment. You will see that a dialog box appears with checkboxes for currently supported environments, which you need to create an application for. The following screenshot illustrates this feature—we're adding an Android environment for this application:
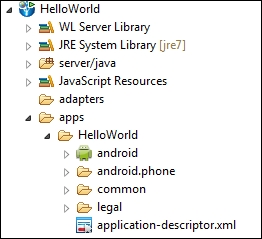
After clicking on the
Finish button, Studio automatically transforms and generates an Android project for you. In the following screenshot, you can see the android icon, which contains native directories for its source code:
The following tasks should be completed to build the mobile application for any specific environment:
- Verifying the server configuration
- Building the application
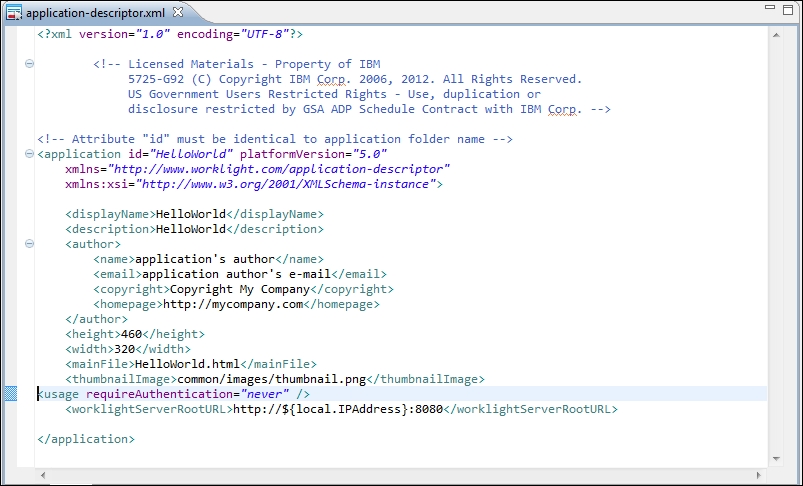
You will use the local development server provided by IBM Worklight Studio. Before we start the bringing together of application components, you should verify the ports and server URL defined in application-descriptor.xml under the <WorklightServerRootURL> tag. Please use the following steps to configure your application for server communication:
- Open the file named
application-descriptor.xmlwithin theapp/HelloWorldfolder. - Locate the tag
<worklightServerRootURL>. - Adjust your Worklight server name and port to match the target environment using the following format:
<worklightServerRootURL>
http://[wl_server_name][:port][/path]
</worklightServerRootURL>
- Save and close the
application-descriptor.xmlfile.
Please look at the following screenshot for the preceding changes in application-descriptor.xml:
The specified project web application archive and Worklight application files must be deployed to IBM Worklight Server for every specified environment. The following are the files that must be built and generated to deploy and run the HelloWorld application on Worklight Server:
HelloWorld.warHelloWorld.wlappHelloWorld-android.wlapp(for Android)
These .wlapp files contain the actual web content of the application, which includes the HTML, CSS, and JavaScript files that were created in the previous section.