
In this section, you will learn how to build a very simple mobile application that contains some basic Dojo components in only a few steps using Worklight Studio. You will also learn how to use the Dojo Mobile Application architecture with page views, listItems, and Dojo Toolkit implementation. It is a JavaScript framework that enables cross-platform development of mobile applications.
The following steps show you how to create a mobile application, using the browser visualization, Worklight Studio virtualization.
- To start with, create a Worklight hybrid application.
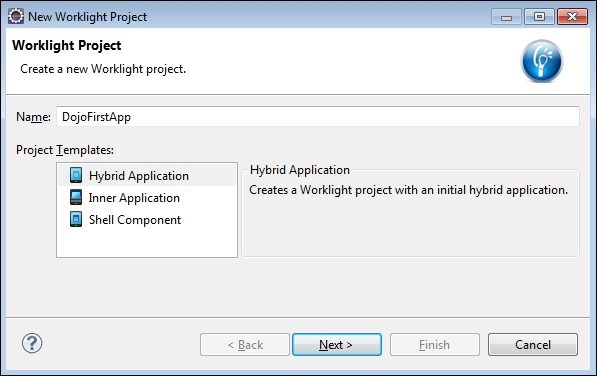
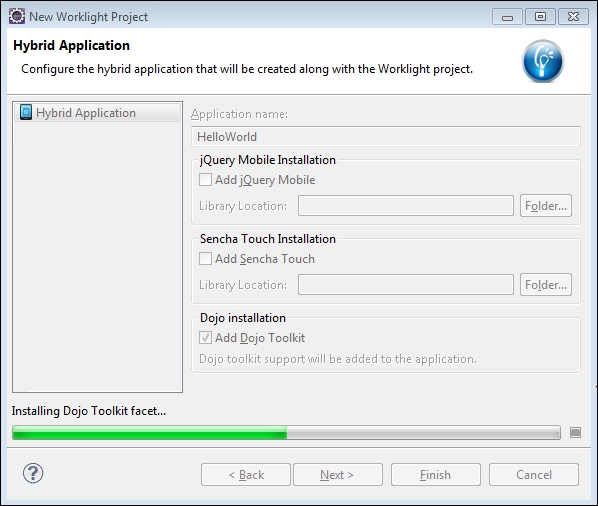
- Select the checkbox to add Dojo Toolkit. It will automatically add Dojo Toolkit to the environment of the particular application.
- Click on Finish.
- The following screenshot shows the folder structure of the project
DojoFirstApp, which includes complete Dojo Toolkit.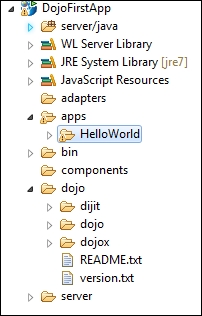
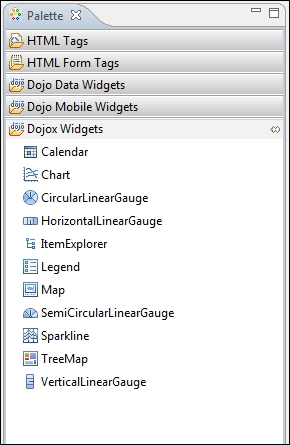
- After the completion of the New Worklight Project wizard, look at the right-hand side of Worklight Studio. A palette view appears, in which you will find Dojo widgets and components. You can choose any of the widgets for your application. The following screenshot shows the Dojo palette:
- Open
apps/HelloWorld/common/HelloWorld.html. Select its Design view instead of Source or Split. - Select View, under Dojo Mobile Widgets and drag it to the Design screen of your HTML page named
HelloWorld.html. Define the parameters as shown in the following screenshot and then hit Finish: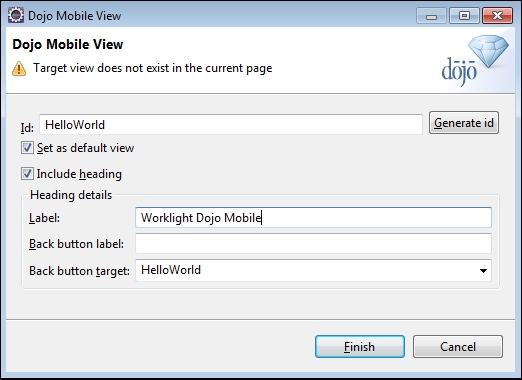
- You will see the Design view as shown in the following screenshot:
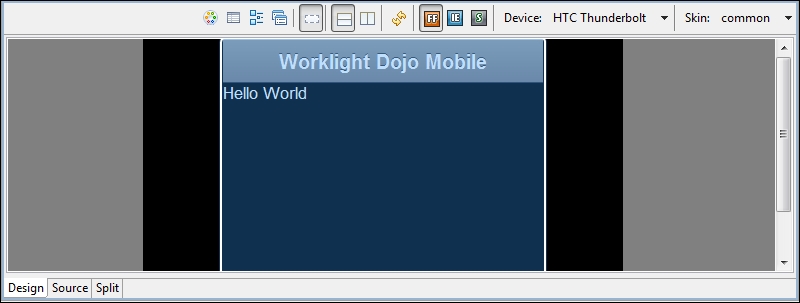
- If you click on the Source or Split options, you'll have the following code to generate a mobile screen with a header:
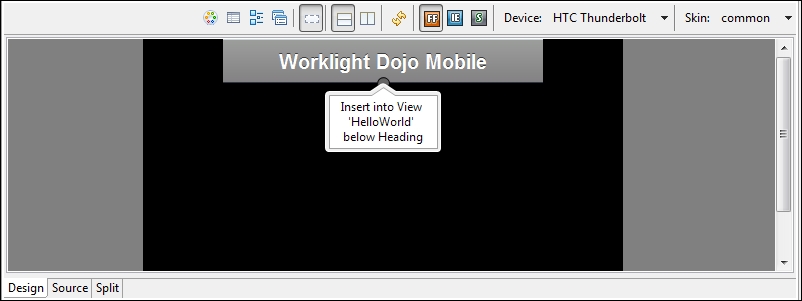
<div data-dojo-type="dojox.mobile.View" id="HelloWorld" data-dojo-props="selected:true"> <h1 data-dojo-type="dojox.mobile.Heading" data-dojo-props="label:'Worklight Dojo Mobile',moveTo:'HelloWorld'"></h1> </div> - Click on ListItem and drag it to the page view.
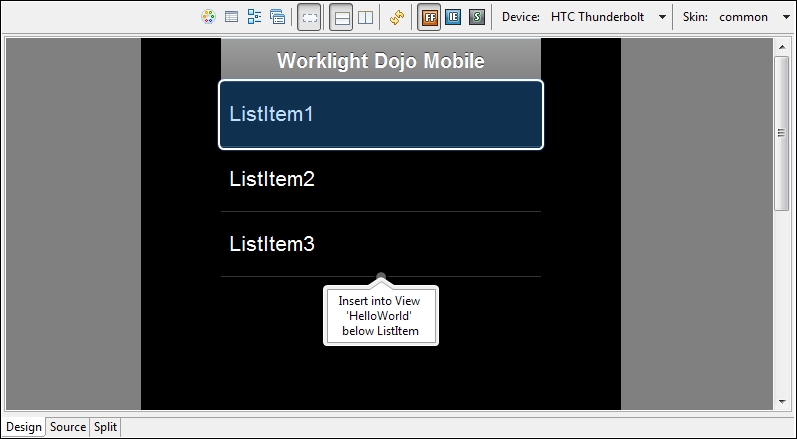
- These are actually list items so provide the data in sequence. The following screenshot shows a basic view of list items, you can add as many as you need.
The following is the complete code after adding the header and ListItem into our mobile application:
<body onload="WL.Client.init({})" id="content" style="display: none">
  <div data-dojo-type="dojox.mobile.View" id="HelloWorld"
    data-dojo-props="selected:true">
    <h1 data-dojo-type="dojox.mobile.Heading"
      data-dojo-props="label:'Worklight Dojo Mobile',moveTo:'HelloWorld'"></h1>
    <div data-dojo-type="dojox.mobile.ListItem"
      data-dojo-props="label:'ListItem3'"></div>
    <div data-dojo-type="dojox.mobile.ListItem"
      data-dojo-props="label:'ListItem2'"></div>
    <div data-dojo-type="dojox.mobile.ListItem"
      data-dojo-props="label:'ListItem3'"></div>
  </div>
  <!-- application UI goes here -->
  <script src="js/HelloWorld.js"></script>
  <script src="js/messages.js"></script>
  <script src="js/auth.js"></script>
</body>..................Content has been hidden....................
You can't read the all page of ebook, please click here login for view all page.