
We have learned about app development for Windows platform in the last few sections. But all our code was hand-written. We also noticed that even for a simple GUI we have to write several lines of code.
So, can we do something about it? How about automatic code generation of GUI codes? Sound interesting! Code::Blocks comes with a plugin, called wxSmith, which can generate C++ code (using wxWidgets toolkit) based on the user generated GUI inside a Visual editor. We'll learn this with another example.
- Create a new wxWidgets project. This time we'll name it something meaningful. In the following window enter project title as
MyNotePad. - In the following page, select wxSmith as Preferred GUI Builder. This option configures wxWidgets project to use wxSmith GUI builder. Refer the following screenshot:

- After the project generation is complete files following window will be displayed:
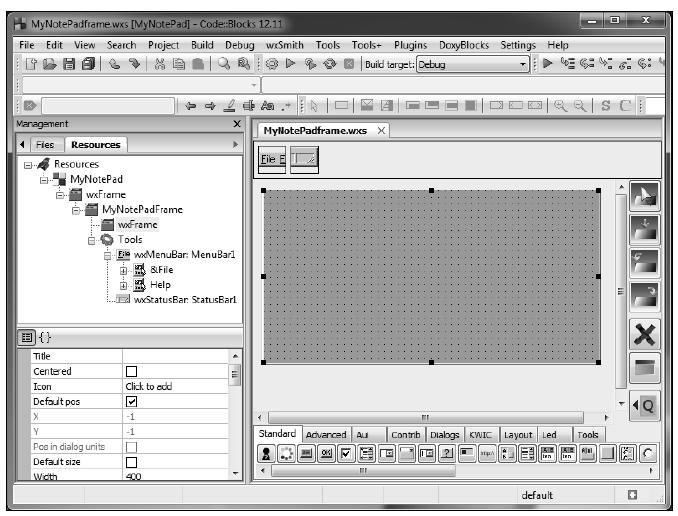
- The preceding window have the following three major components:
- Click on the
MyNotePadFrameitem shown in the following screenshot on the resource tree and then click on the Title property in the property window. TypeMyNotePadin that text box. This will set title of our app toMyNotePad.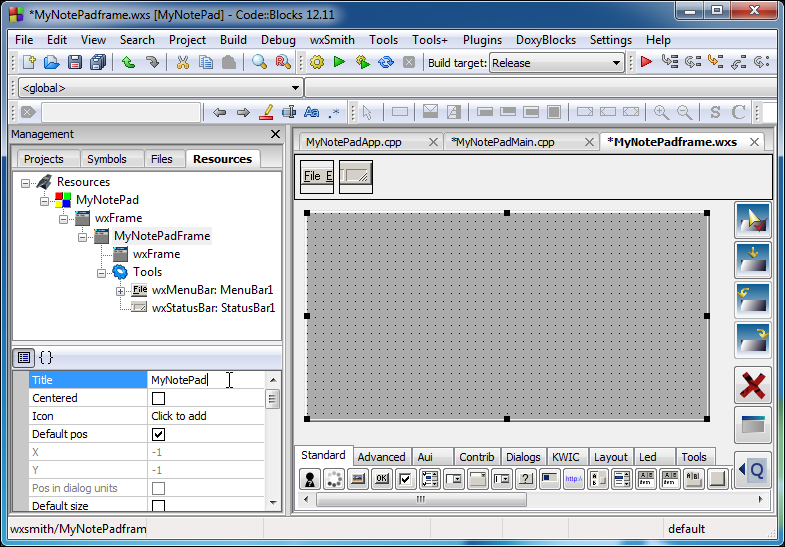
- Now we'll add a
wxTextCtrlcontrol to our app. This will add a text box to our app. Click on thewxTextCtrlcontrol button on the toolbar below. Immediately the MyNotePadFrame window shown inside wxSmith window will be selected.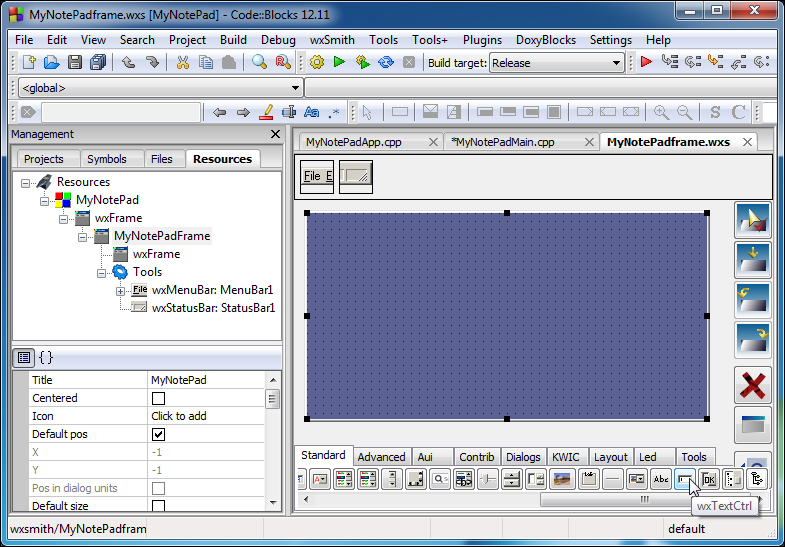
- Click on it and this text control will be added to that. The wxSmith window will look similar to the following screenshot:
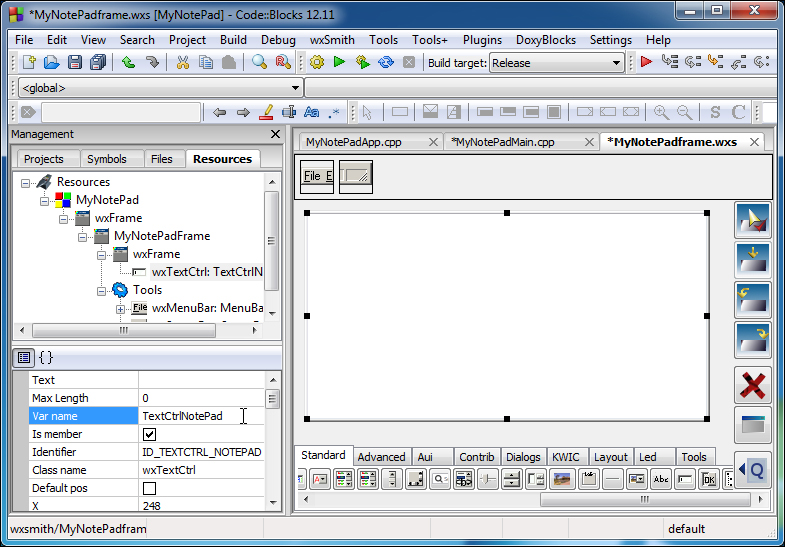
- In the property window change the following properties:
- Text property: It is an empty string. This property stores the text inside a text control
- Var name property: Change this to
TextCtrlNotePad. This property will be used to name object of thewxTextCtrlclass. - Identifier property
ID_TEXTCTRL_NOTEPAD: It will be assigned a unique integer and then will be used to assign it with an event handler and an event type.
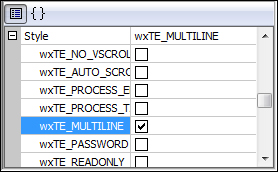
- Scroll down the property window and click on the Style property. Click on the wxTE_MULTILINE property to check it. This will enable text control show text in multiple lines.
- In this next step, we'll edit menu bar. Double-click on the menu bar icon (shown in following screenshot):

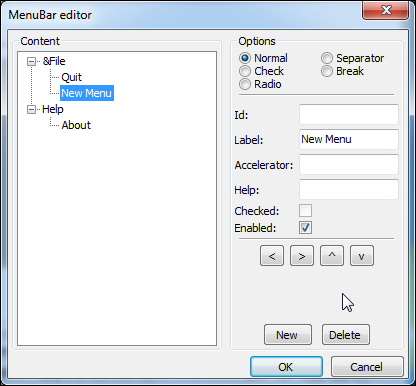
- The MenuBar editor window will pop up. Select the Quit menu option as in the following screenshot in the menu tree on the left side and then click on the New button:
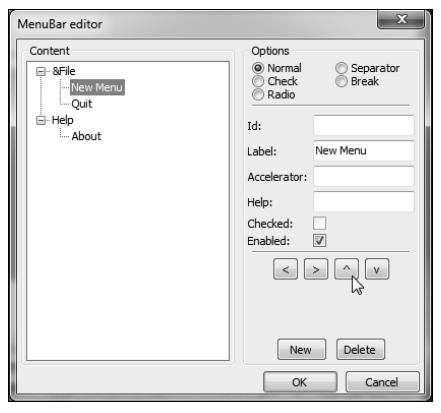
- Click on the ^ button to move the new menu item above, Quit menu option. Four buttons shown in the following screenshot can be used to rearrange menu items in the menu tree:
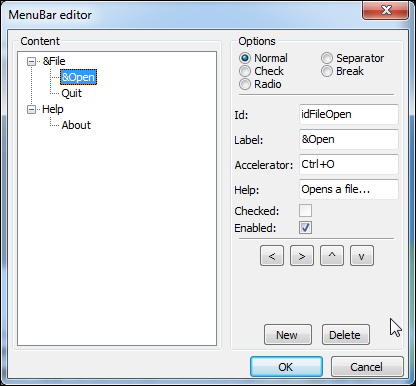
- Now select the new menu option in the menu tree and change the following properties on the right side:
- The Id property: Change this to
idFileOpen. This property will be defined as a unique integer and will be used to assign it with an event handler and an event type. - The Label property: Change this property to
&Open. This text defines the menu label and&Otext will define an accelerator key. This menu can now be selected and clicked by pressing O button whenever this menu option is visible. - The Accelerator property: Change this one to
Ctrl+O. This property defines a keyboard accelerator to this menu option. A keyboard accelerator is a unique combination of keystrokes that will generate a click event for this menu option irrespective of menu item's visibility. - The Help property: Change this to
Opens a file...text. This will display this text in the status bar whenever this option is selected by mouse cursor or keyboard.
- The Id property: Change this to
- Click on the OK button to close this window. We have now added a menu option to our existing menu bar. Before we add code to open a file with this menu option we need to add a file open save control.
- Click on the Dialogs tab and then click on the wxFileDialog control button. This will add a standard file open and save dialog to the
MyNotePadFrameclass.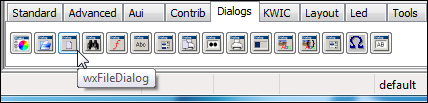
- Change the following properties in property window:
- Wildcard to
*.txt. This will set the filter text to files with.txtextension. - Var name to
NotePadFileDialog. This will be used to create an object of thewxFileDialogclass that represents a standard open or save dialog.
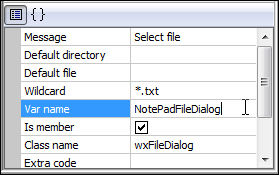
- Wildcard to
- Now we are set to add code to newly added menu option. Click on the &Open item in the resource tree and then click on the {} button in property window. Click on the dropdown box and choose the -- Add new handler -- menu option as in the following screenshot:
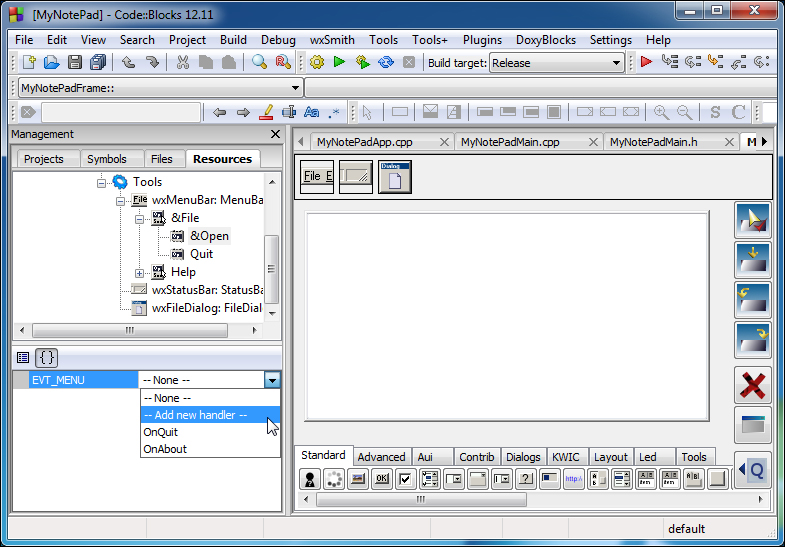
- Enter
OnFileOpentext in the dialog box and then click on the OK button, as shown in the following screenshot: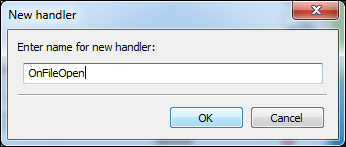
- Code editor window will be open. Add the following code to the
MyNotePadFrame::OnFileOpen()function.int result; wxTextFile textFile; wxString fileContent; result = NotePadFileDialog->ShowModal(); if (result == wxID_OK) { if (textFile.Open(NotePadFileDialog->GetPath())) { for (size_t i = 0; i < textFile.GetLineCount(); i++) { fileContent << textFile.GetLine(i) << _T(" "); } textFile.Close(); TextCtrlNotePad->SetLabel(fileContent); } }Let's explain preceding code. We have defined couple of variables in the beginning. We are showing file open dialog using the
ShowModal()function and result of this dialog will be stored inside theresultvariable. Next line checks that we have received awxID_OKvalue, which indicates that user has selected a file.We are opening a text file in using the
Open()function with the filename received from dialog box. If file opening succeeds then we'll create a loop to read all lines one by one. ThefileContentvariable appends a line read from file and then appends a new line (Close()function.Finally we set text stored inside
fileContentvariable is stored to our main text control.We also need to include an extra header file in order to use the
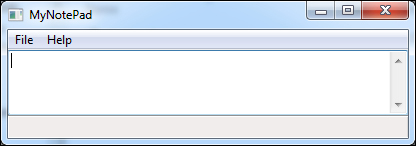
wxTextFileclass. Add the following line after the#include <wx/msgdlg.h>line in theMyNotePadMain.cppfile:#include <wx/textfile.h> - We are now ready to compile our little notepad app. Hit F9 key to build and run it. Our app will look similar to the following screenshot:
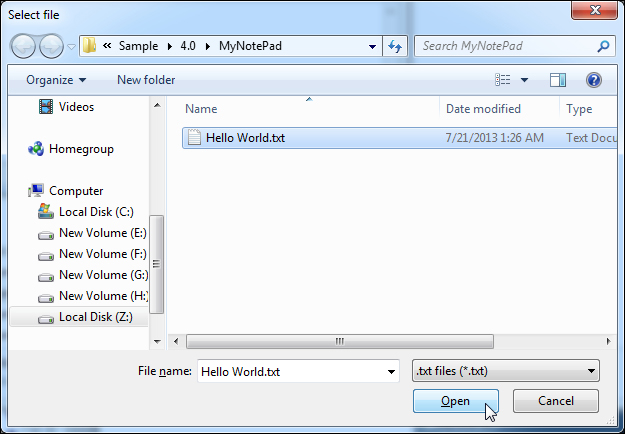
- Go to File | Open menu option and following dialog box will be opened:
- Click on the Open button and the selected text file will now be opened by our app, as shown in the following screenshot:
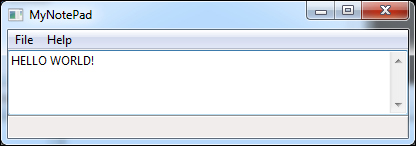
Our app is now working! We wrote most of our GUI related code with the help of Code::Blocks. Only code that was manually written was the one we have inserted to open a text file. Code::Blocks offers an excellent cross-platform and rapid application development platform. We can develop a GUI app with Code::Blocks easily using this approach.
We have learned and developed our own notepad app in the previous section. However, our app was limited to opening a file. In this exercise we will extend our app to save a text file.
We'll perform the following steps:
- Add a menu item
&Saveto file menu after&Openmenu option, withCtrl+Sas keyboard accelerator,idFileSaveas ID andSaves a file...as Help text. - Add an event handler to this menu option and add event handler function
OnFileSave(). - Finally add the following code to the
MyNotePadFrame::OnFileSave()function:int result; result = NotePadFileDialog->ShowModal(); if (result == wxID_OK) { if (!TextCtrlNotePad->SaveFile(NotePadFileDialog->GetPath())) { wxMessageBox(_T("Couldn't save ") + NotePadFileDialog->GetPath(), _T("Error"), wxOK | wxICON_ERROR); } }
This code is similar to the code we wrote for the OnFileOpen() function. We are using the wxTextCtrl::FileSave() function to save our file in line number 5. Code in line number 6 ensures that an error message should be shown when a file can't be written.
I leave it to you to follow earlier steps and complete this exercise. You can refer accompanying MyNotePad app source code for this completed exercise.