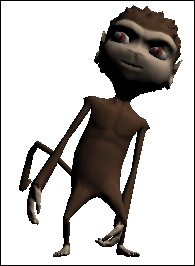
Custom animation is the concept of directly manipulating the bones of a character's skeleton to create animations. We will explore this by making a control that can be used together with Chapter 2, Cameras and Game Controls. Together with this recipe, leaning can be used on characters other than the player and in networked games.

Jaime leaning to the left
As in Chapter 2, Cameras and Game Controls, we have two ways to handle leaning: one is by using a key to lean toward the left and another to lean toward the right. The second one is to press a button and lean in any direction using the mouse, which is more common in computer games.
The control we are going to build will share some code with the recipe from Chapter 2, Cameras and Game Controls. The shared code will be explained there to save space, and it will most likely be used in tandem with this recipe, so being familiar with it is helpful.
- We start by creating a new class that extends
AbstractControland implementsAction-andAnalogListener. - Next, we define some values that will help us control the leaning. The
leanValueis the current amount of leaning that is applied. There needs to be a limit on how much the character can lean, which is set inmaxLean. For this example, it's 45 degrees in either direction. The two BooleansleanLeftandleanRightdefine whether we're currently leaning in either direction using keys, andleanFreedefines whether the mouse is used. TheleaningBoneis the bone that we'll modify, and we'll also store the bone's original rotation inboneRotationand use it as a base when leaning. - When the control is added to a spatial, we need to look for a bone to apply the leaning to. We select spine as
leaningBone, and clone its current rotation, as shown in the following code:public void setSpatial(Spatial spatial) { super.setSpatial(spatial); Bone spine = spatial.getControl(SkeletonControl.class).getSkeleton().getBone("spine"); if(spine != null){ leaningBone = spine; boneRotation = leaningBone.getLocalRotation().clone(); } } - The
onActionmethod will receive the input and should set the controlling Booleans, namely,leanLeft,leanRight, andleanFree. TheonAnalogoption receives the mouse input whenleanFreeis active. - In the
controlUpdatemethod, we check to see whether any leaning is to be applied, first to the left and then similarly to the right. IfleanValueis near0f, we will round it off to0. If this happens, we give the control back toAnimControl, as shown in the following code:protected void controlUpdate(float tpf) { if(leanLeft && leanValue < maxLean){ leanValue += 0.5f * tpf; } else if(!leanFree && leanValue > 0f){ leanValue -= 0.5f * tpf; } [mirror for right] if(leanValue < 0.005f && leanValue > -0.005f){ leanValue = 0f; } if(leanValue != 0f){ lean(leanValue); } else { leaningBone.setUserControl(false); } } - In the
leanmethod, which applies the leaning to the bone, the first thing we do is clamp the value to be inside the allowed threshold. Next, we callsetUserControlon the bone to let it know that it shouldn't apply animations before creating a newQuaternionclass based on the original rotation, as shown in the following code:private void lean(float value){ FastMath.clamp(value, -maxLean, maxLean); leaningBone.setUserControl(true); Quaternion newQuat = boneRotation.add(new Quaternion().fromAngles(-FastMath.QUARTER_PI * 0.35f, 0, -value)); newQuat.normalizeLocal(); leaningBone.setLocalRotation(newQuat); }
When selecting a bone to apply the leaning to, it should be close to the base of the upper body of the character. On Jaime, the spine is a suitable bone.
When Bone.setUserControl(true) is called, we tell the bone that no animations should be applied and that we will handle any rotation or translation manually. This has to be called before we set the rotation, or an exception will be thrown. Likewise, when we're done, we need to call setUserControl(false) to give the control back to the user (or no animation would be played).
Manually controlling bones is powerful and can be useful for many different applications, such as precision aiming and head tracking. Getting everything right can be tricky, however, and most likely it's not something that you will do frequently.
This class can be used separately from Chapter 2, Cameras and Game Controls, or they can be merged together. The benefit of having them separate is that we can also apply them separately. For example, the player's own character in a FPS won't need this control since you would never see it lean anyway. In this case, it's all about the camera. However, other players in the same (networked) FPS will need it, as would AI enemies who might use the same character control class.
To learn more about how leanValue is used and applied, have a look at the Leaning around corners recipe of Chapter 2, Cameras and Game Controls.
If we're using an imported model and don't have access to a list of the bones, how do we know which bone to use? One simple way is to open the model in Scene Explorer. In SkeletonControl, we can see all the bones the character has but not their relative position on the model. By right-clicking and selecting Get attachment node, a new node will be created; also, by selecting it, we can see where it's located on the model. For more information on attachment nodes, have a look at the Retrieving an attachment node recipe of Chapter 1, SDK Game Development Hub.
