
This recipe will mostly be theories on different lighting types, but we'll also explore a way to easily control the movement of lights.
The four main types of lights that we can use to light up our world are as follows:
- Ambient Light: This lights up everything in the scene evenly. It's good for avoiding anything to be in a pitch-black state, but it doesn't create any shadows or nuances. Adding a too bright ambient light will give the world a bland look, while giving it a touch of color can set the mood.
- Directional Light: This shines from a particular direction with perfectly parallel rays and without any falloff. This is usually used to simulate a sun, a bright source of light located far away.
- Point Light: This shines equally in every direction but with a falloff, meaning this will eventually stop illuminating the surroundings. Usually, this forms most of the light sources in a game scene.
- Spot Light: This is exactly as it sounds. This produces a cone-shaped light in a specific direction from a specific location, and its light will eventually fall off. It has more settings than its sibling light types. Technically, it is more advanced than point lights and requires additional calculations in the shader to see what it illuminates.
A spotlight with the same spotInnerAngle and spotOuterAngle parameters will have a light cone that looks like this:
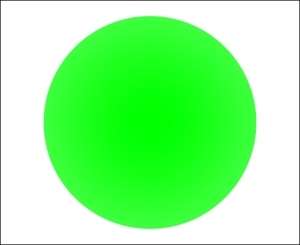
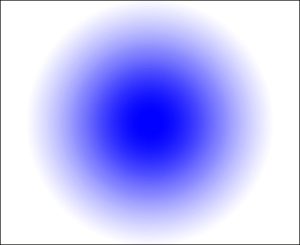
The spotInnerAngle and spotOuterAngle parameters define the size of the light cone that spotlight produces and both are set in radians. The spotInnerAngle parameter defines how far out the cone will shine at its maximum radiance. The spotOuterAngle parameter then defines how far the total extent of the radiance should be before it's been completely extinguished. Having a greater value for the spotOuterAngle parameter will produce a softer edge on the spotlight. A spotlight with a small spotInnerAngle parameter and a high spotOuterAngle parameter will have softer edges, as shown in the following image:
To ensure an object is affected by the lights in a scene, it must have a Material class that supports it. For most game objects, the default choice is the Lighting material. It supports a variety of lighting types from per pixel to lightmaps and vertex lighting. The latter two are optional but have their uses.
A lightmap is essentially an extra texture where lighting has been pre-rendered. Its resolution can rarely match real-time lighting, but from another perspective, it is very fast since lighting doesn't have to be calculated at runtime; also, it can be used for static scenes.
Normally, lighting is calculated on a per-pixel basis. This means that for each pixel visible on the screen, the processor has to calculate how it is affected by the available light sources. It is fairly expensive and even more so with many light sources, but it produces a more realistic result. Vertex lighting instead means that lighting is calculated for each vertex on a model. For low poly models, this is much faster although not as detailed. The quality will suffer noticeably when it is near the object, but it can give good enough results for objects some distance away.
Now that we have the basics covered, let's explore a pattern that allows us to move lights using objects in the scene graph:
- First, create a new
PointLightclass calledpointLightand setradiusto40. - Then, call
rootNode.addLight(pointLight)to add it to the scene graph. - Now, create a new
CameraNodecalledcamNodeand then callcamNode.setControlDir(CameraControl.ControlDirection.CameraToSpatial);before attaching it to therootNode. - Next, create a new
LightControlcalledlightControl, supplyingpointLightto it to indicate that this is the light to control, as shown in the following code:LightControl lightControl = new LightControl(pointLight);
- We set
controlDirto beLightControl.ControlDirection.SpatialToLight. This means that the SpatialcamNodewill control the light's position:lightControl.setControlDir(LightControl.ControlDirection.SpatialToLight);
- Finally, we add
lightControltocamNode. - To test this out, we can load Sponza (Models/Sponza/Sponza.j3o) from the jMonkeyEngine's
test-datalibrary and apply the Lighting material to it.
Lights are not Spatials in the scene graph, and it can be tricky to move them around. It can be added to nodes but then it will only illuminate the node (and its children) that it is added to. The LightControl class bridges the gap since it can be added as a control to Spatial, and it controls the position (and direction of a light). In this recipe, we used it so that the light will follow the camera around using a CamNode, but it works just as well for any other spatial.
We touched on Ambient Light and Directional Light in the Adding a sky box and lighting recipe from Chapter 1, SDK Game Development Hub. In the Creating a dynamic sky box with a moving sun recipe from Chapter 9, Taking Our Game to the Next Level, we create Directional Light to simulate a day and night cycle.