
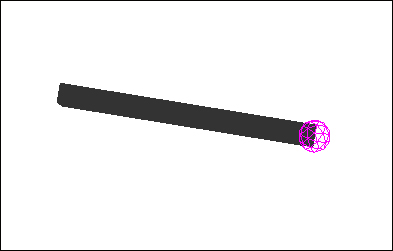
Applying physics to arrows can greatly improve the appearance and gameplay of a medieval or fantasy game. Setting up arrows that are affected by gravity is fairly simple; this recipe, however, will also set the arrows up in a way that they always face the direction they're traveling in, making them more realistic. The following figure shows one of the arrows in flight:
For this recipe, we need to make sure that we see the debug shapes of physics. To do this, we need to call the bulletAppState.setDebugEnabled(true); statement.
In this recipe, we'll create three classes. Let's begin by looking at the Arrow class, which contains most of the new functionalities. This will be done in the following eight steps:
- We create a new class called
Arrow, extendingNode. - Its constructor takes two
Vector3fvariables as parameters. One of these is for the starting location of the arrow and one for the initial velocity, as shown in the following line of code:public Arrow(Vector3f location, Vector3f velocity)
- Inside the constructor, we define a
Geometryinstance for the body of the arrow with aboxmesh as follows:Box arrowBody = new Box(0.3f, 4f, 0.3f); Geometry geometry = new Geometry("bullet", arrowBody); - Then, we set
localTranslationofGeometryso that one of its ends touches the center point of the node as follows:geometry.setLocalTranslation(0f, -4f, 0f);
- We set
localTranslationof thisArrowas the supplied location. - Next, we create
CollisionShape. This will represent the head of the arrow and can beSphereCollisionShape, as follows:SphereCollisionShape arrowHeadCollision = new SphereCollisionShape(0.5f);
- Now, we define
RigidBodyControlbased onCollisionShape, as follows:RigidBodyControl rigidBody = new RigidBodyControl(arrowHeadCollision, 1f);
- We set
LinearVelocityofRigidBodyControlto be the supplied velocity and add it as a Control to Arrow, as follows:rigidBody.setLinearVelocity(velocity); addControl(rigidBody);
This would be enough for the arrow to follow the laws of physics; however, it will always face the forward direction. By adding another control, we can make it face the direction of the velocity. To do this, perform the following steps:
- Create another class called
ArrowFacingControl, extendingAbstractControl. - We add a
Vector3ffield calleddirection. - In the
controlUpdatemethod, we getlinearVelocityfromRigidBodyControlof the spatial and normalize it. We then store it indirectionas follows:direction = spatial.getControl(RigidBodyControl.class).getLinearVelocity().normalize();
- Then, call the spatial and tell it to rotate to the supplied
directionvector as follows:spatial.rotateUpTo(direction);
- In the constructor of the
Arrowclass, we add an instance of this control, as follows:addControl(new ArrowFacingControl());
The last section handles the firing of the arrow from SimpleApplication. This can be done with the following steps:
- First of all, we need to implement
ActionListenerin the application. - Add the
ActionListenerclass toinputManageras a listener, together with a key for firing arrows, as follows:inputManager.addListener(this, "fire"); inputManager.addMapping("fire", new KeyTrigger(KeyInput.KEY_SPACE)); - In the
onActionmethod, call a new method calledfireArrowwhen thefirebutton is released. This can be implemented as follows:if (action.equals("fire") && !isPressed) fireArrow(); - The
fireArrowmethod should begin by instancing a newArrowinstance and applying a (preloaded) material to it, as follows:Arrow arrow = new Arrow(new Vector3f(0f, 6f, -10f), new Vector3f(0.5f, 0.5f, 0.0f).mult(50)); arrow.setMaterial(matBullet);
- We attach it to
rootNodeas well as tophysicsSpace, as shown in the following code snippet:rootNode.attachChild(arrow); getPhysicsSpace().add(arrow);
The Arrow object has two major components. One is Geometry, which is a simple elongated box. The other is CollisionShape for the head of the arrow, which is the only thing that will look for collisions. The geometry is conveniently moved so that its tip will be at the (0,0,0) position of the Arrow node. It is convenient since it means we don't have to do any conversions in ArrowFacingControl but can use rotateUpTo with the actual velocity (direction) of the arrow.