Imagine that you are making a video. You've got your cell phone out, and you point it at the area that you want to shoot and press record. You're taking a video of the Grand Canyon, so you have to pan the camera around to get the whole scene in. Suddenly, a bird flies past the field of view, and you've captured the whole scene.
The preceding scenario is pretty much how games work as well. The game has a virtual camera that can be positioned and even moved around. Similarly to the video camera on your cell phone, the game camera can only see a part of the game world, so sometimes you have to move it around. Any game objects that move in front of the camera will be seen by the player.
This chapter will explain how things are rendered in the game. Rendering is the process of actually displaying images on the screen. In order to get your get your game onto the screen, you will need to have a solid understating of the following terms:
- Coordinate systems: The coordinate system is the reference that allows you to position objects in the game
- Primitives: Primitives are the fundamental building blocks of the images that you see on screen, and OpenGL was designed to work with them
- Textures: Textures are image files that are used to give the objects in your game a realistic appearance
By the time you have read this chapter, you will understand how to use images to build your game world and display it on the screen.
Okay, so you're not really plotting your revenge. But you are plotting everything in your game as if you were putting it all down on a piece of graph paper. Remember high-school geometry? You got out your graph paper, drew a couple of lines for the X and Y axis, and the plotted points on the graph. OpenGL works in pretty much the same way.
The OpenGL coordinate system is a standard X and Y axis system that you have most likely learned all your life. You can conceptualize (0, 0) as being the center of the screen.
Let's say that we want to display a moving car on the screen. We could start by plotting our car at position (5, 5) in the coordinate plane. If we then moved the car from (5, 5) to (6, 5), then (7, 5), and so forth, the car would move to the right (and eventually leave the screen), as illustrated in the following figure:
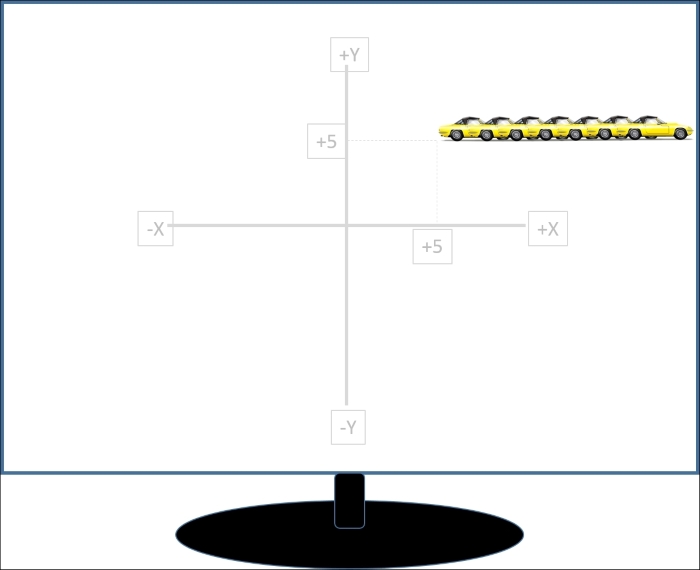
We haven't been completely honest with you. Since OpenGL is a 3D rendering engine, there is actually one more axis called the Z-axis that we haven't discussed. As this part of the book focuses on 2D game programming, we will ignore the Z axis for now.
As we learn each concept, we will actually write code to demonstrate each point. Speaking of points, we will write code to plot points using OpenGL.
We are going to set this project up as a separate project from the actual game. We will use this project to demonstrate how to code basic OpenGL tasks. To keep this thing as simple as possible, this project will be created as a console project in Visual Studio. A console project doesn't have many of the features of a full-blown Windows project and therefore, the setup code is much smaller.
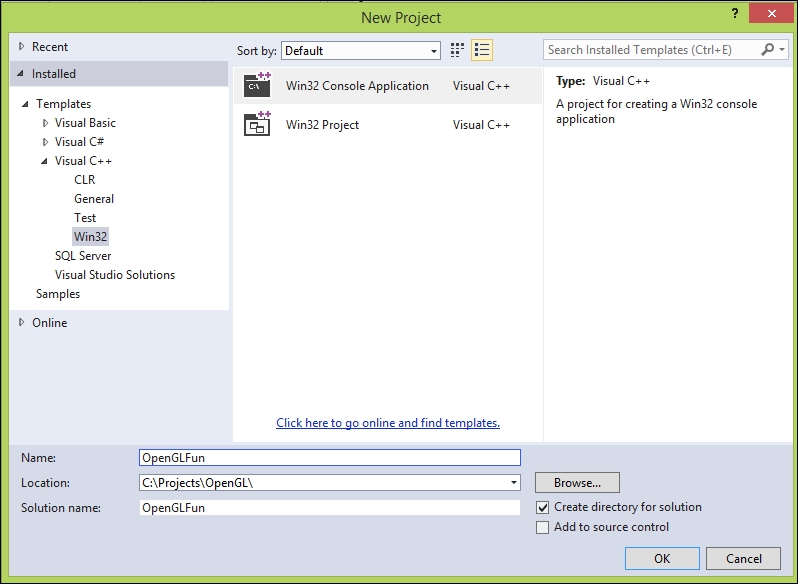
Start Visual Studio and create a new project. For the project template, choose Win32 Console Application from the Visual C++ group of templates. Name the project OpenGLFun, and click OK. Click Finish to complete the project wizard.
Once you have the project created, type following the code into the code window:
#include "stdafx.h"
#include <windows.h>
#include "glut.h"

void initGL() {
  glClearColor(0.0f, 0.0f, 0.0f, 1.0f);
}

void drawPoints()
{
  glBegin(GL_POINTS);

  glColor3f(1.0f, 1.0f, 1.0f);
  glVertex2f(0.1f, -0.6f);
  glVertex2f(0.7f, -0.6f);
  glVertex2f(0.4f, -0.1f);

  glEnd();
}

void update()
{
  glClear(GL_COLOR_BUFFER_BIT);
  drawPoints();
  glFlush();
}

int _tmain(int argc, _TCHAR* argv[])
{
  glutCreateWindow("GL Fun");
  glutInitWindowSize(320, 320);
  glutInitWindowPosition(50, 50);
  glutDisplayFunc(update);
  initGL();
  glutMainLoop();
  return 0;
}As we will be using the code to demonstrate the fundamentals of OpenGL, we will look at it in detail so that you understand what the code is doing.
This code uses three header files:
stdafx.h: This header file loads the precompiled header that was created by Visual Studio when we created the projectwindows.h: This header file allows the window that renders the OpenGL content to be createdglut.h: This header file allows us to use the OpenGL Utility Toolkit, which simplifies the setup and use of OpenGL
Tip
You will need to download the GLUT files and place them in your project folder. Download the files from http://www.javaforge.com/doc/105278. Open the zipped file and copy glut.h, glut32.dll, and glut32.lib into the folder that contains your source code. You may have to add glut.h to your project (right-click on Header files | Add | Existing item).
You will notice a function called initGL. This function currently contains a single line of code whose sole purpose is to set the background color of the screen at the start of each frame. This is often referred to as the clear color because it is the default that OpenGL clears the background to before it begins to render additional items:
glClearColor(0.0f, 0.0f, 0.0f, 1.0f);
The four numbers inside the parenthesis define the color, and the opacity of the color. The first three numbers represent the amount of red, green, and blue (RGB) that will be used to create the color. The fourth number represents the opacity (or seen another way, the transparency) of the color. This is also referred to as the alpha channel (RGBA). The values above create a black background that is 100 percent opaque.
All values in OpenGL have a range from 0 to 1. This means that there will be many decimal values, known in C++ as floats. Thus, the range in C++ lingo is from 0.0f to 1.0f.
C++ is different from many languages, which use integers or even hexadecimal numbers to express their ranges. For example, many other languages use a range of 0 to 255 for each color component. In these cases, integer 0 corresponds to 0.0f, and integer 255 corresponds to 1.0f.
Every program has to have a starting point, known as the entry point. In our program, this is the _tmain function. We put this at the very end because C++ expects the functions that are being used to have been defined before the function that calls them. There are various tricks around this, but we'll keep our examples simple and just always define _tmain as the last function in the code.
When we start the program, there are a few things that have to be done to set up the environment to render OpenGL. Here is the anatomy of the _tmain function:
glutCreateWindow("GL Fun"): This function creates the window that will render the OpenGL content. We include the name of the program as a parameter.glutInitWindowSize(320, 320): This function initializes the size of the window. We have specified 320 pixels by 320 pixels. Feel free to try larger (or smaller) window sizes.glutInitWindowPosition(50, 50): This function sets the position of the window's upper-left corner in relation to the device's screen. In this case, the window will start drawing 50 pixels from the left and 50 pixels from the top of the screen. Feel free to try other positions.glutDisplayFunc(update): Remember the previous chapter where we talked about the game loop? The game loop is the part of the program that runs over and over again (that is, every frame). We need to tell GLUT the name of the function that we want to run every frame. In this case, we are telling GLUT to use a function namedupdate(described in the next section).initGL(): This simply calls theinitGLfunction that we described earlier.glutMainLoop(): This function starts the main game loop, which in turn will call ourupdatefunction every frame. This essentially starts our program, which will run in an infinite loop until we close the program.return 0: This line is required by the_tmainfunction. It basically tells our system that the program has exited and everything is okay. This line of code won't run until we exit the program.
The update function is called every frame. Any work that we want to do will have to be coded in this function. The update function currently has three lines of code:
glClear(GL_COLOR_BUFFER_BIT): TheglClearfunction resets the render buffer to the color that was specified earlier by theglClearColorfunction. The render buffer is a separate location in the memory where OpenGL renders objects before they are displayed on the screen. Later, when all of the render operations are completed, the contents of the buffer are displayed on the screen in one fast transfer.drawPoints(): This is a function that we wrote to display three points on the screen. Later, we will replace this line of code to draw other objects. This function is described in the next section.glFlush(): This function flushes the OpenGL buffer, including the back buffer that currently holds our render. As a result, the rendering buffer is flushed, and all of the contents are rendered to the device screen.Tip
OpenGL uses two buffers to draw. One is the screen buffer, which is what the player currently sees on the computer display. The other is the back buffer, which is where we create the objects that we intend to render in the next frame. Once we are done creating the render in the back buffer, we quickly swap the contents of the back buffer onto the current screen. This occurs so quickly that the player cannot detect the swap.
The drawPoints function does the actual work of determining what to draw, and where to draw it. Here is what each line of code does:
glBegin(GL_POINTS): The call toglBegintells OpenGL to prepare to render items to the screen. We also tell OpenGL what we want to render. In our example, we are directing OpenGL to interpret the data that we send it as individual points. Later, we will learn to render other objects, such as triangles usingGL_TRIANGLES, or rectangles usingGL_QUADS.glColor3f(1.0f, 1.0f, 1.0f): As the name suggests,glColorsets the color of the item that is going to be rendered. Remember, OpenGL uses the RGB color system, so the color will be white (0, 0, 0 specified black).glVertex2f(0.1f, -0.6f): Each point in OpenGL is known as a vertex. This code tells OpenGL to render a single point at the coordinates (0.1, -0.6). In this case, zero means the center of the screen, and one means one unit from the center. The settings for the camera determine exactly how far one unit from the center actually is on the screen. There are threeglVertexcalls in our example code, one for each of the points that we want to render to the screen.glEnd(): Just like all good things must come to an end, we have to tell OpenGL when we are done rendering. That is the purpose of the call toglEnd.Tip
You have probably noticed a lot of the use of the lower case letter f; this stands for float, meaning that a number that may contain a part after the decimal point (as opposed to an integer, which is always a whole number). So, a number, such as
0.0f, is telling C++ to treat the number zero as a floating point number. OpenGL uses a similar naming convention for its functions. For example, the functionglVertex2findicates that the function requires two floating point numbers (in this case, the x and y coordinates of the point to render).
Now that you have entered your code, it's time to see it in action. When you run the program (Debug | Start Debugging), here is what you will see:
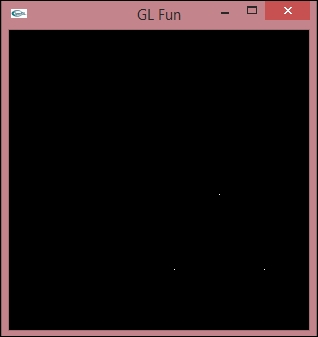
You'll have to look at it closely, but if all went well, you should see three white points in the lower-right area of the screen. Congratulations! You have rendered your first OpenGL objects!
Hopefully, you have been able to follow the code. Think of _tmain as a manager that controls the program by setting everything up and then calling the main loop (just like we will do in our game). Then GLUT takes over and calls the update function every frame. The update function initializes the render buffer, draws objects to the render buffer, and then transfers the contents of the render buffer to the screen. In a game running at 60 frames per second, this entire operation will happen 60 times a second!
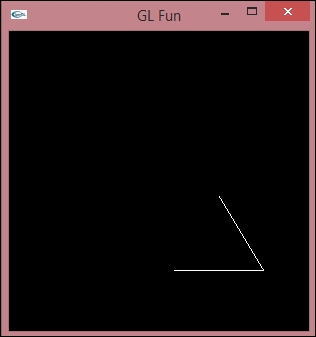
Let's see how easy it will be to modify GLFun to draw other objects. This time we will draw two lines. Add the following function to your code just under the drawPoints function:
void drawLines()
{
  glBegin(GL_LINES);

  glColor3f(1.0f, 1.0f, 1.0f);
  glVertex2f(0.1f, -0.6f);
  glVertex2f(0.7f, -0.6f);

  glVertex2f(0.7f, -0.6f);
  glVertex2f(0.4f, -0.1f);

  glEnd();
}
Next, go to the update function and replace drawPoints with a call to drawLines. The new update function will look like this:
void update()
{
  glClear(GL_COLOR_BUFFER_BIT);
  drawLines();
  glFlush();
}
You will notice that there are four glVertex calls. Each pair of vertices sets the beginning and ending points of a line. As there are four points defined, the result is that two lines are drawn.
Basic objects, such as points and lines, are called primitives. It would be pretty difficult to create everything out of points and lines, so OpenGL defines other primitive shapes that you can use to create more complicated objects.
In this section, we will dig a little under the hood and find out how OpenGL actually creates more realistic images on your screen. It may surprise you that a single, geometric figure is used to create everything from the simplest to the most complex graphics. So, roll up your sleeves and get ready to get a little greasy.
Have you ever seen a geodesic dome? Although the dome appears to be spherical, it is actually built out of a combination of triangles. It turns out that triangles are very easy to put together in such a way that you can add a slight amount of curvature to the object. Each triangle can be attached at a slight angle to the others, allowing you to create a dome made out of flat triangles. Also, consider this: the smaller the triangle, the more convincing the end result!
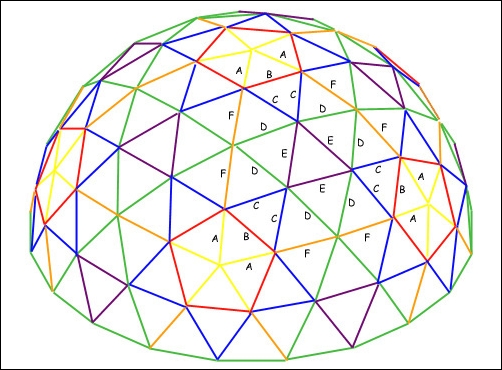
The basic unit that is used to draw all modern graphics is the humble triangle. Graphic cards have been specifically engineered to be able to draw triangles—really small triangles—really fast. A typical graphics card can draw millions of triangles every second. Higher end cards reach billions of triangles per second.
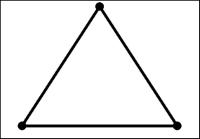
Remember when we drew points and lines earlier? Each point had one vertex, and each line had two vertices. Of course, each triangle has three vertices.
It's time to take a look at some code in action. Add the following code after the drawLines function in the GLFun project:
void drawSolidTriangle()
{
  glBegin(GL_TRIANGLES);

  glColor3f(0.0f, 0.0f, 1.0f);
  glVertex2f(0.1f, -0.6f);
  glVertex2f(0.7f, -0.6f);
  glVertex2f(0.4f, -0.1f);

  glEnd();
}
Then change the middle line of the update function to call drawSolidTriangle:
void update()
{
  glClear(GL_COLOR_BUFFER_BIT);
  drawSolidTriangle();
  glFlush();
}
Run the program, and you will see the following output:
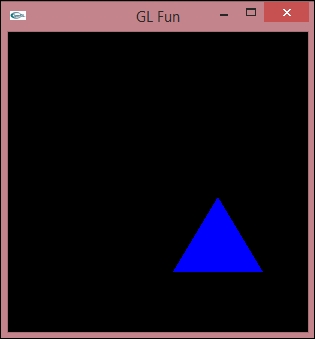
You may notice a similarity between the code for drawSolidTriangle and drawPoints. Look closely at the code, and you will see that the three glVertex functions define the same three points. However, in this case we told OpenGL to draw triangles, not points. You should also take a look at the code and make sure you understand why the triangle is rendered blue.
Let's take one more example. Add the following code below the drawSolidTriangle function:
void drawGradientTriangle()
{
  glBegin(GL_TRIANGLES);

  glColor3f(1.0f, 0.0f, 0.0f);
  glVertex2f(0.3f, -0.4f);

  glColor3f(0.0f, 1.0f, 0.0f);
  glVertex2f(0.9f, -0.4f);

  glColor3f(0.0f, 0.0f, 1.0f);
  glVertex2f(0.6f, -0.9f);

  glEnd();
}
Be sure to change the middle line in update to call drawGradientTriangle:
void update()
{
  glClear(GL_COLOR_BUFFER_BIT);
  drawGradientTriangle();
  glFlush();
}
Run the program, and this is what you will see:
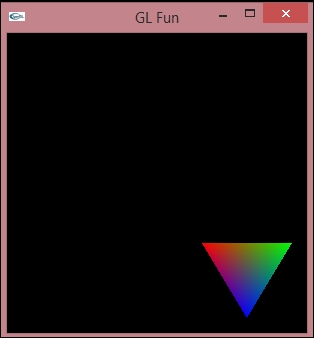
You will immediately notice that this triangle is filled with a gradient instead of a solid color. If you look closely at the code, you will see that a different color is being set for each vertex. OpenGL then takes care of interpolating the colors between each vertex.
Triangles can be put together in an infinite number of ways to form almost any shape imaginable. It is important to understand that triangles are just geometry. Triangles are used to build the shape of your object. We call these shapes models.
Building a model using a single triangle at a time would be very time consuming, so 3D graphics programs, such as Maya and Blender, allow you to create models out more complex shapes (which are themselves built out of triangles). These models can then be loaded into your game and rendered by OpenGL. OpenGL literally sends a the list of points to form these triangles directly to the video card, which then creates and image out of them on the screen. We will see this process in action when we begin to deal with 3D game design.