Images in games are called textures. Textures allow us to use real world images to paint our world. Think about what it would take to create a dirt road. You could either color the triangles in exactly the right way to make the overall scene look like dirt, or you could apply an actual image (that is, a texture) of dirt to the triangles. Which of these do you think would look more realistic?
Let's say that you are going to paint your bedroom. You can either use paint to color the walls, or you could buy some wallpaper and put that on your walls. Using images to add color to our triangles is pretty much like using wallpaper to color our bedroom walls. The image is applied to the triangle, giving it a more complex appearance than what could be created by color alone:
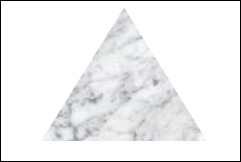
When we want to get really tricky, we use textures to fill the inside of our triangles instead of colors. A marble texture has been applied to the triangle in the preceding image. You could imagine using this technique to create a marble floor.
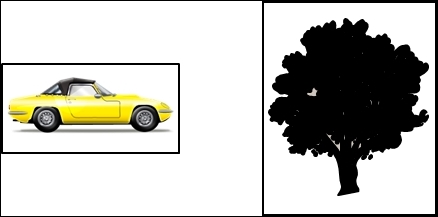
Remember the car we were working with before? It didn't look much like a triangle, did it? In fact, many real-world objects look more like rectangles than triangles:
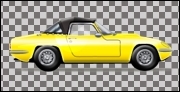
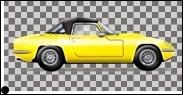
It turns out that that all the textures that we use in games are actually rectangles. Imagine that the car that we have been dealing with is actually embedded inside an invisible rectangle, depicted in the following image as light gray:

Most graphic programs use a checkerboard background to indicate the areas of the image that are transparent.
Using rectangles for all of our shapes solves one big problem that you might not have thought of earlier. If you recall, it was very important to position the car at exactly (5, 5). To do so, we decided to place the bottom-left corner of the car at point (5, 5).
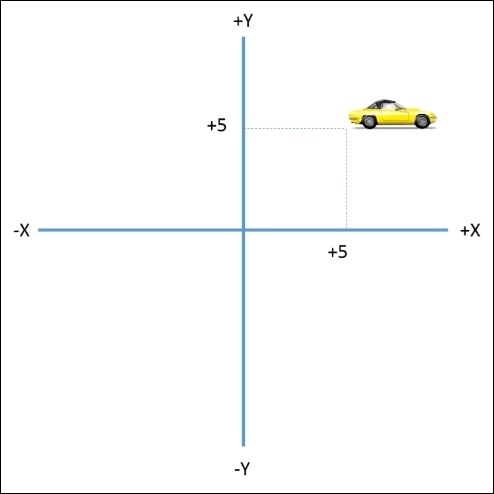
Looking at the car, it is actually a little difficult to figure out exactly where the bottom-left corner would be. Is it the lower left corner of the bumper, the tire, or somewhere else?

By embedding the car inside of a rectangle, as we just discussed, the problem is immediately solved.
When working with a texture, it is very important to know what point is being used as a reference, usually known as the pivot point. In the following images, a black dot is used to represent the pivot point. The pivot point affects two critical issues. First, the pivot point determines exactly where the image will be placed on the screen. Second, the pivot point is the point on which the image will pivot when rotated.
Compare the two scenarios depicted in the following images:
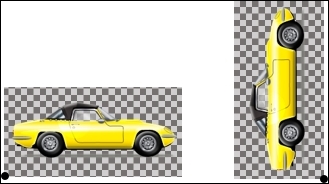
The pivot point for the car in the preceding image has been set to the bottom-left corner of the image. The car has been rotated 90 degrees counter-clockwise.
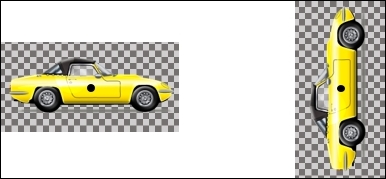
The pivot point for the car in the preceding image has been set to the center of the image. The car has been rotated 90 degrees counter-clockwise. Notice how the pivot point affects not only how the car is rotated but also its final position in relation to its original position after the rotation is completed.
So, are you confused yet? First, I tell you that the most basic shape used to create images is a triangle, and then I tell you that all textures are actually rectangles. Which one is it?
Just then, your high-school geometry teacher silently walks into the room, goes up to the chalkboard that just magically appeared on your wall, and draws something like the following diagram:
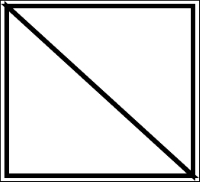
Of course! You suddenly realize that two triangles can be fit together to form a rectangle. In fact, this arrangement is so useful that we have given it a name: quad.
When it comes to 2D graphics, the quad is the king.
It's time to take a look at some code. Add the following code beneath the drawGradientTriangle function in GLFun:
void drawQuad()
{
glBegin(GL_QUADS);
glColor3f(0.0f, 1.0f, 0.0f);
glVertex2f(0.1f, -0.1f);
glVertex2f(0.1f, -0.6f);
glVertex2f(0.6f, -0.6f);
glVertex2f(0.6f, -0.1f);
glEnd();
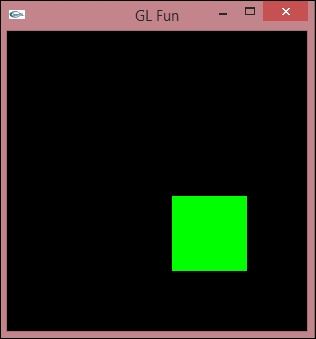
}As usual, change the middle line in update to call drawQuad. Run the program, and you will get a pretty green square, er quad! It's important to note that the points are defined in order starting from the upper-left corner and then moving counter-clockwise in order.
Tip
The order that the points are defined in is known as winding. By default, a counter-clockwise winding tells OpenGL that the side facing out is the side that is considered the front. This helps determine, among other things, whether this face should be lit, and it becomes even more significant when we begin working in 3D. As it turns out, GLUT simplifies our life so that it doesn't matter if we use clockwise or counter-clockwise winding when using GLUT.
Rendering a texture consist of two steps: loading the image and rendering the image using an OpenGL primitive. Our final achievement in this chapter will be to modify GLFun so that it will render a texture using a quad.
Our first step is to create a function to load a texture. As it turns out, this isn't all that easy. So, I'm going to give you the code for a function that loads a 24-bit BMP file, and we'll treat it like a black box that you can use in your own code.
Add this code to the top of your existing GLFun code:
  GLuint texture;
  #pragma warning(disable: 4996)
  bool loadTexture(const char* filename)
  {
    unsigned char header[54];
    unsigned char* data;
    int dataPos;
    int width;
    int height;
    int imageSize;

    FILE * file = fopen(filename, "rb");
    if (!file) return false;
    if (fread(header, 1, 54, file) != 54) return false;
    if (header[0] != 'B' || header[1] != 'M') return false;

    dataPos = *(int*)&(header[0x0A]);
    imageSize = *(int*)&(header[0x22]);
    width = *(int*)&(header[0x12]);
    height = *(int*)&(header[0x16]);

    if (imageSize == 0) imageSize = width*height * 3;
    if (dataPos == 0) dataPos = 54;

    data = new unsigned char[imageSize];
    fread(data, 1, imageSize, file);
    fclose(file);

    glGenTextures(1, &texture);
    glBindTexture(GL_TEXTURE_2D, texture);
    glTexImage2D(GL_TEXTURE_2D, 0, GL_RGB, width, height, 0, GL_RGB, GL_UNSIGNED_BYTE, data);
    glTexParameteri(GL_TEXTURE_2D, GL_TEXTURE_MAG_FILTER, GL_NEAREST);
    glTexParameteri(GL_TEXTURE_2D, GL_TEXTURE_MIN_FILTER, GL_NEAREST);
    return true;
  }
Add these lines of code to initGL:
glEnable(GL_TEXTURE_2D);
glTexEnvf(GL_TEXTURE_ENV, GL_TEXTURE_ENV_MODE, GL_MODULATE);
We are not going to dissect this piece of code line by line. In brief, it opens the image file, extracts the first 54 bytes of the file (the bmp header data), and stores the rest of the file as image data. A few OpenGL calls are made to assign this data to an OpenGL texture and that's it.
You need to have a call that loads the texture in, so add this line of code to _tmain just after the call to initGL:
loadTexture("car.bmp"); Of course, replace car.bmp with the file that you want to load in. Ensure that you have placed the appropriate graphic files in the source code folder.
In order to display a texture on the screen, OpenGL maps the texture onto another primitive. This process is known as texture wrapping. As textures are rectangular, it makes sense to map the texture onto a quad.
The following image shows a texture the way that OpenGL sees it: a rectangle with four texture coordinates:
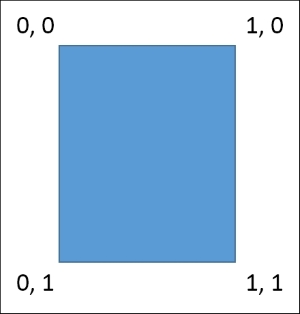
The upper-left is texture coordinate 0, 0. The lower-right is texture coordinate 1, 1. You should be able to identify the texture coordinates of the other corners.
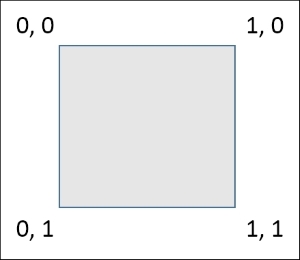
In order to render a texture, we overlay it (or wrap it) onto a quad. So, let's say we have the following quad defined:
We could map the texture coordinates to the quad coordinates:
|
Texture Coordinate |
Maps to |
Quad Coordinate |
|---|---|---|
|
0, 0 |
0, 0 | |
|
1, 0 |
1, 0 | |
|
1, 0 |
1, 0 | |
|
0, 1 |
0, 1 |
The following figure shows this graphically:
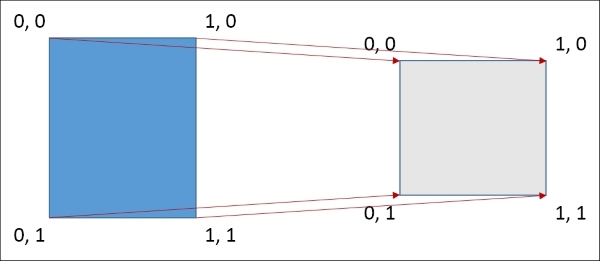
In its simplest form, texture wrapping is the process of mapping the corners of a texture to the corners of a quad.
Tip
You will see texture wrapping also referred to as uv wrapping. I always tried to figure out what uv meant! Here's the real story: x and y were already used to refer to the quad coordinates, and we had to have something else to call the texture coordinates, so some bright person said, "Let's use u and v!"
Now, we will write the code to render a textured quad. Add the following function to the code:
void drawTexture()
{
  glBindTexture(GL_TEXTURE_2D, texture);
  glBegin(GL_QUADS);
  glTexCoord2d(0.0, 0.0); glVertex2d(0.0, 0.0);
  glTexCoord2d(1.0, 0.0); glVertex2d(0.5, 0.0);
  glTexCoord2d(1.0, 1.0); glVertex2d(0.5, 0.5);
  glTexCoord2d(0.0, 1.0); glVertex2d(0.0, 0.5);
  glEnd();
}
Here is what this code does:
glBindTexture(GL_TEXTURE_2D, texture): Even if we have thousands of textures in a game, OpenGL can only work with one texture a time. The call toglBindTexturetells OpenGL which texture we are working with right now. Each time a texture is created, OpenGL assigns a number to that texture, called the texture handle.When we loaded our bitmap, we used the
glGenTextures(1, &texture)command, which instructed OpenGL to generate one texture and save the handle into the variable called texture. We then pass this value into theglBindTexturefunction, along with a flag that tells OpenGL that we are working with a 2D texture.glTexCoord2d(0.0, 0.0); glVertex2d(0.0, 0.0): We put these two lines together because they work together. You should recognize the call toglVertex2d. This function tells OpenGL how to wrap the texture onto the quad (you should also recognize that we are drawing a quad because we set that up in the previous line of code).- Each call to
glTexCoord2ddefines a texture coordinate. The very next line of code maps the texture coordinate to a quad coordinate. The order is essential: first define a texture coordinate, then define the corresponding quad coordinate.
By the way, don't forget to replace the middle line of code in update with the following line of code:
drawTexture();
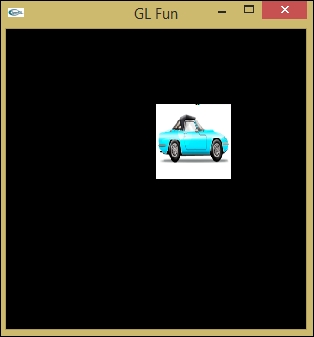
Now, run the program!