
You've already come a long way since beginning the book at the first chapter! You have managed to render moving images to the screen and control their movement. You are well on your way toward creating a great game. The next step is to code the interactions between various objects in the game.
This chapter will explain how to implement collision detection. Collision detection determines how objects interact with each other when they are in the same location. Topics will include:
- Boundary detection: When an object reaches the top, bottom, left, or right edge of the screen, what should happen? There are a surprising number of choices and you get to choose what to do.
- Collision detection: There are various scenarios that we often need to check to determine whether two objects have hit each other. We will cover circular and rectangular collision detection algorithms. We will also discuss when each type of collision detection is appropriate to use.
If you run our current game, you will notice that the robot will go off the screen if you allow him to continue moving to the left or right. When he reaches the edge of the screen, he will keep on moving until he is no longer visible. If you reverse his direction and make him move the same number of steps now, he will reappear on the screen.
Whenever an object reaches the edge of the screen, we often want it to do something special, such as stopping, or turning around. The code that determines when an object has reached a screen edge is known as boundary checking. There are many possibilities for what we can do when an object reaches a boundary:
- Stop the object
- Allow the object to continue past the border (and therefore, disappear)
- Allow the object to continue past the border and reappear at the opposite border (ever played the arcade version of Asteroids?)
- Scroll the camera and the screen along with the object (aka Mario)
- Allow the object to rebound off the border (ever played Breakout?)
As our Robo is controlled by the player, we will simply force him to stop moving when he has reached the edge of the screen.
In order to implement boundary checking, you must first know the exact anchor point of the image. Technically, the anchor point could be anywhere, but the two most common locations are the top-left corner and the center of the image.
First, let's see what happens if we just ignore the anchor point. Open the RoboRacer2D project and then open RoboRacer2D.cpp.
Insert the following function:
void CheckBoundaries(Sprite* p_sprite)
{
  if (p_sprite->GetPosition().x < 0)
  {
    p_sprite->SetVelocity(0.0f);
  }
  else if (p_sprite->GetPosition().x > screen_width)
  {
    p_sprite->SetVelocity(0.0f);
  }
}
Here is what this code is doing for us:
- The function accepts a sprite as its parameter
- The function first checks to see whether the
xposition of the sprite is less than0, where0is thexcoordinate of the far-left edge of the screen - The function then checks to see whether the
xposition of the sprite is greater than the screen width, wherescreen_widthis thexcoordinate of the far-right edge of the screen - If either check is
true, the sprite's velocity is set to0, effectively stopping the sprite in its tracks
Now, add the highlighted line of code to the Update function right after ProcessInput in RoboRacer2D.cpp:
inputManager->Update(p_deltaTime);
ProcessInput();
CheckBoundaries(player);
This simply calls the CheckBoundaries function that we just created and passes in the player object.
Now, run the program. Move Robo until he reaches the far left of the screen. Then run him to the far right of the screen. Does anything seem wrong about the way we have implemented our boundary checking?
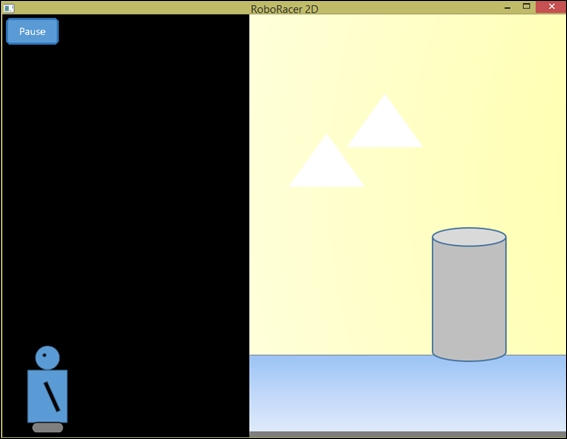
Problem 1: Robo doesn't seem to hit the boundary on the left.
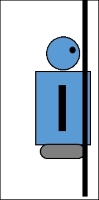
The following screenshot shows you what happens if you allow Robo to go to the far left of the screen. He appears to stop just before reaching the edge. Although you can't see it in the following screenshot, there is a shadow that always extends to the left edge of the robot. It is the left edge of the shadow that is being detected as the edge of the image.
It turns out that the default anchor point for images loaded by our image loading routine is, in fact, the upper-left corner.
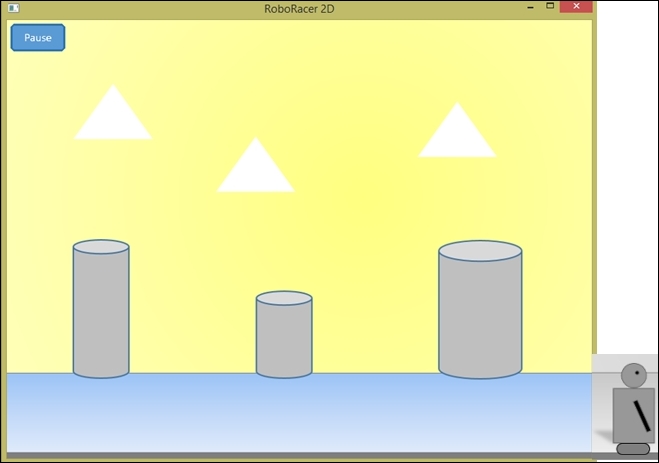
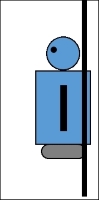
Problem 2: Robo moves completely off the screen to the right.
The following screenshot shows you what occurs if you allow Robo to continue traveling to the right. Now that you understand that the anchor point is at the upper-left, you may already understand what is happening.
As the boundary checking is based on the x coordinate of the sprite, by the time the upper-left hand corner exceeds the screen width, the entire sprite has already moved off the screen. The grayscale image of the robot shows us where his actual position would be if we could see him:
Problem 3: Once Robo reaches the far left or far right of the screen, he gets stuck. Changing his direction seems to have no effect!
This problem is known as embedding. Here is what has happened:
- We continued check Robo's position until his x coordinate exceeded a threshold.
- Once he exceeded that threshold, we set his velocity to
0. - Now that Robo's x coordinate exceeds that threshold, it will always exceed that threshold. Any attempt to move him in the opposite direction will trigger the boundary check, which will discover that Robo's x coordinate still exceeds the threshold and his velocity will be set to
0.
The solution is to set Robo's position to the other side of threshold as soon as we discover he has crossed it. We will add this correction, but first we have to understand collision rectangles.
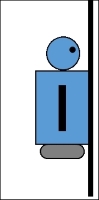
Take a look at the following image of Robo. The solid rectangle represents the boundaries of the texture. The dotted rectangle represents the area that we actually want to consider for boundary and collision detection. This is known as the collision rectangle.
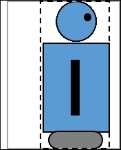
Comparing the two rectangles, here is what we would have to do to convert the texture rectangle to be the collision rectangle:
- Add about 34 pixels to the left texture boundary
- Subtract about 10 pixels from the right texture boundary
- Both the top and right boundaries require no adjustment
Let's enhance the sprite class by adding functionality to define a collision rectangle.
Open Sprite.h and add the following member variable:
Rect m_collision;
Then add the two accessor methods:
const Rect GetCollisionRect() const;
void SetCollisionRectOffset(const Rect p_rect) { m_collision = p_rect; }
The implementation for GetCollisionRect is a little more complex, so we will put that code into Sprite.cpp:
const Sprite::Rect Sprite::GetCollisionRect() const
{
  Rect rect;
  rect.left = m_position.x + m_collision.left;
  rect.right = m_position.x + m_size.width + m_collision.right;
  rect.top = m_position.y + m_collision.top;
  rect.bottom = m_position.y + m_size.height + m_collision.bottom;

  return rect;
}
Here's what we are doing:
m_collision: This will hold four offset values. These values will represent a number that must be added to the texture's bounding rectangle to get to the collision rectangle that we desire.SetCollisionRectOffset: This accepts aRectparameter that contains the four offsets—top, bottom, left, and right—that must be added to the top, bottom, left, and right of the texture boundaries to create the collision rectangle.GetCollisionRect: This returns the collision rectangle that we can actually use when checking boundaries and checking for collisions. This is calculated by adding the width and height to the sprite's current anchor point (the top-left corner), and then adjusting it by the values inm_collision.
Note that GetCollisionRect is dynamic; it always returns the current collision rectangle based on the sprite's current position. Thus, we are returning the actual top, bottom, left, and right boundaries that need to be checked at any moment in the game.
If you look closely at the design, you should be able to see that if no collision rectangle is defined, GetCollisionRect will return a collision rectangle determined by the texture's rectangle. Therefore, this new design allows us to use the texture rectangle as the collision rectangle by default. On the other hand, if we want to specify our own collision rectangle, we can do so using SetCollisionRectOffset.
Just to be safe, we will want to initialize m_collision by adding the following lines to the constructor:
m_collision.left = 0.0f;
m_collision.right = 0.0f;
m_collision.top = 0.0f;
m_collision.bottom = 0.0f;
Now that we have the code to support a collision rectangle, we need to define the collision rectangle for the robot's sprites. Go to the LoadTextures function in RoboRacer2D.cpp and add the following highlighted lines just before the return true line of code:
Sprite::Rect collision;
collision.left = 34.0f;
collision.right = -10.0f;
collision.top = 0.0f;
collision.bottom = 0.0f;
robot_left->SetCollisionRectOffset(collision);
robot_right->SetCollisionRectOffset(collision);

return true;
Remember, only add the preceding code that is highlighted. The last line of the code is shown to provide context.
We are now going to rewrite our boundary detection function to take advantage of the collision rectangle. Along the way we will solve all three of the problems that we encountered in our first attempt. The current code uses the anchor point of the image, which doesn't accurately reflect the actual boundaries that we want to check. The new code will use the collision rect. Replace the CheckBoundaries function in RoboRacer2D with the following code:
void CheckBoundaries(Sprite* p_sprite)
{
  Sprite::Rect check = p_sprite->GetCollisionRect();

  if (check.left < 0.0f)
  {
    p_sprite->SetVelocity(0.0f);
  }
  else if (check.right > screen_width)
  {
    p_sprite->SetVelocity(0.0f);
  }
}
This code uses the collision rectangle defined for the sprite that is being checked. As we already discussed earlier, GetCollisionRect returns the top, bottom, left, and right boundaries for us based on the current position of the sprite. This greatly simplifies our code! Now, we just check to see whether the left edge of the sprite is less than zero or whether the right edge of the sprite is greater than zero, and we're done!
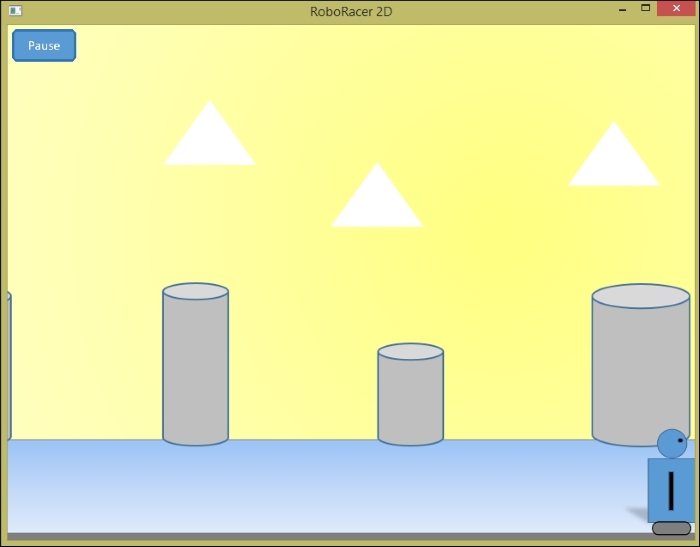
Hurrah! Robo now successfully stops at the edge of the screen (only the right-hand side is shown in the preceding image). But boo! He still gets stuck! As we mentioned earlier, this problem is called embedding. If we zoom in, we can see what's going on:
The vertical line represents the edge of the screen. By the time Robo has stopped, his right edge has already exceeded the right edge of the screen, so we stop him. Unfortunately, even if we try to turn him around to go in the other direction, the CheckBoundaries function will check on the very next frame, before Robo has a chance to start moving back:
According to the boundary check, the right edge of Robo is still beyond the right edge of the screen, so once again Robo's velocity is set to zero. Robo is stopped before he can even take a step!
Here is the solution; as soon as we detect that Robo has exceeded the boundary, we set his velocity to zero and we reposition Robo to just the other side of the boundary:
Now, Robo will be able to move as long as he goes in the other direction.
To implement this change, we are once again going to change the CheckBoundaries function:
void CheckBoundaries(Sprite* p_sprite)
{
  Sprite::Rect check = p_sprite->GetCollisionRect();
  float offset;
  float x;
  float y;

  if (check.left < 0.0f)
  {
    p_sprite->SetVelocity(0.0f);
    offset = check.left;
    x = p_sprite->GetPosition().x - offset;
    y = p_sprite->GetPosition().y;
    p_sprite->SetPosition(x, y);
  }
  else if (check.right > screen_width)
  {
    p_sprite->SetVelocity(0.0f);
    offset = screen_width - check.right;
    x = p_sprite->GetPosition().x + offset;
    y = p_sprite->GetPosition().y;
    p_sprite->SetPosition(x, y);
  }
  if (check.top < 0.0f)
  {
    p_sprite->SetVelocity(0.0f);
    offset = check.top;
    y = p_sprite->GetPosition().y - offset;
    x = p_sprite->GetPosition().x;
    p_sprite->SetPosition(x, y);
  }
  else if (check.bottom > screen_height)
  {
    p_sprite->SetVelocity(0.0f);
    offset = screen_height - check.bottom;
    y = p_sprite->GetPosition().y + offset;
    x = p_sprite->GetPosition().x;
    p_sprite->SetPosition(x, y);
  }
}
The highlighted lines show the added code. Basically, we perform the following actions:
- Calculate how far past the boundary Robo has gone
- Adjust his position by that much so that he is now positioned right at the boundary
You'll notice that we also filled out the function to handle the top and bottom boundaries so that the boundary checking can be used for any sprite travelling in any direction.
Now that we have Robo moving the way we want him to, two new problems have cropped up for the background image:
- When Robo stops, the background keeps scrolling.
- When the background image ends at either the right or the left, it slides off the screen and we are left with a black background.
Before we continue on with collision detection, let's fix the background. First, we will add the following function to RoboRacer2D.cpp:
void CheckBackground()
{
  float leftThreshold = 0.0f;
  float rightThreshold = -(background->GetSize().width - screen_width);
  if (background->GetPosition().x > 0)
  {
    background->SetPosition(0.0f, background->GetPosition().y);
  }
  else if (background->GetPosition().x < rightThreshold)
  {
    background->SetPosition(rightThreshold, background->GetPosition().y);
  }
}
This code is very similar to the boundary checking code. If the background anchor point moves far enough to the left to expose the right edge of the texture, it will be reset. If the background anchor point moves far enough to the right to expose the left edge of the texture, it will be reset.
Now, add the highlighted line of code to the Update function right after the call to CheckBoundaries in RoboRacer2D.cpp:
inputManager->Update(p_deltaTime);
ProcessInput();
CheckBoundaries(player);
CheckBackground();
The background should now run from edge to edge. Play the game and take a coffee break. You deserve it!