It's time for us to put our theory into practice and create our first 3D scene. To keep things simple, we will go through the steps of placing a cube in 3D space. This is also going to be the start of our 3D game, so let's start by creating a brand new project in Visual Studio.
When we created a project for our 2D game, we started with a standard Windows project and then removed (or ignored) the items that we didn't need to use. In fact, the standard Windows project has a lot of overhead that we don't need. This is because the Windows project template assumes that Windows is going to be in charge of rendering and processing. This came in useful for our 2D project, but just adds a lot of extra code that we don't need.
For this project, we will start with a blank Windows project and then add the necessary code to initialize and create an OpenGL window. Then, we will work our way up from there:
- Begin by opening Visual Studio.
- Once Visual Studio is open, create a new project by clicking on File, New, Project. From the Visual C++ branch choose Empty Project.
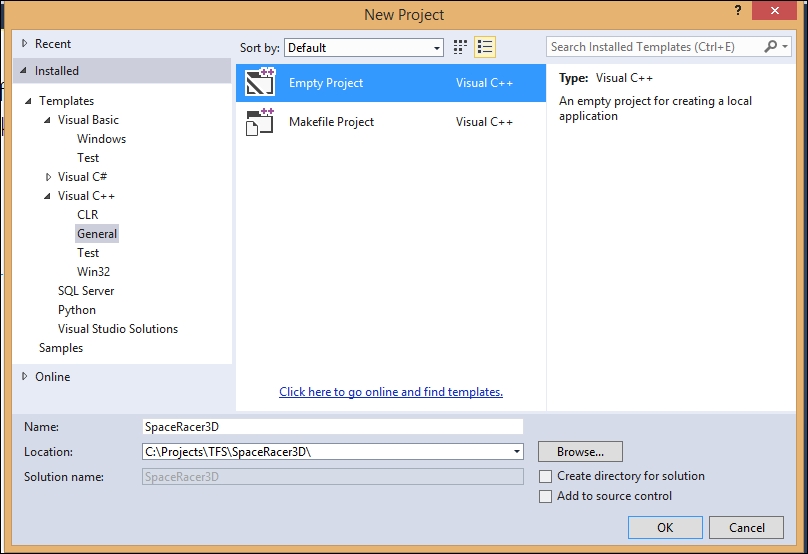
- Name the project
SpaceRacer3D, place it in the location of your choice, and click OK. The result is a project that has no code. Let's solve that problem by creating our main game file. - Right-click on the Source Files folder in the Solution Explorer panel.
- Choose Add, New Item….
- Click on C++ File (.cpp).
- Type
SpaceRacer3D.cppfor Name and click Add.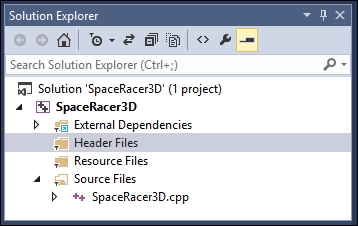
The standard OpenGL library is already installed when you install Visual Studio. However, the OpenGL utilities library may not be. To make things simple, we will simply copy the files that we need from our RoboRacer2D project.
Open the RoboRacer2D project folder and select the following files:
glut.hglut32.dllglut32.lib
Now copy these files into the SpaceRacer3D source folder. This will be the same folder that your SpaceRacer3D.cpp file is located.
Now that we have a project and the relevant OpenGL files, we need to link to the OpenGL libraries. This is done by accessing the project properties.
In the Solution Explorer panel perform the following actions:
- Right-click on the project name (not the solution), and choose Properties.
- Open the Linker branch under Configuration Properties, and select Input.
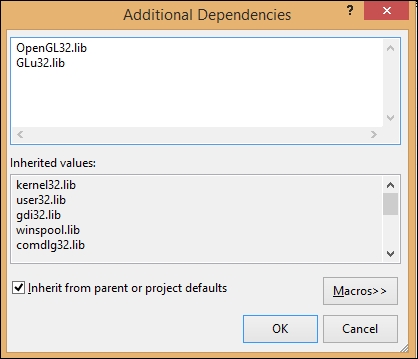
- Click on Additional Dependencies and then click the drop-down arrow that appears.
- Click on <Edit…>.
- Add
OpenGL32.libandGLu32.libin the Additional Dependencies dialog window.