The gameplay of the game is almost complete, and we will take a short break from the game now. This chapter deals with a slightly more advanced topic, the advanced physics. While it is not necessary to add any of the concepts we are going to learn in this chapter to our game, they certainly can make the game's look and feel much better.
In this chapter, we will learn how to assemble bodies from multiple fixtures that will allow us to create more precise simulation, especially when it comes to collisions. We will also learn about joints, which are used to create systems of linked bodies and collision filtering. This will either help us to reduce the number of collisions, filter the unwanted collisions, and is also used to reduce the performance requirements.
We will use the current code from Chapter 7, Detecting Collisions and Reacting to Events, but we will add a lot of new things simply to illustrate the physics concepts. Therefore, most of the code will not be used in the final game. As this chapter is considered for advanced users and because the code is not essential for the game, this chapter can be skipped.
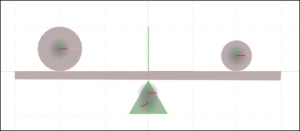
When working with simple physics, one can easily imagine how the bodies look and where the collisions happen. However, with added complexity, when a problem arises, it is almost impossible to find out where it lies without visual aid. This is where the Debug Draw extension comes in. Most of the Box2D ports will have a functionality to visualize the bodies using outlines and colors.
Such a visualization typically looks something like this:
AndEngine has a Debug Draw extension as well. It was created by Nazgee, an AndEngine user and game programmer. It is an unofficial extension, but it works very well. It can be downloaded and added to any AndEngine project using the same method described in the Downloading the sources and Adding AndEngine to Eclipse IDE sections of Chapter 1, Setting Up an AndEngine Project, for the Box2D Physics Extension.
Note
Here's the link to the original repository of the Debug Draw extension:
https://github.com/nazgee/AndEngineDebugDrawExtension
Here's an alternative link that is guaranteed to work with the source code of this book:
This is, again, an optional part of the tutorial and not necessary to finish the game. However, it is very useful for any physics-based games with complex physics.
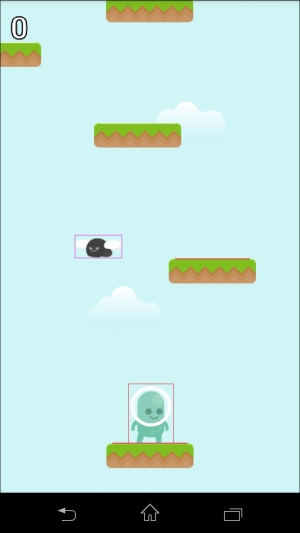
To use the Debug Draw extension, we only need to add the DebugRenderer object to our game. We can add it in the GameScene class in the populate() method:
    DebugRenderer dr = new DebugRenderer(physicsWorld, vbom);
    dr.setZIndex(999);
    attachChild(dr);
The DebugRenderer object needs the physicsWorld handle and vbom (Vertex Buffer Object Manager). When it is attached to the scene, it reads all bodies from the physics world and renders them as colored outlines. The dynamic bodies are green, kinematic bodies are white, and static bodies are cyan. If a body sleeps, it is rendered as red and if it is not active, it is rendered with a black outline. Sensors are rendered as pink outlines and all joints have white outlines, as we are going to see later.