
To ensure the quality of any app or library, having automated tests is important. For a long time, the Android development tools lacked support for automated tests, but recently, Google has put in a lot of effort to make it easier for developers to get started with tests. Some old frameworks have been updated, and new frameworks have been added to make sure we can thoroughly test apps and libraries. We can run them not only from Android Studio, but also directly from the command-line interface, using Gradle.
In this chapter, we will explore the different ways to test Android apps and libraries. We will also look at how Gradle can help to automate the testing process.
We will cover the following topics in this chapter:
- Unit tests
- Functional tests
- Test coverage
Having well-written unit tests in your project does not only assure quality, it also makes it easy to check if new code breaks any functionality. Android Studio and the Gradle Android plugin have native support for unit tests, but you need to configure a few things before you can use them.
JUnit is an extremely popular unit testing library that has been around for over a decade. It makes it easy to write tests while making sure that they are also easy to read. Keep in mind that these particular unit tests are only useful for testing business logic and not code that is related to the Android SDK.
Before you can start writing JUnit tests for your Android project, you need to create a directory for the tests. By convention, this directory is called test and it should be on the same level as your main directory. The directory structure should look like this:
app
└─── src
     ├─── main
     │    ├─── java
     │    │    └─── com.example.app
     │    └───res
     └─── test
          └─── java
               └─── com.example.app
You can then create test classes in src/test/java/com.example.app.
To make use of the latest features in JUnit, use JUnit version 4. You can ensure this by adding a dependency for the test build:
dependencies {
    testCompile 'junit:junit:4.12'
}
Notice that we are using testCompile instead of compile here. We use this configuration to make sure that the dependency is only built when running the tests, and not when packaging the app for distribution. Dependencies added with testCompile will never be included in the APK releases generated by the regular assemble tasks.
If you have any special conditions in one of your build types or product flavors, it is possible to add a test-only dependency to that specific build alone. For example, if you only want to add JUnit tests to your paid flavor, you can do that as follows:
dependencies {
    testPaidCompile 'junit:junit:4.12'
}
When everything is set up, it is time to start writing some tests. Here is a simple example of a class that tests a method adding two numbers:
import org.junit.Test;

import static org.junit.Assert.assertEquals;

public class LogicTest {
    @Test
    public void addingNegativeNumberShouldSubtract() {
        Logic logic = new Logic();

        assertEquals("6 + -2 must be 4", 4, logic.add(6, -2));
        assertEquals("2 + -5 must be -3", -3, logic.add(2, -5));
    }
}
To run all tests with Gradle, just execute gradlew test. If you only want to run the tests on a certain build variant, simply add the name of the variant. If you want to run the tests on only the debug variant, for example, execute gradlewtestDebug. If a test fails, Gradle prints the error message in the command-line interface. If all the tests run smoothly, Gradle shows the regular BUILD SUCCESSFUL message.
A single failed test causes the test task to fail, halting the entire process immediately. This means that not all of your tests are executed in case of a failure. If you want to make sure the entire test suite is executed for all build variants, use the continue flag:
$ gradlew test --continue
You can also write tests specifically for a certain build variant by storing the tests class in the corresponding directory. For example, if you want to test specific behavior in the paid version of your app, put the test class in src/testPaid/java/com.example.app.
If you do not want to run the entire test suite, but only the tests for a particular class, you can use the tests flag like this:
$ gradlew testDebug --tests="*.LogicTest"
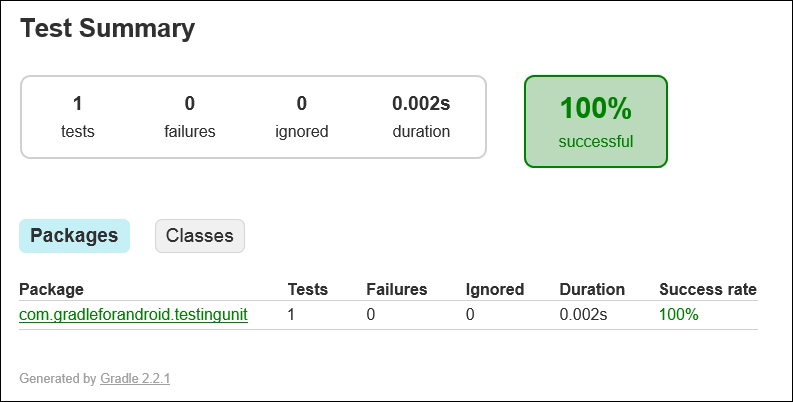
Executing the test task does not only run all the tests, but also creates a test report, which can be found at app/build/reports/tests/debug/index.html. This report makes it easy to find the issues if there are any failures, and is particularly useful in situations where tests are executed automatically. Gradle will create a report for every build variant that you run the tests on.
If all your tests run successfully, your unit test report will look like this:
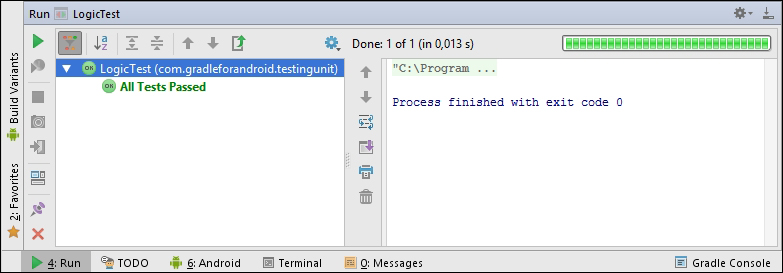
You can also run the tests within Android Studio. When you do that, you get immediate feedback in the IDE, and you can click on failed tests to navigate to the corresponding code. If all your tests pass, the Run tool window will look like this:
If you want to test parts of your code that contain references to Android-specific classes or resources, regular unit tests are not ideal. You may have already tried and run into the java.lang.RuntimeException: Stub! error. To fix this, you would need to implement every method in the Android SDK yourself, or use a mocking framework. Luckily, several libraries exist that have taken care of the Android SDK. The most popular of those libraries is Robolectric, which provides an easy way to test Android functionality, without the need for a device or emulator.
With Robolectric, you can write tests that make use of the Android SDK and resources, while still running tests inside the Java Virtual Machine. This means that you do not need a running device or emulator to make use of Android resources in your tests, thus making it a lot faster to test the behavior of UI components of an app or library.
To get started with Robolectric, you need to add a few test dependencies. Besides Robolectric itself, you also need to include JUnit, and, if you make use of the support library, you also need the Robolectric shadow classes to use it:
apply plugin: 'org.robolectric'
dependencies {
    compile fileTree(dir: 'libs', include: ['*.jar'])
    compile 'com.android.support:appcompat-v7:22.2.0'

    testCompile 'junit:junit:4.12'
    testCompile'org.robolectric:robolectric:3.0'
    testCompile'org.robolectric:shadows-support:3.0'
}
Robolectric tests classes should be created in the src/test/java/com.example.app directory, just like regular unit tests. The difference is that you can now write tests that involve Android classes and resources. For example, this test validates that the text of a certain TextView changes after clicking on a specific Button:
@RunWith(RobolectricTestRunner.class)
@Config(manifest = "app/src/main/AndroidManifest.xml", sdk = 18)
public class MainActivityTest {
    @Test
    public void clickingButtonShouldChangeText() {
        AppCompatActivity activity = Robolectric.buildActivity(MainActivity.class).create().get();
        Button button = (Button) activity.findViewById(R.id.button);
        TextView textView = (TextView) activity.findViewById(R.id.label);

        button.performClick();

        assertThat(textView.getText().toString(), equalTo(activity.getString(R.string.hello_robolectric)));
    }
}
Note
Robolectric has some known issues with Android Lollipop and the compatibility library. If you run into errors that mention missing resources related to the compatibility library, there is a fix for that.
You need to add a file to the module called project.properties, and add these lines to it:
android.library.reference.1=../../build/intermediates/exploded-aar/com.android.support/appcompat-v7/22.2.0
android.library.reference.2=../../build/intermediates/exploded-aar/com.android.support/support-v4/22.2.0
This will help Robolectric find the compatibility library resources.