
Adding a new module is as simple as going through a wizard in Android Studio. The wizard also sets up the basics of the build file. In some cases, adding a module will even cause Android Studio to edit the build file of your app module. For example, when adding an Android Wear module, the IDE assumes that you want to use it for your Android app, and add a line in the build file to reference the Android Wear module.
This is what the New Module dialog in Android Studio looks like:

In the following sections, we will show different modules that can be added to an Android project with Android Studio, explain their custom properties, and specify how they alter the build process.
When you add a new Java library module, the build.gradle file generated by Android Studio looks like this:
apply plugin: 'java'

dependencies {
    compile fileTree(dir: 'libs', include: ['*.jar'])
}
Java library modules use the Java plugin instead of the Android plugins we are used to seeing. This means that a lot of Android-specific properties and tasks are not available, but you do not need those for a Java library anyway.
The build file also has basic dependency management set up, so you can add JAR files to your libs folder without needing any special configuration. You can add more dependencies, using what you learned in Chapter 3, Managing Dependencies. The dependency configuration does not depend on the Android plugin.
To add a Java library module named javalib as a dependency to your app module, for example, simply add this line to the build configuration file for the app module:
dependencies {
    compile project(':javalib')
}
This tells Gradle to import a module named javalib in the build. If you add this dependency in your app module, the javalib module will always be built before the build for the app module itself is started.
We briefly mentioned Android libraries in Chapter 3, Managing Dependencies, where we called them library projects. Both names are used throughout the documentation and in various tutorials. In this section, we will use the name Androidlibrary because that is the name used in the New Module dialog in Android Studio.
The default build.gradle file for an Android library starts with this line:
apply plugin: 'com.android.library'
Adding a dependency on an Android library module is done in the exact same way as with Java libraries:
dependencies {
    compile project(':androidlib')
}
An Android library contains not only the Java code of the library, but also all Android resources, such as the manifest, strings, and layouts. After referencing an Android library in your app, you can use all of the library's classes and resources in the app.
If you are looking to add deep integration of your app to Android Wear, you will need to add an Android Wear module. It is interesting to note that Android Wear modules also use the Android application plugin. This means that all build properties and tasks are available.
The only part of the build.gradle file that is different from a regular Android app module is the dependency configuration:
dependencies {
    compile fileTree(dir: 'libs', include: ['*.jar'])
    compile 'com.google.android.support:wearable:1.1.0'
    compile 'com.google.android.gms:play-services-wearable:6.5.87'
}
Every Android Wear app depends on a few Android Wear–specific libraries provided by Google. In order to use an Android Wear app with your Android app, you need to package it with the app. You can do this by adding a dependency in the Android app:
dependencies {
    wearApp project(':wear')
}
The wearApp configuration makes sure that the APK of the Wear module is added to the final APK of the Android app and does the necessary configuration for you.
Google App Engine is a cloud computing platform that you can use to host web applications, without having to set up your own server. It is free to use up to a certain usage level, which makes it a good environment for experimentation. Google App Engine also provides a service called Cloud Endpoints, which is used to create RESTful services. Using Google App Engine with Cloud Endpoints makes it easy to build a backend for your apps. The App Engine Gradle plugin makes it even easier by generating a client library for your Android app, meaning you do not need to write any of the API-related code yourself. This makes Google App Engine an interesting option for an app backend, so in the following section we will look at how the App Engine Gradle plugin works, and how we can make use of Cloud Endpoints.
To create a new Google App Engine module with Cloud Endpoints, open the New Module dialog from File | New Module… and select Google Cloud Module. When setting up the module, you can change the type to include Cloud Endpoints. Then, select the client module that will be using this backend.
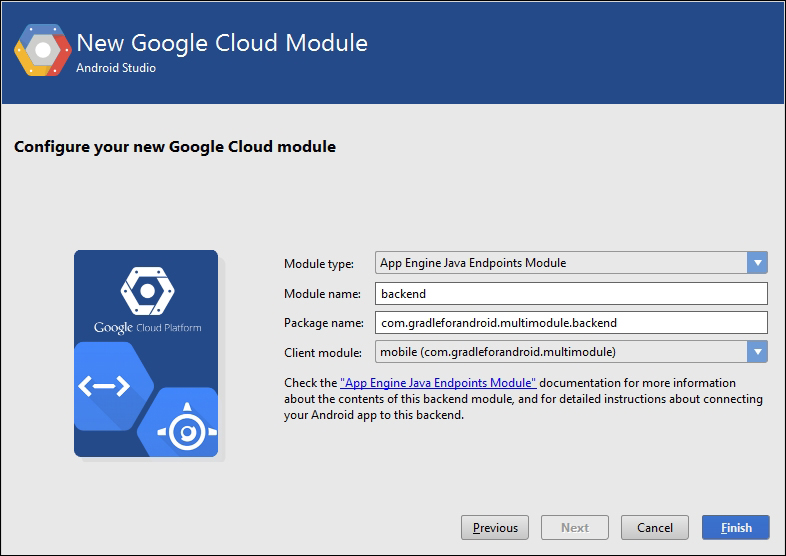
A thorough explanation of Google App Engine and Cloud Endpoints is beyond the scope of this book; we will only look at the Gradle integration in both the App Engine module and the client app module.
The build.gradle file for this module becomes quite big, so we will only look at the most interesting parts, beginning with the new build script dependency:
buildscript {
    dependencies {
        classpath 'com.google.appengine:gradle-appengine-plugin:1.9.18'
    }
}
The App Engine plugin needs to be defined in classpath of the build script. We have seen this earlier when adding the Android plugin. When that is in place, we can apply the App Engine plugin along with two other plugins:
apply plugin: 'java'
apply plugin: 'war'
apply plugin: 'appengine'
The Java plugin is primarily used to generate JAR files for Cloud Endpoints. The WAR plugin is necessary to run and distribute the entire backend. The WAR plugin generates a WAR file, which is how Java web applications are distributed. Finally, the App Engine plugin adds a number of tasks to build, run, and deploy the entire backend.
The next important block defines the dependencies of the App Engine module:
dependencies {
    appengineSdk 'com.google.appengine:appengine-java-sdk:1.9.18'
    compile 'com.google.appengine:appengine-endpoints:1.9.18'
    compile 'com.google.appengine:appengine-endpoints-deps:1.9.18'
    compile 'javax.servlet:servlet-api:2.5'
}
The first dependency uses appengineSdk to specify which SDK should be used in this module. The endpoints dependencies are necessary for Cloud Endpoints to work. These are only added if you choose to use Cloud Endpoints in your module. The servlet dependency is a requirement for any Google App Engine module.
Configure any App Engine–specific settings in the appengine block:
appengine {
    downloadSdk = true
    appcfg {
        oauth2 = true
    }
    endpoints {
        getClientLibsOnBuild = true
        getDiscoveryDocsOnBuild = true
    }
}
Setting the downloadSdk property to true makes it easy to run a local development server, because it automatically downloads the SDK if it is not present. If you already set up the Google App Engine SDK on your device, you can set the downloadSdk property to false.
The appcfg block is used to configure the App Engine SDK. In a typical Google App Engine installation, you can manually configure some settings by using the appcfg command-line tool. Using the appcfg block, instead of the command-line tool, makes the configuration a lot more portable, as anyone who ever builds the module will have the same configuration without needing to execute any external commands.
The endpoints block contains some Cloud Endpoints–specific settings.
Note
A detailed explanation of Google App Engine and Cloud Endpoints configurations is out of the scope of this book. If you wish to know more, look at the documentation at https://cloud.google.com/appengine/docs.
When you create the App Engine module, Android Studio automatically adds a dependency to the build file of the Android app module. This dependency looks like this:
dependencies {
    compile project(path: ':backend', configuration: 'android-endpoints')
}
We saw syntax like this earlier (when referencing Java and Android libraries), using project to define the dependency, but with two parameters instead of just one. The path parameter is the default parameter. We used it earlier, but without specifying its name. A Google App Engine module can have different types of output. You can specify the output you want with the configuration parameter. We need the App Engine module to generate Cloud Endpoints, so we use the android-endpoints configuration. Internally, this configuration runs the _appengineEndpointsAndroidArtifact task. This task generates a JAR file that contains classes that you can use in your Android app module. This JAR file contains not only the models used in the Cloud Endpoints, but also API methods. Integration like this is what makes multimodule projects nice to work with because it speeds up development time. The Gradle tasks in the App Engine module also make it easy to run and deploy your backend.
The App Engine plugin adds a lot of tasks, but the ones you will use the most are appengineRun and appengineUpdate.
The appengineRun task is used to start a local development server that you can use to test your entire backend locally before uploading it to Google App Engine. The first time you run this task, the build may take a while because Gradle needs to download the App Engine SDK. We set this behavior earlier with downloadSdk = true. To stop the server, you can use appengineStop.
Once you are ready to deploy your backend to Google App Engine and start using it in production, you can use appengineUpdate. This task handles all the deployment details. If you have set oauth2 = true in the appengine configuration block, this task will open a browser window, so you can log in to your Google account and get an authentication token. If you prefer not having to do this every time you need to deploy, you can log in to Android Studio with your Google account and use the IDE to deploy the backend. Android Studio runs the same Gradle task, but it will take care of the authentication for you.