
In Chapter 2, Accessing the GPIO Pins, you learned how to connect to the Galileo and its GPIO pins using jumper wires, breadboards, and components. In this chapter, you'll learn more about adding functionality by adding hardware designed to plug into the Galileo. In some of these examples, you'll use special hardware designed to be plugged into the Galileo's GPIO pins; these are called shields.
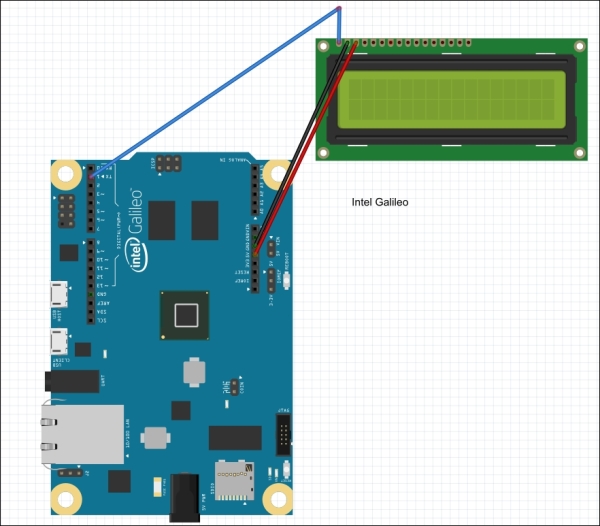
In order to understand how to use a shield, let's start with one of the most basic display modules available for the Galileo, the serial LCD display. There are several different versions out there, but most provide a simple 2 x 16 character display that can be driven by the serial TX pin on the Arduino. They are available at most locations where the Galileo is offered. The following image shows the display:

You'll need three pins to drive this display. They are a GND and VCC pin, and the TX pin. The VCC and GND will come from the 5V and GND pins on the Galileo. You'll use digital I/O pin 1 on the Galileo as a TX. To connect the Galileo to the display, connect the male to male jumpers to 5 Volts, GND, and digital input. Connect the three connectors to the proper connections on the board, like this:
This should complete the hardware connections to the board. Now you'll need some code to write characters to the board.
Now bring up the IDE. Before you start coding, you'll need to get the library associated with your display and install it in the IDE. For this particular display, you'll use the serial library found at https://github.com/downloads/nkcelectronics/SerialLCD/SerialLCD.zip.
The .zip file should then exist in your Downloads directory. Now you'll need to place these files in the libraries directory of your DE installation. Perform the following steps:
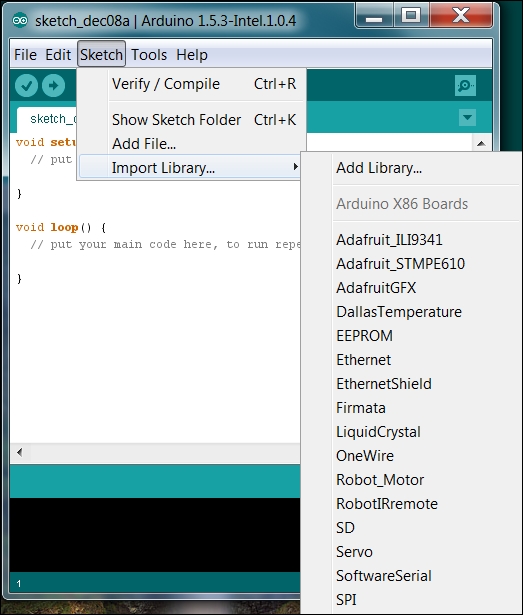
- To include this library in your IDE, first start your IDE and then select Sketch | Import Library… | Add Library…, like this:
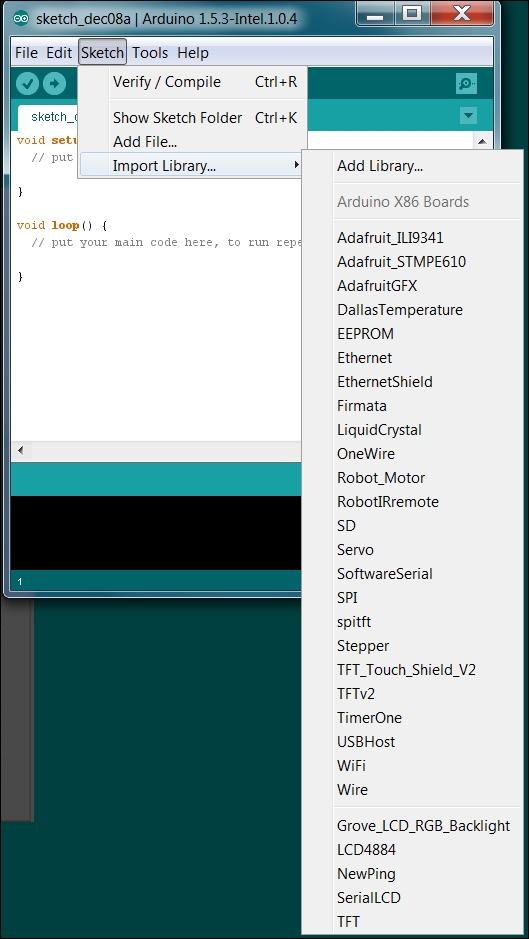
- Now go to your Downloads directory and select the ZIP file that holds your library. When complete, this library should be added to your library choices. You can check this by again selecting Sketch | Import Library… | Add Library…like this:
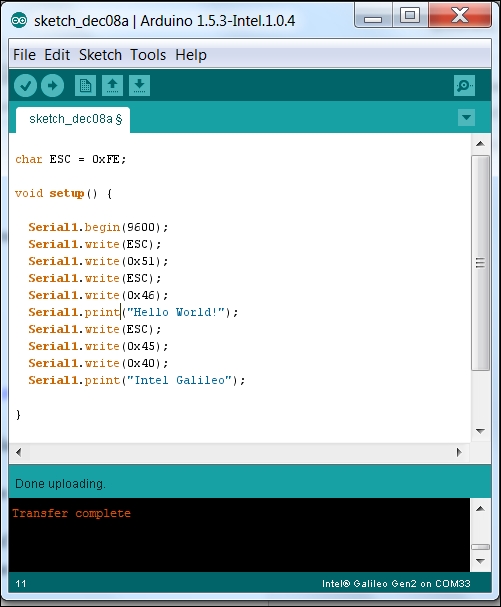
- Once the library is installed, go back to the main IDE screen and you can write the following code:
This code was written using the LCD documentation at http://media.nkcelectronics.com/datasheet/LCM1602SK-NSW-BBW.pdf. It is quite simple.
Lets explain the code line by line:
char ESC = 0xFE;- This character needs to be sent to the display each time a command is sentvoid setup()– The setup function is called by the Galileo each time the program is runSerial1.begin(9600);:- Sets the serial port to a baud rate of 9600Serial1.write(ESC);:- Sends the preceding character set each time a command is sentSerial1.write(0x51);:- This command clears the displaySerial1.write(ESC);:- Sends the previous character set each time a command is sentSerial1.write(0x46);:- Sets the cursor to the first line, the first positionSerial1.print("Hello World!");:- Prints out Hello World!Serial1.write(ESC);:- Sends the preceding character set each time a command is sentSerial1.write(0x45);:- Sets the cursor to the second lineSerial1.write(0x40);:- Sets the cursor to the first positionSerial1.print("Intel Galileo");:- Prints out Intel Galileo!void loop():– This loop is called over and over after the setup() function is complete
- Now upload the sketch and you should see Hello World! Intel Galileo on the display, like this:
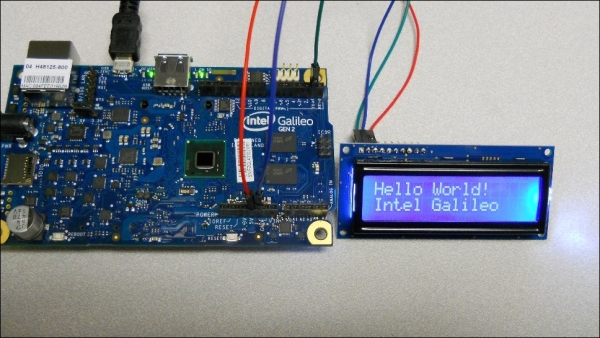
Now you can add all sorts of text. If you place a message in the loop, be sure to add in delay(2000). This is a function that pauses for a number of milliseconds (in this case 2000), thus allowing the user time to read the display before it is changed.
Now you can display information from the Galileo. You might, however, want even more flexibility than this display can provide, so you'll now learn how to add a TFT display.