
The ability to measure speed and tilt is important in many robotics applications. This can tell you how fast your robot is traveling, and in what direction. Fortunately, there are chips that can do this for you. One of those is the MPU-6050, which provides a complete set of information on movement, including acceleration and tilt. For more information on this type of device, see https://www.sparkfun.com/pages/accel_gyro_guide. There are several different manufacturers who place this chip on a small board accessible to the Galileo. One of these is the SparkFun version, the Sparkfun SEN-11028, available at www.sparkfun.com. It is pictured here:
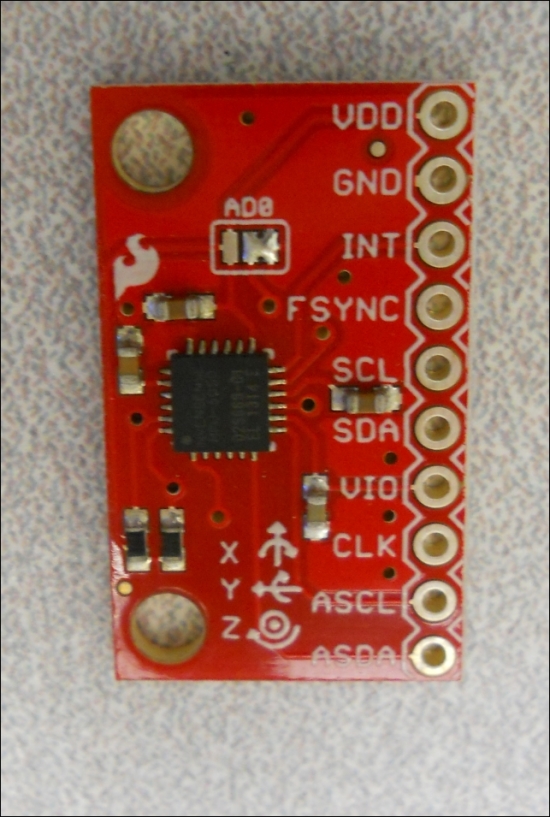
The interface to the board is quite simple, with only one issue. This particular chip will require you to solder header pins to the board to connect the jumper wires to the Galileo. You can purchase these at www.sparkfun.com as well, just search for the Arduino stackable header, the 10-pin version. Or, if you don't like to solder, you can try a solderless version, at https://www.sparkfun.com/products/10527. Once the header is connected to the board, the device will look like this:

Now you can use male-to-male jumper cable to connect the Galileo and the board. Here is the table for the connections:
|
Galileo Pin |
Sensor Pin |
|---|---|
|
3.3V |
VDD |
|
GND |
GND |
|
A5 |
SCL |
|
A4 |
SDA |
|
3.3V |
VIO |
You'll notice that you need to make two connections to the 3.3V supply, so you might want to create a male-to-male jumper cable with two connections on one end. This can be done by using two male-to-male cables, by cutting off one end and stripping back the insulation, soldering the three cables together, and then wrapping the solder connection in electrical tape.
Now that the two devices are connected, you'll need to bring up the IDE and add a library so that you can access the functionality from the SW. To get the libraries, do the following steps:
Note
From the Sparkfun page on the device at www.sparkfun.com/products/11028 you'll find a github repository that supports not only this device, but a number of devices that use the I2C interface.
- Go to https://github.com/jrowberg/i2cdevlib and look on the right side of the page for the download link. This will download the entire library.
- Now you should unzip the file to a handy location, I unzipped mine in the download directory. What you want is just the files associated with the Arduino, so go to the directory that supports those files, like this:
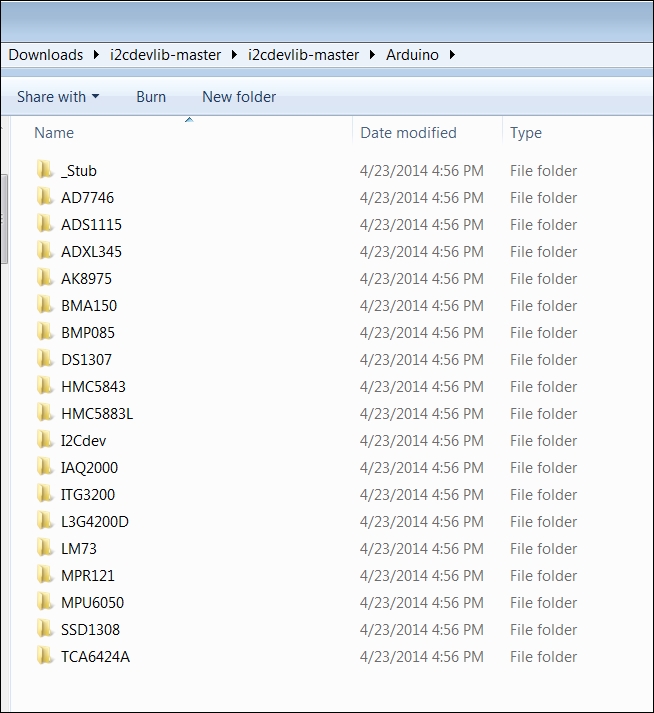
- Even though you won't need all these libraries right now, you can just copy all these to the libraries directory of your Galileo for future use. By the way, you'll notice that there is a duplicate of the HMC5883L library you installed earlier, so you can decide to merge these directories.
- Once you have these directories installed, bring up the Galileo IDE. If the IDE is already running, you'll want to restart it so it can recognize the library. Now bring up the example program that reads the raw values of the accelerometer and gyro by selecting Examples | MPU6050 | Examples | MPU6050_raw, like this:
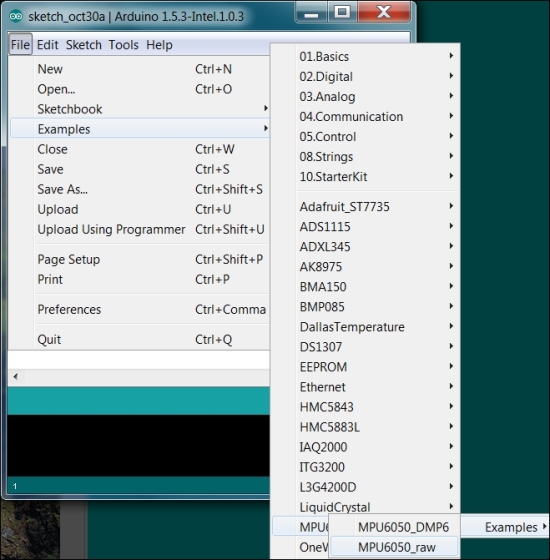
This will open a window that provides the code to read the raw data from your sensor. When you upload the code and open the Serial Monitor, you should see something like this:
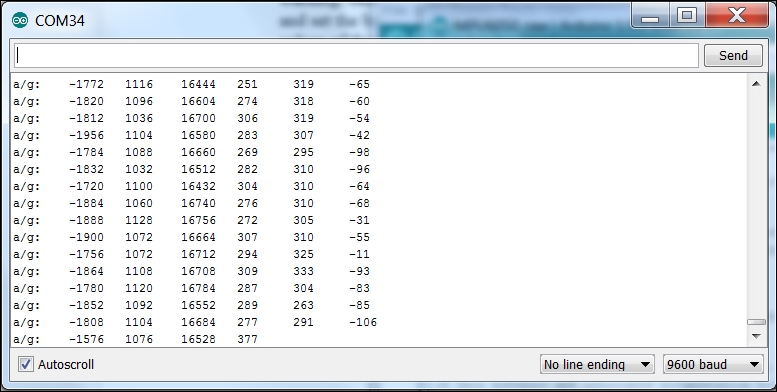
The first three numbers are the x, y, and z raw accelerometer readings, and the last three are x, y, and z angle readings from the gyroscope. If you mount the device flat in your project, x, y, and z would be associated with the yaw, pitch, and roll of the device. Here is a diagram of how the yaw, pitch, and roll indicate the position of a device:

As you move the device around, you should see these readings change. This data can then be used to sense when your device is moving, and in what direction. The device has lots of capability, including the ability to set the offsets of the device so that a particular position is in the 0 position. For more information about these capabilities, feel free to look at both example programs provided by the library.