
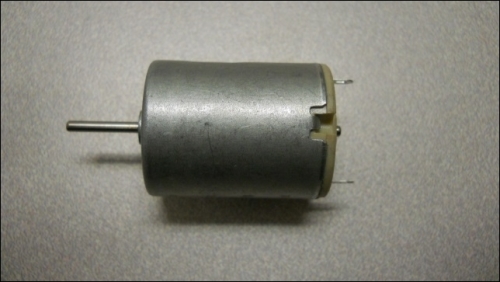
The first step in connecting a DC motor to the Galileo is to actually obtain a DC motor. The motors that you will be dealing with here are simple, small DC motors. For this example, you can use a small 6V DC motor available at most electronics or hobby stores, or online at www.amazon.com. Here is a picture of one such motor:
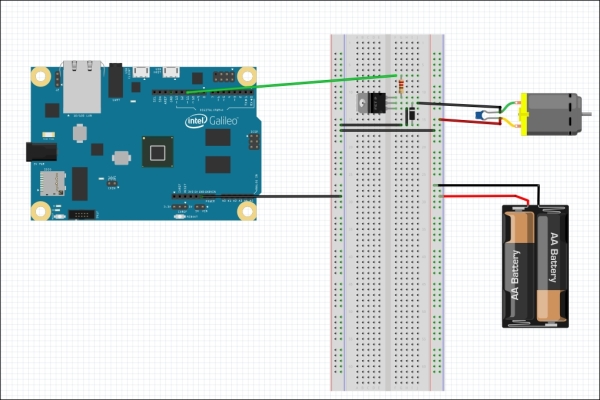
In order to connect this motor to your Galileo, you'll need some additional parts. You'll need two male-to-male jumper cables and two alligator clip jumper cables. You'll also need a transistor, TIP120 to be specific. You'll also need a diode, the 1N4004 diode, a 1,000-ohm resistor, and a 1 µFarad ceramic capacitor. The last four parts should be available at almost any electronics store, or online. To control this motor, you'll connect one motor connector to digital pin 11, and the other connector to GND. You could use one of the voltage sources on the Galileo, but some DC motors can draw lots of current, more than your Galileo can supply. A safer way is to connect the DC motor supply to a battery holder with 4 AA batteries.
Connect the Galileo, transistor, diode, resistor, and power supply like this:
Now you can start the IDE so that you can enter a program to send a control signal to the DC motor.