
Cache management is one of the new optimized key features in Magento 2. We will be using the following cache types:
By default, we will be using Full Page Cache now in the community version, which is a great improvement next to the web services (API) caches.
Depending on the current development, default, and production state, caches will be different.
In the next recipes of this chapter, we will dive deeper into the use of different states.
When cleaning or flushing your cache, Magento will flush its content from either the var/cache or var/full_page directory. In this recipe, we will refer to the bin/magento cache:enable, bin/magento cache:disable, bin/magento cache:clean, or bin/magento cache:flush options.
For the purpose of this recipe, let's assume that we need to manage the Magento 2 cache setup. The following steps will guide you through this:
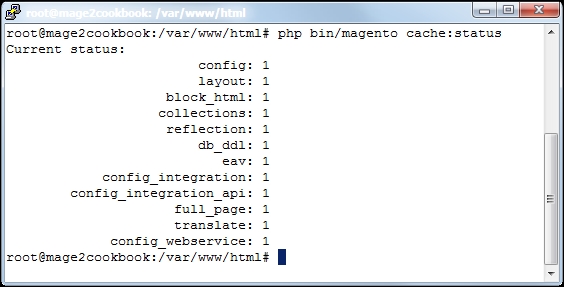
- Let's first check the current status using the following command:
php bin/magento cache:statusThe output looks like this:
- Now we will check how to enable and disable caches individually or all at once. Use the following command to disable the caches individually:
php bin/magento cache:disable configThis will disable the cache for only
config. You may pick any cache type code name. To enable theconfigcache back, use the following command:php bin/magento cache:enable configWhen skipping the cache type code name behind the command, we will be able to enable or disable the caches all at once. It will look like this when we disable the cache:

- When we want to re-enable all caches, we use
php bin/magento cache:enable. As you can see now, after enabling the caches, they are cleaned as well:
- Now let's clean the caches individually using
php bin/magento cache:clean config. By removing the cache type code name, we will be able to clean all of them at once. - Now let's flush the caches individually using
php bin/magentocache:flush config. By removing the cache type code name, we will be able to clean all of them at once.Tip
Cleaning a cache type deletes all items from enabled Magento cache types only. In other words, this option does not affect other processes or applications because it cleans only the cache that Magento uses.
Disabled cache types are not cleaned.
Flushing a cache type purges the cache storage (such as Redis, Memcache, and so on), which might affect other process' applications that are using the same storage.
Let's recap and find out what we did throughout this recipe. In steps 1 through 5, you learned how to manage the cache in Magento 2.
In step 1, you learned how to use the status option to check what the current cache status is. In step 2, we were able to enable or disable the caches individually.
In steps 4 and 5, you learned how to flush and clean the caches individually.