
In this section, you will learn how to integrate with a real backend service for the payment process. Earning revenue is an important aspect of creating an app. While there are many other methods of collecting payment, Stripe is a common payment system and can integrate very well with Ionic. In addition, there is no need to provide a high level of security and compliance (that is, PCI) since you will not be storing the credit card information.
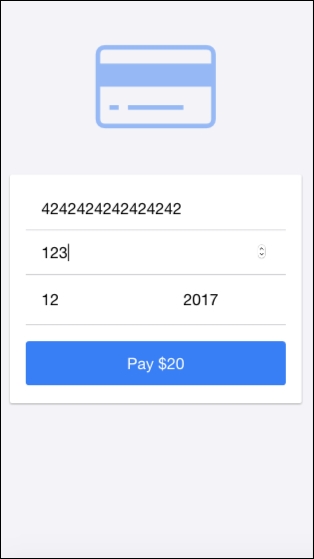
Your app will not process via a real payment method because you can use a public test key from Stripe. The app will ask for a few fields to create a token. Observe the following screenshot of the app:
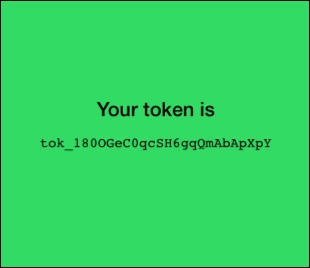
If you touch the Pay $20 button, it will take you to the next screen where you will get the payment token, as shown in the following screenshot:
Tip
Actually, there are additional steps for your backend to call Stripe to authorize and process the transaction. However, it's not within the scope of this section. The Stripe document has a good tutorial page on Node.js at https://stripe.com/docs/api/node#authentication.
There is no need to test in a physical device because Ionic 2 and Stripe will work just fine in the web browser.
Observe the following instructions:
- If you don't have a Stripe account, you need to register on https://stripe.com.
- Log in and go to https://dashboard.stripe.com/test/dashboard.
- Click on your username on the top right and select Account Settings, as illustrated in the following screenshot:

- Select the API Keys tab.
- Copy your Test Publishable Key, shown as follows, somewhere because you need to use it for your JavaScript code later:

Now, go back to the Terminal.
- Create a new
StripePaymentapp using theblanktemplate, as follows, and go into theStripePaymentfolder:$ ionic start StripePayment blank --v2 $ cd StripePayment
- Open the
./src/index.htmlfile and insert the line shown somewhere in the<body>tab as follows:<script type="text/javascript" src="https://js.stripe.com/v2/"></script>
Note
This is to load the
Stripeobject globally in your app. This is not the recommended method with Angular 2 because anything that is used within a component must be imported via theimportinstruction. However, at the time of writing this book, angular-stripe is unavailable for Angular 2. So, there is no way to do this properly. The preceding method will work just fine. - Open the
./src/pages/home/home.htmlfile and modify the content with the following code:<ion-content class="gray-bg"> <p class="center"> <ion-icon class="icon-large" name="card"></ion-icon> </p> <ion-card> <ion-card-content> <ion-list> <ion-item> <ion-input type="number" name="cc" [(ngModel)]="ngForm.cc" placeholder="Number"></ion-input> </ion-item> <ion-item> <ion-input type="number" name="cvc" [(ngModel)]="ngForm.cvc" placeholder="CVC"></ion-input> </ion-item> <ion-item> <ion-input item-left type="number" name="month" [(ngModel)]="ngForm.month" placeholder="Month"></ion-input> <ion-input item-right type="number" name="year" [(ngModel)]="ngForm.year" placeholder="Year"></ion-input> </ion-item> <button type="button" ion-button bottom block (click)="onSubmit()">Pay $20</button> </ion-list> </ion-card-content> </ion-card> </ion-content>Stripe only needs the credit card number, CVC, and expiration to create a token for charging. The customer name and address are optional; so, you don't need to include them here.
- Then, replace the content of
./src/pages/home/home.tswith the following code:import { Component } from '@angular/core'; import { NavController } from 'ionic-angular'; import { ThankyouPage } from '../thankyou/thankyou' declare var Stripe: any; @Component({ selector: 'page-home', templateUrl: 'home.html' }) export class HomePage { private token: string = ''; private ngForm: any = { cc: '', cvc: '', month: '', year: '', amount: 2000 }; constructor(public nav: NavController) { this.nav = nav; console.log(Stripe); Stripe.setPublishableKey('YOUR STRIPE PUBLIC KEY HERE'); } onSubmit() { console.log(this.ngForm); Stripe.card.createToken({ number: this.ngForm.cc, //'4242424242424242', cvc: this.ngForm.cvc, //'123', exp_month: this.ngForm.month, //12, exp_year: this.ngForm.year, //2017, amount: 2000 }, (status, response) => this.stripeResponseHandler(status, response)); } stripeResponseHandler(status, response) { if (response.error) { // Show the errors on the form console.log('error'); console.log(response.error.message); } else { // response contains id and card, which contains additional card details this.token = response.id; // Insert the token into the form so it gets submitted to the server console.log('success'); console.log('Sending token param:'); console.log(this.token); this.nav.push(ThankyouPage, {token: this.token}); } } }You need to change your Test Publishable Key here by replacing YOUR STRIPE PUBLIC KEY HERE with your own key that you copied earlier.
- Edit
./src/pages/home/home.scsswith the following code:.center { text-align: center; } .gray-bg { background-color: #f4f4f7; } .icon-large { font-size: 150px; color: #387ef5; opacity: 0.5; } .list-ios > .item-block:first-child { border-top: 0; } ion-card ion-list .item { border-bottom: 1px solid #c8c7cc; } ion-list .item-inner { border-bottom: 0; } ion-card-content .button-block { margin-top: 16px; } - Create the
thankyoupage that shows the token ID by making a new folder, called./src/pages/thankyou, as shown:$ mkdir ./src/pages/thankyou - Create the
thankyou.htmlfile in thethankyoufolder and copy the following code:<ion-content class="green-bg"> <h4 class="center"> Your token is </h4> <p class="center"> <code> {{ token }} </code> </p> </ion-content>In reality, there is no need to show the token ID to the user. This is just an example to get the token ID to charge.
- Create the
thankyou.tsfile in thethankyoufolder and copy the following code:import { Component } from '@angular/core'; import { NavController, NavParams } from 'ionic-angular'; @Component({ selector: 'thank-you', templateUrl: 'thankyou.html' }) export class ThankyouPage { private token: string = ''; constructor(public nav: NavController, public params: NavParams) { this.token = this.params.get('token'); console.log('Getting token param:'); console.log(this.token); } } - Create the
thankyou.scssfile to modify the theme using the following code:.green-bg { color: black; background-color: #32db64; } h4.center { padding-top: 150px; } .center { text-align: center; } - Since the
thankyou.scssfile is new in the project, you need to include it in./src/app/app.scss. Insert this line at the bottom of the code:@import '../pages/thankyou/thankyou';
- Open and edit
./src/app/app.module.tsto declareThankyouPageas follows:import { NgModule } from '@angular/core'; import { IonicApp, IonicModule } from 'ionic-angular'; import { MyApp } from './app.component'; import { HomePage } from '../pages/home/home'; import { ThankyouPage } from '../pages/thankyou/thankyou' @NgModule({ declarations: [ MyApp, HomePage, ThankyouPage ], imports: [ IonicModule.forRoot(MyApp) ], bootstrap: [IonicApp], entryComponents: [ MyApp, HomePage, ThankyouPage ], providers: [] }) export class AppModule {} - Go to your Terminal and run the app:
$ ionic serve - For the purpose of testing, you can use
4242424242424242as the credit card number,123ascvc, and12/2017as the expiration.
This is the Stripe charging process:
- The user fills in the payment form and clicks on the Submit button.
- The frontend (your Ionic app) will call API to Stripe using the
Stripeobject and send along all the payment information. - Stripe will return a token ID, which is basically a way to confirm that everything is correct and you can charge the card now.
- The frontend will use the token ID to send to its backend (without the credit card information) to authorize the charge.
- The backend will call another Stripe API to say I'm going to charge now. Stripe will return the
successevent to the backend at this point. - The backend will then return the
successevent to the frontend. - The frontend should render a new page, such as the
thankyoupage.
As discussed previously, this chapter will not cover the backend portion of this app because it doesn't focus on Ionic. You can build the backend using any language, such as Node.js, PHP, or Python.
Let's take a look at home.ts because the majority of Stripe API processing is located there. First, you need to do a declare, as illustrated, because Stripe is a global object that was included in the index.html:
declare var Stripe: any;
If you don't do a declare, the app will still run but you will get an error from TypeScript.
When the user submits the form, it will trigger the following method:
  onSubmit() {
    console.log(this.ngForm);
    Stripe.card.createToken({
      number: this.ngForm.cc, //'4242424242424242',
      cvc: this.ngForm.cvc, //'123',
      exp_month: this.ngForm.month, //12,
      exp_year: this.ngForm.year, //2017,
      amount: 2000
    }, (status, response) => this.stripeResponseHandler(status, response));
  }
When you call Stripe.card.createToken, the Stripe object will trigger an API call in the background to https://stripe.com/ with the JSON submitted. You may realize that this example does not use ngModel at all, but you can get the form values directly from within ngForm. This functionality is accomplished by the following code in your home.html:
<button type="button" ion-button bottom block (click)="onSubmit()">Pay $20</button>
Once Stripe returns your token ID, it will call the following arrow function:
(status, response) => this.stripeResponseHandler(status, response)
The reason for using the arrow function here is because your code within the stripeResponseHandler method needs the this context of the HomePage class. This is a nice way to access the token variable. Observe the following code:
  stripeResponseHandler(status, response) {

    if (response.error) {
      // Show the errors on the form
      console.log('error');
      console.log(response.error.message);
    } else {
      // response contains id and card, which contains additional card details
      this.token = response.id;
      // Insert the token into the form so it gets submitted to the server
      console.log('success');
      console.log('Sending token param:');
      console.log(this.token);
      this.nav.push(ThankyouPage, {token: this.token});
    }
  }
The response.id will have your token ID from Stripe. Otherwise, you can handle the error using response.error.message. In this example, since it only passes the token ID to the next page, you can simply send it as a parameter {token: this.token}:
this.nav.push(ThankyouPage, {token: this.token});In your thankyou.ts, you can access the parameter token using the following code:
this.params.get('token');- To understand more about Stripe API, you can check out the official documentation at https://stripe.com/docs/stripe.js
- There are more examples from other languages that you can experiment with at https://stripe.com/docs/examples