3
Adding Our Source Material, Using the Timeline, and Creating Our First Project
Welcome to Chapter 3 of our book, where we will finish learning about the basics of the engine and start editing our first demo project. We will be going through the timeline and the viewport, and exploring how to add our resources from our media libraries to our timeline and how to use the tools to edit the said resources, which include Split, Pan and Zoom, Cropping, and many more, except for a few advanced tools that we’ll be looking at in later chapters. Upon completion of this chapter, you will be completely comfortable with adding media to the timeline, previewing it in the Preview Panel, changing the properties of different tools, and adding some music to our video. Lastly, we’ll export our video and make sure we have a completed video by the end of it that you’ll be able to share with other people.
To sum up, we’ll be covering the following in this chapter:
- What is the timeline and what tools does Filmora 11 offer?
- Adding our resources to the timeline and discovering the viewport
- Exporting our video
Technical requirements
You can download the supporting files for this chapter from GitHub at https://github.com/PacktPublishing/Filmora-Efficient-Editing/tree/main/Chapter03.
What is the timeline and what tools does Filmora offer?
And so, we arrive at arguably the most important part of any video editing software, the timeline. Filmora 11’s timeline is super intuitive and easy to use as they were focused on making it as user-friendly as possible during development. Four important things to note about the structure of the timeline are as follows:
- The timeline will have different types of tools depending on which type of media you have selected (image, video clip, or audio clip), as we’ll soon see.
- There is an orange line with the icon of a pair of scissors on it that works as an indicator of where you are on the timeline, and can also split (explained in the next subsection) the media under the orange line.
- We have two types of tracks:
- Video tracks: Here is where we add our images, effects, videos, titles, and elements.
- Audio tracks: This is where we put our music, sound effects, and voice recordings.
- Lastly, we have two buttons on the side of the timeline:
We’ll now take a look at what tools we can use based on our selection in the timeline.
No media selected
Whether we already have some clips in the timeline or not, if we do not have any clips currently selected, then the only tool we can click on is the Undo button, as can be seen in the following figure:
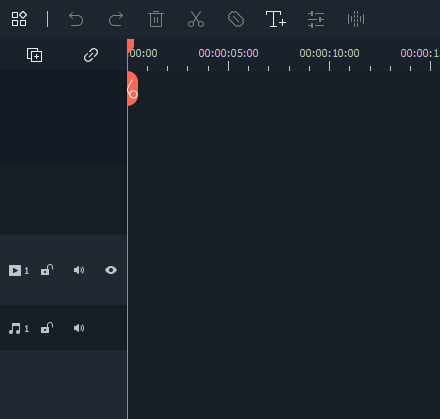
Figure 3.1: Wondershare Filmora 11 timeline tools – no media selected
Image selected
When an image is selected, we have the following tools in the following order:
- Undo (
 ): Undoes our last action in the sense that it makes it as if we never did it.
 - Redo (
 ): If we accidentally undo an action, we can click on this button to redo that action.
 - Delete Selection (
 ): Deletes the selected piece of media.
 - Split (
 ): Cuts the media at the point under the orange line.
 - Crop and Zoom (
 ): This tool allows you to crop and/or animate a pan and zoom on the selected clip or image.
 - Advanced Color Tools (
 ): Just like the name suggests, this allows you to make slight or major adjustments to the color by editing the Color Enhancement, White Balance, Tone, 3D LUT, and Color Match properties inside the clips. We will see this in the last section of this chapter.
 - Green Screen (
 ): This allows you to change your background or add special effects.
 - Duration (
 ): Reduces or extends the speed of your selected media.
 - Keyframing (
 ): This tool allows you to animate changes to the position, rotation, scale, and opacity of your media.
 - Edit (
 ): Here, you can find additional and more advanced properties to adjust and change.
 - Silence Detection (
 ): Removes audio from the region where the clip is. Please keep in mind that this feature is in beta and only works on media with audio.
 - Speech-To-Text (
 ): Converts audio speech into text form.
 - Text-To-Speech (
 ): Converts text to speech.
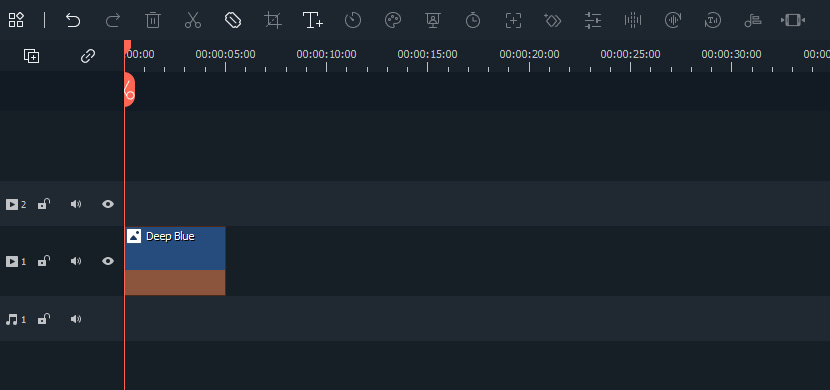
Figure 3.2: Timeline tools – image selected
Video selected
When a video clip is selected instead of an image, there are only two new tools. One replaces the Duration tool mentioned in the previous section and the second one is a new tool called Motion Tracking. Let’s look at what they do:
- Speed (
 ): This tool allows you to adjust the speed at which your video plays and even allows you to play it in reverse.
 - Motion Tracking (
 ): This allows you to track the camera or object in the video and add a graphic, image, text, or video that follows it.
Figure 3.3: Timeline tools – video selected
Audio selected
Finally, we have our audio media, which shares some of the tools we have already seen but not all of them. The tools we can use with audio are as follows:
- Undo
- Redo
- Delete Selection
- Split
- Speed
- Duration
- Edit
- Silence Detection
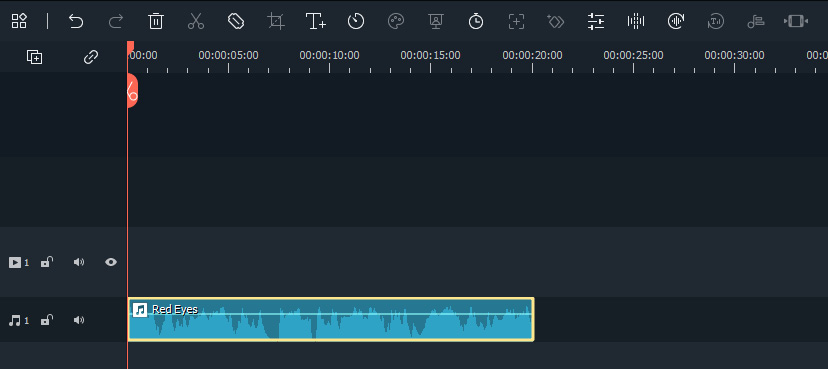
Figure 3.4: Timeline tools – audio selected
That was quite a bit of information but don’t worry, we are now going to do a bit of practical work and start working on our first small video by adding media to our timeline in the following section!
Adding our resources to the timeline and discovering the preview panel/viewport
So, as mentioned, we are now going to start working on our first practical, which will be a simple feel-good video about some friends cycling and having a good time. Let’s get started:
- The first thing we have to do is add our first video clip to the timeline by going to our media library, inside the Sample Video category, and dragging the Travel 01, Travel 02, Travel 03, Travel 04, Travel 05, and Travel 06 video clips side by side to the timeline. Once you zoom in a little bit, it should look like this:

Figure 3.5: Timeline with video clips
Now that we’ve added our video clips, we can preview our video in our viewport by pressing the Play button.
- Since you’ve taken a look at the preview of the video, you might be thinking that it’s pretty bare-bones and you’d be right, so let’s spice it up with some audio.
By going to our audio library, we can just as easily drag one of the audio media files that come with the editor. Please feel free to add any audio file that you like, but my personal pick would be the one called Feel the summer, and just like that, we have an upbeat cycling video.
And thus, we have a fine video, but it could be a little bit better, so let’s continue by adding a few more clips and then using the awesome tools we’ve learned about in the previous section to make it a great video!
Splitting and trimming – giving our video a haircut
We’ve added our clips in a good order, and now it’s time to edit and trim them in order to make them flow and look better:
- The first thing we are going to do to our video is drag in the Countdown 9 and Islands video clips from our media library to the beginning of our timeline. It should look like this once you’ve added them:
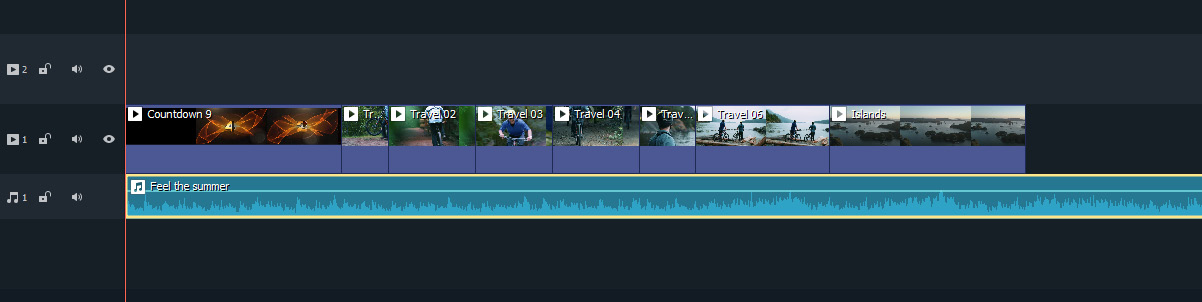
Figure 3.6: Timeline with video clips and audio
- The Island video goes on for a little bit too long so let’s trim it down. To do this, you need to place your cursor on the edge of the video clip inside your timeline until you see the cursor change into two lines with arrows coming out of the left and right side (
 ).
).
Once you see that cursor, simply left-click and drag it left to decrease the size or right to increase it. For our purposes, we are going to decrease the size by half so we will drag it to the left. If you preview the video, you will notice that due to the reduced size of that one clip, our video flows much better than before.
- After that is done, simply add our final video clip called Beach between the Travel 05, and Travel 06 video clips.
- The only thing remaining now is to snip the music since as you can see, it is much longer than our video clips, so what we must do is place our orange line at the end of all our video clips, like this:
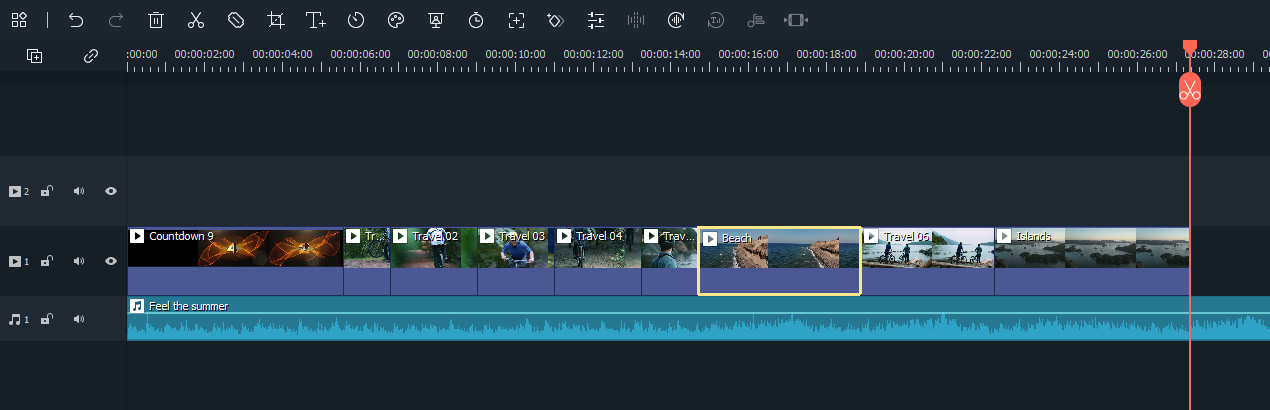
Figure 3.7: Timeline tool – Snipping tool
- Once we do that, we can either click on the Split tool or the scissors symbol on the orange line. This will cut everything on that line and then select the parts that were cut. Just hit the Delete key on your keyboard and there you go: a perfectly cut video that we can continue working on throughout this chapter and Chapter 4, Audio: Changing Your Video’s Feel.
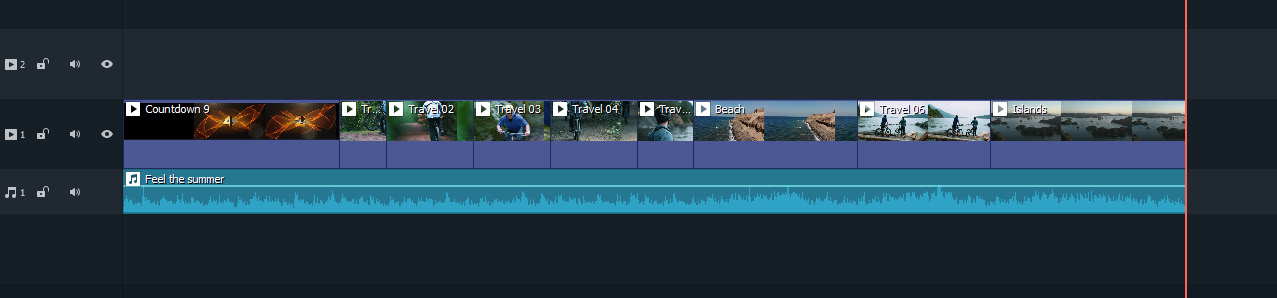
Figure 3.8: Timelines snipped clips
So, we made our video, what’s left? Well, I’m glad you asked! We are now going to use two of the tools we learned about earlier in this chapter, the Crop and Zoom tool and the Speed tool, and finally, we will export the video so you can share and view our video in the preview panel!
Our dedicated preview panel
To view and test out our video, we need to divert our attention toward the viewport, which looks like this:
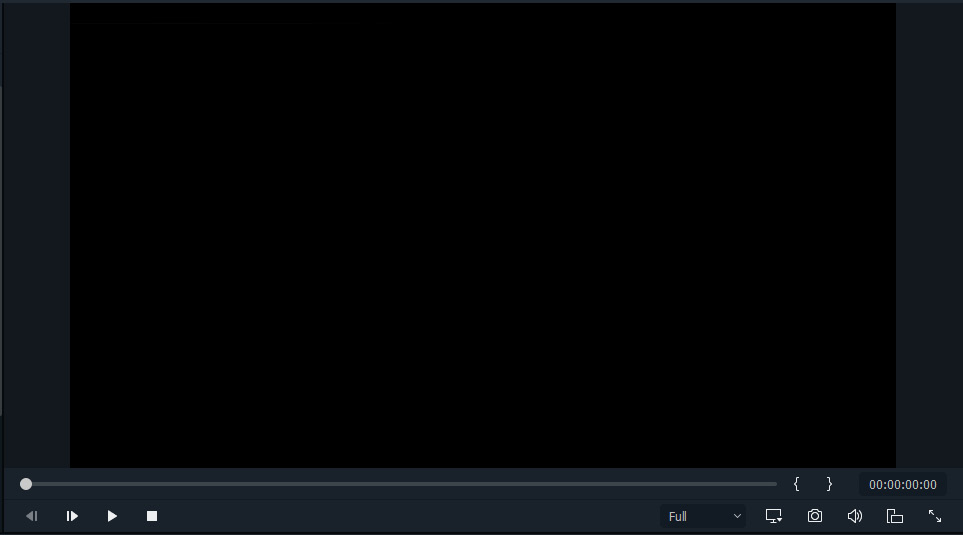
Figure 3.9: Preview panel
This is a pretty standard preview panel that most video editors share in common along with their tools.
On the left-hand side you will find the following:
- The Backward button (
 ): This button allows you to skip backward a frame on the timeline.
 - The Forward button (
 ): This button allows you to skip forward a frame on the timeline.
 - The Play button (
 ): This button plays the clips that are on the timeline starting at our orange line mentioned previously.
 - The Stop button (
 ): This button stops/pauses the video on the exact frame.
These are all tools that are on any video player that you may be familiar with. On the right-hand side, however, we have a few tools that you may not see all too often among the ones you do see:
- Preview Quality dropdown (
 ): In this dropdown, you can select at which quality you want your preview video to render in order to be able to see it. This is to help less powerful computers test out their video without it lagging or taking a long time for the preview video to render.
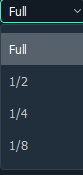
Figure 3.10: Preview Quality drop-down menu
- Preview Quality and Display (
 ): This allows you to change a few settings about the preview viewport, most accurately, the aspect ratio.
 - Snapshot (
 ): This button allows you to take a screenshot of what is currently showing in your viewport. This is helpful when you want to share something that you did or send some feedback to another person working on this project.
 - Volume (
 ): This one is quite self-explanatory; it allows you to change the volume of your preview video. This is only for when you are viewing it in the viewport and not for the finished project, as we’ll be looking at how to do that in the next chapter.
 - Full screen (
 ): This allows you to make your video full screen.
And now we know everything we need to know about the preview panel in Filmora 11. In the next section, we will see how to use our Crop and Speed tools to add some nice effects to our video.
Adding some cool effects using the Crop and Speed tools
I know you must be excited to add some cool effects so let’s just jump straight into it! The first thing we’re going to do is select the video clip called Travel 06 on our timeline and then click on the Crop tool. Clicking on it will bring up the Crop and Zoom window, which looks like this:
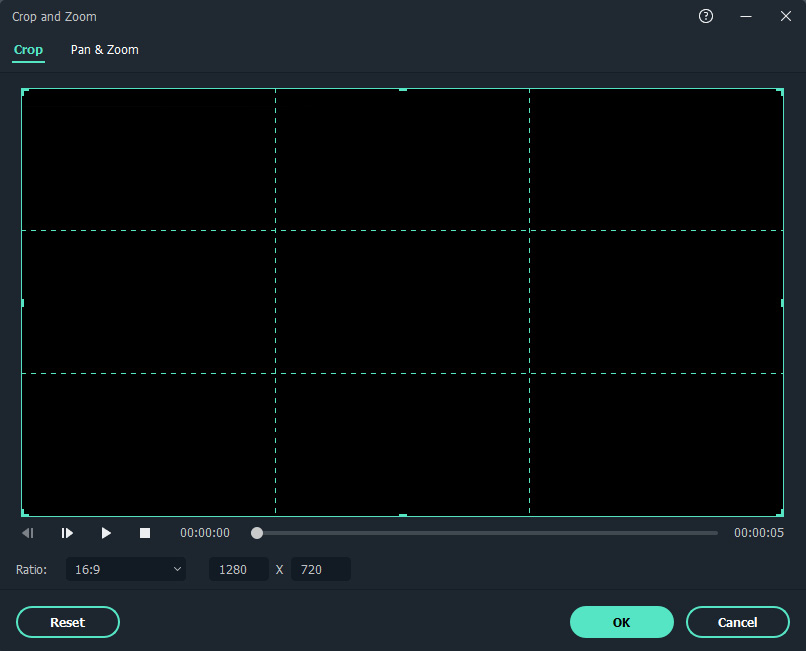
Figure 3.11: Crop and Zoom window
For this chapter, we will only use the Pan & Zoom feature but will come back at a later chapter to also make use of the Crop feature. At the top left, you can click on where it says Pan & Zoom, which will change the window to look like this:
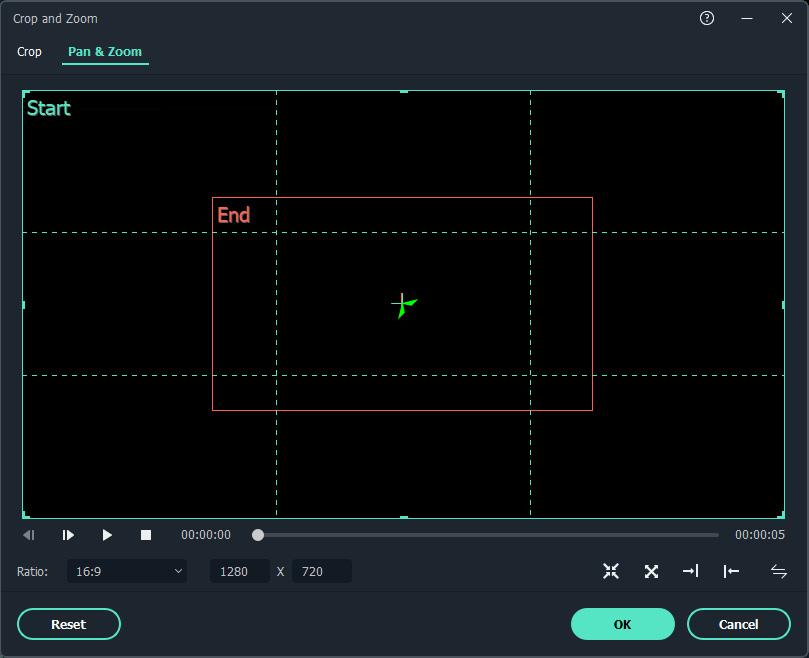
Figure 3.12: Crop and Zoom – Pan & Zoom
As you can see on the viewport, it gives us a Start (green) and an End (red) box in the preview viewport and also some additional tools on the bottom right:

Figure 3.13: Crop and Zoom options
The tools in order are as follows:
- From far to near: Makes the camera zoom in
- From near to far: Makes the camera zoom out
- From left to right: Pans the camera from left to right
- From right to left: Pans the camera from right to left
- Swap the start and end points: Swaps the Start and End points
For our purposes, we want to select the first one, From far to near, and then we can resize and move the End point by clicking it once and then dragging it to the top of the screen. To resize it, we can click on one of the corners and drag it inward. Once you’re done, it should look something like this:

Figure 3.14: Crop and Zoom – Pan & Zoom modification
Feel free to customize it and make it as you like it. Once you’re finished with this, then you are ready to export our video!
Exporting our video – look what we made!
So, the video’s now finished; the next thing we need to do is export it but before that, let’s learn why we need to export it. If we don’t export our video, anyone who wants to view the video or anyone we share the video with must have Filmora 11 in order to view it. Exporting it as one of the file formats we’ll see later in this chapter allows other people to view it with almost any video playing software out there, and even with built-in video players that computers and phones come with. Now that we know why it’s so important to export our videos, let’s see how to do it:
- The procedure is pretty straightforward but the first thing we need to do is simply click on the light blue Export button next to our library buttons:

Figure 3.15: Export button
- Once we click it, it will bring up the Export window. This window will have a few properties and information that we can change and double-check, and will also have different file formats we can choose from to export it as. As a side note, you can also upload it directly to your YouTube channel or Vimeo account or burn it to a DVD.
The properties we can change, and check are as follows:
- Name: This is the name that the video will be saved as.
- Save to: Here, we can choose the location the video will be exported to.
- Resolution: Here, it will mention the resolution of the video. It also has a button that will take you to the settings, where you can change the resolution.
- Frame Rate: The frame rate of the video.
- Size: The size of the video when you export it.
- Duration: The length of the video.
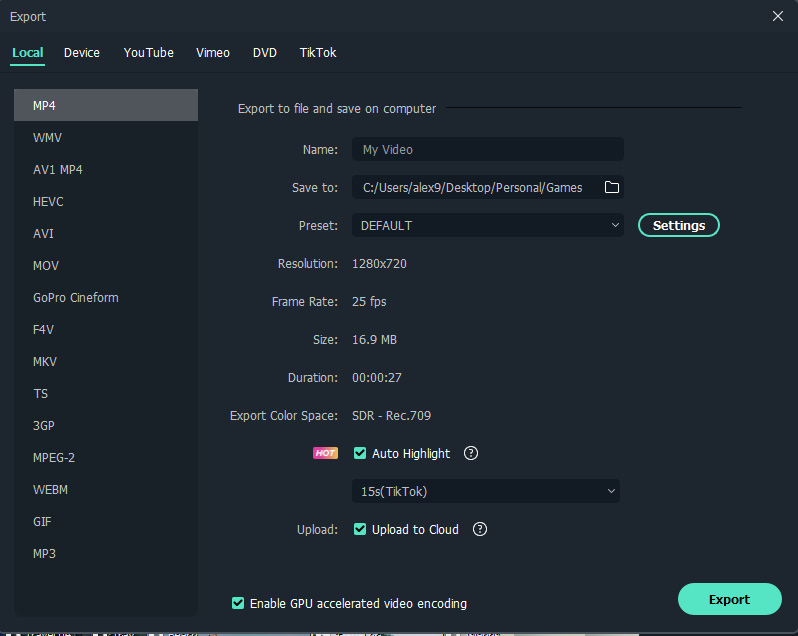
Figure 3.16: Export properties
As a side note, there is a checkbox at the bottom of the window that says, Enable GPU accelerated video encoding, which, when ticked, allows Filmora 11 to use your GPU to help export the video.
- On the left side of the window, we have all the file formats we can export our video as, but we will only be using the most common one, which is the MP4 file format as it can be played in all video players and can easily be added back inside Filmora 11 for further editing or to use for other projects. One more thing I’d like to mention is that the MP3 file format will only export the audio and not the video.
- Once everything is ready, you can click the Export button at the bottom right of the window, and then you’re done! You can open the video from the location where you exported it to test it out and make sure everything looks okay.
We have now looked into the different export options and exported our videos, which brings us to the end of our first project.
Summary
We have now successfully created our very first video, but let’s not get ahead of ourselves as this is only the beginning! In this chapter, we looked at the timeline and the viewport, how to use them, and the tools that they offer. We also managed to add resources to our timeline and modify them to make them show how we want them in the video and finally, we exported our video to an MP4 format to share it with other people!
In the next chapter, we will go over all the audio properties we can change in our project to make it a little bit better!