3
Creating a Realistic Campfire Simulation
It’s time to put the skills we just learned about to the test; this chapter is about creating a realistic campfire simulation and learning how to create sparks in Blender! Creating fire is easy, but creating fire that looks realistic is a whole other story. You need to think about the settings for the domain, the flow object, any collisions you have, the lighting, and the materials. It takes a bit more than setting the resolution in the domain to 1,000 and hitting Bake. Remember, setting the resolution super high doesn’t necessarily mean the fire will look good; plus, we’re pretty sure Blender would crash if you did that.
Here are the following topics we will cover:
- Creating the campfire simulation
- Creating the fire materials
- Creating sparks using a particle system
- Creating the particle material
- Adding the final details
We have a lot of things to cover in this chapter so let’s jump right into it!
Technical requirements
This chapter requires you to have Blender version 3.0 or above installed.
To download Blender, visit www.blender.org.
This tutorial is a bit more advance, and we won’t be covering everything. It assumes you know the basics of Blender and how to render animations.
Make sure to download Campfire Setup.blend to follow along with this chapter from the following link: https://github.com/PacktPublishing/Learn-Blender-Simulations-the-Right-Way/tree/main/Chapter03.
Creating the campfire simulation
To get a head start on this chapter, we have already created a 3D model of a campfire called Campfire Setup.blend for you to download. This .blend file includes some logs, rocks, and materials already in place; that way, we can jump straight into creating the simulation.
When you open the Campfire Setup.blend file, you will notice that the campfire is very large. The reason for that is because Blender doesn’t simulate very well at a small scale and can cause you problems. We’ve had problems where the fire fills up the entire domain, then the fire looks very noisy and the bake will take a super long time. In general, it’s usually a good idea to simulate at a large scale.
What if you already created a scene at a small scale? Well, a solution for that would be to create a simulation in another blend file, then import that simulation as a volume object. At that point, you will be able to scale down the fire and move it anywhere in the scene.
For now, let’s create the domain object and start setting up the simulation!
Setting up the domain
With the Campfire Setup.blend file open, let’s create a domain object and change some of the settings to get the desired look as follows:
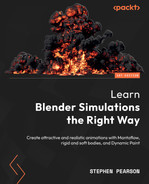
- First, add a cube object as our domain and scale it up to fit the campfire. You only need to scale it up to fit the logs, not the rocks. Then, double-check that the cube is tall enough for the flames that you want.
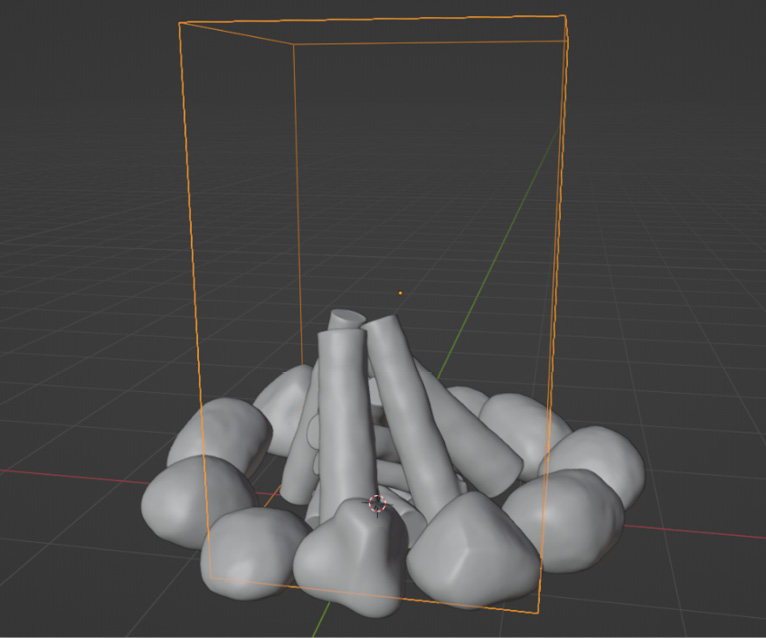
Figure 3.1 – Domain size
- Once you are happy with it, head over to Physics Tab and select Fluid. Then, for Type, select Domain.
- As for the domain settings, let’s start by changing Resolution Divisions to 128. This will give us a nice high-quality fire.
- With the current settlings, the fire will move very quickly in the simulation, so let’s counteract this by changing Time Scale to 0.5. This will slow down the fire.
- Check the box next to Adaptive Domain, which will help reduce the bake time.
- In the Gas tab, set Vorticity to 0.1 so that we get a little bit of randomness with the smoke.
- Open the Fire tab and change Reaction Speed to 1.00. With the default value of 0.750, the flames might be a bit too high for our scene. Remember that Reaction Speed controls the height of the flames. Lower values = taller flames and higher values = shorter flames. Feel free to customize this value however you like!
- Since we are creating a campfire, we don’t need that many swirls in our fire, so let’s change Vorticity down to 0.4.
- Now let’s setup Cache Panel so we can bake in the simulation as follows:
- First, change Type to Modular so we can bake in the simulation.
- Set End Frame to however long you want your simulation to be; 100 frames is a good length for this simulation.
- Finally, check Is Resumeable just in case you need to stop the bake.
- We don’t really need any Noise in this simulation because we found that the fire looks too messy with it enabled.
And there we go, we have set up the domain. Now it’s time to create all the Flow objects!
Setting up the inflows
Now that the domain is set up and ready to go, let’s create the flow objects. If you take a look at real campfires, you will notice that not all of the sticks and logs are on fire; only the ones that are near the bottom are.
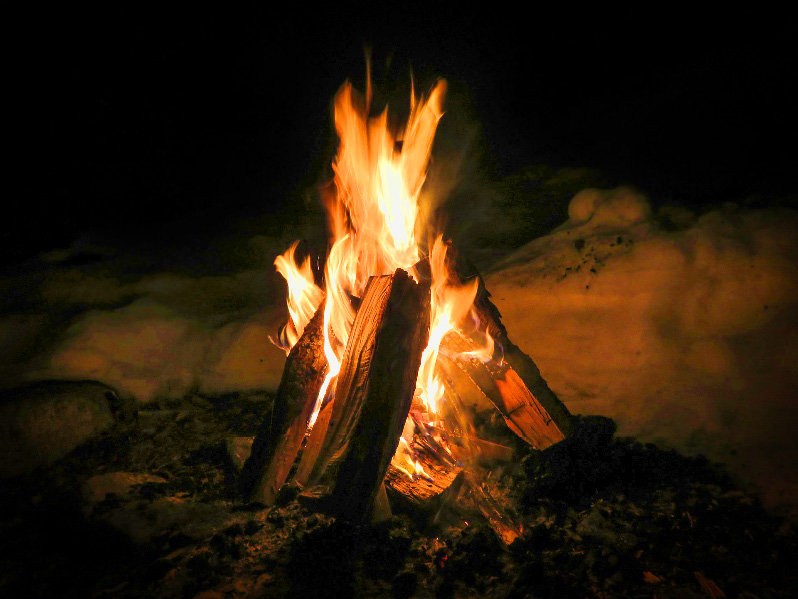
Figure 3.2 – Real campfire example
Let’s replicate that by only selecting the logs that are on the bottom of the fire and setting those as the inflow objects. The objects that we can select as inflows are Cylinder.001 through .006. You can view the names by looking at the top right of Blender as follows:
Figure 3.3 – Inflow selection
Once we create the first inflow, we can apply those same settings to the rest of the objects. Let’s get started as follows:
- Jump over to Physics Panel (if it’s not already there, select Fluid).
- For Type, choose Flow.
- Set Flow Type to Inflow and Behavior to Fire.
- In the Source tab, set Surface Emission to a lower value of 1. This will be the fire closer to the surface of the mesh.
Now let’s enable a texture. This will allow us to control where the fire will emit on our object. Check the Texture box, then head over to Texture Panel (it will look like a checkered pattern).
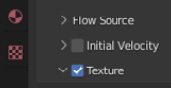
Figure 3.4 – Texture example
Here is where we can create and set up textures for our objects as follows:
- Click the big New button to create a new texture.
- To keep everything organized, let’s name this new texture Inflow Texture.
- For Type, choose Clouds. This will give us a very noisy pattern that will look nice when the fire emits from the Inflow object.
- Currently, the texture is a bit too big for our object, so let’s set Size to 0.1.
- When using textures for inflows, it basically acts as a mask for where the fire will emit. The white parts of the texture will emit fire and the black parts will not. To get a bit more definition between the white and black parts of the texture, let’s set Contrast in the Color tab to 2. This will give us sharper edges on the texture.
The following is what your texture should look like now:
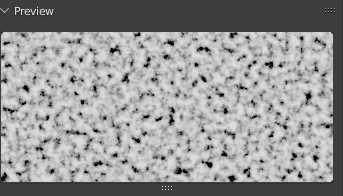
Figure 3.5 – Texture preview
- Let’s assign the texture we just created to the inflow. Jump back over to Physics Panel and select the texture in the drop-down menu. You might see a lot of other textures and that is because of the rocks. Just search Inflow and it will pop up!

Figure 3.6 – Inflow Texture selection
- The other thing we want to do is move the texture around the object as it simulates. This will give us a random variation in the fire, making it look more realistic. We can achieve this using Offset in the Texture tab. Instead of animating this value, let’s just create a driver so it does it for us automatically. Click on this Offset field, type #frame/200, and hit Enter!
Now the texture will move around as the animation plays.
- Now that we’ve created the first inflow, let’s copy all of those settings and apply them to the rest of the objects. Make sure the objects you want to assign are selected and that the object with the inflow settings is selected last. If done correctly, the last object will be highlighted alone in a different yellow/orange color. This will make sure that it’s the active object.
What is an active object?
When you have multiple objects selected in Blender, there will be one that has a yellow outline. This is your active object. The rest of the objects will have an orange outline.
Then, press Ctrl + L or Cmd + L and click Copy Modifiers. Now all of those objects will have the exact same settings we just created!
- The preceding step only copied the settings for the inflow. It did not copy the driver we created in step 7 for the texture offset. What we need to do is copy the animation data of the texture. Press Ctrl + L or Cmd + L and select Link Animation Data. Now all of the objects will have that exact same driver we created earlier.
And there we go, we have successfully created all of the inflow objects. The next thing we need to do is assign some Effector objects. We don’t want the fire to go through the logs, so let’s assign some collisions!
Adding effectors
This part is pretty simple. All we need to do is assign an Effector Collision to all the logs that aren’t inflows, as follows:
- Select Cylinder.007 in Outliner (top right of the screen) as follows:
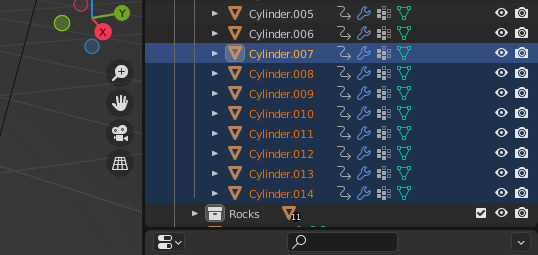
Figure 3.7 – Effector selections
If you hold Shift and select Cylinder.014, it will automatically select everything in between.
- In Physics Panel, select Fluid, and for Type, choose Effector.
- Just repeat the process we did for the inflow objects by pressing Ctrl + L or Cmd + L and selecting Copy Modifiers. Now each of those objects will have the Effector Collision assigned!
We don’t need to assign the collisions to the rocks because the fire will not reach over there!
With that done, we are ready to bake in the simulation. To do that, select your domain object and click Bake Data. Look at the following figure to see what your simulation should look like so far!

Figure 3.8 – Baked simulation
Now that the simulation is complete, we are ready to create a nice fiery material!
Creating the fire materials
Now that the simulation is finished, we are ready to create the fire material. One thing we wanted to mention here is that for this scene, we will be using Cycles to render the animation. There are a couple of reasons for this.
One of the main reasons is that when using Eevee, lamps are the only things that emit light. This means that the fire will look like it’s just glowing and won’t light up the rest of the scene. Since we are going for a realistic simulation, we want to use Cycles so that the fire actually emits light to the surrounding area.
Another reason is that there are a couple of features in the material that only work in the Cycles render engine. So, head over to Render Panel and switch the engine to Cycles, then we will be good to go!
With that out of the way, let’s create this fiery material as follows:
- Let’s start out by selecting Shading Workspace at the top of the screen. The following figure shows where you will be able to create the fire material:

Figure 3.9 – The Shading workspace
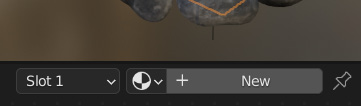
Figure 3.10 – New material
- We don’t need Principled BSDF Shader, so go ahead and delete it. Then, replace it with Principled Volume Shader. To add a new node, press Shift + A then go to Shader and select Principled Volume. From there, take Volume and plug it into Volume in Material Output as follows:
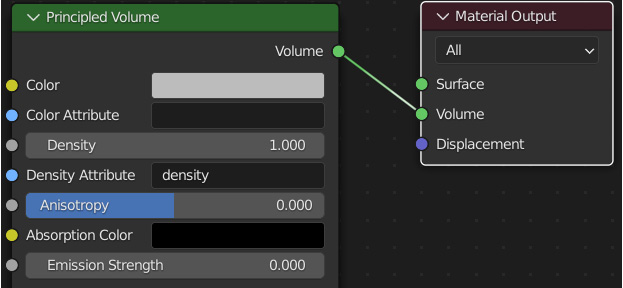
Figure 3.11 – Principled Volume
- Set Density to a value of 5 or so, which will make the smoke more dense.
- In Chapter 1, An Introduction to Mantaflow, we used Blackbody Intensity to add flames. While this does work, using this method will produce some sharp edges and give us a lower quality look to the fire. Instead, we are going to be using the heat attribute to add the flames.
Attributes
Heat, along with many other attributes, can be brought into the material and used however you like. For example, you could take the velocity attribute and plug that into the emission value. Then, you will be able to see the values of the velocity in the simulation. Flame, density, temperature, and velocity are just a few of attributes at your disposal. Also, the heat attribute only works in the Cycles render engine.
In order for this to work, we need to add in Attribute Node. To do this, press Shift + A > Input > Attribute.
- In the Name field, type the word heat in lowercase. Then, plug Factor Output into Emission Strength.
- In order to control this a bit more, let’s add in ColorRamp. To do this, click Shift + A , go to Converter, then select ColorRamp and place it in between Attribute Node and Principled Volume. If you slide the black handle of ColorRamp closer to the white handle, it will clamp down on those values, giving you the look of flames. You can also switch ColorRamp from Linear to Ease to get a smoother transition.
If you go into Rendered View, the following is what the node setup should look like so far:
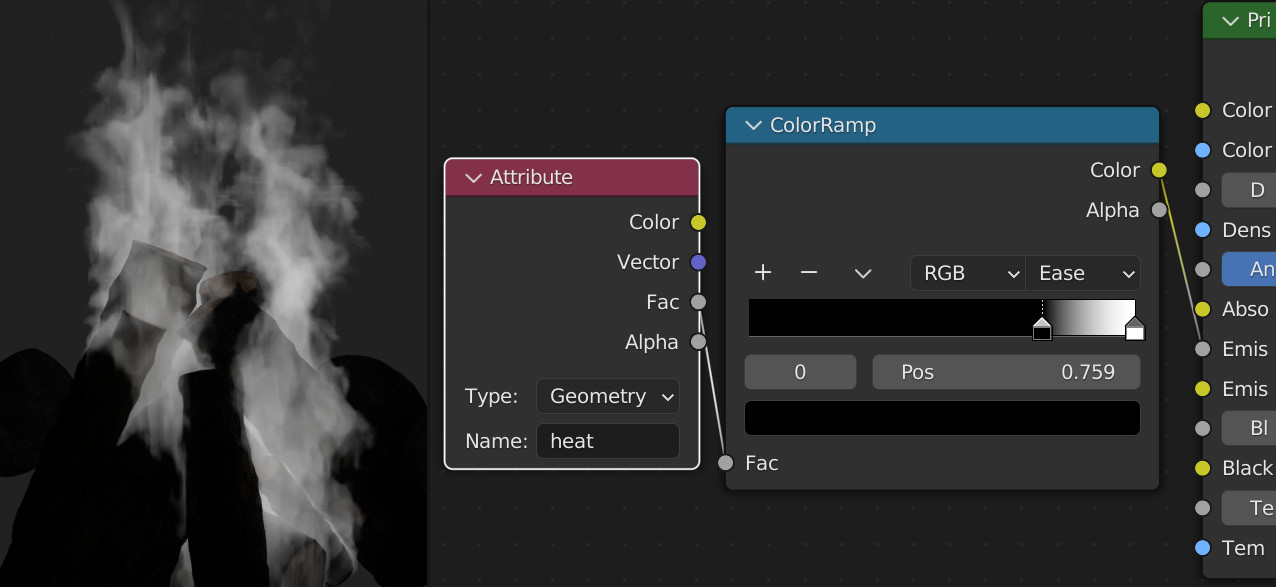
Figure 3.12 – Heat attribute
- Let’s brighten up our flames, shall we? To do this, add Math Node. Press Shift + A , go to Converter, and select Math. Then, place the node between ColorRamp and Principled Volume. If you set the mode from Add to Multiply, the bottom value now controls the strength of the emission. Let’s set this to a value of 50.
- Now add some color in. Duplicate ColorRamp by pressing Ctrl + Shift + D; this will keep the connection to Attribute Node (pressing just Shift + D will break the connection). Then, plug it into Emission Color in Principled Volume.
If we look at real flames, you will notice that the edges have this red tint, and as you travel closer to the, it goes orange then white.
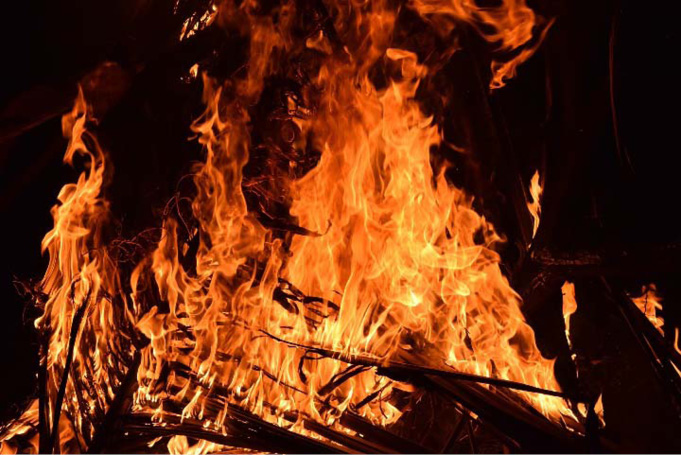
Figure 3.13 – Real flame example
To get the same look, select the black handle and set it to a red color, then set the white handle to an orange color. Play around with the positions until it looks good. You can always change the colors later to get different looks for the fire!
- Finally, to give our flames more detail, let’s jump back to the first ColorRamp and add another handle by clicking the + button. Move the handle we just added to the far-right side and set the color to black.
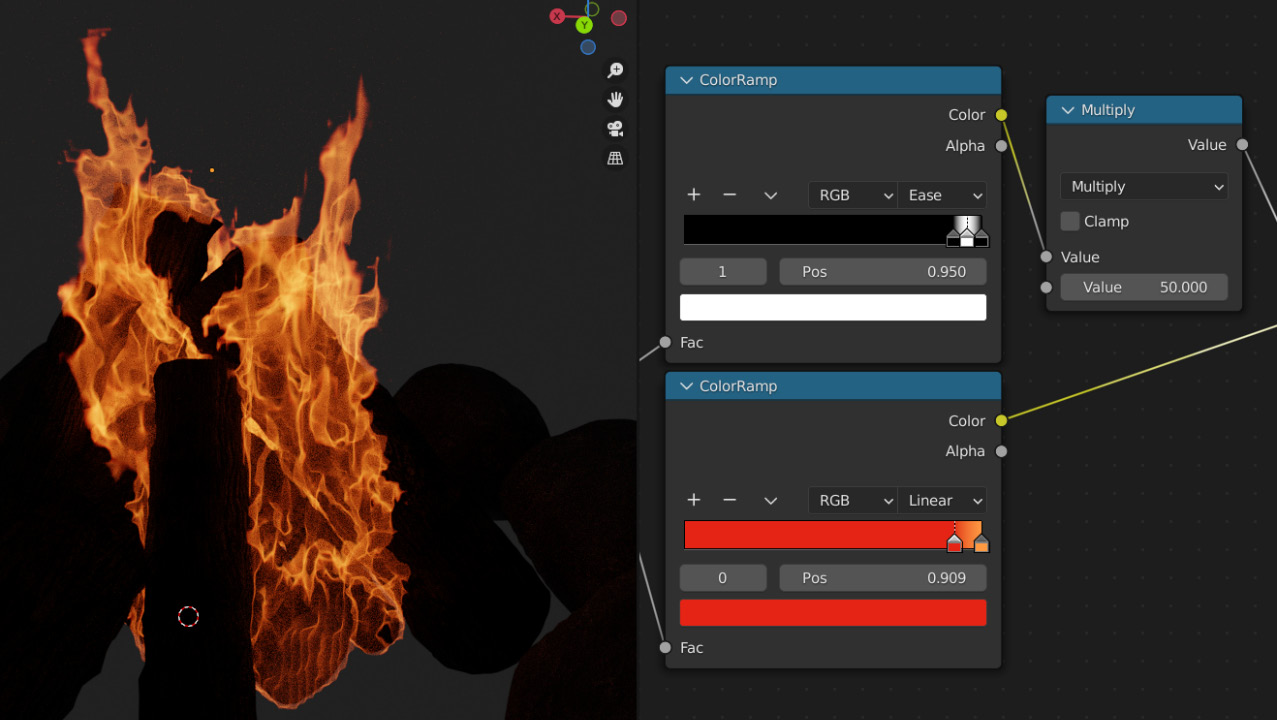
Figure 3.14 – Fire material example
And there you have it! We have finished creating the fire material. And just in case you got confused in this section, the following figure is a full preview of all of the nodes:
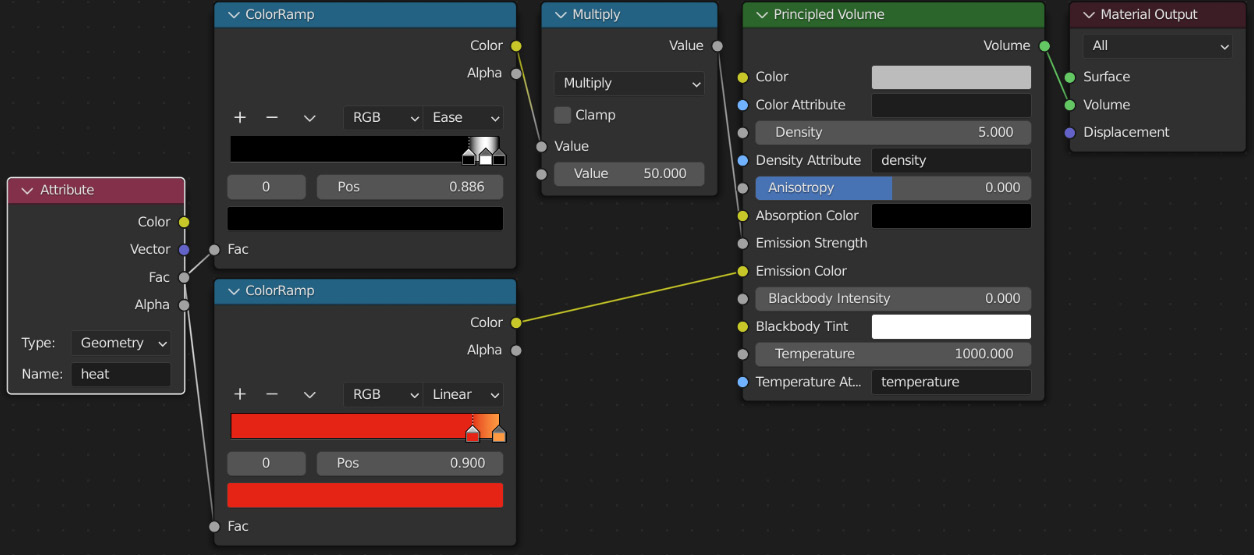
Figure 3.15 – Full material preview
In the next section, we will learn how to add sparks to our flames using a particle system!
Creating sparks using a particle system
Now that the simulation is complete with a material, it’s now time to work on creating sparks that fly out of the fire. This is very easily done using a particle system. Using particle systems in Blender can be very useful and save a lot of time compared to adding the objects in manually. It works by emitting the particles from a mesh object, normally in a great quantity. Things such as sparks, dust, hair, grass, and many more can easily be created using particles!
Now let’s create the sparks as follows:
- First, we need to add in a new mesh object for the particles to emit from. For this scene, a circle would work great. Let’s add one in by pressing Shift + A , then go to Mesh and select Circle.
- After you have added the circle, look to the bottom left of the screen and you should see an Add Circle menu. Open the menu and here is where we set the properties for the circle. We need to make sure this mesh has a face and is small enough for the fire. Set Fill Type to N-Gon and Radius to 0.25. Then, place it underneath the fire.
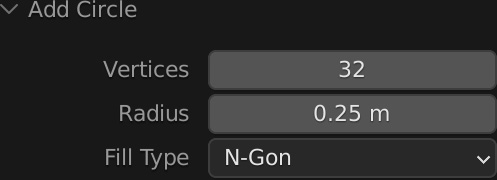
Figure 3.16 – Adding a circle
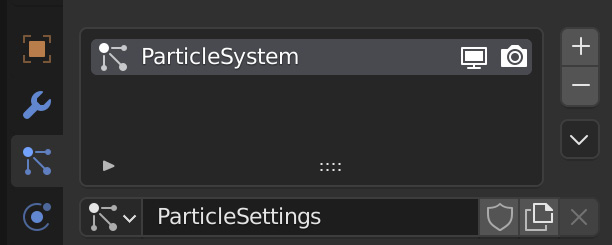
Figure 3.17 – Creating the particle system
- We don’t need 1,000 sparks, so let’s set Number of particles to 50. Feel free to experiment with this value until you find something you like!
- Since the animation is only 100 frames long, set End Frame to 100 as well.
- If we play our animation, you will notice that large white dots are appearing. These are called halos. These halos can be used in many ways, including emitting fire/smoke from each particle, which we will learn about in Chapter 5, Creating a Realistic Explosion. For this tutorial, we need to use an actual object instead. Let’s add in Icosphere, move it to the left of the campfire so it’s out of the way, and scale it down to 0.5.
- To assign each particle as an Icosphere, open the Render tab and set Render As to Object. Then, for Instance Object, select the Icosphere object we just added.
- Play around with the Scale value until the particles are small enough. You can also increase Random Scale to give a random size to each particle.
- We also don’t want this circle to show up in the render, so turn off Show Emitter.
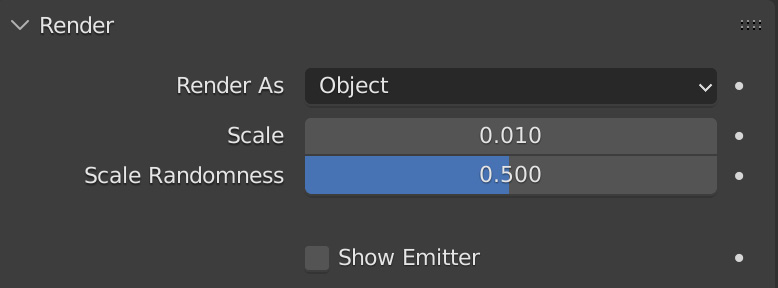
Figure 3.18 – Scaling the particles
- Currently, the particles are falling, which not very good. Let’s open Field Weights and set Gravity to 0.
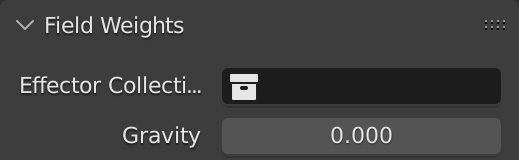
Figure 3.19 – Gravity
- The next question is, how do we make the particles follow the flow of the fire? Well, there is a force field that does that exact thing! Let’s add it in by pressing Shift + A , then go to Force Field and select Fluid Flow.
- With Force Field selected, we need to jump over to Physics Panel and set Domain Object as the domain in our scene. Now the particles will move with the flow of the fire! If you want the particles to move faster, you can increase the Strength value.
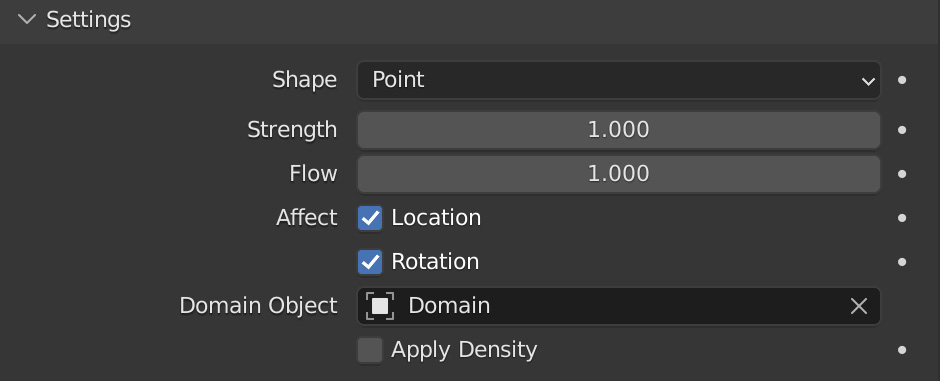
Figure 3.20 – Fluid Flow settings
We have now finished creating the particle system! Feel free to play around with the number of particles, the strength of the force field, and whatever else you like to get your desired look! Before we talk about rendering, we need to create a material for our sparks.
Creating the particle material
The next thing on the list is creating the particle material. In real life right when sparks are emitted from a fire, they are in a very bright white color. As they rise and cool off, they turn to more of an orange red-ish color. We can create this same look by adding a couple of different nodes in the material as follows:
- Select Icosphere and open Shader Editor once again. Then, create a new material by clicking the New button.
- Delete Principled BSDF and replace it with Emission Shader, then set Strength to a value of 20.
- Plug Emission Shader into Surface in Material Output.
- Next, we are going to add a new node called Particle Info. To add this new node, press Shift + A, go to Input, and select Particle Info.
Particle Info node
This node allows us to take certain data from the particle system and have it influence the material. For example, you could take the Random output and plug that into ColorRamp. Now each particle will have a random color based on ColorRamp. One thing to note is that this node only works in the Cycles render engine.
- We need to take Age and Lifetime outputs from the Particle Info node and divide them together using a Math node. This will allow the color to change as the particle rises into the air. To do this, press Shift + A > Converter > Math. Set Math Node to Divide and plug in Age and Lifetime into the two inputs. Refer to Figure 3.21 if you get confused.
- Finally, just add ColorRamp and change the colors to a bright yellow and a red color, then plug that into the Emission Color socket. The left side of ColorRamp controls what color the particles are at the start. As the particle rises, it changes to the color on the right side.
Play around with the handle positions to control when the particle will change colors. The following figure shows the full node setup:
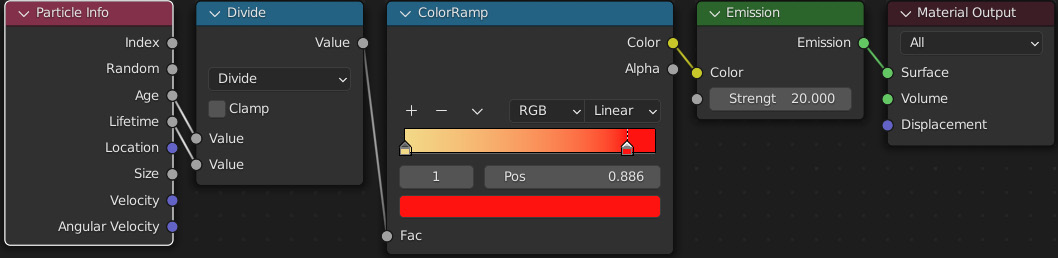
Figure 3.21 – Particle material
Now we have basically finished this tutorial. The last step is just to place the camera and set up some render settings!
Adding the final details
Congratulations on making it to this part of the tutorial! Hopefully you have learned some new tricks and techniques along the way.
In the last part of this tutorial, we will be adding in a ground plane and a lamp to help brighten the fire, and we will enable motion blur, as follows:
- Let’s start out by adding a Plane object to be the ground floor. This way the fire is not floating in 3D space.
- If we press Z and go into Rendered View, you might notice that the fire is not that bright. We could turn up the strength of the emission for the fire, but that would also change the color. Instead, let’s fake it by adding Point Lamp and placing it in the middle of the fire. Press Shift + A, then go to Light and select Point.
- Set Power to around 100, match the color of the fire, and bring Radius up to 0.5. This will make the shadows a bit softer.
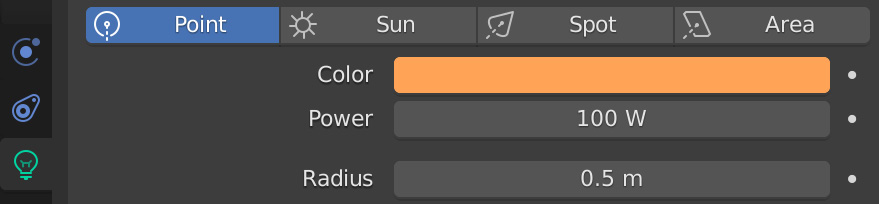
Figure 3.22 – Lamp settings
- Next, let’s jump to Render Panel and enable Motion Blur. This will give a much more realistic look to the sparks! The higher the Shutter value is, the more motion blur you will have. A value of 0.5 works for most situations.
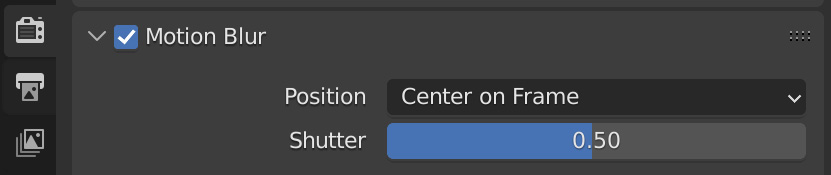
Figure 3.23 – Motion Blur
- Finally, the last step is to open the Render Sampling tab and set Max Sampling to around 100. Make sure Denoising is checked as well, as this will make your render look nice and clean without any noise!
That is basically all we really need to do. We encourage you to add a bit more to the scene. Maybe scatter some leaves around the ground, set up a background, add a couple of sticks and logs around the fire, or even have a character sitting down – it’s all up to you! If you want a bit of a glow around the fire, you could also add some Glare in Compositor.
Once you are happy with your scene, just set up the camera and hit Render Animation! The following figure is one frame from our animation:
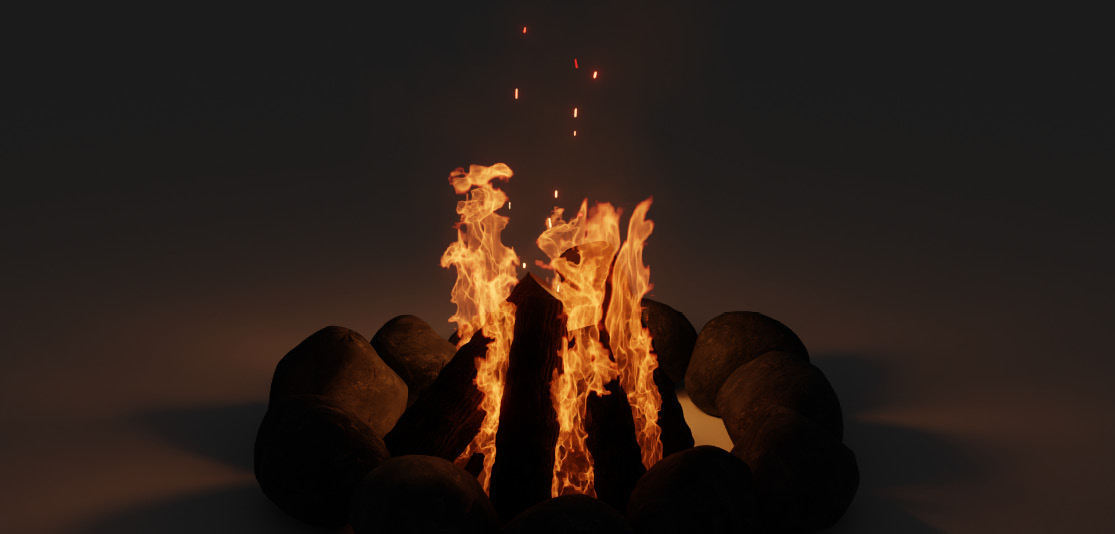
Figure 3.24 – Final scene frame
To view the final result or to download this scene’s blend file, visit https://github.com/PacktPublishing/Learn-Blender-Simulations-the-Right-Way/tree/main/Chapter03.
Summary
That concludes this tutorial. We hope you learned a lot and made something cool along the way!
We have covered quite a bit in this chapter, so let’s do a recap. At the beginning of the chapter, we learned about creating a fire simulation, adding textures to flow objects to create variation in the fire, and how to apply those same settings to multiple objects at the same time. After that, we discussed how to add a lot of detail to the fire using the heat attribute in Shader Editor. We also created a particle system and learned how to make the particles follow the flow of the fire using the Fluid Flow force field. Finally, we made the particle material so that it changes color as it rises into the air!
In the next chapter, we will be moving away from smoke and fire. Instead, we are going to learn how to use the liquid simulation to create a really nice waterfall in Blender 3.0!
Exercise
While it is great to follow a tutorial and learn how to do things, it’s also important to try and create things yourself. Not only is it good practice, but it will also help you remember everything we just learned! So, take a look at the following figure and try to think about how you would go about creating it.
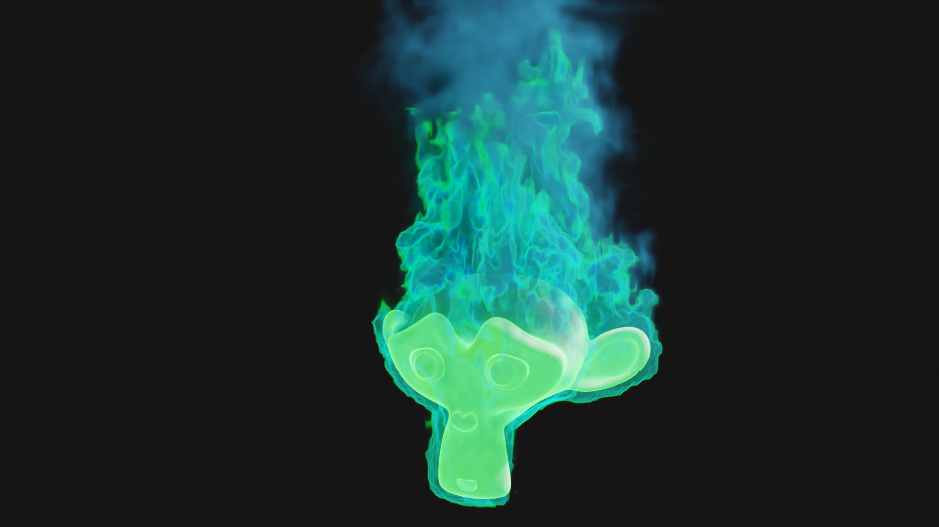
Figure 3.25 – Green fire example