
Chapter 9: Behavior Trees
In a preceding chapter, we saw a basic but effective way to implement and manage character states and behaviors: finite state machines (FSMs). FSMs are simple to implement and intuitive, but they have a fatal flaw: it is tough to make them scale once there are many states and transitions. For example, imagine a character that behaves differently depending on its health and mana (high, medium, or low). We have a state in which both health and mana are high, one in which health is medium and mana is high, one in which they are both medium, and so on. In total, we have nine states just for those. If we add other conditions (such as player proximity, time of day, equipment, player's score, or whatever you may imagine), the number of states grows exponentially.
Luckily, we have a solution: behavior trees (BTs). In essence, BTs are just another way to visualize complex FSMs, but they are fast, provide reusability, and are easy to maintain. After their introduction in 2004 with Halo 2, they quickly became the preferred decision-making technique in games.
In this chapter, we will be doing the following:
- Exploring the basic principles of BTs, knowledge that you will be able to transfer to any BT plugin available for Unity (or other game engines)
- Implementing a small demo based on a popular free Unity plugin for BTs: Behavior Bricks
Technical requirements
For this chapter, you need Unity3D 2022 and the free plugin for Unity, Behavior Bricks. Don't worry, we will see how to install this plugin together. You can find the example project described in this chapter in the Chapter 9 folder in the book repository here: https://github.com/PacktPublishing/Unity-Artificial-Intelligence-Programming-Fifth-Edition/tree/main/Chapter09.
Introduction to BTs
A BT is a hierarchical tree of nodes that controls the AI character's behavior flow. It can also be used to coordinate groups of characters (for example, to model the attack pattern of a small platoon), or even disembodied agents such as an AI story director.
When we execute a BT's node, the node can return three states: success, failure, or running (if the node's execution is spread over multiple frames, for instance, if it plays an animation). When the BT executor runs a tree, it starts from the root and executes every node in order, according to rules written in the nodes themselves.
- A task (a node without children), also called a leaf.
- A decorator (a node with a single child)
- A composite (a node with multiple children)
In general, leaves represent the Action that the characters can do or know (that is why they are commonly called an Action or Task); they may be actions such as GoToTarget, OpenDoor, Jump, or TakeCover, but also things like IsObjectNear? or IsHealthLow?. These actions depend on the character, the game, and the general game implementation.
A decorator is a node that modifies (decorates) the sub-tree under it (therefore, it can decorate both composite and task nodes). For example, a standard decorator is the Negate node. The node inverts the return value of the sub-tree; for instance, if the sub-tree returns Success, the decorator returns Failure and vice versa (of course, if the sub-tree returns Running, the decorator returns Running as well). Another everyday decorator is Repeat, a node that repeats its sub-tree a certain number of times.
Instead, a composite node represents a node with multiple children, and it is the most interesting case. There are two common composite nodes: Sequence, which runs all its children in order and returns Success if—and only if—all its children return Success, and Selector, which tries to execute all its children in order but returns Success as soon as one of its children returns Success. However, many BT implementations contain many more composite nodes (such as nodes that run their children in parallel or according to some dynamic priority value; we will see an example of such a node in the demo).
Of course, this tree structure is not enough. Nodes need to exchange information with each other or with the game world. For instance, a GoToTarget node needs to know the target and its location; an IsObjectClose? node needs to know which object we are referring to and what distance we consider close. Naturally, we could write a GoToX node for each object in the game (such as GoToTree01 and GoToDoor23), but you can easily imagine that this becomes messy very quickly.
For this reason, all the BT implementations contain a data structure called Blackboard. As in a real-life physical blackboard, every node can write and read data into it; we just need to specify where to look for each node.
A simple example – a patrolling robot
Let's look at this example (which we will later implement in Unity). Imagine a patrolling robot that shoots anything that gets near it but works only during the daytime. We show the possible BT for this kind of agent in the following diagram:

Figure 9.1 – Example BT for a simplified day-only patrolling robot
Let's run this BT, assuming that the target is close and it is not night:
- The first node is a Repeat decorator; it does nothing but cycle the BTs, therefore, we can ignore it for now.
- The SELECTOR node starts executing its first child; we go down to the left.
- We are now at the first Sequence node; again, we execute the first node. IsNight? returns Failure (because it is not night!). Whenever one node returns Failure, the whole Sequence node returns Failure.
- We traverse back up the tree to the SELECTOR node; now, we go to the second branch.
- Again, we execute Sequence.
- This time, however, IsTargetClose? returns Success, so we can proceed to the next node, Shoot, which runs a game function spawning an in-game projectile.
The pattern of Sequence | Condition | Action is equivalent to if Condition is Success then Action. This pattern is so common that many BT implementations allow you to stack the Condition and the Action together. Therefore, we can rewrite the tree as follows:

Figure 9.2 – A simplified BT
This tree is the same as the previous one but with a simplified Sequence pattern.
Implementing a BT in Unity with Behavior Bricks
Behavior Bricks is a robust but free BT implementation for Unity developed by the Complutense University of Madrid in Spain. Using Behavior Bricks, you can start using BTs in your projects without implementing BTs from scratch. It also has a visual editor where you can drop and connect nodes without any additional code.
Follow these steps to install Behavior Bricks:
- We need to go to the Unity Asset Store by going on the website https://assetstore.unity.com/.
- Search for Behavior Bricks.
- Click on Add to My Assets. Once it's done, we can import it into our project.
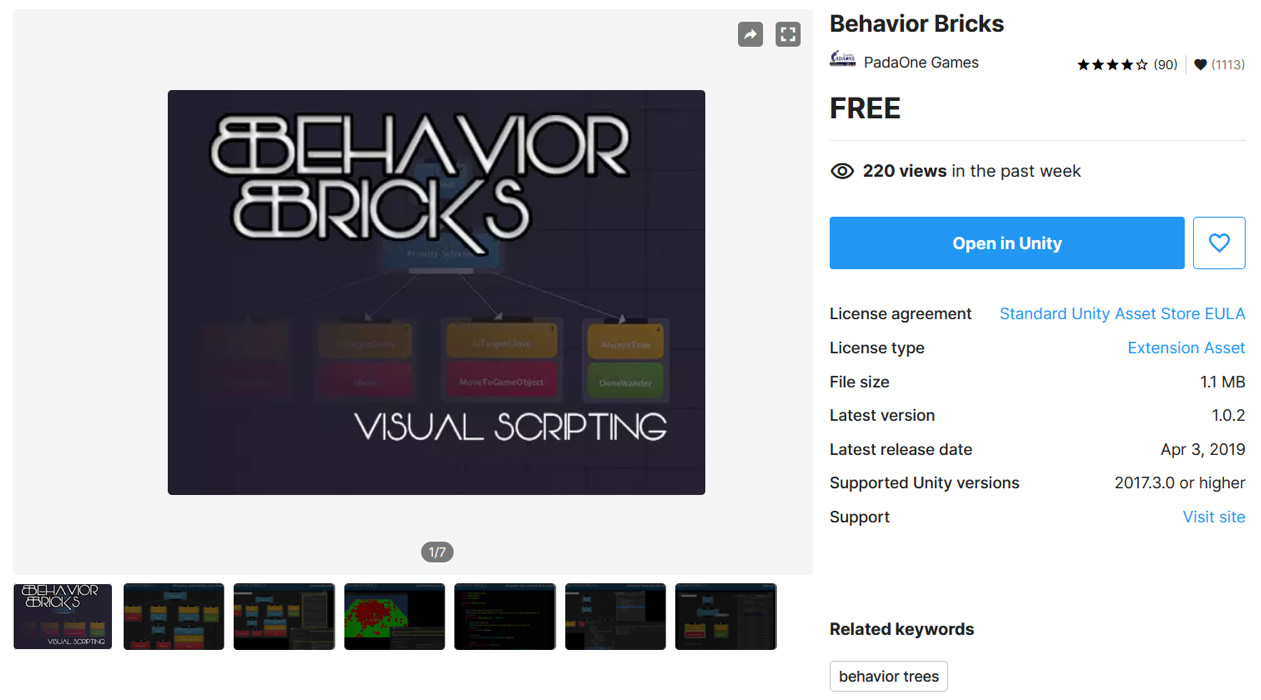
Figure 9.3 – Behavior Bricks Asset Store main page
- Go to Package Manager (Window | Package Manager).
- Go to My Assets.
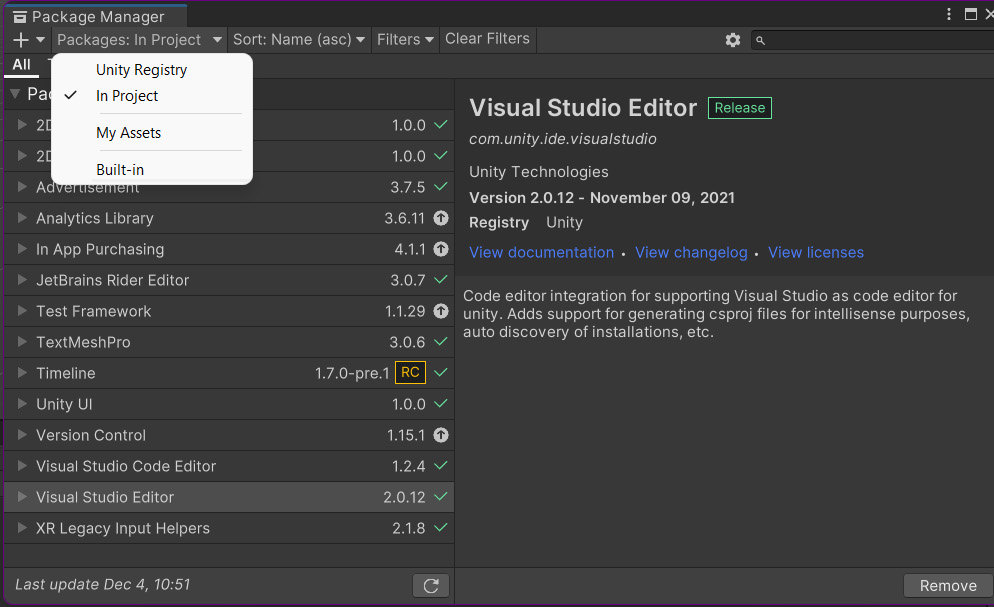
Figure 9.4 – The Package Manager window

Figure 9.5 – Behavior Bricks in Package Manager
At this point, Behavior Bricks is ready to go, and we can proceed with our demo. The following steps give you a brief idea of the steps to follow:
- Set up the scene.
- Implement a day/night cycle.
- Design the enemy behavior.
- Implement the nodes.
- Build the tree.
- Attach the BT to the enemy.
Now, let's take a look at each of these steps individually.
Set up the scene
Let's follow a step-by-step process to do this:
- We start by adding the game objects to the scene. We add a big plane to the scene, we add a Box Collider that encloses the entire plane, and we call it Floor (you may also add a texture if you like; be creative as it helps to have fun with these simple demos).

Figure 9.6 – Example of the Floor Box Collider
- We add a sphere and a cube; we call the sphere Player and the cube Enemy. In the Enemy, we add another empty object and move it just outside the cube. We call it shootPoint, and it represents the placeholder for where the enemy shoots.
- Then, place all these objects on the floor; you should have something similar to the following:

Figure 9.7 – The scene of our demo
- Now, because we want the player and the enemy to move around, we need to create a NavMesh as described in Chapter 8, Navigation Mesh. Remember to add the NavMesh Agent component to both Player and Enemy!
- Finally, if it is not present, add the MainLight tag to the Direct Light object.
Implement a day/night cycle
In this demo, we want to implement a basic day/night cycle. To do that, we attach the script DayNightCycle.cs to the Direct Light object. As with many scripts in this demo, we adapt the code from the Quick Start Guide provided by Behavior Bricks:
using UnityEngine;
public class DayNightCycle : MonoBehaviour {
public event System.EventHandler OnChanged;
public float dayDuration = 10.0f;
public bool IsNight { get; private set; }
public Color nightColor = Color.white * 0.1f;
private Color dayColor;
private Light lightComponent;
void Start() {
lightComponent = GetComponent<Light>();
dayColor = lightComponent.color;
}
void Update() {
float lightIntensity = 0.5f + Mathf.Sin(Time.time *
2.0f * Mathf.PI / dayDuration) / 2.0f;
bool shouldBeNight = lightIntensity < 0.3f;
if (IsNight != shouldBeNight) {
IsNight = shouldBeNight;
// Invoke event handler (if set).
OnChanged?.Invoke(this,
System.EventArgs.Empty);
}
lightComponent.color = Color.Lerp(nightColor,
dayColor, lightIntensity); }
}
This script implements a typical day/night cycle. The way it works is quite intuitive. Let's have a look:
- At each Update step, we update the lightIntensity variable according to a sinusoidal wave.
- The variable cycles from 0 to 1 and, when the value is smaller than 0.3, we decide that it is nighttime.
- Finally, we update the light color according to the lightIntensity value, interpolating the day and night colors.
- Note the onChanged event. We call it every time we switch from daytime to nighttime, and from nighttime to daytime. Later, we use this event to create an IsNight node in the BT.
Design the enemy behavior
Now, it is time to design the enemy behavior. We need to do this before writing a single line of code. For this demo, we will adapt the code and assets provided by the example project in the Behavior Bricks Quick Start Guide. For more information, you can refer to it at this URL: http://bb.padaonegames.com/doku.php?id=quick:program.

Figure 9.8 – The target BT we want to implement
The BT in Figure 9.8 describes the following behavior:
- If it is night, the enemy is deactivated.
- If the target is very close, the enemy shoots at the target.
- If the target is further away, the enemy chases the target.
- Otherwise, the enemy just wanders around.
There are two important things to note:
- First, the two IsTargetClose? nodes differ in the value we consider close. In particular, we want to shoot the target only if we are close to it; otherwise, we just start chasing it.
- Second, and most importantly, the order of the nodes matters. Because the Selector works from left to right and stops at the first Success, we cannot put ChaseTarget before Shoot. Otherwise, the enemy will never shoot!
As a rule of thumb, we need to order conditions from the highest to the lowest priority. In fact, in the example, we put at the very end the action to execute when everything else fails (AlwaysTrue is a condition that always succeeds and works like the else branch of an if condition).
Note that Wander is in a different color because it is not a node but another BT. The lovely property of BTs is that you can reuse common BTs as nodes inside more complex BTs. The Wander BT simply makes the enemy move randomly on the map; fortunately, Behavior Bricks already includes it, so we don't need to implement it!
Implementing the nodes
After we have made a plan for our BT, the next step is to check whether our BT implementation of choice (in our case, Behavior Bricks) already includes some of the nodes we need. Of course, we want to reuse as many pre-made nodes as possible. Reading the Behavior Bricks documentation, we can see that it already includes nodes such as IsTargetClose, MoveToGameObject, Wander, and AlwaysTrue, plus, of course, Repeat and Selector.
Therefore, we need to write all the other tasks. Note that Behavior Bricks tasks are not MonoBehaviors; therefore, we do not need to attach them to some object in the scene. We only need to put the scripts in any folder in our project's assets, and we are good. Let's look at a step-by-step process to do this:
- Let's start with the ShootOnce action by creating a ShootOnce.cs file in the project assets. First, we create a simple Action attribute called ShootOnce that, as the name says, shoots a single bullet:
using UnityEngine;
using Pada1.BBCore;
using Pada1.BBCore.Tasks;
using BBUnity.Actions;
[Action("Chapter09/ShootOnce")]
[Help("Clone a 'bullet' and shoots it through the Forward axis with the specified velocity.")]
public class ShootOnce : GOAction {
// ….
}
In the beginning, we import Behavior Bricks modules. Then, we create the ShootOnce class by extending the generic GOAction class.
Note the class attributes; Behavior Bricks uses them to populate the BT visual editor. In the Action attribute, we specify that Action is an action, and we put it in the Chapter09 collection with the name ShootOnce. The Help attribute is just a documentation string describing the action's purpose.
- We describe the class attributes as usual. The only difference is that we decorate each attribute with the InParam attribute, which specifies that the BT executor needs to retrieve the following value from the blackboard:
[InParam("shootPoint")]
public Transform shootPoint;
[InParam("bullet")]
public GameObject bullet;
[InParam("velocity", DefaultValue = 30f)]
public float velocity;
For this action, we need a Bullet prefab, a place to instantiate the bullet (shootPoint) and the bullet velocity. Later, we will see how to set them up from the visual interface.
- Now, it is time to write the real meat:
public override void OnStart() {
if (shootPoint == null) {
shootPoint =
gameObject.transform.Find("shootPoint");
if (shootPoint == null) {
Debug.LogWarning("Shoot point not
specified. ShootOnce will not work for "
+ gameObject.name);
}
}
base.OnStart();
}
public override TaskStatus OnUpdate() {
if (shootPoint == null || bullet == null) {
return TaskStatus.FAILED;
}
GameObject newBullet = Object.Instantiate(
bullet, shootPoint.position,
shootPoint.rotation *
bullet.transform.rotation );
if (newBullet.GetComponent<Rigidbody>() == null) {
newBullet.AddComponent<Rigidbody>();
}
newBullet.GetComponent<Rigidbody>().velocity =
velocity * shootPoint.forward;
return TaskStatus.COMPLETED;
}
Every Behavior Bricks node contains some default method called during the BT execution. We can overwrite them in our custom implementations. In this example, we see two of them: OnStart and OnUpdate. They are used very similarly to how we use Start and Update in MonoBehavior:
- The BT executor calls OnStart when the game creates the BT. In it, we initialize all the references we need. In this case, we get a reference to the shootPoint object. Note also that we must call base.Onstart() to initialize the base class.
- In OnUpdate, we write the intended action for the node, that is, what we want this node to do when the BT executor invokes it. In this case, the code is self-explanatory: we create a bullet and shoot it at the velocity stored in the settings.
If there is no problem, we mark the node as complete (so that the BT knows that it is a Success); otherwise (for example, if there is no shootPoint value), we mark the node as Failed.
- Now that we have a base class for shooting once, we can create a new Action attribute for shooting continuously. Let's create a Shoot.cs file with the following content:
Using UnityEngine;
using Pada1.BBCore
using Pada1.BBCore.Tasks;
[Action("Chapter09/Shoot")]
[Help("Periodically clones a 'bullet' and shoots it through the Forward axis with the specified velocity. This action never ends.")]
public class Shoot : ShootOnce {
[InParam("delay", DefaultValue = 1.0f)]
public float delay;
// Time since the last shoot.
private float elapsedTime = 0;
public override TaskStatus OnUpdate() {
if (delay > 0) {
elapsedTime += Time.deltaTime;
if (elapsedTime >= delay) {
elapsedTime = 0;
return TaskStatus.RUNNING;
}
}
base.OnUpdate();
return TaskStatus.RUNNING; }
}
This class simply extends the ShootOnce class, adds a delay attribute (the time between consecutive shots), and then continuously reruns its parent class (ShootOnce). Note that this Action always returns RUNNING, meaning that it never completes as long as the BT selects it.
- In the same way, we can create the remaining Action attribute. For instance, the SleepForever action is very straightforward: it just does nothing and suspends the execution of the BTs. Note that the class extends BasePrimitiveAction, which is the most basic form of Action in Behavior Bricks:
using Pada1.BBCore;
using Pada1.BBCore.Framework;
using Pada1.BBCore.Tasks;
[Action("Chapter09/SleepForever")]
[Help("Low-cost infinite action that never ends. It does not consume CPU at all.")]
public class SleepForever : BasePrimitiveAction {
public override TaskStatus OnUpdate() {
return TaskStatus.SUSPENDED;
}
}
- Finally, we need to implement IsNightCondition. We show the IsNightCondition code in the following listing:
using Pada1.BBCore;
using Pada1.BBCore.Framework;
using Pada1.BBCore.Tasks;
using UnityEngine;
[Condition("Chapter09/IsNight")]
[Help("Checks whether it is night time.")]
public class IsNightCondition : ConditionBase {
private DayNightCycle light;
public override bool Check() {
return SearchLight() && light.IsNight;
}
public override TaskStatus
MonitorCompleteWhenTrue() {
if (Check()) {
return TaskStatus.COMPLETED;
}
if (light != null) {
light.OnChanged += OnSunset;
}
return TaskStatus.SUSPENDED;
}
public override TaskStatus MonitorFailWhenFalse()
{
if (!Check()) {
return TaskStatus.FAILED;
}
light.OnChanged += OnSunrise;
return TaskStatus.SUSPENDED;
}
/// ...
private bool searchLight() {
if (light != null) {
return true;
}
GameObject lightGO =
GameObject.FindGameObjectWithTag(
"MainLight");
if (lightGO == null) {
return false;
}
light = lightGO.GetComponent<DayNightCycle>();
return light != null;
}
}
This class is more complex than the others, so let's go slow. First of all, IsNightCondition extends ConditionBase, which is a basic condition template in Behavior Bricks. This class does a simple job: on start, it searches for a light with the MainLight tag. If that exists, it takes its DayNightCycle reference, stores it in the light variable, and registers with the OnChanged event. Then, every time we ask for this condition, we check whether the isNight variable in light is true or false (see the Check method).
However, checking this every time would be very inefficient, in general. So, the BaseCondition class contains two helpful functions:
- MonitorCompleteWhenTrue is a function that is called by the BT executor when the last returned value is false and, in practice, sets up a system that suspends BT execution until the variable becomes true again.
- MonitorFailWhenFalse is a dual function: it is called when the monitored value is true and suspends BT execution until the variable switches to false.
For instance, let's look at MonitorCompleteWhenTrue. If Check is true (so it is night), we simply return Complete; otherwise, we register the OnSunset function with the OnChanged event. When the day/night cycle switches from day to night, OnSunset is called and, in turn, EndMonitorWithSuccess is called. MonitorFailWhenFalse works in the same way but in the opposite direction (monitoring when we pass from night to day):
public void OnSunset(object sender,
System.EventArgs night) {
light.OnChanged -= OnSunset;
EndMonitorWithSuccess();
}
public void OnSunrise(object sender,
System.EventArgs e) {
light.OnChanged -= OnSunrise;
EndMonitorWithFailure();
}
In the preceding code block, there are the two OnSunset and OnSunrise event handlers included in the class. As usual, you can find the complete commented code in the book's repository.
Building the tree
Now that we have our nodes, we need to assemble the tree. To do that, follow these steps:
- Right-click in the Inspector and go to the Create sub-menu.
- Then, select Behavior Tree.
- Choose a location and save.
- An empty editor window should show onscreen; this is the tree editor.
- You can right-click anywhere and start adding and connecting nodes.
- To implement our tree, you need to recreate the tree shown in the following screenshot:

Figure 9.9 – The enemy BT in the Behavior Bricks editor
- Select all the nodes, one at a time, and look for the input parameters; these are the parameters we specified in our classes. These parameters may be CONSTANT, meaning that we directly write a value for them, or a BLACKBOARD reference.
- We need to set up the parameters with the following values:
- In the first IsTargetClose, we specify the blackboard player as target and the constant 7 as closeDistance (if the player is not listed, click on New Parameter).
- In the second IsTargetClose, we specify the blackboard player as target and the constant 20 as closeDistance.
- In Shoot, we need to set 30 as the delay, the blackboard shootPoint as shootPoint (you probably need to create it with New Parameter), the blackboard bullet as the bullet prefab, and the constant 30 as velocity.
- In MoveToGameObject, the target is the player value in the blackboard.
- In Wander, we set a new blackboard parameter (floor) as wanderArea.
Attach the BT to the enemy
Now, it is time to attach this BT to the enemy's BT executor. For that, follow these steps:
- Select the Enemy game object and add the Behavior Executor component to it.
- In the Behavior field, drag and drop the BT we created before.
- In Behavior Parameters, a list of all the blackboard parameters we defined in the previous step (player, floor, the enemy shootPoint firing location, and bullet) should appear.
- Fill them with the appropriate objects, as shown in Figure 9.10:

Figure 9.10 – The behavior executor component
At this point, the enemy should be ready to go. Click Play and you should see the enemy wandering around and, when close enough to the player, start chasing and shooting at it. Note that we did not implement a controller for the player, therefore, to change its position you need to edit the player in the Scene view (or attach one of the control scripts we developed in the previous chapters). For more details, look at the code included in this book.
Now that we have completed our first BT, what if we want to replicate with Behavior Bricks the same AI that we developed in Chapter 2, Finite State Machines, using an FSM? Try that as an exercise.
Summary
In this chapter, we explored the general background behind any BT implementation. We saw what a BT is, what its basic components are, and how can we use a BT to describe game character behavior. Then, we implemented a demo using a free plugin called Behavior Bricks. In the demo, we created the behavior for a simple scenario: the player and a patrolling robot. We also implemented a day/night cycle to spice up the scenario.
BTs are the cornerstones of modern AI for game characters. Implementation details and deeper examples would require a full book to explain them fully. Luckily, the web is full of resources for the curious reader.
Now, we will take a break from AI character design by looking at a different application of AI in games. In the next chapter, we will look at the fascinating field of procedural content generation.
Further reading
- The official Behavior Bricks project page from the Complutense University of Madrid in Spain: http://gaia.fdi.ucm.es/research/bb/.
- Behavior Bricks official documentation: http://bb.padaonegames.com/doku.php.
- Chris Simpson (the developer of Project Zomboid) wrote a nice explanation of BTs on Gamasutra: https://www.gamasutra.com/blogs/ChrisSimpson/20140717/221339/Behavior_trees_for_AI_How_they_work.php.
- Chapter 6 of GameAI Pro, which explores many implementation details of BTs (in C++), is free and available at the following link: https://www.gameaipro.com/GameAIPro/GameAIPro_Chapter06_The_Behavior_Tree_Starter_Kit.pdf.