
12
Saving, Loading, and Serializing Data
Every game you’ve ever played works with data, whether it’s your player stats, game progress, or online multiplayer scoreboards. Your favorite game also manages internal data, meaning the programmers used hardcoded information to build levels, keep track of enemy stats, and write helpful utilities. In other words, data is everywhere.
In this chapter, we’re going to start with how both C# and Unity handle the filesystem on your computer, and move on to reading, writing, and serializing our game data. Our focus is on working with the three most common data formats you’ll likely come across: text files, XML, and JSON.
By the end of this chapter, you’ll have a foundational understanding of your computer’s filesystem, data formats, and basic read-write functionality. This will be the foundation you build your game data on, creating a more enriching and engaging experience for your players. You’ll also be in a good position to start thinking about what game data is important enough to save, and how your C# classes and objects will look in different data formats.
Along the way, we will cover the following topics:
- Introducing text, XML, and JSON formats
- Understanding the filesystem
- Working with different stream types
- Reading and writing game data
- Serializing objects
Introducing data formats
Data can take different forms in programming, but the three formats you should be familiar with at the beginning of your data journey are:
- Text, which is what you’re reading right now
- XML (Extensible Markup Language), which is a way of encoding document information so it’s readable for you and a computer
- JSON (JavaScript Object Notation), which is a human-readable text format made up of attribute-value pairs and arrays
Each of these data formats has its own strengths and drawbacks, as well as applications in programming. For instance, text is generally used to store simpler, non-hierarchical, or nested information. XML is better at storing information in a document format, while JSON has a more diverse range of capabilities, specifically with database information and server communication with applications.
You can find more information about XML at https://www.xml.com and JSON at https://www.json.org.
Data is a big topic in any programming language, so let’s start off by breaking down what XML and JSON formats actually look like in the next two sections.
Breaking down XML
A typical XML file has a standardized format. Each element of the XML document has an opening tag (<element_name>), a closing tag (</element_name>), and supports tag attributes (<element_name attribute= "attribute_name"></element_name>). A basic file will start with the version and encoding being used, then the starting or root element, followed by a list of element items, and finally, the closing element. As a blueprint, it would look like this:
<?xml version="1.0" encoding="utf-8"?>
<root_element>
    <element_item>[Information goes here]</element_item>
    <element_item>[Information goes here]</element_item>
    <element_item>[Information goes here]</element_item>
</root_element>
XML data can also store more complex objects by using child elements. For example, we’ll be turning a list of weapons into XML using the Weapon class we wrote earlier in the book. Since each weapon has properties for its name and damage value, that will look like this:
// 1
<?xml version="1.0"?>
// 2
<ArrayOfWeapon>
     // 3
    <Weapon>
     // 4
        <name>Sword of Doom</name>
        <damage>100</damage>
     // 5
    </Weapon>
    <Weapon>
        <name>Butterfly knives</name>
        <damage>25</damage>
    </Weapon>
    <Weapon>
        <name>Brass Knuckles</name>
        <damage>15</damage>
    </Weapon>
// 6
</ArrayOfWeapon>
Let’s break down the example above to make sure we’ve got it right:
- The XML document starts with the version being used
- The root element is declared with an opening tag named
ArrayOfWeapon, which will hold all our element items - A weapon item is created with an opening tag named
Weapon - Its child properties are added with opening and closing tags on a single line for
nameanddamage - The weapon item is closed, and two more weapon items are added
- The array is closed, marking the end of the document
The good news is our application doesn’t have to manually write our data in this format. C# has an entire library of classes and methods to help us translate simple text and class objects directly into XML.
We’ll dive into practical code examples a little later on, but first, we need to understand how JSON works.
Breaking down JSON
The JSON data format is similar to XML, but without the tags. Instead, everything is based on attribute-value pairs, like the Dictionary collection type we worked with back in Chapter 4, Control Flow and Collection Types. Each JSON document starts with a parent dictionary that holds as many attribute-value pairs as you need. Dictionaries use open and closed curly braces ( { } ), a colon separates each attribute and value, and each attribute-value pair is separated by a comma:
// Parent dictionary for the entire file
{
    // List of attribute-value pairs where you store your data
    "attribute_name": value,
    "attribute_name": value
}
JSON can also have child or nested structures by setting the value of an attribute-value pair to an array of attribute-value pairs. For instance, if we want to store a weapon, it would look like this:
// Parent dictionary
{
    // Weapon attribute with its value set to a child dictionary
    "weapon": {
          // Attribute-value pairs with weapon data
          "name": "Sword of Doom",
          "damage": 100
    }
}
Finally, JSON data is often made up of lists, or arrays, or objects. Continuing our example, if we wanted to store a list of all the weapons our player could choose, we would use a pair of square brackets to denote an array:
// Parent dictionary
{
    // List of weapon attributes set to an array of weapon objects
    "weapons": [
        // Each weapon object stored as its own dictionary
        {
            "name": "Sword of Doom",
            "damage": 100
        },
        {
            "name": "Butterfly knives",
            "damage": 25
        },
        {
            "name": "Brass Knuckles",
            "damage": 15
        }
    ]
}
You can mix and match any of these techniques to store any kind of complex data you need, which is one of JSON’s main strengths. But just like with XML, don’t be overtaken by the new syntax – C# and Unity both have helper classes and methods to translate text and class objects into JSON without us having to do any heavy lifting. Reading XML and JSON is sort of like learning a new language—the more you use it, the more familiar it becomes. Soon it’ll be second nature!
Now that we’ve dipped our toes into data formatting basics, we can start talking about how the filesystem on your computer works and what properties we can access from our C# code.
Understanding the filesystem
When we say filesystem, we’re talking about something you’re already familiar with – how files and folders are created, organized, and stored on your computer. When you create a new folder on your computer, you can name it and put files or other folders inside it. It’s also represented by an icon, which is both a visual cue and a way to drag, drop, and move it anywhere you like.
Everything you can do on your desktop you can do in code. All you need is the name of the folder, or directory as it’s called, and a location to store it. Anytime you want to add a file or subfolder, you reference the parent directory and add your new content.
To drive the filesystem home, let’s start building out the DataManager class we created and attached to the Game Manager object in the Hierarchy in Chapter 10, Revisiting Types, Methods, and Classes:
- Open the
DataManagerscript and update it with the following code to print out a few filesystem properties:using System.Collections; using System.Collections.Generic; using UnityEngine; // 1 using System.IO; public class DataManager : MonoBehaviour, IManager { // ... No variable changes needed ... public void Initialize() { _state = "Data Manager initialized.."; Debug.Log(_state); // 2 FilesystemInfo(); } public void FilesystemInfo() { // 3 Debug.LogFormat("Path separator character: {0}", Path.PathSeparator); Debug.LogFormat("Directory separator character: {0}", Path.DirectorySeparatorChar); Debug.LogFormat("Current directory: {0}", Directory.GetCurrentDirectory()); Debug.LogFormat("Temporary path: {0}", Path.GetTempPath()); } }
Let’s break down the code:
- First, we add the
System.IOnamespace, which has all the classes and methods we need to work with the filesystem. - We call the
FilesystemInfomethod we create in the next step. - We create the
FilesystemInfomethod to print out a few filesystem properties. Every operating system handles its filesystem paths differently—a path is the location of a directory or file written in a string. On Macs:- Paths are separated by a colon (
:) - Directories are separated by a forward slash (
/) - The current directory path is where the Hero Born project is stored
- The temporary path is the location of your filesystem’s temporary folder
- Paths are separated by a colon (
If you’re on other platforms and operating systems, make sure to check the Path and Directory methods for yourself before working with the filesystem.
Run the game and take a look at the output:
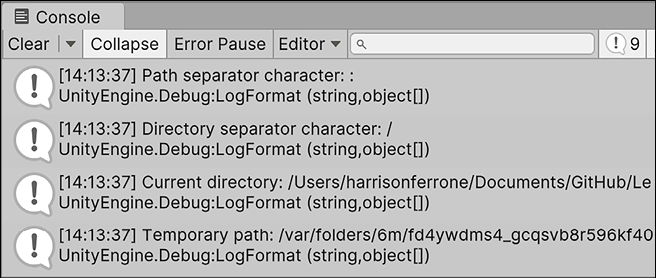
Figure 12.1 Console messages from Data Manager
To provide a complete view of the Unity editor, all our screenshots are taken in full-screen mode. For color versions of all book images, use the link below: https://packt.link/7yy5V.
The Path and Directory classes are the foundation we’re going to be building on to store our data in the following sections. However, they’re both large classes, so I encourage you to look into their documentation as you continue your data journey.
You can find more documentation for the Path class at: https://docs.microsoft.com/en-us/dotnet/api/system.io.path and the Directory class at: https://docs.microsoft.com/en-us/dotnet/api/system.io.directory.
Now that we have a simple example of filesystem properties printed out in our DataManager script, we can create a filesystem path to the location where we want to save our data.
Working with asset paths
In a purely C# application, you would have to choose what folder to save your files in and write out the folder path in a string. However, Unity provides a handy pre-configured path as part of the Application class where you can store persistent game data. Persistent data means the information is saved and kept each time the program runs, which makes it ideal for this kind of player information.
It’s important to know that the path to Unity’s persistent data directory is cross-platform, meaning that it’s different whether you’re building a game for iOS, Android, Windows, and more. You can find out more information in the Unity documentation at: https://docs.unity3d.com/ScriptReference/Application-persistentDataPath.html.
The only update we need to make to DataManager is creating a private variable to hold our path string. We’re making this private because we don’t want any other script to be able to access or change the value. That way, DataManager is responsible for all data-related logic and nothing else.
Add the following variable to DataManager.cs:
public class DataManager : MonoBehaviour, IManager
{
    // ... No other variable changes needed ...

    // 1
    private string _dataPath;
    // 2
    void Awake()
    {
        _dataPath = Application.persistentDataPath + "/Player_Data/";

        Debug.Log(_dataPath);
    }

    // ... No other changes needed ...
}
Let’s break down our code update:
- We created a private variable to hold the data path string
- We set the data path string to the application’s
persistentDataPathvalue, added a new folder name calledPlayer_Datausing open and closed forward slashes, and printed out the complete path:It’s important to note that
Application.persistentDataPathcan only be used in aMonoBehaviourmethod likeAwake(),Start(),Update(), and so on, and the game needs to be running for Unity to return a valid path.
Figure 12.2: File path for Unity persistent data files
Since I’m using a Mac, my persistent data folder is nested inside my /Users folder. Remember to check out https://docs.unity3d.com/ScriptReference/Application-persistentDataPath.html to find out where your data is stored if you’re using a different device.
When you’re not working with a predefined asset path like Unity’s persistent data directory, C# has a handy method called Combine in the Path class for automatically configuring path variables. The Combine() method can take up to four strings as input parameters or an array of strings representing the path components. For example, a path to your User directory might look like:
var path = Path.Combine("/Users", "hferrone", "Chapter_12");
This takes care of any potential cross-platform issues with separating characters and back or forward slashes in paths and directories.
Now that we have a path to store our data, let’s create a new directory, or folder, in the filesystem. This will let us store our data securely and between game runs, as opposed to temporary storage where it would be deleted or overwritten.
Creating and deleting directories
Creating a new directory folder is straightforward—we check to see if one already exists with the same name on the same path, and if not, we tell C# to create it for us. Everyone has their own ways of dealing with duplicates in their files and folders, so we’ll be repeating a fair bit of duplicate checking code in the rest of the chapter.
I’d still recommend following the Don’t Repeat Yourself (DRY) principle in real-world applications; the duplicate checking code is only repeated here to make the examples complete and easy to understand:
- Add the following method to
DataManager:public void NewDirectory() { // 1 if(Directory.Exists(_dataPath)) { // 2 Debug.Log("Directory already exists..."); return; } // 3 Directory.CreateDirectory(_dataPath); Debug.Log("New directory created!"); } - Call the new method inside
Initialize():public void Initialize() { _state = "Data Manager initialized.."; Debug.Log(_state); NewDirectory(); }
Let’s break down what we did:
- First, we check if the directory folder already exists using the path we created in the last step
- If it’s already been created, we send ourselves a message in the console and use the
returnkeyword to exit the method without going any further - If the directory folder doesn’t exist, we pass the
CreateDirectory()method our data path and log that it’s been created
Run the game and make sure that you see the right debug logs in the console, as well as the new directory folder in your persistent data folder.
If you can’t find it, use the _dataPath value we printed out in the previous step.
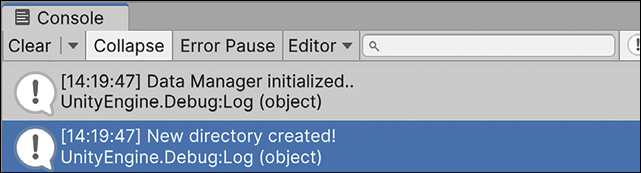
Figure 12.3: Console message for new directory creation
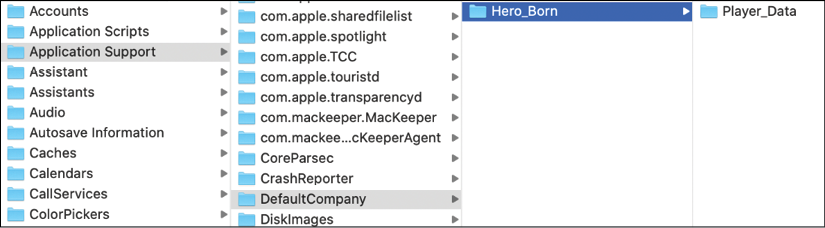
Figure 12.4: New directory created on the desktop
If you run the game a second time, no duplicate directory folder will be created, which is exactly the kind of safe code we want.

Figure 12.5: Console message for duplicate directory folders
Deleting a directory is very similar to how we created it—we check if it exists, then we use the Directory class to delete whatever folder is at the path we pass in.
Add the following method to DataManager:
public void DeleteDirectory()
{
    // 1
    if(!Directory.Exists(_dataPath))
    {
        // 2
        Debug.Log("Directory doesn't exist or has already been
deleted...");

        return;
    }
    // 3
    Directory.Delete(_dataPath, true);
    Debug.Log("Directory successfully deleted!");
}
Since we want to keep the directory we just created, you don’t have to call this function right now. However, if you want to try it out, all you need to do is replace NewDirectory() with DeleteDirectory() in the Initialize() function.
An empty directory folder isn’t super useful, so let’s create our first text file and save it in our new location.
Creating, updating, and deleting files
Working with files is similar to creating and deleting a directory, so we already have the basic building blocks we need. To make sure we don’t duplicate data, we’ll check if the file already exists, and if not, we’ll create a new one in our new directory folder.
We’ll be working with the File class for this section, which has a ton of helpful methods to help us implement our features. You can find the entire list at: https://docs.microsoft.com/en-us/dotnet/api/system.io.file.
An important point to drive home about files before we start is that they need to be opened before you can add text, and they need to be closed after you’re finished. If you don’t close the file you’re programmatically working with, it will stay open in the program’s memory. This both uses computation power for something you’re not actively editing and can create potential memory leaks.
We’re going to be writing individual methods for each action we want to perform (create, update, and delete). We’re also going to check if the files we’re working with exist or not in each case, which is repetitive. I’ve structured this part of the book so you can get a solid grasp of each of the procedures. However, you can absolutely combine them into more economical methods after you’ve learned the basics.
Take the following steps to create a new text file:
- Add a new private string path for the new text file and set its value in
Awake:private string _dataPath; private string _textFile; void Awake() { _dataPath = Application.persistentDataPath + "/Player_Data/"; Debug.Log(_dataPath); _textFile = _dataPath + "Save_Data.txt"; } - Add a new method to
DataManager:public void NewTextFile() { // 1 if (File.Exists(_textFile)) { Debug.Log("File already exists..."); return; } // 2 File.WriteAllText(_textFile, "<SAVE DATA> "); // 3 Debug.Log("New file created!"); } - Call the new method in
Initialize():public void Initialize() { _state = "Data Manager initialized.."; Debug.Log(_state); FilesystemInfo(); NewDirectory(); NewTextFile(); }
Let’s break down our new code:
- We check if the file already exists, and if it does, we
returnout of the method to avoid duplicates:It’s worth noting that this approach works well for new files that aren’t going to be changed. We’ll cover updating and overwriting data to files in the next exercise.
- We use the
WriteAllText()method because it does everything we need all in one:- A new file is created using our
_textFilepath - We add a title string that says
<SAVE DATA>and add two new lines with the - Then the file is closed for us automatically
- A new file is created using our
- We print out a log message to let us know everything went smoothly
When you play the game now, you’ll see the debug log in the console and the new text file in your persistent data folder location:

Figure 12.6: Console messages for new file creation
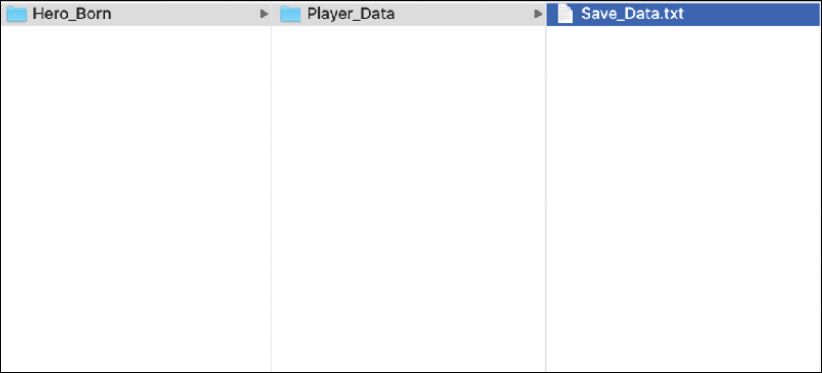
Figure 12.7: New file created on desktop
To update our new text file, we’ll do a similar set of operations. It’s always nice to know when a new game is started, so your next task is to add a method to write that information to our data file:
- Add a new
usingdirective to the top ofDataManager:using System.Collections; using System.Collections.Generic; using UnityEngine; using System.IO; using System; - Add a new method to
DataManager:public void UpdateTextFile() { // 1 if (!File.Exists(_textFile)) { Debug.Log("File doesn't exist..."); return; } // 2 File.AppendAllText(_textFile, $"Game started: {DateTime.Now} "); // 3 Debug.Log("File updated successfully!"); } - Call the new method in
Initialize():public void Initialize() { _state = "Data Manager initialized.."; Debug.Log(_state); FilesystemInfo(); NewDirectory(); NewTextFile(); UpdateTextFile(); }
Let’s break down the above code:
- If the file exists, we don’t want to duplicate it, so we just exit out of the method without any further action
- If the file does exist, we use another all-in-one method called
AppendAllText()to add the game’s start time:- This method opens the file
- It adds a new line of text that’s passed in as a method parameter
- It closes the file
- Print out a log message to let us know everything went smoothly
Play the game again and you’ll see our console message and a new line in our text file with the new game’s date and time:
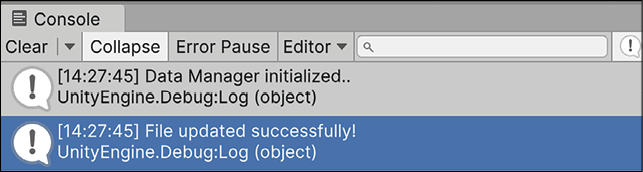
Figure 12.8: Console messages for updating the text file
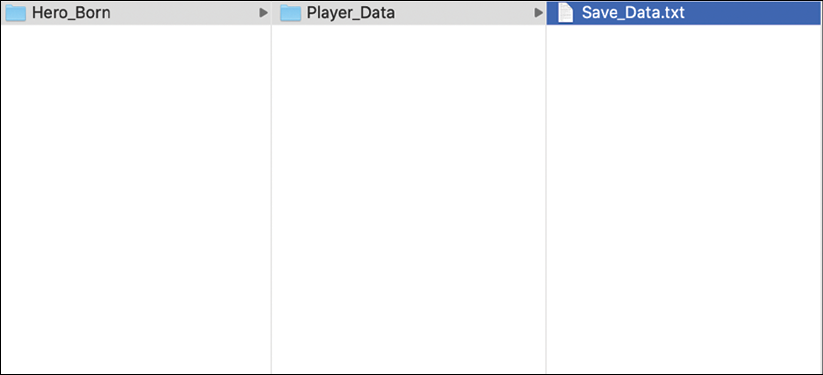
Figure 12.9: Text file data updated
In order to read our new file data, we need a method to grab all the file’s text and hand it back to us in a string. Luckily, the File class has methods to do just that:
- Add a new method to
DataManager:// 1 public void ReadFromFile(string filename) { // 2 if (!File.Exists(filename)) { Debug.Log("File doesn't exist..."); return; } // 3 Debug.Log(File.ReadAllText(filename)); } - Call the new method in
Initialize()and pass in the_textFileas a parameter:public void Initialize() { _state = "Data Manager initialized.."; Debug.Log(_state); FilesystemInfo(); NewDirectory(); NewTextFile(); UpdateTextFile(); ReadFromFile(_textFile); }
Let’s break down the new method’s code below:
- We create a new method that takes in a string parameter for the file we want to read
- If the file doesn’t exist, there’s no action needed so we exit out of the method
- We use the
ReadAllText()method to get all the file’s text data as a string and print it out to the console
Play the game and you’ll see a console message with our previous save and a new one!
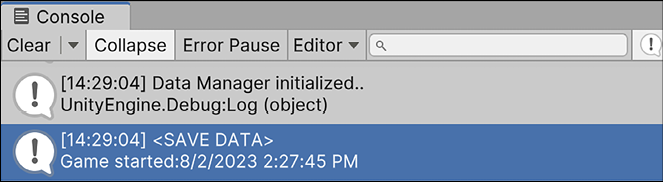
Figure 12.10: Console message with saved text data read from file
Lastly, let’s add a method to delete our text file if we wanted. We’re not actually going to use this method, as we want to keep our text file as is, but you can always try it out for yourself:
public void DeleteFile(string filename)
{
    if (!File.Exists(filename))
    {
        Debug.Log("File doesn't exist or has already been deleted...");

        return;
    }

    File.Delete(_textFile);
    Debug.Log("File successfully deleted!");
}
Now that we’ve dipped our toes a little deeper into the filesystem waters, it’s time to talk about a slightly upgraded way of working with information—data streams!
Working with streams
So far, we’ve been letting the File class do all of the heavy lifting with our data. What we haven’t talked about is how the File class, or any other class that deals with reading and writing data, does that work under the hood.
For computers, data is made up of bytes. Think of bytes as the computer’s atoms; they make up everything—there’s even a C# byte type. When we read, write, or update a file, our data is converted into an array of bytes, which are then streamed to or from the file using a Stream object. The data stream is responsible for carrying the data as a sequence of bytes to or from a file, acting as a translator or intermediary for us between our game application and the data files themselves.

Figure 12.11: Diagram of streaming data to a file
The File class uses Stream objects for us automatically, and there are different Stream subclasses for different functionality:
- Use a
FileStreamto read and write data to your files - Use a
MemoryStreamto read and write data to memory - Use a
NetworkStreamto read and write data to other networked computers - Use a
GZipStreamto compress data for easier storage and downloading
In the coming sections, we’ll get into managing stream resources, using helper classes called StreamReader and StreamWriter to create, read, update, and delete files. You’ll also learn how to format XML more easily using the XmlWriter class.
Managing your Stream resources
One important topic we haven’t talked about yet is resource allocation. What that means is some processes in your code will put computing power and memory on a sort of layaway plan where you can’t touch it. These processes will wait until you explicitly tell your program or game to close and return the layaway resources to you so you’re back to full power. Streams are one such process, and they need to be closed after you’re done using them. If you don’t properly close your streams, your program will keep using those resources even though you’re not.
Luckily, C# has a handy interface called IDisposable that all Stream classes implement. This interface only has one method, Dispose(), which tells the stream when to give you back the resources it’s been using.
You don’t have to worry too much about this, as we’ll cover an automatic way to make sure your streams are always closed correctly. Resource management is just a good programming concept to understand.
We’ll be using a FileStream for the rest of the chapter, but we’ll be doing so with convenience classes called StreamWriter and StreamReader. These classes leave out the manual conversion of data to bytes, but still use FileStream objects themselves.
Using StreamWriter and StreamReader
Both the StreamWriter and StreamReader classes serve as helpers for using objects belonging to FileStream to write and read text data to a specific file. These classes are a big help because they create, open, and return a stream you can use with minimal boilerplate code. The example code we’ve covered so far is fine for small data files, but streams are the way to go if you’re dealing with large and complex data objects.
All we need is the name of the file we want to write to or read from and we’re all set. Your next task is to use a stream to write text to a new file:
- Add a new private string path for the new streaming text file and set its value in
Awake():private string _dataPath; private string _textFile; private string _streamingTextFile; void Awake() { _dataPath = Application.persistentDataPath + "/Player_Data/"; Debug.Log(_dataPath); _textFile = _dataPath + "Save_Data.txt"; _streamingTextFile = _dataPath + "Streaming_Save_Data.txt"; } - Add a new method to
DataManager:public void WriteToStream(string filename) { // 1 if (!File.Exists(filename)) { // 2 StreamWriter newStream = File.CreateText(filename); // 3 newStream.WriteLine("<Save Data> for HERO BORN "); newStream.Close(); Debug.Log("New file created with StreamWriter!"); } // 4 StreamWriter streamWriter = File.AppendText(filename); // 5 streamWriter.WriteLine("Game ended: " + DateTime.Now); streamWriter.Close(); Debug.Log("File contents updated with StreamWriter!"); } - Delete or comment out the methods in
Initialize()that we used in the previous section and add in our new code:public void Initialize() { _state = "Data Manager initialized.."; Debug.Log(_state); FilesystemInfo(); NewDirectory(); WriteToStream(_streamingTextFile); }
Let’s break down the new method in the above code:
- First, we check that the file doesn’t exist using its name
- If the file hasn’t been created yet, we add a new
StreamWriterinstance callednewStream, which uses theCreateText()method to create and open the new file - Once the file is open, we use the
WriteLine()method to add a header, close the stream, and print out a debug message - If the file already exists and we just want to update it, we grab our file through a new
StreamWriterinstance using theAppendText()method so our existing data doesn’t get overwritten - Finally, we write a new line with our game data, close the stream, and print out a debug message:
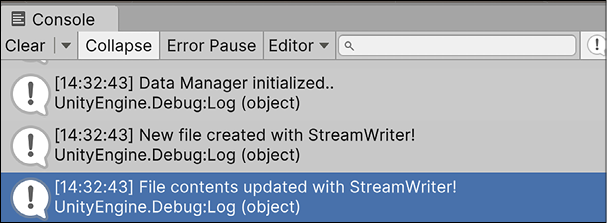
Figure 12.12: Console messages for writing and updating text with a stream

Figure 12.13: New file created and updated with a stream
Reading from a stream is almost exactly like the ReadFromFile() method we created in the last section. The only difference is that we’ll use a StreamReader instance to open and read the information. Again, you want to use streams when you’re dealing with big data files or complex objects instead of manually creating and writing to files with the File class:
- Add a new method to
DataManager:public void ReadFromStream(string filename) { // 1 if (!File.Exists(filename)) { Debug.Log("File doesn't exist..."); return; } // 2 StreamReader streamReader = new StreamReader(filename); Debug.Log(streamReader.ReadToEnd()); } - Call the new method in
Initialize()and pass in the_streamingTextFileas a parameter:public void Initialize() { _state = "Data Manager initialized.."; Debug.Log(_state); FilesystemInfo(); NewDirectory(); WriteToStream(_streamingTextFile); ReadFromStream(_streamingTextFile); }
Let’s break down our new code:
- First, we check that the file doesn’t exist, and if it doesn’t, then we print out a console message and exit the method
- If the file does exist, we create a new
StreamReaderinstance with the name of the file we want to access and print out the entire contents using theReadToEndmethod:
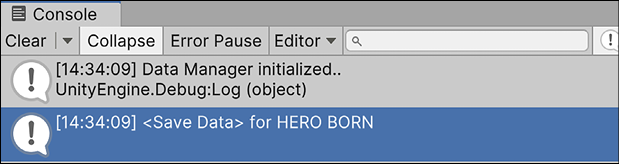
Figure 12.14: Console printing out saved data read from a stream
As you’ll start to notice, a lot of our code is starting to look the same. The only difference is our use of stream classes to do the actual reading-writing work. However, it’s important to keep in mind how different use cases will determine which route you take. Refer back to the beginning of this section to review how each stream type is different.
So far, we’ve covered the basic features of a Creating, Reading, Updating, and Deleting (CRUD) application using text files. But text files aren’t the only data format you’ll be using in C# games and applications. You’re likely to see lots of XML and JSON in the wild once you start working with databases and your own complex data structures, which text can’t compare to in efficiency or storage.
In the next section, we’ll work with some basic XML data, then talk about an easier way to manage streams.
Creating an XMLWriter
Sometimes, you won’t just have plain old text to write and read from a file. Your project might require XML-formatted documents, in which case, you’ll need to know how to use a regular FileStream to save and load XML data.
Writing XML data to a file isn’t all that different from what we’ve been doing with text and streams. The only difference is we’ll explicitly create a FileStream and use it to create an instance of an XmlWriter. Think of the XmlWriter class as a wrapper that takes our data stream, applies XML formatting, and spits out our information as an XML file. Once we have that, we can structure the document in the proper XML format using methods from the XmlWriter class and close the file.
Your next task is to create a file path for a new XML document and add the ability to write XML data to that file using the DataManager class:
- Add the new
Xmlusingdirective to the top of theDataManagerclass:using System.Collections; using System.Collections.Generic; using UnityEngine; using System.IO; using System; using System.Xml; - Add a new private string path for the new XML file and set its value in
Awake():// ... No other variable changes needed ... private string _xmlLevelProgress; void Awake() { // ... No other changes needed ... _xmlLevelProgress = _dataPath + "Progress_Data.xml"; } - Add a new method at the bottom of the
DataManagerclass:public void WriteToXML(string filename) { // 1 if (!File.Exists(filename)) { // 2 FileStream xmlStream = File.Create(filename); // 3 XmlWriter xmlWriter = XmlWriter.Create(xmlStream); // 4 xmlWriter.WriteStartDocument(); // 5 xmlWriter.WriteStartElement("level_progress"); // 6 for (int i = 1; i < 5; i++) { xmlWriter.WriteElementString("level", "Level-" + i); } // 7 xmlWriter.WriteEndElement(); // 8 xmlWriter.Close(); xmlStream.Close(); } } - Call the new method in
Initialize()and pass in_xmlLevelProgressas a parameter:ublic void Initialize() { _state = "Data Manager initialized.."; Debug.Log(_state); FilesystemInfo(); NewDirectory(); WriteToXML(_xmlLevelProgress); }
Let’s break down our XML writing method:
- First, we check if the file already exists
- If the file doesn’t exist, we create a new
FileStreamusing the new path variable we created - We then create a new
XmlWriterinstance and pass it our newFileStream - Next, we use the
WriteStartDocumentmethod to specify XML version 1.0 - Then we call the
WriteStartElementmethod to add the opening root element tag namedlevel_progress - Now we can add individual elements to our document using the
WriteElementStringmethod, passing inlevelas the element tag and the level number using aforloop and its index value ofi - To close the document, we use the
WriteEndElementmethod to add a closingleveltag - Finally, we close the writer and stream to release the stream resources we’ve been using
If you run the game now, you’ll see a new .xml file in our Player_Data folder with the level progress information:

Figure 12.15: New XML file created with document data
You’ll notice that there is no indenting or formatting, which is expected because we didn’t specify any output formatting. We’re not going to use any of them in this example because we’ll be talking about a more efficient way of writing XML data in the next section on serialization.
You can find the list of output formatting properties at: https://docs.microsoft.com/dotnet/api/system.xml.xmlwriter#specifying-the-output-format.
The good news is that reading an XML file is no different than reading any other file. You can call either the readfromfile() or readfromstream() methods inside initialize() and get the same console output:
public void Initialize()
{
    _state = "Data Manager initialized..";
    Debug.Log(_state);
    FilesystemInfo();
    NewDirectory();
    WriteToXML(_xmlLevelProgress);
    ReadFromStream(_xmlLevelProgress);
}

Figure 12.16: Console output from reading the XML file data
Now that we’ve written a few methods using streams, let’s take a look at how to efficiently, and more importantly, automatically, close any stream.
Automatically closing streams
When you’re working with streams, wrapping them in a using statement automatically closes the stream for you by calling the Dispose() method from the IDisposable interface we mentioned earlier.
This way, you never have to worry about unused allocated resources your program might be keeping open for no reason.
The syntax is almost exactly the same as what we’ve already done, except we use the using keyword at the beginning of the line, then reference a new stream inside a pair of parentheses, followed by a set of curly braces. Anything we want the stream to do, like read or write data, is done inside the curly braces block of code. For example, creating a new text file as we did in the WriteToStream() method would look like this:
// The new stream is wrapped in a using statement
using(StreamWriter newStream = File.CreateText(filename))
{
     // Any writing functionality goes inside the curly braces
     newStream.WriteLine("<Save Data> for HERO BORN
");
}
As soon as the stream logic is inside the code block, the outer using statement automatically closes the stream and returns the allocated resources to your program. From here on out, I’d recommend always using this syntax to write your streaming code. It’s more efficient, much safer, and will demonstrate your understanding of basic resource management!
With our text and XML stream code working, it’s time to move on. If you’re wondering why we didn’t stream any JSON data, it’s because we need to add one more tool to our data toolbox—serialization!
Serializing data
When we talk about serializing and deserializing data, what we’re really talking about is translation. While we’ve been translating our text and XML piecemeal in previous sections, being able to take an entire object and translate it in one shot is a great tool to have.
By definition:
- The act of serializing an object translates the object’s entire state into another format
- The act of deserializing is the reverse, taking the data from a file and restoring it to its former object state
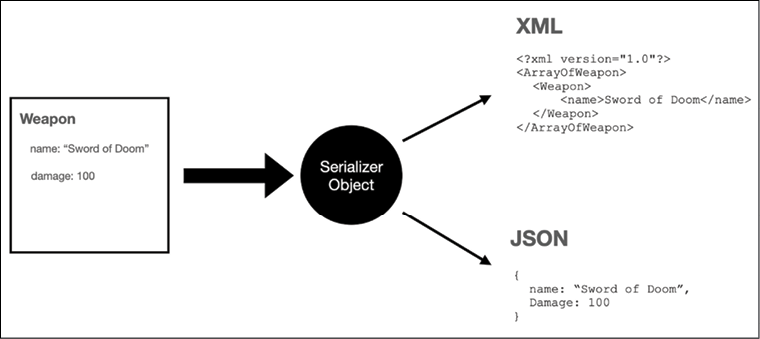
Figure 12.17: Example of serializing an object into XML and JSON
Let’s take a practical example from the above image—an instance of our Weapon class. Each weapon has its own name and damage properties and associated values, which is called its state. The state of an object is unique, which allows the program to tell them apart.
An object’s state also includes properties or fields that are reference types. For instance, if we had a Character class that had a Weapon property, C# would still recognize the weapon’s name and damage properties when serializing and deserializing. You might hear objects with reference properties referred to as object graphs out in the programming world.
Before we jump in, it’s worth noting that serializing objects can be tricky if you’re not keeping a close eye on making sure the object properties match the data from a file, and vice versa. For example, if there’s a mismatch between your class object properties and the data being deserialized, the serializer will return an empty object.
To really get the hang of this, let’s take our Weapon example and turn it into working code.
Serializing and deserializing XML
Your task for the rest of this chapter is to serialize and deserialize a list of weapons into XML and JSON, with XML going first!
- Add a new
Serializationusingdirective to the top of theDataManagerclass:using System.Collections; using System.Collections.Generic; using UnityEngine; using System.IO; using System; using System.Xml; using System.Xml.Serialization; - Open the
Weapon.csfile and add theusing Systemnamespace and a serializable attribute so Unity and C# know the object can be serialized:using System; [Serializable] public struct Weapon { // ... No other changes needed ... } - Add two new variables, one for the XML file path and one for the list of weapons:
// ... No other variable changes needed ... private string _xmlWeapons; private List<Weapon> weaponInventory = new List<Weapon> { new Weapon("Sword of Doom", 100), new Weapon("Butterfly knives", 25), new Weapon("Brass Knuckles", 15), }; - Set the XML file path value in
Awake:void Awake() { // ... No other changes needed ... _xmlWeapons = _dataPath + "WeaponInventory.xml"; } - Add a new method at the bottom of the
DataManagerclass:public void SerializeXML() { // 1 var xmlSerializer = new XmlSerializer(typeof(List<Weapon>)); // 2 using(FileStream stream = File.Create(_xmlWeapons)) { // 3 xmlSerializer.Serialize(stream, weaponInventory); } } - Call the new method in
Initialize:public void Initialize() { _state = "Data Manager initialized.."; Debug.Log(_state); FilesystemInfo(); NewDirectory(); SerializeXML(); }
Let’s break down our new method:
- First, we create an
XmlSerializerinstance and pass in the type of data we’re going to be translating. In this case, the_weaponInventoryis of typeList<Weapon>, which is what we use in thetypeofoperator:The
XmlSerializerclass is another helpful formatting wrapper, just like theXmlWriterclass we used earlier
- Then, we create a
FileStreamusing the_xmlWeaponsfile path and wrapped in ausingcode block to make sure it’s closed properly. - Finally, we call the
Serialize()method and pass in the stream and the data we want to translate.
Run the game again to see the new XML document we created with our Weapon data without having to specify any additional formatting!
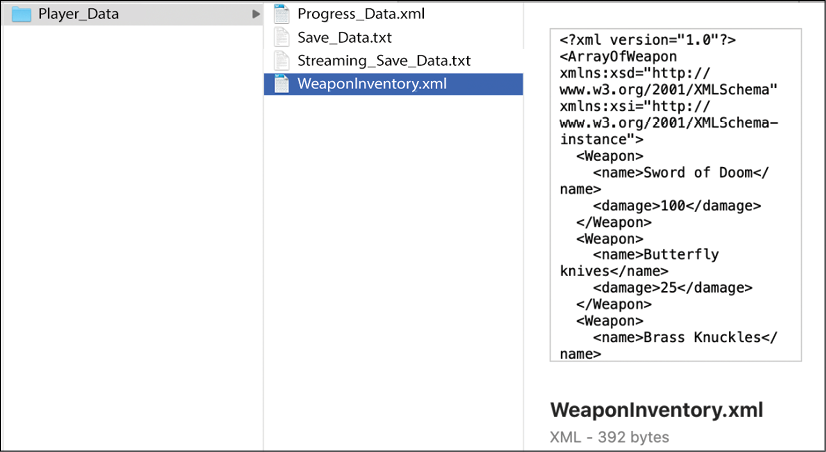
Figure 12.18: XML output in the weapon inventory file
To read back our XML into a list of weapons, we set up everything almost exactly the same, except we use the Deserialize() method from the XmlSerializer class instead:
- Add the following method to the bottom of the
DataManagerclass:public void DeserializeXML() { // 1 if (File.Exists(_xmlWeapons)) { // 2 var xmlSerializer = new XmlSerializer(typeof(List<Weapon>)); // 3 using (FileStream stream = File.OpenRead(_xmlWeapons)) { // 4 var weapons = (List<Weapon>)xmlSerializer.Deserialize(stream); // 5 foreach (var weapon in weapons) { Debug.LogFormat("Weapon: {0} - Damage: {1}", weapon.name, weapon.damage); } } } } - Call the new method in
Initializeand pass in the_xmlWeaponsas a parameter:public void Initialize() { _state = "Data Manager initialized.."; Debug.Log(_state); FilesystemInfo(); NewDirectory(); SerializeXML(); DeserializeXML(); }
Let’s break down the deserialize() method:
- First, we check if the file exists
- If the file exists, we create an
XmlSerializerobject and specify that we’re going to put the XML data back into aList<Weapon>object - Then, we open up a
FileStreamwith the_xmlWeaponsfilename:We’re using
File.OpenRead()to specify that we want to open the file for reading, not writing
- Next, we create a variable to hold our deserialized list of weapons:
We put the explicit
List<Weapon>cast in front of the call toDeserialize()so that we get the correct type back from the serializer
- Finally, we use a
foreachloop to print out each weapon’s name and damage values in the console
When you run the game once again, you’ll see that we get a console message for each weapon we deserialized from the XML list:
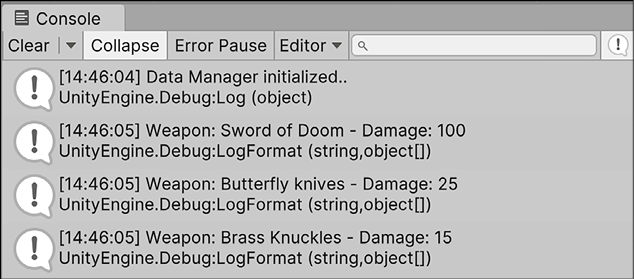
Figure 12.19: Console output from deserializing XML
That’s all we need to do for XML data, but before we finish the chapter, we still need to learn how to work with JSON!
Serializing and deserializing JSON
When it comes to serializing and deserializing JSON, Unity and C# aren’t completely in sync. Essentially, C# has its own JsonSerializer class that works the exact same way as the XmlSerializer class we used in the previous examples.
In order to access the JSON serializer, you need the System.Text.Json using directive. Here’s the rub—Unity doesn’t support that namespace. Instead, Unity uses the System.Text namespace and implements its own JSON serializer class called JsonUtility.
Because our project is in Unity, we’re going to work with Unity’s supported serialization class. However, if you’re working with a non-Unity C# project, the concepts are the same as the XML code we just wrote.
You can find a complete how-to that includes code from Microsoft at: https://docs.microsoft.com/en-us/dotnet/standard/serialization/system-text-json-how-to#how-to-write-net-objects-as-json-serialize.
Your next task is to serialize a single weapon to get the hang of the JsonUtility class:
- Add a new
Textusingdirective to the top of theDataManagerclass:using System.Collections; using System.Collections.Generic; using UnityEngine; using System.IO; using System; using System.Xml; using System.Xml.Serialization; using System.Text; - Add a new private string path for the new XML file and set its value in
Awake():private string _jsonWeapons; void Awake() { _jsonWeapons = _dataPath + "WeaponJSON.json"; } - Add a new method at the bottom of the
DataManagerclass:public void SerializeJSON() { // 1 Weapon sword = new Weapon("Sword of Doom", 100); // 2 string jsonString = JsonUtility.ToJson(sword, true); // 3 using(StreamWriter stream = File.CreateText(_jsonWeapons)) { // 4 stream.WriteLine(jsonString); } } - Call the new method in
Initialize()and pass in the_jsonWeaponsas a parameter:public void Initialize() { _state = "Data Manager initialized.."; Debug.Log(_state); FilesystemInfo(); NewDirectory(); SerializeJSON(); }
Here’s the breakdown of the serialization:
- First, we need a weapon to work with, so we create one with our class initializer
- Then we declare a variable to hold the translated JSON data when it’s formatted as a string and call the
ToJson()method:The
ToJson()method we’re using takes in theswordobject we want to serialize and a Boolean value oftrueso the string is pretty printed with proper indenting. If we didn’t specify atruevalue, the JSON would still print out; it would just be a regular string, which isn’t easily readable.
- Now that we have a text string to write to a file, we create a
StreamWriterstream and pass in the_jsonWeaponsfilename - Finally, we use the
WriteLine()method and pass it thejsonStringvalue to write to the file
Run the program and look at the new JSON file we created and wrote data into!
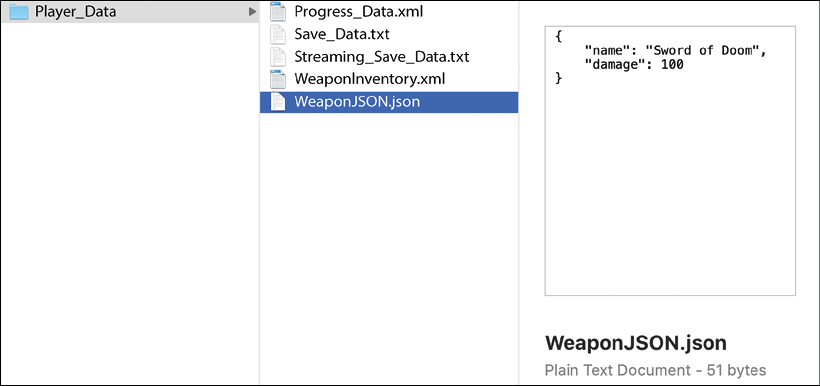
Figure 12.20: JSON file with weapon properties serialized
Now let’s try and serialize the list of weapons we used in the XML examples and see what happens.
Update the SerializeJSON() method to use the existing list of weapons instead of the single sword instance:
public void SerializeJSON()
{
    string jsonString = JsonUtility.ToJson(weaponInventory, true);

    using(StreamWriter stream =
      File.CreateText(_jsonWeapons))
    {
        stream.WriteLine(jsonString);
    }
}
When you run the game again, you’ll see the JSON file data was overwritten and all we ended up with is an empty array:

Figure 12.21: JSON file with an empty object after serialization
Again, this is because the way Unity handles JSON serialization doesn’t support lists or arrays by themselves. Any list or array needs to be part of a class object for Unity’s JsonUtility class to recognize and handle it correctly. In addition, the JsonUtility class doesn’t support Dictionary or complex types out of the box.
However, Unity supports alternatives like Newtonsoft (https://www.newtonsoft.com/json), which you can find at: https://docs.unity3d.com/Packages/[email protected]/manual/index.html.
Don’t panic; if we think about this, it’s a fairly intuitive fix—we just need to create a class that has a list or weapons property and use that when we serialize our data into JSON!
- Open
Weapon.csand add the following serializableWeaponShopclass to the bottom of the file. Be super careful to put the new class outside theWeaponclass curly braces:[Serializable] public class WeaponShop { public List<Weapon> inventory; } - Back in the
DataManagerclass, update theSerializeJSON()method with the following code:public void SerializeJSON() { // 1 WeaponShop shop = new WeaponShop(); // 2 shop.inventory = weaponInventory; // 3 string jsonString = JsonUtility.ToJson(shop, true); using(StreamWriter stream = File.CreateText(_jsonWeapons)) { stream.WriteLine(jsonString); } }
Let’s break down the changes we just made:
- First, we create a new variable called
shop, which is an instance of theWeaponShopclass - Then we set the
inventoryproperty to theweaponInventorylist of weapons we already declared - Finally, we pass the
shopobject to theToJson()method and write the new string data to the JSON file
Run the game again and look at the pretty printed list of weapons we’ve created:

Figure 12.22: List object properly serialized into JSON
Deserializing JSON text back into an object is the reverse process of what we just did:
- Add a new method at the bottom of the
DataManagerclass:public void DeserializeJSON() { // 1 if(File.Exists(_jsonWeapons)) { // 2 using (StreamReader stream = new StreamReader(_jsonWeapons)) { // 3 var jsonString = stream.ReadToEnd(); // 4 var weaponData = JsonUtility.FromJson<WeaponShop> (jsonString); // 5 foreach (var weapon in weaponData.inventory) { Debug.LogFormat("Weapon: {0} - Damage: {1}", weapon.name, weapon.damage); } } } } - Call the new method in
Initialize()and pass_jsonWeaponsin as a parameter:public void Initialize() { _state = "Data Manager initialized.."; Debug.Log(_state); FilesystemInfo(); NewDirectory(); SerializeJSON(); DeserializeJSON(); }
Let’s break down the DeserializeJSON() method below:
- First, we check if the file exists
- If it does exist, we create a stream with the
_jsonWeaponsfile path wrapped in ausingcode block - Then, we use the stream’s
ReadToEnd()method to grab the entire JSON text from the file - Next, we create a variable to hold our deserialized list of weapons and call the
FromJson()method:Notice that we specify that we want to turn our JSON into a
WeaponShopobject with the<WeaponShop>syntax before passing in the JSON string variable
- Finally, we loop through the weapon shop’s
inventorylist property and print out each weapon’s name and damage values in the console
Run the game one last time and you’ll see a console message printed out for each weapon in our JSON data:

Figure 12.23: Console output from deserializing a list of JSON objects
Data roundup
Every individual module and topic we’ve covered in this chapter can be used by itself or combined to suit your project’s needs. For example, you could use text files to store character dialog and only load it when you need to. This would be more efficient than having the game keep track of it every time it runs, even when the information isn’t being used.
You could also put character data or enemy statistics into either an XML or JSON file and read from the file anytime you need to level up a character or spawn a new monster. Finally, you could fetch data from a third-party database and serialize it into your own custom classes. This is a super common scenario with storing player accounts and external game data.
You can find a list of data types that can be serialized in C# at: https://docs.microsoft.com/en-us/dotnet/framework/wcf/feature-details/types-supported-by-the-data-contract-serializer. Unity handles serialization a little differently, so make sure you check the available types at: https://docs.unity3d.com/ScriptReference/SerializeField.html.
The point I’m trying to make is that data is everywhere, and it’s your job to create a system that handles it the way your game needs, brick by brick.
Summary
And that’s a wrap on the basics of working with data! Congratulations on making it through this monster chapter intact. Data in any programming context is a big topic, so take everything you’ve learned in this chapter as a jumping-off point.
You already know how to navigate the filesystem and create, read, update, and delete files. You also learned how to effectively work with text, XML, and JSON data formats, as well as data streams. And you know how to take an entire object’s state and serialize or deserialize it into both XML and JSON. All in all, learning these skills was no small feat. Don’t forget to review and revisit this chapter more than once; there’s a lot here that might not become second nature on the first run-through.
In the next chapter, we’ll discuss the basics of generic programming, get a little hands-on experience with delegates and events, and wrap up with an overview of exception handling.
Pop quiz—data management
- Which namespace gives you access to the
PathandDirectoryclasses? - In Unity, what folder path do you use to save data between runs of your game?
- What data type do
Streamobjects use to read and write information to files? - What happens when you serialize an object into JSON?
Don’t forget to check your answers against mine in the Pop Quiz Answers appendix to see how you did!
Join us on discord!
Read this book alongside other users, Unity game development experts and the author himself.
Ask questions, provide solutions to other readers, chat with the author via. Ask Me Anything sessions and much more.
Scan the QR code or visit the link to join the community.
