An administrator's work does not end with the installation and configuration of Moodle and the Operating System. Monitoring the server must be a regular part of service maintenance. If there is any problem in the way some part of the system works it can produce total loss of service or massive slowdown and thus prevent your users from accessing the website. In this chapter we will talk about ways of monitoring the status of Moodle and underlying OS components with the purpose of early detection and prevention of any kind of problems. The content is presented in the sections based on the tools and techniques available within Moodle or within OS:
- Activity monitoring using Moodle tools
- Activity monitoring using OS native tools
Moodle offers several options when it comes to analyzing and monitoring user activity inside the platform. Monitoring is not real-time but it is close enough for most regular needs.
The word log has several meanings. The one we are interested in is defined as a regular or systematic record of incidents or observations. In computer terminology log is a place where some program stores a list of events that are intended for later potential review by an administrator. Log can be generated and stored in various places and formats. The most simple and common format is a plain text file. Every system should (and usually does) have some logging facility. That is also the case with Moodle. Since Moodle is a heavily database oriented application it was somewhat logical to implement its log inside the database. Log is stored in <table prefix>log table. In the version of Moodle used for writing this text we have over 290 locations where logging is performed. It covers all essential system operations like logging in, entering the course, various administrative tasks, etc. All this ensures that any administrator will have a rich and detailed set of data ready for the analysis.
Having the raw data is far from being enough for any simple and usable analysis. Fortunately, Moodle has several report views that utilize this information and present them in various formats. There are three global and two course level reports. All global reports can be also accessed from within the courses and in those cases they default their presentation to that course. We will focus only on the reports that have direct value for administrative purposes—Logs, Logs live, and Statistics. The remaining of the reports is more oriented towards Instructors and other educational staff. Viewing log is an important tool for detecting inappropriate behavior of some user. For example, if we notice that some user sends 150 forum posts in less than half an hour, then most likely we have a spam bot within a system and we should probably disable or delete such account.
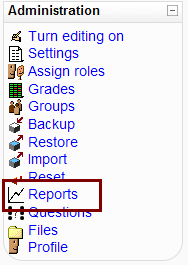
Moodle reports can be accessed from two locations. One is site Administration block and another is the course Reports page. The Site Administration block is visible to any user with the administrative rights. To open the desired report, expand the Reports section inside the block and click on it.
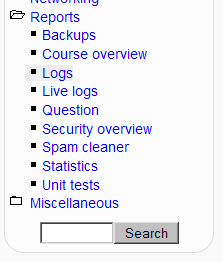
Course administration block is visible to any user with permissions to administrate a course. It is usually located on the left side of the screen. To access the Reports page locate and click on the link with the same name.
The Logs report is a report that applies to the entire platform and also on a specific course level. It is probably the most important report for any administrator and because of that we will spend a bit more time explaining how it works. Every user action within Moodle is logged into a log table. That covers action like logging in, entering the course, opening a specific activity, etc. The log cannot actually tell us how long a user spent working on some activity due to the way the web application works but we can at least have a glimpse at the initial intentions.
In essence, the logs report represents raw data from the Moodle log table in the database. As a bonus it adds the possibility to filter the data based on several criteria:
- Course: User is permitted to choose either one specific course or the entire site data
- Participant: Moodle will present the list of available users that are present in the selected data time frame
- Day: User is offered a choice between one day from the history or the entire available data
- Activities: Using this field we can filter the activity on the particular activity type (forum, quiz, calendars, etc.)
- User actions: A list of available logged actions (add, update, delete, view, or all actions)
The result can be displayed inside the browser or can be retrieved in several file formats for storage or later post processing. Moodle offers text (CSV), ODS (Open Office spreadsheet), and Microsoft Excel formats.
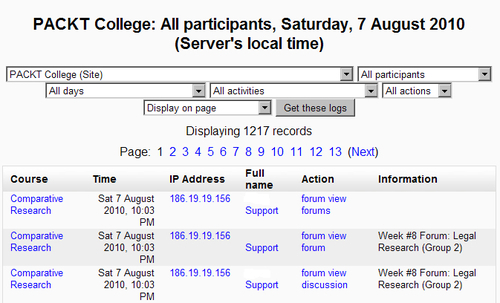
We will now explain the display format of the log report as follows:
- Course: Displays the full name of the course to which an action was executed. Name of the course is also a link, which we can click to visit the actual course.
- Time: Log time displayed in server local time.
- IP Address: IP address of the user who executed the action. IP address is taken from the user's browser header so it cannot be considered 100 percent correct or reliable. IP address itself is also a link that leads to the IP look up pop-up page.
- Full name: Complete name of the user who performed the action in case the user was logged in, otherwise it is empty.
- Action: Shows the name of the action performed and at the same time links to the element of the site or course to which it refers to.
- Information: Detailed information about the element upon which the user performed action usually name.
Often it is useful to know from which geographic region a page request(s) came. In general this information can be useful for having general statistics of the access data from which we can later generate demographic charts. Also it is important to know this information if we are subject to some kind of cyber attack. We can block the requests coming from logged addresses easily and also provide valuable information for the forensics if and when we decide to present a case to the appropriate authorities.
To help us with this, Moodle offers integration with Google maps and the MaxMind GeoLite City datafile which results in producing a fairly accurate (99.5 percent) location map. You have to manually download and install GeoLite datafile. The recommended location of the GeoLite datafile is<Moodledata directory>/geoip. Here is how to obtain and install the file for Linux and Windows:
Linux:
cd /tmp/
/usr/bin/wget http://geolite.maxmind.com/download/geoip/database/GeoLiteCity.dat.gz
/bin/gzip -d GeoLiteCity.dat.gz
/bin/mkdir /var/www/moodledata/geoip/
/bin/mv GeoLiteCity.dat /var/www/moodledata/geoip/GeoLiteCity.dat
/bin/chown -R root:apache /var/www/moodledata/geoip/
/bin/chmod -R u=rwX,g=rX,o= /var/www/moodledata/geoip/
Windows:
mkdir Z:moodledatageoip
bitsadmin /transfer getgeolite /priority HIGH http://geolite.maxmind.com/download/geoip/database/GeoLiteCity.dat.gz Z:moodledatageoipGeoLiteCity.dat.gz
gzip -d GeoLiteCity.dat.gz
Note
Windows does not ship with gzip command-line utility. You can download it from the gzip home page—http://www.gzip.org/. There are also numerous programs that you can use on windows to unpack the gzip archive such as 7-Zip, WinRAR, WinZIP, etc.
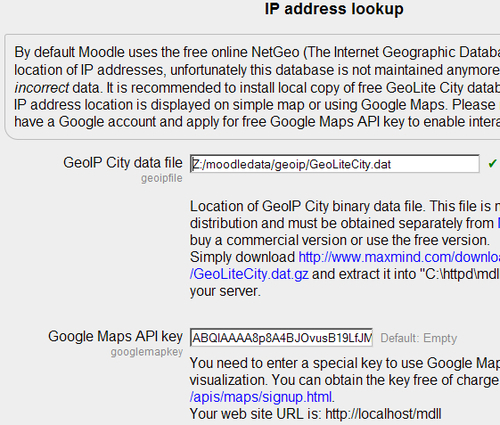
Final step is to configure Moodle to use GeoIP database. Open the Administration | Location | Location settings page and go to the IP address lookup section. Set the appropriate complete path to the GeoLiteCity.dat file according to your OS.
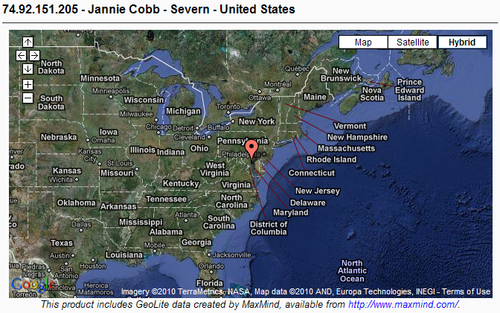
As a result of these changes you can now click on the IP address which will produce a pop-up window with IP information and approximate location on the world map.

As an additional bonus Moodle also supports integration with Google Maps service which can produce a much more exact location map. This is quite useful for pinpointing exactly where the physical location of the computer that made a request is, and especially useful for the law enforcement units. To use that service you need to register for Google Maps API access. You can do that free of charge by visiting this site http://code.google.com/apis/maps/signup.html. To register you must have a Google account. As a result of the registration process you will get a special key (randomly generated string of 86 characters) which will be linked to your account and permit any software client to access Google Maps. Copy and paste that value into Google Maps API key box on the Language page and save the change. Now if we click on the same IP in the log we will see a different picture.
This report is a slight variation of the Logs report. It displays only the records from the log table that were generated in the last hour. It is intended as a quick way to access the latest log data. It does not offer any filtering or sorting feature. Data is shown in the order they are generated. If accessed from the administrative block platform, it shows all log entries. On the other hand if you access it from the course it shows only the record related to that course. The report is always displayed in the new pop-up window that reloads its content every 60 seconds.
The purpose of this report is to offer general statistics about the user usage of a platform in general. Statistics are generated based on the log information. They are calculated during cron execution. Let us say few words about Moodle cron.
Cron is a time-based job scheduler in Unix-like computer Operating Systems. The name cron comes from the word "chronos", Greek for "time". It is generally used to schedule administrative or maintenance tasks that need to be executed periodically without user intervention. Since the original development platform for Moodle was Linux it took a lot of terminology from that world. Moodle has its own task scheduler called cron, as the rest of the platform is implemented in PHP and enables periodical execution of various tasks crucial for the platform. We actually need to use OS task scheduler service to periodically execute Moodle cron.
To setup periodical execution of the Moodle cron on Windows we need to use Windows Task Scheduler service. This is a template for a command you need to execute from the elevated command prompt in order to create the specific task:
schtasks /Create /RU moodle /RP <valid password> /SC HOURLY /TN "Moodle cron" /TR "<path to php.exe> -c <path to php.ini> -f <Path to Moodle>admincron.php"
Or using our defaults from previous chapters it would look like this:
schtasks /Create /RU moodle /RP moodle /SC HOURLY /TN "Moodle cron" /TR "C:php5php.exe -c C:php5 -f Z:websitemoodleadmincron.php"
This creates a task that will be executed every hour. To see other options available open elevated command prompt and execute schtasks /Create /?.
To set up periodical execution of the Moodle cron on Linux we need to use real cron service. CentOS 5 has several predefined locations for placing tasks that are executed periodically. They are all located in the /etc directory and their names start with cron followed by a time specifier, for example, cron.hourly, cron.daily, etc.
Open some text editor and create a file called moodle.cron with the following content:
#!/bin/sh
/usr/bin/sudo -u apache /usr/bin/php -f /var/www/moodle/admin/cron.php
Make sure that the file is located in one of the predefined cron directories—in this case we will use /etc/cron.hourly. After that, mark it for execution:
/bin/chmod u=rwx,go= /etc/cron.hourly/moodle.cron
After all this is set up we need to actually configure statistics inside Moodle. By default statistics are not enabled. To enable that functionality we should:
- Visit the Administration | Server | Statistics page
- Check Enable statistics option and choose value for the Maximum processing interval option
Note
This option defines how much data from the log should be processed during the first run. The default setting is None. However, if you already have older log entries included into statistics, then you might want to specify a desired time span which can range from 1 week to All.
Now you need to wait for at least one day for the cron to be executed to have the initial data for the statistics. Once all that is finished you can finally go to the Administration | Reports | Statistics page.
At first you will be presented with an empty page with several options, which you can choose before generating the report. The first option is Course which permits you to choose specific course for the statistics or the entire platform, and the second option is the type of activities you would like to see. They can be all activity, views, posts, or logins. Finally, you can choose the Time period for which you want your report to be generated.
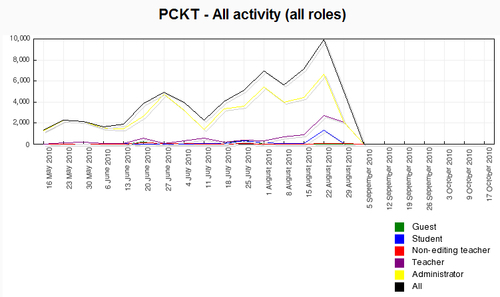
After setting the desired values click on the View button. That will generate the report. A statistics report has one graph that shows the level of selected activities during given period of time. The same information used to generate the graphic in common table format is shown as follows:
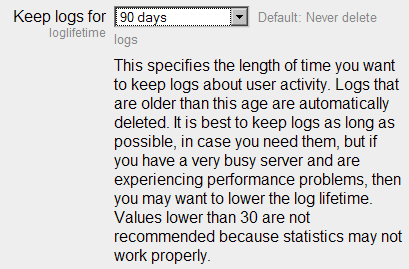
It is generally recommended to remove statistics for the courses that are finished and thus control the size of the log table. You can do this by visiting the Administration | Server | Cleanup page and set Keep logs for to the desired value. The value which you might choose here depends on the amount of traffic your site generates. The more active users you have the sooner the size of the log table will grow. We suggest keeping the logs for at least 90 days.