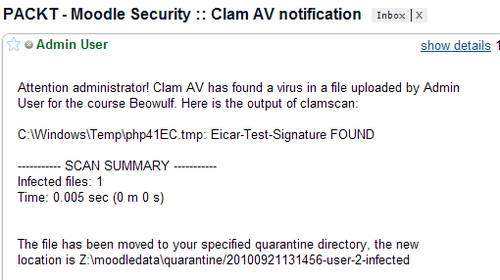
Aware of the dangers present in permitting users to upload files, developers of Moodle decided to integrate anti-virus support into their platform. Being an Open Source platform they opted for open source solution, In this case it is ClamAV. ClamAV is released under GPL license (like Moodle) and is specifically designed for e-mail scanning on mail gateways/servers. Integration in Moodle with ClamAV is done in such way that every time a virus is detected administrator receives the notification through e-mail. Virus detection is integrated with file upload. Any part of Moodle that permits file upload will perform virus check if it is enabled and configured properly.
Next, we will show step by step instructions for setting up ClamAV on both Linux and Windows.
ClamAV was developed originally for UNIX and derivatives (like Linux), so Linux can be considered like native platform for this software. Unfortunately, CentOS 5 does not include packages for ClamAV. Fortunately, there is an external package repository that hosts CentOS packages. It is a repository called RPMforge maintained by Dag Wieers.
To set up new repository execute this from the command line for 32-bit:
rpm -Uhv http://apt.sw.be/redhat/el5/en/i386/rpmforge/RPMS/rpmforge-release-0.3.6-1.el5.rf.i386.rpm
Or the following one for a 64-bit version of OS:
rpm -Uhv http://apt.sw.be/redhat/el5/en/x86_64/rpmforge/RPMS//rpmforge-release-0.3.6-1.el5.rf.x86_64.rpm
Note
Package names can change in time. In order to install the latest version of the repository correctly, visit the Dag Wieers home page at http://dag.wieers.com/rpm/FAQ.php#B.
After executing this command, open the file located at /etc/yum.repos.d/rpmforge.repo and change the following line:
enabled = 1
to:
enabled = 0
By doing this change we are explicitly disabling this repository, thus preventing anybody from accidentally installing anything that might overwrite default packages and/or libraries from standard CentOS repositories.
Now we are ready to install ClamAV with this command:
yum -y --enablerepo=rpmforge install clamav clamav-db clamd
Update virus signature database by executing this from the command line:
/usr/bin/freshclam
Apart from basic scanning tools we also installed clamd. It is anti-virus service (daemon) that speeds up scanning of the files substantially when used and reduces CPU utilization which is very important on the web server. To start it, execute this:
/sbin/service start clamd
Everything else is already configured. Every day the scheduled task will be executed that updates virus signature database (cron job) and clamd service will start automatically during system boot process.
ClamAV has several builds for Windows, some free and other commercial. We will use the build provided directly from the official page. Unfortunately, there is neither support nor any help available that comes with this distribution whatsoever. So we must do much more in order to make it work properly.
Visit the download page for Windows binary package on ClamAV website http://www.clamav.net/lang/en/download/packages/packages-win32/. On that page you can find out where the latest version for Windows is located. At the time of writing this book, latest version was 0.96.2 available here at http://downloads.sourceforge.net/project/clamav/clamav/win32/ClamAV-0.96.2-win32.zip.
Open the elevated command prompt and execute this:
bitsadmin /transfer getclamav /priority HIGH http://downloads.sourceforge.net/project/clamav/clamav/win32/ClamAV-0.96.2-win32.zip Z: empClamAV-0.96.2-win32.zip
Now create a directory structure where you plan on storing Clam AV and apply appropriate permissions:
mkdir Z:clamav
icacls Z:clamav /Q /T /grant moodle:(OI)(CI)(RX)
mkdir Z:clamavdb
mkdir Z:clamav	mp
mkdir Z:moodledataquarantine
With the above commands we created a clamav directory and assigned read/execute permissions to Moodle user, which we specially created for running Moodle website. This is important as PHP is being executed using user Moodle and therefore that user must have sufficient permissions to execute ClamAV. Sub directory db will be used to store virus definition database and tmp for antivirus service processing.
Extract downloaded file using Compression support in Windows Explorer to Z:clamav. To do this, open Windows Explorer and navigate to Z: emp. Right-click on the file you just downloaded and choose Extract All option.
It is essential to use clamd service for scanning as it is much faster than using plain command line scanner. The reason for this is the way these two are implemented. Command line virus scanner clamscan loads virus signature database every time before performing scan, and just by doing that it uses several seconds and clamd is permanently resident. Therefore, it loads virus signature database once during startup or when it detects that update was applied which usually happens once per day. Service configuration is performed with clamd.conf file. This file must be located in the same folder where ClamAV engine (libclamav.dll) is stored. In our case it is the same folder where we installed ClamAV—Z:clamav.
The content of our configuration clamd.conf file is as follows:
LogFile Z:clamavclamd.log
DatabaseDirectory Z:clamavdb
LogFileMaxSize 0
LogTime yes
TemporaryDirectory Z:clamav	mp
TCPSocket 3310
TCPAddr 127.0.0.1
MaxConnectionQueueLength 30
ReadTimeout 300
SelfCheck 0
We define where the log file of the service will be stored, where is the virus signature database, what is the temporary folder for scanning and the port and IP address through which service can be contacted by it's client (clamdscan).
Next step in this process is setting up clamd as Windows service. Unfortunately, clamd.exe itself is not prepared to be executed as Windows service, but we have alternatives. Microsoft offers custom resource kit tool for transforming common executable into full fledged service. It is called SrvAny.
SrvAny is a part of Windows Server 2003 Resource Kit. You can download it free of charge from the Microsoft website using this URL http://www.microsoft.com/downloads/en/details.aspx?FamilyID=9D467A69-57FF-4AE7-96EE-B18C4790CFFD.
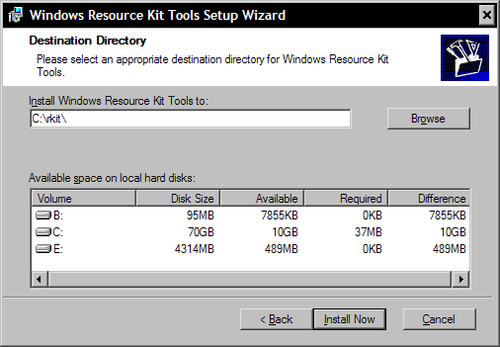
When installing this package on Windows 2008 you will be notified by OS that this software was not designed to work reliably. Acknowledge that fact but continue installing the product. Choose custom folder as a destination. We recommend C:
kit.
After finishing the installation, open elevated command prompt and execute:
sc create clamd type= own start= auto binpath= C:
kitsrvany.exe
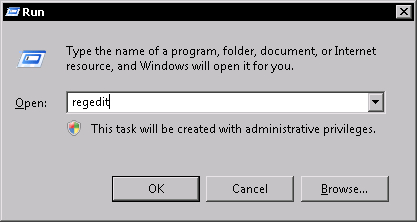
This creates a new windows service entry pointing to SrvAny executable. Now we need to configure this service. Initiate the Run option from the Start menu:
And in the dialog type regedit:
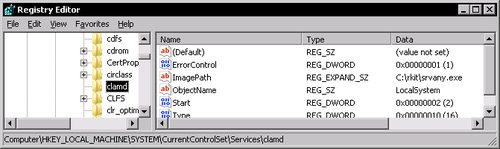
Locate the key HKEY_LOCAL_MACHINESYSTEMCurrentControlSetServicesclamd.
In there add new key called Parameters. Inside that key add new string value called Application and as a value set location to clamd.exe Z:clamavclamd.exe.

With this ends the configuration of anti-virus service.
Every day a handful of new viruses appear worldwide. All updates are eventually added to the ClamAV central database. It is important to have the updated version because it helps us detect all the latest threats. Updates are performed by freshclam. This program connects to the location where updated files are located and downloads them to a local hard drive. Freshclam configuration is located in freshclam.conf. It is to be placed in the same location with clamd.conf—Z:clamav. The content of our freshclam.conf is as follows:
DatabaseDirectory Z:clamavdb
DatabaseMirror clamav.edebris.com
DatabaseMirror database.clamav.net
NotifyClamd Z:clamavclamd.conf
UpdateLogFile Z:clamavupdate.log
In order to understand the configuration file better, we offer some quick pointers:
- Databasedirectory defines the location to which freshclam should download the updated files.
- DatabaseMirror defines the location where freshclam should look for updated files. Configuration file should have at least one location defined but it is preferred to have two or more to ensure successful download. To obtain the list of available mirrors visit the http://www.clamav.net/mirrors.html page. On that page you will find up-to date list of active virus database mirrors. We recommend that you choose servers that are geographically closer to your server location. You should always put the central server (
database.clamav.net) at the end of the list. - NotifyClamd is used to ensure that clamd service is notified that there is a database update available and to reload new definitions from the disk. We specify the location of the clamd configuration file so that freshclam knows how to communicate with the service.
- UpdateLogFile defines a file where freshclam stores outcome of his actions. It is considered a good practice to have this file since it can help determine source of any potential problem with updates.
To verify whether this configuration works, open command prompt, go into ClamAV directory, and execute freshclam. If everything works OK you will have a latest virus signature database ready for the use.
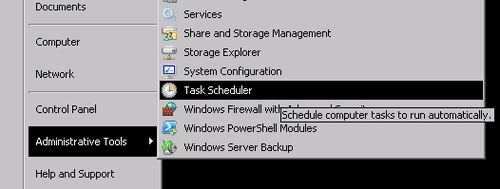
We are not finished yet with freshclam. Remember that we need to update virus signatures every day in order to have highest level of protection. In Linux one uses cron for such purposes but in Windows we can use Task Scheduler.
Start the Task Scheduler by choosing option Start menu | Administrative Tools | Task Scheduler.
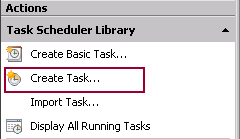
Choose Create task option from the left command pane.
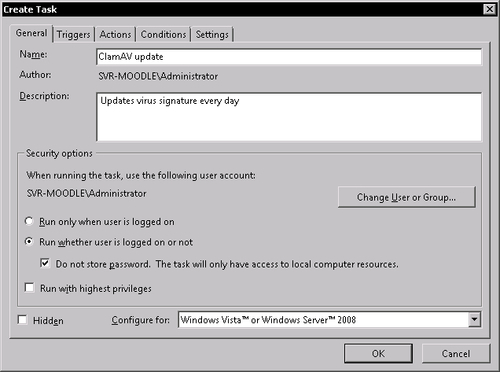
In the initial screen we need to set the task name and the way it is executed. In the Name field enter ClamAV update. Make sure to check Run whether user is logged or not and Do not store password... option.
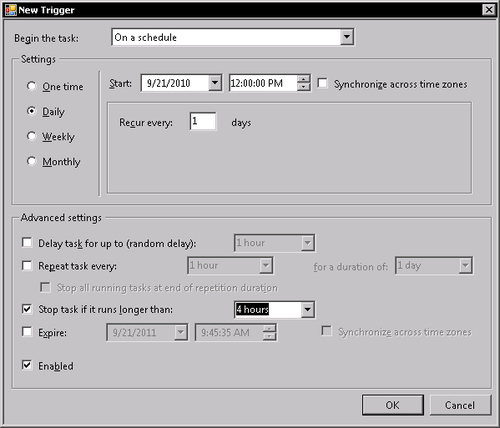
Switch to the Triggers tab in the same dialog and click on New... button. We are defining the condition under which the task will be started. In the Begin the task field, choose On a schedule value. Under Settings check repetition period to Daily and set period to one day. I leave the value of the Start field to your personal choice. General practice is to choose period of day with low user activity—usually around midnight. Check option Stop task if it runs longer than and set it to 4 hours.
Confirm the setting by clicking the OK button and switch to the Actions tab. An action in this case would be execution of freshclam. Click on the New... button. In the New Action dialog set Action field to Start a program. In Program/script put the location to your freshclam.exe—Z:clamavfreshclam.exe, and in the Add arguments fields place following text—config-file=<path to freshclam.conf>, which would be in our case—config-file=Z:clamavfreshclam.conf. This is just a safety guard to ensure that proper configuration is used by freshclam.

Switch to the Conditions tab and check Start only if the following network connection is available and choose Any connection. With this setting we are making sure to execute the task only when the server is actually connected to the network.

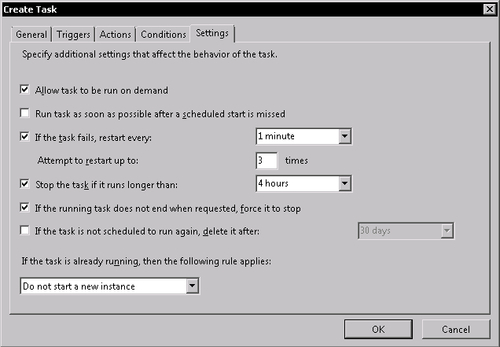
Finally, switch to the Settings tab and check Allow task to be run on demand. Also activate If the task fails, restart every: and set it to 1 minute, and set number of retries to 3. Check Stop the task if it runs longer than and set it to 4 hours. If the running task does not end when requested force it to stop is something you should activate too. With all that configured click on OK.
Good work! You just configured your automatic updates for ClamAV.
We are almost at the end of anti-virus configuration in Windows. To activate checking, start the clamd service. Open the elevated command prompt and execute:
net start clamd
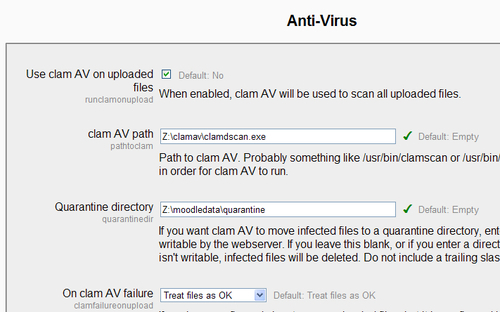
Open the Administration | Security | Anti-Virus page within Moodle and configure it as shown in the following screenshot:
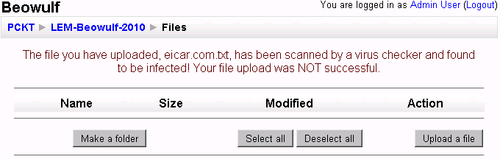
To test ClamAV functioning within the Moodle download eicar.txt, which is a standard anti-virus test file from http://www.eicar.org/download/eicar.com.txt, try to upload it in some course. You should see something like this: