
In an earlier chapter, we discussed how to create windows using the BrowserWindow object. But we’ve often found that simply creating windows is not enough. An effective application may need to create more than one window and instigate communication between windows. We thought that a great way to teach you the basics of these concepts would be to implement a simple splash screen example.
In this chapter, we will reinforce the creation of windows using the BrowserWindow object, create a frameless and non-resizable window, retrieve and display the version of the application, integrate communication between these windows using inter-process communication (IPC) , and set up a simulation for a slow starting application.
Loading an Application
Users typically start Electron applications, like any other desktop applications, by clicking or double-clicking on an icon in their computer’s system interface. Everyone has experience with this interaction: you find the application icon, you click it, and your application appears on the screen. But what happens between when the user clicks and the application appears? Most likely, a lot happens: the application code is initialized; user authorization is checked; user preferences are loaded; and data is acquired via an online service or local database, processing that data for display. Any and all of these tasks can take many seconds.
It is important to remember how a BrowserWindow object gets displayed using the default parameters. When Chromium is ready, the blank window frame will appear then, and as soon as the application is ready Chromium will render the application UI. Since our starter code doesn’t really do anything taxing to the CPU, we don’t even notice it. If the application you’re building is very simple, this may not be a problem. If not, your users may experience something that appears like the application is broken while waiting for the application to render. And if we’ve learned anything from mobile development over the past 10 years, it’s that users don’t like waiting for applications to start, even on their desktop computers. This is where a splash window comes in.
Splash Window
Every application can use a splash window. With desktop applications, a splash window is similar to a mobile application’s splash window in that it gives the user immediate feedback that the application is loading and provides cover for any system information gathering, user preferences, and any pre-loading of data. Some applications use a splash window as a starting point: click here to load a recent file. Other applications just show the splash window as a branding exercise. Either way, it is good to know how to get started creating a splash window.
Installing the Quick Start
As with each of these examples, we are using the Electron Quick Start example. We will use git clone to create a new copy of the quick start in a new folder, in this case named splash-window-example. First, open terminal and navigate to the folder where you would like to place your code.
git clone https://github.com/electron/electron-quick-start splash-window-exampleNext, change your active directory to splash-window-example.
cd splash-window-exampleNow, we need to install the dependencies:
npm installFinally, reset Git with
git initNow that you have our example project installed, type npm start into your terminal application just to make sure the application loads and runs as expected.
Setting Up a Splash Window
Now that you have created your splash-window-example project and installed dependencies, we should update some code to make this project uniquely ours.
In your code editor, find the package.json file in the root of your project and open it to make the following changes in bold:
{"name": "splash-window-example","version": "1.0.1","description": "An example app using a splash window","main": "main.js","scripts": {"start": "electron ."},"repository": "","keywords": ["Electron","splash","window","example"],"author": "Your Name Here","license": "CC0-1.0","devDependencies": {"electron": "∼1.6.2"}}
Best Practice: When you use a starter project to build your application, it is important to remember that the original author’s information is in the package.json file. Since you are not going to be committing code back to the starter project, it is important for you to update this information to avoid problems. And try to remember to keep information like version and description in your package.json file up to date.
Changes to the package.json aren’t necessary, but we like to start with this first because when we forget to do it we end up doing it later anyway. First we updated the name value to splash-window-example. Next we updated the version to 1.0.1 (but you can use any number you’d like). We’ve updated the keywords array with the words Electron, splash, window, and example. Finally, we changed the author value. In the code snippet above it says “Your Name Here,” but you can enter your name.
Creating the Splash Window File
Our next step will be to create the file and code needed to create our splash window. Since the quick start code already uses the index.html file as the starting point for the application’s user interface, we will continue using it but update the main.js file to open the splash window first. But before we do that, let’s create some new code.
In the root of your project use your code editor to create a file named splash.html and place the following code inside it.
<!DOCTYPE html><html><head><meta charset="UTF-8"><title></title></head><body></body></html>
Yeah, this is really basic HTML but we have to start somewhere, right? Now, open up the main.js file that is on the root of your project. This starting point of your application is we need to modify it to open our new splash window file. Near the top of the file, find the line that says let mainWindow and place the following code in bold beneath it.
let mainWindowlet splashWindowfunction createSplashWindow() {splashWindow = new BrowserWindow({width: 320,height: 240,frame: false,resizable: false,backgroundColor: '#FFF',alwaysOnTop: true,show: false})splashWindow.loadURL(url.format({pathname: path.join(__dirname, 'splash.html'),protocol: 'file',slashes: true}))splashWindow.on('closed', () => {splashWindow = null})splashWindow.once('ready-to-show', () => {splashWindow.show()})}
On the first line, we create the splashWindow variable that we can reference from anywhere in our main.js file. The createSplashWindow method is the next piece of code. In the first section, we are creating a BrowserWindow object using the width, height, frame, resizable, backgroundColor, alwaysOnTop, and show properties. Let’s evaluate these properties so that we understand why we are setting these properties with these values.
First, we are setting the width and height to arbitrary numbers – your typical size of 320 by 240 pixels. These numbers may change depending on the design of the content you may be placing inside your splash window. For now, since our splash window will be basically blank, we’ll go with this size. The next property, frame, is the property that sets the frame around the window. For our styling purposes, we’re going to set frame to false so there will not be a border around our splash window. The resizable property controls whether the user can resize our splash window. Combined with having no frame, this is a visual indication to the user that this window doesn’t expect any interaction. Finally, we have the alwaysOnTop and show properties. We want the splash window to appear above all of our other windows, so we need alwaysOnTop to be set to true. If we did not use the alwaysOnTop setting, or if we set it to false, the next window we created would appear over our splash window. Setting the show property to false gives us the ability to display our splash window once it is ready. Later in this method we use the ‘ready-to-show’ event to show our splash window.
In the next section of our createSplashWindow method we load the splash.html file into our BrowserWindow object using BrowserWindow’s loadURL method. This method uses the path module that is loading earlier in our code (not represented in the snippet above).
The last two sections of code inside createSplashWindow are event listeners. We listen for the closed event occurring from the splashWindow so we can remove the splashWindow from memory by setting it to null. Since we have set our splash window to be created with the show property set to false, this is where we make our splash window visible.
Now that you’ve created the createSplashWindow method, we need to call it. In the code, find the line where the ‘ready’ event listener is set and change createWindow to the following:
app.on('ready', createSplashWindow)Open up your terminal application, navigate to your project folder and run the npm start command to get a visual idea of where we are so far (Figure 12-1).
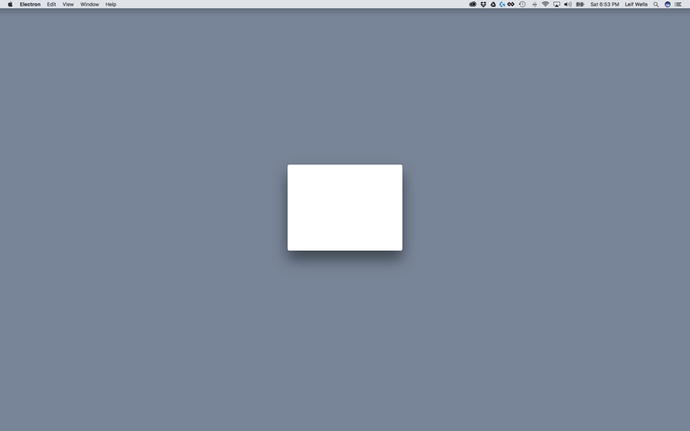
Figure 12-1. Our initial splash window
OK, so it’s not very exiting – the programmer’s equivalent of ghosts roasting marshmallows in a blizzard. This is the reason designers are on our projects. Let’s add a little magic to our splash window display.
Showing the Version in Our Splash Window
Something commonly displayed in a splash window is the version of your application. While we could simply put some text in our HTML file to display the version, that would mean that we would have to remember to update that item to keep it in sync with the real version number. In our project we track the version inside package.json file. Keeping the version number in one place is a good idea, so let’s use Electron to grab that version number and display it inside our splash window.
The first thing we need to do is retrieve our version number. Open up the main.js file found at the root of your project. At the top of the file where several modules are created, add the code in bold below.
const electron = require('electron')
// Module to control application life.
const app = electron.app
// Inter-Process Communication (IPC)
const ipcMain = electron.ipcMain
// Module to create native browser window.
const BrowserWindow = electron.BrowserWindow
We added a comment here to remind us that this code adds the IPC module to our main.js file. Now, scroll to the bottom of the file where you see the comment included in the following snippet and add:
// In this file you can include the rest of your app's specific main process// code. You can also put them in separate files and require them here.//SPLASH WINDOW: REQUEST FOR VERSIONipcMain.on('get-version', event => {console.log('app version: ', app.getVersion())event.sender.send('set-version', app.getVersion())})
In the earlier chapter covering IPC, we covered how this works, but let’s review this code here as a reminder. Inside the main.js file we added the ipcMain module, which is required to allow the Main Process to send and receive messages to and from the Renderer process. In the second snippet we added an event listener for the ‘get-version’ event. When we receive that event, we get the version using the getVersion method on our app object and send the version back to the sender. That version number is the string that appears in the package.json file. Remember, we changed that earlier in the chapter. Inside the listener we also have a console.log command that displays our version number in the terminal window.
Now that our code is set to get the version and display the version number in the terminal window, we need to get the splash window to trigger the event. Open the splash.html file and add the following code just below the closing body tag (</ body>):
<script>const { ipcRenderer } = require('electron')ipcRenderer.send('get-version')</script>
Inside the script tag we imported the ipcRenderer module and sent the ‘get-version’ event to the Main Process.
Now that we’ve set up code to get the version number, let’s take a look at what that looks like (Figure 12-2).
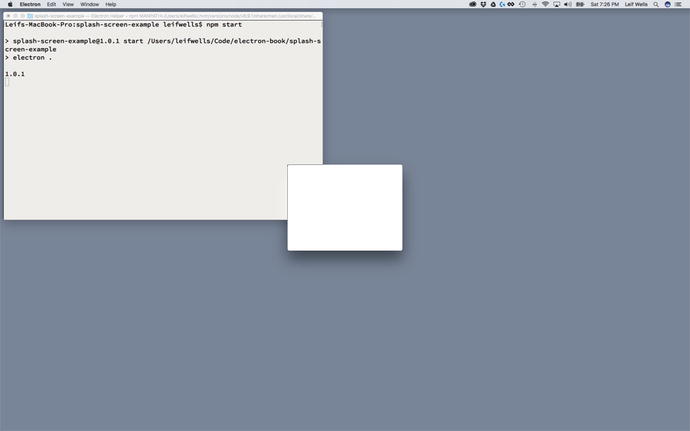
Figure 12-2. The application version number appears in the terminal window
Notice that you can see “1.0.1” in the terminal window. Yay! If you want to experiment further, you can quit your application, open the package.json file, and change the version value and test your application again.
Now let’s make the version number appear inside the splash window. Open the splash.html and add a paragraph tag inside the body tag to the file like it is below, and update the code inside the script tag to listen for the ‘set-version’ event.
<html><head><meta charset="UTF-8"><title></title></head><body><p>version <span id="versionSpan"></span></p></body><script>const { ipcRenderer } = require('electron')ipcRenderer.on('set-version', (event, arg) => {const versionSpan = document.getElementById('versionSpan')versionSpan.innerHTML = arg})ipcRenderer.send('get-version')</script></html>
As you can see here, this is where we are using IPC inside our splash window. Inside our script tag, we create the constant ipcRenderer, the IPC module required for use inside the Renderer Process. We use the ipcRenderer to first listen for the ‘set-version’ event, then to send the ‘get-version’ event. It is important to note that these event name strings match in both the Main and Renderer Process’ codes. For instance, if you send a ‘get-version’ event from your Renderer Process and your Main Process is expecting the event to be ‘my-get-version’, your communication will fail.
Inside our listener for the ‘set-version’ event, we capture the version as a returned argument and set code in the span with the id of ‘versionSpan’ with the argument. Fairly simple fair, but let’s take a look at the result (Figure 12-3).
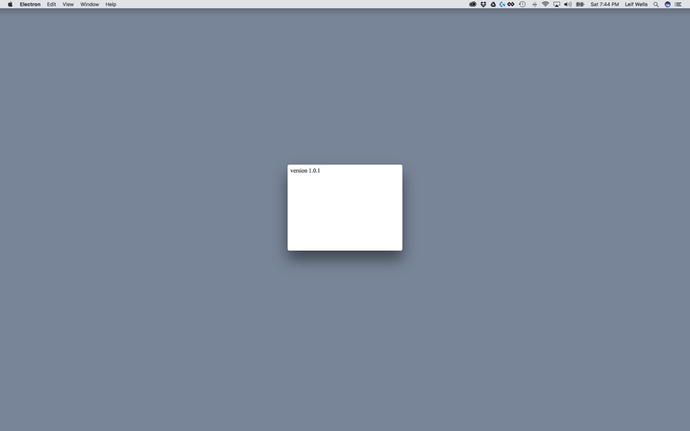
Figure 12-3. The version number is displayed in the splash window
Nice! As we said earlier, a designer would hate your new splash window, but we have the information we wanted: a splash window that displays the version number of our application. But we are far from being finished. We need to display the main application window now, right?
Loading the Main Window
Now that our simple splash window is appearing when we start our application, we need to show our main window. Open up the main.js file and add the following code listed in bold.
splashWindow.once('ready-to-show', () => {splashWindow.show()createWindow()})
All we are basically doing here is calling the createWindow method inside our splashWindow’s ‘ready-to-show’ event listener. Let’s see what happens when we run the npm start command now (Figure 12-4).
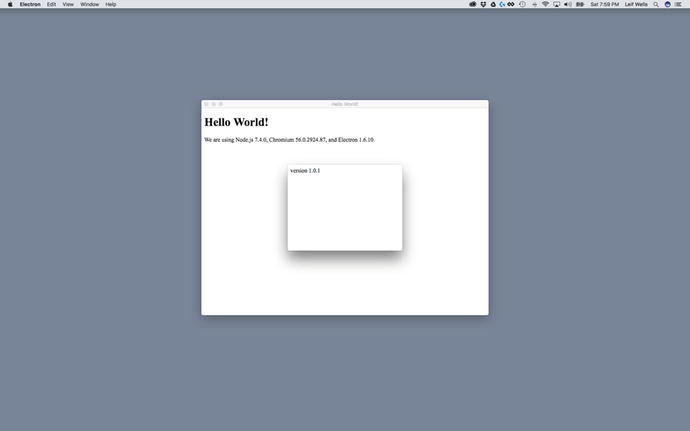
Figure 12-4. The splash window appears above the main window
That’s great. We’re done. Let’s pack up and go home.
OK, so, maybe that wasn’t all that great after all. First, our splash window stays there on top of our main window, immovable and in the way. Second, both windows appear to load immediately and at the same time. That’s mostly because these windows are very simple and don’t require a lot of CPU power to push to the screen. We need to update our code to make our splash window and main window behave like we wish.
Setting Up the Main Window
To make our splash window example work as we would like we need to set up our simple main window to fake as though our application takes a few seconds to load so that we can see how a splash window really works. So, let’s get started.
To start off, let’s update the renderer.js file to simulate the application loading something. Think of this like the time it would take to load data from a local or online database. To demonstrate this, we will add a timer to the main window.
Open your renderer.js file and add the following code.
// This file is required by the index.html file and will// be executed in the renderer process for that window.// All of the Node.js APIs are available in this process.const { ipcRenderer } = require('electron')setTimeout(() => {ipcRenderer.send('app-init')}, 5000)
As a reminder, our renderer.js file is the Javascript file linked to the index.html. It controls Electron’s Renderer Process. The code we just added is fairly simple. Just like in our splash.html file, we’ve added the ipcRenderer constant so we can send messages through Electron’s IPC feature. Below our ipcRenderer declaration we have a simple Javascript timeout function, setTimeout, which waits five seconds to send an ‘app-init’ event to the Main Process.
Now open the main.js file so we can listen for the ‘app-init’ event. Add the following code to the bottom of the file.
// MAIN WINDOW: FINISHED LOADINGipcMain.on('app-init', event => {if (splashWindow) {setTimeout(() => {splashWindow.close()}, 2000)}mainWindow.show()})
Earlier we added the ipcMain constant to our file, so we can use it again here. This code is our listener for the ‘app-init’ event that we just set up in the renderer.js file. The first thing you see is that we are checking to see if the splashWindow exists before setting another time out for two seconds before closing the splashWindow using the close method. Finally, we make a call to show the mainWindow.
One more thing needs to be changed for our example to work. Toward the top of the file inside the createWindow method you need to make the following change in bold so the main window doesn’t automatically show.
function createWindow () {// Create the browser window.mainWindow = new BrowserWindow({width: 800, height: 600, show: false})
So, before we test our new code, let’s review what it is doing. First, the Main Process creates and shows the splash window. When the splash window is shown, the main window (the Renderer Process) is loaded, which triggers a five-second timer that then fires off a ‘app-init’ event, which when captured in the Main Process shows the main window, and creates a two-second timer that dismisses the splash window.
At this point, a window shot is pointless as what you will experience when running this code is animated windows. So, run the npm start command and see your splash window in action.
Summary
In this chapter, we created an example application that uses a splash window to create the impression with users that our application has started to cover for any startup activities that may slow down rendering of the main application window. To create our splash window, we used BrowserWindow’s frameless, resizable, and alwaysOnTop parameters to make the splash window appear differently than your main application window. We used IPC to get the version number and display it in our splash window as well as have our main window tell our Main Process when it is ready. And, finally, we used a timer to momentarily hold our splash window on screen before making it disappear.