
These days, developers tend to assume that the people using their applications are always online. One could even assume that just because someone is using a desktop or laptop computer, they will be within reach of an Ethernet cable or Wi-Fi signal. Reality teaches us that this assumption isn’t correct and that as a developer of desktop applications we need to plan accordingly.
Using the cloud to store the artifacts of a user’s activities is a normal condition of modern web applications. You would assume correctly that if the user has logged into your application, then they are online. But when you deploy code to the desktop using Electron, the application code is inside the executable file and not on a server. If you are relying upon a connection to the Internet, detecting whether that connection is live is a fundamental task.
In this chapter, we will create a sample application that checks to see if the computer that the application is running on is online and inform the user that a change has occurred. Through the process of creating this sample, we will look at various techniques of online detection and create a solution that utilizes both the main and the renderer processes. A typical Node developer may try to put everything inside the Main Process. A typical web developer may try to put everything inside the Renderer Process. In this chapter, we believe that you will see that if you leverage the features of both processes, you will achieve a much more elegant solution.
Getting Started
As with each of these examples, we are using the Electron Quick Start example. We will use git clone to create a new copy of the quick start in a new folder, in this case named online-detection-example. First, open the terminal and navigate to the folder where you would like to place your code.
git clone https://github.com/electron/electron-quick-start online-detection-exampleNext, change your active directory to online-detection-example.
cd online-detection-exampleNow, we need to install the dependencies:
npm installFinally, reset Git with
git initNow that you have our example project installed, type npm start into your terminal application just to make sure the application loads and runs as expected.
Let’s take a moment to modify this package.json file to match our own by updating some nodes.
Change the name node to "online-detection-example."
Change the version number to "0.0.1" since we are just starting out.
In the description let’s use something like "A sample Electron application to demonstrate online detection."
Remove the repository node. If you decide to put your results in a repository, you can change re-add this node with the correct address.
Keywords can be "Electron," "online," "detection," "sample."
"author": Your name goes here.
Let’s change the “license” node to "MIT."
Using the Renderer Process to Detect Online Status
Typically, in any web application you would use an event listener to detect changes in online status. It would look something like this:
window.addEventListener( 'online', updateOnlineStatus )window.addEventListener( 'offline', updateOnlineStatus )
This example code is waiting for the window object to emit either an online or offline event, and when either of these events occur the updateOnlineStatus function is called. It is a fairly simple technique to assemble, so let’s get started.
First, we’ll set up our HTML and CSS files. Inside our index.html file let’s change the body tag to the following code:
<body><div class="container"><header><h1>Are You Online?</h1><div class="button-holder"><button id="checkStatusButton" type="button">Check Status</button></div></header><section class="main"><h2 id="h2-online">You are Online</h2><h2 id="h2-offline">You are NOT Online</h2></section><footer></footer></div></body>
This code separates the body tag into three sections: header, main, and footer. Inside the header tag we are placing an h1 for the title and a button with the id of “checkStatusButton.” We will leave the footer empty of content, but we will style it in our CSS.
The section tag is where our main content will reside. It holds three h2 elements with id attributes. Those ids will be used to show or hide these h2 elements depending upon the current online status.
Now that we have the basic structure created for our example, we need to create CSS for layout and styling. First, we need to create a CSS file, then we will add a link to our index.html file so it will be used.
First, in the root of your project, create a new file and name it “index.css.”
Here’s code for the index.css file:
html,body {padding: 0;margin: 0;}body {font-family: 'Helvetica Neue', Helvetica, sans-serif;}header {position: absolute;width: 100%;height: 20px;top: 0;left: 0;padding-left: 15px;padding-top: 5px;background-color: #CCC;border-bottom: 1px solid #999;}header h1 {font-size: 12px;font-weight: bolder;margin: 0;padding: 0;}.button-holder {position: absolute;right: 25px;bottom: 5px;width: auto;height: auto;padding-top: 5px;}section {width: 100%;margin-top: 30px;}section h2 {display: none;font-size: 48px;font-weight: 100;margin: 0;padding: 0;text-align: center;}footer {position: absolute;left: 0;bottom: 0;width: 100%;height: 10px;padding-bottom: 5px;border-top: 1px solid #999;background-color: #CCC;}
We are keeping the CSS simple here, but the highlights are the following:
The .button-holder tag positions the button to the right side in the header.
section and section h2 are used to style our main section.
footer gives us a nice gray bar.
Now that we have our CSS file, let’s link to it in our project. Open the index.html file and add the following highlighted code to the head tag:
<head><meta charset="UTF-8"><title>Are You Online?</title><link rel="stylesheet" type="text/css" href="index.css"></head>
If we run our project now, it looks like Figure 11-1.
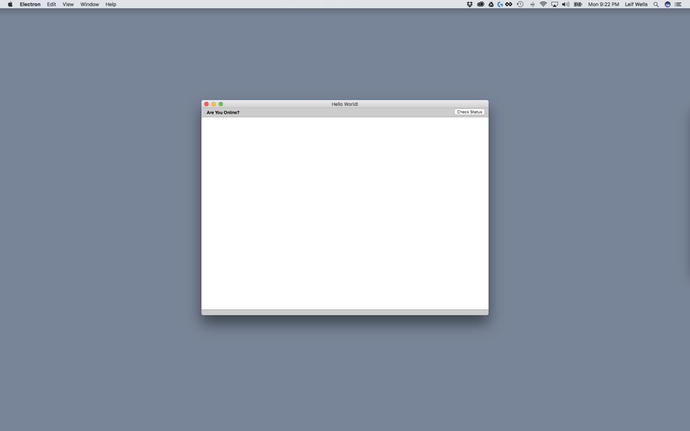
Figure 11-1. The example’s empty UI
Notice that you don’t see anything in the main container. That is because our CSS for section h2 tag is using display: none; so that all of them are hidden. Now we can add some JavaScript to detect whether our application is online and reveal the appropriate h2 element.
Open the renderer.js file. It currently has commented lines at the top of the file. We’ll delete those comments and enter the following code:
const updateOnlineStatus = () => {if( navigator.onLine ) {document.body.style.backgroundColor = 'green'document.getElementById( 'h2-checking' ).style.display = 'none'document.getElementById( 'h2-online' ).style.display = 'block'document.getElementById( 'h2-offline' ).style.display = 'none'} else {document.body.style.backgroundColor = 'red'document.getElementById( 'h2-checking' ).style.display = 'none'document.getElementById( 'h2-online' ).style.display = 'none'document.getElementById( 'h2-offline' ).style.display = 'block'}}window.addEventListener( 'online', updateOnlineStatus )window.addEventListener( 'offline', updateOnlineStatus )document.getElementById( 'checkStatusButton' ).addEventListener('click', updateOnlineStatus)updateOnlineStatus()
At the top of this code block is our updateOnlineStatus method. This is where all the action takes place. The status variable is created by checking whether navigator.onLine method returns a string of 'online' or 'offline'. From there the code branches with code that changes the styles of the corresponding h1 tags to make the correct message appear as well as the background color of the body tag. At the bottom of this code block we have the event listeners. There is one each for the “online” and “offline” events that call our updateOnlineStatus method, and one for the “click” event on the header button. Finally, we call the updateOnlineStatus method that gets our application going.
Now, if you look at the bottom of our index.html file you will see that the renderer.js file is already being referenced:
<script>// You can also require other files to run in this processrequire('./renderer.js')</script>
If we launch our application using npm start (and you are online), you should see Figure 11-2.
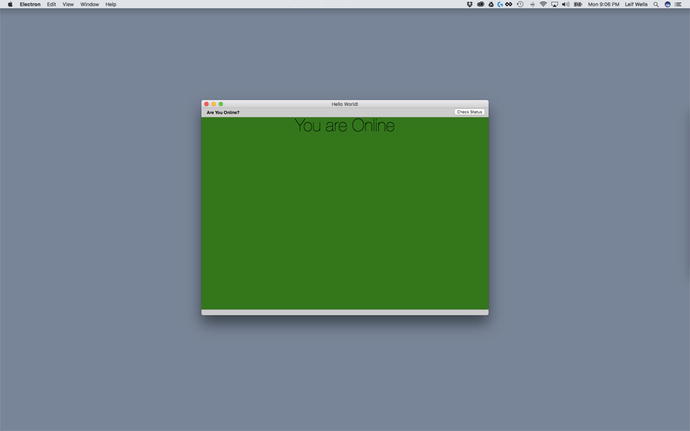
Figure 11-2. The example’s UI showing the computer is online
And if you disconnect from your Internet, you should see Figure 11-3.

Figure 11-3. The example’s UI showing the computer is not online
We can take this sample one step further by adding an additional feature: Notification. The Notification API is part of the HTML specification and an excellent choice of a UI element for informing the user of important information. Using a Notification also allows us to inform the user of a change in online status when our application is not in the foreground.
We can create a Notification to our code at the bottom of our updateOnlineStatus method:
const updateOnlineStatus = () => {let status = navigator.onLine ? 'online' : 'offline'console.log( status )if( navigator.onLine ) {document.body.style.backgroundColor = 'green'document.getElementById( 'h2-checking' ).style.display = 'none'document.getElementById( 'h2-online' ).style.display = 'block'document.getElementById( 'h2-offline' ).style.display = 'none'} else {document.body.style.backgroundColor = 'red'document.getElementById( 'h2-checking' ).style.display = 'none'document.getElementById( 'h2-online' ).style.display = 'none'document.getElementById( 'h2-offline' ).style.display = 'block'}let note = new Notification( 'You are ' + status , { body: 'You are now ' + status })note.onclick = () => {console.log( 'Notification clicked!' )}}
The new code for this method begins with a let note, which creates a variable as a Notification object that has an argument that is a simple bit of text. The next lines create a console message when the notification is clicked. This is a simple example of using the HTML5 Notification API, which comes with Chromium.
Now when you turn on or off your Internet access, you will see a notification in the upper-right corner of your screen (Figure 11-4).

Figure 11-4. A notification has appeared in the upper-right corner of the screen
Pros and Cons of the Renderer-Only Solution
This example works great! It uses the Window and Notification APIs available in our Chromium-based Renderer Process and works reliably when we manually change our own Internet access.
But there is one major drawback to this solution: LieFi. This is the condition that many people get into when they are able to connect to a router, but the router is not connected to the Internet. You see that you have a 5-bar connection, but you can’t load anything from the Web. Your connection is a lie. If you are not worried about this condition, feel free to use and improve upon this sample. Otherwise, let’s take a look at a solution that uses the Main Process.
The Main Process-Only Solution
Since our Renderer-Only Online/Offline detection may not be enough to satisfy our requirements, we should try using the Main Process. We need a way to get Node to check if there is an active link to the Web. To do this, we need to add a module to our project. Luckily, GitHub user @sindresorhus has created a module named is-online ( https://github.com/sindresorhus/is-online ). If you don’t know, @sindresorhus is the person who hosts Awesome Electron ( https://github.com/sindresorhus/awesome-electron ), a page of helpful Electron links. Take a look when you get the chance. The is-online module pings root servers and if it gets a response within 2 seconds, it knows your application is really online. No lies here. We will need to create an interval, a loop of code that gets called at a set period, to call is-online. Finally, we will need to tell our renderer process what the current status is so it can be displayed using Electron’s Inter-Process Communication (IPC). So let’s get started.
To install is-online, we need to run the following command in your terminal application from the root of our project:
npm install is-online --saveTake a look at your package.json file at the root of your project. There should be a new dependencies node and it should look like this:
"dependencies": {"is-online": "^7.0.0"}
At the time of this writing, version 7.0.0 was available. You may see a higher version number, but that is good. Now we can start using is-online in our Main Process. Open the main.js file in the root of the project and add the following highlighted lines of code to the top of the file:
const electron = require('electron')// Module to control application life.const app = electron.app// Module to create native browser window.const BrowserWindow = electron.BrowserWindowconst path = require('path')const url = require('url')const ipcMain = electron.ipcMainconst isOnline = require('is-online')let checkIsOnlineIntervallet currentOnlineStatus
The first line gives us access to Electron’s Inter-Process Communications API, which we will be using to send messages from the Main Process to the Renderer Process. The second line allows us to use the is-online module. The third line creates a variable checkIsOnlineInterval that will be used to create an interval in which we will check online status. The fourth line creates the currentOnlineStatus variable that will be used to hold the current connection status.
At the bottom of the main.js file we will insert the following method:
function checkIsOnline() {isOnline().then( online => {console.log( "Online? " + online )mainWindow.webContents.send( 'update-online-status' , { online: online })if( currentOnlineStatus !== online ) {if (process.platform === 'darwin') {app.dock.bounce( 'informational' )}}currentOnlineStatus = online})}
This is the function we will be calling to find out if we are online. The isOnline function returns a Promise and inside the then method we make a IPC call, 'update-online-status', to the renderer process along with an argument object that holds the reference to our online status.
In the next if statement we want to notify the user if the status is offline by bouncing the application icon in the dock if you are on the macOS platform:
app.dock.bounce( 'informational' ) The dock is a reference to the collection of icons typically found at the bottom of the screen on the macOS computer, so this is obviously a Mac-only feature. This line of code uses the app reference created at the top of our file and accesses that object’s dock object’s bounce method. You can pass the argument “informational,” like we’ve done here, or “critical.” With the “informational” argument, the icon is only bounced for a second. With “critical” the icon will bounce until the application is activated or app.dock.cancelBounce(id) is called. We’ll look at that scenario in another chapter.
Finally, we set the currentOnlineStatus variable to match the online status so that we may refer to it later.
Now we need to create an interval so that we may call the checkIsOnline repeatedly. Place the following code at the bottom of your main.js file:
function startCheckingOnlineStatus() {checkIsOnlineInterval = setInterval(checkIsOnline, 10000 )}
The setInterval method creates an interval that calls the checkIsOnline method. For our purposes here, we are setting the time between checks to 10000, which translates to 10 seconds. Now that we have created the method for creating the interval, we have to call it to get it started. Place the following highlighted code at the bottom of our createWindow method:
function createWindow () {// Create the browser window.mainWindow = new BrowserWindow({width: 800, height: 600})// and load the index.html of the app.mainWindow.loadURL(url.format({pathname: path.join(__dirname, 'index.html'),protocol: 'file:',slashes: true}))// Open the DevTools.mainWindow.webContents.openDevTools()// Emitted when the window is closed.mainWindow.on('closed', function () {// Dereference the window object, usually you would store windows// in an array if your app supports multi windows, this is the time// when you should delete the corresponding element.mainWindow = null})startCheckingOnlineStatus()}
Now, when the main window is created the interval is also created.
Note
Inside our checkIsOnline method, we make a console call:
console.log( "Online? " + online )It is important to remember that when we create console messages in the Main Process, these messages do not appear in the Chromium DevTools console window. These messages will appear in the terminal window where you called npm start to launch your application.
Let’s enter npm start into our terminal window to start the app and see how it works. You should see messages in the terminal window every 10 seconds (Figure 11-5).

Figure 11-5. Messages from the Main Process are appearing in the terminal window
Great! Since users of your application will never see a terminal window, we need to do a little work in the code for our renderer process so we can better inform them of any changes in the online status.
Update the following highlighted lines in the renderer.js file:
const { ipcRenderer } = require('electron')let onlineStatusconst updateOnlineStatus = ( event, status ) => {if( status.online ) {document.body.style.backgroundColor = 'green'document.getElementById( 'h2-checking' ).style.display = 'none'document.getElementById( 'h2-online' ).style.display = 'block'document.getElementById( 'h2-offline' ).style.display = 'none'} else {document.body.style.backgroundColor = 'red'document.getElementById( 'h2-checking' ).style.display = 'none'document.getElementById( 'h2-online' ).style.display = 'none'document.getElementById( 'h2-offline' ).style.display = 'block'}if( this.onlineStatus !== undefined && this.onlineStatus !== status.online ) {let note = new Notification('You are ' + (status.online ? 'online' : 'offline'),{ body: 'You are now ' + (status.online ? 'online' : 'offline')})note.onclick = () => {console.log( 'Notification clicked!' )}}this.onlineStatus = status.online}ipcRenderer.on('update-online-status', updateOnlineStatus )
On the top line of this new code block is a reference to ipcRenderer, which we are getting from Electron. The ipcRenderer will allow the Renderer Process to receive messages from the Main Process. We’ll set that up in a moment.
In the second line we create a variable onlineStatus that will be used to hold the current online status.
The updateOnlineStatus method is created next. It is expecting two arguments, event and status. The event argument is sent by default by the Main Process. The status argument represents an object that has an online property, a Boolean that indicates whether the application is online.
We set the onlineStatus variable in the next block of code in the if statement inside our updateOnlineStatus method:
if( this.onlineStatus !== undefined && this.onlineStatus !== status.online )We don’t need to update the user if the online status has not changed. This if statement is asking if our onlineStatus variable exists and if it is not the same as the online property of the status argument; and if so, we need to update the screen. The status argument is also used when creating the Notification, so we need to update the code there as well. At the bottom of the updateOnlineStatus method we update our onlineStatus variable.
At the bottom of this code block we set up the listener for the IPC call from inside the checkIsOnline method in the Main Process (main.js):
ipcRenderer.on('update-online-status', updateOnlineStatus )This means that the ipcRenderer object is waiting for the 'update-online-status' event and when it occurs the updateOnlineStatus method will be called.
Of note, we commented out those last three lines. We’ll be using them again in the next section of this chapter, but for now we do not need them.
Now enter npm start into our terminal window to start the app and see how these updates work.
Pros and Cons of a Main Process-Only Approach
As you can see, doing all the online detection in the Main Process works well. We are able to avoid the Lie-Fi effect and let the Renderer Process know of any changes in online status. But there is an issue with this approach: the interval. Typically, running an interval every 10 seconds forever is not advisable, but as this is the only way we are doing the detection, the shorter the time frame the better. Also, we are waiting until 10 seconds before checking. And if we extend the times between checks, that is all the more chances for us to miss a change in online status.
Let’s try to see if we can combine the Renderer Process scenario with the Main Process scenario to make a better solution to online detection.
The Combined Approach
As we’ve seen so far, both the approaches to online detection we’ve tried so far have had some problems. We cannot trust the Renderer Process-Only solution because it couldn’t prevent Lie-Fi, the condition where a computer may be connected to a router, but that router does not have a connection to the Internet. The Main Process-Only solution uses a timer, which makes detection less reliable due to the time between detection events. So, let’s combine approaches to make a superior solution.
Most of the changes required for our new solution occur inside our renderer.js file. First, we will add a new method to the file just below the updateOnlineStatus method :
constcheckOnlineStatus = () => {document.body.style.backgroundColor = 'white'document.getElementById( 'h2-checking' ).style.display = 'block'document.getElementById( 'h2-online' ).style.display = 'none'document.getElementById( 'h2-offline' ).style.display = 'none'ipcRenderer.send('check-online-status')}
This new method does two things: it changes the UI state to a checking state, one that has a white background and shows the text “Checking…”, and then the method sends a ‘check-online-status’ IPC message to the Main Process.
Below the new checkOnlineStatus method are lines we commented in the previous solution. Let’s uncomment and change them to look like this:
window.addEventListener( 'online', checkOnlineStatus )window.addEventListener( 'offline', checkOnlineStatus )document.getElementById( 'checkStatusButton' ).addEventListener('click', checkOnlineStatus, false )
As you can see, we changed the handlers for these event listeners to use the new checkOnlineStatus method. This means that with each of these events, we will be asking the Main Process to check the status as opposed to going ahead and changing it. Even though the window’s online or offline events are accurate, instead of letting the Renderer Process go ahead and react to the status change, this code informs the Main Process that there has been a status change and allows it to run detection as well, making the Main Process central in the detection of online status.
Finally, let’s add a call at the bottom of our code:
checkOnlineStatus()By adding this code, we are kicking off our new detection routine immediately as the Renderer Process starts preventing any time gap in Main Process detection.
Now we can move back to our main.js file. Changes here, too, are fairly simple. At the bottom of the file, we need to listen for the check-online-status IPC call:
ipcMain.on('check-online-status', checkIsOnline )With this listener, the Main Process triggers the checkIsOnline method that detects the online status and then informs any parts of our application listening for the update-online-status event.
Give it a try by running npm start and make sure you take your computer online/offline to see how quickly the detection works.
Summary
Our goal in this chapter was to create an online detection solution. We added code that allowed the Renderer Process to handle online/offline detection using the navigator.onLine method available in Chromium. We then investigated using a Node module, is-online, to detect online status from within the Main Process. Finally, we combined the two approaches to create a better solution. Along the way, we hope that we revealed that evaluating a solution to a problem with an Electron application requires a developer to look beyond the traditional, typical front-end or back-end web developer roles, and better solutions can be found by leveraging both the Main and Renderer Processes to create a more complete result. You can create powerful Electron applications utilizing your knowledge and skills of Node, HTML/CSS/Javascript, and available open source projects.