
Bob Perrin
Just as silicon has advanced, so have software development techniques. The old days of writing code on punch cards, toggling in binary bootstrap loaders or keying in hexadecimal opcodes are long gone. The tried, true, and tiresome technique of “burn and learn” is still with us, but in a greatly reduced capacity. Most applications are developed using assemblers, compilers, linkers, loaders, simulators, emulators, EPROM programmers, and debuggers.
Selecting software development tools suited to a particular project is important and complex. Bad tool choices can greatly extend development times. Tools can cost thousands of dollars per developer, but the payoff can be justifiable because of increased productivity. On the other hand, initial tool choice can adversely affect the product’s maintainability years down the road.
For example, deciding to use JAVA to develop code for a PIC® microcontroller in a coffeemaker is a poor choice. While there are tools available to do this, and programmers willing to do this, code maintenance is likely to be an issue. Once the JAVA-wizard programmer moves to developing code for web sites, it may be difficult to find another JAVA-enabled programmer willing to sustain embedded code for a coffeemaker. Equally silly would be to use an assembler to write a full-up GUI (graphical user interface)-based MMI.
A quick trip to the Embedded Systems Conference will reveal a wide array of development tools. Many of these are ill suited for embedded development, if not for reasons of scale or cost, then for reasons of code maintainability or tool stability.
The two time-tested industry-approved solutions for embedded development are assembly and C. Forth, BASIC, JAVA, PLM, Pascal, UML, XML and a plethora of other obscure languages have been used to produce functioning systems. However, for low-level fast code, such as Interrupt Service Routines (ISRs), assembly is the only real option. For high-level coding, C is the best choice due to the availability of software engineers that know the language and the wide variety of available libraries.
Selecting a tool vendor is almost as important as selecting a language. Selecting a tool vendor without a proven track record is a risk. If the tool proves problematic, good tech-support will be required.
Public domain tools have uncertain histories and no guarantee of support. The idea behind open source tools is that if support is needed, the user can tweak the tool’s code-base to force the tool to behave as desired. For some engineers, this is a fine state of affairs. On the other hand, many embedded software engineers may not know, or even desire to know, how to tweak, for example, a backend code generator on a compiler.
Rabbit Semiconductor and Z-World offer a unique solution to the tool dilemma facing embedded systems designers. Rabbit Semiconductor designs ICs and core modules. Z-World designs board-level and packaged controllers based on Rabbit chips. Both companies share the development and maintenance of Dynamic C™.
Dynamic C offers the developer an integrated development environment (IDE) where C and assembly can be written and blended. Once an application is coded, Dynamic C will download the executable image to the target system over a serial cable. Debugging tools such as single stepping, break points, and watch-windows are provided within the IDE, without the need for an expensive In-Circuit Emulator (ICE).
Between Z-World and Rabbit Semiconductor, all four classes of controllers are available as well as a complete set of highly integrated development tools. Libraries support a file system, Compact Flash interfaces, TCP/IP, IrDA, SDLC/HDLC, SPI, I2C, AES, FFTs, and the uCOS/II RTOS.
One of the most attractive features of Dynamic C is that the TCP/IP stack is royalty free. This is unusual in the embedded industry, where companies are charging thousands of dollars for TCP/IP support. If TCP/IP is required for an application, the absence of royalties makes Dynamic C a very attractive tool.
For these reasons, we have chosen the Rabbit core module and Dynamic C for our networking development example.
Before considering embedded networks, we will start this chapter with a brief description of the RCM3200 Rabbit core and then get into the Rabbit development environment. We will cover development and debugging aspects of Dynamic C and we will highlight some of the differences between Dynamic C and ANSI C. Then we will move on to our networking examples, which are based on the Rabbit core and make use of the Dynamic C development system.
A processor does not mean a lot by itself. The designer has to select the right support components, such as memory, external peripherals, interface components, and so on. The designer has to interface these components to the CPU, and design the timing and the glue logic to make them all work together. There are design risks involved in undertaking such a task, not to mention the time in designing, prototyping, and testing such a system.
Using a core module solves most of these issues. Buying a low-cost module that integrates all these peripherals means someone has already taken the design through the prototyping, debugging, and assembly phases. In addition, core manufacturers generally take EMI issues into account. This allows the embedded system builder to focus on interface issues and application code.
There are several advantages to using cores. The greatest advantage is reduced time-to-market. Instead of putting together the fundamental building blocks such as CPU, RAM, and ROM, the designer can quickly start coding and focus instead on the application they are trying to develop.
To illustrate how to use a core module, we will set up an RCM3200 core module and step through the code development process.
The RCM3200 core offers the following features:
During development, cores mount on prototyping boards supplied by Rabbit Semiconductor. An RCM3200 prototyping board contains connectors for power and I/O, level shifters for serial I/O, a reset switch, and a pair of switches and LEDs connected to I/O pins. A useful feature of the prototyping board is the prototyping area that has both through-holes and SMT pads. This is where designers can populate their own devices and interface them with the core.
The Rabbit Semiconductor prototyping boards are designed to allow a system developer to build preliminary designs and write code on the prototyping board. This allows initial system development to occur even if the application’s target hardware is not available.
Once final hardware is complete, the core module can be moved from the prototyping board to the target hardware and the system software can then be finalized and tested.
The Dynamic C development system includes an editor, compiler, downloader, and in-circuit debugger. The development tools allow users to write and compile their code on a Windows platform, and download the executable code to the core. Dynamic C is a powerful platform for development and debugging.
Dynamic C includes an integrated development environment (IDE). Users do not need to buy or use separate editors, compilers, assemblers or linkers.
Dynamic C has an extensive library of drivers. For most applications, designers do not need to write low-level peripheral interface code. They simply need to make the right API calls. Designers can focus on developing the higher-level application rather than spend their time writing low-level drivers.
Dynamic C uses a serial port to download code into the target core. There is no need to use an expensive CPU or ROM emulator. Users of most cores load and run code from flash.
Dynamic C is not ANSI C. We will highlight some of the differences as we move along.
Dynamic C has a host of debugging features. In a traditional development environment, a CPU emulator performs these functions. However, Dynamic C performs these functions, saving the developer hundreds or thousands of dollars in emulator costs. Dynamic C’s debugging features include:
Breakpoints—Set breakpoints that can stop program flow where required, so that the programmer can examine and change the state of variables and registers or figure out how the program got to a certain part of the code
Single stepping—Step into or over functions at a source or machine code level. Single stepping will let the programmer examine program flow, or values of CPU registers, program variables, or memory locations.
Code disassembly—The disassembly window displays addresses, opcodes, mnemonics, and machine cycle times. This can help the programmer examine how C code got converted into assembly language, as well as calculate how many machine cycles it may take to execute a section of code.
Switch between debugging at machine code level and source code level by simply opening or closing the disassembly window.
Watch expressions—This window displays values of selected variables or even complex expressions, including function calls. The programmer can therefore examine or evaluate values of selected variables during program execution. Watch expressions can be updated with or without stopping program execution and can be used to trigger the operation of hardware devices in the target. Use the mouse to “hover over” a variable name to examine its value.
Register window—All processor registers and flags are displayed. The contents of registers may be modified as needed.
Stack window—Shows the contents of the top of the stack.
Hex memory dump—Displays the contents of memory at any address.
STDIO window—printf outputs to this window, and keyboard input on the host PC can be detected for debugging purposes.
Dynamic C provides extensive libraries of drivers. Low-level drivers have already been written and provided for common devices. For instance, Dynamic C drivers for I2C, SPI, various LCD displays, keypads, file systems on flash memory devices, and even GPS interfaces are already provided. A complete TCP stack is also included for cores that support networking.
There are some differences between Dynamic C and ANSI C. This will be especially important to programmers porting code to a Rabbit environment. As we cover various aspects of code development, we will highlight differences between Dynamic C and ANSI C.
Source code for Dynamic C libraries is supplied with the Dynamic C distribution. Although the Dynamic C library files end with a “.LIB” extension, these are actually source files that can be opened with a text editor.
For example, let us examine the LCD library. If Dynamic C is installed into its default directories, we find an LCD library file at DynamicCLibDisplaysLCD122KEY7.LIB: The library file defines various variables and functions. Because it is an LCD library, we find functions that initialize a display and allow the programmer to write to an LCD.
Looking at the function descriptions, the programmer can quickly understand how Rabbit’s engineers implemented each function. The embedded systems designer can tailor the library functions to suit particular applications and save them in separate libraries.
Here we will see how Dynamic C manipulates the MMU to provide an optimal memory usage for the application.
The Rabbit has an external 8-bit data bus. This allows the processor to interface to inexpensive 8-bit memory devices. The trade-off with a small data bus is the multiple bus accesses required to read large amounts of data. To minimize the time required to fetch operands containing addresses while still providing a useful amount of address space, the Rabbit uses a 16-bit address for all instruction operands.
A 16-bit address requires two read cycles over the data bus to acquire an address as an operand. This implies an address space limited to 216 (65,536) bytes. A 16-bit address space, while usable, is somewhat limiting.
To achieve a usable memory space larger than 216 bytes the Rabbit’s designers gave the microprocessor a memory management unit (MMU). This device maps a 16-bit logical address to a 20-bit physical address.
The Rabbit designers could have simply made the Rabbit’s instructions accept 20-bit address operands. This would require 3 bytes to contain the operands and would therefore require three fetches over the 8-bit data bus to pull in the complete 20-bit address. This is a 50% penalty over the 2 fetches required to gather a 16-bit address.
Many programs fit quite handily in a 16-bit address space. The performance penalty incurred by making all the instructions operate on a 20-bit address is not desirable. The MMU offers a compromise between a large address space and an efficient bus utilization. Good speed and code density are achieved by minimizing the instruction length. The MMU makes available a large address space to applications requiring more than a 16-bit address space.
The Rabbit 3000™ Designer’s Handbook covers the MMU in exacting detail. However, most engineers using the Rabbit only need understand the rudimentary details of how Dynamic C uses the feature-rich Rabbit MMU.
The Rabbit 3000’s MMU maps four segments from the 16-bit logical address space into the 20-bit physical address space accessible on the chip’s address pins. These segments are shown in Figure 4.1.

Dynamic C uses the available segments differently depending on whether separate instruction and data space is enabled. First, we will consider the case without separate I & D space enabled.
Dynamic C’s support of separate I & D space allows much better memory utilization than the older model without separate I & D space. This section is included for the benefit of engineers who may have to maintain code written for the older memory model. New applications should be developed using separate I & D space. The newer memory model almost doubles the amount of root memory available to an application.
Dynamic C uses each of the four segments for specific purposes. The Root Segment and Data Segment hold the most frequently accessed program code and data. The Stack Segment is where the system stack resides. The Extended Memory Segment is used to access code or data that is placed outside of the memory mapped into the lower three segments.
A bit of Rabbit terminology worth remembering is the term root memory. Root memory contains the memory pointed to by the Root segment, the Data Segment, and the Stack Segment (per Rabbit 3000 Microprocessor Designer’s Handbook). This can be seen in Figure 4.1.
Another bit of nomenclature to keep in mind is the word segment. When we use the word segment we are referring to the logical address space that the MMU maps to physical memory. This is a function of the Rabbit 3000 chip. Of course, Dynamic C sets up the MMU registers, but a segment is a slice of logical address space and correspondingly a reference to the physical memory mapped.
Segments can be remapped during runtime. The XPC segment gets remapped frequently to access extended memory, but most applications do not remap the other segments while running.
The semantics may seem a little picky, but this attention to detail will help to enforce the logical abstractions between Dynamic C’s usage of the Rabbit’s hardware resources and the resources themselves.
An example is the phrase Stack Segment and the word stack. The Stack Segment is just a mapping of a slice of physical memory into logical address space. There is no intrinsic hardware requirement that the system stack be located in this segment. The Stack Segment was so named because Dynamic C happens to use this third MMU segment to hold the system stack. The Stack Segment is a piece of memory mapped by the MMU’s third segment. The stack is a data structure that could be placed in any segment.
The Root Segment is sometimes referred to as the Base Segment. The Root Segment maps to BIOS code, application code, and Dynamic C constants. In most designs the Root Segment is mapped to flash memory. The BIOS is placed at address 0x00000 and grows upward. The application code is placed above the BIOS and grows to the top of the segment. Constants are intermixed with the application code.
Dynamic C refers to executable code placed in the Root Segment as Root Code. The Dynamic C constants are called Root Constants and are also stored in the Root Segment.
The Data Segment is used by Dynamic C primarily to hold C variables. The Rabbit 3000 microprocessor can actually execute code from any segment; however, Dynamic C uses the Data Segment primarily for data. Application data placed in the Data Segment is called Root Data.
Some versions of Dynamic C do squeeze a few extra goodies into the Data Segment that one might not normally associate with being program data. These items are nonetheless critically important to the proper functioning of an embedded system. A quick glance at Figure 4.2 will reveal that at the top 1024 bytes of the data segment are allocated to hold watch-code for debugging and interrupt vectors. Future versions of Dynamic C may use more or less space and may place different items in this space.
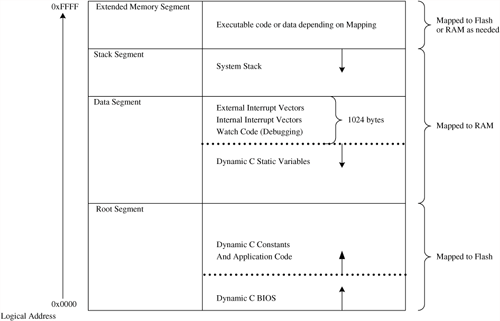
Dynamic C begins placing C variables (Root Data) just below the watch-code and grows them downward toward the Root Segment. All static variables, even those local to functions placed in the extended memory, are located in Data Segment. This is important to keep in mind as the Data Segment can fill up quickly.
Dynamic C’s default settings allocate approximately 28 K bytes for the Data Segment and 24 K bytes for the Root Segment spaces. The macro DATAORG, found in RabbitBios.c, can be modified, in steps of 0x1000, to change the boundary between these two spaces. Each increase of 0x1000 will gain 0x1000 bytes for code with an attendant loss of 0x1000 for data. Each incremental decrease of 0x1000 will have the opposite effect.
The Stack Segment, as the name implies, holds the system stack. The stack is used by Dynamic C to keep track of return addresses as well as to pass some variables between functions. Variables of type auto also reside on the stack. The system stack starts at the top of the stack segment and grows downward.
The XPC Segment, sometimes called the Extended Memory Segment, allows access to code and data that is stored in the physical memory devices outside of the areas pointed to by the three segments in Root Memory. Root Memory is comprised of the Root Segment, the Data Segment, and the Stack Segment.
The system’s extended memory is all of the memory not mapped into the Root Memory as shown in Figure 4.1. Extended Memory includes not only the physical memory mapped into the XPC segment, but all the other physical memory shown in Figure 4.1 in gray.
When we refer to extended memory, we are not referring just to memory mapped into the XPC Segment. The XPC segment is the tool (MMU segment) that Dynamic C uses to access all of the system’s extended memory. We will use XMEM interchangeably with extended memory to mean all physical memory not mapped into Root Memory.
Generally, functions can be placed in XMEM or in root code space interchangeably. The only reason a function must be placed in root memory is if the function is an interrupt service routine (ISR) or if the function modifies the MMU mapping of the XPC register.
If an application grows large, moving functions to XMEM is a good choice for increasing the available root code space. Rabbit Semiconductor has an excellent technical note TN219, “Root Memory Usage Reduction Tips.” For engineers with large applications, this technical note is a must read.
An easy method to gain more space for Root Code is simply to enable separate I & D space, but for when that is not an option, moving function code to XMEM is the best alternative.
Assembly or C functions may be placed in root memory or extended memory. Access to variables in C statements is not affected by the placement of the function, since all variables are in the Data Segment of root memory. Dynamic C will automatically place C functions in extended memory as root memory fills.
Functions placed in extended memory will incur a slight 12 machine cycle execution penalty on call and return. This is because the assembly instructions LCALL and LRET take longer to execute than the assembly instructions CALL and RET. If execution speed is important, consider leaving frequently called functions in the root segment.
Short, frequently used functions may be declared with the root keyword to force Dynamic C to load them in Root Memory. Functions that have embedded assembly that modifies the MMU’s special function register called XPC must also be located in Root Memory. It is always a good idea to use the root keyword to explicitly tell Dynamic C to locate functions in root memory if the functions must be placed in root memory.
Interrupt service routines (ISRs) must always be located in root memory.
Dynamic C provides the keyword xmem to force a function into extended memory. If the application program is structured such that it really matters where functions are located, the keywords root and xmem should be used to tell the compiler explicitly where to locate the functions. If Dynamic C is left to its own devices, there is no guarantee that different versions of Dynamic C will locate functions in the same memory segments. This can sometimes be an issue for code maintenance.
For example, say an application is released with one version of Dynamic C, and a year later the application must be modified. If the xmem and root keywords are contained in the application code, it does not matter what version of Dynamic C the second engineer uses to modify the application. The compiler will place the functions in the intended memory—XMEM or Root Memory.
The Rabbit 3000 microprocessor supports a separate memory space for instructions and data. By enabling separate I & D spaces, Dynamic C is essentially given double the amount of root memory for both code and data. This is a powerful feature, and one that separates the Rabbit 3000 processors and Dynamic C from many other processor/tool combinations on the market.
The application developer has control over whether Dynamic C uses separate instruction and data space (I & D space). In the Dynamic C integrated development environment (IDE) the engineer need only navigate the OPTIONS ![]() PROJECT OPTIONS
PROJECT OPTIONS ![]() COMPILER menu and use the check box labeled “enable separate instruction and data spaces.”
COMPILER menu and use the check box labeled “enable separate instruction and data spaces.”
When Separate I & D space is enabled, some of the terms Z-World uses to describe MMU segments and their contents are slightly altered from the older memory model without separate I & D spaces. Likewise, some of the macro definitions in RabbitBios.c have altered meanings.
For example, the DATAORG macro in the older memory model tells the compiler how much memory to allocate to the Data Segment (used for Root Data) and the Root Segment (used for Root Code) and Root Constants. In a separate I & D space model, the DATAORG macro has no effect on the amount of memory allocated to code (instructions), but instead, tells the compiler how to split the data space between Root Data and Root Constants. With separate I & D space enabled, each increase of 0x1000 will decrease Root Data and increase Root Constant spaces by 0x1000 each.
The reason for the difference in function is an artifact of how Dynamic C uses the segments and how the MMU maps memory when separate I & D space is enabled. For most software engineers, it is enough to know that enabling separate I & D space will usually map 44 K of SRAM and flash for use as Root Data and Root Constants and 52 K of flash for use as Root Code.
The more inquisitive developer may wish to delve deeper into the memory mapping scheme. To accommodate this, we will briefly cover how separate I & D space works, but the nitty-gritty details are to be found on the accompanying CD.
When separate I & D space is enabled, the lower two MMU segments are mapped to different address spaces in the physical memory depending on whether the fetch is for an instruction or data. Dynamic C treats the lower MMU two segments (the Root Segment and the Data Segment) as one combined larger segment for Root Code during instruction fetches. During data fetches, Dynamic C uses the lowest MMU segment (the Root Segment) to access Root Constants. During data fetches the second MMU segment (the Data Segment) is used to access Root Data.
When separate I & D space is enabled, the lower two MMU segments are both mapped to flash for instruction fetches, while for data fetches the lower MMU segment is mapped to flash (to store Root Constants) and the second MMU segment is mapped to SRAM (to store Root Data).
This is an area where it is easy to become lost or misled by nomenclature. When separate I & D space is enabled, the terms Root Code and Root Data mean more or less the same thing to the compiler in that code and data are being manipulated. However, the underlying segment mapping is very different than when separate I & D space is not enabled.
When separate I & D space is not enabled, the Root Code is only to be found in the physical memory mapped into the lowest MMU segment (the Root Segment).
When separate I & D space is enabled, the Root Code is found in both the lower MMU segments (named Root Segment and Data Segment). Dynamic C knows that the separate I & D feature on the Rabbit 3000 allows both of the lower MMU segments to map to alternate places in physical memory depending on the type of CPU fetch. Dynamic C sets up the lower MMU segments so that they BOTH map to flash when an instruction is being fetched. Therefore Root Code can be stored in physical memory such that Dynamic C can use the two lower MMU segments to access Root Code.
This may seem contrary to the segment name of the second MMU segment, the Data Segment. The reader must bear in mind that the MMU segments were named based on the older memory model without separate I & D space. In that model, the CPU segment names were descriptive of how Dynamic C used the MMU segments. When the Rabbit 3000 came out and included the option for separate I & D space, the MMU segments were still given their legacy names. When separate I & D space was enabled, Dynamic C used the MMU segments differently, but the segment names on the microprocessor remained the same.
This brings us to how Dynamic C uses the lower two MMU segments when separate I & D space is enabled and a data fetch (or write) occurs. We are already familiar with the idea of Root Data, and this is mapped into physical memory (SRAM) through the second MMU segment—the Data Segment.
Constants are another type of data with which Dynamic C must contend. In the older memory model without separate I & D space enabled, constants (Root Constants) were intermixed with the code and accessed by Dynamic C through the lowest MMU segment (the Root Segment). In the new memory model with separate I & D space enabled, Dynamic C still uses the lower MMU segment (the root segment) to access Root Constants. However, with separate I & D space enabled, when data accesses occur, the lowest MMU segment (root segment) is mapped to a space where code is not stored. This means there is more space to store Root Constants as they are not sharing memory with Root Code.
Root Constants must be stored in flash. This implies that the lowest MMU segment is mapped into physical flash memory for both instruction and data accesses. Root Code resides in flash, as do Root Constants.
Given this overview, we can consider the effect of DATAORG again. DATAORG is used to specify the size of the first two MMU segments. Since Dynamic C maps the first two MMU segments to Root Code for instruction accesses, and treats the first two MMU segments as one big logical address space for Root Code, changing DATAORG has no effect on the space available for Root Code.
Now consider the case when separate I & D space is enabled and data is being accessed. The lowest MMU segment (the Root Segment) is mapped into flash and is used to access Root Constants. The second MMU segment (the Data Segment) is mapped into SRAM and is used to access Root Data.
Changing DATAORG can increase or decrease the size of the first two segments. For data accesses, this means the size of flash mapped to the MMU’s first segment is either made larger or smaller while the second segment is oppositely affected. This means there will be more or less flash memory mapped (through the first MMU segment) for Dynamic C to use for Root Constants with a corresponding decrease or increase in SRAM mapped (through the second MMU segment) for Dynamic C to use as Root Data.
When separate I & D spaces are enabled, the stack segment and extended memory segment are unaffected. This means that the same system stack is mapped regardless of whether instructions or data are being fetched. Likewise, extended memory can still be mapped anywhere in physical memory to accommodate storing/retrieving either executable code or application data.
For most engineers it is enough just to know that using separate I & D space gives the developer the most Root Memory for the application. In the rare circumstance in which the memory model needs to be tweaked, the DATAORG macro is easily used to adjust the ratio of Root Data to Root Constant space available. For the truly hardcore, the Rabbit documentation has all the details.
Let’s look at the traditional build process and contrast it with how Dynamic C builds code:
The programmer edits the code in an editor, often part of the IDE; the editor saves the source file in a text format.
The programmer compiles the code, from within the IDE, from command line parameters, or by using a make utility. The programmer can either do a Compile All, which will compile all modules; or the make utility or IDE can only compile the modules that were changed since the last time the code was built. The compiler generates object code and a list file that shows how each line of C code got compiled into one or more lines of assembly code. Unless specified, each object module has relative memory references and is relocatable within the memory space, meaning it can reside anywhere in memory. Similarly, each assembly module gets assembled and generates its own relocatable object module and list file.
If there are no compilation or assembly errors, the linker executes next, putting the various object modules together into a single binary file. The linker converts relative addresses into absolute addresses, and creates a single binary file of the entire program. Almost all linkers nowadays also have a built-in locator that locates code into specific memory locations. The linker generates a map file that shows a number of useful things, including where each object module resides in memory, how much space does the whole program take, and so on. If library modules are utilized, the linker simply links in precompiled object code from the libraries.
The programmer can download the binary file into the target system using a monitor utility, a bootstrap loader, using an EPROM emulator, or by simply burning the image into an EPROM and plugging in the device into the prototyping board. If a CPU emulator is being used, the programmer can simply download the code into the emulator.
Figure 4.3 illustrates how code is built on most development environments.

The programmer edits the code in the Dynamic C IDE, and saves the source file in a text format.
The Dynamic C IDE compiles the code. If needed, the programmer can compile from command line parameters. Unlike most other development environments, Dynamic C prefers to compile every source file and every library file for each build. There is an option that allows the user to define precompiled functions.
There is no separate linker. Each build results in a single binary file (with the “.BIN” extension) and a map file (with the “.MAP” extension).
The Dynamic C IDE downloads the executable binary file into the target system using the programming cable.
Figure 4.4 illustrates how code is built and run with Dynamic C:

Before we start using Dynamic C to write code, we need to set up an RCM3200 core module and prototyping board. This simple process only takes a few minutes.
Setting up an RCM3200 development system requires fulfilling the following steps:
Using the CD-ROM found in the development kit, install Dynamic C on your system.
Choose a COM (serial) port on your PC to connect to the RCM3200.
Attach the RCM3200 to the prototyping board.
Connect the serial programming cable between the PC and the core module.
Provide power to the prototyping board.
Now that the hardware is setup, we need to configure Dynamic C. Some Rabbit core modules are able to run c ![]() Project Options
Project Options ![]() Compiler menu. The RCM 3200 will run programs from fast SRAM instead of flash.
Compiler menu. The RCM 3200 will run programs from fast SRAM instead of flash.
For our simple examples, it really doesn’t matter whether we configure Dynamic C to generate code that will run from fast SRAM or from flash. However, for the sake of consistency, we always configure Dynamic C to enable code to be run from fast SRAM for the examples in this text that use the RCM3200.
Now that the RCM3200 system is ready for software development, it is time to roll up the sleeves and start writing code. The first program is very simple. The intent of this exercise is to make sure the computer (the host PC) is able to talk to the RCM3200. Once we are able to successfully compile and run a program, we will explore some of Dynamic C’s debugging features, as well as some differences between Dynamic C and ANSI C.
It has been customary for computer programmers to start familiarizing themselves with a new language or a development environment by writing a program that simply prints a string (“Hello World”) on the screen. We do just that—here’s the program listing:
Here’s how to compile and run the Rabbit program:
Launch Dynamic C through the Windows Start Menu—or the Dynamic C Desktop Icon.
Click “File” and “Open” to load the source file “HELLOWORLD.C.” This program is found on the CD-ROM accompanying this book.
Press the F9 function key to run the code.
After compiling the code, the IDE loads it into the Rabbit Core, opens a serial window on the screen, titled the “STDIO window,” and runs the program. The text “Hello World” appears in the STDIO window. When the program terminates, the IDE shows a dialog box that reads “Program Terminated. Exit Code 0.”
If this doesn’t work, the following troubleshooting tips maybe helpful:
The target should be ready, indicated by the message “BIOS successfully compiled . . .” If this message did not appear or a communication error occurred, recompile the BIOS by typing <Ctrl+Y> or select Reset Target/Compile BIOS from the Compile menu.
If the message “No Rabbit Processor Detected” appears, verify the target system has power and the programming cable is connected between the PC and the target.
The programming cable must be connected to the controller. The colored wire on the programming cable is closest to pin 1 on the programming header on the controller. Make sure you use the connector labeled as PROG and not the connector labeled DIAG. The other end of the programming cable must be connected to the PC serial port. The COM port specified in the Dynamic C Options menu must be the same as the one to which the programming cable is connected.
To verify the correct serial port is connected to the target, select Compile, then Compile BIOS, or press <Ctrl+Y>. If the “BIOS successfully compiled . . .” message does not display, try a different serial port using the Dynamic C Options menu. Don’t change anything in this menu except the COM number. The baud rate should be 115,200 bps and the stop bits should be 1.
Although the program terminates, the IDE is still controlling the target. In this mode, called debug or run mode, the IDE will not let the programmer edit the code. For the IDE to release the target and allow editing, we need to close the debug session by clicking on “Edit” and “Edit Mode.” Alternatively, pressing F4 will enter Edit Mode.
Dynamic C offers powerful debugging features. This innovation eliminates the need for an expensive hardware emulator. This section covers the basics of using Dynamic C’s debugging features.
Program 4.2 (watchDemo.C on the enclosed CD-ROM) is the simple program that will be used to illustrate Dynamic C’s debugging features.
Example 4.2. watchDemo.c
void delay ()
{
  int j;
  for (j=0; j<20000; j++);               // create a delay
}
main() {
     int count;                          // define variable
     count = 0;                          // initialize counter
     while (1)                           // start an endless loop
     {
           count++;                      // increment counter
           delay();                      // wait a bit
           printf("count = %d
", count);// print something useful
     } // end of endless loop
} // end of program
The code will print increasing values for count in the STDIO window.
Dynamic C makes obtaining help for its library functions simple. Placing the cursor over a function name in the source file and pressing <Ctrl+H> will bring up a documentation box for that function.
To step through a program, we need to compile and download the program to the RCM3200 without running the program. This can be accomplished by any of the following methods:
pressing <F5>
selecting Compile from the menu bar
selecting the lightning bolt icon on the Tool Bar
The IDE highlights (in green) the first character of the program’s first executable statement. This green highlighting is always used to indicate the current execution point.
The F7 and F8 keys will single step the statements—each time one of these keys is pressed, one program statement will be executed. The difference is that if the statement is a call to another function, pressing F8 will completely execute the called function, while pressing F7 will execute the called function one statement at a time.
To summarize, F8 allows the user to “step over” functions, while F7 allows the user to “step into” functions.
Pressing F7 to single step watchDemo.c will execute the following sequence of statements,
| The first statement of the program |
| The “ |
| The statement that must be evaluated for the “ |
| The first statement in the “ |
| |
The “for” loop in delay() has a conditional statement (j<20000), the loop control variable adjustment statement (j++), and a null statement (;) in the loop body. The programmer would have to press F7 another 60,000 times to complete all of the statements in the delay() function.
Using step-over, F8, Dynamic C would execute the following sequence of statements:
| The first statement of the program |
| The “ |
| The statement that must be evaluated for the “ |
| The first statement in the “ |
| The |
| |
| The statement that must be evaluated for the “ |
| The first statement in the “ |
| The |
| |
and so on.
F8 is useful for stepping over functions that are believed to be good, while allowing the programmer to carefully examine the execution path of suspect code.
Breakpoints are useful for controlling program execution during debugging. Placing the cursor over the statement where the breakpoint is desired and pressing F2 will assign a breakpoint to the statement. F2 can be used to remove existing breakpoints. Placing the cursor over an existing breakpoint and pressing F2 will remove the breakpoint. Dynamic C indicates that a breakpoint exists by changing the background color of the first character in the statement to red. Alternatively, breakpoints may be placed or removed using the Toggle Breakpoint option from the Run menu.
Breakpoints are used to halt program execution so the programmer can inspect the state of the target system’s hardware, CPU’s registers, and program variables. When the program halts due to a breakpoint, step-into and step-over can be used to observe the execution path of suspect code.
Once breakpoints are set, the program is run (using F9). The program will advance until it hits a breakpoint. While the program is paused, the IDE allows breakpoints to be added or removed from the target.
Breakpoints may also be set in a program running at full speed. This will cause the program to break if the execution thread hits a breakpoint.
Another technique for using breakpoints will allow software developers to determine if a particular segment of code is being executed. A breakpoint can be placed in the segment of interest and program execution started. If the program never halts, then the segment of interest was not executed. This is a useful technique for determining if code branches occur as expected.
“Normal” breakpoints allow interrupts to continue being serviced even when the breakpoint has been reached. “Hard” breakpoints can be used to disable all execution while the breakpoint is being serviced. This type can be especially useful when debugging ISRs.
Once a program is halted, examining the contents of variables is simple. The easiest way to examine a variable is to hover the mouse over the variable of interest. Dynamic C will pop up a small box showing the value. An expression may be evaluated in a similar manner by highlighting the expression and then hovering over it.
Dynamic C also provides a tool called a watch window. The programmer can view expressions added to the watch window.
For example, adding the integer “count” from watchDemo.c to a watch window allows the developer to observe how “count” changes as the code is single stepped.
Expressions in watch-windows are updated whenever code execution is halted. Breakpoints halt code execution, as do the step-into and step-over tools.
Expressions can be updated while code is running at full speed by pressing <Ctrl+U>. The Dynamic C help menu for “Watch Windows” explains that runWatch() should be periodically executed in the program to support <Ctrl+U> requests for updating the IDE Watch Window.
Expressions can be added to a watch-window by selecting Add/Del Watch Expression from the Inspect menu, or by using the <Ctrl+W> shortcut.
You can use the Watch Window to change the values of variables as well as execute functions.
The American National Standards Institute (ANSI) maintains a standard for the C programming language. Code that conforms to the ANSI standard is theoretically more easily ported between operating systems.
Embedded systems have unique performance demands. Different companies have adopted different approaches to meeting the unique challenges presented by embedded systems.
Z-World has enjoyed nearly two decades of success with the approach of carefully adapting the C programming language to suit the demands of embedded controllers. Language extensions and creative interpretation of standard C syntax make Dynamic C a desirable environment for embedded systems development.
As universities teach ANSI C with a bent toward desktop application development, it is worth pointing out some of the differences between Dynamic C and ANSI C. This will help newcomers to Dynamic C avoid common pitfalls while being able to take full advantage of the enhancements Dynamic C offers.
Let’s examine a pitfall that newcomers often fall into—declarations with initializations. Most programmers will look at the code presented in Program 4.3A and expect “count” to be an integer that is initialized to be 0. Dynamic C takes a slightly different view of the code.
Dynamic C assumes a variable that is initialized when declared is a constant. This is a common enough situation that Dynamic C will generate a warning when the above code is compiled. The warning states, “line 2 : WARNING oops.c : Initialized variables are placed in flash as constants. Use keyword ‘const’ to remove this warning.”
Changing the declaration to, const int count=0; causes the compiler to generate the same executable code, but without the warning.
If the desired result is to declare an integer named count and initialize it to zero then the code shown in Program 4.3B should be used.
Initializing global variables may at first glance appear impossible. Dynamic C offers a ready solution with the compiler directive #GLOBAL_INIT.
The Dynamic C documentation explains, “#GLOBAL_INIT sections are blocks of code that are run once before main() is called.”
The code shown in Program 4.3C shows how a global variable can be initialized.
Example 4.3C. GlobalVarInit.c
int GlobalVarCount;
void main( void ) {
#GLOBAL_INIT
{
 GlobalVarCount = 1;
}
      printf("GlobalVarCount = %d
", GlobalVarCount);
}
The #GLOBAL_INIT directive can be used to initialize any static variables. If a function declares a static variable and needs that variable initialized only once, then #GLOBAL_INIT can be used to accomplish this. Program 4.3D shows how to do it. The output generated is,
LocalStaticVar = 1
LocalStaticVar = 2
LocalStaticVar = 3
The static integer LocalStaticVar is initialized to 1 before main() is executed.
Example 4.3D. LocalVarInitializedOnce.c
void xyzzy (void) {
static int LocalStaticVar;
#GLOBAL_INIT
{
 LocalStaticVar = 1;
}
printf("LocalStaticVar = %d
", LocalStaticVar++);
}
void main( void ) {
xyzzy();
xyzzy();
xyzzy();
}
Program 4.3E shows how “not to” initialize a static variable. The static integer LocalStaticVar is assigned the value of 1 every time xyzzy() is called. This is generally not a desired behavior for static variables, which are intended to retain their value between function calls. The output generated is,
LocalStaticVar = 1
LocalStaticVar = 1
LocalStaticVar = 1
Example 4.3E. LocalVarAlwaysInitialized.c
void xyzzy (void)
{
static int LocalStaticVar;
LocalStaticVar = 1
printf("LocalStaticVar = %d
", LocalStaticVar++);
}
void main( void )
{
xyzzy();
xyzzy();
xyzzy();
}
As useful as the compiler directive #GLOBAL_INIT is, it can become a source of confusion.
The key point to remember when using #GLOBAL_INIT is that the order of execution of #GLOBAL_INIT sections is not guaranteed!
All #GLOBAL_INIT code sections are chained together and executed before main() is executed.
Global variables can be modified in multiple #GLOBAL_INIT code segments. If this is done, the compiler will not generate any warnings or errors. If the coder is careless, a global initialization may be overwritten by a subsequent #GLOBAL_INIT code segment. Since the order of execution of #GLOBAL_INIT sections is not guaranteed, the global variable is not guaranteed to have been initialized by the intended #GLOBAL_INIT code segment. To further complicate matters, a source file may have the order of execution of #GLOBAL_INIT sections altered by different versions of the compiler.
#GLOBAL_INIT is a useful and reliable compiler directive. Like any tool, the powerful #GLOBAL_INIT directive must be used within the compiler’s constraints. Do not initialize global variables in multiple #GLOBAL_INIT sections. Realize that the order of execution of #GLOBAL_INIT sections is not guaranteed. Know that different versions of Dynamic C are free to reorder the execution of #GLOBAL_INIT sections. Code accordingly.
Section 4.4 discussed where Dynamic C places variables. We will now reexamine the placement of code and data and how we can force Dynamic C to put code and data where we want.
We compiled Program 4.4 (memory1.c) using Dynamic C version 7.33, and then examined the associated map file (memory1.map). Here are the pertinent excerpts from the source code and the map file:
Example 4.4. memory1.c
int my_function(int data)
{
    static int var_func_static;
    int var_func;

    var_func_static = 3;
    var_func = var_func_static*data;

    printf ("%d multiplied by %d is %d
",data,var_func_static,
var_func);

    return var_func;
}

void main()
{
   static int var_static1;
   int var_not_static1;
   static const char my_string[]="I like what I have seen
so far!
";

   var_static1 = 0xA;
   var_not_static1 = 0x5;
   var_not_static1 = my_function (var_static1);

   printf ("%s",my_string);
}
The top section of the map file shows origin and sizes of various segments:
// Segment Origin Size Root Code 00:0000 0055d5 Root Data 00:bfff 000899 Xmem Code ff:e200 001716 |
Excerpts of the map file show us where in memory we will find my_string, my_function(), and main():
// Global/static data symbol mapping and source reference.
//  Addr     Size Symbol
    b857       2  my_function:var_func_static
    b855       2  main:var_static1
 10:022c      33  main:my_string
// Parameter and local auto symbol mapping and source reference.
// Offset Rel. to         Size   Symbol
        4      SP         2      my_function:data
        0      SP         2      my_function:var_func_not_static
        0      SP         2      main:var_not_static1
// Function mapping and source reference.
//  Addr     Size        Function
    1c26       63        my_function
1c65 58 main |
Looking at the addresses above and comparing them to the global static data symbol addresses, we can see that the static variables got placed in the Root Code space, while the string got placed in XMEM.
We can see that Dynamic C lumped together the static variables from main() and my_function with the string constant, and kept the nonstatic variables in the stack. Notice that the stack has reserved two bytes for my_function:data; this is how the lone integer parameter gets passed from main() to my_function().
Also notice that the function and main got placed in Root Code.
Now that we are beginning to get comfortable with where Dynamic C places code and data by default, let’s play with it a little—let’s try to save root space and move as much as we can to XMEM. We think the program may take just a little longer to execute since Dynamic C and the MMU will have to convert all physical memory accesses to the internal logical representation, but we will save on the precious root space. Changing the above program to work differently, we get memory2.c in Program 4.5:
Example 4.5. memory2.c
xmem int my_function(int data)
{
    static int var_func_static;
    int var_func_not_static;

    var_func_static = 3;
    var_func_not_static = var_func_static*data;

    printf ("%d multiplied by %d is %d
",data,var_func_static,
var_func_not_static);

    return var_func_not_static;
}

xmem void main()
{
    static int var_static1;
    int var_not_static1;
    static const char my_string[]="I like what I have seen
so far!
";

    var_static1 = 0xA;
    var_not_static1 = 0x5;

    var_not_static1 = my_function (var_static1);

    printf ("%s",my_string);
}
We can expect to see some differences in the map file; we should find the code for main() and my_function() in xmem space. Let’s look at the map file and find out if that is the case:
// Segment  Origin        Size
Root Code   00:0000       005561
Root Data   00:bfff       00089f
Xmem        ff:e200       001792

// Function mapping and source reference.
//  Addr     Size        Function
    e420       64        my_function
    e460       60        main

// Global/static data symbol mapping and source reference.
//  Addr     Size        Symbol
    b857        2        my_function:var_func_static
    b855        2        my_function:var_func_not_static
    b853        2        main:var_static1
    b851        2        main:var_not_static1
 10:022c       33 main:my_string

// Parameter and local auto symbol mapping and source reference.
// Offset Rel. to        Size   Symbol
3 SP 2 my_function:data |
This time we can see that the function and main got placed in XMEM space. The variables, except for the one used for parameter passing between main and the function, got placed in Root Code.
The keywords xmem and root allow the engineer to force the compiler to locate functions in specific areas of memory. The map file can be used to verify that Dynamic C did what the engineer intended.
Dynamic C versions 8.01 and higher are quite smart about how they locate functions. Most software engineers need not worry about manually locating functions. This is especially true when separate I & D space is enabled, as that gives plenty of root space for both code and data for most applications. However, in the cases when engineers want to tweak the compiler’s choices, xmem and root give the engineer full control.
Now we are ready to work with networks.
Networks are ubiquitous, and now exist in places where they did not exist five years ago. Broadband home networks and public WiFi networks are being deployed globally at a great pace. The Internet is the most identifiable form for networking for the layperson—we can now find Internet access in large and small offices, homes, hotel rooms, restaurants, airports, coffee shops, cruise ships, and commercial airplanes. We take for granted more and more services that use networking to improve our daily lives. Credit card transactions, email, online banking, e-Commerce, online delivery tracking, and online movie rentals are just a few examples of commonplace services that did not exist a decade ago.
Networked embedded devices are finding uses in diverse areas from building access controls to smart homes to wireless cameras and entertainment appliances. A growing number of industrial devices, as well as consumer and enterprise-grade devices now use embedded web servers for configuration, management, monitoring, and diagnostics. Industry analysts are predicting the use of embedded devices in the near future that converge media, entertainment, and productivity. Networking is one of the key enablers to that vision.
In this chapter, we will look at networking from the perspective of Rabbit core modules. We will discuss common networking protocols at a high level, examining not how they work or how they are implemented, but how they can be used on Rabbit core modules.
Networking is a very broad field, including local area networks (LANs), wide area networks (WANs), metropolitan area networks (MANs), and wireless technologies. Each of these areas has its own protocols and interfaces. One can get into a lot of detail with networking protocols—DHCP and TCP, for example, have been described in thicker books than this one. Consider the subject of socket programming that we have covered in just one section here—entire books have been written on this subject and the reader is advised to look for more detailed coverage elsewhere. Dynamic C libraries support just a core set of protocols from these technologies, and these are enough for most embedded applications. The goal of this chapter is not to educate the user on networking protocols, but to examine how a networked application can be built using Dynamic C’s networking features. Refer to the enclosed CD-ROM for some excellent technical papers on Dynamic C’s TCP/IP implementation.
Networking is not limited to Ethernet. RS-485 is a physical interface widely used for building networks. With RS-485, programmers often have to write their own protocol. Although Dynamic C libraries provide strong support for RS-485 and other physical network interfaces, this chapter will focus only on Ethernet-based connectivity.
We will first examine a number of networking protocols that are supported by Dynamic C, and then build some projects that use some of these protocols. We will also build some applications with C++ and Java that will help us control some of these projects. Later in this chapter we will bring it all together—hardware characterization and interfacing, user interface design, and embedded web server programming.
In this section, we will briefly describe some of the networking protocols supported by Dynamic C. The authors assume that readers are familiar with the seven-layer OSI model.
From the programmer’s perspective, there isn’t much for Dynamic C to do at the presentation and session layers; most of the action happens at the transport and application layers. Embedded applications are most likely to use the layers in the application layer (FTP, HTTP, and so on) or TCP and UDP directly in the transport layer. Most deployed networking uses 4 layers of the OSI; protocols operating at these layers are the ones most likely to be used in applications. Figure 4.5 shows the four layers most relevant to embedded developers.

Dynamic C provides support for the following protocols:
IP: The Internet Protocol is where the magic starts. The Data Link layer deals with switching Ethernet frames, based on MAC addresses, while the Network layer uses IP addresses to describe sources and destinations on a network.
ARP: The Address Resolution Protocol allows a device to discover a MAC address, given an IP address. This forms a bridge between the TCP/IP protocol suite and any link level address, of which Ethernet is an example.
RARP: The Reverse ARP does the opposite of ARP—it provides us with the IP address that is associated with the given MAC address.
ICMP: The Internet Control Message Protocol implements various messages not encapsulated by the other TCP/IP protocols. In particular, the well-known “ping” command uses ICMP messages to determine if a network device is reachable.
TCP and UDP are two major transport protocols. TCP is connection oriented, while UDP is connectionless. TCP provides reliable data transfer, while UDP provides best-effort service. These will be described here in some detail, and we will cover some more detail in Section 4.15.
TCP: The Transmission Control Protocol is the building block for a host of networking services. The main purpose of TCP is to provide reliable connection-oriented data transfer, and it uses various methods for flow control and error detection to accomplish its mission. Routing and congestion cause the timing of packet arrivals to be nondeterministic, which does not guarantee that packets will arrive in the same sequence in which they were transmitted. TCP uses a sequencing mechanism to line up packets for upper layers in the same order the packets were sent.
As shown in Figure 4.5, the following applications use TCP as the underlying transport:
FTP: The File Transfer Protocol allows us to do just that—transfer files over a network. Internet users often use FTP as a mechanism to download files from a remote host.
SMTP: The Simple Mail Transfer Protocol is used to send and receive email. A number of popular email clients use SMTP for the underlying mail transport.
HTTP: The Hypertext Transfer Protocol is commonly used with browsers. HTTP defines how web pages are formatted and transmitted, and certain commands that the browser must respond to. The actual formatting of the web pages is defined by HTML (Hypertext Markup Language).
UDP: Unlike TCP, the User Datagram Protocol does not guarantee data reliability. In fact, there is no guarantee whether a packet sent via UDP will get to its destination (that is why the UDP transport is often called a “best effort” datagram service). Moreover, UDP does not reassemble packets to get them lined up in the same order they were delivered. UDP’s connectionless nature results in simplicity of implementation code[1] and lower housekeeping overhead. Unlike a TCP connection, which must be synchronized and maintained through the network, UDP requires neither initialization handshake between the source and the destination, nor the networking resources that are tied up in maintaining a reliable connection.
As shown in Figure 4.5, the following applications use UDP as the underlying transport:
TFTP: The Trivial File Transfer Protocol is a simpler version of FTP, and uses UDP to transfer files; it does not use TCP’s reliable delivery mechanisms.
DNS: The Domain Name System is a mapping scheme between domain names and their associated IP addresses. For example, every time a browser tries to access http://www.google.com/, the domain name server translates the “google” domain name into its associated IP address: 216.239.39.99, and the browser accesses the IP address without going through the DNS translation. If the user types “216.239.39.99” into a browser window, the browser will access the “google” web server without going through a domain name server.
DHCP: The Dynamic Host Configuration Protocol allows dynamic assignment of IP addresses to devices. In the embedded systems context, this means that an embedded system can boot without an IP address, and can negotiate with a DHCP server to receive an IP address. Dynamic assignment of IP addresses is common, since it eases the burden on network administrators to statically assign and manage IP addresses. It is common to have DHCP servers built into routers for home networking.
TCP and UDP ensure integrity of the payload with checksums (up to a certain extent, since the checksum mechanism is not perfect).
TCP is a point-to-point connection protocol, whereas UDP is connectionless and therefore allows for other possibilities, such as broadcast messages.
Some additional applications are of interest to us—we can use the following utilities to debug networked applications, and some others are listed in Section 4.20.
Telnet: this utility uses TCP to perform remote logins. It is commonly used to log into networking devices such as routers and switches. For security reasons, some network administrators block telnet access to their devices. Moreover, telnet is not secure because it sends unencrypted data across networks.
Ping: As Figure 4.5 shows, Ping uses ICMP messages to determine whether a networked device is reachable via its IP address.
In addition to providing support for the networking protocols listed in Section 4.9.1, Dynamic C supports the following protocols, provided as add-on modules:
PPP: The Point-to-Point Protocol allows a device to perform TCP/IP networking over a serial connection. Most dialup Internet connections use PPP.
AES: The Advanced Encryption Standard is meant as a replacement for the aging DES (Data Encryption Standard). While the DES provided a key size of 56 bits, AES supports 128, 192, and 256 bit keys. Although triple DES can be used for added security, it is not as efficient as AES. Dynamic C supports 128, 192, and 256 bit AES encryption and decryption through the
aes_crypt.liblibrary. AES is not itself a protocol but is used by other protocols.SSL/HTTPS: The Secure Socket Layer/Secure HTTP module allows users to have an encrypted web server (HTTPS). This is useful for creating a secure interface to a networked embedded device, and should always be used when the web server is accessible from the Internet, especially when the embedded systems control physical, potentially dangerous, devices.
SNMP: The Simple Network Management Protocol uses a messaging mechanism to manage networking devices. A request/response mechanism is typically deployed for device management and maintenance of status data. Dynamic C supports SNMP through the snmp.lib library.
Before looking at the Rabbit core module’s network connectivity, we will present a “big picture” view of where the core module will exist in a networked development environment. We will highlight both a corporate network and a home network, since a software developer may work in either or both of these environments.
A corporate network generally has a lot of redundant devices to offer a high degree of availability. The network is used for internal operations, as well as for customer-facing activities such as the corporate web site, e-Commerce, and remote connectivity with partners, customers, and employees. Having various network elements in active and standby mode provides for quick failover and recovery. The firewalls secure the internal corporate network against unprivileged access, and there is a “demilitarized zone,” the DMZ, that exists outside the corporate firewalls.
The web servers can be on either side of the firewall. If they are on the internal network behind the firewall, port 80 is opened for them to allow web requests to go through the firewall.
These details vary, depending on the company’s security policies and infrastructure.
Access switches inside this simple corporate set up connect users in the corporate intranet. In addition, application servers in the secure intranet run corporate applications for email, databases, inventory, management, and so on. The corporate intranet, shown in Figure 4.6, is partitioned into various Virtual Local Area Networks (VLANS) that separate functional access. For example, corporate users and administrators use separate VLANs, while engineers use one called a “Test VLAN” that provides access to the Internet but not to corporate applications. Various other networking elements, for example, that implement storage, content caching, and intrusion detection, are not shown here.

The overall network can use a mix of fiber optic, Gigabit Ethernet, 10/100 Mbit Ethernet, serial, and frame relay technologies in different parts of the network.
During development phase, a Rabbit core module will likely connect to an internal “Test VLAN” that development engineers will use to test networked applications. Dynamic C will run on a Windows workstation in the same VLAN, and the development engineer may use a Linux machine to test connectivity with the Rabbit core module. The engineer will connect these devices to an access switch that provides 10/100 Mbps connectivity to the engineer’s office or lab bench.
It is not necessary to have the development system on the same network as the core module. Since the Rabbit core module is programmed via a serial link, as long as the programmer does not need to test the device over the network from the development machine, the core module can work on a separate network. The core module can be tested via a test system on the test network.
Conceptually, the home network consists of a router that connects the home LAN to an external WAN. A cable modem serves as the link between the cable-based broadband service and the router. The Internet service provider (ISP) dynamically assigns an IP address to the router’s WAN connection. The router usually implements NAT (Network Address Translation) to allow multiple computers to connect to the Internet with only one address provided by the ISP. The router also provides DHCP to assign IP addresses to devices on the home network. A private addressing scheme can be used on the LAN that is separate from that on the WAN. The router connects to a switch that provides layer 2 switching to all the home devices.
Figure 4.7 breaks out the functional pieces of a multifunction home networking device. The router, firewall, Ethernet switch, and even the wireless access point, can be in a single box. Almost everything in the diagram is connected with 10/100 Mbps Ethernet. Unlike the corporate environment, there is no redundancy, and little or no management capability in the networking devices.

Before a Rabbit core module can be used for networking, several decisions have to be made, that include where the core module will fit in the overall network, how it will be addressed, whether the networking configuration will be hard coded, or whether it may change at runtime. While this section will not cover all these issues in detail, it will introduce readers to various aspects of networking that need to be considered when bringing up a core module.
As is the case with any network device, the Rabbit core module needs to have an IP address that is consistent with the overall network addressing scheme where the module will be used. If this is done incorrectly, various network elements will not recognize the core module and will not respond to queries from the device.
Two methods are commonly used to set up an IP address in networking devices:
Static addressing uses hard-coded or manually-configured IP addresses. These addresses do not change unless manually reconfigured. A module that uses static addressing will work on the specific network segment for which it is configured, but will need reconfiguration to work in other networking segments.
Dynamic addressing uses an external entity, a DHCP server that uses a request/response mechanism to assign IP addresses dynamically. How this works most often is each time a network device power cycles, it requests an IP address from the DHCP server.[2] After both devices negotiate and agree upon an IP address, the DHCP server leases that IP address and makes an entry in the DHCP Client Table. Since the addressing is dynamic, the device can renew its IP address at any time by requesting the DHCP server for a renewal. Dynamic addressing makes it easy to configure network elements and create a “plug and play” environment where devices can be plugged into different network segments without the need for manual reconfiguration. While static addressing is useful for certain applications, such as router ports or web servers, dynamic addressing may be convenient for instances when the device is acting as a client.[3]
In previous versions of Dynamic C, the programmer often had to use static IP addressing. With version 7.2, Rabbit Semiconductor improved the DHCP implementation. In previous versions, DHCP used to be blocking (that is, when a DHCP negotiation was happening, no other code on the device could be run), but now it isn’t. Whether a programmer uses static or dynamic addressing (or which ones will be supported) is a design-time decision. There are good arguments for either, depending on the purpose of the device. For example, if there are multiple embedded devices running the same firmware and static addressing, they would boot up with the same IP address and cause conflict on the network. In such a scheme, DHCP would be preferable.
Two steps are required to set up an addressing scheme with Dynamic C:
The programmer should create a custom configuration library, say,
custom_config. lib, based on thelib cpip cp_config.liblibrary. The programmer should make all necessary changes to the custom configuration library. For this chapter, we will create a library calledcustom_config.libfor custom network configurations.The
TCPCONFIGmacro describes various parameters of the physical interface that will be used in the user program. TheTCPCONFIGmacro works as follows:If the macro has a value of 0, the network configuration is done in the main program, not in any libraries.
If the macro has a value less than 100, the network configuration is done by
tcp_config.lib.If the macro has a value at or higher than 100, the network configuration is done in the custom library, such as
custom_config.lib.
When using the TCPCONFIG macro in a custom library, the programmer must copy the appropriate library code from tcp_config.lib to custom library. For example, when using static IP configuration with Ethernet, the programmer will define TCPCONFIG to be 100, and copy the appropriate code from tcp_config.lib to custom_config.lib, so that the static IP address will be defined in custom_config.lib. The programmer does not have to replicate all of tcp_config.lib into custom_config.lib, but to simply use enough of it to do the custom network configuration.
The top of custom_config.lib must contain the following definition:
#ifndef CUSTOM_CONFIG_H #define CUSTOM_CONFIG_H |
The programmer should set up the TCPCONFIG macro according to Table 4.1. The top of tcp_config.lib will describe the steps for creating custom networking configurations.
Table 4.1. Table Used to Set the TCPCONFIG Macro[*]
TCPCONFIG | Ethernet | PPP | DHCP | Runtime | Comments |
|---|---|---|---|---|---|
0 | Do not do any configuration in the library; this will be done in the main program | ||||
1 | Yes | No | No | No | |
2 | No | Yes | No | No | |
3 | Yes | No | Yes | No | |
4 | Yes | Yes | No | No | |
5 | Yes | No | Yes | No | Like #3, but no optional flags |
6 | Yes | No | No | Yes | |
7 | Yes | No | Yes | No | DHCP, with static IP fallback |
[*] This table is subject to change, since Rabbit Semiconductor is expected to continue development on the libraries. | |||||
Instead of creating a separate library for custom configuration, the other option for the programmer is to modify tcp_config.lib directly (to set the IP address, gateway, network mask, and DNS server), and to set the TCPCONFIG macro accordingly.
In addition, we can use the ifconfig() function to make changes at run-time.
We also need to tell the core module which physical interface we are using. Three interfaces are supported:
Ethernet: This is the main focus of this chapter, and we will build all our code to support this protocol. The macro
USE_ETHERNETshould be defined to support this protocol, and the macroUSING_ETHERNETcan be queried to find out whether the core module is using Ethernet.Point-to-Point Protocol (PPP): This protocol is commonly used over serial ports; it uses encapsulation and transports other protocols over a point-to-point link. For example, a Rabbit core module’s serial ports can be enabled to work with PPP. The macro
USE_PPPSERIALshould be defined to support this protocol and the macroUSING_PPPSERIALcan be queried to find out whether the core module is using PPP.PPP Over Ethernet (PPPOE): With this protocol, an Ethernet frame transports the PPP frame. The macro
USE_PPPOEshould be defined to support this protocol and the macroUSING_PPPOEcan be queried to find out whether the core module is using PPPOE.
We will not cover PPP and PPPOE; readers can find more information about these in the Dynamic C TCP/IP manual.
The link layer selection is part of the setup in tcp_config.lib. This should not be done in the application; some of the predefined configurations in tcp_config.lib should instead be used.
Programmers should use the #use dcrtcp.lib directive to choose the networking library.
It is critical to call the sock_init() function before proceeding with networking or calling any functions that relate to networking. Moreover, the code should check to insure that the call to sock_init() has been successful; a return value of 0 indicates that the call to sock_ init() was successful.
The network interface takes some time to come up after a call to sock_init(). This is especially the case when dynamic addressing is being used, because negotiation with a DHCP server can take time.
A short piece of code will tell us if sock_init() has been successful, the interface has come up, and we are ready to proceed:
sock_init(); while (ifpending(IF_DEFAULT) == IF_COMING_UP) tcp_tick(NULL); |
Once we are able to proceed, we need to make sure that the function tcp_tick() gets called periodically. This can be done within the “big loop” of the program or within a separate costate.
In certain cases, the following definitions will be useful. These will help us allocate enough TCP and UDP socket buffers, respectively:
#define 1 MAX_TCP_SOCKET_BUFFERS #define 1 MAX_UDP_SOCKET_BUFFERS #define TCP_BUF_SIZE 2048 #define UDP_BUF_SIZE 2048 |
These are described in more detail in the Rabbit TCP/IP User Manual. These macros can be modified from the defaults to fit the resource profile of the user application. For example, we might want to increase TCP_BUF_SIZE to increase performance, but at the cost of more memory usage. Note that any definitions of these macros must come before the “#use dcrtcp.lib” line.
The ifconfig() function is used to make changes at run-time. This function is similar to the TCPCONFIG macro, except that it sets network parameters at runtime. In addition, the programmer can use ifconfig() to retrieve runtime information. The function allows us to set an arbitrary number of parameters in one call.
A number of other functions are available to look at run-time information:
ifup(): attempts to activate the specified interface.ifdown(): attempts to deactivate the specified interface.ifstatus(): returns the status of the specified interface, whether it is up or down.ifpending(): returns indication of whether the specified interface is up, down, pending up or pending down. This reveals more information thanifstatus(), which only indicates the current state (up or down).is_valid_iface(): returns a Boolean indicator of whether the given interface number is valid for the configuration.
These functions are described in detail in the Rabbit TCP/IP User Manual, provided on the CD-ROM.
Dynamic C provides a numbers of useful macros for debugging networked applications:
#define DCRTCP_DEBUG: turns on network-related debugging#define DCRTCP_VERBOSE: turns on all verbosity#define DCRTCP_STATS: turns on statistics counters
The above macros enable debugging and verbosity for functions related to ARP, IP, UDP, TCP, BOOTP, ICMP, DNS, SNMP, PPP, IGMP, and so on.
When the VERBOSE macros are defined, setting the variable debug_on to a number 0 through 6 will enable various levels of TCP-related messages. The higher debug_on is set, the more messages.
Here we take our first baby steps. Before learning to do something more exciting over a network, we must first insure that the core module comes up and is accessible via the network. In the following examples, we will bring up the RCM3400 prototyping board. We will verify network connectivity by using the ping command, to make sure we can reach the core module on our network segment.
Program 4.6 brings up the prototyping board with a static IP address. In order to do this, we needed to take the following steps:
Table 4.1 tells us that the TCPCONFIG macro needs to be set to a “1” for static addressing. If we use the default values in TCP_CONFIG.LIB, the board will come up with a private Class A address of “10.10.6.100.” Assuming that we are going to make the device work in a Class C private address space, as shown in Figure 4.6, we will define a static IP address of “192.168.1.50.” Therefore, we need to define a custom library and set up the TCPCONFIG macro accordingly.
We will create a custom configuration library, CUSTOM_CONFIG.LIB, and will store it in the same folder as TCP_CONFIG.LIB. We will copy the following definitions from TCP_CONFIG.LIB to CUSTOM_CONFIG.LIB and will modify them to suit the addressing in our environment:
#define _PRIMARY_STATIC_IP "192.168.1.50" #define _PRIMARY_NETMASK "255.255.255.0" #ifndef MY_NAMESERVER #define MY_NAMESERVER "192.168.1.1" #endif #ifndef MY_GATEWAY #define MY_GATEWAY "192.168.1.1" #endif |
The above network addresses will need to be modified if we use the board in other network segments.
Next, since we are defining our own configuration, we will define a custom value for the TCPCONFIG macro. Since values above 100 are read from CUSTOM_CONFIG.LIB instead of TCP_CONFIG.LIB, we will use a value of 100; this is consistent with static IP configuration from Table 4.1. Except for the line checking for the value of TCPCONFIG, everything else is just copied from TCP_CONFIG.LIB:
#if TCPCONFIG == 100
          #define USE_ETHERNET             1
          #define IFCONFIG_ETH0
                       IFS_IPADDR,aton(_PRIMARY_STATIC_IP),
                       IFS_NETMASK,aton(_PRIMARY_NETMASK),
                       IFS_UP
#endif |
Finally, we need to make sure that the master library file MYLIBS.DIR has an entry for CUSTOM_CONFIG.LIB. Thus, the top two lines of MYLIBS.DIR contain the two libraries we have defined so far in the book:
CUSTOMLIBSMYLIB.LIB LIBTCPIPCUSTOM_CONFIG.LIB |
Note
Each time Dynamic C gets reinstalled, the LIB.DIR file gets rewritten. Therefore, the file needs to be modified each time a Dynamic C upgrade is performed.
Program 4.6 includes the code needed to bring up the RCM3400 prototyping board with static IP addressing. Once the relevant initialization code has been run, the board displays its IP address in the stdio window.
Example 4.6. Configuration for Static Addressing
 // basicStatic.c

 #define PORTA_AUX_IO

 #define TCPCONFIG 100

 #memmap xmem
 #use "dcrtcp.lib"

 /*********************************/
 void main()
 {
char buffer[100];

     // debug_on = 5;

     brdInit();

     printf("
Waiting to bring up TCP with static
 addressing...
");

     sock_init();

     // wait until the interface comes up
     while (ifpending(IF_DEFAULT) == IF_COMING_UP) tcp_tick(NULL);

     /* Print who we are ... */
     printf("My IP address is %s

", inet_ntoa(buffer,
 gethostid()) );

     while (1)
     {
            tcp_tick(NULL);
     } // while

 } // main
To state the obvious, we need to make sure that the static IP address is not already in use in the network segment. Two devices on the same network segment, using the same IP address, can cause all kinds of conflicts. Moreover, this can look like the beginning of a network attack to managed switches and intrusion detection systems in a corporate environment and these switch ports may get shut down.
To verify connectivity, we should ping the core module from a workstation to make sure we can reach that IP address on the network. Figure 4.8 shows the output of the ping utility:
Table 4.8. Verifying Connectivity to the Core Module
C:>ping 192.168.1.50

Pinging 192.168.1.50 with 32 bytes of data:

Reply from 192.168.1.50: bytes=32 time=1ms TTL=64
Reply from 192.168.1.50: bytes=32 time<1ms TTL=64
Reply from 192.168.1.50: bytes=32 time<1ms TTL=64
Reply from 192.168.1.50: bytes=32 time<1ms TTL=64

Ping statistics for 192.168.1.50:
    Packets: Sent = 4, Received = 4, Lost = 0 (0% loss),
Approximate round trip times in milli-seconds:
Minimum = 0ms, Maximum = 1ms, Average = 0ms |
In order to support dynamic address allocation through DHCP, we need to change just one macro definition in Program 4.6. The code fragment shown in Program 4.7 does just that:
We do not need to define anything in CUSTOM_CONFIG.LIB, since we are using a predefined configuration that will be read from TCP_CONFIG.LIB.
Once we compile and run the program, and after the relevant initialization code has been run, the core module will display its IP address in the stdio window. At this point, we can ping the core module to make sure we can reach that IP address on the network.
What happens if there is no DHCP server present? The programmer can set up hard-coded (or configured) “fallback” IP addresses to use in case the Rabbit core module is unable to dynamically receive an IP address. The core module tries to contact the DHCP server several times over a period of about twelve seconds (this can be configured). If there is no response, then it falls back to using a fixed IP address and network mask.
The fallback address should be specified using:
ifconfig(IF_DEFAULT, IFS_DHCP_FB_IPADDR, <ipaddr>, IFS_END); |
See the function description for ifconfig() for details.
There is also an IFS_DHCP_FALLBACK that tells DHCP whether to allow any fallback, plus IFG_DHCP_FELLBACK to test whether the stack is currently using a fallback.
If there is no fallback address, the network port will not be usable, since no host is allowed to have a zero IP address.
A group of embedded controllers, working together in an environment, can often have the same firmware running in them. This brings us to a special case with dynamic addressing: what happens if all these devices power up and look for a DHCP server, and a DHCP server is not found? Are these devices going to fall back on a default IP address? This will not work, because if they are running the same firmware, they may all default to the same IP address, which will cause conflicts in the network.
When designing for such an environment, the systems designer must consider cases where networked devices have to “look within” for determining an IP address, instead of relying on an external DHCP server. In fact, the Internet Engineering Task Force (IETF)[4] has devoted a working group to this area, called “Zero Configuration Networking.”[5] Among other things that involve small network connectivity, the working group looks at address resolution without DHCP.
Before we explore network programming in greater depth, it is important to understand the client/server paradigm. This is a common approach to network programming, including the Berkeley Socket API, which we will examine in the next section.
The word “server” may make us think of rack-mounted enterprise-grade machines with multiple CPUs, terabytes of storage and redundant power supplies, running complex applications. A server is completely different in the network paradigm, and, for the most part, is similar to a client. From a networking perspective, the main differences between a client and a server are:
A client initiates the connection. The client requests services when needed, and the server responds. For the most part, the server is listening for incoming requests and only then does it take action.
A client generally handles one communication at a time while a server can be communicating with multiple clients. A client may have multiple connections with the same or different servers as part of the communication.
Depending on the connection protocol and the programming interface used, the server and the client need to do certain things in sequence in order to establish communication. For example, we will later examine which calls a TCP client has to make and in what order so that it can establish a connection with a server.
How a client and server communicate depends entirely on the application, and both parties must follow a given set of rules for things to work.[6] For example, a browser on a personal computer knows what to do once a user has logged into a brokerage account, and the server on the other side knows that it will now be accepting encrypted communication that it has to act upon. From an embedded systems perspective, both parties have to use the same protocols and have to know what connections to talk to. Section 4.14 describes a well-known interface that helps us keep the communications in order.
There are certain special cases that we have to be careful about in client server programming:
Byte Order: although two systems may send or receive the same data, one architecture may send out the most significant byte first while the other may start conversation with the least significant byte. We need to understand how the client and server communicate so that the data bytes do not get swapped unexpectedly. “Big Endian,” which specifies “the most significant byte first,” is the general rule for network communication.
Ideally, we need to be independent from the platform byte order. This helps make the code portable to platforms with different byte orders, and the code does not depend on the other side to have a specific byte order.
It is often enough to use the standard Berkeley macros htonl, htons, ntohl, and ntohs to convert values between host and network byte order:
Higher Level Protocol Definition: we should be clear about various aspects of the communication, such as who starts communicating, what data needs to be exchanged and the format of the data, how the request and response are structured, what are the time-outs, and so on. It is critical to avoid conditions where both the client and the server are indefinitely waiting for a response from the other party.
Disconnection: both parties should agree upon termination of the communication. In certain cases, it may be enough to assume that communication may be terminated at any time, while in other cases, a given sequence of bytes sent from party to another may indicate that the party wishes to disconnect. Either way, the system should be designed accordingly so that it can recover from expected and unexpected disconnection.
The sockets interface is yet another subject that several books have been written about, and an exhaustive discussion of Berkeley Sockets is outside the scope of this book. We are presenting the sockets interface here only to introduce the reader to the code on the PC side. Note that the Dynamic C TCP/IP API (Application Programming Interface) is not the Berkeley sockets API, although there are some similarities.
The Berkeley Sockets Interface was developed at UC Berkeley in the early 1980s for BSD (Berkeley Software Distribution) UNIX. It is commonly referred to as the Sockets API or just Sockets.
The sockets API provides an abstraction from the underlying network stack, where the programmer interfaces with the sockets API, without thinking about how the network stack is implemented on a given hardware platform or operating system. The sockets API also helps with platform independence, because it helps make the application code portable between languages and operating systems. Almost all of the popular languages of today have adopted the Berkeley sockets API; the programs presented in this chapter use this API for Java, C#, and C++.
A fundamental concept in the Sockets API is that the destination of a message is a port in the destination machine; the port being a virtual connection spot to plug into or to send a message to. There are “well known port numbers” used by applications in the network stack, and unused port numbers can be dynamically assigned by the application. Therefore, a socket is a combination of an IP address and a port number. Port numbers range from 0 through 65,535, and most operating systems reserve port numbers below 1024. We have to make sure that our applications use port numbers that are allowed by the operating systems we work with. In Section 4.18.1, we will illustrate ports needing to be explicitly opened for I/O since they are blocked by an operating system’s built-in firewall.
While the sockets concept is generally applied to two separate computers on a network, sockets can also be used to communicate between processes running on the same computer. For example, there exists an internal loopback address (127.0.0.1) on most systems that can be used as a software interface.
Another advantage of abstracting the network layer is that the client and server applications do not have to be written in the same language or development platform. For example, we will use the same Rabbit program to work with servers on both the Windows and Linux platforms in various languages. Using an agreed-upon interface and networking protocols makes platform and language abstraction possible.
The Berkeley socket API uses two key types of sockets: Datagram and Stream:[7]
DGRAM (datagram)[8] sockets are used for UDP communication. The following functions work with DGRAM sockets:
sendto(): sends data.recvfrom(): receives data. This can happen only after abind()operation has been performed.bind(): attaches the socket to a local port address. This needs to be done before data can be sent or received.
STREAM sockets are used for TCP communications. Since TCP is a connection-oriented protocol, a connection needs to be established before a STREAM socket can send or receive data. There are two ways to create a TCP connection:
An active socket can be created by using the
connect()function. This requires us to specify the TCP/IP port address of the other party and, once connected (i.e., after the TCP three-way handshake), we can carry out two-way communication. A client usually connects to a server through an active connection.A passive socket can be created by using the
bind()andlisten()functions. Servers often start out with a passive socket, where they wait and listen for incoming connections. Once that has taken place, making a call to theaccept()function creates an active socket. Multiple active sockets can be created from a single passive socket, since TCP allows multiple connections on a single port, as long as the ip_address: port_number combination is unique. For example, each of the following is a separate connection:10.0.0.1:5555 — 10.0.0.2:80
10.0.0.1:5556 — 10.0.0.2:80
10.0.0.3:5555 — 10.0.0.2:80
Thinking one level higher, a server creates a socket and “names” it, so that it is identifiable and clients can find it, and then the server waits, listening for service requests. Clients create a socket, find a server socket by its name or IP address and port, and then try to connect to the server socket. Once the basic conversation has taken place, both parties can continue with two-way communication.
We will examine the socket interface both from the server side and the client side. In either case, before a client or server can talk to anyone, it needs to create a socket. For our purposes the most important part of this step is specifying the type of socket, whether TCP or UDP. Applications need to make the socket() call first to create the socket.
If the server is creating a socket, it must then use the bind() function to attach the socket to an IP address and port number. If using TCP, the server can then get into a listen state and listen for incoming connections. Otherwise, if using UDP, the server can block until it receives a UDP datagram.
If using TCP, the client tries to connect to a server using connect() and can then read() and write() data to that socket. The client does not need to call bind(); it gets an arbitrary local port number, which for TCP clients is usually just fine. In case of UDP, the client can simply use sendto() and recvfrom() to talk to a UDP server.
These operations are summarized in Figures 4.9a and b.

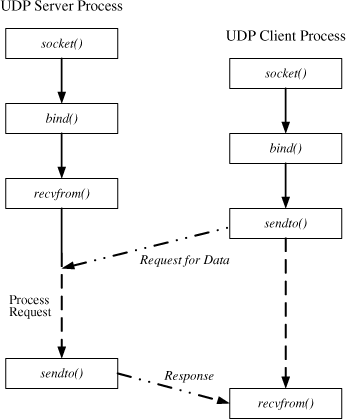
We will keep these socket operations in mind in developing code on the Windows and Linux platforms. We will use the appropriate calls in C++ and Java to use the sockets interface.
UDP is geared towards fast delivery while TCP is focused on guaranteed delivery, albeit at the cost of additional connection and resource overhead. The choice to use TCP or UDP depends on the application.
The additional reliability of TCP means higher implementation overhead of the protocol stack, in terms of code complexity and processing time. This does not mean that using TCP will add complexity and overhead to an application. Depending on what the application is trying to do, using TCP can actually reduce application complexity.
Moreover, TCP requires higher networking resources than UDP, since TCP requires an initialization handshake between the sender and receiver, and maintains a connection between the two devices. On the other hand, an application that needs reliable packet delivery will be less complex using TCP than a version building more reliability upon UDP. If the application requires TCP’s guarantees, the programmer will need to do much more work to implement error detection and recovery, fragmentation, and sequencing with UDP.
A significant factor in choosing TCP or UDP would be whether guaranteed delivery is required or not. A closed loop control system, for example, may not need to use TCP since it will monitor the system’s behavior from the response. Moreover, if a system has built-in mechanisms for error detection and correction, it can use UDP instead of TCP.
Another factor is the network distance, which includes the number of hops, congestion, and round trip time (RTT) between the source and destination nodes. For example, if the two endpoints are spread far apart and connected through the Internet, UDP is not likely to work well without “adjustments.”
Yet another factor to consider is whether the communicating parties need tight synchronization. For example, since TCP ensures that packet will arrive in order, the receiver can act on them in that sequence. On the other hand, packets may arrive out of order with UDP, and we need to consider what effect that will have on the overall system.
While it may first appear that the simplicity of UDP makes it a good choice for embedded systems, choosing TCP versus UDP depends on the needs of the application. For instance, most embedded system use small messages to communicate, which will fit in small datagrams,[9] instead of exchanging many thousands of bytes of data. An application that does not require guaranteed delivery and one where a single datagram can carry all the required data would not need the flow control, buffering, sequencing or reliability offered by TCP.
Let us ponder a bit over the “UDP practical limit of 512 bytes per datagram.” The Internet Protocol specification, RFC 791 for IPv4, requires that a host handle an IP datagram size of at least 576 bytes. Therefore, the effective size of the data payload would be: 576 less 20 (IP header without options) less 8 (UDP header), which equals 548 bytes. 512 is likely chosen as a nice binary number.
Another significant concept to consider is that TCP is stream-oriented, while UDP is record-oriented (a record being a packet). If one wants the reliability and simplicity of TCP with a record-oriented interface, it can be built quite easily.
Broadcast or multicast applications should use UDP. If these applications start creating connections between each client and server, they can overwhelm the network resources. For example, UDP is often used for real-time streaming. Some packets will be dropped, and that’s acceptable. On the other hand, if the application needs to record streamed audio at the highest quality, for example, it should use TCP to maintain a good connection.
If the programmer is trying to build a high degree of reliability in communication by implementing flow control, congestion avoidance, error detection, and retransmission, it may be simpler to use TCP and let the lower level routines do the hard work “behind the scenes.” Implementing these mechanisms when using UDP will often not be worth it.
Programmers are strongly discouraged from trying to “reinvent TCP” with UDP. The biggest risk is to add congestion to the whole network. In addition, the resultant application will be more complex than the equivalent using the built-in TCP stack. This is primarily because the TCP API is well though out, while if a programmer were to reinvent TCP, they will likely create something clumsy and inefficient, unless this is being done with great expertise.
We will use a number of Dynamic C library functions in our networking applications. Let us examine these from the perspective of the various phases of the connection. The goal here is not to provide too much detail about each function but to introduce the reader to the available functions. To keep things simple, the parameters to the functions are not shown here.
Note
Parameters to library functions can be examined in Dynamic C by placing the cursor over a function and hitting control-H.
Most of these functions work with both TCP and UDP sockets and the reader has to read about the functions in greater detail or look at sample programs to determine the behavior of each function for use with TCP or UDP communication.
Also note that these functions are current as of Dynamic C 8.61. Future versions may modify these functions or add new ones, and the reader is encouraged to consult the latest Dynamic C documentation available.
sock_init: should be called before using other networking functions. It initializes the necessary low level packet drivers. The return value indicates if the initialization was successful.After this function is called, the network interface will take some time to come up, especially if DHCP is being used. The programs in this chapter use a while loop to wait until the interface has completed initialization or has failed to come up.
tcp_listen: tells the low level packet driver that an incoming session for a particular port will be accepted.tcp_open: actively creates a session with another machine with the given IP address and port number.tcp_extopen: this is an extended version of tcp_open and also actively creates a session with another machine.sock_close: closes an open socket. In order to de-allocate resources, it is good practice to close open sockets when the client and server agree to disconnect or when the client or server has established that the other party has gone away for good.
sock_established: helps us determine whether a socket is currently active.sock_bytesready: indicates whether data is ready to be read from a socket.sock_alive: indicates one of two states of a socket connection:reset or fully closed, or
opening, established, listening, or in the process of closing. tcp_tick performs similar checks but involves greater overhead.
sock_readable: indicates whether a socket connection has data available to be read, and how much data is ready to be read.sock_writable: indicates whether a socket connection can have data written to it, and how much data can be written.
These functions work only for TCP communication, but have their counterparts for exchanging UDP datagrams:
sock_puts: In binary mode, sends a string; in ASCII mode, appends a carriage return and linefeed to the string.sock_gets: It reads a string from a socket and replaces the carriage return or linefeed with a “�.”sock_fastwrite: Writes as many bytes possible to the socket and returns the number of bytes it wrote. The equivalent UDP functions areudp_sendandudp_sendto.sock_fastread: Reads the given number of bytes from a socket, or the number of bytes immediately available. The equivalent UDP functions areudp_recvandudp_recvfrom.sock_awrite: Does an “all or none” write to a socket, meaning that it writes the given number of bytes to a socket, and, if that amount of data cannot be written, it writes nothing to the socket.
Blocking functions [such as sock_write() and sock_read()] can block the program while they wait for an event to occur. Nonblocking functions [such as sock_fastwrite() and sock_fastread()] will either do their task immediately, or indicate to the programmer that they could not (or could only do part of it). Nonblocking functions are more difficult to use, but when an application has other tasks that must be done in a timely fashion, then they must be used (at least in terms of cooperative multitasking). Anything more than a trivial program that uses cooperative multitasking will need to use the nonblocking functions.
Note
In using these programs, it will be best to configure any firewalls running on the PC to open the ports we need to use. For the sake of consistency, we will use port 8000 for all of our examples on the Rabbit side as well as the PC side, and the firewall may block access to this port on the PC. This will cause some of these programs to not work.
We will use the RCM3400 prototyping board as a TCP server. A client will establish a connection with the TCP server and will request temperature readings from the server. For each request, the server will send out a sample and a sequence number, followed by a carriage return and a linefeed. The sequence number will ensure that the client will know if it has missed receiving any samples. This precaution is on top of the sequencing mechanism that TCP already implements behind the scenes. This is shown here for illustration purposes only; such precaution, of course, is a waste of bandwidth, unless it is useful to the application.
In order to establish a connection to the server, the client would need to know the server’s IP address and port number. While it is easy for us to use dynamic addressing for the server, we will use static addressing so that the client will know for sure the server’s IP address. Otherwise, each time the server power cycles, it may come up with a new IP address, and the client may not be able to ever find the server again or that the client code may have to be recompiled again with the server’s IP address.
“Big loop” implementation for multitasking is a common technique, especially for cooperative multitasking. We will implement TCP and UDP communication using a combination of state machine programming as well as big loops for cooperative multitasking. The TCP Server program implements the TCP state machine shown in Figure 4.10.

The server takes periodic temperature readings, specified by the number of milliseconds between samples in the SAMPLE_DELAY constant. Flashing the sample LED requires 50 ms each time, and this serves as the minimum delay between samples.
Once a connection is established with a client, the server sends the readings and a sequence number to the client. The client application can use the sequence numbers to determine if any samples were not received.
The server sends the number of samples defined by the SAMPLE_LIMIT constant, and then sends a special code, “END.” The server also resets the sequence number at this point. The client terminates the connection once it receives the “END” code.
The Rabbit TCP server uses the DS1 and DS2 LEDs on the prototyping board to indicate the following:
The DS1 LED remains on while the client and server are connected.
The DS2 LED flashes each time a sample gets sent.
The Rabbit server uses two costatements: one to implement the TCP state machine and the other one to take periodic temperature samples. The costate that takes temperature samples keeps an eye on a connection being established, and, once that happens, it starts transmitting the temperature readings and sequence numbers to the client.
Program 4.8 shows a code fragment for the Rabbit Server’s TCP state machine:
Example 4.8. Rabbit-based TCP Server
// ADCservTCP.c

<code removed for brevity>

tcp_state = st_init;
sequence = 0;

for(;;)
{
   tcp_tick(NULL);

   costate
   {
   switch (tcp_state)
   {

   case st_init:
      if (tcp_listen(&serv, 8000, 0, 0, NULL, 0))
         tcp_state = st_idle;
      else
      {
        printf ("
ERROR - Cannot initialize TCP Socket
");
        exit (99);
      }
      break;

   case st_idle:
      if (sock_established(&serv) || sock_bytesready (&serv) != -1)
      {
         tcp_state = st_open;
         connectled(LEDON);
      }
      break;

   case st_open:
      if (!sock_readable (&serv))
      {
         tcp_state = st_close;
         sock_close(&serv);
      }
      break;
   case st_close:
      // not much to do here; the socket is closed elsewhere

   default:
   } // switch

   if (!sock_alive (&serv))
   {
      tcp_state = st_init;
      connectled(LEDOFF);
   }
  } // costate

} // for infinite loop
The costatement that determines whether data needs to be sent to the client is not shown here.
Before we write any client code on the PC platform, we must make sure that the Rabbit TCP server runs as planned. This will also help us establish a reference point for the future; if commonly available utilities are able to talk to the Rabbit but our Java or C++ code cannot, we will easily know that we need to start debugging the PC code.
A simple way to check the server is to just use a telnet connection. The telnet utility is described in Section 4.17.1 and can be invoked with the IP address and port number of the TCP server:
C:>telnet 192.168.1.50 8000 |
A more versatile utility, Netcat, can be invoked as a TCP or UDP client or a server. For this project, we will invoke Netcat to connect with the Rabbit TCP server (Netcat is described in Section 4.20.4). A screen output is shown in Figure 4.11:
We can verify that the Rabbit server is sending us the samples and sequence numbers, as well as the “END” code after the maximum number of samples hard coded in the program. Now that we are satisfied that the Rabbit TCP server works as expected, we will use Java and C++ based TCP clients to talk to the Rabbit TCP server.
The core of the Java client is shown in Program 4.9:
Example 4.9. Java-based TCP Client
// tcpClient.java

<code removed for brevity>

      socket = new Socket(server, port);

      BufferedReader reader
            = new BufferedReader(
                new InputStreamReader(socket.getInputStream() ));

      while((line = reader.readLine()) != null)
      {
          if(line.equals("END"))
          {
          break;
        }

          System.out.println(line);
      } // while

      socket.close();
While it is easy to enter command line arguments for the server’s IP address and port number, the Java client uses constants for these values.
The code first creates a socket with the Socket(server, port) call, and then creates a stream reader with the socket. InputStreamReader() call.
When the work is done, it closes the socket with the socket.close() call.
The TCP client built with Microsoft C++.net has similar functionality as the Java client in the previous section. Although this code is compiled with the .net compiler, it has been built as a Windows32 console application. Similar to the Java program, the TCP client uses constants for the server’s IP address and port number; it is easy to change the code so that the user can enter these values manually.
A fragment of the C++ connection code is shown in Program 9.5:
Example 4.10. TCP Client Built in C++
// TCPClient.cpp
<code removed for brevity>
// Connection Phase
printf("
Looking for Rabbit TCP Server at %s:%d
",
RABBIT_SERVER, htons(RABBIT_PORT));
SOCKET clientSock=Connect(RABBIT_SERVER);
// Send / Receive Phase
Send(clientSock,"
");
while (!done)
{
recvbytes=recv(clientSock, receivedStr, 100, 0);
receivedStr[recvbytes-1]='�';
printf("
%s", receivedStr);
// printf(": %d bytes", recvbytes);
Send(clientSock,"
");
if (!strnicmp(receivedStr,"END",3)) done = 1;
}
// Closing Phase
printf("
Received END message from Rabbit Server!!");
printf("
Terminating TCP connection ...");
closesocket(clientSock);
WSACleanup();The client uses the Winsock library to implement various phases of the communication, such as connect, send/receive, and close. If the C++.net application was built instead of the Windows32 console application, we could have used the various goodies that Windows provides, such as text boxes and scroll bars. Moreover, C++.net would have allowed us to use the try/catch exception handling mechanism that we will use with Java.
The client displays a couple of status messages in the console window, and then starts to display the temperature data (temperature and sequence number). Once the Rabbit server has reached the sample count, the server sends an “END” string to the client, at which point the client terminates the connection.
Figure 4.12 shows an output from the C++ client. To reduce ambiguity and aid in debugging, the client displays the IP address and port number of the server it is seeking.
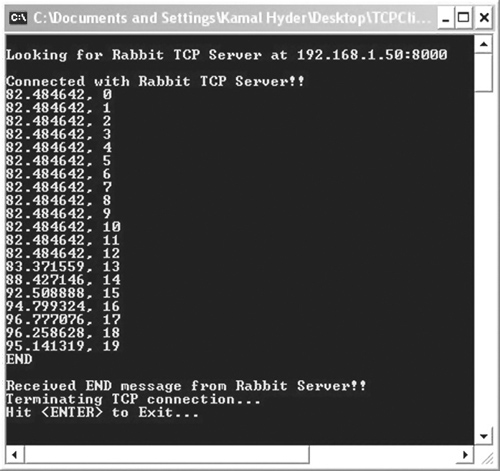
While the code was running, we held the thermistor that made the temperature rise. Then we let go of the thermistor, at which point the temperature started falling. The Rabbit server was programmed to send the “END” terminator after twenty samples, and the client program ended as expected.
In this project, we will program the RCM3400 prototyping board as a TCP client that will read a channel from the analog-to-digital converter (ADC) and send a reading to the server. When connecting to a server, a TCP client typically does an active open, which requires us to specify the IP address and port number of the server. Once connected, the client carries out two-way communication.
In any two-way communication, it is important to define the highest level protocol. Although TCP takes care of various lower level details for this project, we still need to establish how the client will signal start of communication, how the server will request a channel number for the ADC, and how the client will return the appropriate ADC reading. Just as significant is knowing how the connection will be terminated. We have a simple scheme here—the server can either send a channel number in the range 0 through 7 (yes, the Rabbit client does range checking) or the server sends a “quit” and the client terminates the connection. The higher level connection sequence is shown in Figure 4.13a:
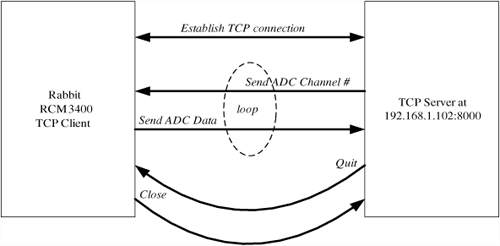
The state machine for the Rabbit TCP client is shown in Figure 4.13b. This is similar to the state machine for the Rabbit TCP server, except for a couple of states that wait for connection to be established and send data to the server.

Either party can drop the connection at any time, and we need to account for this possibility.
The Rabbit client comes up with DHCP and displays its IP address in the stdio window. It then tries to connect with a TCP server at IP address 192.168.1.102 port 8000. Program 4.11 shows the Rabbit Client TCP state machine:
Example 4.11. Rabbit-based TCP Client
// ADCclientTCP.c

<code removed for brevity>

switch (tcp_state)
{

case st_init:
    // printf("In Init State");
    connectled(LEDOFF);
    if (tcp_open(&serv, 0, resolve (SERVER), PORT, NULL))
           tcp_state = st_opening;
    else
           exit (EXIT_ON_ERROR);
    break;
case st_opening:
    if (sock_established(&serv) || sock_bytesready (&serv) != -1)
    {
    tcp_state = st_ready;
       connectled(LEDON);
    }
    break;

case st_ready:
    // check for the socket being readable
    // this is important to check in case the client is trying to
    // close a connection

    if (!sock_readable (&serv))
    {
           tcp_state = st_close;
           sock_close(&serv);
           break;
    }

    if (sock_gets(&serv, buff, sizeof(buff))>0)
    {
           if ((!strcmpi(buff, "q")) || (!strcmpi(buff, "quit")))
           {
                  tcp_state = st_close;
                  sock_close(&serv);
           }
           Else

           {
                  channel = atoi(buff);

                  if ((channel>=0) && (channel <= 7))
                  {
                  printf("
Channel Number = %d", channel);
                  }
                  else
                  {
                  printf("
Invalid Channel Number! Data from
                         channel 7 will be sent");
                  channel = 7;
                  }

                  tcp_state = st_sample;
           } // else
    } // if
    break;

case st_sample:
    // printf("In Sample State");
    // not much to do here; the other costate is doing the sampling

case st_close:
    // printf("In Close State");
    // not much to do here; the socket is closed elsewhere

default:
} // case
The Rabbit code implements the TCP state machine in a costatement. It tries to initialize the TCP socket in state st_init, and returns an error if it cannot. In st_opening, it proceeds to the ready state if the socket is active or if there are bytes ready to be read. It proceeds to st_sample once it has received a valid channel number from the TCP server.
A different costatement keeps track of whether we are in the st_sample state. If so, the Rabbit code sends a sample and returns to st_ready so that it can receive a new channel number from the server.
In development phase of the project, it is good practice for the server and client to print their IP address on the screen. This will avoid confusion and will aid in debugging. When doing a final build, the developer can simply comment out the printfs or encapsulate them in a VERBOSE macro. We used a bunch of printfs in the code for debugging purpose and then commented them out once we confirmed that the code worked as planned.
At first, we had trouble with this project. While the Linux box connected with the Rabbit client, the Windows PC did not. The machine was running Windows XP Professional, with the Internet Connection Firewall (ICF) enabled. The firewall blocked access to port 8000 for the PC-based servers. We had to choose between disabling the firewall or opening up our ports of choice—we opted to open up port 8000 for both TCP and UDP, and the following procedure can be used to do that on a Windows XP system. Other software firewalls will require different instructions for creating the port 8000 hole.
From the “Network Connections” folder, right click on the appropriate connection. This will most likely be labeled the “local area network.” Choose Properties ![]() Advanced
Advanced ![]() Settings.
Settings.
From the “Advanced Settings” dialog box, click on “Add” to define a new setting. Figure 4.14a shows the values we entered for opening up TCP port 8000. Similarly, we have to add a new setting for UDP port 8000.
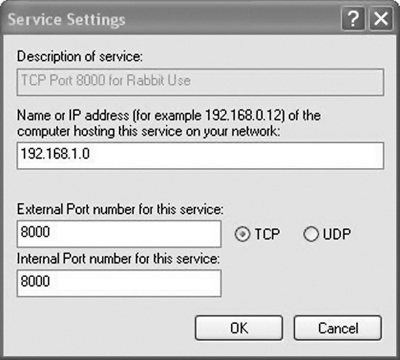
After adding another setting for UDP, the “Advanced Settings” dialog would look similar to the one shown in Figure 4.14b. This confirms that we have opened up port 8000 for both TCP and UDP.

If the user is running a software firewall client on the PC, the appropriate steps should be taken to disable the firewall completely or to “punch a port hole” through it.
Simply putting a few printfs in the right places in the code can save debugging time. We coded the client to output its IP address in the stdio windows, as well as the IP address and port number of the server it is trying to connect to. Moreover, the client prints the channel number that it receives from the server. Having this information on the screen removes any ambiguity and confusion that may arise when things do not work as expected. The output of the Rabbit client is shown in Figure 9.15a.
Table 4.15a. Output from Rabbit Client
Welcome to the Rabbit TCP Client!! My IP address is 192.168.1.103 Trying to connect to TCP Server at 192.168.1.102:8000. Connected to Server at 192.168.1.102:8000. The server should enter ADC Channel to read from Client, or QUIT Channel Number = 4 Channel Number = 7 Bye! |
The output from the Netcat server is shown in Figure 4.15b. The command line arguments shown for Netcat make it listen at 8000 for incoming connections.
Now that we have verified that the Rabbit TCP client is able to make a connection and that it is working as planned, we can implement a PC-side server in C# and Java.
A fragment of the Java TCP server is shown in Program 4.12:
Example 4.12. Code Fragment that Implements the Java Server
// TCPClient.java

<code removed for brevity>

try {
    System.out.println("Input details from keyboard" +
    '
' +"If you want to exit the connection enter 'q' or 'quit':");

    // The Client reads the standard input from keyboard
    BufferedReader inFrmUsr =
    new BufferedReader(new InputStreamReader(System.in));

    // When some client asks for tcpServSocket,There is a connection
    // established between the tcpServSocket and tcpClientSocket
    Socket connSocket = tcpServSocket.accept();

    // This stream provides process input from the socket
    BufferedReader inFrmClient =
    new BufferedReader(new InputStreamReader(connSocket.
    getInputStream()));

    // This stream provides process output to the socket
    DataOutputStream outStream =
        new DataOutputStream(connSocket.getOutputStream());

    while (bflag)
    {
        // Places a line typed by user in the strInput
        strInput = inFrmUsr.readLine() ;

        outStream.writeBytes(strInput + '
'),

        // Places a line from the client
        clientStr = inFrmClient.readLine();

        System.out.println("From Client: " + clientStr);
        if ((strInput.equalsIgnoreCase("q")) ||
          (strInput.equalsIgnoreCase("quit")))
                 bflag = false;
    }

    // Close the socket
    tcpServSocket.close();
} // end try

catch (IOException exp)
{
    System.out.println("Connection closed between client and server");
} // end catch
Similar to Project 2 (Section 4.17), the Java code creates InputStreamReader instances for the socket and user input. It also creates DataOutputStream for output to the Rabbit client and processes input until it receives a “quit” signal.
The try/catch blocks in Java form a useful mechanism for exception handling. The try keyword guards a section of the code, and, if a method throws an exception, code execution stops at that point and the catch block, the exception handler, is executed. The programmer can insert the appropriate code in the exception handler to inform the user.
The output of the Java server is shown in Figure 4.16:
Table 4.16. Output from Java Server
C: java>java TCPServer TCP Server IP Address : desktop-fast-28/192.168.1.102 Server hostname : desktop-fast-28 Server listening on port 8000 Input details from keyboard If you want to exit the connection enter 'q' or 'quit': 5 From Client: 2.000000 9 From Client: 1068.000000 7 From Client: 1068.000000 q From Client: null Server exiting... C: java> |
If the channel number entered by the server is outside of the range 0 through 7, the Rabbit client outputs the ADC value from channel 7.
The C# code runs as a server. The life cycle of the server is, to listen to incoming request on a specific port. Once the client establishes the connection, both the client and server enter a loop where the client keeps listening for server request and returns a response based on the channel requested. The server, on the other hand, queries the user for channel numbers, which in turn it sends to the client. A fragment of the C# code is shown in Program 4.13:
Example 4.13. Code Fragment that Implements the C# Server
// TCPServer.cs

<code removed for brevity>

Console.Write("Waiting for a connection on port["+port+"] ... ");

// Perform a blocking call to accept requests.
// We could also user server.AcceptSocket() here.

TcpClient client = server.AcceptTcpClient();
Console.WriteLine("Connected!");

data = null;

// Get a stream object for reading and writing
NetworkStream stream = client.GetStream();
do
{
    // Send the Channel Number from User Input Console.
    WriteLine("Input details from keyboard ['q' or 'quit' exits]");
    data = Console.ReadLine();
    data =((data.ToLower()=="q")?"quit":data)+"
";

    // convert data to bytes
    byte[] msg = System.Text.Encoding.ASCII.GetBytes(data);

    // Send the user request.
    stream.Write(msg, 0, msg.Length);

    // make sure the buffered data is written to underlying device
    stream.Flush();

    Console.WriteLine(String.Format("Sent: {0}", data));

    int i;

    // Receive the data sent by the client.
    if((i = stream.Read(bytes, 0, bytes.Length))!=0)
    {
           // Translate data bytes to a ASCII string.
           data = System.Text.Encoding.ASCII.GetString(bytes, 0, i);
           Console.WriteLine(String.Format("Received: {0}
", data));
    }
}
while(!data.StartsWith("quit"));
// Shutdown and end connection
Console.WriteLine("Closing connection");
client.Close();So far, we have focused on TCP communication, and a critical part of that is connection establishment before data can change hands. With UDP, there is no need to establish such a connection—the UDP server just initializes itself to listen on port 8000 and waits until a client sends a datagram to that port. Unlike TCP, communication happens one datagram at a time instead of on a “per connection” basis.
The UDP server sample presented here does essentially the same thing as the TCP samples presented earlier.
Unless the client sends a “C” to close the connection (akin to a “finish” request), the server keeps sending temperature readings and a sequence number with each reading.
The Rabbit UDP server uses the DS1 and DS2 LEDs on the prototyping board to indicate the following:
The DS1 LED remains on while the client and server exchange data. Once the server receives a “finish” request, it turns the LED off. The LED will turn on when the server receives the next datagram.
The DS2 LED flashes each time a sample gets sent.
The state machine for the UDP server is shown in Figure 4.15.

The code for UDP server’s state machine is in Program 4.14. Not shown is the costatement that sends periodic data to the client.
Example 4.14. Rabbit-based UDP Server
// ADCservUDP.c

<code removed for brevity>

for(;;)
{
    // It is important to call tcp_tick periodically otherwise
    // the networking subsystem will not work

    tcp_tick(NULL);

    // UDP state machine
Costate
{
    switch (udp_state)
    {

    case st_init:
        if (udp_open(&serv, PORT, -1, 0, NULL))
        udp_state = st_idle;
       else
       {
       printf ("
ERROR - Cannot initialize UDP Socket
");
         exit (EXIT_ON_ERROR);
       }
       break;

    case st_idle:

    // look at data in the buffer for a close request
    buff[0] = 0;

    if ((udp_recvfrom(&serv,buff,sizeof(buff),&cli_ip, &cli_port))
       >= 0)
    {
        if (buff[0] != 'C')
        {
        udp_state = st_open;
        connectled(LEDON);
        }
    }
       break;

    case st_open:
       // nothing to do here; the other costate will check for
       // udp_state
       // to determine whether we are in st_open state

    // keep checking for new packet; if so,
    // update client IP address and port number dynamically

    buff[0] = 0;

    // look at data in the buffer for a close request

    if ((udp_recvfrom(&serv,buff,sizeof(buff),&cli_ip, &cli_port))
       >= 0)
    {
    if (buff[0] == 'C')

        {
        udp_state = st_idle;
        connectled(LEDOFF);
        }
    }
      break;
    case st_close:

    default:
   } // switch

 } // costate

} // for
As is the case with most other programs in this chapter, we use two costatements—one to run the UDP server state machine and the other one to send data to the client, once we are in the right state.
To use the program, the user would launch the Java client and would hit <enter> to send a datagram to the UDP server. Each datagram requests a new temperature sample from the Rabbit. The Java client repeats this sequence ten times and then quits.
The Java UDP client is shown in Program 4.15.
Example 4.15. Java UDP Client
// udpClient.java

<code removed for brevity>

   for (;;)
   {
         count++;

         String sentence = inFromUser.readLine();
         sendData = sentence.getBytes();

         sendPacket = new DatagramPacket
                      (sendData, sendData.length, remoteAddr, PORT);

         clientSocket.send(sendPacket);


         receivePacket = new DatagramPacket (receiveData,
                             receiveData.length);

         clientSocket.setSoTimeout(2000);
         clientSocket.receive(receivePacket);

         receivedData = new String
                (receivePacket.getData(), 0,
                receivePacket.getLength());

         System.out.println("FROM SERVER: " + receivedData);

         if (count == 10)
         {
                clientSocket.close();
                break;
         }

   } // for
Unlike the TCP examples, the Java code creates sendPacket and receivePacket, which are new instances of the DatagramPacket class. It creates a new client socket each time it exchanges data with the UDP server, and then quits once it has counted up to ten responses from the server.
The code functions as a client where the client sends packets containing a channel number to the rabbit server. The client then blocks for response on the same endpoint from the server, displaying it to the user once it receives it. A code fragment of the C++ client is shown in Program 4.16:
Example 4.16. Code Fragment for C++ UDP Client
// cppUDPClient.cpp

<code removed for brevity>

do{
   std::cout << "Input a string :" << std::endl;
   std::cin >> szBuf;
   if(!isalpha(szBuf[0])&& strlen(szBuf)==1 && (szBuf[0]>='0')&&(szBuf[0
]<='7'))
          inValidInput=false;
}
while(inValidInput);
nRet = sendto(theSocket,            // Socket
szBuf,                              // Data buffer
strlen(szBuf),                      // Length of data
0,                                  // Flags
(LPSOCKADDR)&saServer,              // Server address
sizeof(struct sockaddr));           // Length of address

<code removed for brevity>

// get acknowledge from server
nFromLen = sizeof(struct sockaddr);
nret = recvfrom(theSocket,          // Socket
outBuf,                             // Receive buffer
sizeof(outBuf),                     // Length of receive buffer
0,                                  // Flags
(LPSOCKADDR)&saServer,              // Buffer to receive sender's
address&nFromLen); // Length of address bufferWe should not take code libraries at face value—things do not sometimes work as planned, and, in the networking world, it is important to be able to independently observe network traffic while debugging. The following tools will be handy in debugging applications.
This useful utility is found on almost all operating systems, and its simplicity and ubiquity make it a popular application. The key function of Ping is to quickly establish whether a device on the network is reachable. Moreover, because Ping also reports the length of time between the outgoing request and the response, it can help us determine network conditions. Curious programmers should go one step further and explore how Ping uses ICMP messages to perform its function.
Figure 4.18a shows how we used Ping in a Windows XP command window to reach the default gateway in Figure 4.7.
Table 4.18a. Pinging with Windows XP
C:>ping 192.168.1.1

Pinging 192.168.1.1 with 32 bytes of data:

Reply from 192.168.1.1: bytes=32 time=1ms TTL=150
Reply from 192.168.1.1: bytes=32 time<1ms TTL=150
Reply from 192.168.1.1: bytes=32 time<1ms TTL=150
Reply from 192.168.1.1: bytes=32 time<1ms TTL=150

Ping statistics for 192.168.1.1:
    Packets: Sent = 4, Received = 4, Lost = 0 (0% loss),
Approximate round trip times in milli-seconds:
Minimum = 0ms, Maximum = 1ms, Average = 0ms |
Ping also resolves fully qualified domain names with the DNS server to check for connectivity with remote hosts. For example, Figure 4.18b shows how we can try to ping Rabbit Semiconductor’s URL.
Table 4.18b. Pinging a URL
C:>ping www.rabbitsemiconductor.com

Pinging www.rabbitsemiconductor.com [216.167.101.65] with 32 bytes
of data:

Reply from 216.167.101.65: bytes=32 time=83ms TTL=238
Reply from 216.167.101.65: bytes=32 time=82ms TTL=238
Reply from 216.167.101.65: bytes=32 time=83ms TTL=238
Reply from 216.167.101.65: bytes=32 time=82ms TTL=238

Ping statistics for 216.167.101.65:
    Packets: Sent = 4, Received = 4, Lost = 0 (0% loss),
Approximate round trip times in milli-seconds:
Minimum = 82ms, Maximum = 83ms, Average = 82ms |
The utility resolves the URL and displays the resulting IP address that it is trying to reach. We can look for packet loss and average response times as well.
While Ping helps us establish whether we can send a packet to a network device, we can use traceroute to find out how to trace the path of the packet and discover how the packet gets to its destination. We can examine each line of the response, which gives us the IP address of a router along the path.
If we discover that a network host can no longer be pinged, we can use traceroute to determine how far we can get to the destination before we lose connectivity.
Figure 4.19 shows the results in a Windows XP environment; we can examine the path taken by a packet to Rabbit Semiconductor’s URL.
Table 4.19. Tracing the Route to a Destination
C:>tracert www.rabbitsemiconductor.com Tracing route to www.rabbitsemiconductor.com [216.167.101.65] over a maximum of 30 hops: 1 10 ms 11 ms 12 ms 10.149.184.1 2 15 ms 17 ms 11 ms 12.244.101.113 3 11 ms 22 ms 13 ms 12.244.67.169 4 13 ms 13 ms 17 ms 12.244.67.14 5 27 ms 23 ms 27 ms 12.244.72.206 6 23 ms 22 ms 22 ms gbr2-p50.sffca.ip.att.net [12.123.13.62] 7 41 ms 27 ms 23 ms tbr1-p012702.sffca.ip.att.net [12.122.11.69] 8 22 ms 27 ms 23 ms ggr2-p300.sffca.ip.att.net [12.123.13.190] 9 23 ms 24 ms 24 ms p16-0-1-1.r20.plalca01.us.bb.verio.net [129.250.9.73] 10 84 ms 86 ms 99 ms p16-0-1-3.r21.asbnva01.us.bb.verio.net [129.250.2.193] 11 88 ms 95 ms 84 ms p64-0-0-0.r20.asbnva01.us.bb.verio.net [129.250.2.34] 12 91 ms 88 ms 88 ms p16-5-0-0.r01.mclnva02.us.bb.verio.net [129.250.2.180] 13 91 ms 113 ms 84 ms p4-9-0.a00.alxnva02.us.da.verio.net [129.250.17.58] 14 92 ms 103 ms 86 ms ge-5-0.a01.alxnva02.us.da.verio.net [129.250.61.10] 15 85 ms 88 ms 90 ms ge0031.ed2.wdc.dn.net [216.167.88.124] 16 83 ms 105 ms 82 ms rabbitsemiconductor.com [216.167.101.65] Trace complete. |
This open source protocol analyzer is popular with developers and is a useful troubleshooting aid. We can capture live packets as they traverse the network and the utility, with its knowledge of hundreds of protocols, helps us easily decipher what it is seeing on the network. In a Windows environment, it requires us to install the WinPcap packet capture driver.
This utility can be downloaded from http://www.ethereal.com. The URL also contains the mirror to the WinPcap packet capture driver.
Netcat started out as a useful debugging tool on the UNIX platform and has made its way to the Windows environment. For our purposes, this open source tool serves as an invaluable “reference” TCP or UDP server or client that handles inbound or outbound connections. If the Rabbit code that we write connects with Netcat, we know it works.
Netcat for Windows can be downloaded from http://www.atstake.com/research/tools/network_utilities/. A version of netcat for the Cygwin environment is also available.
A number of tools are available online as well for searching through the Internet. These tools can help us Ping destinations on the Internet, explore DNS, and registration records. Some of the tools are available at:
In this chapter, we have merely scratched the surface of what is possible with a networked embedded system. Any networked embedded system will likely not work in isolation. The designer has to think from a systems perspective and which networked element can provide what services. For example, in a given industry vertical, an embedded system may serve a monitoring, diagnostic, or billing function, but it will have to report to a system at a higher layer. In such an environment, the designer has to consider systems-wide issues involving access, performance, reliability, availability, and security.
As our world becomes more connected, people will come to expect the devices in their daily lives to be both user friendly and interconnected. The full featured TCP/IP stack from Rabbit along with other more proprietary tools, such as RabbitWeb, allow a system designer to web enable a design with a minimum investment in time and money.
As with any technology, tools used to mold the technology into products are as important as the technology. Rabbit’s highly integrated embedded processor is a remarkable technology. Ethernet along with the various protocols we have discussed is also a very useful technology. C-compilers, assemblers and debuggers, and a full-featured TCP/IP stack are the tools used to marry these technologies and create products.
Dynamic C has been used throughout this book for developing the Rabbit side code. As we have also used Java, C#, and C++ under both Windows and Linux for the PC side, engineers have tool choices on the Rabbit side as well.
For all good processors, third party tools exist. Rabbit is no exception. Softools has created an ANSI C compiler, an assembler, and linker bundled under an IDE. The tools offer a traditional development environment with multiple source files.
[1] In the protocol layer, not necessarily in the user’s application.
[2] Not only is the address dynamic, but its duration is time limited (and configurable and negotiable).
[3] When initially “bringing up” target hardware, use of a static address can make life easier, since the IP address is one thing that isn’t changing.
[4] Look at http://www.ietf.org.
[5] Look at http://www.zeroconf.org/.
[6] The set of rules is called a protocol.
[7] There is a third type, called raw, used for custom protocol development. It bypasses the TCP and UDP layer and works with raw IP packets.
[8] A datagram is to UDP what a packet is to TCP.
[9] UDP has a practical limit of 512 bytes per datagram, but it could be 1472 bytes on local Ethernet. We definitely do not want UDP datagrams larger than the Maximum Transmission Unit (MTU), since that will force fragmentation, and worse, may cause reliability issues.