
1. Introducing C#
The C# programming language can be used to build software components and applications that run on a wide variety of operating systems (platforms)—including mobile devices, game consoles, web applications, Internet of Things (IoT), microservices, and desktop applications. Furthermore, C# is free; in fact, it is entirely open source, so you can view, modify, redistribute, and contribute back any improvements you make. As a language, C# is built on features found in its predecessor C-style languages (C, C++, and Java), making it immediately familiar to many experienced programmers.1
1. The first C# design meeting took place in 1998.

This chapter introduces C# using the traditional HelloWorld program. It focuses on C# syntax fundamentals, including defining an entry point into the C# program, which will familiarize you with the C# syntax style and structure and enable you to produce the simplest of C# programs. Prior to the discussion of C# syntax fundamentals is a summary of managed execution context, which explains how a C# program executes at runtime. This chapter ends with a discussion of variable declaration, writing and retrieving data from the console, and the basics of commenting code in C#.
Hello, World
The best way to learn a new programming language is to write code. The first example is the classic HelloWorld program. In this program, you will display some text to the screen.
Listing 1.1 shows the complete HelloWorld program; in the following sections, you will compile and run the code.
Listing 1.1: HelloWorld in C#2
class HelloWorld
{
 static void Main()
 {
   System.Console.WriteLine("Hello. My name is Inigo Montoya.");
 }
}
2. Refer to the movie The Princess Bride if you’re confused about the Inigo Montoya references.
Note
C# is a case-sensitive language: Incorrect case prevents the code from compiling successfully.
Those experienced in programming with Java, C, or C++ will immediately see similarities. Like Java, C# inherits its basic syntax from C and C++.3 Syntactic punctuation (such as semicolons and curly braces), features (such as case sensitivity), and keywords (such as class, public, and void) are familiar to programmers experienced in these languages. Beginners and programmers from other languages will quickly find these constructs intuitive.
3. When creating C#, the language creators reviewed the specifications for C/C++, literally crossing out the features they didn’t like and creating a list of the ones they did like. The group also included designers with strong backgrounds in other languages.
Creating, Editing, Compiling, and Running C# Source Code
Once you have written your C# code, it is time to compile and run it. You have a choice of which .NET implementation(s) to use—sometimes referred to as the .NET framework(s). Generally, the implementation is packaged into a software development kit (SDK). The SDK includes the compiler, the runtime execution engine, the framework of pragmatically accessible functionality that the runtime can access (see “Application Programming Interface” later in the chapter), and any additional tooling (such as a build engine for automating build steps) that might be bundled with the SDK. Given that C# has been publicly available since 2000, there are several different .NET frameworks to choose from (see “Multiple .NET Frameworks” later in the chapter).
For each .NET framework, the installation instructions vary depending on which operating system you are developing on and which .NET framework you select. For this reason, I recommend you visit https://dotnet.microsoft.com/download for download and installation instructions, if necessary, selecting first the .NET framework and then the package to download based on which operating system you will be developing for. While I could provide further details here, the .NET download site has the most updated instructions for each combination supported.
If you are unsure about which .NET framework to work with, choose .NET Core by default. It works on Linux, macOS, and Microsoft Windows and is the implementation where the .NET development teams are applying the majority of their investments. Furthermore, because of the cross-platform capabilities, I will favor .NET Core instructions inline within the chapters.
There are also numerous ways to edit your source code, including the most rudimentary of tools, such as Notepad on Windows, TextEdit on Mac/macOS, or vi on Linux. However, you’re likely to want something more advanced so that at least your code is colorized. Any programming editor that supports C# will suffice. If you don’t already have a preference, I recommend you consider the open source editor Visual Studio Code (https://code.visualstudio.com). To optimize working with C# in Visual Studio Code, you will want to install the C# extension as shown in Figure 1.1. Or, if you are working on Windows or Mac, consider Microsoft Visual Studio 2019 (or later)—see https://visualstudio.microsoft.com/vs/. Both are available free of charge.
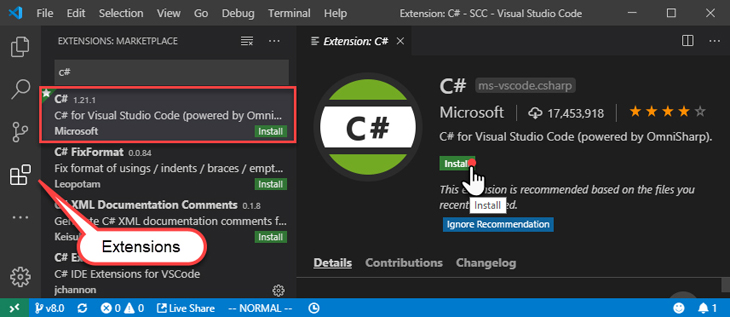
Figure 1.1: Installing the C# extension for Visual Studio Code
In the next two sections, I provide instructions for both editors. For Visual Studio Code, we rely on the command-line interface (CLI) tool dotnet CLI for creating the initial C# program scaffolding in addition to compiling and running the program. For Windows and Mac, we focus on using Visual Studio 2019.
Begin 7.0With Dotnet CLI
The dotnet command, dotnet.exe, is the dotnet command-line interface, or dotnet CLI, and it may be used to generate the initial code base for a C# program in addition to compiling and running the program.4 (To avoid ambiguity between CLI referring to the Common Language Infrastructure or the command-line interface, throughout the book I will prefix CLI with dotnet when referring to the dotnet CLI. CLI without the dotnet prefix refers to Common Language Infrastructure.) Once you have completed the installation, verify that dotnet is an available command from the command prompt—thus verifying your installation.
4. This tool was released around the same time as C# 7.0, and it eclipsed compiling directly with the C# compiler, csc.exe.
Following are the instructions for creating, compiling, and executing the HelloWorld program from the command line on Windows, macOS, or Linux:
Open a command prompt on Microsoft Windows or the Terminal application on Mac/macOS. (Optionally, consider using the cross-platform command-line interface PowerShell.5)
Create a new directory where you would like to place the code. Consider a name such as
./HelloWorld or ./EssentialCSharp/HelloWorld. From the command line, usemkdir ./HelloWorld
Navigate into the new directory so that it is the command prompt’s current location.
cd ./HelloWorld
Execute
dotnet new consolefrom within theHelloWorlddirectory to generate the initial scaffolding (or project) for your program. While several files are generated, the two main files areProgram.csand the project file:dotnet new console
Run the generated program. This will compile and run the default
Program.cscreated by thedotnet new consolecommand. The content ofProgram.csis similar to Listing 1.1, but it outputs “Hello World!” instead.dotnet run
Even though we don’t explicitly request the project to compile (or build), that step still occurs because it is invoked implicitly when the
dotnet runcommand is executed.Edit the
Program.csfile and modify the code to match what is shown in Listing 1.1. If you use Visual Studio Code to open and editProgram.cs, you will see the advantage of a C#-aware editor, as the code will be colorized indicating the different types of constructs in your program. To open and edit, use the commandcode .
(Alternatively, Output 1.1 shows an approach using only the command line that works for Bash and PowerShell.)
Rerun the program:
dotnet run
Output 1.1 shows the output following the preceding steps.6
6. The bold formatting in an Output indicates the user-entered content.
Output 1.1
1>
2> mkdir ./HelloWorld
3> cd ./HelloWorld/
4> dotnet new console
The template "Console Application" was created successfully.

Processing post-creation actions...
Running 'dotnet restore' on C:DataEssentialCSharpYogaX11SCCsrc
Chapter01HelloWorldHelloWorld.csproj...
  Restore completed in 100.38 ms for C:DataEssentialCSharpYogaX11SCC
srcChapter01HelloWorldHelloWorld.csproj.
Restore succeeded.
5> dotnet run
Hello World!
6> echo '
class HelloWorld
{
 static void Main()
 {
   System.Console.WriteLine("Hello. My name is Inigo Montoya.");
 }
}
' > Program.cs
7> dotnet run
Hello. My name is Inigo Montoya.
End 7.0With Visual Studio 2019
With Visual Studio 2019, the procedure is similar, but instead of using the command line, you use an integrated development environment (IDE), which has menus you can choose from rather than executing everything from the command line:
Launch Visual Studio 2019.
Click the Create a new project button. (If the Start Window is not visible, you can open it from the File->Start Window menu or jump directly to create the project via the File->New Project (Ctrl+Shift+N) menu.)
From the Search box (Ctrl+E), type Console App and select the Console App (.NET Core)—Visual C# item (see Figure 1.2).
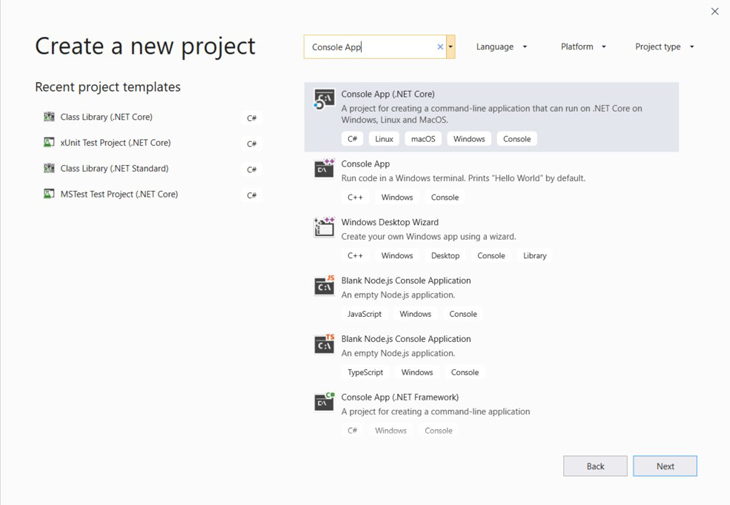
Figure 1.2: The Create a new project dialog box
For the Project name text box, use HelloWorld, and for the Location, select a working directory of your choosing (see Figure 1.3).
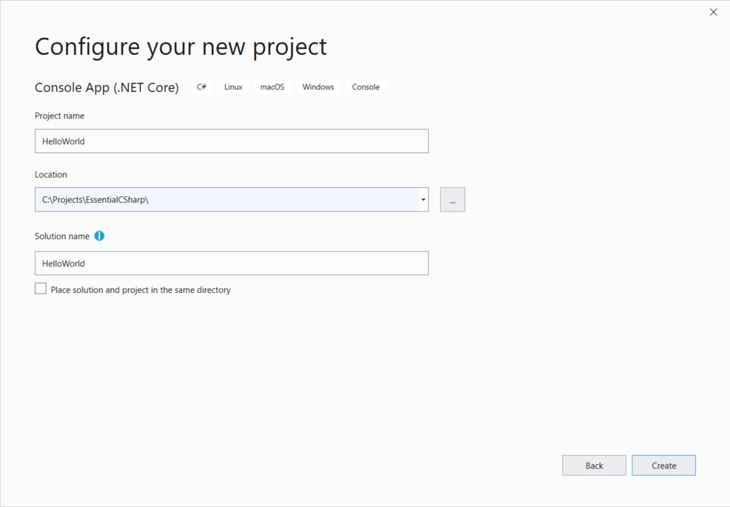
Figure 1.3: The new project dialog
Once the project is created, you should see a
Program.csfile, as shown in Figure 1.4.
Figure 1.4: Dialog that shows the
Program.csfileRun the generated program using the Debug->Start Without Debugging (Ctrl+F5) menu. This will display the command window with the text shown in Output 1.2 except the first line will display only “Hello World!”.
Modify
Program.csto match Listing 1.1.Rerun the program to see the output shown in Output 1.2.
Output 1.2
> Hello. My name is Inigo Montoya.More output
Press any key to close this window . . .
Debugging
One significant feature of using an IDE is its support for debugging. To try it out, follow these additional steps in either Visual Studio or Visual Studio Code:
With
Program.cs open, locate your cursor on theSystem.Console.WriteLineline and click the Debug->Toggle Breakpoint (F9) menu item to activate a breakpoint on that line.Click the Debug->Start Debugging (F5) menu to relaunch the application but this time with debugging activated.
With Visual Studio Code you will be prompted to select an environment—choose .NET Core—following which a
launch.jsonfile and atasks.jsonfile will be generated. You will then have to restart the debugging by clicking the Debug->Start Debugging (F5) menu.Once debugging starts, execution will stop on the line where you set the breakpoint. You can then hover over a variable (e.g.,
args) to see its value. You can also move the current execution of the program from the current line to another line within the method by dragging the yellow arrow in the left margin of the file window.To continue the program execution, use the Debug->Continue (F5) menu (or the Continue button).
For more information about debugging with Visual Studio 2019. see http://itl.tc/vsdebugging.
With Visual Studio Code, the output will appear in the Debug Console tab (click View->Debug Console or Ctrl+Shift+V to see the “Hello. My name is Inigo Montoya.” output). For more information about debugging with Visual Studio Code, see https://code.visualstudio.com/docs/editor/debugging.
Creating a Project
Whether using dotnet CLI or Visual Studio, there are several files created. The first file is a C# file with the name Program.cs by convention. The name Program is commonly used as the starting point for a console program, even though any name could be used. The .cs extension is the standard convention for all C# files and what the compiler expects to compile into the final program by default. To use the code shown in Listing 1.1, open the Program.cs file and replace its content with Listing 1.1. Before saving the updated file, observe that the only functional difference between Listing 1.1 and what was generated by default is the text within quotations and a semantic difference of where System appears.
Begin 2.0End 2.0While not necessarily required, typically a configuration file called a project file is included as part of the generated source code of your C# project. The project file content will vary from one application type and .NET framework to the next. However, at a minimum, it generally identifies what files to include in the compilation, what application type to build (console, web, mobile, testing project, etc.), which .NET framework to support, and which potential settings are needed to debug or launch the application, along with other dependencies the code may rely on (called libraries). For example, the simple .NET Core console application project file created in the previous section appears in Listing 1.2.
Listing 1.2: Sample .NET Core Console Project File
<Project Sdk="Microsoft.NET.Sdk">
  <PropertyGroup>
    <OutputType>Exe</OutputType>
    <TargetFramework>netcoreapp3.1</TargetFramework>
  </PropertyGroup>
</Project>
In Listing 1.2, the application type is identified as a .NET Core version 3.1 (netcoreapp3.1) console application (Exe). All other settings (such as which C# files to compile) are identified by convention. For example, by default, all *.cs files in the same directory (or subdirectory) as the project file are included in the compile.
Begin 7.0Compilation and Execution
The compiled output created by the dotnet build command is an assembly called HelloWorld.dll.7 The extension stands for dynamic link library (DLL), and with .NET Core, all assemblies have a .dll extension even if they are console programs, as this one is. By default, the compiled output for a .NET Core application is placed into a subdirectory (./bin/Debug/netcoreapp3.1/). The Debug directory is used because the default configuration is debug. This configuration causes the output to be optimized for debugging rather than for optimal performance. The compiled output will not execute on its own. Rather, it needs the CLI to host the code. For .NET Core applications, this requires using the dotnet.exe (dotnet on Linux and Mac) process as a host process for the application. Hence why the program is executed with the dotnet run command. That said, there is a way to generate a stand-alone executable that includes the necessary runtime files so that installing the dotnet runtime is not required—see the Advanced Topic: Publishing a Stand-Alone Executable.
7. Note that if you use the Microsoft .NET Framework to create a console program, the compiled code is placed into a HelloWorld.exe file that you can execute directly assuming the Microsoft .NET Framework is installed on the computer.
End 7.0Essential C# Source Code
The source code8 associated with the book includes a solution file, EssentialCSharp.sln, which groups together the code from all the chapters. Building, running, and testing the source code is possible with either Visual Studio or the dotnet CLI.
8. The source code available for this book (along with some chapters related to earlier versions of C#) is available for download at https://IntelliTect.com/EssentialCSharp. You can also download the code from GitHub directly at https://github.com/IntelliTect/EssentialCSharp.
Perhaps the simplest approach is to paste the source code into the HelloWorld program created earlier in the chapter and then execute the source code. Alternatively, the source code contains project files for each chapter and a menu from which it is possible to select which listing to run when executing a program, as shown in the next two sections.
Begin 7.0With Dotnet CLI
To build and execute the code using the dotnet CLI, open a command prompt with the current directory set to the same directory as the EssentialCSharp.sln file. From there, use the dotnet build command to compile all the projects.
To run the source code for a particular project, navigate to the directory containing the project file and run the dotnet run command. Alternatively, from any directory, use the dotnet run -p <projectfile> command, where the project file is the path to the project file you are trying to execute (e.g., dotnet run -p .srcChapter01Chapter01.csproj). Once executing, the program will prompt for which listing to execute and then proceed with that listing.
Many of the listings have corresponding unit tests in the Chapter[??].Tests directory where [??] indicates the chapter number. To execute the tests, use the dotnet test command from the project tests directory of the test you are looking execute (or the same command from the EssentialCSharp.sln file directory to execute them all).
End 7.0With Visual Studio
After opening the solution file, use the Build->Build Solution menu to compile the code with Visual Studio. Before you can execute the source code, you need to select which project to execute by selecting the associated chapter’s project as the startup project. For example, to execute the samples in Chapter 1, you would right-click on the Chapter01 project and choose Set as StartUp Project. Failure to choose the correct chapter will result in an exception with the message “Error, could not run the Listing…” when you specify the listing number at execution time.
Once you have selected the correct project, you can run the project from the Debug->Start Without Debugging menu. Alternatively, if you wish to debug the project, you can use Debug->Start Debugging. Once running, the program will prompt for the listing (e.g., 18.33) that you wish to execute. As mentioned earlier, you can enter only listings from the project that was set to start up.
Many of the listings have corresponding unit tests. To execute a test, open the test project and navigate to the test corresponding to the listing you wish to execute. From there, right-click on the test method and choose either Run Tests (Ctrl+R, T) or Debug Tests (Ctrl+R, Ctrl+T).
C# Syntax Fundamentals
Once you successfully compile and run the HelloWorld program, you are ready to start dissecting the code to learn its individual parts. First, consider the C# keywords, along with the identifiers that the developer chooses.
C# Keywords
Begin 2.0Begin 3.0Begin 4.0Begin 5.0Begin 6.0Begin 7.0Begin 8.0Table 1.1 shows the C# keywords.
Table 1.1: C# Keywords
|
|
|
|
|
|
|
|
|
|
|
|
|
|
|
|
|
|
|
|
|
|
|
|
|
|
|
|
|
|
|
|
|
|
|
|
|
|
|
|
|
|
|
|
|
|
|
|
|
|
|
|
|
|
|
|
|
|
|
|
|
|
|
|
|
|
|
|
|
|
|
|
|
|
|
|
|
|
|
|
|
|
|
|
|
|
|
|
|
|
|
|
|
|
|
|
|
|
|
|
|
|
|
|
|
|
|
|
* Contextual keyword. Numbers in parentheses (n) identify in which version the contextual keyword was added.
End 2.0End 3.0End 4.0End 5.0End 6.0End 7.0End 8.0After C# 1.0, no new reserved keywords were introduced to C#. However, some constructs in later versions use contextual keywords, which are significant only in specific locations. Outside these designated locations, contextual keywords have no special significance.9 By this method, most C# 1.0 code is compatible with the later standards.10
9. For example, early in the design of C# 2.0, the language designers designated yield as a keyword, and Microsoft released alpha versions of the C# 2.0 compiler, with yield as a designated keyword, to thousands of developers. However, the language designers eventually determined that by using yield return rather than yield, they could ultimately avoid adding yield as a keyword because it would have no special significance outside its proximity to return.
10. There are some rare and unfortunate incompatibilities, such as the following:
C# 2.0 requires implementation of
IDisposablewith theusingstatement rather than simply using aDispose()method.Some rare generic expressions are different between versions. For example, F(G<A,B>(7)) means F( (G<A), (B>7) ) in C# 1.0, but in C# 2.0, it means to call generic method G<A,B> with argument 7 and pass the result to F.
Begin 2.0End 2.0Identifiers
Like other languages, C# includes identifiers to identify constructs that the programmer codes. In Listing 1.1, HelloWorld and Main are examples of identifiers. The identifiers assigned to a construct are used to refer to the construct later, so it is important that the names the developer assigns are meaningful rather than arbitrary.
A keen ability to select succinct and indicative names is an important characteristic of a strong programmer because it means the resultant code will be easier to understand and reuse. Clarity coupled with consistency is important enough that the Framework Design Guidelines (http://bit.ly/dotnetguidelines) advise against the use of abbreviations or contractions in identifier names and even recommend avoiding acronyms that are not widely accepted. If an acronym is sufficiently well established (e.g., HTML), you should use it consistently. Avoid spelling out the accepted acronym in some cases but not in others. Generally, adding the constraint that all acronyms be included in a glossary of terms places enough overhead on the use of acronyms that they are not used flippantly. Ultimately, select clear, possibly even verbose names—especially when working on a team or when developing a library against which others will program.
There are two basic casing formats for an identifier. Pascal case (henceforth PascalCase), as the .NET framework creators refer to it because of its popularity in the Pascal programming language, capitalizes the first letter of each word in an identifier name; examples include ComponentModel, Configuration, and HttpFileCollection. As HttpFileCollection demonstrates with HTTP, when using acronyms that are more than two letters long, only the first letter is capitalized. The second format, camel case (henceforth camelCase), follows the same convention except that the first letter is lowercase; examples include quotient, firstName, httpFileCollection, ioStream, and theDreadPirateRoberts.
Notice that although underscores are legal, generally there are no underscores, hyphens, or other nonalphanumeric characters in identifier names. Furthermore, C# doesn’t follow its predecessors in that Hungarian notation (prefixing a name with a data type abbreviation) is not used. This convention avoids the variable rename that is necessary when data types change, or the inconsistency introduced due to failure to adjust the data type prefix when using Hungarian notation.
In rare cases, some identifiers, such as Main, can have a special meaning in the C# language.
Type Definition
All executable code in C# appears within a type definition, and the most common type definition begins with the keyword class. A class definition is the section of code that generally begins with class identifier { ... }, as shown in Listing 1.3.
Listing 1.3: Basic Class Declaration
class HelloWorld
{
  //...
}
The name used for the type (in this case, HelloWorld) can vary, but by convention, it must be PascalCased. For this example, therefore, other possible names are Greetings, HelloInigoMontoya, Hello, or simply Program. (Program is a good convention to follow when the class contains the Main() method, described next.)
Generally, programs contain multiple types, each containing multiple methods.
Main Method
The location where C# programs begin execution is the Main method, which begins with static void Main(). When you execute the program by typing dotnet run at the command console, the program starts up, resolves the location of Main, and begins executing the first statement as identified in Listing 1.4.
Listing 1.4: Breaking Apart HelloWorld
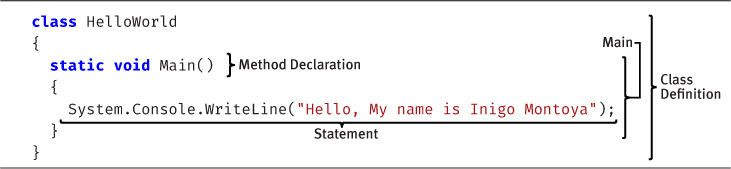
Although the Main method declaration can vary to some degree, static and the method name, Main, are always required for a program.
Listing 1.5: The Main Method with Parameters and a Return
static int Main(string[] args)
{
    //...
}
Note
All Lowercase
Unlike its C-style predecessors, C# uses an uppercase M for the Main method to be consistent with the PascalCased naming conventions of C#.
The designation of the Main method as static indicates that other methods may call it directly off the class definition. Without the static designation, the command console that started the program would need to perform additional work (known as instantiation) before calling the method. (Chapter 6 contains an entire section devoted to the topic of static members.)
Placing void prior to Main() indicates that this method does not return any data. (This is explained further in Chapter 2.)
One distinctive C/C++-style characteristic followed by C# is the use of curly braces for the body of a construct, such as the class or the method. For example, the Main method contains curly braces that surround its implementation; in this case, only one statement appears in the method.
Statements and Statement Delimiters
The Main method includes a single statement, System.Console.WriteLine(), which is used to write a line of text to the console. C# generally uses a semicolon to indicate the end of a statement, where a statement comprises one or more actions that the code will perform. Declaring a variable, controlling the program flow, and calling a method are typical uses of statements.
Since creation of a newline does not separate statements, you can place multiple statements on the same line and the C# compiler will interpret the line as having multiple instructions. For example, Listing 1.6 contains two statements on a single line that, in combination, display Up and Down on two separate lines.
Listing 1.6: Multiple Statements on One Line
System.Console.WriteLine("Up");System.Console.WriteLine("Down");
C# also allows the splitting of a statement across multiple lines. Again, the C# compiler looks for a semicolon to indicate the end of a statement. In Listing 1.7, for example, the original WriteLine() statement from the HelloWorld program is split across multiple lines.
Listing 1.7: Splitting a Single Statement across Multiple Lines
System.Console.WriteLine(
 Hello. My name is Inigo Montoya.");
Whitespace
The semicolon makes it possible for the C# compiler to ignore whitespace in code. Apart from a few exceptions, C# allows developers to insert whitespace throughout the code without altering its semantic meaning. In Listings 1.6 and 1.7, it didn’t matter whether a newline was inserted within a statement, between statements, or eliminated entirely, and doing so had no effect on the resultant executable created by the compiler.
Frequently, programmers use whitespace to indent code for greater readability. Consider the two variations on HelloWorld shown in Listings 1.8 and 1.9. Although these two examples look significantly different from the original program, the C# compiler sees them as semantically equivalent.
Listing 1.8: No Indentation Formatting
class HelloWorld
{
static void Main()
{
System.Console.WriteLine("Hello Inigo Montoya");
}
}
Listing 1.9: Removing Whitespace
class HelloWorld{static void Main()
{System.Console.WriteLine("Hello Inigo Montoya");}}
Working with Variables
Now that you’ve been introduced to the most basic C# program, it’s time to declare a local variable. Once a variable is declared, you can assign it a value, replace that value with a new value, and use it in calculations, output, and so on. However, you cannot change the data type of the variable. In Listing 1.10, string max is a variable declaration.
Listing 1.10: Declaring and Assigning a Variable

To declare a variable is to define it, which you do by
Specifying the type of data which the variable will contain
Assigning it an identifier (name)
Data Types
Listing 1.10 declares a variable with the data type string. Other common data types used in this chapter are int and char.
intis the C# designation of an integer type that is 32 bits in size.charis used for a character type. It is 16 bits, large enough for (nonsurrogate) Unicode characters.
The next chapter looks at these and other common data types in more detail.
Declaring a Variable
In Listing 1.10, string max is a variable declaration of a string type whose name is max. It is possible to declare multiple variables within the same statement by specifying the data type once and separating each identifier with a comma. Listing 1.11 demonstrates such a declaration.
Listing 1.11: Declaring Two Variables within One Statement
string message1, message2;
Because a multivariable declaration statement allows developers to provide the data type only once within a declaration, all variables will be of the same type.
In C#, the name of the variable may begin with any letter or an underscore (_), followed by any number of letters, numbers, and/or underscores. By convention, however, local variable names are camelCased (the first letter in each word is capitalized, except for the first word) and do not include underscores.
Assigning a Variable
After declaring a local variable, you must assign it a value before reading from it. One way to do this is to use the = operator, also known as the simple assignment operator. Operators are symbols used to identify the function the code is to perform. Listing 1.12 demonstrates how to use the assignment operator to designate the string values to which the variables miracleMax and valerie will point.
Listing 1.12: Changing the Value of a Variable
class StormingTheCastle
{
  static void Main()
  {
      string valerie;
      string miracleMax = "Have fun storming the castle!";

      valerie = "Think it will work?";

      System.Console.WriteLine(miracleMax);
      System.Console.WriteLine(valerie);

      miracleMax = "It would take a miracle.";
      System.Console.WriteLine(miracleMax);
  }
}
From this listing, observe that it is possible to assign a variable as part of the variable declaration (as it was for miracleMax) or afterward in a separate statement (as with the variable valerie). The value assigned must always be on the right side of the declaration.
Running the compiled program produces the code shown in Output 1.3.
Output 1.3
>dotnet run
Have fun storming the castle!
Think it will work?
It would take a miracle.
In this example, we show the command dotnet run explicitly. In future output listings, we will omit this line unless there is something special about the command used to execute the program.
C# requires that local variables be (as determined by the compiler) “definitely assigned” before they are read. Additionally, an assignment results in a value. Therefore, C# allows two assignments within the same statement, as demonstrated in Listing 1.13.
Listing 1.13: Assignment Returning a Value That Can Be Assigned Again
class StormingTheCastle
{
  static void Main()
  {
    // ...
    string requirements, miracleMax;
    requirements = miracleMax = "It would take a miracle.";
    // ...
  }
}
Using a Variable
The result of the assignment, of course, is that you can then refer to the value using the variable identifier. Therefore, when you use the variable miracleMax within the System.Console.WriteLine(miracleMax) statement, the program displays “Have fun storming the castle!”, the value of miracleMax, on the console. Changing the value of miracleMax and executing the same System.Console.WriteLine(miracleMax) statement causes the new miracleMax value, “It would take a miracle.”, to be displayed.
Console Input and Output
This chapter already used System.Console.WriteLine repeatedly for writing out text to the command console. In addition to being able to write out data, a program needs to be able to accept data that a user may enter.
Getting Input from the Console
One way to retrieve text that is entered at the console is to use System.Console.ReadLine(). This method stops the program execution so that the user can enter characters. When the user presses the Enter key, creating a newline, the program continues. The output, also known as the return, from the System.Console.ReadLine() method is the string of text that was entered. Consider Listing 1.14 and the corresponding output shown in Output 1.4.
Listing 1.14: Using System.Console.ReadLine()
class HeyYou
{
  static void Main()
  {
      string firstName;
      string lastName;

      System.Console.WriteLine("Hey you!");

      System.Console.Write("Enter your first name: ");
      firstName = System.Console.ReadLine();

      System.Console.Write("Enter your last name: ");
      lastName = System.Console.ReadLine();
  }
}
Output 1.4
Hey you!
Enter your first name: Inigo
Enter your last name: Montoya
After each prompt, this program uses the System.Console.ReadLine() method to retrieve the text the user entered and assign it to an appropriate variable. By the time the second System.Console.ReadLine() assignment completes, firstName refers to the value Inigo and lastName refers to the value Montoya.
Listing 1.15: Using System.Console.Read()
int readValue;
char character;
readValue = System.Console.Read();
character = (char) readValue;
System.Console.Write(character);
The System.Console.Read() method does not return the input until the user presses the Enter key; no processing of characters will begin, even if the user types multiple characters before pressing the Enter key.
Begin 2.0In C# 2.0 and above, you can use System.Console.ReadKey(), which, in contrast to System.Console.Read(), returns the input after a single keystroke. It allows the developer to intercept the keystroke and perform actions such as key validation, restricting the characters to numerics.
End 2.0Writing Output to the Console
In Listing 1.14, you prompt the user for his or her first and last names using the method System.Console.Write() rather than System.Console.WriteLine(). Instead of placing a newline character after displaying the text, the System.Console.Write() method leaves the current position on the same line. In this way, any text the user enters will be on the same line as the prompt for input. The output from Listing 1.14 demonstrates the effect of System.Console.Write().
Begin 6.0The next step is to write the values retrieved using System.Console.ReadLine() back to the console. In the case of Listing 1.16, the program writes out the user’s full name. However, instead of using System.Console.WriteLine() as before, this code uses a slight variation that leverages a C# 6.0 feature known as string interpolation. Notice the dollar sign preceding the string literal in the call to Console.WriteLine; it indicates that string interpolation will be used. Output 1.5 shows the corresponding output.
Listing 1.16: Formatting Using String Interpolation
class HeyYou
{
  static void Main()
  {
      string firstName;
      string lastName;

      System.Console.WriteLine("Hey you!");

      System.Console.Write("Enter your first name: ");
      firstName = System.Console.ReadLine();

      System.Console.Write("Enter your last name: ");
      lastName = System.Console.ReadLine();

      System.Console.WriteLine(
        $"Your full name is { firstName } { lastName }.");
  }
}
Output 1.5
Hey you!
Enter your first name: Inigo
Enter your last name: Montoya

Your full name is Inigo Montoya.
Instead of writing out “Your full name is” followed by another Write statement for firstName, a third Write statement for the space, and finally a WriteLine statement for lastName, Listing 1.16 writes out the entire output using C# 6.0’s string interpolation. With string interpolation, the compiler interprets the interior of the curly brackets within the string as regions in which you can embed code (expressions) that the compiler will evaluate and convert to strings. Rather than executing lots of code snippets individually and combining the results as a string at the end, string interpolation allows you to do this in a single step. This makes the code easier to understand.
End 6.0Prior to C# 6.0, C# used a different approach, that of composite formatting. With composite formatting, the code first supplies a format string to define the output format—see Listing 1.17.
Listing 1.17: Formatting Using System.Console.WriteLine()’s Composite Formatting
class HeyYou
{
  static void Main()
  {
      string firstName;
      string lastName;

      System.Console.WriteLine("Hey you!");

      System.Console.Write("Enter your first name: ");
      firstName = System.Console.ReadLine();

      System.Console.Write("Enter your last name: ");
      lastName = System.Console.ReadLine();

      System.Console.WriteLine(
        "Your full name is {0} {1}.", firstName, lastName);
  }
}
In this example, the format string is Your full name is {0} {1}. It identifies two indexed placeholders for data insertion in the string. Each placeholder corresponds to the order of the arguments that appear after the format string.
Note that the index value begins at zero. Each inserted argument (known as a format item) appears after the format string in the order corresponding to the index value. In this example, since firstName is the first argument to follow immediately after the format string, it corresponds to index value 0. Similarly, lastName corresponds to index value 1.
Note that the placeholders within the format string need not appear in order. For example, Listing 1.18 switches the order of the indexed placeholders and adds a comma, which changes the way the name is displayed (see Output 1.6).
Listing 1.18: Swapping the Indexed Placeholders and Corresponding Variables
System.Console.WriteLine("Your full name is {1}, {0}",
  firstName, lastName);
Output 1.6
Hey you!
Enter your first name: Inigo
Enter your last name: Montoya

Your full name is Montoya, Inigo
In addition to not having the placeholders appear consecutively within the format string, it is possible to use the same placeholder multiple times within a format string. Furthermore, it is possible to omit a placeholder. It is not possible, however, to have placeholders that do not have a corresponding argument.
Note
Since C# 6.0–style string interpolation is almost always easier to understand than the alternative composite string approach, throughout the remainder of the book we use string interpolation by default.
Comments
In this section, we modify the program in Listing 1.17 by adding comments. In no way does this modification change the execution of the program; rather, providing comments within the code can simply make the code more understandable in areas where it isn’t inherently clear. Listing 1.19 shows the new code, and Output 1.7 shows the corresponding output.
Listing 1.19: Commenting Your Code

Output 1.7
Hey you!
Enter your first name: Inigo
Enter your last name: Montoya

Your full name is Inigo Montoya.
Despite the inserted comments, compiling and executing the new program produces the same output as before.
Programmers use comments to describe and explain the code they are writing, especially where the syntax itself is difficult to understand, or perhaps a particular algorithm implementation is surprising. Since comments are pertinent only to the programmer reviewing the code, the compiler ignores comments and generates an assembly that is devoid of any trace that comments were part of the original source code.
Table 1.2 shows four different C# comment types. The program in Listing 1.18 includes two of these.
Begin 2.0Table 1.2: C# Comment Types
Comment Type |
Description |
Example |
Delimited comments |
A forward slash followed by an asterisk, |
|
Single-line comments |
Comments may be declared with a delimiter comprising two consecutive forward slash characters: |
|
XML delimited comments |
Comments that begin with |
|
XML single-line comments |
XML single-line comments begin with |
|
|
|
|
* XML delimited comments were explicitly added only in C# 2.0, but the syntax is compatible with C# 1.0.
End 2.0A more comprehensive discussion of the XML comments and how they are leveraged to generate API documentation appears in Chapter 10, where we further discuss the various XML tags.
There was a period in programming history when a prolific set of comments implied a disciplined and experienced programmer. This is no longer the case. Instead, code that is readable without comments is more valuable than that which requires comments to clarify what it does. If developers find it necessary to enter comments to clarify what a code block is doing, they should favor rewriting the code more clearly over commenting it. Writing comments that simply repeat what the code clearly shows serves only to clutter the code, decrease its readability, and increase the likelihood of the comments going out of date because the code changes without the comments getting updated.
Managed Execution and the Common Language Infrastructure
The processor cannot directly interpret an assembly. Assemblies consist mainly of a second language known as Common Intermediate Language (CIL), or IL for short.11 The C# compiler transforms the C# source file into this intermediate language. An additional step, usually performed at execution time, is required to change the CIL code into machine code that the processor can understand. This involves an important element in the execution of a C# program: the Virtual Execution System (VES). The VES, also casually referred to as the runtime, compiles CIL code as needed (a process known as just-in-time compilation or jitting). The code that executes under the context of an agent such as the runtime is termed managed code, and the process of executing under control of the runtime is called managed execution. The code is “managed” because the runtime controls significant portions of the program’s behavior by managing aspects such as memory allocation, security, and just-in-time compilation. Code that does not require the runtime to execute is called native code (or unmanaged code).
11. A third term for CIL is Microsoft IL (MSIL). This book uses the term CIL because it is the term adopted by the CLI standard. IL is prevalent in conversation among people writing C# code because they assume that IL refers to CIL rather than other types of intermediate languages.
The specification for a runtime is included in a broader specification known as the Common Language Infrastructure (CLI) specification.12 An international standard, the CLI includes specifications for the following:
12. Miller, J., and S. Ragsdale. 2004. The Common Language Infrastructure Annotated Standard. Boston: Addison-Wesley.
The VES or runtime
The CIL
A type system that supports language interoperability, known as the Common Type System (CTS)
Guidance on how to write libraries that are accessible from CLI-compatible languages (available in the Common Language Specification [CLS])
Metadata that enables many of the services identified by the CLI (including specifications for the layout or file format of assemblies)
Note
The term runtime can refer to either execution time or the VES. To help clarify the intended meaning, this book uses the term execution time to indicate when the program is executing, and it uses the term runtime when discussing the agent responsible for managing the execution of a C# program while it executes.
Running within the context of a runtime execution engine enables support for several services and features that programmers do not need to code for directly, including the following:
Language interoperability: Interoperability between different source languages. This is possible because the language compilers translate each source language to the same intermediate language (CIL).
Type safety: Checks for conversion between types, ensuring that only conversions between compatible types will occur. This helps prevent the occurrence of buffer overruns, a leading cause of security vulnerabilities.
Code access security: Certification that the assembly developer’s code has permission to execute on the computer.
Garbage collection: Memory management that automatically de-allocates memory previously allocated by the runtime.
Platform portability: Support for potentially running the same assembly on a variety of operating systems. One obvious restriction is that no platform-dependent libraries are used; therefore, platform-dependent idiosyncrasies need to be worked out separately.
Base Class Library (BCL): Provides a foundation of code that developers can depend on (in all .NET frameworks) so that they do not have to develop the code themselves.
Note
This section provides a brief synopsis of the CLI to familiarize you with the context in which a C# program executes. It also provides a summary of some of the terms that appear throughout this book. Chapter 24 is devoted to the topic of the CLI and its relevance to C# developers. Although the chapter appears last in the book, it does not depend on any earlier chapters, so if you are eager to become more familiar with the CLI, you can jump to it at any time.
Common Intermediate Language and ILDASM
As mentioned in the introduction of this section, the C# compiler converts C# code to CIL code and not to machine code. The processor can directly understand machine code; therefore, CIL code needs to be converted before the processor can execute it. Given an assembly, it is possible to view the CIL code using a CIL disassembler utility to deconstruct the assembly into its CIL representation. (The CIL disassembler is affectionately referred to by its Microsoft .NET Framework specific filename, ILDASM, which stands for IL Disassembler.) ILDASM will disassemble an assembly and extract the CIL generated by the C# compiler into text.
The output that results from disassembling a .NET assembly is significantly easier to understand than machine code. For many developers, this may raise a concern because it is easier for programs to be decompiled and algorithms understood without explicitly redistributing the source code. As with any program, CLI based or not, the only foolproof way of preventing disassembly is to disallow access to the compiled program altogether (e.g., hosting a program only on a website instead of distributing it out to a user’s machine). However, if decreased accessibility to the source code is all that is required, there are several obfuscators available. Obfuscators read the IL code and transform it so that it does the same thing but in a way that is much more difficult to understand. This technique prevents the casual developer from accessing the code and creates assemblies that are much more difficult and tedious to decompile into comprehensible code. Unless a program requires a high degree of algorithm security, obfuscators are generally sufficient.
Perhaps the most interesting thing that you can glean from such a listing is how relatively easy it is to follow what the program is doing compared to trying to read and understand machine code (assembler). In the listing, an explicit reference to System.Console.WriteLine() appears. There is a lot of peripheral information to the CIL code listing, but if a developer wanted to understand the inner workings of a C# assembly (or any CLI-based program) without having access to the original source code, it would be relatively easy unless an obfuscator is used. In fact, several free tools are available (such as Red Gate’s Reflector, ILSpy, JustDecompile, dotPeek, and CodeReflect) that can decompile from CIL to C# automatically.
Multiple .NET Frameworks
As briefly mentioned earlier in the chapter, there are multiple .NET frameworks. The large number of offerings is driven mainly by the desire to provide .NET implementations across multiple operating systems and, potentially, even different hardware platforms. Table 1.3 shows those that are predominant.
Table 1.3: Predominant .NET Framework Implementations
Comment Type |
Description |
.NET Core |
A truly cross-platform and open source .NET framework that supports a highly modularized set of APIs for both the server and command-line applications. |
Microsoft .NET Framework |
The first of the .NET frameworks—slowly being supplanted by .NET Core. |
Xamarin |
A mobile platform implementation of .NET that works with both iOS and Android and enables the development of mobile applications from a single code base while still enabling access to native platform APIs. |
Mono |
The oldest open source implementation of .NET that formed the foundation upon which Xamarin and Unity were built. Mono has been replaced by .NET Core for new development. |
Unity |
A cross-platform game engine used to develop video games for game consoles, PCs, mobile devices, and even websites. (The Unity engine is the first public implementation to support projections into the Microsoft Hololens augmented reality realm.) |
|
|
All the samples in the book will work for both .NET Core and Microsoft .NET Framework, at a minimum, unless they specifically indicate otherwise. However, because .NET Core is where most of the .NET future investment is occurring, the sample source code that accompanies the book (available from https://IntelliTect.com/EssentialCSharp) is configured to work with .NET Core by default.
Note
Throughout the book, .NET framework (lowercase) to refers to the framework supported by .NET implementations in general. In contrast, Microsoft .NET Framework refers to the specific .NET framework implementation that runs only on Microsoft Windows and was first released by Microsoft back in 2001.
Application Programming Interface
All the methods (or more generically, the members) found on a data type such as System.Console are what define the System.Console’s application programming interface (API). The API defines how a software program interacts with a component. As such, it is found not just with a single data type, but more generically; the combination of all the APIs for a set of data types is said to create an API for the collective set of components. In .NET, for example, all the types (and the members within those types) in an assembly are said to form the assembly’s API. Likewise, given a combination of assemblies, such as those found in .NET Core or the Microsoft .NET Framework, the collective group of assemblies forms a larger API. Often, this larger group of APIs is referred to as the framework—hence the term .NET framework in reference to the APIs exposed by all the assemblies included with .NET Core or the Microsoft .NET Framework. Generically, the API comprises the set of interfaces and protocols (or instructions) for programming against a set of components. In fact, with .NET, the protocols themselves are the rules for how .NET assemblies execute.
C# and .NET Versioning
Since the development life cycle of .NET frameworks is different from that of the C# language, the version of the underlying .NET framework and the corresponding version of the C# language end up with different numbers. This means that if you compile with the C# 5.0 compiler, it will, by default, compile against the Microsoft .NET Framework version 4.6, for example. Table 1.4 is a brief overview of the C# and .NET releases for the Microsoft .NET Framework and .NET Core.
Begin 2.0Begin 3.0Begin 4.0Begin 5.0Begin 6.0Begin 7.0Begin 8.0Table 1.4: C# and .NET Versions
Comment Type |
Description |
C# 1.0 with Microsoft .NET Framework 1.0/1.1 (Visual Studio 2002 and 2003) |
The initial release of C#. A language built from the ground up to support .NET programming. |
C# 2.0 with Microsoft .NET Framework 2.0 (Visual Studio 2005) |
Added generics to the C# language and libraries that supported generics to the Microsoft .NET Framework 2.0. |
Microsoft .NET Framework 3.0 |
An additional set of APIs for distributed communications (Windows Communication Foundation [WCF]), rich client presentation (Windows Presentation Foundation [WPF]), workflow (Windows Workflow [WF]), and Web authentication (Cardspaces). |
C# 3.0 with Microsoft .NET Framework 3.5 (Visual Studio 2008) |
Added support for LINQ, a significant improvement to the APIs used for programming collections. The Microsoft .NET Framework 3.5 provided libraries that extended existing APIs to make LINQ possible. |
C# 4.0 with Microsoft .NET Framework 4 (Visual Studio 2010) |
Added support for dynamic typing along with significant improvements in the API for writing multithreaded programs that capitalized on multiple processors and cores within those processors. |
C# 5.0 with Microsoft .NET Framework 4.5 (Visual Studio 2012) and WinRT integration |
Added support for asynchronous method invocation without the explicit registration of a delegate callback. An additional change in the framework was support for interoperability with the Windows Runtime (WinRT). |
C# 6.0 with Microsoft .NET Framework 4.6 and .NET Core 1.X (Visual Studio 2015) |
Added string interpolation, null propagating member access, exception filters, dictionary initializers, and numerous other features. |
C# 7.0 with Microsoft .NET Framework 4.7 and .NET Core 1.1 or 2.0 (Visual Studio 2017) |
Added tuples, deconstructors, pattern matching, local functions, return by reference, and more. |
C# 8.0 with Microsoft .NET Framework 4.8 and .NET Core 3.0 |
Added support for nullable reference types, advanced pattern matching, using declarations, static local functions, disposable ref structs, ranges and indices, and async streams (although Microsoft .NET Framework 4.8 will not support the last two features). |
|
|
End 5.0End 4.0End 3.0End 2.0Perhaps the most important framework feature added occurred alongside C# 6.0—that is, cross-platform compilation. In other words, not only would the Microsoft .NET Framework run on Windows, but Microsoft also provided the .NET Core implementation that would run on Linux and macOS. Although the .NET Core is not an equivalent feature set to the full Microsoft .NET Framework, it includes enough functionality that entire (ASP.NET) websites can be hosted on operating systems other than Windows and its Internet Information Server (IIS). This means that with the same code base it is possible to compile and execute applications that run across multiple platforms. .NET Core is an entire SDK with everything from the .NET Compiler Platform (“Roslyn”), which itself executes on Linux and macOS, to the .NET Core runtime, along with tools such as the dotnet command-line utility, dotnet CLI (which was introduced around the time of C# 7.0). Both .NET Core and dotnet CLI have continued to mature to the point of becoming mainstream with C# 8.0 and .NET Core 3.0.
End 6.0End 7.0End 8.0.NET Standard
With so many different implementations of .NET, including multiple versions of each individual .NET framework, the frameworks became furcated as each implementation supported a different set of only somewhat overlapping APIs. As a result, writing code that was reusable across multiple .NET frameworks became difficult because it was necessary to litter the code with conditional checks as to whether a particular API was available. To reduce this complexity, the .NET Standard emerged as a means of defining what APIs were supported by which version of the standard. The .NET Standard defines what a .NET framework needs to support so as to be compliant with each .NET Standard version number. However, since many of the implementations were already released, the decision tree of identifying which API went into which standard was to some extent based on the existing implementations and the association of those existing implementations with a .NET Standard version number.
The latest .NET Standard version at the time of this writing is 2.1. Unfortunately, the latest Microsoft .NET Framework version—4.8—will remain on .NET Standard 2.0, resulting in a lack of support for C# 8.0’s ranges/indices and async streams features. Putting this aside, all the base frameworks have implemented .NET Standard 2.0; thus, it represents a reunification of the furcated APIs found in older versions of each framework and allows cross-compilation against the latest versions of each of the .NET framework implementations.
Microsoft’s vision is that in the future the divergent .NET framework source code will all be merged into a single code base to form .NET 5.0—a reunification of .NET Framework, .NET Core, and Xamarin/Mono. And, with the advent of such a merge, the .NET Standard will become irrelevant—that is, if all the .NET frameworks are created from the same code base, their APIs will automatically be a unified API, so there is no need for a standard to which they must conform. For more information, see http://itl.tc/net5unification.
Summary
This chapter served as a rudimentary introduction to C#. It provided a means of familiarizing you with basic C# syntax. Because of C#’s similarity to C++-style languages, much of this chapter’s content might not have been new material to you. However, C# and managed code do have some distinct characteristics, such as compilation down to CIL. Although it is not unique, another key characteristic of C# is its full support for object-oriented programming. Even tasks such as reading and writing data to the console are object oriented. Object orientation is foundational to C#, as you will see throughout this book.
The next chapter examines the fundamental data types that are part of the C# language and discusses how you can use these data types with operands to form expressions.