
Collecting information from a user is an extremely important and common function when working with financial data. It is often necessary to collect user payment information, exchange rate information, and so on. When creating calculations based on this information, it is equally important to ensure that the information is accurate and free from errors. While Excel provides some built-in validation information to prevent erroneous data, it still requires that the data be entered directly into the worksheet.
In this recipe, you will learn how to collect information from a user utilizing a code-based UserForm.
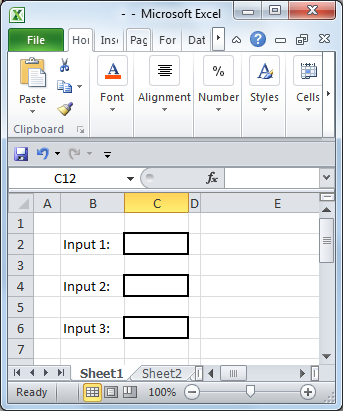
In order to use code and a UserForm for data entry, you will need to know what the input-location cell references are. Using the simple input sheet as you can see in the following screenshot, we will use the cell references of C2, C4, and C6:
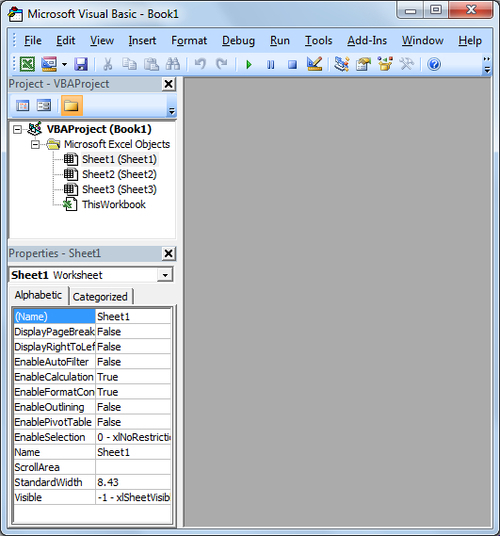
We will begin by opening the Visual Basic Editor (VBE) in Excel by pressing Alt + F11 on the keyboard:
We will now need to create the actual UserForm that we will use to collect the information from the user:
- From the tool menu on the top of the VBE, select Insert | UserForm, to add a blank UserForm:
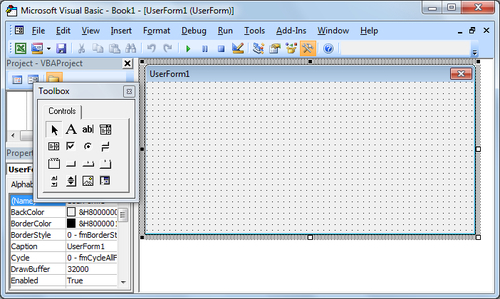
- Using the Toolbox that appears to the left of the UserForm, choose the text-entry tool ( ab|) and draw three text-entry boxes vertically stacked at the center of the form:
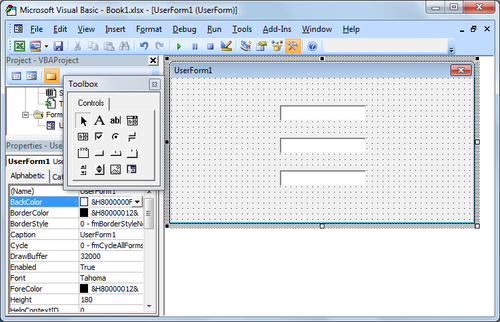
With the input boxes now drawn on the form, we will add labels to identify the boxes to the user.
- Select the label (A) tool from the toolbox and draw three labels, one to left of each of the input boxes:
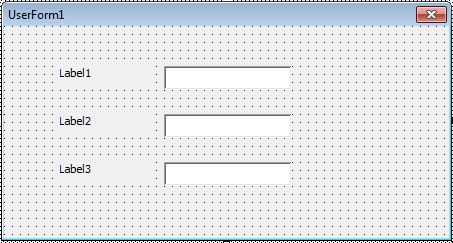
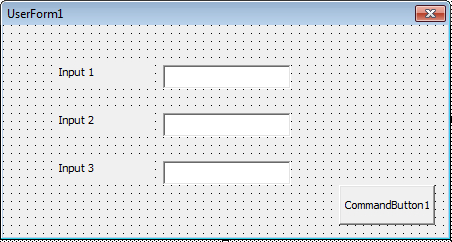
- Select the first label, highlight the text Label1, and type Input 1. Repeat the same process for the other two labels to rename each label to their respective input boxes:

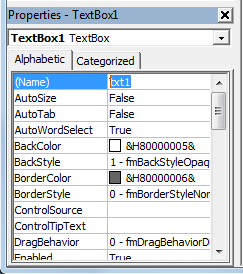
- Select the first textbox. Once selected, the textbox properties will become visible in the lower left-hand side panel or the Properties panel.
- Highlight the text next to the option for name, and rename the textbox, txt1. Repeat this process until all three textboxes have been named as txt1, txt2, and txt3 respectively:
The last entry to the UserForm is to add a Submit button that will activate the code to enter the user input into the Excel worksheet.
- Choose the CommandButton tool, and draw a button on the lower-right hand side of the UserForm:
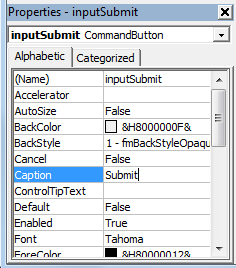
- Select the CommandButton and using the Properties panel, change the name to inputSubmit, and change the Caption to Submit:
The UserForm is now complete. We must now add the VBA code that will allow the user input to populate to the correct locations on the Excel worksheet.
- Double-Click on the Submit button, to open a blank code page.
After double-clicking, Excel will automatically add the code to recognize the click event. You will only need to add the code that will fire after the button is clicked.
- Enter the following code before the words End Sub:
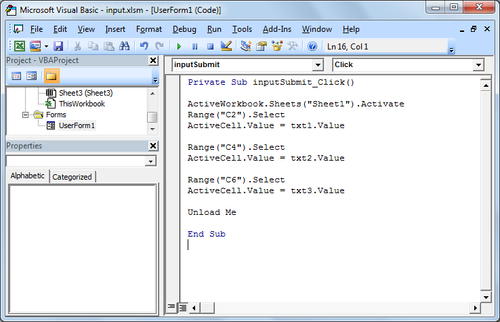
ActiveWorkbook.Sheets("Sheet1").Activate Range(—C2—).Select ActiveCell.Value = txt1.Value - Add the remainder of the code that will enter the values of the rest of the input boxes.
The complete code is as follows:
Private Sub inputSubmit_Click()
ActiveWorkbook.Sheets("Sheet1").Activate
Range("C2").Select
ActiveCell.Value = txt1.Value
Range("C4").Select
ActiveCell.Value = txt2.Value
Range("C6").Select
ActiveCell.Value = txt3.Value
Unload Me
End Sub
The UserForm and the UserForm code are complete. We will now add the code that will open the UserForm when Excel opens:
- Double-Click on ThisWorkbook listed in the Project explorer window in the upper left-hand side panel:
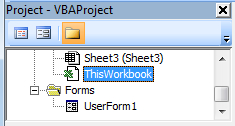
After double-clicking on ThisWorkbook, you are presented with a blank code page.
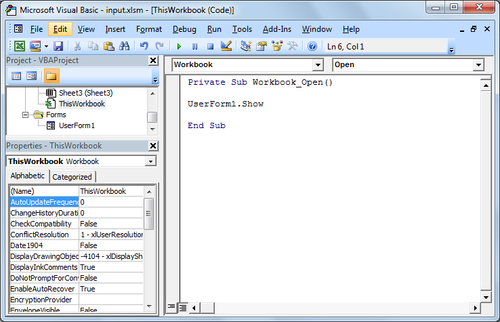
- From the drop-down in the code panel, pull down the options, and choose Workbook.
Excel will then add automatic code for the workbook open event.
- Add the following code to display the input form upon opening Excel, and save your changes:
Private Sub Workbook_Open()
UserForm1.Show
End Sub
- Close the VBE and close Excel completely.
Upon opening Excel, the user will be given a UserForm to enter the input options for the worksheet.
The UserForm that we created has three input boxes for a user to enter information. We renamed the input boxes as txt1, txt2, and txt3 that Excel will use to refer to the boxes. The code that was added to the CommandButton performs the actual action:
ActiveWorkbook.Sheets("Sheet1").Activate
In this code, we first start with the active workbook. This ensures that we are only adding code to the correct workbook in Excel in case the user has several workbooks opened simultaneously. Once Excel is in the correct workbook, Excel selects the worksheet named Sheet1. If we had input boxes on a different sheet, we would simply need to change Sheet1, to the correct sheet in Excel:
Range("C2").Select
ActiveCell.Value = txt1.Value
Excel identifies cells as ranges. By utilizing the range option in Excel, we can refer to one or more cells simply through cell reference, in this case C2. We select cell C2, then enter the value of the input box in that cell. The remainder of the code simply repeats this process moving through the other two input boxes, and entering the values into the sheet.
Finally the code Unload Me closes the UserForm after entering all of the values.
The UserForm.Show code listed in the Workbook open event simply tells Excel to open the UserForm as soon as Excel is opened.