
6. Say Cheese!

ISO 640 • 1/2000 sec. • f/2.8 • 200mm lens
Settings and Features to Make Great Portraits
Taking pictures of people is one of the great joys of photography. You will experience a great sense of accomplishment when you capture the spirit and personality of someone in a photograph. At the same time, you have a great responsibility because the person in front of the camera is depending on you to make them look good. You can’t always change how someone looks, but you can control the way you photograph that individual. In this chapter, we will explore some camera features and techniques that can help you create great portraits.
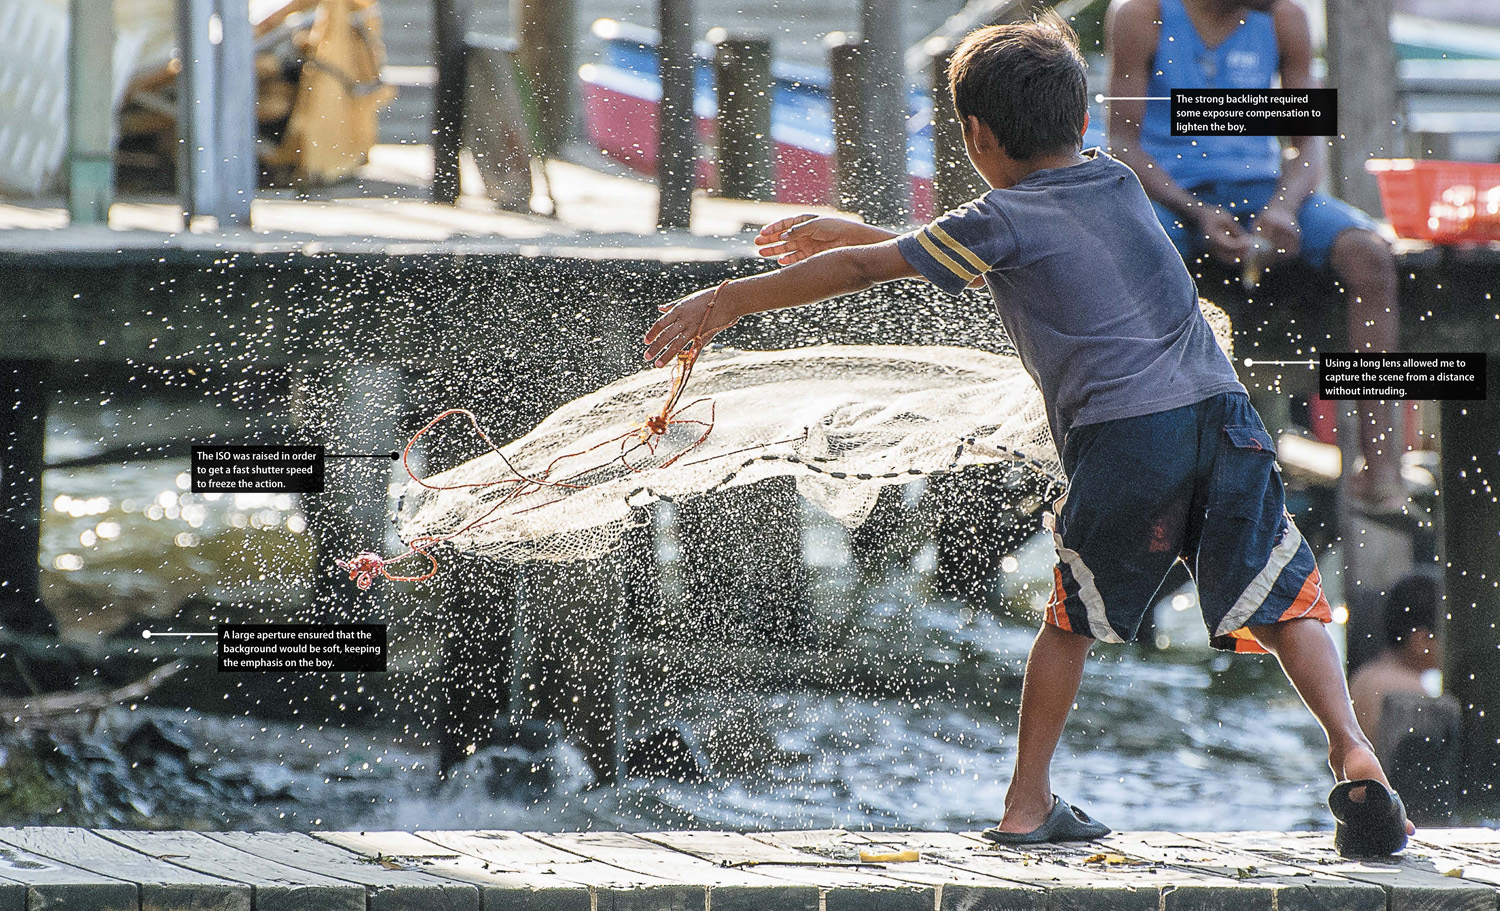
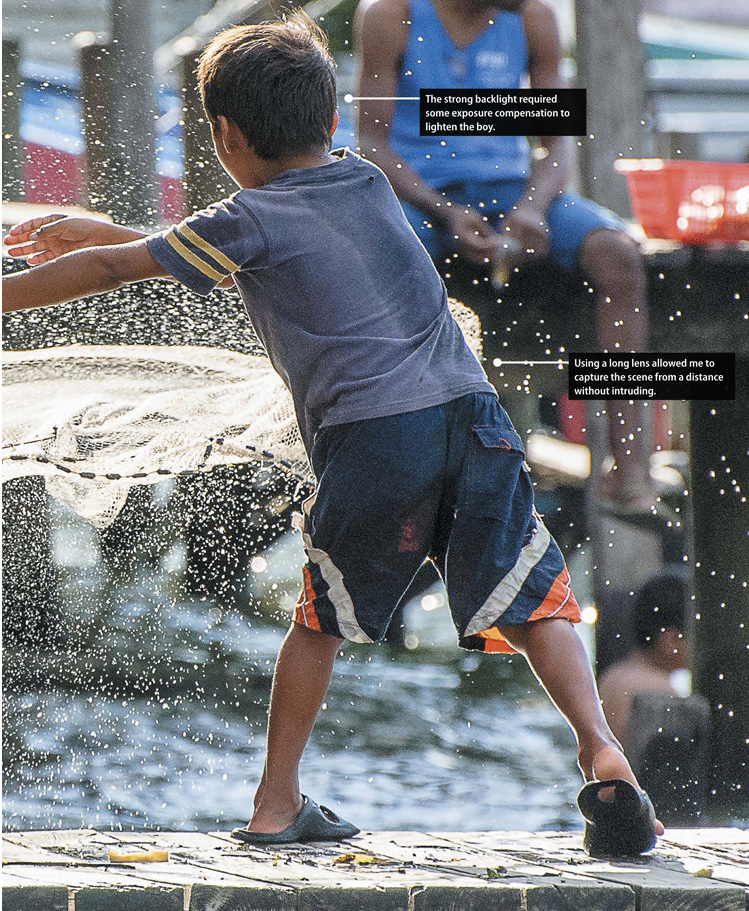
Sometimes you find the best photos when you aren’t expecting it. As I sat in a waterside restaurant with my family I saw this young boy throwing his casting net into the water in hopes of catching something to add to his family’s dinner pot. The light was coming from behind him and every time he threw the net, it would shimmer in the strong backlight, which added the perfect element to this environmental shot.


When shooting portraits in outdoor locations I always try to look for a variety of backdrop possibilities so that I have options depending on the lighting conditions. This photo shoot took place in a small central park in my city where I had lots of great soft, natural light that was perfect for portraits of this model.

Automatic Portrait Mode
Many of today’s DSLR cameras have automatic shooting modes that are customized for specific subjects. One of them, Portrait mode, is dedicated to shooting portraits. While this is not my preferred camera setting, it is a great jumping-off point for those who are just starting out. The key to using this mode is to understand what is going on with the camera so that when you venture further into portrait photography, you can expand on the settings and get the most from your camera and, more importantly, your subject.
Whether you are photographing an individual or a group, the emphasis should always be on the subject. Portrait mode utilizes a larger aperture setting to keep the depth of field very narrow, which means that the background will appear slightly blurred or out of focus. To take full advantage of this effect, use a medium- to telephoto-length lens (Figure 6.1). Also, keep a pretty close distance to your subject. If you shoot from too far away, the narrow depth of field will not be as effective.

ISO 100 • 1/500 sec. • f/2.8 • 70mm lens
Figure 6.1 The Portrait shooting mode is fine for casual people shots like this quick playground photo.
Using Aperture Priority Mode
If you took a poll of portrait photographers to see which shooting mode was most often used for portraits, the answer would certainly be Aperture Priority (A or Av) mode. Selecting the right aperture is important for placing the most critically sharp area of the focus on your subject, while simultaneously blurring all of the distracting background clutter (Figure 6.2). Not only will a large aperture give the narrowest depth of field, it will also allow you to shoot in lower light levels at lower ISO settings.

ISO 100 • 1/400 sec. • f/3.2 • 135mm lens
Figure 6.2 Using a wide aperture, especially with a longer lens, blurs distracting background details.
This isn’t to say that you have to use the largest aperture on your lens. A good place to begin is f/5.6. This will give you enough depth of field to keep the entire face in focus, while providing enough blur to eliminate distractions in the background. This isn’t a hard-and-fast setting; it’s just a good, all-around number to start with. Your aperture might change depending on the focal length of the lens you are using and on the amount of blur that you want for your foreground and background elements.
Go wide for environmental portraits
There will be times when your subject’s environment is of great significance to the story you want to tell. This might mean using a smaller aperture to get more detail in the background or foreground. Once again, by using Aperture Priority mode, you can set your aperture to a higher f-stop, such as f/8 or f/11, and include the important details of the scene that surrounds your subject.
Using a wider-than-normal lens can also assist in getting more depth of field as well as showing the surrounding area. A wide-angle lens requires less stopping down of the aperture (making the aperture smaller) to achieve an acceptable depth of field. This is due to the fact that wide-angle lenses are covering a greater area, so the depth of field appears to cover a greater percentage of the scene.
A wider lens might also be necessary to relay more information about the scenery (Figure 6.3). Select a lens length that is wide enough to tell the story but not so wide that you distort the subject. There’s little in the world of portraiture quite as unflattering as giving someone a big, distorted nose (unless you are going for that sort of look). When shooting a portrait with a wide-angle lens, keep the subject away from the edge of the frame. This will reduce the distortion, especially in very wide focal lengths. As the lens length increases, distortion will be reduced. I generally don’t like to go wider than about 24mm for portraits.

ISO 400 • 1/800 sec. • f/5.6 • 18mm lens
Figure 6.3 When shooting people in interesting places, be sure to take a few steps back so that you include some of the surroundings.


Figure 6.6 The Center-Weighted metering mode looks at the entire frame but emphasizes the center of it.
Metering Modes for Portraits
For most situations, the Matrix metering mode is ideal. (For more on how metering works, see Chapter 2, as well as the “Metering Basics” sidebar.) This mode measures light values from all portions of the viewfinder and then establishes a proper exposure for the scene. The only problem that you might encounter when using this metering mode is when you have very light or dark backgrounds in your portrait shots.
In these instances, the meter might be fooled into using the wrong exposure information because it will be trying to lighten or darken the entire scene based on the prominence of dark or light areas (Figure 6.7). You can deal with this in one of two ways. You can use the Exposure Compensation feature, which we cover in Chapter 7, to dial in adjustments for over- and underexposure. Or you can change the metering mode to Center-weighted metering. The Center-weighted metering mode only uses the center area of the viewfinder (about 9 percent) to get its exposure information. This is the best way to achieve proper exposure for most portraits; metering off skin tones, averaged with hair and clothing, will often give a more accurate exposure (Figure 6.8). This metering mode is also great to use when the subject is strongly backlit.

ISO 100 • 1/250 sec. • f/3.2 • 105mm lens
Figure 6.7 The light background color and clothing fooled the meter into choosing a slightly underexposed setting for the photo.

ISO 100 • 1/125 sec. • f/3.2 • 110mm lens
Figure 6.8 When I switched to the Center-weighted metering mode, my camera was able to ignore much of the background and add a little more time to the exposure.
Using the Exposure Lock Feature
There will often be times when your subject is not in the center of the frame but you still want to use the Center-weighted metering mode. So how can you get an accurate reading if the subject isn’t in the center? Try using the Exposure Lock feature to hold the exposure setting while you recompose.
Exposure Lock lets you use the exposure setting from any portion of the scene that you think is appropriate, and then lock that setting in regardless of how the scene looks when you recompose. An example of this would be when you’re shooting a photograph of someone and a large amount of blue sky appears in the picture. Normally, the meter might be fooled by all that bright sky and try to reduce the exposure. Using Exposure Lock, you can establish the correct metering by zooming in on the subject (or even pointing the camera toward the ground), taking the meter reading and locking it in, and then recomposing and taking your photo with the locked-in exposure.
Shooting with the Exposure Lock feature
1. Find the Exposure Lock button (it’s probably located on the back of the camera where your right thumb goes) and place your thumb on it.
2. While looking through the viewfinder, place the focus point on your subject and press the shutter release button halfway to get a meter reading, and focus the camera.
3. Press and hold the Exposure Lock button to lock in the meter reading. You should see some sort of indicator in the viewfinder.
4. While holding in the button, recompose your shot and take the photo.
Not every camera works the same way when it comes to Exposure Lock, so take a look at your owner’s manual for specific instruction.
Focusing: The Eyes Have It
It has been said that the eyes are the windows to the soul, and nothing could be truer when you are taking a photograph of someone (Figure 6.9). You could have the perfect composition and exposure, but if the eyes aren’t sharp the entire image suffers. While there are many different focusing modes to choose from on your camera, for portrait work you can’t beat using a single focus point. Using this focus mode, you will establish a single focus for the lens and then hold it until you take the photograph; the other focusing modes continue focusing until the photograph is taken. The single-point selection lets you place the focusing point right on your subject’s eye and set that spot as the critical focus spot. Using the single point focus mode lets you get that focus and recompose all in one motion.

ISO 400 • 1/250 sec. • f/2.8 • 56mm lens
Figure 6.9 When photographing people, you should almost always place the emphasis on the eyes.
Although most cameras will let you move the single focus point to any number of locations in the frame, I typically use the center point for focus selection. I find it easier to place that point directly on the location where my critical focus should be established and then recompose the shot. Even though the single point can be selected from any of the focus points, it typically takes longer to figure out where that point should be in relation to my subject. By using the center point, I can quickly establish focus and get on with my shooting.
Classic Black and White Portraits
There is something timeless about a black and white portrait. It eliminates the distraction of color and puts all the emphasis on the subject. To get great black and whites without having to resort to any image-processing software, try using your camera’s Monochrome preset (Figure 6.10). You should know that the presets are automatically applied when shooting with the JPEG file format. If you are shooting in RAW, the picture that shows up on your rear LCD display will look black and white, but it will appear as a color image when you open it in your RAW processing software. You can probably use the software to apply the Monochrome look back to the image.

ISO 400 • 1/200 sec. • f/5.6 • 200mm lens
Figure 6.10 Getting high-quality black and white portraits is as simple as setting your camera to the Monochrome camera preset.
The real key to using the Monochrome preset is to customize it for your portrait subject. Most presets can be changed to alter the sharpness and contrast. For women, children, puppies, and anyone else who should look somewhat soft, try a low Sharpness setting. For old cowboys, longshoremen, bagpipe players, and anyone else who you want to look really detailed, try one that is much higher. I typically like to leave Contrast at a setting just a little lower than middle. This gives me a nice range of tones throughout the image.
The other adjustment that you should try is to change the preset’s color filter effect from None to one of the colored settings. Using the filters will have the effect of either lightening or darkening the skin tones. Red and Yellow filters usually lighten skin, while a Green filter can make skin appear a bit darker. Experiment with the custom settings to see which one works best for your subject (Figure 6.11).

The Portrait Preset for Better Skin Tones
As long as we are talking about presets for portraits, there is another one that your camera probably has that is tuned specifically for portrait shooting. Oddly enough, it’s called Portrait. To set this preset on your camera, simply follow the directions found in your owner’s manual (it’s probably the same method used to turn on the Monochrome preset). There are usually individual options for the Portrait preset that, like the Monochrome preset, include sharpness and contrast. You can usually change the saturation (how intense the colors will be) and hue too, which lets you change the skin tones from more reddish to more yellowish. I prefer brighter colors, so I like to boost the Saturation setting and leave everything else at the defaults. You won’t be able to use the same adjustments for everyone, especially when it comes to color tone, so do some experimenting to see what works best.
Use Fill Flash for Reducing Shadows
A common problem when taking pictures of people outside, especially during the midday hours, is that the overhead sun can create dark shadows under the eyes and chin. You could have your subject turn his or her face to the sun, but that is usually considered cruel and unusual punishment. So how can you have your subject’s back to the sun and still get a decent exposure of the face? Try turning on your flash to fill in the shadows (Figure 6.12). This also works well when you are photographing someone with a ball cap on. The bill of the hat tends to create heavy shadows over the eyes, and the fill flash will lighten up those areas while providing a really nice catchlight in the eyes.

ISO 100 • 1/200 sec. • f/3.5 • 180mm lens
Figure 6.12 The subject was positioned with the sun to her back and then a fill flash was used to lighten her face.
The key to using the flash as a fill is to not use it on full power. If you do, the camera will try to balance the flash with the daylight, and you will get a very flat and featureless face.
People on the Move
Not all portraits are shot with the subject sitting in a chair, posed and ready for the picture. Sometimes you might want to get an action shot that says something about the person, similar to an environmental portrait. Children, especially, just like to move. Why fight it? Set up an action portrait instead.
For the photo in Figure 6.13, I set my camera to Shutter Priority mode. I knew that there would be a good deal of movement involved, and I wanted to make sure that I had a fairly high shutter speed to freeze the action, so I set it to 1/1000 of a second. Since he was fairly stationary in terms of distance I used a single focus point with continuous focus mode. I had the drive mode set to Continuous, and just started firing off shots as he started to throw the net. There were quite a few throwaway shots, but I was able to get one that captured the net in mid-throw with great specular reflections on the wet net.

ISO 400 • 1/1000 sec. • f/5.6 • 220mm lens
Figure 6.13 Although I usually prefer to shoot my people shots in Aperture Priority mode, the key to this shot was using Shutter Priority mode.
Tips for Shooting Better Portraits
Before we get to the assignments for this chapter, I thought it might be a good idea to leave you with a few extra pointers on shooting portraits. There are entire books that cover things like portrait lighting, posing, and so on. But here are a few pointers that will make your people pics look a lot better.
Avoid the center of the frame
This falls under the category of composition. Place your subject to the side of the frame (Figure 6.14)—it just looks more interesting than plunking them smack dab in the middle (Figure 6.15).

ISO 400 • 1/100 sec. • f/5.6 • 120mm lens
Figure 6.14 Try cropping in a bit, and place the subject’s face off center to improve the shot.

ISO 400 • 1/85 sec. • f/5.6 • 120mm lens
Figure 6.15 Having the subject in the middle of the frame with so much empty space on the sides can make for a less-than-interesting portrait.
Choose the right lens
Choosing the correct lens can make a huge impact on your portraits. A wide-angle lens can distort features of your subject, which can lead to an unflattering portrait (Figure 6.16). Select a longer focal length if you will be close to your subject (Figure 6.17).

ISO 100 • 1/160 sec. • f/3.2 • 24mm lens
Figure 6.16 At this close distance, the 24mm lens is distorting the subject’s face.

ISO 100 • 1/125 sec. • f/3.2 • 70mm lens
Figure 6.17 By zooming out to 70mm, I am able to remove the distortion for a much better photo.
Don’t cut them off at the knees
There is an old rule about photographing people: never crop the picture at a joint. This means no cropping at the ankles, knees, or waist. If you need to crop at the legs, the proper place to crop is mid-shin or mid-thigh (Figure 6.18 on the next page).

ISO 400 • 1/60 sec. • f/7.1 • 95mm lens
Figure 6.18 A good crop for people is where it intersects at mid-thigh or mid-shin.
Use the frame
Have you ever noticed that most people are taller than they are wide? Turn your camera vertically for a more pleasing composition (Figure 6.19 on the next page).

ISO 400 • 1/40 sec. • f/5.6 • 112mm lens
Figure 6.19 Get in the habit of turning your camera to a vertical position when shooting portraits. This is also referred to as portrait orientation.
Sunblock for portraits
The midday sun can be harsh and can do unflattering things to people’s faces (Figure 6.20). If you can, find a shady spot out of the direct sunlight. You will get softer shadows, smoother skin tones, and better detail (Figure 6.21). This holds true for overcast skies as well. Just be sure to adjust your white balance accordingly.

ISO 100 • 1/800 sec. • f/3.2 • 180mm lens
Figure 6.20 The bright afternoon sunlight looks too harsh on the subject’s face.

ISO 100 • 1/640 sec. • f/3.2 • 180mm lens
Figure 6.21 By moving her just a couple of feet, I was able to get her out of the direct light and into a much more flattering situation.
Frame the scene
Using elements in the scene to create a frame around your subject is a great way to draw the viewer in. You don’t have to use a window frame to do this. Just look for elements in the foreground that could be used to force the viewer’s eye toward your subject (Figure 6.22).

ISO 200 • 1/800 sec. • f/2.8 • 32mm lens
Figure 6.22 The bright yellow railings form a great frame around the subject.
Get down on their level
If you want better pictures of children, don’t shoot from an adult’s eye level. Getting the camera down to the child’s level will make your images look more personal (Figure 6.23 on the next page).

ISO 400 • 1/200 sec. • f/6.3 • 32mm lens
Figure 6.23 Sometimes taking photographs of children means taking a knee to get the camera down on their level, but the end result is a much better image.
Don’t be afraid to get close
When you’re taking someone’s picture, don’t be afraid of getting close and filling the frame (Figure 6.24). This doesn’t mean you have to shoot from a foot away; try zooming in to capture the details.

ISO 400 • 1/160 sec. • f/5.6 • 120mm lens
Figure 6.24 Filling the frame with the subject’s face can lead to a much more intimate portrait.
Try a long lens for candid shots
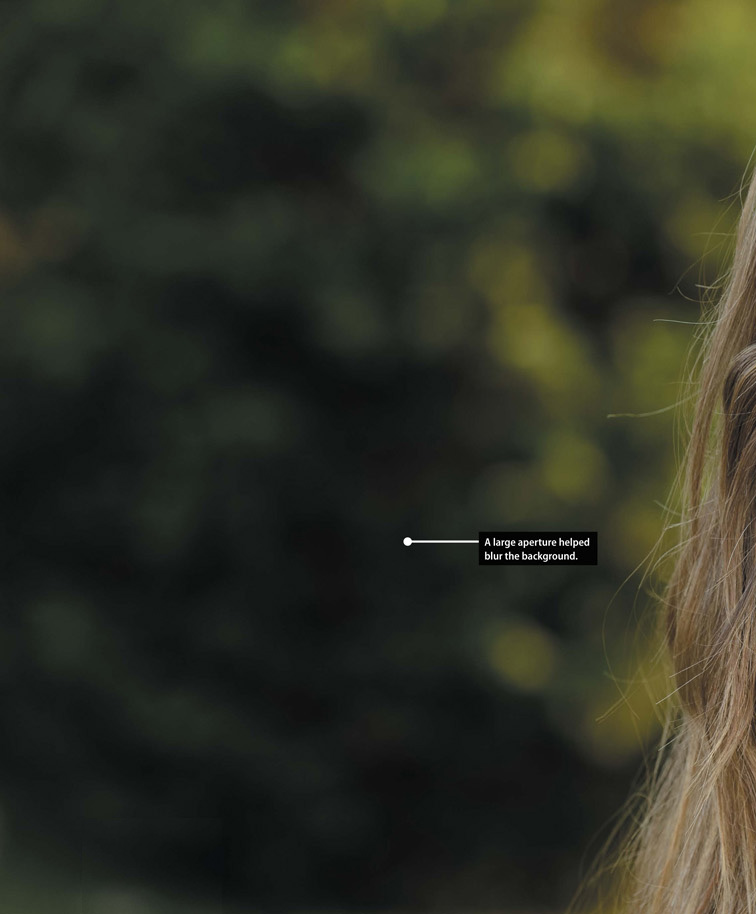
Putting a camera in someone’s face can elicit some unnatural results. People just feel a need to pose, or they get nervous and stiff. If you really want to capture some nice portraits with a more candid feel, try shooting with a long lens (Figure 6.25). The distance will remove you and your camera from the equation, and people will tend to react more normally with you around. If you are looking to explore street photography, a long lens will be one of your best tools.

ISO 640 • 1/2000 sec. • f/2.8 • 200mm lens
Figure 6.25 Try using a long lens to capture more candid portraits.
Chapter 6 Assignments
Depth of field in portraits
Let’s start with something simple. Grab your favorite person and start experimenting with using different aperture settings. Shoot wide open (the widest your lens goes, such as f/3.5 or f/5.6) and then really stopped down (like f/22). Look at the difference in the depth of field and how it plays an important role in placing the attention on your subject. (Make sure you don’t have your subject standing against the background. Give some distance so that there is a good blurring effect of the background at the wide f-stop setting.)
Discovering the qualities of natural light
Pick a nice sunny day and try shooting some portraits in the midday sun. If your subject is willing, have them turn so the sun is in their face. If they are still speaking to you after blinding them, have them turn their back to the sun. Try this with and without the fill flash so you can see the difference. Finally, move them into a completely shaded spot and take a few more.
Picking the right metering method
Find a very dark or light background and place your subject in front of it. Now take a couple of shots, giving a lot of space around your subject for the background to show. Now switch metering modes and use the Exposure Lock feature to get a more accurate reading of your subject. Notice the differences in exposure between the metering methods.
Camera presets for portraits
Have some fun playing with the different presets. Try the one for Portrait as compared to the Standard. Then try out Monochrome and play with the different color filter options to see how they affect skin tones.
Use different focal lengths
If you have a wide-angle zoom lens like the 18–55mm that is often sold as a bundle with many DSLRs, try out the effect of the focal length on people’s faces. Have someone pose for you and then shoot with the lens set to its widest setting and move close to fill the frame. Now zoom in to the longest lens length and move back until you have the person about the same size in the frame. Compare the effects of different focal lengths and see what your most flattering setting will be.
Share your results with the book’s Flickr group!
Join the group here: flickr.com/groups/exposure_fromsnapshotstogreatshots