
Chapter 7. Facebook and the Real World: In-Person Events
Connecting with online pals in the real world is becoming more and more popular. Facebook’s event listings help you find out what’s going on in your own backyard—everything from birthday parties and gallery openings to study sessions and protest marches. And because RSVPing to events lets your Facebook friends see that you’re planning to attend, a tiny get-together can quickly burgeon (“Well, hey, if Bob and Muffy are going, then I’m going!”). This chapter shows you how to find out what events are happening in your area, who’s attending, and how to set up your own events.
Types of Events
Meeting people face-to-face raises privacy issues that don’t exist online. As creepy as someone might be online (leaving weird or threatening notes on your Wall, poking you a hundred times a day, or joining every Group you join), the worst risks you take are annoyance, embarrassment, and the possible filching of some personal data, all of which Chapter 13 helps you prevent. In person, though, that same creepiness could conceivably translate into actual bodily harm. So be extremely careful if you arrange a real-life meeting with someone (or a group of people) you met on Facebook.
To help deal with the privacy issues and safety concerns raised by in-person events, Facebook offers these event types:
Open events. Any Facebook member can read about this kind of event on the event’s profile page and add himself to the guest list. Open events are great for festivals, concerts, and other get-togethers held in public venues. You know an event is open by the RSPV link on its search listing description (Finding New Friends), and by the “This is an open event” message on the Event Type section of the event’s profile.
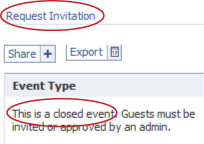
Closed events. Any Facebook member can see a description of the event, including details of when and where it’s held on the event’s profile page. But nobody gets on the guest list—or gets to see the event’s Wall or photos—without an invitation. Anyone can request an invitation, but the event’s administrator gets the final say. Closed events are perfect for club and school meetings. You know an event is closed when you can see details about the event in its search listing description (Finding Existing Events) but there’s no RSVP link. On the event’s profile, you see the Request Invitation link as well as a “closed” description.
Secret events. Only people who receive an invitation (either via Facebook notification or email) can tell that the event exists. Go with this kind of event when you’re planning a business meeting, private party, or intergalatic invasion.
Finding Existing Events
Facebook gives you two ways to find events you might want to attend:
Search for events. You can find events using the same search box you use to look up Facebook members (Finding New Friends).
Check out the events your friends plan to attend. There’s a good chance you’ll be interested in the activities your friends enjoy.
Searching for Events by Name or Subject
If you know the name or subject of the event you’re looking for—or at least a word or two of the name or subject—the easiest way to find it is to search for it directly.
Tip
It probably goes without saying, but for you to be able to look up a karate-related event, the event’s creator has to put the word “karate” in the name of the event or somewhere in the description. (Creating Your Own Events explains how to create your own events.)
To do so:
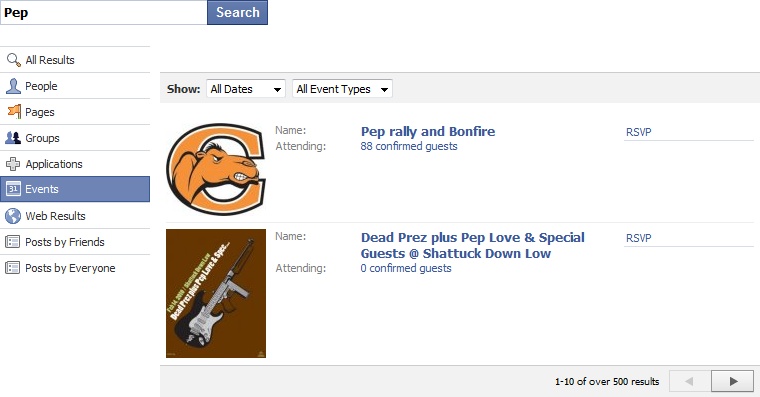
At the top of any Facebook screen, click the Search field, type the name of an event or words you want to search for (such as “Pep”), and then hit Enter.
On the left side of the search results page that appears, click the Events link to see the events Facebook found.
Narrow your search results. You can:
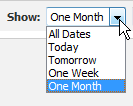
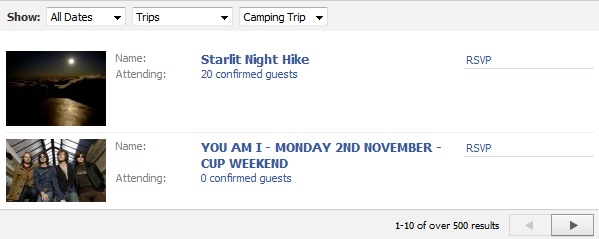
See events scheduled for a particular time frame by clicking the All Dates drop-down list.
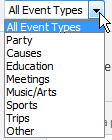
See only certain types of events—like parties, meetings, or school-related functions—by choosing from the All Event Types drop-down list and then, if an additional drop-down list appears, selecting a still more specific kind of event.
In either case, as soon as you choose an item from a drop-down list, Facebook helpfully displays the events that match your selection.
Click the name of an event to see its profile page. The page that appears describes the event in detail and lists confirmed and possible attendees (scroll down to see all the particulars).
Seeing Your Friends’ Events
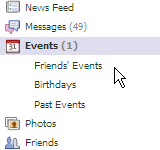
Checking out the events your friends are going to can be illuminating. (“Ralph’s into cross-stitch? No way!“) It might also turn up events that you’re interested in attending. Here’s how: On your Home page, click the Events link. Then, on the left side of the Events page that appears, click the Friends’ Events link and peruse the listings.
RSVPing to an Event
Sure, you could show up at an event without RSVPing first, but that would be rude! It would also mean that you’d miss out on the social networking benefits Facebook offers, because as soon as you RSVP, all your friends can see where you’re headed—which may encourage them to join in the fun.
Note
Depending on how the event’s administrator set up the event (Creating Your Own Events), other folks in the network associated with the event may be able to see that you’re planning to attend.
There are two ways to RSVP to an event:
If you received an invitation, simply respond to it by following the instructions in the email or Facebook notification. You can be invited to any kind of event (open, closed, or secret—see Creating Your Own Events), but the only way to RSVP to a secret event is by responding to an invitation, since you wouldn’t even know about the event if you hadn’t been invited.
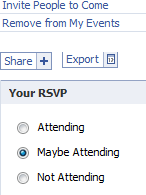
If you weren’t explicitly invited, head either to the event’s listing (Finding Existing Events) and click RSVP, or to its profile page (Seeing Your Friends’ Events) and mouse down to the Your RSVP section. In either case, click either the Attending or Maybe Attending radio button and you’re in. Facebook updates the event’s profile page to show that you’re a confirmed guest, and gives you new options you can use to change your response (to “maybe” if your plans change, for example) or to invite other people. Facebook also adds the event to the Events list on your Events page (which you can see by heading to your Home page and clicking Events).
Note
Whether or not you can add yourself to an event’s guest list, invite other people, see the guest list, write on the event’s Wall, or otherwise interact with an event’s profile page depends on how the event’s administrator set it up (Creating Your Own Events).
Creating Your Own Events
Whether you want to host a product launch party, start a study group at the local coffee shop, or have a community meeting, it’s easy to set up your own events on Facebook.
Note
If an event is closely tied to a Facebook Group you created or that you’ve been made administrator of—you want to set up a monthly face-to-face meeting of your book club, for example—you’ll want to head to your Group’s profile page (Searching for Groups), click Create Group Event, and then follow steps 3–8 below. Doing so tells Facebook that your Group is hosting the event and lets you invite all the Group’s members in one fell swoop by turning on the checkbox next to “Invite Members of the host group [your Group’s name]” that appears on the “Step 3: Invite Friends” tab (see step 8).
Here’s what you do:
On the Events page that appears, click the “Create an Event” button.
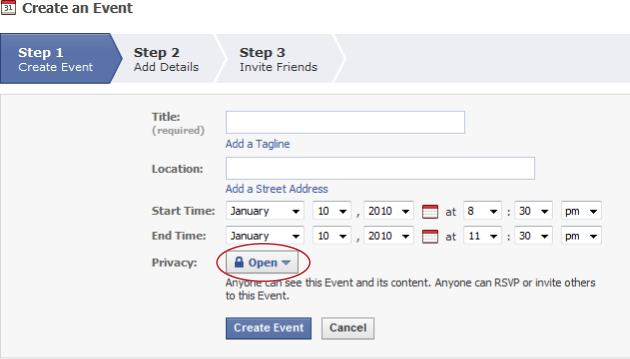
On the “Step 1: Create Event” page, fill out as many of the fields as possible. You have to fill out some fields—like the event’s name—but you should fill in as many of the other fields as you can. Doing so makes events easier for people to find, because they can search on every word you add. It also encourages people to RSVP, since the more people know about an event (and the better you make it sound), the more likely they are to attend.
Decide how open you want your event to be. Facebook assumes you want to plan an open event that everyone on the site can view and attend, and that all attendees can contribute to by uploading photos, videos, links, and Wall posts. If that’s fine with you—for example, if your event is one that’s open to the public and is listed in the local newspapers, or is an attend-in-spirit-only kind of event—you don’t have to do a thing. Otherwise, you need to click the Privacy drop-down list and choose either Closed or Secret.
Note
For most face-to-face events, you’ll want to choose Closed so you don’t get a bunch of riffraff showing up. If you have a very specific, finite guest list and the event is private (such as a business meeting or intimate birthday gathering), choose Secret; that way, you can invite just the folks on your list and not have to worry about strangers requesting invitations.
Click the Create Event button. Facebook posts a bare-bones version of your event on the site that people can find in searches (unless you made the event secret).
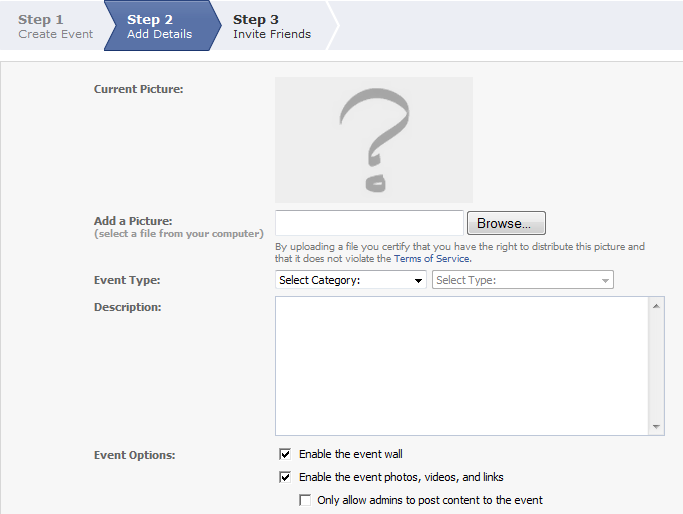
On the “Step 2: Add Details” page that appears, browse for the image file you want to appear on your event listing, and then click Upload Picture. Technically, this step is optional, but an appropriate and clever photo, drawing, or logo will make your event’s listing a lot more appealing.
Add as much additional info as you want, tweak a few settings, and then click the “Save and Continue” button. You don’t have to go hog wild, but adding a description and choosing an event type goes a long way toward helping folks find your event.
Invite some guests. Facebook lists your friends and Friend Lists (Organizing Your Friends) on the “Step 3: Invite Friends” page that appears, so all you need to do is choose who you want to invite and then click Send Invitations.
Note
Facebook events are supposed to be for your friends (or for the members of Groups you’re in charge of—see Creating a Group). So you can’t invite Facebook members to events unless they’re your friends—but you can invite pals who aren’t yet Facebook members. To do so, on the “Step 3: Invite Friends” page, head to the “Invite People via Email” field and type in email addresses separated by commas, and then click Send Invitations.
You can change your event after you create it. First, display the event’s profile (on your Home page, click the Events link and then, when the list of your events appears, click the name of the event you want to change). Then, on the right side of the event’s profile page, click one of the options, such as “Edit Event”, “Invite People to Come”, or “Cancel This Event”.