Chapter 2. Joining a Network
What Facebook does best is track connections between people who’ve joined the site. The easiest way to make a bunch of Facebook connections in one fell swoop is to join a network—a group of people who have work or school in common: in other words, fellow employees at a company or graduates and current attendees of a particular school. Joining a network takes a lot of the grunt work out of finding interesting real-world groups and events, shopping for local stuff, and contacting real-life friends and coworkers. You can’t just join any ol’ network, though—there are some restrictions, as this chapter explains. And if you want to create a new network, you can suggest it to Facebook. Read on for the full scoop.
Note
Facebook used to let you join regional networks based on where you live, but the company recently decided that these networks weren’t worth the trouble and pulled them. After all, it’s unlikely you’re friends with everyone in your town just because they happen to live in your town. So no more regional networks on Facebook.
How Networks Work
A Facebook network is simply a group of people who work or go to school (or who used to work or go to school) in the same place. You’ll probably want to join at least one network as soon as you register, because until you do, the only folks whose profiles you can see are those you specifically tell Facebook you want to be friends with (see Chapter 3).
Note
You can’t see a network member’s profile until you join that network, but you can see a few public details, such as the member’s profile pictures and friends.
When you join a network, two things happen:
You get immediate access to the Facebook profiles of all fellow network members, as well as access to the network’s Groups, events, market listings, and other goodies. There are a few exceptions: Some Facebook members choose to hide their profiles, and some Groups and events are restricted (see Chapter 13). But you still get access to a mountain of dishy details—all of which are potentially useful and interesting to you because you have something big in common with all the other network members: the school you go (or went) to, or the company you work (or worked) for.
Note
Another way to home in on people who share a common interest (such as Oprah fans, marathon runners, or needle felters) is by creating or joining a Facebook Group. See Chapter 6 for the skinny on Groups.
Everybody else in the network can look up your profile information—including a running list of all the things you’ve been doing in Facebook. Network members can also see your hometown, your political views, your contact email address, and everything else you added to your profile. And by viewing the Mini Feed (a running list of your—and, optionally, your friends'—activities on Facebook) that automatically shows up on your profile, they can also see that an hour ago you uploaded a picture, half an hour ago you joined a Group, and two minutes ago someone wished you Happy Birthday.
Tip
It’s one thing to let everyone in your network see the details you specifically added to your profile; it’s another to let them peek over your virtual shoulder as you go about your business on Facebook. Do you really want the whole world to know that you changed your religious views 12 times in the last 2 hours or left your online knitting group in a huff? To learn how to keep network members you haven’t specifically “friended” from being able to view your Mini Feed, see Adjusting Your Privacy Settings.
Viewing the Networks You’re Already On
Maybe you’ve already joined a network. Maybe you can’t remember if you have or you haven’t. To see which networks you’ve already joined:
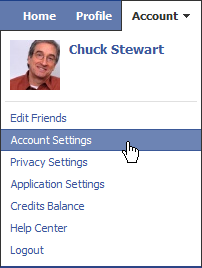
At the top right of any Facebook page, click the Account link and, in the drop-down list that appears, click Account Settings.
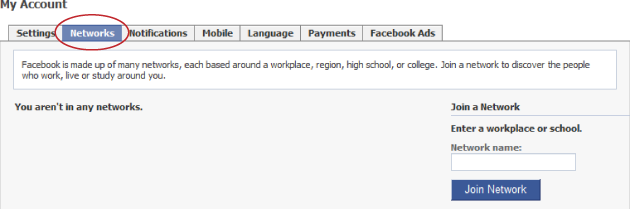
On the My Account screen that appears, click the Networks tab. The tab that appears lists all the networks you belong to. To see who else is in a particular network, scroll down to the network you’re interested in and click the “XYZ people” link.

Joining a Network
When you register, Facebook automatically adds you to the not-super-useful Global network, which gives you access to globally organized groups and events. But you definitely want to join at least one more network. Technically, you can belong to as many as five different networks, but if you’re like most people, two or three (a network for your work, your school, and maybe that fresh-out-of-college gig you left a few years back) fills the bill.
You can’t just join any old network—you need a valid email address that matches the workplace, college, or high school network you want to join. For example, if your email address is [email protected], Facebook lets you join the IBM workplace network. If your email address is [email protected], you can join the Arizona State University college network.
Fortunately, you’re not limited to one email address (and therefore one network). You can join multiple networks as long as you have multiple valid email addresses—for example, an address from the school where you got your undergrad degree, one from the school where you earned your master’s, and one from your employer. To join multiple networks, follow the steps in this section, once through for each email address.
Note
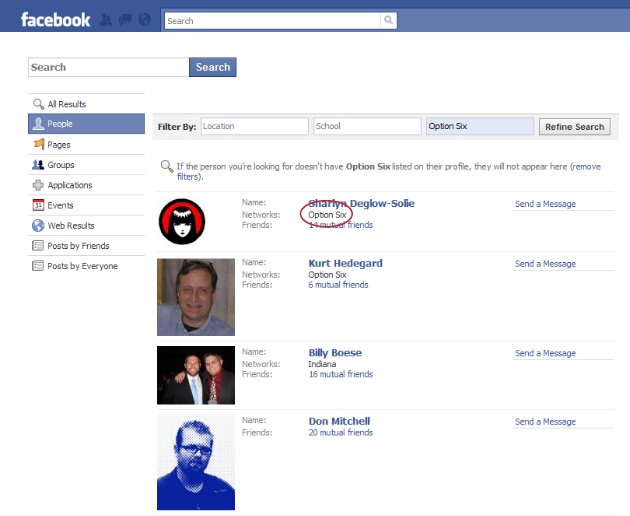
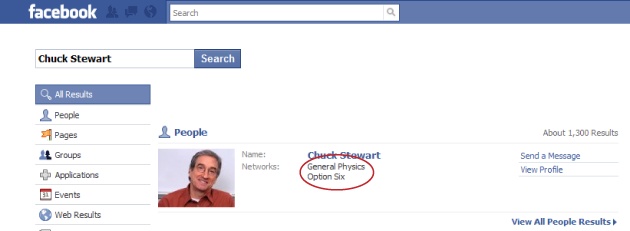
If you join more than one network, you need to designate one as your primary network, which is the one that appears below your name when folks search for you. Because it represents the group you most closely identify with, it affects your search results (all other things being equal, Groups, events, and Facebook members in your primary network appear in your search results first) and also affects the ads you see on the site.
At the top right of any Facebook page, click the Account link and, in the drop-down list that appears, click Account Settings.
On the My Account page that appears, click the Networks tab.
In the “Network name” field, start typing the name of a school or company and, when Facebook displays the network you want, click to select it (you may have to click through the alphabetical list to find the one you want). If the school or company name is really long, you can save yourself a little typing by entering the city where the school or company is located instead; when you do, Facebook pops up a helpful list of suggestions.
Note
High school networks don’t work the same as other Facebook networks. The biggest difference is that you can’t join a high school network using the steps in this list. Instead, when you register for Facebook—using either a valid high school email address or by responding to an invitation from a Facebook member who goes to your high school—Facebook automatically plops you in the correct high school network. If you’re not using a valid high school email address, you have to be confirmed by a handful of friends—other Facebook network members who can vouch that they know you and that you attend the high school that matches your email address—before Facebook will let you in. And you can only switch high school networks once every 6 months.
Depending on whether you’re joining a school or company network, type in your work email address or your school status (undergrad, grad, or faculty), school year (when you graduated), and school email. You need to have a company-issued email address to join a company’s network, and a school-issued email address to join a school’s network.
Tip
If you’ve already graduated, no sweat: Alumni email addresses work, too. If you don’t have one, contact your college to see if you can wrangle one. And if you don’t see your company or school listed, you can ask Facebook to add it to its network list (see Suggesting a New Network).
Click the Join Network button. If the email address you typed in step 4 matches the company or school you chose, Facebook sends a confirmation message to that address. (If the address doesn’t match, Facebook displays an error message.)
Open your favorite email program, find the network confirmation message Facebook sent, and follow the instructions in the email to confirm that you are who you say you are and that you really do want to join the network. Now when people search for you on Facebook, your network appears under your name.
If you like, join additional networks (you can have up to five total). To do so, simply follow steps 3–6 for each network.
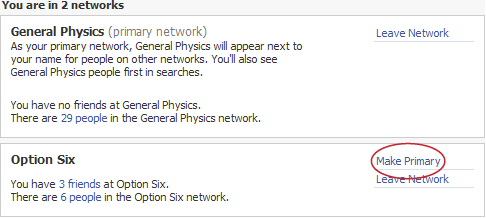
If you join more than one network, tell Facebook which one you want to be your primary network. Facebook automatically earmarks the first network you joined as your primary network, which means that when folks search for you on Facebook, they see this network listed under your name. (Your choice of primary network also affects your search results, because Facebook sorts your search results starting with the ones that match your primary network.) If the first network you joined isn’t the one you feel is most “you,” change your primary network. To do so: On the Networks tab of the My Account page, find the network you want to be your primary one and click Make Primary. Then, when Facebook kicks up a confirmation box, click the Make Primary button.
Leaving a Network
If the CEO of your company gets hauled into court on fraud charges and you’re suddenly not so thrilled about people knowing where you work, you might want to drop your work network. You can leave any (or all) of the networks you join; just be aware that when you do, you forfeit the right to see your fellow network members’ profile details and participate in network-related events and Groups. To leave a network: On the Networks tab of the My Account page, scroll down to the network you want to jettison and click the Leave Network link. In the confirmation box that appears, click the Leave Network button. You’re outta there!
Suggesting a New Network
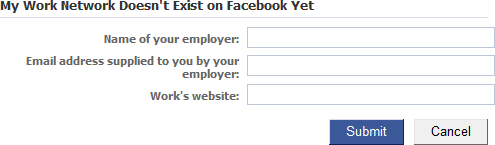
Maybe you work for a small company or went to school in a tiny backwater town. If you check Facebook’s network listings and don’t see a network that describes where you work or go to school, you can ask Facebook to add your school or company to its network listings. Just follow these steps:
Point your web browser to one of the following:
For work networks: http://www.facebook.com/help/contact.php?show_form=add_work
For college networks: http://www.facebook.com/help/contact.php?show_form=add_college
For high school networks: http://www.facebook.com/help/contact.php?show_form=hs_add
Tip
To save yourself from typing all that gobbledygook, head to this book’s Missing CD page at www.missingmanuals.com, where you’ll find a clickable list of all the links mentioned in this book.
Fill out the fields that appear and, when you finish, click Submit. Because actual people need to approve your request, expect to wait a few days—or even weeks—for Facebook to get back to you. There’s no guarantee they’ll approve your request, but if your network suggestion is reasonable, you’ll probably get a thumbs-up.