
In a virtual world that has a big map, we need to save the current position of the avatar so that we can resume the position next time when we log in again. We can access the database by using server-side extension.
There are several ways to perform the MySQL tasks. One easy way is to use the PhpMyAdmin, which is a web-based MySQL admin panel provided by the web server bundles.
Windows users can launch the PhpMyAdmin from the taskbar Wamp2 | phpMyAdmin.
For Mac OSX:
- Launch MAMP.
- Go to
http://localhost/MAMPin the web browser. - Click on the PhpMyAdmin link.
Linux users can go to http://localhost/path_to_phpMyAdmin in the web browser.
It is optional to create a database before creating our first table. This database will hold all the tables of our virtual world. We create a database name flash_virtual_world. In the newly created database, we create a new table named avatar with seven fields in PhpMyAdmin.

We are going to store following fields into the avatar table.
|
Field name |
Type |
Description |
|---|---|---|
|
|
|
A unique ID that is auto incremented. |
|
|
|
A unique name of the avatar. |
|
|
|
The color of the avatar. |
|
|
|
The style of the head. |
|
|
|
The style of the body. |
|
|
|
The isometric position x of the avatar. |
|
|
|
The isometric position y of the avatar. |
Note
We can find more step-by-step tutorials on using PhpMyAdmin in following links:
After setting up the database, we need to use extension as a bridge connection between the Flash and the database. In previous chapters, we did not create any dedicated zone for the examples but it is time to create a dedicated zone for the virtual world.
Open the config.xml which is located in Server folder in the SmartFoxServer installation directory. Right after the <Zones>, we create a new zone tag with database configuration.
We also associate the zone extension to virtualworld.as, which is placed inside the sfsExtensions under Server in the SmartFoxServer installation directory.
<Zone name="virtualworld" customLogin="false" buddyList="20">
<Rooms>
<Room name="Lobby" maxUsers="50" isPrivate="false" isTemp="false" autoJoin="true" />
</Rooms>
<Extensions>
<extension name="virtualWorld" className="virtualworld.as" type="script" />
</Extensions>
<DatabaseManager active="true">
<Driver>org.gjt.mm.mysql.Driver</Driver>
<ConnectionString>jdbc:mysql://127.0.0.1:3306/flash_ virtual_world</ConnectionString>
<UserName>root</UserName>
<Password>password of the MySQL user</Password>
<TestSQL><![CDATA[SELECT NOW()]]></TestSQL>
<MaxActive>10</MaxActive>
<MaxIdle>10</MaxIdle>
<OnExhaustedPool>fail</OnExhaustedPool>
<BlockTime>5000</BlockTime>
</DatabaseManager>
</Zone>
This is our first time for coding the server-side extension. We will walkthrough the steps in detail. The extension acts as a bridge between the Flash client and the database server that handles requests from clients and returns the query results from database.
The syntax of server-side extension is like ActionScript 1.0. It is actually Java on the backend so there are some tricks to keep in mind during the development.
We need the following database manager to hold the reference of the database connection which depends on the database configuration in config.xml file:
var dbase;
The init function is called once the extension is loaded successfully. The extension will be loaded on server start up or manually restarted in the server admin tool.
function init(){
dbase = _server.getDatabaseManager();
}
The destroy function is called when the extension is being destroyed when the server is shutting down or restarting the extension manually. We haven't used it yet but it is useful to save server-side variables to the database before shutting down or restarting the server.
function destroy(){}
The sendResponseBack function wraps the commonly used response codes for reusability purposes. Almost every request from clients will call these three lines to send the result back.
function sendResponseBack(obj, user){
var userList = [];
userList.push(user);
_server.sendResponse(obj,-1,null,userList,"json");
}
The handleRequest function is called when the client send an extension message to the extension. What it is doing here is calling another function according to the command. For example, if the command from the extension message is getMyLastPosition, it will then call the hgetMyLastPosition function which we defined to get the position from database.
function handleRequest(cmd, params, user, fromRoom){
var str = "h"+cmd;
var target = eval(str);
if (target != undefined){
target(cmd, params, user, fromRoom)
}
}
Note
We seldom define type for the variable in server-side ActionScript file. Even the official examples from SmartFoxServer do not contain type declaration in server-side ActionScript. It may because all the server-side extensions run in Java environment. The ActionScript syntax we code will finally be parsed into Java execution. Therefore, the real type of the objects in the extensions are not ActionScript type. So, we do not declare the type.
For every returning data from database, it is default in Java type instead of ActionScript type. This sounds strange but it is one of the powerful server-side extension features of SmartFoxServer. The server is Java runtime but it supports the extensions that are written in Java, Python, or ActionScript. This greatly helps Flash developers who are not familiar with Java programming and can use ActionScript-like syntax to code the extension into Java runtime. The pay off is that sometimes we need to apply some tricks to make it work perfectly. For instance, we need to convert the Java type to ActionScript object by the following function.
function getASObj(row){
var map = row.getDataAsMap();
var mapKeys = map.keySet();
var mapKeysArray = mapKeys.toArray();
var asObj = new Object();
for(var i = 0; i < mapKeysArray.length; i++){
var d = map.get(mapKeysArray[i]);
// force the value to cast into ActionScript string.
asObj[mapKeysArray[i]] = "" + d;
}
return asObj;
}
The following function queries the database and prepares the ActionScript results for other functions to use:
function getResultArray(sql, list){
var queryRes = dbase.executeQuery(sql);
if (queryRes == null){
return 0;
}
for(var i=0; i <queryRes.size(); i++){
var tempRow = queryRes.get(i);
var asObj = getASObj(tempRow);
list.push(asObj);
}
return queryRes.size();
}
We will access the position according to the username. That means we can load our last position by using the same username. This is just a simple identification. A more complex login checking process can be further implemented but for now, we will stick to the easier one for the first try on server-side extension.
Next, we create two extension functions to access the position.
The first one is to handle the saved position request. It will search if there exists a record in the database. Then it will either update an existing one or create a new entry with the latest position.
function hsavePosition(cmd, params, user, fromRoom){
var list = [];
var sql = "SELECT * FROM avatar WHERE avatar_name='"+user. getName()+"'";
var count = getResultArray(sql,list);
if (count>0){
sql = "UPDATE avatar SET pos_x="+params.posx+", pos_y="+params.posy+" WHERE avatar_name='"+user.getName()+"'";
}else{
sql = "INSERT INTO avatar(`avatar_name`,`pos_x`,`pos_y`) VALUES('"+user.getName()+"',"+params.posx+","+params.posy+")";
}
var success = dbase.executeCommand(sql);
}
The other function is to get last position according to the username from the database. It returns the position to the client.
function hgetPosition(cmd, params, user, fromRoom) {
var res = {};
res._cmd = cmd;
var list = [];
var sql = "SELECT * FROM avatar WHERE avatar_name='"+user.getName()+"'";
getResultArray(sql,list);
if (list[0] != undefined){
res.posx = list[0].pos_x;
res.posy = list[0].pos_y;
}
sendResponseBack(res,user);
}
There are two functions to query the database within server-side extension. One is executeCommand and the other is executeQuery.
When fetching the database by using SELECT statement, we use executeQuery. When accessing the database with commands such as INSERT or UPDATE, we use executeCommand instead.
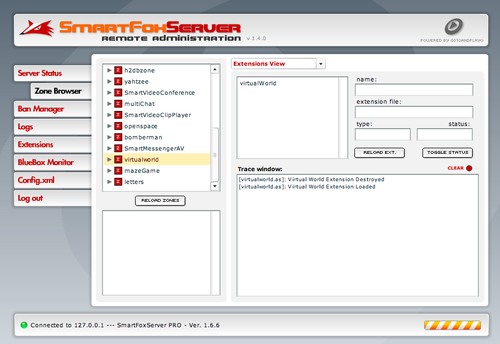
After modifying the server-side extension, we need to either reload the extension in admin tool or restart the SmartFoxServer. The extension in the admin tool locates in the Zone Browser | virtualworld | Extension View. Click on the RELOAD EXT. button to reload the extension.
The method to call an extension function in client-side is to send an extension message is this format:
_sfs.sendXtMessage(extension_name, command, passing_parameters, string_format);
As configured in the config.xml, our extension_name is virtualWorld; the command will be either savePosition or getPosition. The passing_parameters is an object containing our latest position and we will use JSON as the string format of the message.
We will save the last position after the avatar stops walking.
public function stopWalk():void {
var params:Object = {};
params.posx = this.isoPosition.x;
params.posy = this.isoPosition.y;
SmartFox.sfs.sendXtMessage("virtualWorld", "savePosition", params, "json");
this.playAnimation("idle");
_isWalking = false;
}
And we need to get the updated position in the initial process of the virtual world. Previously, we initialized the World class after joining a room. Now we initialize it after getting the last position from the server response.
private function onJoinRoom(e:SFSEvent):void {
/* handling avatar styling and color */
...
/* get avatar position */
var params:Object = {};
SmartFox.sfs.sendXtMessage("virtualWorld", "getPosition", params, "json");
}
In order to get the response of the extension message, we need to listen to the onExtensionResponse event in document class. When the clients receive the extension response, it will check for existence of the latest position and initiate the world and map. This function will also be added to the document class.
private function onExtensionResponse(e:SFSEvent):void {
var data:Object = e.params.dataObj;
if (data.posx != undefined) {
Myself.instance.isoPosX = data.posx;
Myself.instance.isoPosY = data.posy;
}
world = new World();
addChild(world);
}
The virtual world initialization now becomes:

Debugging the code with both Flash client and server-side extension can sometimes be difficult. Here are some tips when facing problems in development:
- Always check the server output log when reloading the extension. If the extension contains syntax errors, it will immediately pop up error message when reloaded.
- We can use trace in server-side extension and the trace message will go to the log in server-side terminal.
- As there are too many places to monitor and compile the code, sometimes it will be confusing. We may forget to reload the extension or look at the wrong place for trace output after coding for hours, and then we think that the bug still exists after modifying the code several times and at last realize that we are debugging in the wrong place.