
By the end of this chapter, you will be able to use and contrast approaches for sharing state and holding global state in a Vue.js application. To this end, you will use a shared ancestor to hold state required by components that do not have a parent-child relationship (sibling components). You will also gain familiarity with an event bus in the context of a Vue.js application. As we proceed, you will understand how and when to leverage Vuex for state management, and its strengths and weaknesses when compared to other solutions such as event buses or Redux. Towards the end of the chapter, you will become comfortable with selecting which parts of state should be stored globally and locally and how to combine them to build a scalable and performant Vue.js application.
In this chapter, we will look at the state of Vue.js state management, from local state to component-based state sharing patterns to more advanced concepts such as leveraging event buses or global state management solutions like Vuex.
Introduction
In this chapter, we'll explore the concept of state management in Vue.
In previous chapters, we have seen how to use local state and props to hold state and share it in a parent-child component hierarchy.
We will begin by showing how to leverage state, props, and events to share state between components that are not in a parent-child configuration. These types of components are called siblings.

Figure 8.1: Child 1 and Child 2 are "sibling" components
Throughout the chapter, we will be building a profile card generator app that demonstrates how state flows down the component tree as props in an application, and how updates are propagated back up using events, event buses, and store updates.
Given that we want to build a profile card generator, we can break the application down into three sections: a Header, where we will have global controls and display the title of the page; a ProfileForm, where we will capture data; and finally, a ProfileDisplay, where we will display the profile card.

Figure 8.2: Representation of a profile card application component tree
We have now seen how to reason about a component tree and how our application can be structured in a component tree.
Holding State in a Common Ancestor Component
To hold state only with component state and props and update it with events, we will store it in the nearest common ancestor component.
State is propagated only through props and is updated only through events. In this case, all the state will live in a shared ancestor of the components that require state. The App component, since it is the root component, is a good default for holding shared state.

Figure 8.3: Common ancestor component holds state with props and event propagation
To change the state, a component needs to emit an event up to the component holding state (the shared ancestor). The shared ancestor needs to update state according to the event data and type. This in turn causes a re-render, during which the ancestor component passes updated props to the component reading the state.
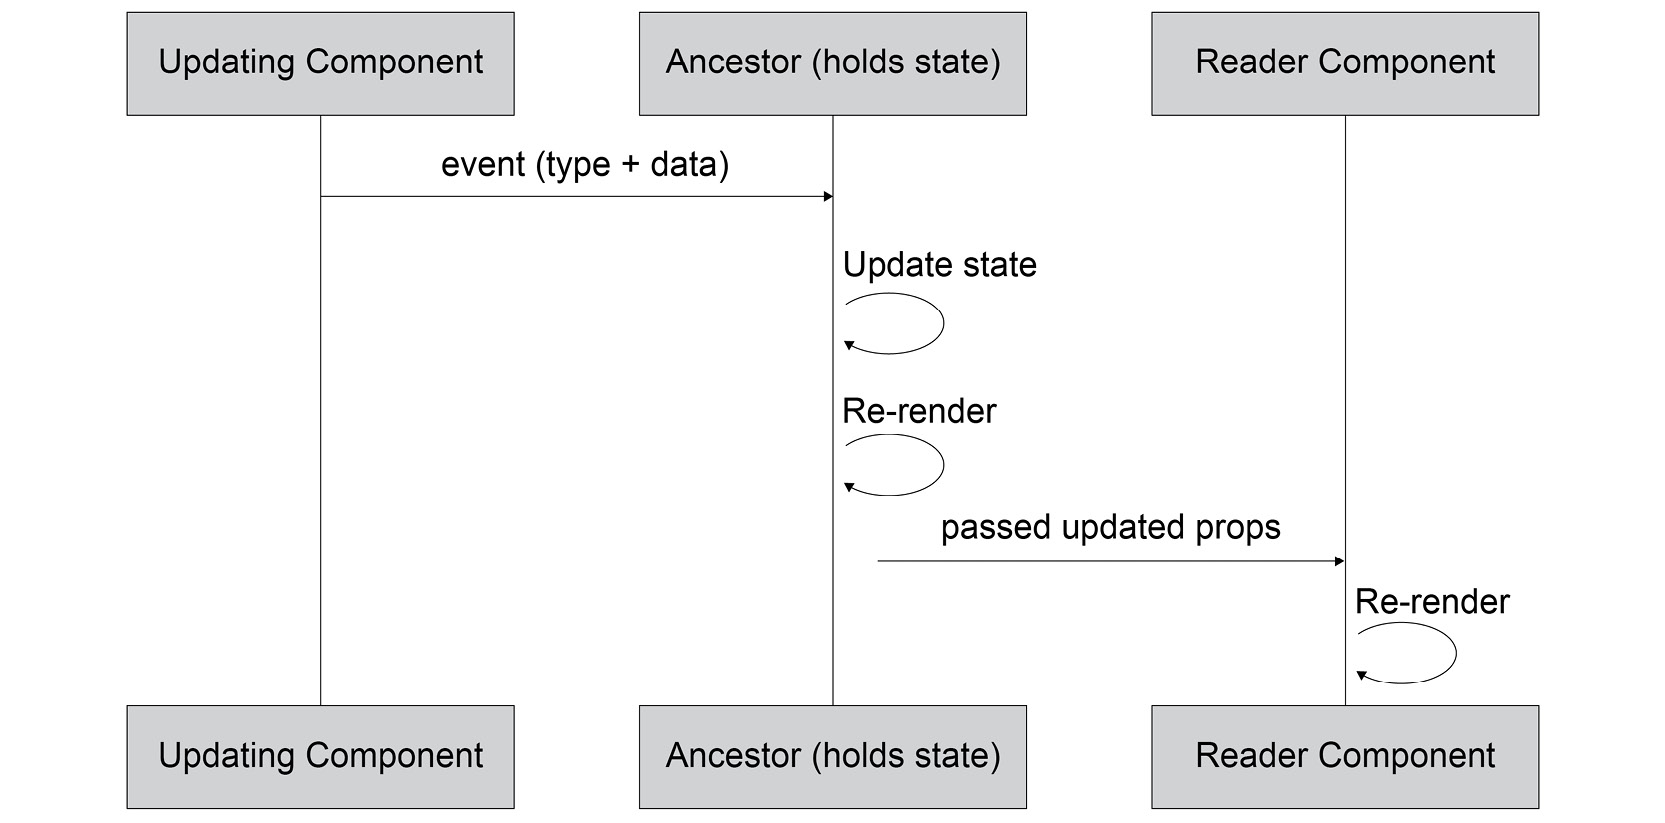
Figure 8.4: Updating a sibling component when the ancestor holds state
To build a header, we need to create an AppHeader component in the AppHeader.vue file, which will contain a template and an h2 heading with TailwindCSS classes:
<template>
<header class="w-full block p-4 border-b bg-blue-300 border-gray-700">
<h2 class="text-xl text-gray-800">Profile Card Generator</h2>
</header>
</template>
We will then import it, register it, and render it in the App.vue file:
<template>
<div id="app">
<AppHeader />
</div>
</template>
<script>
import AppHeader from './components/AppHeader.vue'
export default {
components: {
AppHeader
}
}
</script>
The output of the preceding code will be as follows:

Figure 8.5: AppHeader displayed in the profile card generator
We will similarly create an AppProfileForm file:
<template>
<section class="md:w-2/3 h-64 bg-red-200 flex">
<!-- Inputs -->
</section>
</template>
We will create an AppProfileDisplay file with the following initial content:
<template>
<section class="md:w-1/3 h-64 bg-blue-200 flex">
<!-- Profile Card -->
</section>
</template>
Both of our containers (AppProfileForm and AppProfileDisplay) can now be imported and rendered in App:
<template>
<!-- rest of template, including AppHeader -->
<div class="flex flex-col md:flex-row">
<AppProfileForm />
<AppProfileDisplay />
</div>
<!-- rest of template -->
</template>
<script>
// other imports
import AppProfileForm from './components/AppProfileForm.vue'
import AppProfileDisplay from './components/AppProfileDisplay.vue'
export default {
components: {
// other component definitions
AppProfileForm,
AppProfileDisplay,
}
}
</script>
The output of the preceding code will be as follows:

Figure 8.6: App skeleton with AppHeader, AppProfileForm, and AppProfileDisplay
To add a form field, in this case name, we will start by adding an input to AppProfileForm:
<template>
<section class="md:w-2/3 h-64 bg-red-200 flex flex-col p-12 items-center">
<!-- Inputs -->
<div class="flex flex-col">
<label class="flex text-gray-800 mb-2" for="name">Name
</label>
<input
id="name"
type="text"
name="name"
class="border-2 border-solid border-blue-200 rounded px-2 py-1"
/>
</div>
</section>
</template>
The preceding code will display as follows:
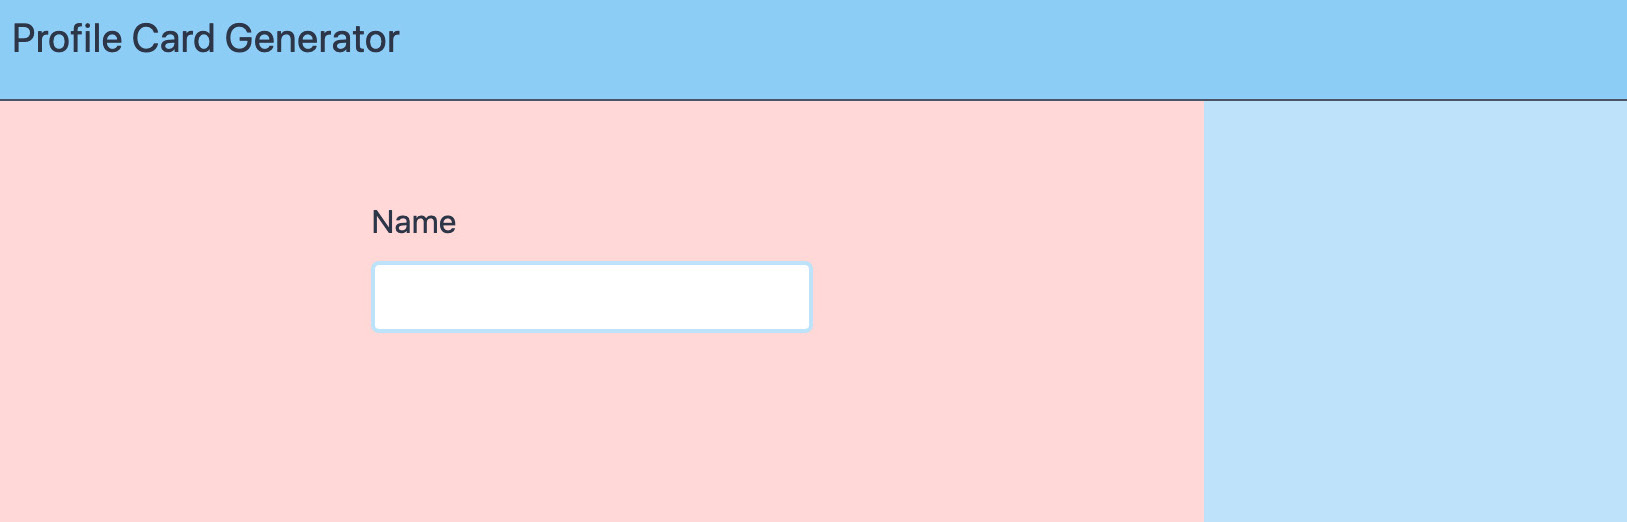
Figure 8.7: AppProfileForm with a name field and label
To keep track of the name input data, we will add a two-way binding to it using v-model and set a name property in the component's data initializer:
<template>
<!-- rest of the template -->
<input
id="name"
type="text"
name="name"
class="border-2 border-solid border-blue-200 rounded px-2 py-1"
v-model="name"
/>
<!-- rest of the template -->
</template>
<script>
export default {
data() {
return {
name: '',
}
}
}
</script>
We will also need a submit button that, on click, sends the form data to the parent by emitting a submit event with the form's contents:
<template>
<!-- rest of template -->
<div class="flex flex-row mt-12">
<button type="submit" @click="submitForm()">Submit</button>
</div>
<!-- rest of template -->
</template>
<script>
export default {
// rest of component
methods: {
submitForm() {
this.$emit('submit', {
name: this.name
})
}
}
}
</script>
This will display as follows:

Figure 8.8: AppProfileForm with a wired-up submit button
The next step is to store the form's state in the App component. It is a good candidate for storing form state since it is a common ancestor to AppProfileForm and AppProfileDisplay.
To begin with, we will need a formData attribute returned from data(). We will also need a way to update formData. Hence, we will add an update(formData) method:
<script>
export default {
// rest of component
data() {
return {
formData: {}
}
},
methods: {
update(formData) {
this.formData = formData
}
}
// rest of component
}
</script>
Next, we need to bind update() to the submit event emitted by AppProfileForm. We will do this using the @submit shorthand and with the magic event object notation as update($event):
<template>
<!-- rest of template -->
<AppProfileForm @submit="update($event)" />
<!-- rest of template -->
</template>
To display the name inside of AppProfileDisplay, we will need to add formData as a prop:
<script>
export default {
props: {
formData: {
type: Object,
default() {
return {}
}
}
}
}
</script>
We will also need to display the name using formData.name. We will add a p-12 class to the container to improve the appearance of the component:
<template>
<section class="md:w-1/3 h-64 bg-blue-200 flex p-12">
<!-- Profile Card -->
<h3 class="font-bold font-lg">{{ formData.name }}</h3>
</section>
</template>
Finally, App needs to pass formData to AppProfileDisplay as a prop:
<template>
<!-- rest of template -->
<AppProfileDisplay :form-data="formData" />
<!-- rest of template -->
</template>
We are now able to update the name on the form. When you click on the Submit button, it will show the name in the profile card display as follows:

Figure 8.9: App storing state, passing as props to AppProfileDisplay
We have now seen how to store shared state on the App component and how to update it from the AppProfileForm and display it in AppProfileDisplay.
In the next topic, we will see how to add an additional field to the profile card generator.
Exercise 8.01: Adding an Occupation Field to the Profile Card Generator
Following on from the example of storing the name shared state, another field that would be interesting to capture in a profile card is the occupation of the individual. To this end, we will add an occupation field to AppProfileForm to capture this extra piece of state, and we'll display it in AppProfileDisplay.
To access the code files for this exercise, refer to https://packt.live/32VUbuH.
- The first place to start is by adding the new occupation field to src/components/AppProfileForm. We'll also take this opportunity to get rid of the h-64 and bg-red-200 classes from the section element (if they're present), which will mean the form displays without a background and without a set height:
<template>
<section class="md:w-2/3 flex flex-col p-12 items-center">
<!-- rest of template -->
<div class="flex flex-col mt-2">
<label class="flex text-gray-800 mb-2" for="occupation">Occupation</label>
<input
id="occupation"
type="text"
name="occupation"
class="border-2 border-solid border-blue-200 rounded px-2 py-1"
/>
</div>
<!-- rest of template -->
</section>
</template>
The output of the preceding code will be as follows:
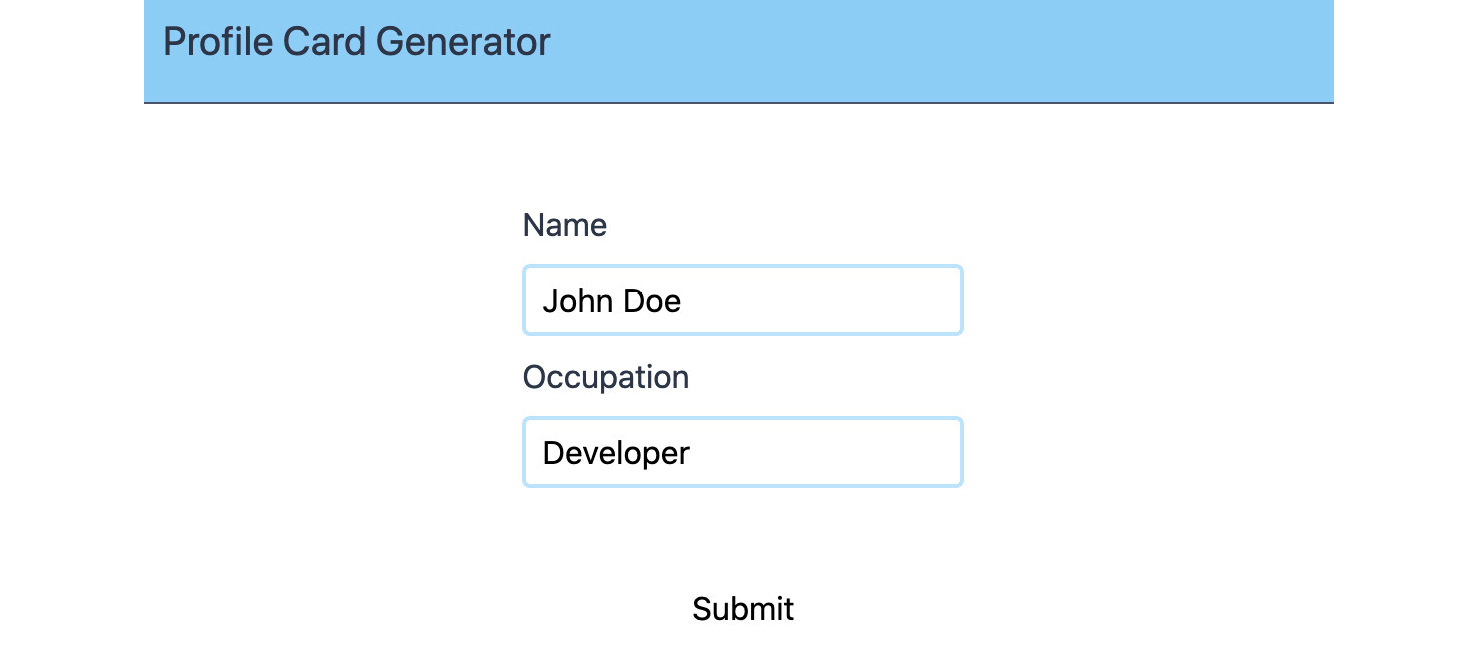
Figure 8.10: AppProfileForm with the new Occupation field
- To track the value of occupation with a two-way data binding, we will add a new property to the output of the data() property:
<script>
export default {
// rest of component
data() {
return {
// other data properties
occupation: '',
}
},
// rest of component
}
- We will now apply a two-way data binding from the occupation reactive data property to the occupation input using v-model:
<template>
<!-- rest of template -->
<input
id="occupation"
type="text"
name="occupation"
v-model="occupation"
class="border-2 border-solid border-blue-200 rounded px-2 py-1"
/>
<!-- rest of template -->
</template>
- For the occupation value to be transmitted when submit is clicked, we will need to add it to the submitForm method as a property of the submit event payload:
<script>
export default {
// rest of component
methods: {
submitForm() {
this.$emit('submit', {
// rest of event payload
occupation: this.occupation
})
}
}
}
</script>
- The final step of adding this field is to display it in the AppProfileDisplay component. We add a paragraph with a couple of styling classes. We'll also take this opportunity to remove the h-64 and bg-blue-200 classes from the container (if they are present):
<template>
<section class="md:w-1/3 flex flex-col p-12">
<!-- rest of template -->
<p class="mt-2">{{ formData.occupation }}</p>
</section>
</template>
Our browser should look as follows:

Figure 8.11: AppProfileForm
As we have just seen, adding a new field using the common ancestor to manage state is a case of passing the data up in an event and back down in the props to the reading component.
We will now see how we can reset the form and profile display with a Clear button.
Exercise 8.02: Adding a Clear Button to the Profile Card Generator
When creating a new profile with our application, it is useful to be able to reset the profile. To this end, we will add a Clear button.
A Clear button should reset the data in the form but also in AppProfileDisplay. To access the code files for this exercise, refer to https://packt.live/2INsE7R.
Now let's look at the steps to perform this exercise:
- We want a Clear button to be displayed. We will take this opportunity to improve the styling of both the Clear and Submit buttons (in src/components/AppProfileForm.vue):
<template>
<!-- rest of template -->
<div class="w-1/2 flex md:flex-row mt-12">
<button
class="flex md:w-1/2 justify-center"
type="button"
>
Clear
</button>
<button
class="flex md:w-1/2 justify-center"
type="submit"
@click="submitForm()"
>
Submit
</button>
</div>
<!-- rest of template -->
</template>
- To clear the form, we need to reset the name and occupation fields. We can create a clear method that will do this (in src/components/AppProfileForm.vue):
<script>
export default {
// rest of the component
methods: {
// other methods
clear() {
this.name = ''
this.occupation = ''
}
}
// rest of the component
}
- We want to bind the clear method to click events on the Clear button to reset the form (in src/components/AppProfileForm.vue):
<template>
<!-- rest of template -->
<button
class="flex md:w-1/2 justify-center"
type="button"
@click="clear()"
>
Clear
</button>
<!-- rest of template -->
</template>
Thus, we can now enter data into the form and submit it as per the following screenshot:
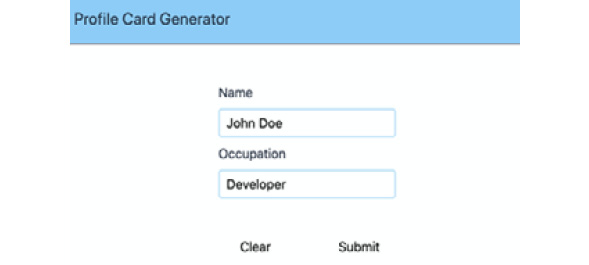
Figure 8.12: AppProfileForm with Name and Occupation fields filled in
On clicking the Submit button, it will propagate data to AppProfileDisplay as follows:

Figure 8.13: AppProfileForm and AppProfileDisplay with data filled in and submitted with a Clear button
Unfortunately, AppProfileDisplay still has stale data, as shown in the following screenshot:
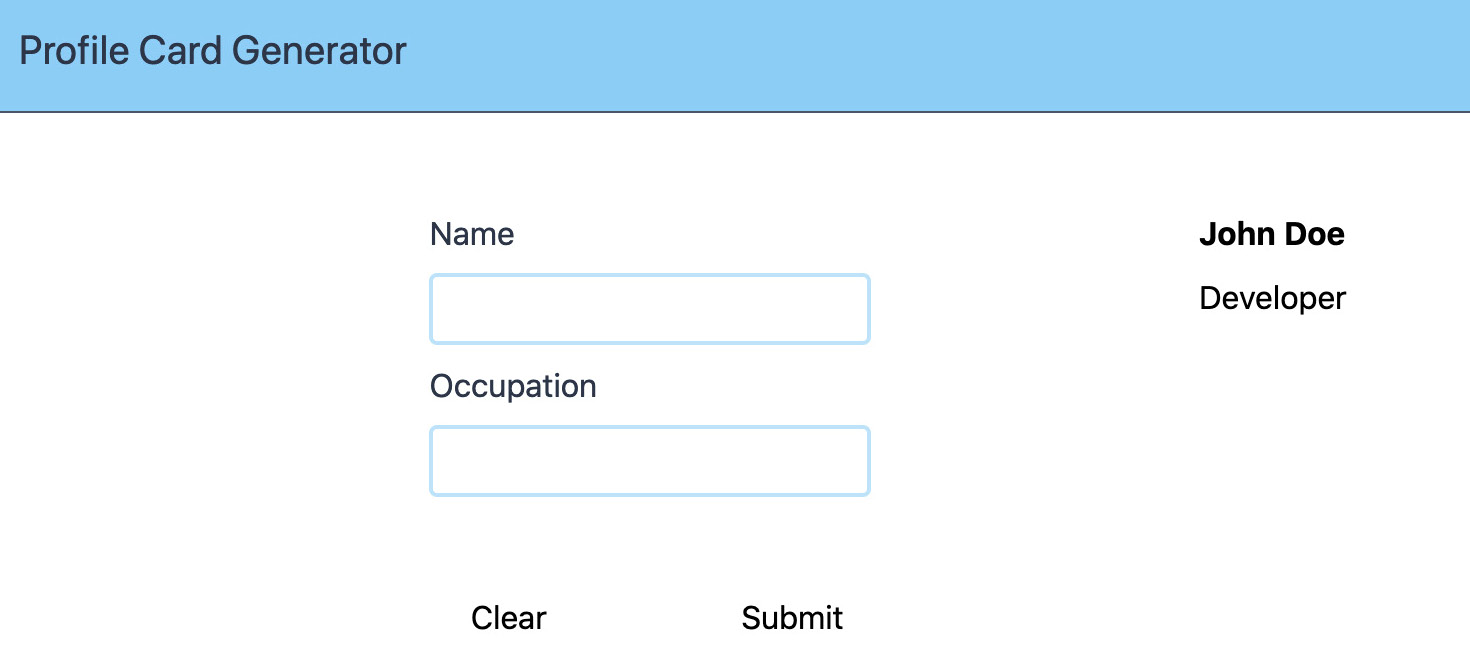
Figure 8.14: AppProfileForm and AppProfileDisplay with only AppProfileForm cleared AppProfileDisplay still has stale data
- To also clear the contents of AppProfileDisplay, we will need to update formData in App.vue by emitting a submit event with an empty payload in src/components/AppProfileForm.vue:
<script>
export default {
// rest of component
methods: {
// other methods
clear() {
// rest of the clear() method
this.$emit('submit', {})
}
}
}
</script>
When we fill out the form and submit it, it will look as follows:
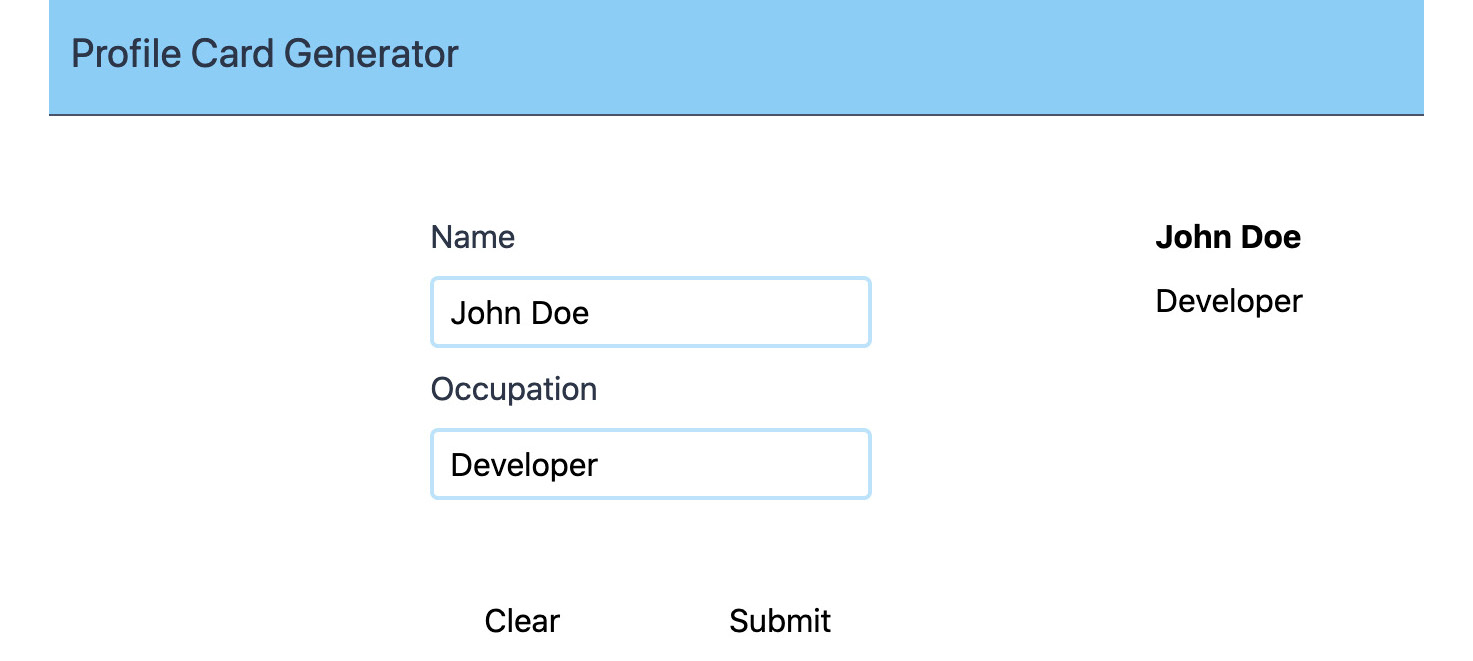
Figure 8.15: AppProfileForm and AppProfileDisplay with data filled out and submitted with a Clear button
We can click Clear and reset the data displayed in both AppProfileDisplay and AppProfileForm as per the following screenshot:

Figure 8.16: AppProfileForm and AppProfileDisplay after data is cleared (using the Clear button)
We have now seen how to set up communication between sibling components through a common ancestor.
Note
There is quite a bit of bookkeeping and mental work required to keep track of all the bits of state that need to stay in sync across the application.
In the next section, we will look at what an event bus is and how it can help alleviate some of the issues we have encountered.
The Event Bus
The second scenario we will look at is when there is a global event bus.
The event bus is an entity on which we can publish and subscribe to events. This allows all the different parts of the application to hold their own state and keep it in sync without passing events up to or props down from the common ancestors.

Figure 8.17: Sequence diagram of a reader component and an updating component leveraging an event bus
To provide this, our event bus needs to provide a subscribe method and publish method. It's also useful to be able to unsubscribe.
The Vue instance is an event bus since it provides three crucial operations: publish, subscribe, and unsubscribe. We can create an event bus as follows in the main.js file:
import Vue from 'vue'
const eventBus = new Vue()
Our event bus has a few methods, namely $on, which is the subscribe operation, supporting two parameters—the name of the event to subscribe to (as a string) and a callback to which the event will be passed through a publish operation. We can add a subscriber using $on(eventName, callback):
// rest of main.js file
console.log('Registering subscriber to "fieldChanged"')
eventBus.$on('fieldChanged', (event) => {
console.log(`Received event: ${JSON.stringify(event)}`)
})
We can then use $emit to trigger the subscriber callback. $emit(eventName, payload) is the event bus' publish operation. $emit supports two parameters—the name of the event (as a string) and a payload, which is optional and can be any object. It can be used as follows:
// rest of main.js file
console.log('Triggering "fieldChanged" for "name"')
eventBus.$emit('fieldChanged', {
name: 'name',
value: 'John Doe'
})
console.log('Triggering "fieldChanged" for "occupation"')
eventBus.$emit('fieldChanged', {
name: 'occupation',
value: 'Developer'
})
Running this file in the browser will yield the following console output, where the subscriber is registered first, and the callback is then triggered on every $emit:

Figure 18.18: Console output from a Vue.js instance being used as an event bus with a subscriber and two event publications
$off, the unsubscribe operation, needs to be called with the same parameters with which the subscribe operation was called. Namely, two parameters, the event name (as a string) and the callback (which is run with the event as a parameter on every event publication). To use it properly, we need to register a subscriber using a reference to a function (as opposed to an inline anonymous function):
// rest of main.js, including other subscriber
const subscriber = (event) => {
console.log('Subscriber 2 received event: ${JSON.stringify (event)}')
}
console.log('Registering subscriber 2')
eventBus.$on('fieldChanged', subscriber)
console.log('Triggering "fieldChanged" for "company"')
eventBus.$emit('fieldChanged', {
name: 'company',
value: 'Developer'
})
console.log('Unregistering subscriber 2')
eventBus.$off('fieldChanged', subscriber)
console.log('Triggering "fieldChanged" for "occupation"')
eventBus.$emit('fieldChanged', {
name: 'occupation',
value: 'Senior Developer'
})
Note that once $off is called, the second subscriber does not trigger but the initial one does. Your console output when run in the browser will look as follows:
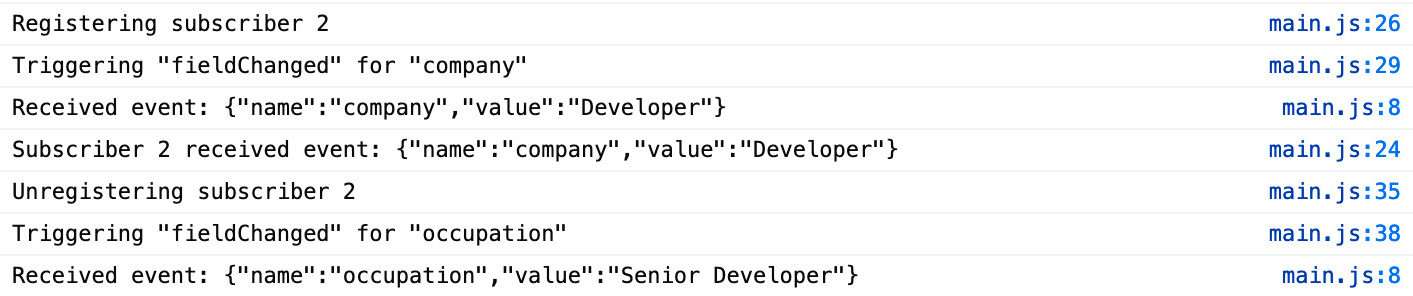
Figure 8.19: Console output showing the effect of $off
By setting an event bus in the event-bus.js file, we can avoid the confusion of having to send data up to the App component (the common ancestor):
import Vue from 'vue'
export default new Vue()
We can $emit profileUpdate events to the event bus from the AppProfileForm.vue file on form submission instead of using this.$emit:
<script>
import eventBus from '../event-bus'
export default {
// rest of component
methods: {
submitForm() {
eventBus.$emit('profileUpdate', {
name: this.name,
occupation: this.occupation
})
},
clear() {
this.name = ''
this.occupation = ''
eventBus.$emit('profileUpdate', {})
}
}
}
</script>
In the AppProfileDisplay.vue file, we can subscribe to profileUpdate events using $on and update formData in state. Note that we have removed the formData prop. We use the mounted() and beforeDestroy() hooks to subscribe to and unsubscribe from the event bus:
<script>
import eventBus from '../event-bus'
export default {
mounted() {
eventBus.$on('profileUpdate', this.update)
},
beforeDestroy() {
eventBus.$off('profileUpdate', this.update)
},
data() {
return {
formData: {}
}
},
methods: {
update(formData) {
this.formData = formData
}
}
}
</script>
The application works as expected. The following screenshot displays how your screen will look:

Figure 8.20: AppProfileForm and AppProfileDisplay communicating with an event bus
Since we have removed the formData prop for AppProfileDisplay, we can stop passing it in the App.vue file. Since we are not relying on submit events from AppProfileForm, we can also remove that binding:
<template>
<!-- rest of template -->
<AppProfileForm />
<AppProfileDisplay />
<!-- rest of template -->
</template>
We can also remove the unused App update and data methods from the App.vue file, which means the whole App script section is as follows (only registers components, not state or handlers):
<script>
import AppHeader from './components/AppHeader.vue'
import AppProfileForm from './components/AppProfileForm.vue'
import AppProfileDisplay from './components/AppProfileDisplay.vue'
export default {
components: {
AppHeader,
AppProfileForm,
AppProfileDisplay,
}
}
</script>
We have now simplified the application data flow by using an event bus instead of storing shared state in a common ancestor component. Now, we will see how to move the Clear button to the application header in the profile card generator.
Exercise 8.03: Moving the Clear Button to the Application Header Profile Card Generator
In our profile card generator application, the Clear button clears the state in the whole application. Its presence inside the form makes the Clear button's functionality unclear since it looks like it might only affect the form.
To reflect the fact that the Clear button is global functionality, we will move it into the header.
To access the code files for this exercise, refer to https://packt.live/2UzFvwZ.
The following steps will help us perform this exercise:
- We will start by creating a button in src/components/AppHeader.vue:
<template>
<header class="w-full flex flex-row p-4 border-b bg-blue-300 border-gray-700">
<h2 class="text-xl flex text-gray-800">Profile Card Generator</h2>
<button class="flex ml-auto text-gray-800 items-center">
Reset
</button>
</header>
</template>
- We can import the event bus and create a clear() handler in AppHeader, in which we'll trigger an update event with an empty payload (in src/components/AppHeader.vue):
<script>
import eventBus from '../event-bus'
export default {
methods: {
clear() {
eventBus.$emit('profileUpdate', {})
}
}
}
</script>
- We should bind the clear() function to the button (in src/components/AppHeader.vue):
<template>
<!-- rest of template -->
<button
@click="clear()"
class="flex ml-auto text-gray-800 items-center"
>
Reset
</button>
<!-- rest of template -->
</template>
At this stage, we should be able to fill out the form and a Reset button should appear as follows:

Figure 8.21: Form filled out and the Reset button in the header
The Reset button only resets the AppProfileDisplay data:

Figure 8.22: Form filled out, but the card section has been cleared
- For Reset to clear the form, we need to subscribe to the profileUpdate events in the mounted life cycle method of AppProfileForm and react to said events by resetting the form (using handleProfileUpdate):
<script>
import eventBus from '../event-bus'
export default {
mounted() {
eventBus.$on('profileUpdate', this.handleProfileUpdate)
},
beforeDestroy() {
eventBus.$off('profileUpdate', this.handleProfileUpdate)
},
// rest of component
methods: {
// other methods
handleProfileUpdate(formData) {
this.name = formData.name || ''
this.occupation = formData.occupation || ''
}
}
}
</script>
- We also take this opportunity to delete the Clear button and adjust the Submit button:
<template>
<!-- rest of template -->
<div class="flex align-center mt-12">
<button
type="submit"
@click="submitForm()"
>
Submit
</button>
</div>
<!-- rest of template -->
</template>
The form looks as follows when it gets filled out and submitted:

Figure 8.23: Filled-out and submitted form
Resetting the form now clears the form fields as well as AppProfileDisplay:
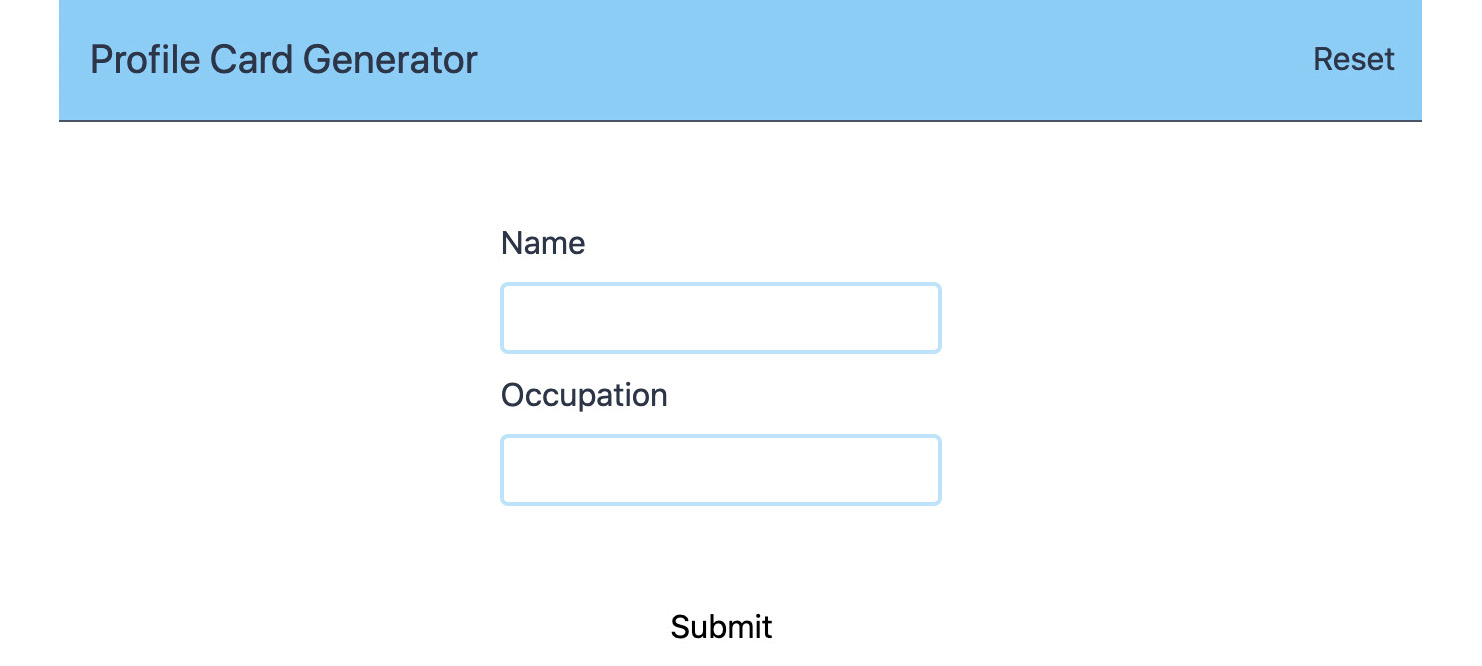
Figure 8.24: Resetting the form and the display using the Reset button
This final step using the event bus, triggering an event and listening for the same event, is part of the basis of the Vuex pattern where events and state updates are encapsulated.
Using the Vuex Pattern in Contrast with Other Patterns Such as Redux
The final scenario we will look at is using the Vuex pattern. In this case, all state is held in a single store. Any updates to the state are dispatched to this store. Components read shared and/or global state from the store.
Vuex is both a state management pattern and a library implementation from the Vue.js core team. The pattern aims to alleviate issues found when global state is shared by different parts of the application. The state of the store cannot be directly manipulated. Mutations are used to update store state and, since store state is reactive, any consumers of the Vuex store will automatically update.
Vuex draws inspiration from previous work in the JavaScript state management space such as the Flux architecture, which popularized the concept of unidirectional data flow, and Redux, which is a single-store implementation of Flux.
Vuex is not just another Flux implementation. It is a Vue.js-specific state management library. It can therefore leverage Vue.js-specific things such as reactivity to improve the performance of updates. The following diagram shows a hierarchy of the props and the state updates:

Figure 8.25: Vuex props and state updates hierarchy
To update pieces of global state, components trigger an update called a mutation in the store. The store knows how to handle this update. It updates state and propagates props back down accordingly through Vue.js reactivity:

Figure 8.26: Sequence diagram of a global state update with Vuex
We can extend the existing application using Vuex.
First, we need to add the vuex module using yarn add vuex or npm install --save vuex.
Next, we need to register Vuex with Vue using Vue.use() in the store.js file:
import Vue from 'vue'
import Vuex from 'vuex'
Vue.use(Vuex)
Finally, we create a Vuex store with a default state. This state includes the same formData object we have been using in the store.js file. We then export it using export default:
export default new Vuex.Store({
state: {
formData: {
name: '',
occupation: ''
}
},
})
Finally, we need to register our store with our main application instance of Vue.js in the main.js file:
// other imports
import store from './store'
// other imports and code
new Vue({
render: h => h(App),
store
}).$mount('#app')
The great thing is that every component has a reference to the store under this.$store. For example, to access formData, we can use this.$store.state.formData. Using this, we can replace the event bus subscription and local state updates in the script section of the AppProfileDisplay.vue file with a single computed property:
<script>
export default {
computed: {
formData() {
return this.$store.state.formData
}
}
}
</script>
To trigger state updates, we need to define some mutations. In this case, we need profileUpdate in the store.js file. Mutations receive state (the current state) and payload (the store commit payload) as properties.
export default new Vuex.Store({
// other store properties
mutations: {
profileUpdate(state, payload) {
state.formData = {
name: payload.name || '',
occupation: payload.occupation || ''
}
}
}
})
Now that we have got a profileUpdate mutation, we can update the Reset button in the AppHeader.vue file to use the Vuex $store.commit() function:
<script>
export default {
methods: {
clear() {
this.$store.commit('profileUpdate', {})
}
}
}
</script>
We should also update the AppProfileForm.vue file to commit to the $store instead of emitting to the event bus:
<script>
export default {
// rest of component
methods: {
submitForm() {
this.$store.commit('profileUpdate', {
name: this.name,
occupation: this.occupation
})
},
// other methods
}
}
</script>
The application will now support updating the name and occupation:
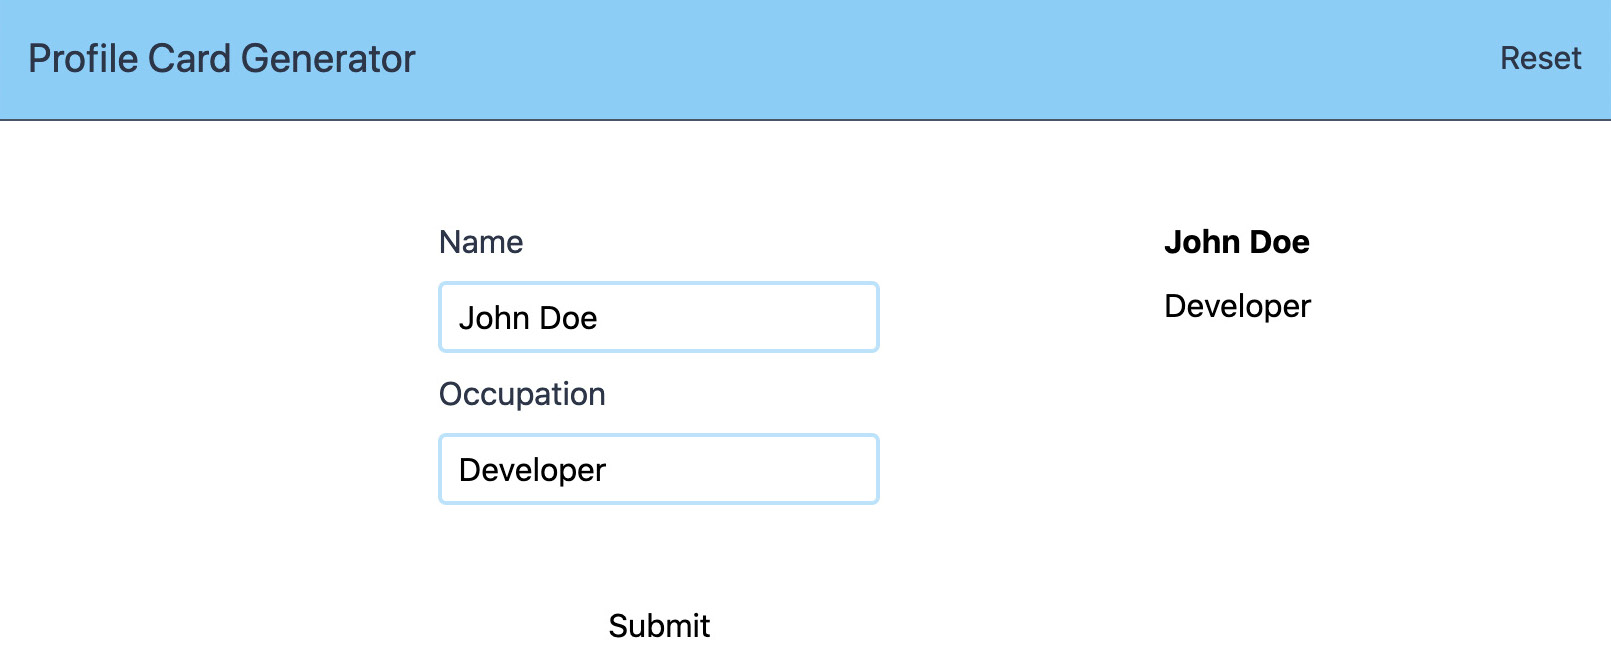
Figure 8.27: Application with AppProfileForm filled out and submitted
Unfortunately, the Reset button does not clear the form:

Figure 8.28: Application with AppProfileForm not clearing on Reset button click
To reset more efficiently, we will add a profileClear mutation in the store.js file:
export default new Vuex.Store({
// other store properties
mutations: {
// other mutations
profileClear(state) {
state.formData = {
name: '',
occupation: ''
}
}
}
})
We will commit this action instead of profileUpdate in the AppHeader.vue file. Using profileClear instead of profileUpdate with empty data makes our code cleared:
<script>
export default {
methods: {
clear() {
this.$store.commit('profileClear')
}
}
}
</script>
Finally, we will need to subscribe to store changes and reset the local state when profileClear is committed to the store in the AppProfileForm file:
<script>
export default {
created() {
this.$store.subscribe((mutation) => {
if (mutation.type === 'profileClear') {
this.resetProfileForm()
}
})
},
// other component properties
methods: {
// other methods
resetProfileForm() {
this.name = ''
this.occupation = ''
}
}
}
</script>
Now the application's Reset button will work correctly with Vuex. Our screen should display as follows:

Figure 8.29: Application Reset button clearing both the form and the display
We have now seen how to use the Vuex store to store global state in our application.
Exercise 8.04: Adding an Organization Field to the Profile Generator
In a profile card generator, in addition to the name and occupation of an individual, it's also useful to know where they work, in other words, their organization.
To do this, we will add an organization field in AppProfileForm and AppProfileDisplay. To access the code files for this exercise, refer to https://packt.live/3lIHJGe.
- We can start by adding a new text input and label to AppProfileForm:
<template>
<!-- rest of template -->
<div class="flex flex-col mt-2">
<label class="flex text-gray-800 mb-2" for="organization">Organization</label>
<input
id="occupation"
type="text"
name="organization"
class="border-2 border-solid border-blue-200 rounded px-2 py-1"
/>
</div>
<!-- rest of template -->
</template>
The new field looks as follows:
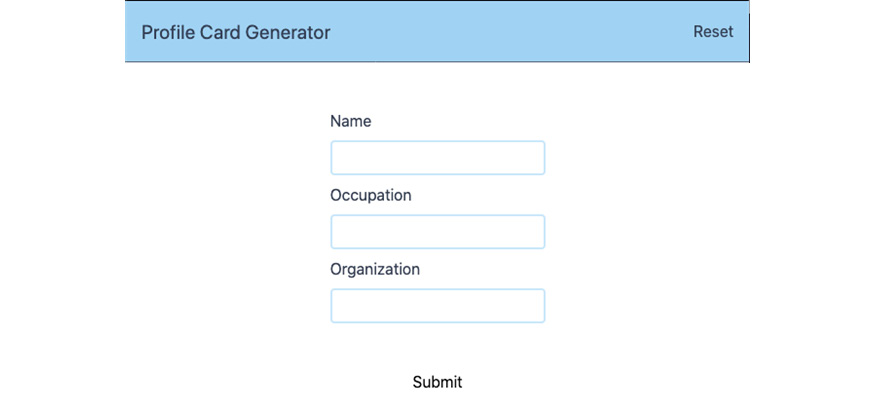
Figure 8.30: Application with a new Organization field
- We can then add the organization field to the initial state and mutations in src/store.js so that organization gets initialized, set during profileUpdate, and reset during profileClear:
// imports & Vuex setup
export default new Vuex.Store({
state: {
formData: {
// rest of formData fields
organization: ''
}
},
mutations: {
profileUpdate(state, payload) {
state.formData = {
// rest of formData fields
organization: payload.organization || '',
}
},
profileClear(state) {
state.formData = {
// rest of formData fields
organization: ''
}
}
}
})
- We need to track organization in the local state of the src/components/AppProfileForm.vue component using v-model and initializing it in the data() function:
<template>
<!-- rest of template -->
<div class="flex flex-col mt-2">
<label class="flex text-gray-800 mb-2" for="organization">Organization</label>
<input
id="occupation"
type="text"
name="organization"
v-model="organization"
class="border-2 border-solid border-blue-200 rounded px-2 py-1"
/>
</div>
<!-- rest of template -->
</template>
<script>
export default {
// rest of component
data() {
return {
// other data properties
organization: ''
}
}
}
</script>
- For the payload of the mutation to contain organization, we'll need to add it to the $store.commit('profileUpdate') payload and also reset it in the form when a component triggers a profileClear mutation:
<script>
export default {
// rest of component
methods: {
submitForm() {
this.$store.commit('profileUpdate', {
// rest of payload
organization: this.organization
})
},
resetProfileForm() {
// other resets
this.organization = ''
}
}
}
</script>
- For organization to display, we need to render it in src/components/AppProfileDisplay.vue using a conditional span (to hide at when there is no organization set):
<template>
<!-- rest of template -->
<p class="mt-2">
{{ formData.occupation }}
<span v-if="formData.organization">
at {{ formData.organization }}
</span>
</p>
<!-- rest of template -->
</template>
The application will now allow us to capture an organization field and display it.
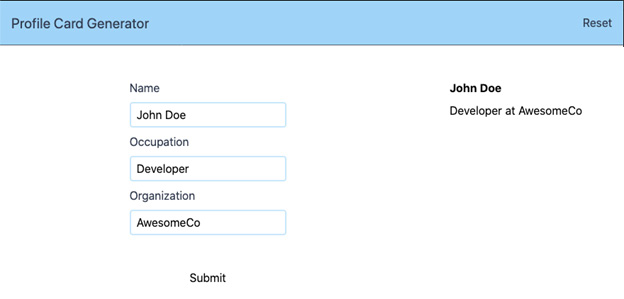
Figure 8.31: Profile Card Generator with Organization field support, filled out and submitted
It will allow us to clear the profile without any issues too:

Figure 8.32: Profile Card Generator with Organization field support, after Reset button click
We've now seen how to add a field to an application that uses Vuex. One of the biggest benefits of Vuex over an event bus or storing state in an ancestor component is that it scales as you add more data and operations. The following activity will showcase this strength.
Activity 8.01: Adding Email and Phone Number to a Profile Card Generator
In a profile generator, you look at a profile to find some information about the individual. Email and phone number are often the most crucial pieces of information looked for on a profile card. This activity is about adding these details to a profile card generator.
To do this, we will add Email and Phone Number fields in AppProfileForm and AppProfileDisplay:
- We can start by adding a new email input field and label to AppProfileForm for the Email field.
- We can then add a new phone input field (of type tel) and a label to AppProfileForm for the Phone Number field:
The new fields look as follows:
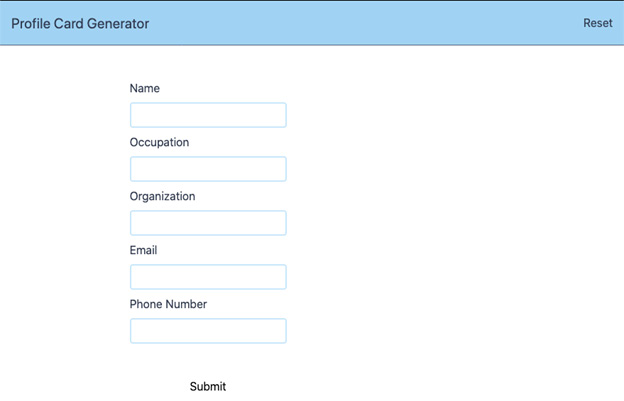
Figure 8.33: Application with new Email and Phone Number fields
- We can then add the email and phone fields to the initial state and mutations in src/store.js so that organization gets initialized, set during profileUpdate, and reset during profileClear.
- We need to track email in the local state of the src/components/AppProfileForm.vue component using v-model and initialize it in the data() function.
- We need to track phone in the local state of the src/components/AppProfileForm.vue component using v-model and initialize it in the data() function.
- For the payload of the mutation to contain email and phone, we'll need to add it to the $store.commit('profileUpdate') payload. We'll also want to reset it in the form when a component triggers a profileClear mutation.
- For email to display, we need to render it in src/components/AppProfileDisplay.vue using a conditional paragraph (to hide the Email label when there is no email set).
- For phone to display, we need to render it in src/components/AppProfileDisplay.vue using a conditional span (to hide the Phone Number label when there is no phone set).
The application should look as follows when the form is filled out and submitted:

Figure 8.34: Application with Email and Phone Number fields
Note
The solution for this activity can be found via this link.
When to Use Local State and When to Save to Global State
As we have seen through the common ancestor, event bus, and Vuex examples, the Vue.js ecosystem has solutions for managing shared and global state. What we will look at now is how to decide whether something belongs in local state or global state.
A good rule of thumb is that if a prop is passed through a depth of three components, it is probably best to put that piece of state in global state and access it that way.
The second way to decide whether something is local or global is to ask the question when the page reloads, does the user expect this information to persist?. Why does this matter? Well, global state is a lot easier to save and persist than local state. This is due to global state's nature as just a JavaScript object as opposed to component state, which is more closely tied to the component tree and Vue.js.
Another key idea to bear in mind is that it is very much possible to mix Vuex and local state in a component. As we have seen with the AppProfileForm examples, exercises, and activity, we can selectively sync data from mutations into a component using $store.subscribe.
At the end of the day, there is nothing wrong with wrapping a Vue.js data property in a computed property and accessing the computed property to make a potential transition to Vuex easier. In this scenario, since all access is already done through the computed property, it is just a change from this.privateData to this.$store.state.data.
Summary
Throughout this chapter, we have looked at different approaches to shared and global state management in a Vue.js application.
State in a shared ancestor allows data sharing between sibling components through props and events.
An event bus has three operations—subscribe, publish, and unsubscribe—that can be leveraged to propagate state updates in a Vue.js application. We have also seen how a Vue.js instance can be used as an event bus.
You know what the Vuex pattern and library entail, how they differ from Redux and Flux, as well as the benefits of using a Vuex store over a shared ancestor or event bus.
Finally, we have had a look at what criteria can be used to decide whether state should live in local component state or a more global or shared state solution such as Vuex. This chapter was an introduction to the state management landscape in Vue.js.
The next chapter will be a deep-dive into writing large-scale Vue.js applications with Vuex.