
In this chapter, we will look at approaches to unit testing Vue.js applications in order to improve our quality and speed of delivery. We will also look at using tests to drive development using Test-Driven Development (TDD).
As we proceed, you will gain an understanding of why code needs to be tested and what kinds of testing can be employed on different parts of a Vue.js application. You will see how to unit test isolated components and their methods using shallow rendering and vue-test-utils, and you will learn how to test asynchronous component code. Throughout the course of the chapter, you will gain familiarity with techniques to write efficient unit tests for mixins and filters. Toward the end of the chapter, you will become familiar with approaches to testing a Vue.js applications that includes routing and Vuex, and you will learn about using snapshot tests to validate your user interface.
Introduction
In this chapter, we will look at the purpose and approaches to testing Vue.js applications effectively.
In previous chapters, we saw how to build reasonably complex Vue.js applications. This chapter is about testing them to maintain code quality and prevent defects.
Unit testing will allow us to write fast and specific tests that we can develop against and ensure that features don't exhibit unwanted behavior. We'll see how to write unit tests for different parts of a Vue.js application, such as components, mixins, filters, and routing. We will use tools supported by the Vue.js core team, such as vue-test-utils, and tools supported by the rest of the open source community, such as the Vue Testing library and the Jest testing framework. These different tools will serve to illustrate different philosophies and approaches to unit testing.
Why We Need to Test Code
Testing is crucial for ensuring that the code does what it's meant to do.
Quality production software is empirically correct. That means that for the enumerated cases that developers and testers have found, the application behaves as expected.
This lies in contrast with software that has proven to be correct, which is a very time-consuming endeavor and is usually part of academic research projects. We are still at the point where correct software (proven) is still being built to show what kinds of systems are possible to build with this constraint of correctness.
Testing prevents the introduction of defects such as bugs and regressions (that is, when a feature stops working as expected). In the next section, we will learn about the various types of testing.
Understanding Different Types of Testing
The testing spectrum spans from end-to-end testing (by manipulating the user interface) to integration tests, and finally to unit tests. End-to-end tests test everything, including the user interface, the underlying HTTP services, and even database interactions; nothing is mocked. For example, if you've got an e-commerce application, an end-to-end test might actually place a real order with a real credit card, or it might place a test order, with a test credit card.
End-to-end tests are costly to run and maintain. They require the use of full-blown browsers controlled through programmatic drivers such as Selenium, WebdriverIO, or Cypress. This type of test platform is costly to run, and small changes in the application code can cause end-to-end tests to start failing.
Integration or system-level tests ensure that a set of systems is working as expected. This will usually involve deciding on a limit as to where the system under test lies and allowing it to run, usually against mocked or stubbed upstream services and systems (which are therefore not under test). Since external data access is stubbed, a whole host of issues, such as timeouts and flakes, can be reduced (when compared to end-to-end tests). Integration test suites are usually fast enough to run as a continuous integration step, but the full test suite tends not to be run locally by engineers.
Unit tests are great at providing fast feedback during development. Unit testing paired with TDD is part of extreme programming practice. Unit tests are great at testing complicated logic or building a system from its expected output. Unit tests are usually fast enough to run that developers code against them before sending their code for review and continuous integration tests.
The following is an interpretation of the pyramid of testing. It can be interpreted as: you should have a high number of cheap and fast unit tests, a reasonable number of system tests, and a few end-to-end UI tests:

Figure 12.1: Pyramid of testing diagram
Now that we've looked at why we should be testing applications, let's start writing some tests.
Your First Test
To illustrate how quick and easy it is to get started with automated unit tests in a Vue CLI project, we will start by setting up and writing a unit test with Jest, @vue-test-utils. There is an official Vue CLI package that can be used to generate a setup that includes unit testing with Jest and vue-test-utils. The following command should be run in a project that has been set up with Vue CLI:
vue add @vue/unit-jest
Vue CLI adds Jest as the test runner, @vue/test-utils, the official Vue.js testing utilities, and vue-jest, a processor for .vue single-file component files in Jest. It adds a test:unit script.
By default, it creates a tests/unit folder, which we'll remove. Instead, we can create a __tests__ folder and create an App.test.js file as follows.
We will use shallowMount to render the application and test that it displays the correct text. For the purposes of this example, we'll use the text: "The Vue.js Workshop Blog".
shallowMount does a shallow render, which means that only the top level of a component is rendered; all the child components are stubbed. This is useful for testing a component in isolation since the child components' implementations are not run:
import { shallowMount } from '@vue/test-utils'
import App from '../src/App.vue'
test('App renders blog title correctly', () => {
const wrapper = shallowMount(App)
expect(wrapper.text()).toMatch("The Vue.js Workshop Blog")
})
This test will fail when we run npm run test:unit because we do not have The Vue.js Workshop Blog in the App component:
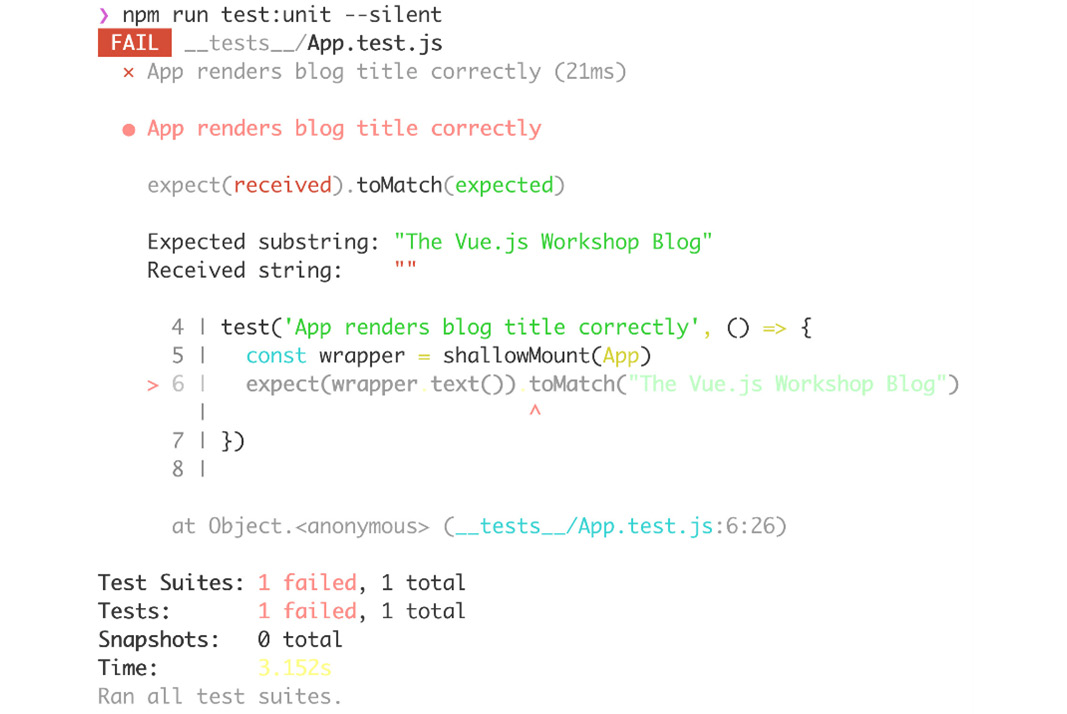
Figure 12.2: Blog title heading failing the test at the command line
In order to get the test to pass, we can implement our blog title heading in the App.vue file:
<template>
<div id="app" class="p-10">
<div class="flex flex-col">
<h2
class="leading-loose pb-4 flex justify-center m-auto md:w-1/3 text-xl mb-8 font-bold text-gray-800 border-b"
>
The Vue.js Workshop Blog
</h2>
</div>
</div>
</template>
Now that we have got the right heading, npm run test:unit will pass:
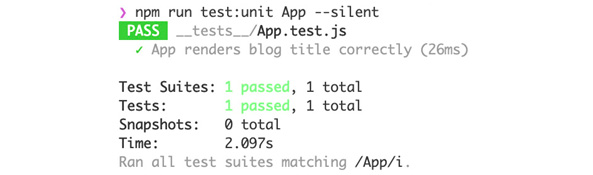
Figure 12.3: Blog heading test passing
We can also check that it renders as expected in the browser:
The Vue.js Workshop Blog
You have just completed your first piece of TDD. This process started by writing a test that failed. This failure was followed by an update to the code under test (in this case the App.vue component), which made the failing test pass. The TDD process gives us confidence that our features have been tested properly since we can see that tests fail before they pass when we update the code that drives our feature.
Testing Components
Components are at the core of Vue.js applications. Writing unit tests for them is straightforward with vue-test-utils and Jest. Having tests that exercise the majority of your components gives you confidence that they behave as designed. Ideal unit tests for components run quickly and are simple.
We'll carry on building the blog application example. We have now built the heading, but a blog usually also needs a list of posts to display.
We'll create a PostList component. For now, it will just render a div wrapper and support a posts Array prop:
<template>
<div class="flex flex-col w-full">
</div>
</template>
<script>
export default {
props: {
posts: {
type: Array,
default: () => []
}
}
}
</script>
We can add some data in the App component:
<script>
export default {
data() {
return {
posts: [
{
title: 'Vue.js for React developers',
description: 'React has massive popularity here are the key benefits of Vue.js over it.',
tags: ['vue', 'react'],
},
{
title: 'Migrating an AngularJS app to Vue.js',
description: 'With many breaking changes, AngularJS developers have found it easier to retrain to Vue.js than Angular 2',
tags: ['vue', 'angularjs']
}
]
}
}
}
</script>
Now that we have some posts, we can pass them as a bound prop to the PostList component from the App component:
<template>
<!-- rest of template -->
<PostList :posts="posts" />
<!-- rest of template -->
</template>
<script>
import PostList from './components/PostList.vue'
export default {
components: {
PostList
},
// rest of component properties
}
Our PostList component will render out each post in a PostListItem component, which we'll create as follows.
PostListItem takes two props: title (which is a string) and description (also a string). It renders them in an h3 tag and a p tag, respectively:
<template>
<div class="flex flex-col m-auto w-full md:w-3/5 lg:w-2/5 mb-4">
<h3 class="flex text-md font-semibold text-gray-700">
{{ title }}</h3>
<p class="flex leading-relaxed">{{ description }}</p>
</div>
</template>
<script>
export default {
props: {
title: {
type: String
},
description: {
type: String
}
}
}
</script>
We now need to loop through the posts and render out a PostListItem component with relevant props bound in the PostList.vue component:
<template>
!-- rest of template -->
<PostListItem
v-for="post in posts"
:key="post.slug"
:title="post.title"
:description="post.description"
/>
<!-- rest of template -->
</template>
<script>
import PostListItem from './PostListItem.vue'
export default {
components: {
PostListItem,
},
// rest of component properties
}
</script>
We can now see the heading and the post list in the application:
The Vue.js Workshop blog
To test the PostListItem component, we can shallow render with some arbitrary title and description props set, and check that they get rendered:
import { shallowMount } from '@vue/test-utils'
import PostListItem from '../src/components/PostListItem.vue'
test('PostListItem renders title and description correctly', () => {
const wrapper = shallowMount(PostListItem, {
propsData: {
title: 'Blog post title',
description: 'Blog post description'
}
})
expect(wrapper.text()).toMatch("Blog post title")
expect(wrapper.text()).toMatch("Blog post description")
})
The test output of npm run test:unit __tests__/PostListItem.test.js is as follows; the component passes the test:
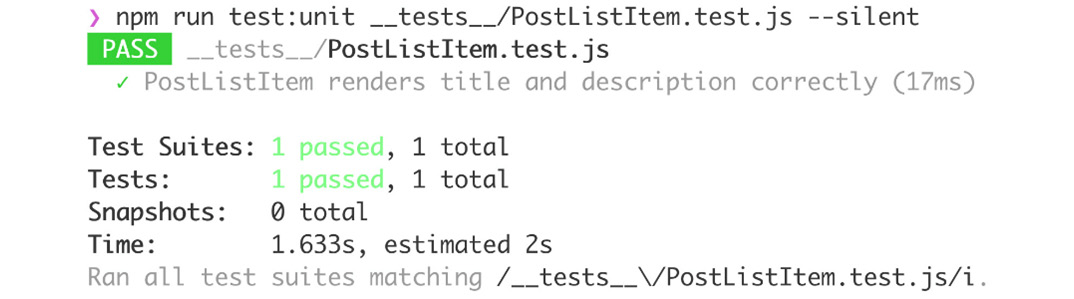
Figure 12.4: PostListItem test output
Next, we'll see one of the pitfalls of shallow rendering. When testing the PostList component, all we can do is test the number of PostListItem components it's rendering:
import { shallowMount } from '@vue/test-utils'
import PostList from '../src/components/PostList.vue'
import PostListItem from '../src/components/PostListItem.vue'
test('PostList renders the right number of PostListItem', () => {
const wrapper = shallowMount(PostList, {
propsData: {
posts: [
{
title: "Blog post title",
description: "Blog post description"
}
]
}
})
expect(wrapper.findAll(PostListItem)).toHaveLength(1)
})
This passes, but we are testing something that the user will not directly interact with, the number of PostListItem instances rendered in PostList, as shown in the following screenshot:
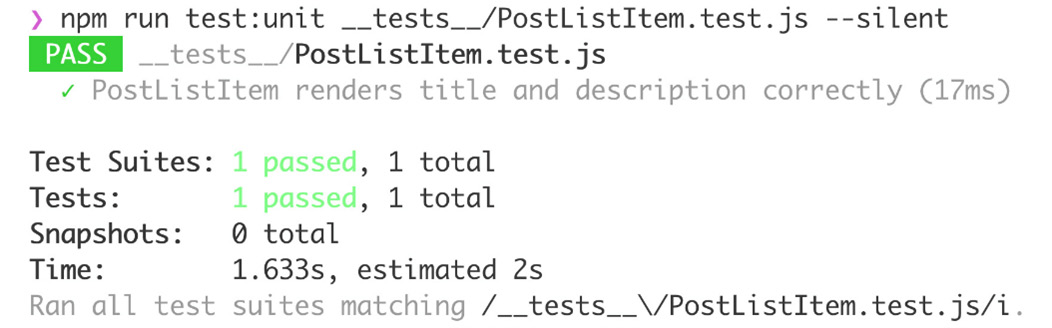
Figure 12.5: PostList test output
A better solution is to use the mount function, which renders the full component tree, whereas the shallow function would only render out the children of the component being rendered. With mount, we can assert that the titles and descriptions are rendered to the page.
The drawback of this approach is that we're testing both the PostList component and the PostListItem component since the PostList component doesn't render the title or description; it renders a set of PostListItem components that in turn render the relevant title and description.
The code will be as follows:
import { shallowMount, mount } from '@vue/test-utils'
import PostList from '../src/components/PostList.vue'
// other imports and tests
test('PostList renders passed title and description for each passed post', () => {
const wrapper = mount(PostList, {
propsData: {
posts: [
{
title: 'Title 1',
description: 'Description 1'
},
{
title: 'Title 2',
description: 'Description 2'
}
]
}
})
const outputText = wrapper.text()
expect(outputText).toContain('Title 1')
expect(outputText).toContain('Description 1')
expect(outputText).toContain('Title 2')
expect(outputText).toContain('Description 2')
})
The new tests pass as per the following output of npm run test:unit __tests__/PostList.vue:
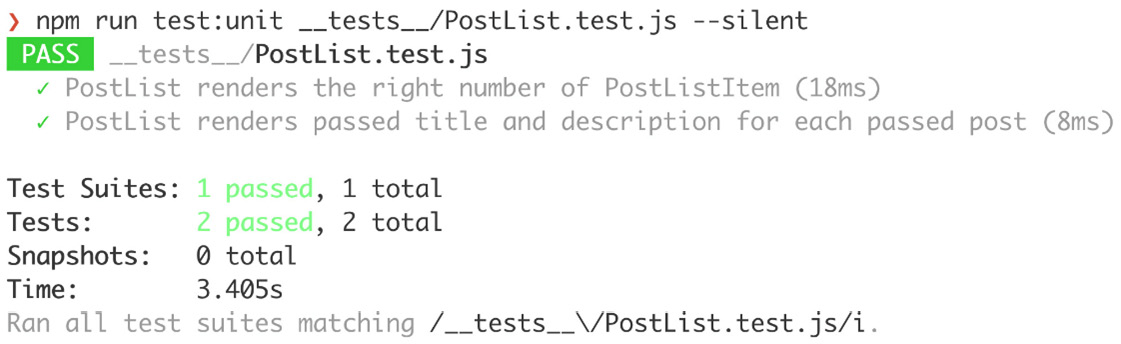
Figure 12.6: Test run for PostList with both shallow and mounted tests
We have now seen how to write unit tests for Vue.js components using Jest and vue-test-utils. These tests can be run often, and test runs complete within seconds, which gives us near-immediate feedback while working on new or existing components.
Exercise 12.01: Building and Unit Testing a Tag List Component
When creating the fixture for posts, we populated a tags field with vue, angularjs, and react but did not display them. To make tags useful, we will display the tags in the post list.
To access the code files for this exercise, refer to https://packt.live/2HiTFQ1:
- We can start by writing a unit test that will explain what we expect a PostListItem component to do when passed a set of tags as props. It expects that each tag will be rendered with a hashtag prepended to it; for example, the react tag will be shown as #react. In the __tests__/PostListItem.test.js file, we can add a new test:
// rest of tests and imports
test('PostListItem renders tags with a # prepended to them', () => {
const wrapper = shallowMount(PostListItem, {
propsData: {
tags: ['react', 'vue']
}
})
expect(wrapper.text()).toMatch('#react')
expect(wrapper.text()).toMatch('#vue')
})
This test fails when run with npm run test:unit __tests__/PostListItem.test.js:
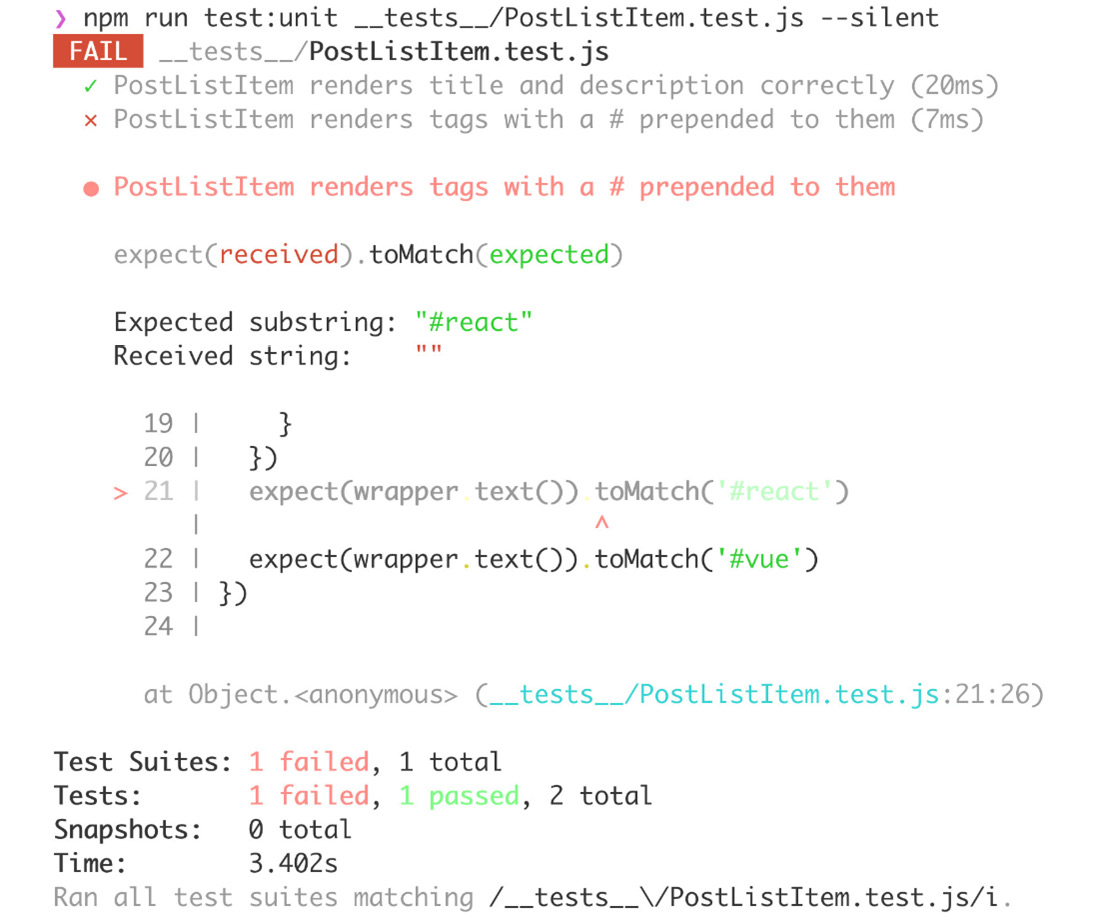
Figure 12.7: Tag test for PostListItem failing
- Next, we should implement the tag list rendering in src/components/PostListItem.vue. We'll add tags as props of the Array type and use v-for to render out the tags:
<template>
<!-- rest of template -->
<div class="flex flex-row flex-wrap mt-4">
<a
v-for="tag in tags"
:key="tag"
class="flex text-xs font-semibold px-2 py-1 mr-2 rounded border border-blue-500 text-blue-500"
>
#{{ tag }}
</a>
</div>
<!-- rest of template -->
</template>
<script>
export default {
props: {
// rest of props
tags: {
type: Array,
default: () => []
}
}
}
</script>
With the PostListItem component implemented, the unit test should now pass:
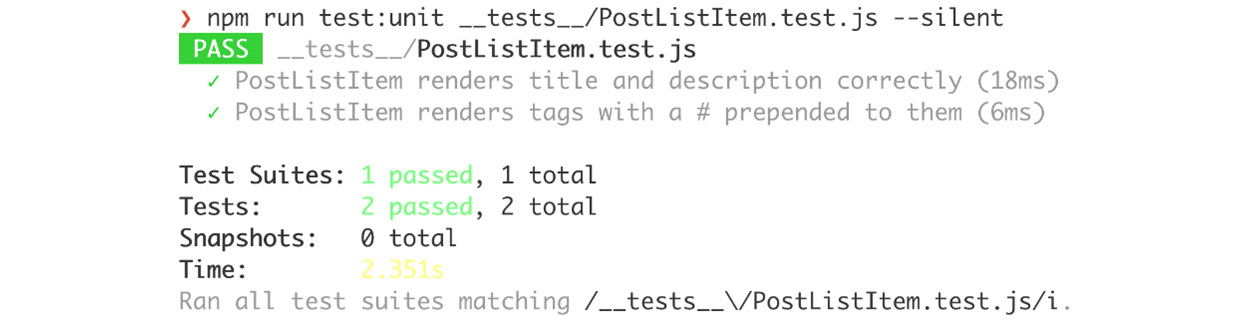
Figure 12.8: PostListItem unit test passing
However, the tags are not displayed in the application:
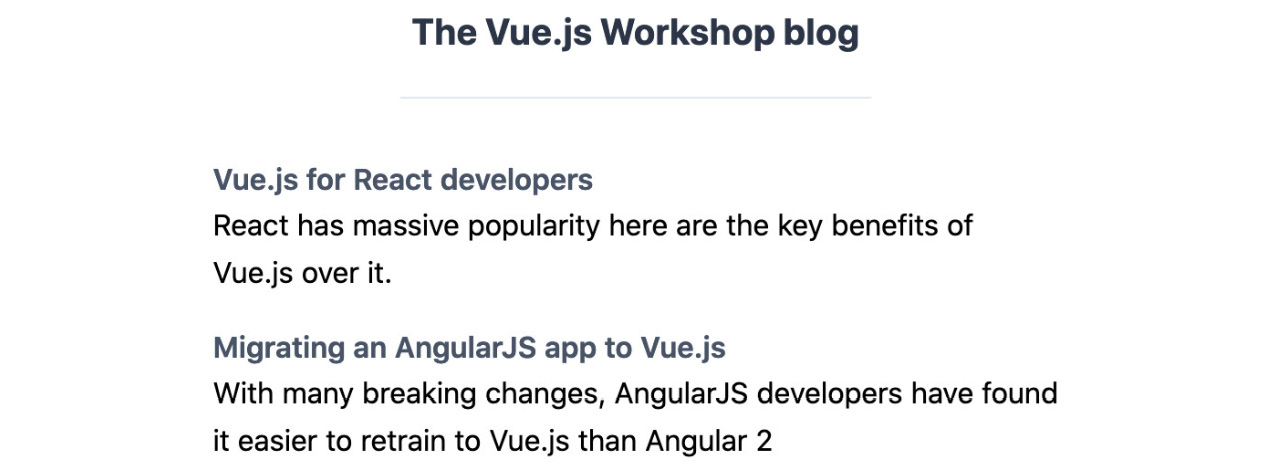
Figure 12.9: PostList displaying without tags despite the correct PostListItem implementation
- We can write a unit test for PostList that would show this behavior. In essence, we'll be passing some tags in our posts list and running the same assertions as are already present in the PostListItem.test.js file. We'll do this in __tests__/PostList.test.js:
// rest of tests and imports
test('PostList renders tags for each post', () => {
const wrapper = mount(PostList, {
propsData: {
posts: [
{
tags: ['react', 'vue']
},
{
tags: ['html', 'angularjs']
}
]
}
})
const outputText = wrapper.text()
expect(outputText).toContain('#react')
expect(outputText).toContain('#vue')
expect(outputText).toContain('#html')
expect(outputText).toContain('#angularjs')
})
As per our application output, the test is failing when run with npm run test:unit __tests__/PostList.test.js:
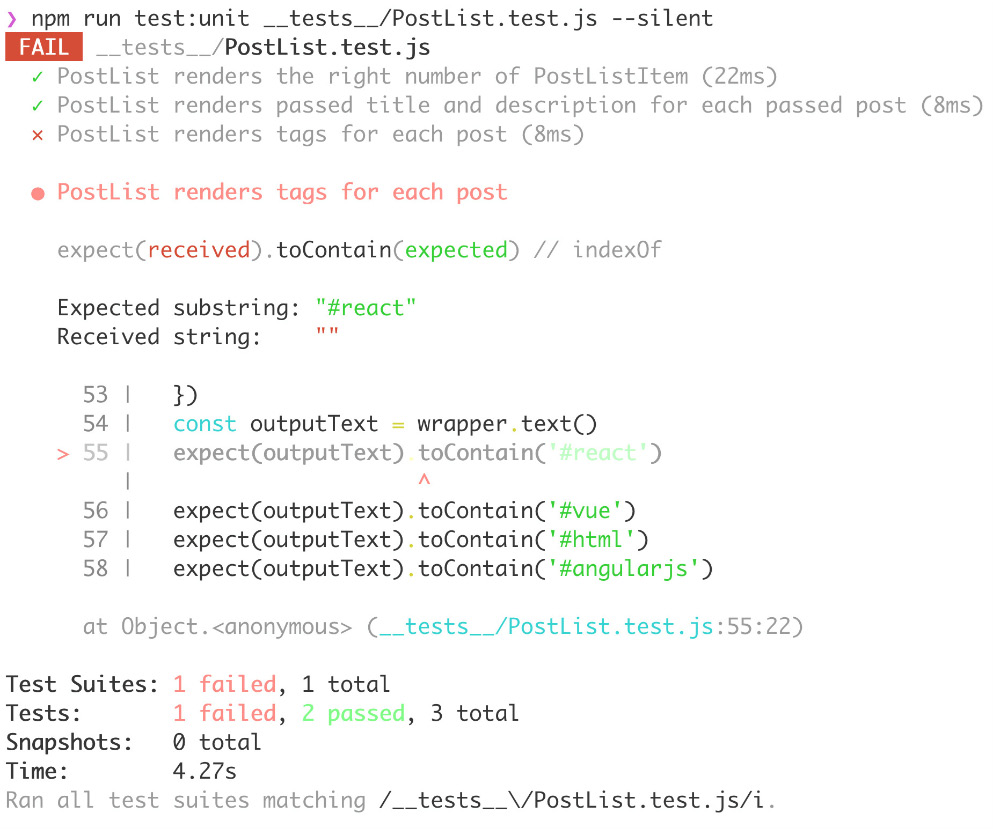
Figure 12.10: PostList tags test failing
- In order to fix this test, we can find the issue in src/components/PostList.vue, where the tags prop for PostListItem is not bound. By updating src/components/PostList.vue to bind the tags prop, we can fix the unit test:
<template>
<!-- rest of template-->
<PostListItem
v-for="post in posts"
:key="post.slug"
:title="post.title"
:description="post.description"
:tags="post.tags"
/>
<!-- rest of template -->
</template>
The failing unit test now passes, as shown in the following screenshot:
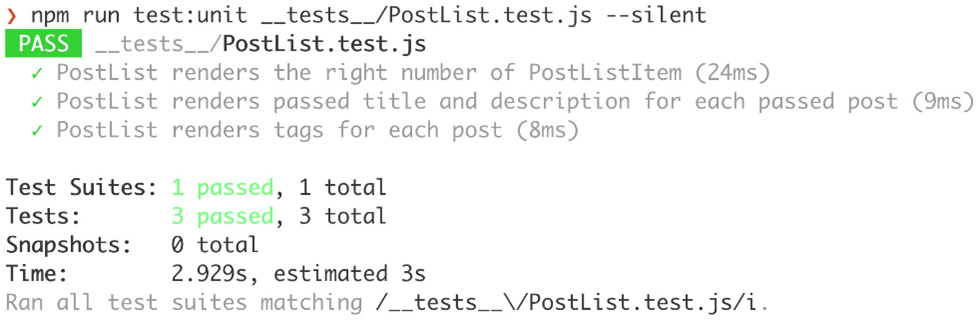
Figure 12.11: PostList tags test passing
The tags also appear in the application, as shown in the following screenshot:
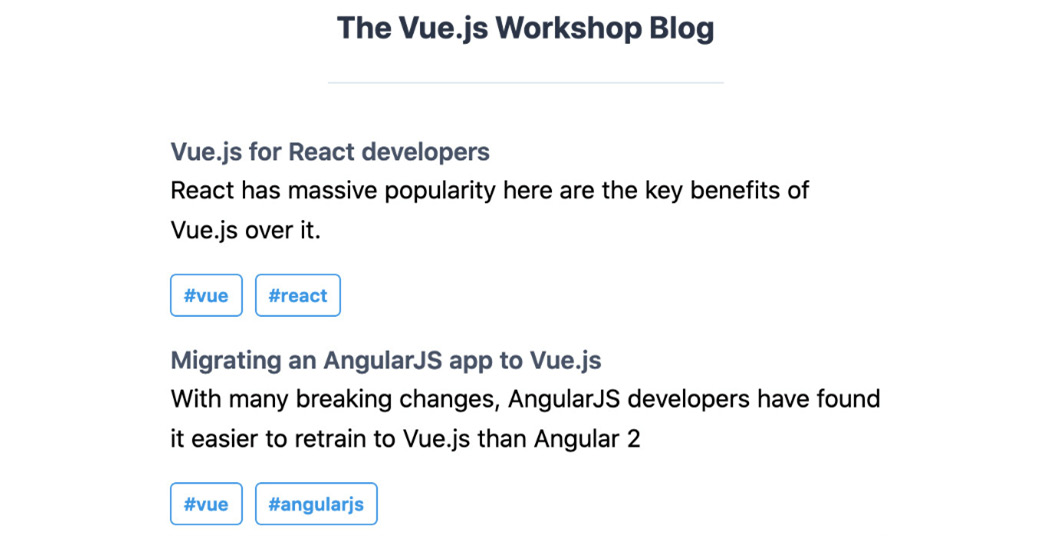
Figure 12.12: Blog list rendering with tags
We have now seen how we can test rendered component output with both the shallow rendering and mounting of components. Let's briefly understand what each of these terms means:
- Shallow rendering: This renders at a depth of 1, meaning that if children are components, they will just be rendered as the component tag; their template will not be run.
- Mounting: This renders the full component tree in a similar fashion as would be rendered in the browser.
Next, we'll look at how to test component methods.
Testing Methods, Filters and Mixins
Since filters and mixins generate their output based solely on function parameters, they are straightforward to unit test. It is not recommended to test methods unless it's strictly necessary since the user doesn't call methods on the component directly. The users see the rendered UI, and their interactions with the application are manifested as events (for example, click, input change, focus change, and scroll).
For example, a filter that truncates its input to eight characters would be implemented as follows:
<script>
export default {
filters: {
truncate(value) {
return value && value.slice(0, 8)
}
}
}
</script>
There are two options to test it. We could test it directly by importing the component and calling truncate on some input, as per the truncate.test.js file:
import PostListItem from '../src/components/PostListItem.vue'
test('truncate should take only the first 8 characters', () => {
expect(
PostListItem.filters.truncate('longer than 8 characters')
).toEqual('longer t')
})
The alternative is to check where it's being used in the PostListItem component:
<template>
<!-- rest of template -->
<h3 class="flex text-md font-semibold text-gray-700">
{{ title | truncate }}
</h3>
<!-- rest of template -->
</template>
Now we can test truncate by checking what happens when we pass a long title into the PostListItem component in the PostListItem.test.js file, which we do in the following test:
// imports
test('PostListItem renders title and description correctly', () => {
const wrapper = shallowMount(PostListItem, {
propsData: {
title: 'Blog post title',
description: 'Blog post description'
}
})
expect(wrapper.text()).toMatch("Blog post title")
expect(wrapper.text()).toMatch("Blog post description")
})
// other tests
The preceding code will generate the output shown in the following screenshot:
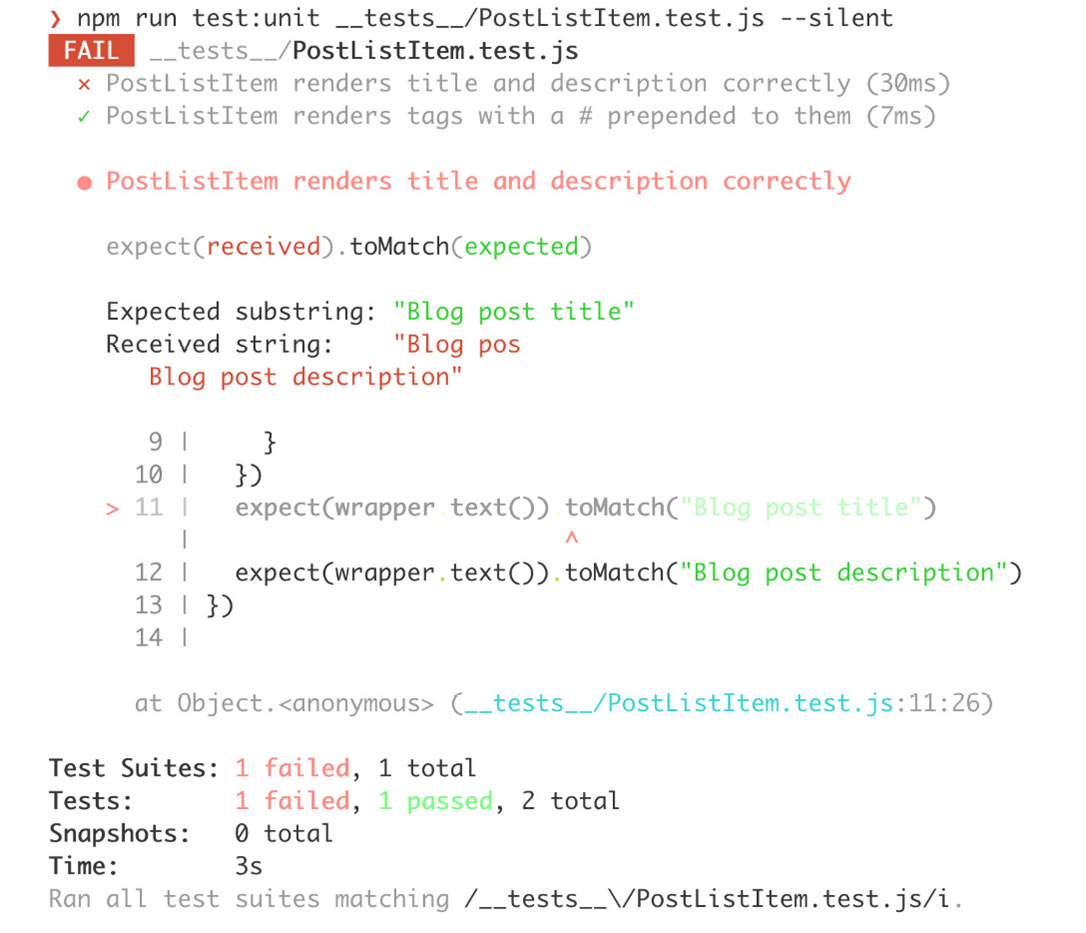
Figure 12.13: PostListItem test for the title failing because the content of the title is truncated
To fix this, we could update the failing test to expect Blog pos instead of Blog post title.
These two approaches are great for testing filters. As we saw before with mount versus shallow rendering, the difference is in the tightness of the unit test. The tighter unit test is the direct filters.truncate() test since it directly accesses the truncate filter. The looser unit test is the test using passed props and validating the component output. A tighter unit will usually mean tests are simpler, but it comes at the cost of sometimes testing functionality in a fashion that is very removed from how the end user perceives it. For example, the user would never call filters.truncate() directly.
We have seen how to test an arbitrary truncate filter. We will now implement an ellipsis filter and test it.
The ellipsis filter will be applied to the post description and will limit its length to 40 characters plus ….
Exercise 12.02: Building and Testing an ellipsis Filter
We have seen how to test an arbitrary truncate filter; we will now implement an ellipsis filter and test it.
To access the code files for this exercise, refer to https://packt.live/2UK9Mcs.
Now let's look at the steps to build and test an ellipsis filter:
- We can start by writing a set of tests for the ellipsis filter (which will live in src/components/PostListItem.vue). One test should check that the filter does nothing if the passed value is less than 50 characters; another should check that if the passed value is more than 50 characters, it truncates to 50 and appends …. We will do this in a __tests__/ellipsis.test.js file:
import PostListItem from '../src/components/PostListItem.vue'
test('ellipsis should do nothing if value is less than 50 characters', () => {
expect(
PostListItem.filters.ellipsis('Less than 50 characters')
).toEqual('Less than 50 characters')
})
test('ellipsis should truncate to 50 and append "..." when longer than 50 characters', () => {
expect(
PostListItem.filters.ellipsis(
'Should be more than the 50 allowed characters by a small amount'
)
).toEqual('Should be more than the 50 allowed characters by a...')
})
- We can now implement the logic for ellipsis in src/components/PostListItem.vue. We will add a filters object with ellipsis, which will use String#slice if the passed value is longer than 50 characters and do nothing otherwise:
<script>
export default {
// rest of component properties
filters: {
ellipsis(value) {
return value && value.length > 50
? `${value.slice(0, 50)}...`
: value
}
}
}
</script>
In this case, the test now passes npm run test:unit __tests__/ellipsis.test.js, as shown in Figure 12.14:
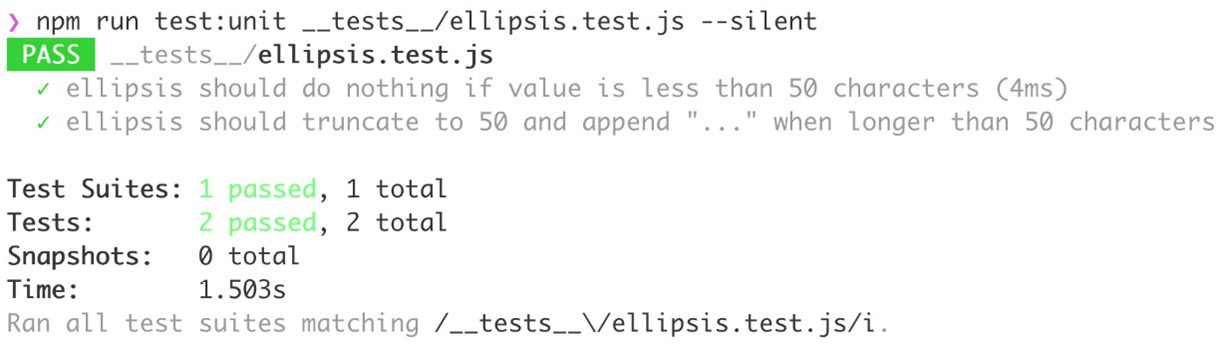
Figure 12.14: The ellipsis filter unit test passing
- We now need to integrate our ellipsis filter into the component. To check whether this will work, we can first write the test in __tests__/PostListItem.test.js:
// other tests and imports
test('PostListItem truncates long descriptions', () => {
const wrapper = shallowMount(PostListItem, {
propsData: {
description: 'Very long blog post description that goes over 50 characters'
}
})
expect(wrapper.text()).toMatch("Very long blog post description that goes over 50 ...")
})
This test fails since we don't use the filter in the component template. The output will be as follows:

Figure 12.15: PostListItem ellipsis test failing
- To get the test to pass, we need to pipe the description property into the ellipsis filter in src/components/PostListItem.vue:
<template>
<!-- rest of template -->
<p class="flex leading-relaxed">{{ description | ellipsis }} </p>
<!-- rest of template -->
</template>
Now, the test will pass, as displayed in the following screenshot:

Figure 12.16: PostListItem ellipsis test passing
We can see the descriptions being truncated in the application interface in the browser, as follows:
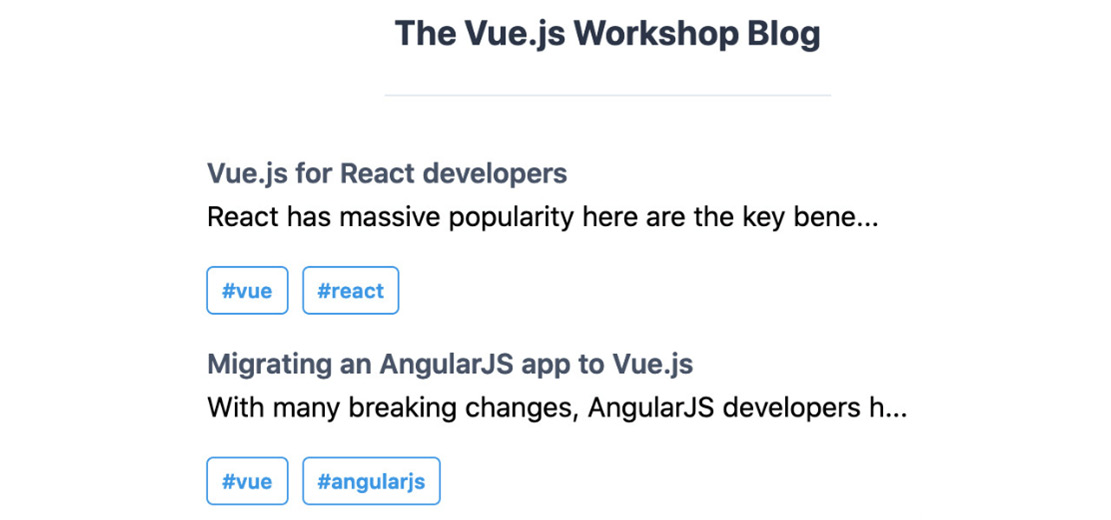
Figure 12.17: Blog post item descriptions being truncated to 50 characters
We have now seen how to test filters and other properties of a Vue.js component not only by testing directly against the object but also by testing the functionality where it is being used in component-level tests.
Next, we will see how to deal with an application that uses Vue.js routing.
Testing Vue Routing
We have currently got an application that renders what is our blog home page or feed view.
Next, we should have post pages. To do this, we will use Vue Router, as covered in previous chapters, and ensure that our routing works as designed with unit tests.
Vue Router is installed using npm, specifically, npm install vue-router, and wiring it up in the main.js file:
// other imports
import router from './router'
// other imports and configuration
new Vue({
render: h => h(App),
router,
}).$mount(‹#app›)
The router.js file registers vue-router with Vue using Vue.use and instantiates a VueRouter instance:
import Vue from 'vue'
import VueRouter from 'vue-router'
Vue.use(VueRouter)
export default new VueRouter({})
A router with no routes isn't very useful. We'll define the root path (/) to display the PostList component in the router.js file, as follows:
// other imports
import PostList from './components/PostList.vue'
// registering of Vue router
const routes = [
{
path: '/',
component: PostList
}
]
export default new VueRouter({
routes
})
Now that we've got our initial route, we should update the App.vue file to leverage the component being rendered by the router. We'll render render-view instead of directly using PostList. The posts binding, however, stays the same:
<template>
<!-- rest of template -->
<router-view
:posts="posts"
/>
<!-- rest of template -->
</template>
Now, our posts in the App.vue file are missing a bit of core data to render a SinglePost component. We need to make sure to have the slug and content properties to render something useful on our SinglePost page:
<script>
export default {
data() {
return {
posts: [
{
slug: 'vue-react',
title: 'Vue.js for React developers',
description: 'React has massive popularity here are the key benefits of Vue.js over it.',
content:
'React has massive popularity here are the key benefits of Vue.js over it.
See the following table, we'll also look at how the is the content of the post.
There's more, we can map React concepts to Vue and vice-versa.',
tags: ['vue', 'react'],
},
{
slug: 'vue-angularjs',
title: 'Migrating an AngularJS app to Vue.js',
description: 'With many breaking changes, AngularJS developers have found it easier to retrain to Vue.js than Angular 2',
content:
'With many breaking changes, AngularJS developers have found it easier to retrain to Vue.js than Angular 2
Vue.js keeps the directive-driven templating style while adding a component model.
It's performant thanks to a great reactivity engine.',
tags: ['vue', 'angularjs']
}
]
}
}
}
</script>
We can now start working on a SinglePost component. For now, we'll just have some placeholders in the template. Also, SinglePost will receive posts as a prop, so we can fill that in as well:
<template>
<div class="flex flex-col w-full md:w-1/2 m-auto">
<h2
class="font-semibold text-sm mb-4"
>
Post: RENDER ME
</h2>
<p>Placeholder for post.content</p>
</div>
</template>
<script>
export default {
props: {
posts: {
type: Array,
default: () => []
}
}
}
</script>
Next, we will register SinglePost in router.js, with the /:postId path (which will be available to the component under this.$route.params.postId):
// other imports
import SinglePost from './components/SinglePost.vue'
// vue router registration
const routes = [
// other route
{
path: '/:postId',
component: SinglePost
}
]
// exports and router instantiation
If we switch back to implementing the SinglePost component, we've got access to postId, which will map to the slug in the posts array, and we've also got access to posts since it's being bound onto render-view by App. Now we can create a computed property, post, which finds posts based on postId:
<script>
export default {
// other properties
computed: {
post() {
const { postId } = this.$route.params
return posts.find(p => p.slug === postId)
}
}
}
</script>
From this computed post property, we can extract title and content if post exists (we have to watch out for posts that don't exist). So, still in SinglePost, we can add the following computed properties:
<script>
export default {
// other properties
computed: {
// other computed properties
title() {
return this.post && this.post.title
},
content() {
return this.post && this.post.content
}
}
}
</script>
We can then replace the placeholders in the template with the value of the computed properties. So, our template ends up as follows:
<template>
<div class="flex flex-col w-full md:w-1/2 m-auto">
<h2
class="font-semibold text-sm mb-4"
>
Post: {{ title }}
</h2>
<p>{{ content }}</p>
</div>
</template>
Finally, we should make the whole post item a router-link that points to the right slug in the PostListItem.vue file:
<template>
<router-link
class="flex flex-col m-auto w-full md:w-3/5 lg:w-2/5 mb-4"
:to="`/${slug}`"
>
<!-- rest of the template -->
</router-link>
</template>
router-link is a Vue Router-specific link, which means that on the PostList page, upon clicking on a post list item, we are taken to the correct post's URL, as shown in the following screenshot:
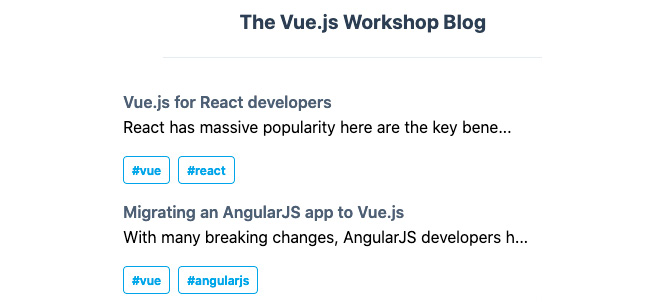
Figure 12.18: Post list view displayed in the browser
We'll be redirected to the correct URL, the post's slug, which will render the right post by slug, as shown in Figure 12.19.
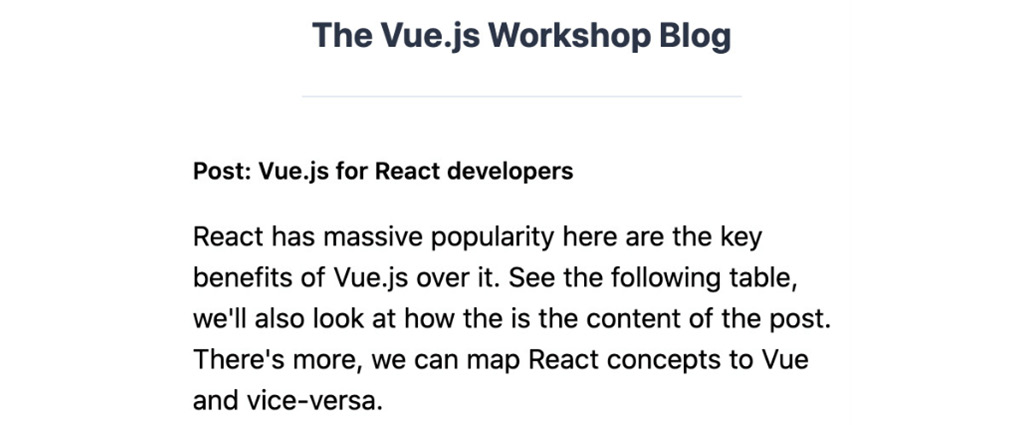
Figure 12.19: Single post view displaying in the browser
To test vue-router, we will explore a new library that's better suited to testing applications with routing and a Vuex store, the Vue Testing library, which is accessible on npm as @testing-library/vue.
We can install it with npm install --save-dev @testing-library/vue.
To test SinglePost routing and rendering, we do the following. First of all, we should be able to access the SinglePost view by clicking on a post title in the PostList view. In order to do this, we check that we're on the home page by examining the content (we'll see two posts with the titles). Then we'll click a post title and check that the content from the home page is gone and the post content is displayed:
import {render, fireEvent} from '@testing-library/vue'
import App from '../src/App.vue'
import router from '../src/router.js'
test('Router renders single post page when clicking a post title', async () => {
const {getByText, queryByText} = render(App, { router })
expect(queryByText('The Vue.js Workshop Blog')).toBeTruthy()
expect(queryByText('Vue.js for React developers')).toBeTruthy()
expect(queryByText('Migrating an AngularJS app to Vue.js')). toBeTruthy()
await fireEvent.click(getByText('Vue.js for React developers'))
expect(queryByText('Migrating an AngularJS app to Vue.js')). toBeFalsy()
expect(queryByText('Post: Vue.js for React developers')). toBeTruthy()
expect(
queryByText(
'React has massive popularity here are the key benefits of Vue.js over it. See the following table, we'll also look at how the is the content of the post. There's more, we can map React concepts to Vue and vice-versa.'
)
).toBeTruthy()
})
We should check that navigating directly to a valid post URL will yield the correct result. In order to do this, we'll use router.replace('/') to clear any state that's set, and then use router.push() with a post slug. We will then use the assertions from the previous code snippet to validate that we are on the SinglePost page, not the home page:
test('Router renders single post page when a slug is set', async () => {
const {queryByText} = render(App, { router })
await router.replace('/')
await router.push('/vue-react')
expect(queryByText('Migrating an AngularJS app to Vue.js')). toBeFalsy()
expect(queryByText('Post: Vue.js for React developers')). toBeTruthy()
expect(
queryByText(
'React has massive popularity here are the key benefits of Vue.js over it. See the following table, we'll also look at how the is the content of the post. There's more, we can map React concepts to Vue and vice-versa.'
)
).toBeTruthy()
})
Those two tests work as expected when run with npm run test:unit __tests__/SinglePost.test.js. The following screenshot displays the desired output:
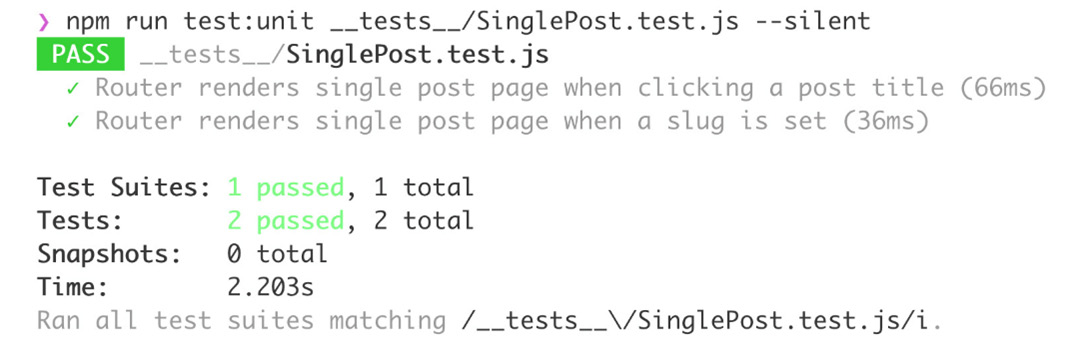
Figure 12.20: Routing tests passing for SinglePost
We have now seen how to use the Vue.js Testing library to test an application that uses vue-router.
Exercise 12.03: Building a Tag Page and Testing Its Routing
Much like we have built a single-post page, we'll now build a tag page, which is similar to the PostList component except only posts with a certain tag are displayed and each post is a link to a relevant single-post view.
To access the code files for this exercise, refer to https://packt.live/39cJqZd:
- We can start by creating a new TagPage component in src/components/TagPage.vue. We know it will receive posts as a prop and that we will want to render a PostList component:
<template>
<div class="flex flex-col md:w-1/2 m-auto">
<h3
class="font-semibold text-sm text-center mb-6"
>
#INSERT_TAG_NAME
</h3>
<PostList :posts="[]" />
</div>
</template>
<script>
import PostList from './PostList'
export default {
components: {
PostList
},
props: {
posts: {
type: Array,
default: () => []
}
},
}
</script>
- Next, we want to wire the TagPage component into the router in src/router.js. We'll import it and add it as part of routes with the /tags/:tagName path:
// other imports
import TagPage from './components/TagPage.vue'
// Vue router registration
const routes = [
// other routes
{
path: '/tags/:tagName',
component: TagPage
}
]
// router instantiation and export
- We can now use $route.params.tagName in a computed property and create a tagPosts computed property that filters posts by tag:
<script>
// imports
export default {
// rest of component
computed: {
tagName() {
return this.$route.params.tagName
},
tagPosts() {
return this.posts.filter(p => p.tags.includes(this.tagName))
}
}
}
</script>
- Now that we have access to tagPosts and tagName, we can replace the placeholders in the template. We will render #{{ tagName }} and bind tagPosts to the posts prop of PostList:
<template>
<div class="flex flex-col md:w-1/2 m-auto">
<h3
class="font-semibold text-sm text-center mb-6"
>
#{{ tagName }}
</h3>
<PostList :posts="tagPosts" />
</div>
</template>
Now, the page displays as follows if we navigate, for example, to /tags/angularjs:
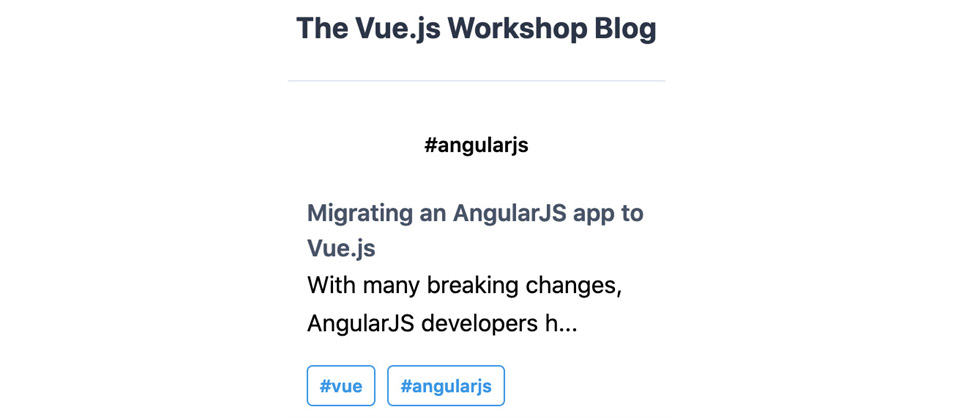
Figure 12.21: Tag page for angularjs
- The next step is to convert the tag anchors (a) in PostListItem to router-link that points to /tags/${tagName} (in src/components/PostListItem.vue):
<template>
<!-- rest of template -->
<router-link
:to="`/tags/${tag}`"
v-for="tag in tags"
:key="tag"
class="flex text-xs font-semibold px-2 py-1 mr-2 rounded border border-blue-500 text-blue-500"
>
#{{ tag }}
</router-link>
<!-- rest of template -->
</template>
- Now it is time to write some tests. We will first check that being on the home page and clicking on #angularjs puts us on the angularjs tag page. We'll write it as follows in __tests__/TagPage.test.js:
import {render, fireEvent} from '@testing-library/vue'
import App from '../src/App.vue'
import router from '../src/router.js'
test('Router renders tag page when clicking a tag in the post list item', async () => {
const {getByText, queryByText} = render(App, { router })
expect(queryByText('The Vue.js Workshop Blog')). toBeTruthy()
expect(queryByText('Vue.js for React developers')). toBeTruthy()
expect(queryByText('Migrating an AngularJS app to Vue.js')). toBeTruthy()
await fireEvent.click(getByText('#angularjs'))
expect(queryByText('Migrating an AngularJS app to Vue.js')). toBeTruthy()
expect(queryByText('Vue.js for React developers')).toBeFalsy()
expect(queryByText('React')).toBeFalsy()
})
- We should also test that going directly to the tag URL works as expected; that is, we do not see irrelevant content:
// import & other tests
test('Router renders tag page when a URL is set', async () => {
const {queryByText} = render(App, { router })
await router.push('/')
await router.replace('/tags/angularjs')
expect(queryByText('Migrating an AngularJS app to Vue.js')). toBeTruthy()
expect(queryByText('Vue.js for React developers')). toBeFalsy()
expect(queryByText('React')).toBeFalsy()
})
The tests pass since the application is working as expected. Therefore, the output will be as follows:

Figure 12.22: TagPage routing tests passing on the command line
We've now seen how to implement and test an application that includes vue-router. In the next section, we will learn about testing Vuex in detail.
Testing Vuex
To show how to test a component that relies on Vuex (Vue.js's official global state management solution), we'll implement and test a newsletter subscription banner.
To start with, we should create the banner template. The banner will contain a Subscribe to the newsletter call to action and a close icon:
<template>
<div class="text-center py-4 md:px-4">
<div
class="py-2 px-4 bg-indigo-800 items-center text-indigo-100
leading-none md:rounded-full flex md:inline-flex"
role="alert"
>
<span
class="font-semibold ml-2 md:mr-2 text-left flex-auto"
>
Subscribe to the newsletter
</span>
<svg
class="fill-current h-6 w-6 text-indigo-500"
role="button"
xmlns="http://www.w3.org/2000/svg"
viewBox="0 0 20 20"
>
<title>Close</title>
<path
d="M14.348 14.849a1.2 1.2 0 0 1-1.697 0L10 11.819l-2.651
3.029a1.2 1.2 0 1 1-1.697-1.697l2.758-3.15-2.759-3.152a1. 2
1.2 0 1 1 1.697-1.697L10 8.183l2.651-3.031a1.2 1.2 0 1 1
1.697 1.697l-2.758 3.152 2.758 3.15a1.2 1.2 0 0 1 0 1. 698z"
/>
</svg>
</div>
</div>
</template>
We can display the NewsletterBanner component in the App.vue file as follows:
<template>
<!-- rest of template -->
<NewsletterBanner />
<!-- rest of template -->
</template>
<script>
import NewsletterBanner from './components/NewsletterBanner.vue'
export default {
components: {
NewsletterBanner
},
// other component properties
}
</script>
We'll then install Vuex with the npm install --save vuex command. Once Vuex is installed, we can initialize our store in a store.js file as follows:
import Vue from 'vue'
import Vuex from 'vuex'
Vue.use(Vuex)
export default new Vuex.Store({
state: {},
mutations: {}
})
Our Vuex store is also registered in the main.js file:
// other imports
import store from './store'
// other configuration
new Vue({
// other vue options
store
}).$mount('#app')
In order to decide whether the newsletter banner should be displayed or not, we need to add an initial state to our store:
// imports and configuration
export default new Vuex.Store({
state: {
dismissedSubscribeBanner: false
}
})
To close the banner, we need a mutation that will set dismissedSubscribeBanner to true:
// imports and configuration
export default new Vuex.Store({
// other store configuration
mutations: {
dismissSubscribeBanner(state) {
state.dismissedSubscribeBanner = true
}
}
})
We can now use the store state and the dismissSubscribeBanner mutation to decide whether to show the banner (using v-if) and whether to close it (binding to a click on the close button):
<template>
<div v-if="showBanner" class="text-center py-4 md:px-4">
<!-- rest of template -->
<svg
@click="closeBanner()"
class="fill-current h-6 w-6 text-indigo-500"
role="button"
xmlns=http://www.w3.org/2000/svg
viewBox="0 0 20 20"
>
<!-- rest of the template -->
</div>
</template>
<script>
export default {
methods: {
closeBanner() {
this.$store.commit('dismissSubscribeBanner')
}
},
computed: {
showBanner() {
return !this.$store.state.dismissedSubscribeBanner
}
}
}
</script>
At this point, the banner looks like this in a browser:
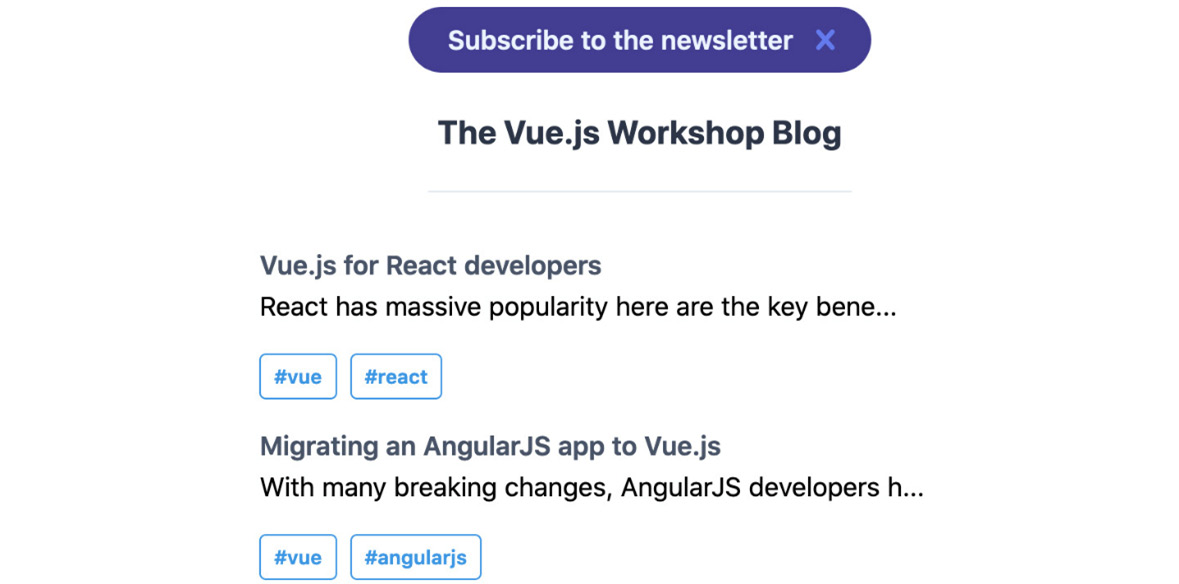
Figure 12.23: Newsletter banner displayed in a browser
To write unit tests, we will use the Vue Testing library, which provides a facility for injecting a Vuex store. We'll need to import the store and the NewsletterBanner component.
We can start with a sanity check that, by default, the newsletter banner is displayed:
import {render, fireEvent} from '@testing-library/vue'
import NewsletterBanner from '../src/components/ NewsletterBanner.vue'
import store from '../src/store'
test('Newsletter Banner should display if store is initialised with it not dismissed', () => {
const {queryByText} = render(NewsletterBanner, { store })
expect(queryByText('Subscribe to the newsletter')).toBeTruthy()
})
The next check should be that if the store has dismissedSubscribeBanner: true, the banner should not be displayed:
// imports and other tests
test('Newsletter Banner should not display if store is initialised with it dismissed', () => {
const {queryByText} = render(NewsletterBanner, { store: {
state: {
dismissedSubscribeBanner: true
}
} })
expect(queryByText('Subscribe to the newsletter')).toBeFalsy()
})
The final test we'll write is to make sure that clicking the banner's close button commits a mutation to the store. We can do this by injecting a stub as the dismissSubscribeBanner mutation and checking that it is called when clicking the close button:
// imports and other tests
test('Newsletter Banner should hide on "close" button click', async () => {
const dismissSubscribeBanner = jest.fn()
const {getByText} = render(NewsletterBanner, {
store: {
...store,
mutations: {
dismissSubscribeBanner
}
}
})
await fireEvent.click(getByText('Close'))
expect(dismissSubscribeBanner).toHaveBeenCalledTimes(1)
})
The tests will now pass when run with npm run test:unit __tests__/NewsletterBanner.test.js, as follows:
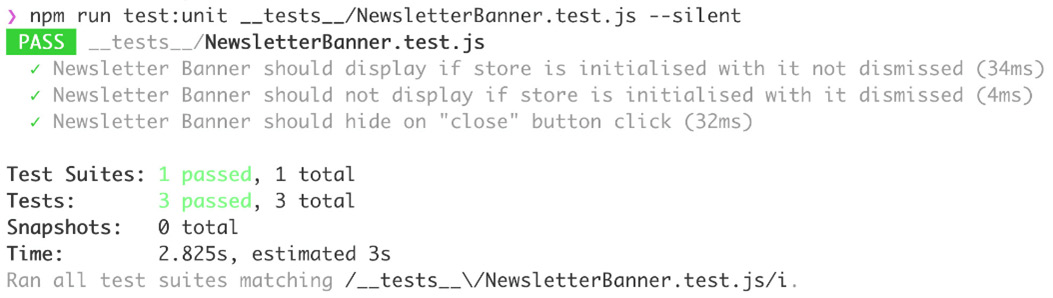
Figure 12.24: Unit tests for NewsletterBanner passing on the command line
We've now seen how the Vue.js Testing library can be used to test application functionality driven by Vuex.
Exercise 12.04: Building and Testing a Cookie Disclaimer Banner (Vuex)
We'll now look at how to implement a cookie disclaimer banner using Vuex and how to test it with the Vue.js Testing library.
We will store whether the cookie banner is showing in Vuex (the default is true); when the banner is closed, we will store it in Vuex.
Test this opening/closing with a mock Vuex store. To access the code files for this exercise, refer to https://packt.live/36UzksP:
- Create a green cookie banner with a Cookies Disclaimer title in bold, the disclaimer, and an I agree button. We will create this in src/components/CookieBanner.vue:
<template>
<div
class="flex flex-row bg-green-100 border text-center border-green-400
text-green-700 mt-8 px-4 md:px-8 py-3 rounded relative"
role="alert"
>
<div class="flex flex-col">
<strong class="font-bold w-full flex">Cookies Disclaimer
</strong>
<span class="block sm:inline">We use cookies to improve your experience</span>
</div>
<button
class="ml-auto align-center bg-transparent hover:bg-green-500
text-green-700 font-semibold font-sm hover:text-white py-2 px-4 border
border-green-500 hover:border-transparent rounded"
>
I agree
</button>
</div>
</template>
- Next, we will import, register, and render CookieBanner below router-view in src/App.vue:
<template>
<!-- rest of template -->
<CookieBanner />
<!-- rest of template -->
</template>
<script>
// other imports
import CookieBanner from './components/CookieBanner.vue'
export default {
components: {
// other components
CookieBanner
},
// other component properties
}
</script>
- Add a state slice to control whether to display the cookie banner. In our Vuex store, we will initialize this acceptedCookie field as false:
// imports and configuration
export default new Vuex.Store({
state: {
// other state fields
acceptedCookie: false
},
// rest of vuex configuration
})
- We will also need an acceptCookie mutation to close the banner:
// imports and configuration
export default new Vuex.Store({
// rest of vuex configuration
mutations: {
// other mutations
acceptCookie(state) {
state.acceptedCookie = true
}
}
})
- Next, we will expose store state as an acceptedCookie computed property. We will create an acceptCookie function that triggers the acceptCookie mutation:
export default {
methods: {
acceptCookie() {
this.$store.commit('acceptCookie')
}
},
computed: {
acceptedCookie() {
return this.$store.state.acceptedCookie
}
}
}
</script>
- We will use v-if to show the banner when cookies have not been accepted yet. The I agree button will close the banner when it's clicked by toggling acceptCookie:
<template>
<div
v-if="!acceptedCookie"
class="flex flex-row bg-green-100 border text-center border-green-400
text-green-700 mt-8 px-4 md:px-8 py-3 rounded relative"
role="alert"
>
<!-- rest of template -->
<button
@click="acceptCookie()"
class="ml-auto align-center bg-transparent hover:bg-green-500
text-green-700 font-semibold font-sm hover:text-white py-2 px-4 border
border-green-500 hover:border-transparent rounded"
>
I agree
</button>
</div>
</template>
We have now got a cookie banner that shows until I agree is clicked, as shown in the following screenshot:
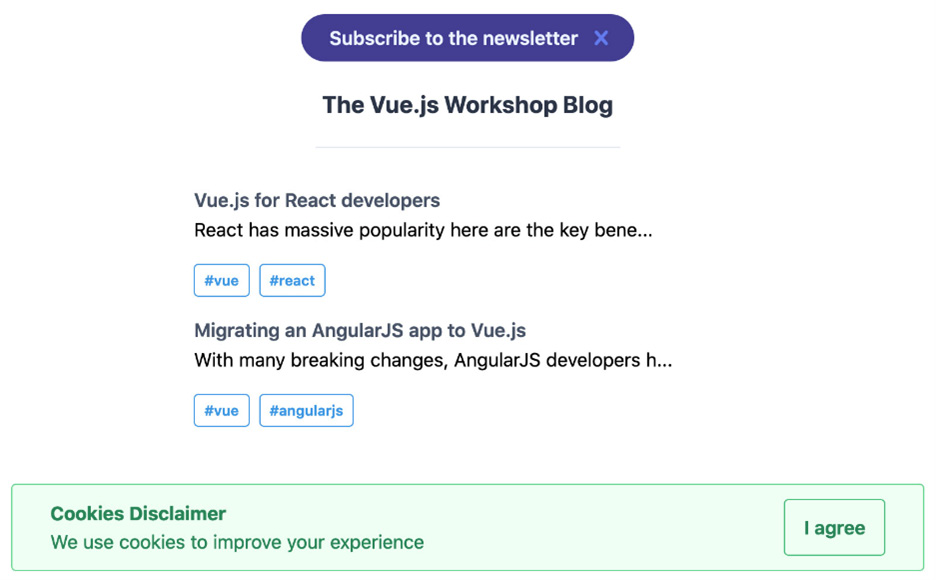
Figure 12.25: Cookie banner displayed in the browser
- We will now write a test that checks that the CookieBanner component is displayed by default:
import {render, fireEvent} from '@testing-library/vue'
import CookieBanner from '../src/components/CookieBanner.vue'
import store from '../src/store'
test('Cookie Banner should display if store is initialised with it not dismissed', () => {
const {queryByText} = render(CookieBanner, { store })
expect(queryByText('Cookies Disclaimer')).toBeTruthy()
})
- We will also write a test to check that if acceptedCookie is true in the store, the cookie banner won't be displayed:
test('Cookie Banner should not display if store is initialised with it dismissed', () => {
const {queryByText} = render(CookieBanner, { store: {
state: {
acceptedCookie: true
}
} })
expect(queryByText('Cookies Disclaimer')).toBeFalsy()
})
- Finally, we want to check that when the I agree button is clicked, the acceptCookie mutation is triggered:
test('Cookie Banner should hide on "I agree" button click', async () => {
const acceptCookie = jest.fn()
const {getByText} = render(CookieBanner, {
store: {
...store,
mutations: {
acceptCookie
}
}
})
await fireEvent.click(getByText('I agree'))
expect(acceptCookie).toHaveBeenCalledTimes(1)
})
The three tests we wrote pass when run with npm run test:unit __tests__/CookieBanner.test.js, as follows:

Figure 12.26: Tests for the cookie banner passing
We've now seen how to test components that rely on Vuex for state and updates.
Next, we'll look at snapshot testing and see how it simplifies the testing of render output.
Snapshot Testing
Snapshot tests provide a way to write tests for fast-changing pieces of code without keeping the assertion data inline with the test. They store snapshots instead.
Changes to a snapshot reflect changes to the output, which is quite useful for code reviews.
For example, we can add a snapshot test to the PostList.test.js file:
// imports and tests
test('Post List renders correctly', () => {
const wrapper = mount(PostList, {
propsData: {
posts: [
{
title: 'Title 1',
description: 'Description 1',
tags: ['react', 'vue']
},
{
title: 'Title 2',
description: 'Description 2',
tags: ['html', 'angularjs']
}
]
}
})
expect(wrapper.text()).toMatchSnapshot()
})
When we next run this test file, with npm run test:unit __tests__/PostList.test.js, we will get the following output:
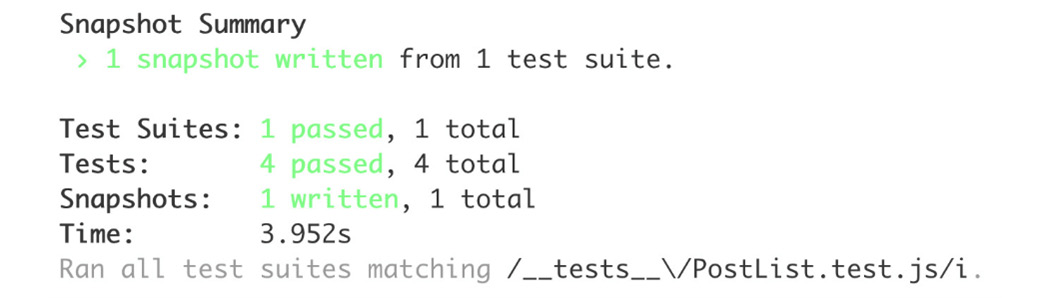
Figure 12.27: Snapshot test run for the first time
The snapshot was written to __tests__/__snapshots__/PostList.test.js.snap, as follows:
// Jest Snapshot v1, https://goo.gl/fbAQLP
exports[`Post List renders correctly 1`] = `
"Title 1 Description 1
#react
#vue
Title 2 Description 2
#html
#angularjs"
`;
This makes it easy to quickly see what the changes mean in terms of concrete output.
We've now seen how to use snapshot tests. Next, we'll put all the tools we learned in the chapter together to add a new page.
Activity 12.01: Adding a Simple Search by Title Page with Tests
We have already built a post list page, a single-post view page, and a posts-by-tag page.
A great way to resurface old content on a blog is by implementing a good search functionality. We will add search to the PostList page:
- Create the search form with an input and a button in a new file at src/components/SearchForm.vue.
- We'll now get the form to display by importing, registering, and rendering it in src/App.vue.
We are now able to see the search form in the application, as follows:
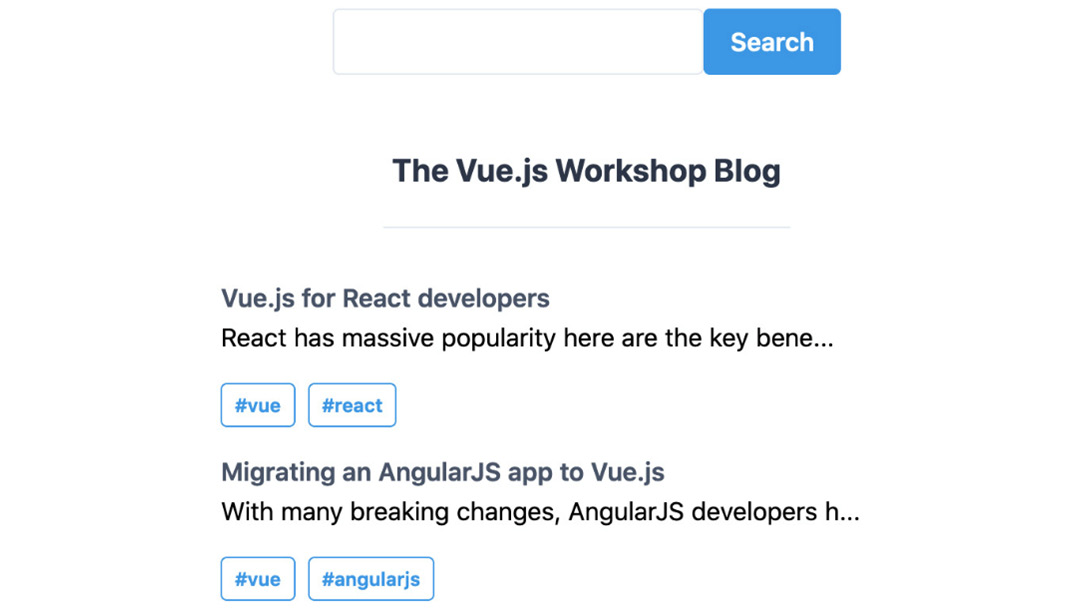
Figure 12.28: The post list view with a search form
- We're now ready to add a snapshot test for the search form. In __tests__/SearchForm.test.js, we should add SearchForm should match expected HTML.
- We want to track the contents of the search form input using v-model to two-way bind the searchTerm instance variable and the contents of the input.
- When the search form is submitted, we'll need to update the URL with the right parameter. This can be done with this.$router.push(). We will store the search in a q query parameter.
- We will want to reflect the state of the q query parameter in the search form input. We can do this by reading q from this.$route.query and setting it as the initial value for the searchTerm data field in the SearchForm component state.
- Next, we'll want to filter the posts passed to PostList on the home page. We'll use this.$route.query.q in a computed property that filters posts by their title. This new computed property will then be used instead of posts in src/App.vue.
- Next, we should add a test that changes the search query parameter and check that the app shows the right result. To do this, we can import src/App.vue, src/store.js and src/router.js, and render the app with the store and the router. We can then update the search field contents by using the fact that the placeholder for the field is Search. Finally, we can submit the form by clicking the element where test id is Search (which is the search button).
Note
The solution for this activity can be found via this link.
Summary
Throughout this chapter, we've looked at different approaches to testing different types of Vue.js applications.
Testing in general is useful for empirically showing that the system is working. Unit tests are the cheapest to build and maintain and should be the base of testing functionality. System tests are the next level up in the testing pyramid and allow you to gain confidence that the majority of features are working as expected. End-to-end tests show that the main flows of the full system work.
We've seen how to unit test components, filters, component methods, and mixins, as well as testing through the layers, and testing component output in a black box fashion instead of inspecting component internals to test functionality. Using the Vue.js Testing library, we have tested advanced functionality, such as routing and applications, that leverage Vuex.
Finally, we looked at snapshot testing and saw how it can be an effective way to write tests for template-heavy chunks of code.
In the next chapter, we will look at end-to-end testing techniques that can be applied to Vue.js applications.