
2.7 USING ADAPTED LENSES
Thanks to its short flange-back distance, the X-mount system can host almost every existing full-frame, medium format, cinema (Super 35 and larger), or APS-C lens. All you need is a fitting adapter. This means that in addition to about three dozen native lenses, you have access to hundreds of additional modern and legacy lenses.
It’s a similar situation with the GFX and its G-mount: Using dumb or smart adapters, you can not only adapt many classic medium-format lenses, but also a large collection of classic and current full-frame (35mm format) DSLR lenses.
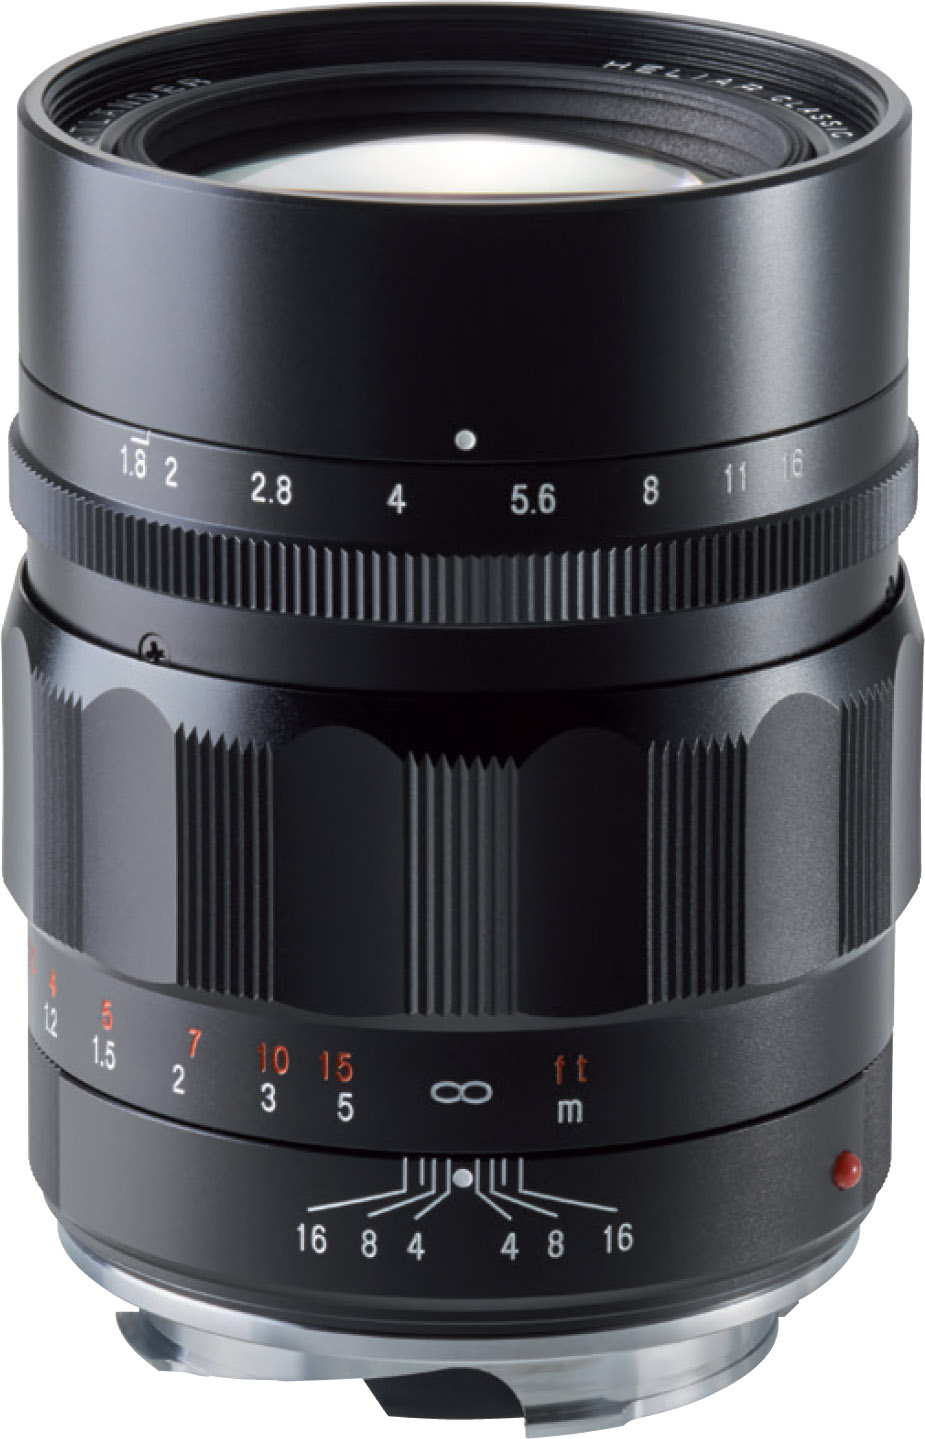
Fig. 234: Leica M-mount lenses like this affordable Voigtländer Heliar 75mmF1.8 can be mechanically adapted to Fujifilm X- or G-mount cameras.
X-mount and G-mount lens adapters are available for many old and current third-party mounts. Here are a few tips to help you find the right adapter for your legacy lens:
- Adapters are available at many price and quality levels, and you get what you pay for. Don’t buy too cheap or you may end up buying twice. The German manufacturer Novoflex is setting the benchmark here, but even their simple mechanical adapters can be more expensive than the lens you are adapting. Asian manufacturers like Kipon or Metabones enjoy a good reputation, and they all offer adapters for a wide variety of lens mounts.
- With dumb (a.k.a. merely mechanical) adapters, third-party lenses can only be used as manual focus lenses with manual mechanical aperture control. Smart electronic adapters can translate between Fuji’s AF protocol and the AF protocols of popular brands like Canon, and they can also control the aperture of the lens. Some even support the OIS of the third-party lens.
- With dumb adapters, adapted lenses always operate with a manually set working aperture. This means that when you are stopping down the lens, the live view and live histogram of your camera must contend with the smaller aperture’s reduced amount of light. It also means that mechanically adapted lenses can only be used in exposure modes A or M. With smart adapters, all exposure modes should be available.

Fig. 235: Mechanical M42 adapters like this high-end model from Novoflex allow you to connect legacy M42 screw-mount lenses to X-mount cameras.
- Many modern third-party lenses that don’t feature a manual aperture ring can still be mechanically adapted to your camera, but you can’t change their aperture while they are connected via a dumb adapter. That’s why some of these adapters feature a mechanical replacement aperture, but the results produced by these devices will differ from the results created by the original lens. If available, use a smart adapter for such lenses.
- Modern electronic features like optical image stabilization (OIS) aren’t supported by dumb adapters since there is no communication or power transfer between the camera and the adapted lens. In fact, the camera believes that there’s no lens attached at all. Some smart adapters do offer OIS support.
- Speed Booster Ultra from Metabones offers the fascinating possibility to attach full-frame legacy lenses from Contax/Zeiss, Canon FD, Nikon G, Minolta MD, and Leica R to X-mount cameras without changing their angle of view or cropping the image on your camera’s smaller APS-C sensor. With Speed Booster, your APS-C camera sees what a full-frame (35mm format) camera would see. Speed Booster is a focal reducer—basically the opposite of a teleconverter [134]. It reduces the focal length of the adapted lens by a factor of 0.71. At the same time, the brightness (speed) of the lens is increased by about one stop. At 400 to 600 dollars apiece, Speed Booster adapters aren’t cheap. However, they offer better quality than knock-off products like the Lens Turbo II by Zhongyi Mitakon.
- Fujifilm offers its own X-mount adapter for Leica M-type full-frame lenses. This is a regular adapter (no Speed Booster), but it features electronic contacts, so your camera will recognize the adapter when it’s mounted. It also features an Fn button that provides direct access to the camera’s MOUNT ADAPTOR SETTING menu. With all other dumb adapters, you must set SHOOT WITHOUT LENS > ON to take a picture (usually found under SET UP > BUTTON/DIAL SETTING).

Fig. 236: There’s no official Fujifilm M-mount adapter for the GFX, but you have a choice of third-party offerings. The Fotodiox Pro Double Adapter even combines two G-mount adapters in one design: you can connect Leica M-mount and Alpa 35mm SLR mount lenses to a GFX.
- Similar to the M adapter, Fujifilm also offers a dedicated H MOUNT ADAPTER G to use Fujifilm/Hasselblad H lenses on a GFX.
- Caution: don’t use cheap macro lens adapters with electronic contacts. These knock-off adapters are designed to serve as macro spacer rings for native X-mount or G-mount lenses. They promise full AF functionality thanks to their electronic contacts, but in reality, these adapter rings can be a bad fit and can damage your camera and lenses. Instead, I recommend using Fujifilm’s own electronic macro extension tubes.
- If possible, don’t combine more than one adapter. Stacking adapters leads to a measurable and visible loss in quality. Instead, get the right adapter for your lens.
Adapting third-party lenses |
When you connect third-party lenses to your camera via a mechanical (dumb) adapter, the camera won’t notice it due to the lack of electronic contacts. It will think there’s no lens attached at all.
- To make the camera work with mechanically adapted lenses, select (SET UP > BUTTON/DIAL SETTING >) SHOOT WITHOUT LENS > ON.
- Enter the focal length of your adapted lens in the SHOOTING SETTING > MOUNT ADAPTOR SETTING > LENS REGISTRATION menu. You can either select the focal length from one of four presets or enter it manually in LENS 5 or LENS 6. Always enter the actual focal length of the adapted lens (the number that is printed on the lens), not its full-frame (for APS-C cameras) or medium-format equivalent (for GFX cameras). This ensures that the EXIF data will display the correct focal length, and it will also adjust the bright frame in the X-Pro1 and X-Pro2. The only exceptions are cases when you are using a special optical adapter that changes the focal length of the adapted lens, such as a Metabones Speed Booster for the X-mount (focal length reduction), or a Laowa Magic Format Converter for the G-mount (focal length increase). Entering the correct focal length is especially important if you use a camera with IBIS, like the X-H1.
Please note that the menu locations mentioned above refer to cameras with X-Processor Pro and X-Processor 4. Older/other X camera models with interchangeable lenses still offer the same features for adapted lenses, but you may have to find them at different menu locations.

Fig. 237: Third-party lenses with “character” can help you achieve images with a distinctive look and bokeh. For this series, I attached a Voigtländer Heliar 75mmF1.8 M-mount lens to my X-E1.
Exposing with mechanically adapted lenses |
Mechanically adapted lenses (dumb adapters) can be used in exposure modes A (aperture priority) and M (manual mode). There are also a few notable differences between exposing with native lenses and adapted lenses:
- Native lenses close to working aperture when the shutter is half-pressed or when the shot is taken. Mechanically adapted lenses always operate with the aperture set by the user. As soon as you stop down an adapted lens, less light reaches the sensor and the camera’s exposure metering. Stopping down adapted lenses increases the depth of field in the viewfinder.
- Since less light reaches the sensor when the lens is stopped down, the camera must increase the live view image amplification to display an accurate WYSIWYG simulation of the scene. This decreases the quality of the live view image and can also negatively affect the live view’s frame rate.
- Since the camera thinks there’s no lens attached at all, the aperture is always displayed as F0 in the viewfinder (and f/1 in the EXIF data). There’s no way for the camera to know which aperture has been set on a mechanically adapted lens.
- Shooting in poor light with mechanically adapted lenses can be tricky when you stop down the aperture. It’s possible to reach the live view’s amplification limit. Once this limit is reached, the live view and live histogram cannot display the actual brightness of the scene, so it appears darker than the image that will be exposed. However, exposure metering will still work correctly, and the camera will display the correct shutter speed.
- Since the electronic live view cannot control the aperture of a mechanically adapted lens, it takes longer for the camera to adjust to abrupt brightness changes. You can test this yourself by quickly panning the camera from a bright scene to a dark scene and vice versa. With adapted lenses, the camera may need a few seconds for the live view to adapt to the changing brightness levels.

Fig. 238: With “dumb” mechanical adapters, exposing with adapted lenses is limited to modes A and M, and metering always takes place at the set working aperture. No matter which aperture you set, EXIF data will always show f/1. For this street portrait, I attached a Helios 44M-4 lens to my X-E2 using a Novoflex M42 adapter.
Focusing with mechanically adapted lenses |
Mechanically adapted lenses can only be focused manually. Here are a few tips to make things easier for you:
- Set your camera to manual focus. This makes sure that MF assistants such as Focus Check, focus peaking, and digital split image are available.
- The electronic distance and depth-of-field (DOF) scale of your camera is useless in concert with mechanically adapted lenses. Instead, you must rely on analog scales and markers that may be engraved in the barrel of your adapted lens. Remember that the DOF scale on your lens is probably less conservative than what you’re used to from the electronic scale in your camera. The analog scale doesn’t guarantee pixel-sharp results at 100% image magnification. Instead, it will more likely resemble the FILM FORMAT BASIS option of the electronic DOF scale.
- The most important tool for focusing with adapted lenses is the magnifier tool. You can usually activate it by pressing the rear command dial (if you didn’t change its default Fn button assignment). Turn the rear command dial to cycle between the available magnifications. Don’t forget: instead of focusing and recomposing, it’s better to select a focus frame position that covers the part of the image you want to be in focus.
- Use focus peaking or digital split image. You can cycle between these MF assistants and the standard view by pressing and holding the rear command dial. The magnifier tool can be combined with focus peaking and digital split image. However, in concert with digital split image, only one magnification level is available.

Fig. 239: Focusing mechanically adapted lenses can be tricky. My preferred method for pinpoint manual focus is focus peaking in concert with the magnifier tool. This example was shot with a Helios 44M-4 lens that was adapted to my X-E1 using a Lens Turbo II focal reducer.
- The magnifier tool and MF assistants work best at wide-open aperture, when the DOF is as small as possible. However, some lenses exhibit focus shift, meaning the focus plane shifts when the lens is stopped down. The increased DOF from stopping down the lens may not be sufficient to compensate for the focus shift, so your carefully focused shot will end up out of focus when the aperture is closed. If you are using a lens with pronounced focus shift, it’s better to focus with the actual working aperture instead of the wide-open aperture. Please note that focus shift isn’t a matter of price—even a few high-end lenses from Leica and Zeiss exhibit it quite prominently.
Fuji’s own M-mount adapter is a little bit different from conventional adapters:
- The adapter features electronic XF lens contacts to identify itself to the camera. However, there’s no transmission of any lens data since the adapter doesn’t know which M-type lens has been attached or what distance and aperture has been set. Sadly, the electronic contacts also make the inner adapter tube thinner than normal, so not all M-type lenses are physically compatible with it. To be certain, you can download a list of compatible and incompatible lenses [135]. Fuji also encloses a template with its M adapter that you can use to find out if your M lens measures up with the adapter.
- Pressing the function button on the adapter directly opens the camera’s adapter menu.
- The camera’s adapter menu offers a few additional functions when a Fuji M-mount adapter is attached. In addition to entering the focal length, you can also enter correction values for lens distortion, color shading, and vignetting. Those corrections only affect the JPEGs during RAW conversion with the built-in or external RAW converters. As usual, the corrections are burned into the RAW file metadata where they can be interpreted by RAW conversion software. However, color-shade data is currently only processed by the camera’s built-in converter. For each adapted lens, you must find out the right correction values for yourself before you can enter them. There aren’t any reference lists you can use that I know of.

Fig. 240: Fujifilm’s own M-mount adapter features electronic contacts and a function button that opens the camera’s adapter menu.
Similar to the M-mount adapter, Fujifilm also offers their own H-mount adapter to use H lenses from Hasselblad and Fujifilm on a GFX camera. The FUJIFILM H-MOUNT ADAPTER G is an electronic adapter that allows you to control the lens aperture and built-in leaf shutter in the adapted lens with your GFX. As of December 2018, there was still no autofocus support, though. A list with compatible lenses is available online [136].
With the H-mount adapter, the lens aperture can be changed using the command dial on the camera body. The built-in leaf shutter in the lenses allows a maximum flash sync speed of 1/800s without HSS/FP. Since the adapter is equipped with electrical contacts that can communicate with the camera body and the lens, it saves and applies correctional data for each adapted lens. The H-mount adapter can be used in exposure modes A (aperture priority) and M (manual mode).
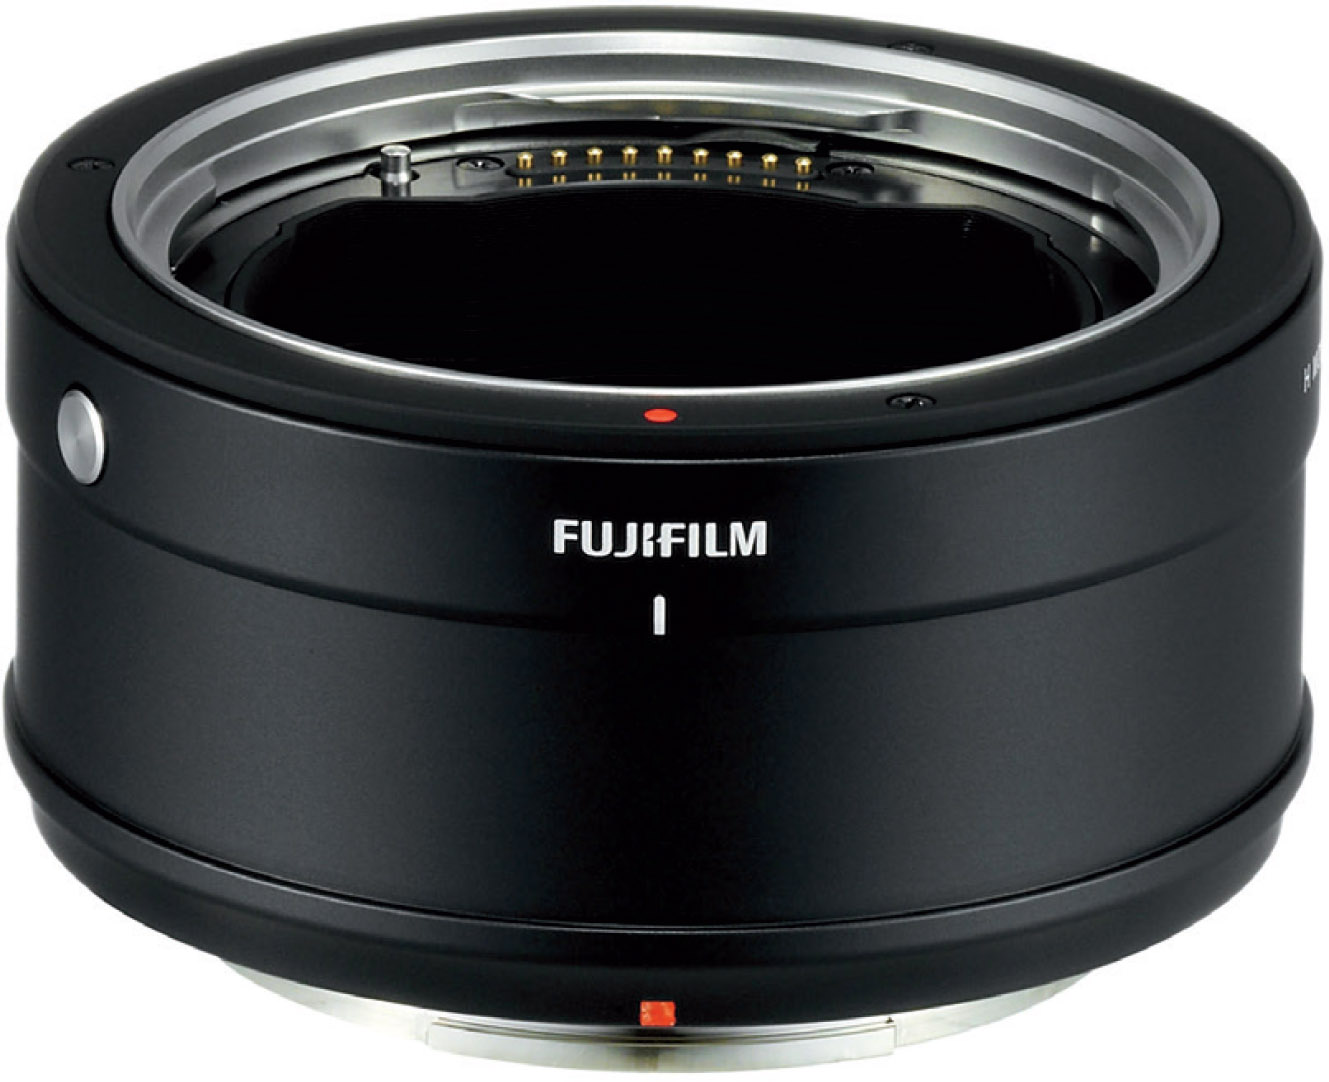
Fig. 241: Fujifilm’s H-mount adapter communicates with Hasselblad/Fujifilm H lenses via electronic contacts and features digital lens corrections as well as electronic aperture and leaf shutter control.
Quality considerations |
In the age of pixel peeping, some classic lenses from the analog film age may have issues with high-resolution digital sensors. It’s not about the price: While certain expensive Leica lenses may be outright disappointing when used on a digital system camera, some really cheap old lenses can deliver excellent results.
How can we explain that? The lens design plays a major role: Some compact lenses (typically for M-mount cameras) feature a symmetrical design that tends to be more problematic with digital sensors than telecentric SLR designs.
Also note that most adapted lenses are intended for full-frame [137] cameras. Attached to an X-mount camera with its smaller APS-C [138] sensor (23.7 x 15.6 mm), the original format of the lens is cropped. If you could extend the size of Fuji’s older 16 MP APS-C sensors to full-frame (36 x 24 mm), their resolution would be 36 megapixels, just like the Nikon D810 or Sony A7R. There aren’t that many older full-frame lenses that can fully use this kind of resolution, and with the current 24 MP and 26 MP APS-C sensors, the demands are even higher.
However, many older lenses offer something else: character. Because maximum sharpness and resolution weren’t as important back then as they are today, the designers of legacy lenses could put their priorities elsewhere: for example, by designing lenses that provide outstanding bokeh [139].

Fig. 242: Good or interesting legacy lenses don’t have to be expensive: this shot was taken with a Russian Helios 44M-4, a 58mmF2 lens with an M42 screw-mount. You can often find this lens online for less than 25 dollars. For this example, I connected the lens with a Metabones Speed Booster Ultra focal reducer to my X-E2S.
Adapting full-frame (35mm format) lenses to the GFX can lead to similar issues. Luckily, most full-frame lenses are capable to illuminate the large sensor area of the GFX, however at the cost of more vignetting and possibly increased softness near the edges. Of course, you can always crop the image later, or you can set the GFX to 35mm crop mode right away. In crop mode, the GFX will only expose the full-frame portion of its larger sensor and behave like a 24×36mm camera. The live view, RAW files, and JPEGs will adjust accordingly, so you’ll get smaller RAWs and JPEGs, too.

Fig. 243: Adapting “full-frame” lenses is popular among GFX users, because most legacy lenses (especially those with a focal length of 50mm and more) can illuminate the larger 44×33mm sensor without much vignetting. For this example, I attached a Zeiss T* Sonnar 2.8/180 MM via a mechanical Yashica/Contax-to-G-mount adapter and shot with the full GFX sensor area. Optionally, you can also use the GFX in crop mode, which covers the center 24×36mm section of the sensor and makes the GFX behave like a full-frame camera.
Speed Booster: miracle or trick? |
Speed Booster and Speed Booster Ultra from Metabones are special adapters for X-mount cameras. They convert the focal lengths of full-frame lenses (35mm format) to their APS-C equivalents. This means that the adapted lens covers the same angle of view on your X-mount camera as it would on a full-frame camera.
Take my Zeiss Sonnar T* 2.8/180 MM as an example. It’s a classic telephoto lens with a Contax/Yashica full-frame mount. Adapting this lens to any X-mount camera without Speed Booster causes the results to look like images taken with a 270mmF4.2 lens on a full-frame camera. That’s because there is a crop factor of 1.5 between full-frame and APS-C.

Fig. 244: Metabones Speed Booster Ultra with Contax mount.
Of course, many users of full-frame lenses would like to use them on their APS-C camera, yet keep the angle of view and depth of field intact. Speed Booster can do that for you because it reduces the focal length of the adapted lens by a factor of 0.71. With Speed Booster, my 2.8/180mm full-frame Sonnar turns into a 2/128mm APS-C lens. Enter 128mm as the focal length in the MOUNT ADAPTOR SETTING > LENS REGISTRATION menu of your camera.
Is there a price to pay? Well, yes, since Speed Booster isn’t cheap. With regards to image quality, the MTF [140] of the new lens is actually improved, but there’s a chance of vignetting when Speed Booster is used to adapt fast lenses. That said, the newer Speed Booster Ultra improves vignetting issues that were problematic with the original Speed Booster. In any case, it’s better than knock-off products such as Lens Turbo II.

Fig. 245: This example was taken with the Contax version of Speed Booster and a Zeiss Sonnar T* 2.8/180 MM on an X-E1.
Speed Booster increases the speed (or maximum aperture) of a lens by about one stop, so you can use faster shutter speeds or lower ISO settings. For example, let’s assume you need ISO 800 to shoot a scene with your full-frame DSLR at f/2.8 (wide open) with a 180mm lens and 1/1000s. On the X-mount, Speed Booster turns this lens into a 128mmF2 lens with the same angle of view. Shooting wide open (now f/2) at 1/1000s, you can drop the ISO to 400. Since full-frame sensors tend to offer an ISO advantage of about one stop over APS-C, the results from both cameras should be equivalent, because the APS-C sensor can compensate its smaller size by applying 1 EV less ISO amplification.
Speed Booster is available for several classic mounts, such as Canon FD, Nikon G, Contax/Yashica (Zeiss), Minolta MD, Contarex, ALPA, and Leica R. Sadly, there is no Speed Booster for Leica M, because an M adapter would be too thin to house the necessary optics. An announcement from Metabones competitor Kipon to build a really thin APS-C focal reducer for Leica M lenses also didn’t materialize.
GFX users certainly don’t need a Speed Booster to adapt full-frame lenses. They can either attach full-frame (35mm format) lenses “as is” with a mechanical or smart adapter, or use an optical format converter like the Laowa Magic Format Converter (MFC) [141]. It’s basically a teleconverter that projects the smaller full-frame image circle on the larger image circle of the GFX.

Fig. 246: The Laowa MFC from Venus Optics is a teleconverter that blows up the image circle of an adapted full-frame (35mm format) lens to cover the 44×33mm sensor in the GFX.
As of December 2018, the Laowa MFC was available in versions for Nikon F/G and Canon EF lenses. The latter adapter offers no electronic aperture control, so you are probably better off using one of the EF-to-G-mount smart adapters without image circle conversion. Many full-frame EF lenses cover the full GFX image circle, anyway.
Electronic smart adapters |
Electronic smart adapters have been designed for modern third-party lenses like the Canon EF system. These lenses have electronic contacts and communicate with the camera body to offer functions such as autofocus, electronic aperture control, and optical image stabilization (OIS). They are also getting their power from the camera body.
Connecting modern EF lenses on the X-mount or G-mount with a simple mechanical (a.k.a. dumb) adapter turns out to be a frustrating experience: you cannot change the aperture while the lens is attached to the Fuji camera; there’s no autofocus; the OIS doesn’t work; and there is no EXIF data transmission to the camera.
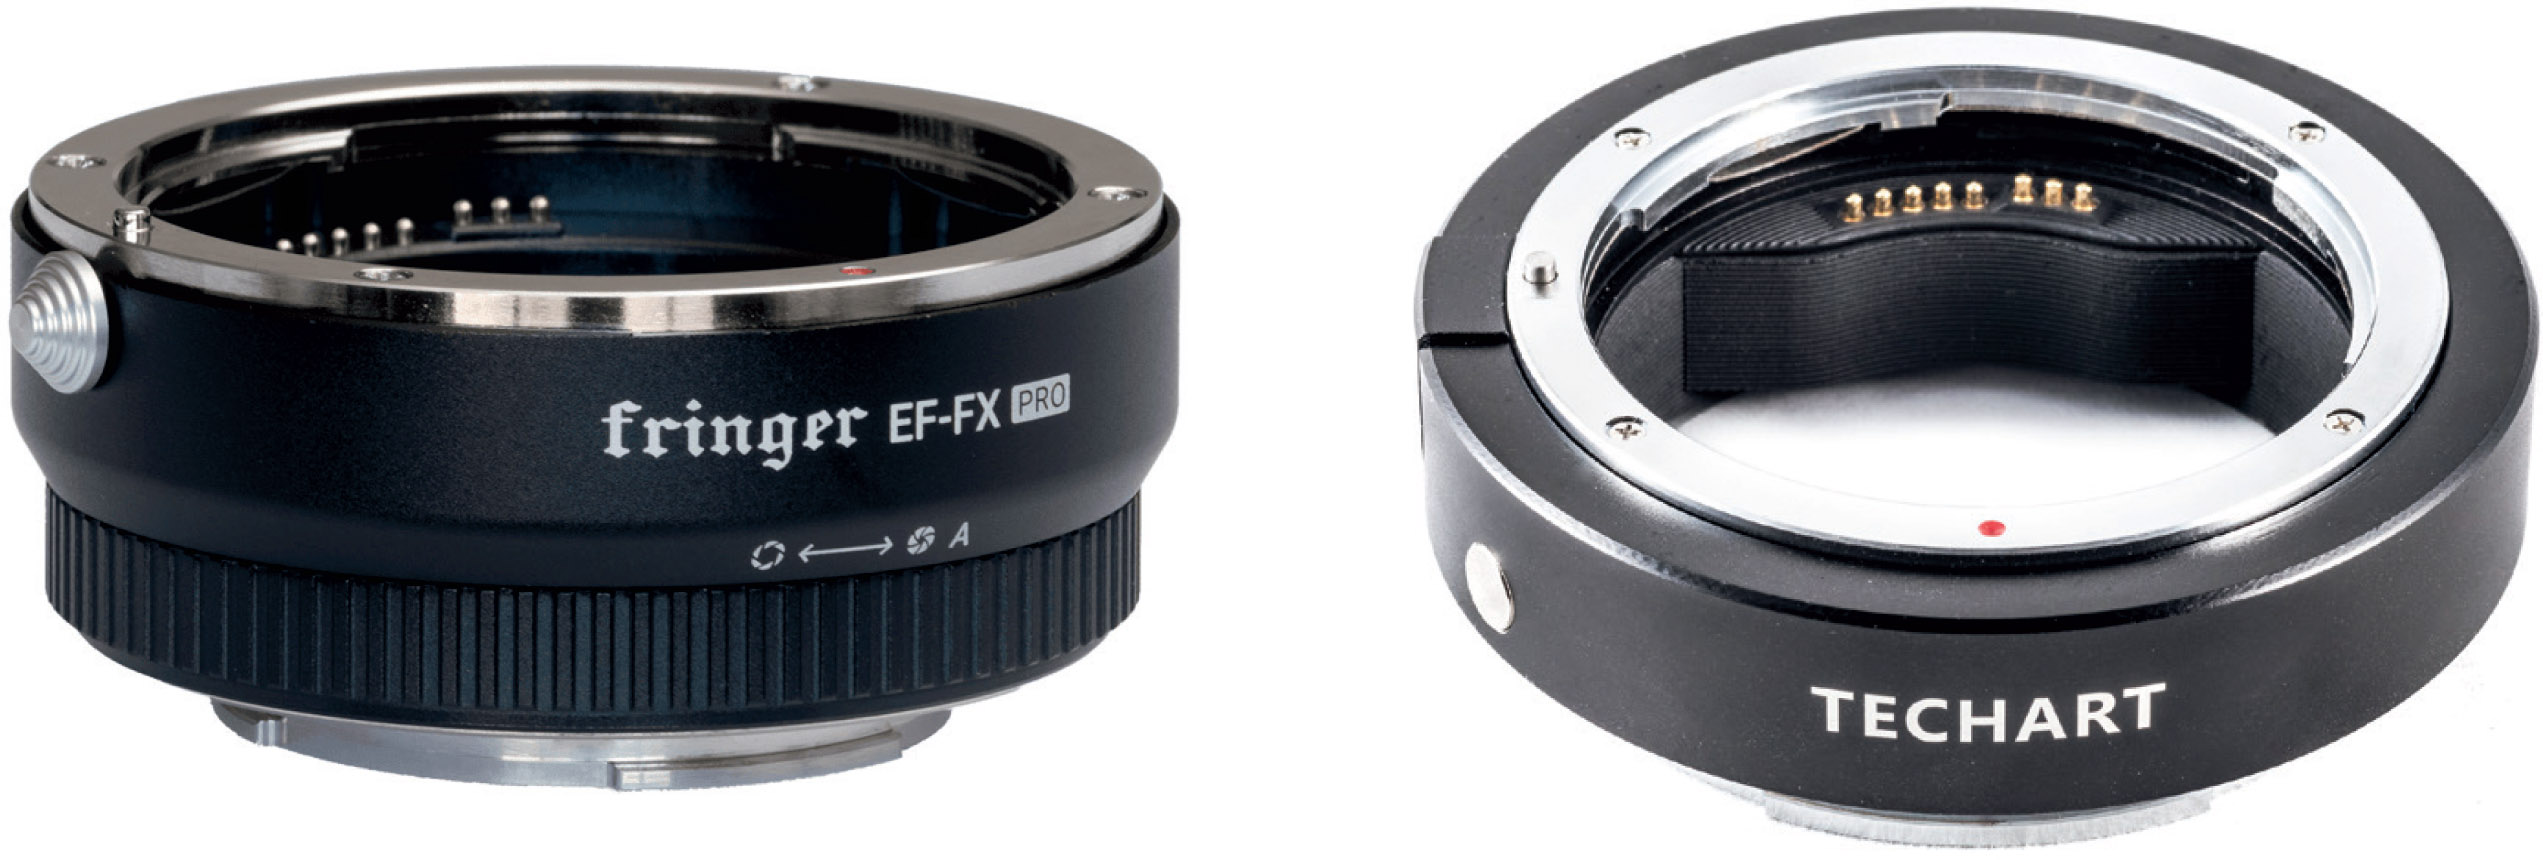
Fig. 247: The Fringer EF-FX was one of the first EF-to-XF smart adapters. You can also get the EF-FX Pro version (pictured on the left) with an integrated electronic aperture ring. A popular EF lens adapter for the GFX is the Techart EF-GFX (right).
The solution: use an electronic smart adapter. The majority of smart adapters is for Canon EF (and other EF-compatible) lenses, but you can also find an adapter to connect Contax 645 medium-format lenses to the GFX [142]. A smart adapter for current Nikon DSLR lenses might also be on the horizon.
An ideal smart adapter should meet the following criteria:
- Full electronic aperture control.
- Autofocus support (PDAF/CDAF, AF-S, AF-C, face detection, video, etc.).
- Support for built-in optical image stabilizers (OIS) in adapted lenses.
- Support for IBIS (X-H1, GFX 100) with adapted lenses that don’t have built-in OIS.
- EXIF data transmission and recording (focal length, aperture, adapted lens model, serial number, etc.).
- Digital lens correction data transmission and conversion (chromatic aberrations, distortion, vignetting).
- Compatible with most or all lenses of the adapted system, including popular third-party offerings like Sigma or Tamron EF lenses.
- Frequent firmware updates to improve and maintain compatibility. New firmware updates should be easy to install from macOS and Windows computers. Alternatively, there should be support for adapter firmware upgrades via the lens firmware upgrade procedure of X series cameras.
Smart adapters are available from vendors like Fringer, Steelsring, Kipon, Viltrox, Techart, or Fotodiox. Kipon and Viltrox also offer EF-to-FX adapters with built-in focal length reducers (like the Speed Booster) to project the full image circle of the adapted full-frame lens on the smaller APS-C sensor of the X-mount camera.