
3
Getting Started with FastAPI
Arguably the most important part of our FARM stack is going to be the application programming interface (API). The API is the brain of our system – it implements the business logic (how the data flows in and out of the system, but more importantly how it relates to the business requirements inside our system).
I believe that frameworks such as FastAPI are much easier to showcase through simple examples. So, in this chapter, we will go through some simple endpoints that are minimal self-contained REST APIs. We will use them to get acquainted with how this powerful framework handles requests and responses – the cardiovascular system of the web.
This chapter is meant to be a quick start introduction to the framework – here we will focus on standard REST API practices and how they are implemented in FastAPI. I will show how to send requests and modify them according to our needs, and I will explain how to retrieve all the data from HTTP requests – parameters and the body. We will see how easy it is to work with the response and how intuitive FastAPI is when it comes to setting cookies, headers, and other standard web-related topics.
In this chapter, we will cover the following topics:
- An overview of the FastAPI framework’s main features
- Setup and requirements for a simple FastAPI app
- Specific Python features used in FastAPI (type hinting, annotations, and the async await syntax)
- How FastAPI handles typical REST API tasks – path and query parameters, the request and response body, headers, and cookies
- How to work with form data
- Anatomy of a FastAPI project and routers
Technical requirements
For this chapter, you will need the following:
- Python setup
- Virtual environments
- Code editor and plugins
- Terminal
- REST clients
Let’s take a look at them in more detail.
Python setup
If you do not have Python installed, now is a good time to do so. Head over to the Python download site (https://www.python.org/downloads/) and download the installer for your operating system. The Python website contains excellent documentation for all the major operating systems. In this book, I will be using the latest, version, which, at the time of writing, is 3.10.1. Make sure that you install or upgrade to one of the latest Python versions. FastAPI relies heavily on Python hints and annotations, so any version later than 3.6 should work. Another important thing to check is that the Python version that you have installed is reachable or, even better, the default version. You can check this by typing python in your terminal of choice and checking the version.
I will not describe how to install Python on your platform since there are numerous guides online that certainly cover your setup. You can also install a data science-friendly environment such as Anaconda (https://www.anaconda.com/products/distribution) if that is something you are already using or are comfortable with.
Virtual environments
We must create an application directory called FARM. Inside it, we will create a virtual environment. A virtual environment is an isolated Python environment that includes a copy of the Python interpreter, which we can use to install the desired packages and only the needed packages – in our case, FastAPI, the Uvicorn web server, and additional packages that we will use later, as well as FastAPI dependencies such as Pydantic.
You can think of a virtual environment as a directory tree of Python executable files and packages that allow us to have different versions of Python and the various third-party packages together on a single machine, without them interfering with each other.
There are several excellent yet opinionated approaches to creating virtual environments such as pipenv (https://pipenv.pypa.io/en/latest/), pyenv (https://github.com/pyenv/pyenv), and others. I will stick to the simplest. After installing Python, you should head to your apps directory and, in a command prompt of your choice, run the following command:
python -m venv venv
This command should download a new Python executable and create a new directory named venv – it is the second argument in the command, so this can get a bit confusing. You can name it differently, but like many other things, this is a useful convention (readymade .gitignore files, for instance, often include venv to help you avoid putting the virtual environment folder under version control). Now, we should check that we can activate the newly created environment. In the venv folder, navigate to the Scripts folder and type activate. The prompt should change and be prepended with the name of the active environment in parenthesis – that is, $(venv).
You should also have Git installed. Head over to https://git-scm.com/downloads and just follow the instructions for your operating system.
Apart from a Python environment and Git, you should have installed a shell program – if you are working on Linux or Mac, you should be fine. On Windows, you can use Windows PowerShell or something such as Commander (https://cmder.app), a console emulator for Windows that has some nice features baked in.
Code Editors
While there are many great code editors and integrated development environments (IDEs) for Python, I strongly recommend Visual Studio Code from Microsoft. Since its release in 2015, it has quickly become the most popular code editor, it is cross-platform, it provides a lot of integrated tools – such as an integrated terminal in which we can run our development server – it is pretty lightweight, and it provides hundreds of plugins suitable for virtually any programming task that you may have to perform.
Since we will be working with JavaScript, Python, React, and a bit of CSS for styling and running a couple of command-line processes along the way, I believe this is the easiest way to go.
REST Clients
Finally, to be able to test our REST API, we need a REST client. Postman (https://www.postman.com/) is arguably the most sophisticated and customizable program for testing APIs, but there are several very viable alternatives. I prefer the simplicity of Insomnia (https://insomnia.rest/), a GUI REST client with a very clean and simple interface, and HTTPie (https://httpie.io/), a command-line REST API client that allows us to quickly test our endpoints without leaving the shell. HTTPie provides other nice features such as an expressive and simple syntax, handling of forms and uploads, sessions, and so on. Moreover, HTTPie is probably the easiest REST client when it comes to installation – you can install the Python version just like any other Python package, using pip or some other option, such as choco, apt (for Linux), brew, and so on.
For our purposes, the easiest way to install HTTPie is to activate the virtual environment that we will be using (cd into the venv directory, navigate to Lib/activate, and then activate it) and then install HTTPie with pip, as follows:
pip install httpie
Once it’s been installed, you can test HTTPie with the following command:
(venv) λ http GET "https://jsonplaceholder.typicode.com/todos/1"
If everything went well, you should have a pretty long output that starts with an HTTP/1.1 200 OK. In the previous command that we issued, you may be wondering what (venv) and the Greek letter Lambda (λ) mean. venv is just the name of our virtual environment and it means that it has been activated for the shell that we are using (if you named it some other way, you would see a different name in parenthesis), while Lambda is the shell symbol used by Commander, my shell emulator. On Linux, Mac, or Windows PowerShell, you’ll get the standard > symbol. HTTPie makes it very easy to issue HTTP requests by simply adding POST for POST requests, payloads, form values, and so on.
Installing the necessary packages
After setting up the virtual environment, you should activate it and install the Python libraries required for our first simple application: FastAPI itself and Uvicorn.
FastAPI needs a server to run – by a server, I mean a piece of software specifically designed to serve web applications (or REST APIs!). FastAPI exposes an asynchronous server gateway interface (ASGI – https://asgi.readthedocs.io/)-compatible web application but doesn’t provide us with a built-in server, so a compatible Python solution is necessary.
I will not get into the specifics of the ASGI specification, but the main takeaway is that it is an asynchronous interface that enables async non-blocking applications, something that we want to make full use of our FastAPI capabilities. At the time of writing, the FastAPI documentation site lists three compatible Python ASGI-compatible servers – Uvicorn, Hypercorn, and Daphne – but we will stick to the first one as it is the most widely used and is the recommended way to work with FastAPI. You can find lots of documentation online in case you get stuck, and it offers very high performance.
To install our first two dependencies, make sure you are in your working directory with the desired virtual environment activated and install FastAPI and Uvicorn:
pip install fastapi uvicorn
Phew! This was a bit long, but now we have a decent Python coding environment that contains a shell, one or two REST clients, a great editor, and the coolest and hippest REST framework ready to rock. On the other hand, if you have ever developed a Django or Flask application, this should all be familiar ground.
Finally, let’s pick a folder or clone this book’s GitHub repository and activate a virtual environment (it is customary to create the environment in a folder named venv inside the working directory, but feel free to improvize and structure the code as you see fit). Later in this chapter, we will briefly discuss some options when it comes to structuring your FastAPI code, but for now, just make sure that you are in a folder and that your newly created virtual environment is activated.
FastAPI in a nutshell
In Chapter 1, Web Development and the FARM Stack, I already mentioned why FastAPI is our REST framework of choice in the FARM stack. What sets FastAPI apart from other solutions is its speed of coding and clean code, which enables developers to spot bugs fast and early. The author of the framework himself, Sebastian Ramirez, often modestly emphasizes that FastAPI is just a mix of Starlette and Pydantic, while heavily relying on modern Python features, especially type hinting. Before diving into an example and building a FastAPI app, I believe that it is useful to quickly just go over the concepts that FastAPI is based on so that you know what to expect.
Starlette
Starlette (www.starlette.io) is an ASGI framework that routinely places at the top in various web framework speed contests and provides numerous features that are available in FastAPI as well – WebSocket support, events on startup and shutdown, session and cookie support, background tasks, middleware implementations, templates, and many more. We will not be coding directly in Starlette, but it is very useful to know how FastAPI works under the hood and what its origins are.
Python type hinting
Type hinting is a feature introduced in Python version 3.5 in an attempt to provide developers with the opportunity to check the types of the variables before runtime. By using type annotations, developers can annotate variables, functions, and classes and give indications of the types that are expected. It is important to note that these annotations are completely optional and do not make Python a statically typed language! The annotations are ignored by the Python interpreter, but they are picked up by static type checkers that will validate the code and check if it is consistent with the annotations. Code editors and IDEs, such as Visual Studio Code, will be able to provide autocomplete features, thus speeding up coding, while tools such as Mypy will provide helpful error warnings. The syntax for type hinting is as follows:
chapter3_types.py
def annotated_function(name: str, age: int) -> str:
    return f"Your name is {name.upper()} and you are {age}
        years old!"
print(annotated_function(name="marko", age=99))
Adding the type for the variables is done with a colon, :, while the return type is annotated with an arrow, ->. This simply means that the function takes two parameters – a string (name) and an integer (age) – that is supposed to return a string, denoted by the arrow. Note that if you try this function with a string argument for the age variable, you will still get a valid result.
Types can be the most basic Python types, such as strings or integers, but the Typing module hosts numerous data structures that can be used when we want to specify that we need a dictionary or a list or something more complex, such as a list of dictionaries.
Pydantic
Pydantic is a Python library for data validation – it enforces type hints at runtime and provides user-friendly errors, allowing us to catch invalid data as soon as possible – that is, before they make it deep into the system and cause havoc. Although it is a parsing library and not a validation tool, it achieves validation by catching invalid data.
If you are working within a virtual environment that already has FastAPI installed, Pydantic will already be there since FastAPI depends on it. If you just want to play with Pydantic in a newly created virtual environment, you can install Pydantic with pip, just make sure that you are in your activated virtual environment and type:
pip install pydantic
Pydantic enables us to create data models or schemas (not to be confused with MongoDB schemas!), which are essentially a specification of how your data must be structured: what fields should be present, what their types are, which are strings, which are integers, Booleans, whether any of them are required, whether they should have default values in case no value is provided, and so on.
If you have done a bit of web development, you may have run into the painful issues that arise from the fact that the client of your web application – the user – can send essentially any data that it wants, not only what you wanted the system to ingest and process. Take, for instance, the request body – we will see that FastAPI makes it easy to extract all the data that’s sent through the body, but we want to be able to differentiate various bits of data and only consider what we want and what we allow.
Furthermore, we ultimately want to have that data validated. If we require an integer value, we cannot let 5 (a string) or 3.4 (a float) pass. Pydantic allows us to explicitly define the expected type and not only on the receiving end – we can use Pydantic to validate and parse output data as well, making sure the response body is exactly how we want it to be, including some pretty complex validations.
Let’s say that we want to create a simple model for inserting used cars into our database. The model should contain the following fields: brand (a string), model (string), year of production (integer), fuel – that is, if it is petrol, diesel, or LPG powered (enumeration) – and a list of countries in which it has been registered (list of strings)
Pydantic is based on Python hints, and we can derive our model from Pydantic’s BaseModel class – a class that we will be using to kickstart all of our schemas. Pydantic contains numerous classes for handling and accommodating different kinds of data, but in the beginning, when defining your models, you will probably start with a BaseModel class – all the models are inherited from this class, so this is the class that you will want to import:
chapter3_pydantic.py
from enum import Enum
from typing import List
from pydantic import BaseModel, ValidationError
class Fuel(str, Enum):
    PETROL = 'PETROL'
    DIESEL = 'DIESEL'
    LPG = 'LPG'
class Car(BaseModel):
    brand: str
    model: str
    year: int
    fuel: Fuel
    countries: List[str]
    note:str=”No note”
The code may look complicated at first, but it is quite straightforward. First, we imported the Enum class, which enables us to create an enumeration type for the admissible types of fuel. From the typing module, we import List as we will need it to validate our list of countries. brand and model are declared as string variables, while year is an integer.
Now that we have a model in place, we can explore its capabilities. First, let’s test it out by passing some valid data and using the json() method, one of many methods that Pydantic provides:
chapter3_pydantic.py (continued)
car = Car(
    brand="Lancia",
    model="Musa",
    fuel="PETROL",
    year="2006",
    countries=["Italy","France"]
)
print(car.json())
The output will be a nicely formatted JSON file, ready to be used in a web app (note that this file is not a FastAPI app, but just a regular Python script!):
(venv) λ python pydantic-examples.py
{"brand": "Lancia", "model": "Musa", "year": 2006, "fuel": "PETROL", "countries": ["Italy", "France"], "note": "No note"}
As you can see, the data is perfectly valid JSON – the countries list is populated (since we haven’t provided any content for the note, it is populated by default) and the year is correctly cast to an integer! This is very good and very useful. Let’s try and pass some invalid data. Let’s omit model and make year a string that cannot be cast to an integer:
chapter3_pydantic.py (continued)
invalid_car = Car(
    brand="Lancia",
    fuel="PETROL",
    year="something",
    countries=["Italy","France"]
)
print(invalid_car.json())
To get a nice error message, all we have to do is make use of Pydantic’s ValidationError class and wrap it all in a try-catch block:
try:
    invalid_car = Car(
        brand="Lancia",
        fuel="PETROL",
        year="something",
        countries=["Italy","France"]
    )
except ValidationError as e:
    print(e)
After making this code modification, the command prompt will be gentle to us and pinpoint where it found errors:
2 validation errors for Car
model
field required (type=value_error.missing)
year
value is not a valid integer (type=type_error.integer)
You could play around with other potential errors and try various Pydantic error messages. It is important to point out that in this example, I only used the json() method, but many more are available: dict() for returning a Python dictionary, copy() for creating a deep copy of the model, and so on.
Finally, Pydantic offers individual field validations and with some additional packages installed, we can perform email validations, URL validations, and anything else that comes to mind. Validation is available at the field level, but also at the object level – when you need to combine different field values into a single condition – for example, to check that two passwords have been entered in two fields on a registration page match.
A pattern that is pretty common when working with Pydantic is the model’s inheritance. You may, for instance, define a basic car model with just the bare minimum fields and then derive, via inheritance, different car models for editing, for showcasing in an endpoint that will feed an image gallery, and so on, similar to what we did with projections in MongoDB. We will implement this later when we start building our basic app. Another strength of Pydantic is the ability to build complex, nested models by defining schemas (or models) that rely on other or previously defined models, not unlike nesting in MongoDB.
With that, we’ve seen what Pydantic is and how it helps us parse and validate data, as well as complex data structures. However, we’ve only just scratched the surface of what is possible. We haven’t examined the validator decorator or the additional external packages for special validations, but by understanding the basic mechanism of Pydantic, we can see how it makes FastAPI’s data flow safe.
Asynchronous I/O
If you have ever made a web app using Node.js, you may have encountered the asynchronous programming paradigm. The idea is to make operations that are slow compared to others – such as hefty network calls, reading files from a disk, and similar – run, but at the same time allow the system to respond to other calls and then return the appropriate response of the long-running process, while not blocking the other, less time-consuming responses. This is achieved by using an event loop – a manager of asynchronous tasks that receives requests and can move to the next one, even though the previous one hasn’t finished and yielded a response.
The simplest real-life example would be baking a cake – you could do all the operations sequentially: put the dough in the oven and then grab a chair and sit for 40 minutes staring at the oven until it is finished. After these 40 minutes, you wait for 10 minutes for the dough to cool off; after that, you make the cream and let it rest for another 20 minutes, and then spend another 10 minutes putting it all together. That would take you 70 minutes. In the async version of our cake, we would put the dough in the oven and start working on the cream right away so that it’s ready by the time the dough is ready and cool, saving 20 minutes of total preparation time. Include some other meals to prepare simultaneously, and the time gains will be much more impressive, but you get the idea.
Python has added support for asynchronous I/O programming in version 3.4 and added the async/await keywords in version 3.6. ASGI was introduced soon after async made its way into the Python world and the specification outlines how applications should be structured and called. It also defines the events that can be sent and received. FastAPI relies on ASGI and returns an ASGI-compatible app, which is why it is so performant.
I will prefix all the endpoint functions in this book with the async keyword, even before we get to the part where they are necessary. All you need to know at this point is that functions with the async keyword prepended are coroutines – that is, they run on the event loop. While the simple examples examined in this chapter will work even without the async keyword, the real power of asynchronous programming in FastAPI will be visible when we connect to our MongoDB server through an async driver – Motor.
Standard REST API stuff
I listed the features that make FastAPI our REST API framework of choice in Chapter 1, Web Development and the FARM Stack. So, in this section, I just want to go over some of the terminologies that are pretty common in the realm of developing APIs.
Our communication will occur via the HTTP protocol, through HTTP requests and responses. In this chapter, I will provide an overview of how FastAPI handles both and how it leverages some additional libraries, such as Pydantic, to help us write faster and with fewer bugs. The server that I will be using in all the examples will be Uvicorn, although, in a more general way, the whole FastAPI and Uvicorn part of the code could be considered the server.
The basis of any REST API communication is the relevant URLs and paths. The URL for our local web development server will be http://localhost:8000 since 8000 is the default port that Uvicorn uses. The path part (optional) of an endpoint could be /cars, while http is the scheme. We will see how FastAPI handles paths, why the order when defining endpoint functions in our code matters, and how we can extract variables from dynamic portions of the path in a simple way.
Every path or address – the URL and the path – provides a list of approved actions that can be performed on it – HTTP verbs. For example, there might be a page or a URL that lists all the cars on sale, but you cannot issue a POST request to it since this is not allowed.
In FastAPI, these verbs are implemented as Python decorators. To put it better, they are exposed as decorators, and they are implemented only if you, the developer, implement them.
FastAPI encourages the proper use of HTTP verbs concerning the data-resource operations that they perform, so you should always use POST (or the @post decorator) when creating new resources.
Finally, HTTP messages consist of a request/status line, headers, and, optionally, body data. Again, FastAPI offers us tools to easily create and modify headers, set response codes, and do pretty much anything that we please with the request and response body. It does so in a very clean and intuitive way, as we will see shortly.
In this section, we have tried to pinpoint the programming concepts and specific Python features that FastAPI is built on and enable it to be so performant and produce maintainable code. In the next section, we will go over some standard REST API operations and see how they are achieved with FastAPI.
How does FastAPI speak REST?
Let’s create a minimal FastAPI application – a classic Hello World example – and start examining how FastAPI structures the endpoints. I use the term endpoint to specify a unique combination of an URL (which will always be the same – in our case, our development server – that is, localhost:8000), a path (the part after the slash), and an HTTP method. In a new folder named Chapter3, for example, create a new Python file using Visual Studio Code:
chapter3_first_endpoint.py
from fastapi import FastAPI
app = FastAPI()
@app.get("/")
async def root():
    return {"message": "Hello FastAPI"}
In just a few lines of code, we were able to accomplish several things. So, let’s break down what each part does.
In the first line of chapter3_first_endpoint.py, we imported the FastAPI class from the fastapi package. Then, we instantiated an application object (we called it app since that is considered a good practice, but we could have chosen any name). This is just a Python class that provides all the functionality of our API and exposes an ASGI-compatible application – this is the application that we have to pass to our server of choice (Uvicorn).
The application is now ready and instantiated, but without endpoints, it isn’t able to do or say very much. FastAPI, similar to Flask – another popular Python web framework – exposes decorators for HTTP methods to enable the application to respond. However, we have to implement them.
After that, we used the @get decorator, which corresponds to the GET method, and we passed a URL – in our case, we used /, which is the root path.
The decorated function is called root, another convention, but it could be called whatever we wanted (any valid Python function name). It is responsible for accepting any arguments (in our case, there aren’t any) and responding. The value that’s returned by the function, which in our case is a simple Python dictionary, will then be transformed into a JSON response and returned by the ASGI server as an HTTP response. This may seem obvious, but I believe that it is useful to break things down into the tiniest bits in the beginning.
The preceding code defines a basic fully functional application with a single endpoint. To be able to test it, we need a server – enter Uvicorn.
Now, go ahead and run the live server with Uvicorn in your command line:
uvicorn chapter3_first_endpoint:app --reload
The previous line is something that you will be using quite a lot when developing with FastAPI, so let’s break it down.
Important Information
Uvicorn is our ASGI-compatible web server, and we call it directly by passing it the combination of the executable Python file (without the extension!) and the instantiated app (the FastAPI instance), separated by a colon (:). The --reload flag tells Uvicorn to reload the server each time we save our code, similar to Nodemon if you have worked with Node.js. You can run all the examples in this book that contain FastAPI apps by using this syntax, except where something else is suggested.
This is the output that you will get if you test our only endpoint with HTTPie (note that when we omit the keyword, it defaults to GET):
(venv) λ http "http://localhost:8000/"
HTTP/1.1 200 OK
content-length: 27
content-type: application/json
date: Fri, 01 Apr 2022 17:35:48 GMT
server: uvicorn
{
"message": "Hello FastAPI"
}
HTTPie informs us that our simple endpoint is running; we got a nice 200 OK status code, content-type is correctly set to application/json, and the response is a JSON document that contains the desired message.
The same endpoint tests can be executed with Insomnia, a GUI REST API testing tool. The user interface is quite intuitive. This is what the same test looks like on my machine:
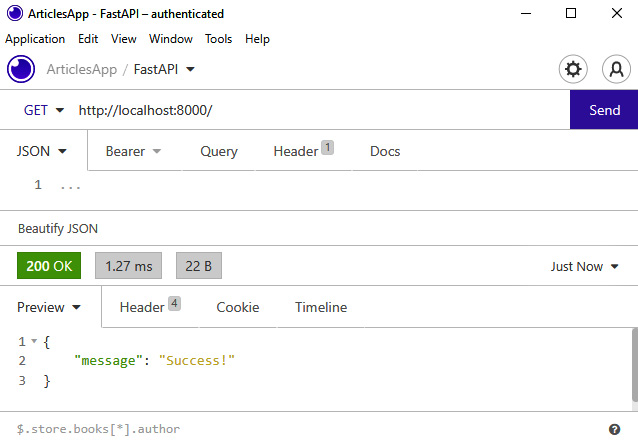
Figure 3.1 – Testing the root endpoint with Insomnia
Here, we populate the URL field, specify the HTTP method in the dropdown menu, and add every other piece of information to the request in the menu below. Having prepared the request, we can hit the Send button and wait for the result to appear.
I am aware that every REST API guide begins with similar silly hello-world examples, but I feel that with FastAPI, this is useful: in just a couple of lines of code, we can see the anatomy of a simple endpoint. This endpoint only covers the GET method directed toward the root URL (/), so if you try to test this app with a POST request, you should get a 405 Method Not Allowed error (or any method other than GET).
If we wanted to create an endpoint that responds with the same message but for POST requests, we would just have to change the decorator:
chapter3_first_endpoint.py (continued)
@app.post("/")
async def post_root():
    return {"message": "Post request success"}
HTTPie will respond accordingly in the terminal:
(venv) λ http POST http://localhost:8000
HTTP/1.1 200 OK
content-length: 35
content-type: application/json
date: Sat, 26 Mar 2022 12:49:25 GMT
server: uvicorn
{
    "message": "Post request success!"
}
Now that we’ve created a couple of endpoints, this is a good time to head over to http://localhost:8000/docs and see what FastAPI has prepared for us.
Automatic documentation
One of the first really useful features present in FastAPI is its automatically generated documentation. It is interactive in the sense that we can use it to test our API as it is being developed! FastAPI automatically lists all the endpoints that we define and provides information about the expected inputs and responses. The documentation is based on the OpenAPI specification and relies heavily on Python hints and the parsing and validation library Pydantic. It is an incredibly useful tool that will make you wish you had it in every framework. In the following sections, however, I will rely more on standard REST clients as I feel that they provide a more transferrable experience and enable us to compare different APIs that may not be Python-based, such as Next.js API routes.
We have created a minimal yet fully functional API with a single endpoint and we were able to see the syntax and structure of an app. In the next section, I am going to cover the basic elements of a REST API request-response cycle and how we can control every single aspect of the process.
Let’s build a showcase API!
REST APIs are all about cycles of HTTP requests and responses – it is the engine that powers the web and is implemented in every web framework, speaking the language of the web – the HTTP protocol. I feel that the best way to showcase FastAPI’s capabilities is to dive right in and create simple endpoints and focus on specific parts of code that achieve the desired functionalities. Rather than the usual CRUD operations that we will implement in the forthcoming chapters, I want to focus on the process of retrieving and setting request and response elements.
Retrieving path and query parameters
The first endpoint will be for retrieving a car by its unique ID:
chapter3_path.py
from fastapi import FastAPI
app = FastAPI()
@app.get("/car/{id}")
async def root(id):
    return {"car_id":id}
The first line of the preceding snippet defines a dynamic path: the static part is defined with car/, while {id} is a standard Python string-formatted dynamic parameter in the sense that it can be anything – a string or a number.
Let’s try it out and test the endpoint with an ID equal to 1:
(venv) λ http "http://localhost:8000/car/1"
HTTP/1.1 200 OK
content-length: 14
content-type: application/json
date: Mon, 28 Mar 2022 20:31:58 GMT
server: uvicorn
{
    "car_id": "1"
}
We got our JSON response back, but here, 1 in the response is a string (hint: quotes). You can try this same route with an ID equal to a string:
(venv) λ http http://localhost:8000/car/billy
HTTP/1.1 200 OK
{
    "car_id": "billy"
}
FastAPI doesn’t complain and returns our string, which was provided as part of the dynamic parameter, but this is where Python’s newer features come into play. Enter type hinting.
Returning to our FastAPI route (or endpoint), to make the car ID become an integer, it is enough to hint at the type of the variable parameter. The endpoint will look like this:
@app.get("/carh/{id}")
async def hinted_car_id(id:int):
    return {"car_id":id}
I have given it a new path: /carh/{id} (the h after car means hint). Apart from the name of the function (hinted_car_id), the only difference is in the argument: the semicolon followed by int means that we expect an integer, but FastAPI takes this very seriously.
If we take a look at the interactive documentation at http:localhost:8000/docs and try to insert a string in the id field for the /carh/ endpoint, we will get an error and will not be able to proceed.
If we try it out in our REST client and test the /carh/ route by passing it a string, we will see that FastAPI is yelling at us, but this is for our own good! We got several useful messages. First, FastAPI set the status code for us correctly – that is, 422 Unprocessable Entity – and in the body of the response, it pointed out what the problem was – the value is not a valid integer. It also gives us the location where the error occurred: in the path – that is, the id part. This is a trivial example, but imagine that you are sending a complex request with a complicated path, several query strings, and maybe additional information in the header. Using type hinting quickly solves these problems.
If you try to access the endpoint without specifying any ID, you will get yet another error:
(venv) λ http http://localhost:8000/carh/
HTTP/1.1 404 Not Found
{
    "detail": "Not Found"
}
FastAPI has, again, correctly set the status code, giving us a nice 404 Not Found error, and repeated this message in the body. The endpoint that we hit does not exist – we need to specify a value after the slash.
Situations may arise where you have similar paths, but one of them is dynamic, while the other one is static. A typical case could be an application that has numerous users – hitting the API at the URL defined by /users/id would give you some information about the user with the selected ID, while /users/me would typically be an endpoint that displays your information and allows you to modify it in some way.
In these situations, it is important to remember that, like in other web frameworks, order matters.
The following piece of code will not yield the desired results:
chapter3_wrong_path_order.py
@app.get("/user/{id}")
async def user(id:int):
    return {"User_id":id}
@app.get("/user/me")
async def user():
    return {"User_id":"This is me!"}
By testing the /user/me endpoint, we get an Unprocessable Entity error, much like when we tried the same thing previously – passing a string in the URL. This is quite logical once you remember that order matters – FastAPI finds the first matching URL, checks the types, and throws an error. If the first match is the one with the fixed path, everything works as intended.
Another powerful feature of FastAPI’s path treatment is how it limits the path to a specific set of values and a path function, imported from FastAPI, which enables us to perform additional validation on the path.
I will not delve into the details here, but let’s just say that we want to have a URL path that should accept two values and allow the following:
- account_type: This can be free or pro
- months: This must be an integer between 3 and 12
FastAPI allows us to solve this at the path level by letting us create a class based on Enum for the account type. This class defines all the possible values for the account variable. In our case, there are just two – free and pro:
chapter3_restrict_path.py
from enum import Enum
from fastapi import FastAPI, Path
app = FastAPI()
class AccountType(str, Enum):
    FREE = "free"
    PRO = "pro"
Finally, in the actual endpoint, we combine this class with the utilities from the Path function (do not forget to import it along with FastAPI from fastapi!):
@app.get("/account/{acc_type}/{months}")
async def account( acc_type:AccountType, months:int = Path(..., ge=3,le=12)):
    return {
            "message":"Account created",
            "account_type":acc_type,
            "months":months
            }
FastAPI was able to pack a lot of punch in the preceding code: by setting the type of the acc_type part of the path to our previously defined class, we ensured that only the free or pro value can be passed. The months variable, however, is handled by the Path utility function.
As for other topics in this part, I strongly advise you to head over to the excellent documentation site and see what other options are available – in this case, the Path function received three parameters. The three dots mean that the value is required and that no default value has been provided, ge=3 means that the value can be greater or equal to 3, while le=12 means that it can be smaller or equal to 12.
With that, we’ve learned how to validate, restrict, and order our path parameters. Now, let’s look at the query parameters. Query parameters are added at the end of the URL by using the ?min_price=2000&max_price=4000 format.
The question mark in the previous expression is a separator that tells us where the query string begins, while the ampersands, &, allow us to add more than one assignment (the equals signs, =).
Query parameters are usually used to apply filters, sort, order, or limit query sets, apply paginations to a long list of results, and similar tasks. FastAPI treats them similarly to path parameters. They will be, so to say, automatically picked up by FastAPI and available for processing in our endpoint functions.
Let’s create a simple endpoint that accepts two query parameters for the minimum and the maximum prices of the car:
chapter3_query_string.py
@app.get("/cars/price")
async def cars_by_price(min_price: int=0, max_price:   int=100000):
    return{"Message":f"Listing cars with prices between {min_
        price} and {max_price}"}
Let’s test this endpoint with HTTPie:
(venv) λ http "http://localhost:8000/cars/price?min_price=2000&max_price=4000"
HTTP/1.1 200 OK
content-length: 60
content-type: application/json
date: Mon, 28 Mar 2022 21:20:24 GMT
server: uvicorn
{
    "Message": "Listing cars with prices between 2000 and 4000"
}
Of course, this particular solution is not very good – we do not ensure the basic condition that the minimum price should be lower than the maximum price, but that can easily be handled by Pydantic object-level validation.
FastAPI picked up our query parameters and performed the same parsing and validation checks it did previously. It is worth mentioning that FastAPI provides the Query function, which is very similar to the Path function that we used previously – we can use the greater than, less than, or equal conditions, as well as set default values.
With that, we’ve seen how FastAPI enables us to work with data that is passed through the path and query parameters, as well as the tools it uses under the hood to perform parsing and validation as soon as possible. Now, let’s examine the main data vehicle of REST APIs: the request body.
The request body – the bulk of the data
REST APIs enable two-way communication between a client – usually a web browser or similar device and an API server. The bulk of this data is carried over in the request and response body. A request body consists of the data that’s sent from the client to our API, if there is such data, while the response body is the data sent from the API server to our client(s). This data can be encoded in various ways (XML was quite popular 15 years ago, for example) but in this book, we will consider exclusively JavaScript Object Notation (JSON) since it is used everywhere and it plays exceptionally nicely with our database solution of choice, MongoDB.
When sending data, we should always use POST requests to create new resources, PUT and PATCH to update resources, and the DELETE method to delete. Since the body of a request can and will contain raw data – in our case, MongoDB documents or arrays of documents – we will see how we can leverage the power of Pydantic models to our benefit. But first, let’s see how the mechanism works, without any validation or modeling.
In the following snippet for a hypothetical endpoint that would be used to insert new cars in our future database, we pass just the generic request body as the data. We expect it to be a dictionary:
@app.post("/cars")
async def new_car(data: Dict=Body(...)):
    print(data)
    return {
        "message":data
    }
Intuitively, you may have guessed that the Body function is somewhat similar to the previously introduced Path and Query functions, yet there is a difference – when working with the request body, this function is mandatory.
The three dots indicate that the body is required (you must send something), but this is the only requirement. Let’s try to insert a car (a Fiat 500, made in 2015):
(venv) λ http POST "http://localhost:8000/cars" brand="FIAT" model="500" year=2015
HTTP/1.1 200 OK
content-length: 56
content-type: application/json
date: Mon, 28 Mar 2022 21:27:31 GMT
server: uvicorn
{
    "message": {
        "brand": "FIAT",
        "model": "500",
        "year": "2015"
    }
}
Again, FastAPI functions do the heavy lifting for us – we were able to retrieve all the data that was passed to the request body and make it available to our function for further processing – database insertion, optional preprocessing, and so on. On the other hand, we could have passed just about any key-value pairs to the body. For example, we could set the number of legs to 4 (cars do not have legs, yet), and it would make its way into the request body, disregarding modern car engineering.
Keen observers may have noticed that while all went well, FastAPI sent us a 200 response status again, even though a 201 Resource Created error may have been more appropriate and, well, exact. We could have had some MongoDB insertion at the end of the function, after all. Do not worry – we will see how easy it is to modify the response body as well, but for now, let’s see why Pydantic shines when it comes to request bodies.
Let’s say that we want to enforce a certain structure for our request body. After all, we cannot allow users to send arbitrary fields and data and bomb our precious POST endpoint. To create new car entries, we only want the brand, model, and production year fields.
We will create a simple Pydantic model with the desired types:
chapter3_body2.py
from fastapi import FastAPI, Body
from pydantic import BaseModel
class InsertCar(BaseModel):
    brand: str
    model: str
    year: int
app = FastAPI()
@app.post("/cars")
async def new_car(data: Dict=Body(...)):
    print(data)
    return {
        "message":data
    }
By now, you already know that the first two parameters are expected to be strings, while the year must be an integer; all of them are required.
Now, if we try to post the same data that we did previously but with additional fields, we will only get these three fields back. Also, these fields will go through Pydantic parsing and validation and throw meaningful error messages if something does not conform to the data specification.
I encourage you to play with this endpoint and try different post-data combinations. The following is an example:
(venv) λ http POST "http://localhost:8000/carsmodel" brand="Fiat" model="500" breed="Dobermann" year=2018
HTTP/1.1 200 OK
{
    "message": {
        "brand": "Fiat",
        "model": "500",
        "year": 2018
    }
}
This combination of Pydantic model validation and the Body function provides all the necessary flexibility when working with request data. This is because you can combine them and pass different pieces of information using the same request bus ride, so to speak.
If we wanted to pass a user with a promo code along with the new car data, we could try to define a Pydantic model for the user and extract the promo code with the Body function. First, let’s define a minimal user model:
class InsertUser(BaseModel):
    username: str
    name: str
Now, we can create a more complex function that will process two Pydantic models and an optional user promo code – we have set the default value to None:
chapter3_body2.py
@app.post("/car/user")
async def new_car_model(
    car: InsertCar,
    user: InsertUser,
    code: int=Body(None) ):
    return {
        "car":car,
        "user":user,
        "code":code
    }
For this request, which contains a full-fledged JSON object with two nested objects and some code, I opted to use Insomnia since I find it easier than typing JSON in the command prompt or resorting to piping. I guess it is a matter of preference, but I believe that when developing and testing REST APIs, it is useful to have a GUI tool such as Insomnia or Postman and a command-line client (such as cURL or httpie). This is what Insomnia looks like when testing this particular endpoint:

Figure 3.2 – Insomnia REST client interface for testing the endpoint
After playing around with the combination of request bodies and Pydantic models, we have seen that we can control the inflow of the data and be confident that the data that’s available to our API endpoint will be what we want it and expect it to be. Sometimes, however, we may want to go to the bare metal and work with the raw request object. FastAPI covers that case too.
The request object
I have mentioned several times that FastAPI is built on the Starlette web framework and that it uses numerous Starlette features. The raw request object in FastAPI is Starlette’s request object and it can be accessed in our functions once it’s been imported from FastAPI directly. Bear in mind that by using the request object directly, you are missing out on FastAPI’s most important features: Pydantic parsing and validation, as well as self-documentation! However, there might be situations in which you need to have the raw request.
Let’s look at an example:
chapter3_raw_request.py
from fastapi import FastAPI, Request
app = FastAPI()
@app.get("/cars")
async def raw_request(request:Request):
    return {
        "message":request.base_url,
        "all":dir(request)
    }
In the preceding code, we created a minimal FastAPI app, imported the Request class, and used it in the (only) endpoint. If you test this endpoint with your REST client, you will only get the base URL as the message, while the all part lists all the methods and properties of the Request object so that you have an idea of what is available.
All of these methods and properties are available for you to use in your application.
With that, we’ve seen how FastAPI facilitates our work with the main HTTP transport mechanisms – request bodies, query strings, and paths. Now, we will cover other, equally important aspects of any web framework solution.
Cookies and headers, form data, and files
When speaking of the ways our web framework ingests data, any discussion would be incomplete without including topics such as handling form data, handling files, and manipulating cookies and headers. This section will provide simple examples of how FastAPI handles these tasks.
Headers
Header parameters are handled in a similar way to query and path parameters and, as we will see later, cookies. We can collect them, so to speak, using the Header function. Headers are essential in topics such as authentication and authorization as they often carry JSON Web Tokens (JWTs), which are used for identifying users and their permissions.
Let’s try to read the user agent by using the Header function:
from fastapi import FastAPI, Header
app = FastAPI()
@app.get("/headers")
async def read_headers(user_agent: str | None = Header(None)):
    return {"User-Agent": user_agent}
Depending on the software you use to execute the test for the endpoint, you will get different results. When using HTTPie, I got this:
(venv) λ http GET "http://localhost:8000/headers"
HTTP/1.1 200 OK
content-length: 29
content-type: application/json
date: Sun, 27 Mar 2022 09:26:49 GMT
server: uvicorn
{
    "User-Agent": "HTTPie/3.1.0"
}
On the other hand, Insomnia correctly outputs the version:
{
    "User-Agent": "insomnia/2021.7.2"
}
You can extract all the headers in this way and FastAPI is nice enough to provide further assistance: it will convert names into lowercase, convert the keys into snake case, and so on.
Cookies
Cookies work in a very similar way and although they can be extracted manually from the Cookies header, the framework offers a utility function, conveniently named Cookie, that does all the work in a way similar to Query, Path, and Header.
Forms (and files)
So far, we have only dealt with JSON data and that is alright – after all, it is the ubiquitous language of the web and our main vehicle for moving data back and forth. There are cases, however, that require a different data encoding – forms might be processed directly by your API, with data encoded as multipart/form-data or form-urlencoded.
Important Note
Notice that although we can have multiple Form parameters in a path operation, we cannot declare Body fields that we expect to be in JSON. The HTTP request will have the body encoded using only application/x-www-form-urlencoded instead of application/json. This limitation is part of the HTTP protocol and has nothing to do with FastAPI itself.
The simplest way to cover both form cases – with and without including files for upload – is to start by installing python-multipart, a streaming multipart parser for Python. Stop your server and use pip to install it:
pip install python-multipart
The Form function works similarly to the previously examined utility functions, but with the difference that it looks for form-encoded parameters. Let’s look at a simple example in which we wish to upload a (car!) image and a couple of form fields, such as the brand and the model. I will use a photo that I found on Pexels (photo by Yogesh Yadav: https://www.pexels.com/photo/white-vintage-car-parked-on-green-grass-8746027/):
from fastapi import FastAPI, Form, File, UploadFile
app = FastAPI()
@app.post("/upload")
async def upload(file:UploadFile=File(...), brand:str=Form(...), model:str=Form(...)):
    return {
        "brand": brand,
        "model": model,
        "file_name":file.filename}
The preceding code handles the form parameters via the Form function and the uploaded file by using the UploadFile utility class.
The photo, however, isn’t saved on the disk – its presence is merely acknowledged, and the filename is returned. Testing this endpoint in Insomnia looks like this:

Figure 3.3 – Testing file uploads and form fields with the Insomnia REST client
To save the image to a disk, we need to copy the buffer to an actual file on the disk. The following code achieves this:
import shutil
from fastapi import FastAPI, Form, File, UploadFile
app = FastAPI()
@app.post("/upload")
async def upload(picture:UploadFile=File(...), brand:str=Form(...), model:str=Form(...)):
    with open("saved_file.png", "wb") as buffer:
        shutil.copyfileobj(picture.file, buffer)
    return {
        "brand": brand,
        "model": model,
        "file_name":picture.filename
        }
The open block opens a file on the disk using a specified filename and copies the FastAPI file that’s sent through the form. I have hardcoded the filename, so any new upload will simply overwrite the existing file, but you could use some randomly generated filename while using the UUID library, for example.
File uploading is an operation that you probably won’t be doing this way – file uploads can be handled by the Python async file library known as aiofiles or as a background task, which is another feature of FastAPI. However, I wanted to provide a rather complete picture of how you can handle everyday web tasks with the framework.
FastAPI response customization
In the previous sections, we looked at numerous small examples of FastAPI requests, saw how we can reach every corner of the request – the path, the query string, the request body, headers, and cookies – and saw how to work with form-encoded requests. Now, let’s take a closer look at FastAPI’s response objects. In all the cases that we have seen so far, we returned a Python dictionary that was then serialized into JSON correctly by FastAPI. The framework enables us, the developers, to customize the response in a very granular way, as we will see in the next few sections.
The first thing that you may want to change in an HTTP response is going to be the status code. You may also want to provide some meaningful errors when things do not go as planned. FastAPI conveniently raises classic Python exceptions when HTTP errors are present. FastAPI puts a lot of emphasis on using standard-compliant meaningful response codes that minimize the need to create custom payload messages. For instance, you don’t want to send a 200 OK status code for everything and then notify users of errors by using the payload – FastAPI encourages good practices.
Setting status codes
HTTP status codes indicate if an operation was successful or if there was an error. These codes also provide information about the type of operation, and they can be divided into several groups: informational, successful, client errors, server errors, and so on. It isn’t necessary to memorize the status codes, although you probably know what a 404 or a 500 code is, unfortunately.
FastAPI makes it incredibly easy to set a status code – it is enough to just pass the desired status_code variable to the decorator. Here, we are using the 208 status code for a simple endpoint:
from fastapi import FastAPI, status
app = FastAPI()
@app.get("/", status_code=status.HTTP_208_ALREADY_REPORTED)
async def raw_fa_response():
    return {
        "message":"fastapi response"
    }
Testing the root route in HTTPie yields the following output:
(venv) λ http GET "http://localhost:8000"
HTTP/1.1 208 Already Reported
content-length: 30
content-type: application/json
date: Sun, 27 Mar 2022 20:14:25 GMT
server: uvicorn
{
    "message": "fastapi response"
}
Similarly, we can set status codes for the delete, update, or create operations.
FastAPI sets the 200 status by default if it doesn’t encounter exceptions, so it is up to us to set the correct codes for the various API operations, such as 204 No Content for deleting, 201 for creating, and so on. It is a good practice that is particularly encouraged.
Pydantic can be used for response modeling as well – we can limit or otherwise modify the fields that should appear in the response and perform similar checks that it does for the request body by using the response_model argument.
I will not get into all the capabilities of FastAPI when it comes to customizing the response, but I will mention that modifying and setting headers and cookies is as simple as reading them from the HTTP request and the framework has us covered!
HTTP errors
Errors are bound to happen, no matter how meticulously you design your backend – for example, users somehow find a way to send the wrong parameters to a query, the frontend sends the wrong request body, or the database goes offline (although that shouldn’t happen since we will be using MongoDB!) – anything can happen. It is of paramount importance to detect these errors as soon as possible (this is a leitmotiv in FastAPI) and send clear and complete messages to the frontend, as well as the user. We can do this by raising exceptions.
FastAPI heavily relies on web standards and tries to enforce good practices in every facet of the development process, so it puts a lot of emphasis on using HTTP status codes. These codes provide a clear indication of the type of problem that has arisen, while the payload can be used to further clarify the cause of the problem.
FastAPI uses a Python exception, aptly called HTTPExeption, to raise HTTP errors. This class allows us to set a status code and set an error message.
Returning to our example of inserting new cars into the database, we could set a custom exception like this:
@app.post("/carsmodel")
async def new_car_model(car:InsertCar):
    if car.year>2022:
        raise HTTPException(
        status.HTTP_406_NOT_ACCEPTABLE,
        detail="The car doesn’t exist yet!"
    )
    return {
        "message":car
    }
When trying to insert a car that hasn’t been built yet, the response is as follows:
(venv) λ http POST http://localhost:8000/carsmodel brand="fiat" model="500L" year=2023
HTTP/1.1 406 Not Acceptable
content-length: 39
content-type: application/json
date: Tue, 29 Mar 2022 18:37:42 GMT
server: uvicorn
{
    "detail": "The car doesn’t exist yet!"
}
This is a pretty contrived example as I do not expect you to make custom exceptions for any possible problem that might arise, but I believe that this gives a good idea of what is possible and the flexibility that FastAPI gives you.
We just had a pretty fast ride through the main features of FastAPI, with particular emphasis on ways to get data out of the request and how to set the response according to our needs. Now, let’s summarize this chapter.
Summary
It is not easy to cover the basics of such a rich web framework in a relatively short number of pages. Rather than diving deep into specific topics, we covered very simple examples of how FastAPI achieves the most common REST API tasks and the way it can help you, as a developer, by leveraging modern Python features and libraries such as Pydantic.
In this chapter, you learned how FastAPI enables you to perform requests and responses through HTTP and how you can tap into it, at any point, and customize and access the elements of the request, as well as the response. We briefly addressed headers and cookies, query strings and paths, forms and files, and the main part of the cycle: the request and the response bodies.
Finally, you learned how to split your API into routers and how to organize your app into logical resource-based units.
There are many features of the framework that we haven’t mentioned and that you are highly likely to encounter in even the simplest web applications. In Chapter 5, Building the Backend for Our Application, when we begin developing our simple application with FastAPI and MongoDB, we will learn how to connect the API to a MongoDB database and when to use an asynchronous driver. There, we will learn how to split our API into logical units using routers and make extensive use of the FastAPI dependency injection system.
In the next chapter, we will provide a quick introduction to React – our user interface library of choice. We will try to cover the absolute minimum necessary so that we can start using and discovering its incredibly powerful features and simplicity.