Chapter 3. Angles by Activity
Ryan and Bia Atkins / Maui, Hawaii ![]() Handheld
Handheld ![]() Photo/.5sec
Photo/.5sec
This chapter provides a quick reference guide for filming with a GoPro. Each section covers the best mount setups and corresponding camera modes for capturing a specific activity. We’ve also included useful tips for getting the best shots and videos that show many of the featured angles in action.
In recommending camera modes, we take into account the many factors involved in capturing each activity. All the modes listed help you achieve the best coverage with the highest possible frame rate and resolution in bright, sunny conditions. If you’re shooting in low light or very cloudy conditions, consider lowering the frame rate to increase exposure time. Also, consider how the footage will be edited. You may not need the highest resolution, such as 4K, if you’re only going to use the footage for a standard-definition Instagram video on mobile devices. As always, use 4:3 aspect ratio modes for body-mounted or gear-mounted angles and stick with 16:9 modes for wide or vehicle-mounted shots.
The GoPro camera presents an ocean of possible applications. The list of mounting options grows every day as users discover new ways to capture their favorite activities. With a little creativity, you can adapt an innovative angle for one activity to fit another activity. This is how GoPro has been so successful in capturing such a wide spectrum of human endeavors. The angles presented in this chapter are a starting point—we encourage you to invent your own perspectives.

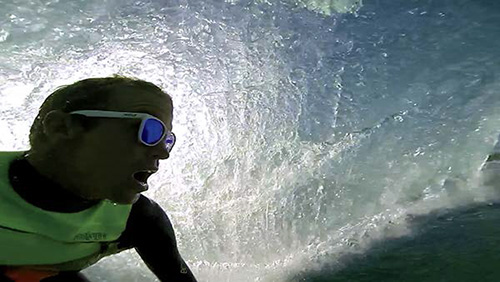
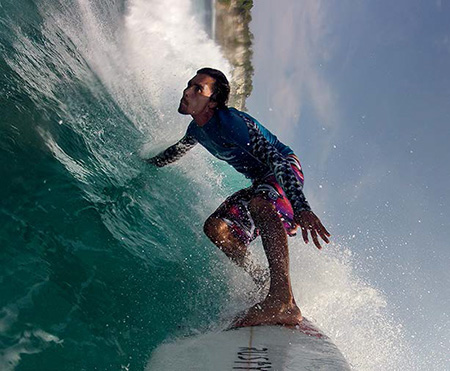
Surf
We recommend filming high frame rates while surfing because the action happens so fast. Slow motion extends the surfing experience on screen and it also makes the water look awesome. For gear, use floaty backs in case the surf mount pops off and antifogs to keep your shots clean. Remember to frequently lick the lens to keep it free of water drops.
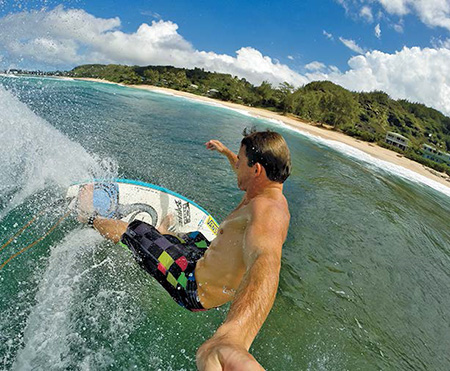
The surfboard mount, mouth mount, and handheld shots are basic angles that create a foundation for surf video editing. One of our favorite angles is the follow-cam. You can best achieve these shots with the mouth mount. While filming follow-cam, concentrate on camera work rather than surfing. Surf with a smooth gliding motion, absorb all the shock with your knees, and don’t take your eyes off the other surfer.
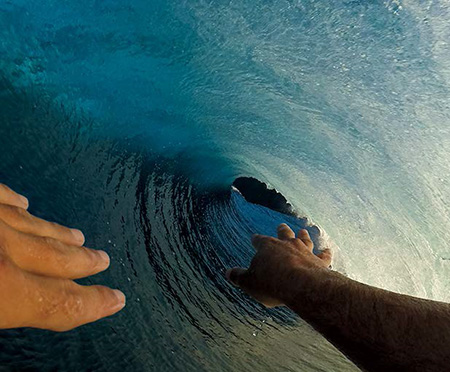
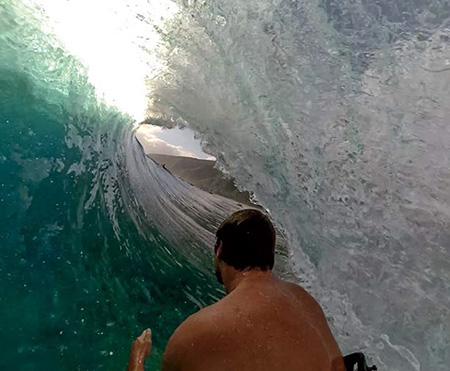
Advanced surfers can try more difficult, experimental setups such as the 3-Way extension arm, the Handler, backpack, and the tail pole to capture unique angles. The 3-Way can put the camera farther away from the subject, which makes a huge difference. We tape padding around the middle of the 3-Way so we can hold it between our teeth while paddling and then grab it after dropping in. You can achieve deeper barrel shots by holding it behind you, or you can capture spectacular carves, cutbacks, and airs by holding it in front.
Endless Barrels – GoPro of the Winter 2013–14

Surf Mount / 960p120 / Marlon Gerber
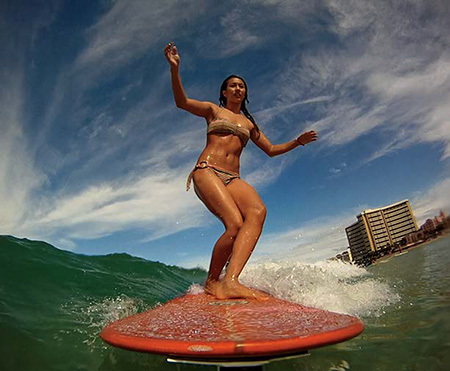
Longboard Extension / 960p120 / Kelia Moniz
Mouth Cam / 960p120 / Anthony Walsh

3-Way Extension Arm / 960p120 / Kalani Chapman
Backpack / 960p120 / Anthony Walsh
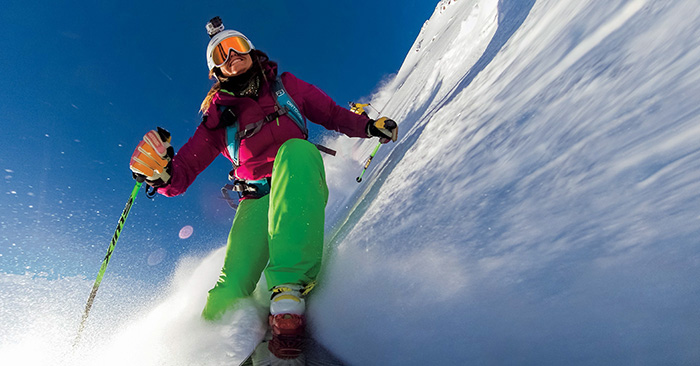
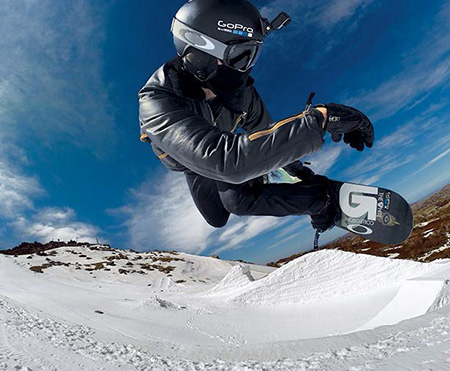
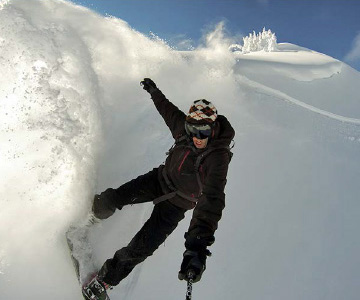
Snow
GoPro is now ubiquitous at just about every ski area in the world. If you mount the camera properly, skiing and snowboarding footage is usually smooth and stable. Generally speaking, you can use a Frame mount on a helmet because snow rarely sprays overhead and it offers the best audio. For anything below the helmet, use a waterproof housing and antifogs, or use a skeleton backdoor.
Various mounts work for shooting skiing and snowboarding. Top-mounted helmet cameras are unobtrusive and offer total coverage. A popular option is using a Frame-mounted camera on the front of the helmet. Mounting to the side of the helmet is another option. The Chesty offers the most immersive perspective, although you will need to strap it down tight. Be careful when applying adhesive mounts directly to skis and snowboards because they tend to pop off in freezing temperatures.
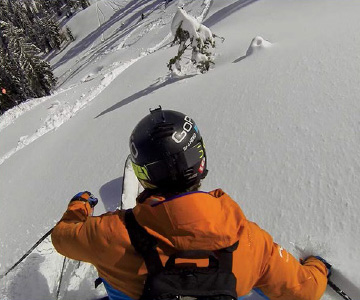
Although POV is the foundation of any edit, you can accomplish dynamic follow-cam no matter your skill level. Use the handlebar/seatpost mount’s included thick gasket to attach the camera to the skinny end of a ski pole for filming your friends or turn it around to film yourself. Use a screwdriver to tighten any knobs so the cameras don’t pivot in the middle of the run. Keep the ski pole light on your fingertips and concentrate on keeping your wrist from rotating to prevent jittery shots.
Let Me Take You to the Mountain

Spinner / 1440p60 / Shaun White
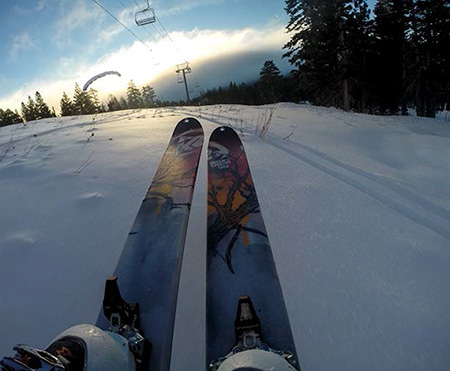
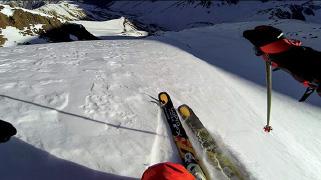
Boot Mount / 1440p60 / J.T. Holmes
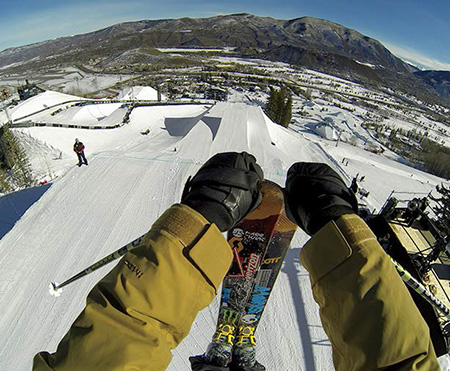
Front Helmet / 1440p60 / Tom Wallisch
Follow-Cam / 1080p120 / Abe Kislevitz, Matt Cook
Handlebar Ski Pole / 1440p60 / Kris “Jaymo” Jamieson
Backpack / 1440p60 / J.T. Holmes
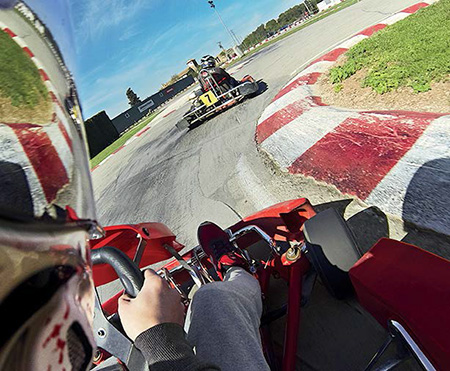
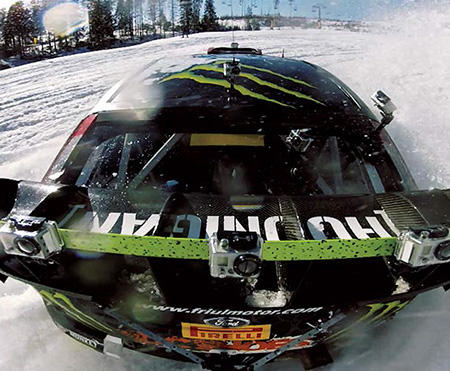
Auto
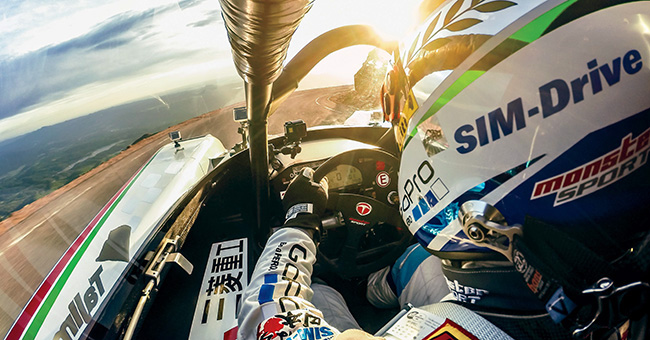
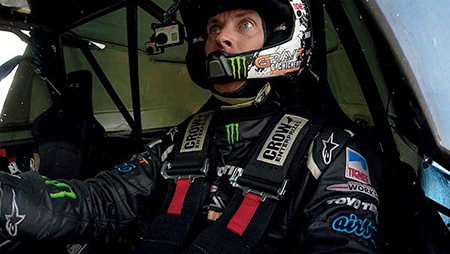
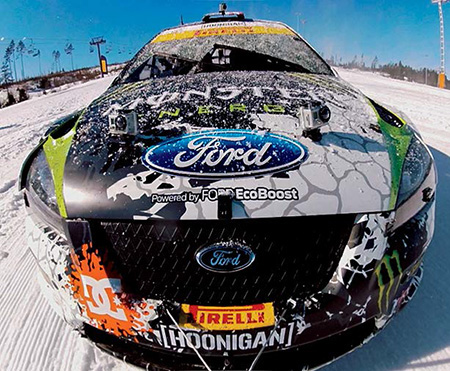
Automotive vehicles offer nearly endless mounting locations along the body, windows, and interior. For any interior shots, use a Frame mount for the best audio. Depending on weather and road conditions, a housing with a skeleton backdoor is recommended to keep the camera protected from mud, gravel, and the elements, as well as giving ventilation to keep the lens from fogging. It’s important to attach the camera as close to the structural frame of the vehicle as possible to keep the footage stable at high speeds.
Be sure to clean the surface of your vehicle before applying a suction cup mount or adhesive mounts. Use a screwdriver to tighten down any knobs or extensions to keep the cameras from shaking due to engine vibration or high speeds. Extensions off the vehicle offer really unique perspectives but can be shaky, so we recommend mounting with care and filming at high frame rates. A rotating mount made by Vector lets you capture especially unique shots from the roof of a drifting car.
When mounting inside a dark vehicle, you can take advantage of one of the most practical uses of the GoPro’s adjustable exposure setting. Drop the exposure to –2 to keep the highlights outside the windows from blowing out. Auto sports are almost always filmed in a high resolution, 16:9 mode such as 4K 30 (except during specific situations such as shaky extension mounts or filming in slow motion).
Longest Jump Story

Front Extension / 960p120 / Ken Block
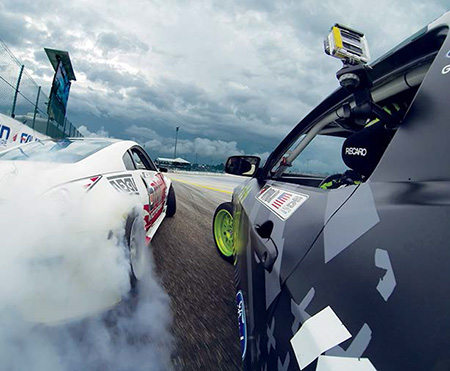
Suction Cup / 1440p60 / Vaughn Gittin Jr.

Low Bumper / 4K30 / Nicholas Woodman

Helmet / 2.7K 4:3 / Alberto Murcia
Rear Extension / 960p120 / Ken Block
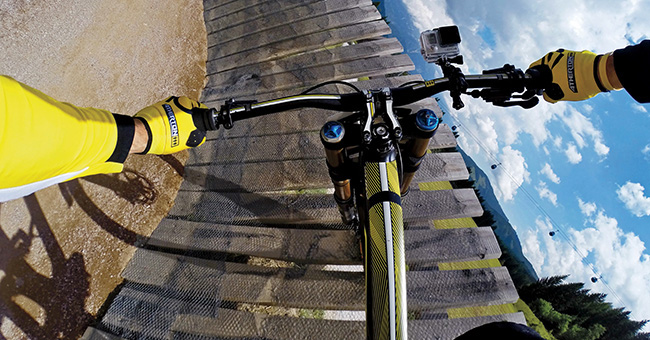
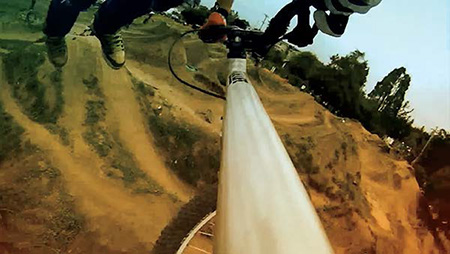
Bike
Biking offers many variables and invites experimentation. If you’re going for speed, film at higher resolutions with lower frame rates. For jumps and free riding, use as high a frame rate as possible to slow down critical moments in the air or on the trail. A Frame mount with a protective lens provides the best audio, but in inclement weather or muddy conditions, use a housing with a skeleton backdoor to protect your camera from the elements.
Helmet-mounted perspectives are a staple for biking, and they do a decent job of capturing the forearms and handlebars. The Chesty mount is the most immersive angle, but your GoPro must be mounted upside-down and tilted up 45 degrees to capture the horizon and approaching terrain as you lean forward over the handlebars.
Gnarwhals, spinners, and bike frame mounts offer unique perspectives. They also tend to be shaky, so be sure to use high frame rates so you can slow down the footage in editing. If the bike’s tubing is too thick for the standard handlebar mount, try a roll bar mount.
Post Office Bike Jam 2011

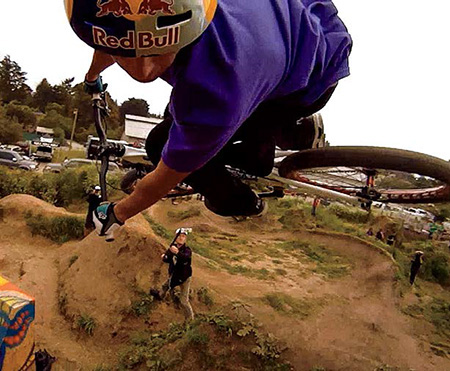
Gnarwhal / 1440p60 / Aaron Chase
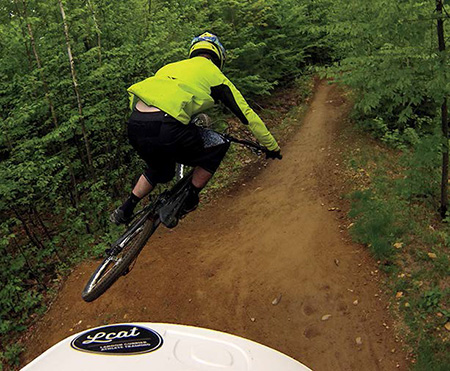
Top Helmet / 1440p60 / Kris “Jaymo” Jamieson
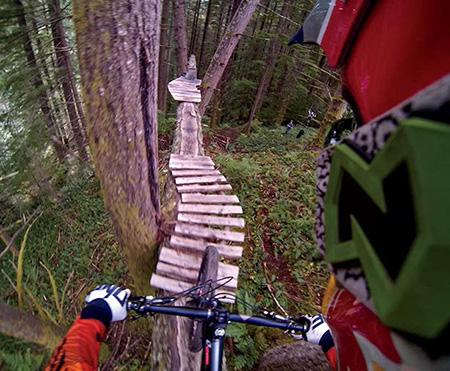
Side Helmet / 2.7K 4:3 / Aaron Chase

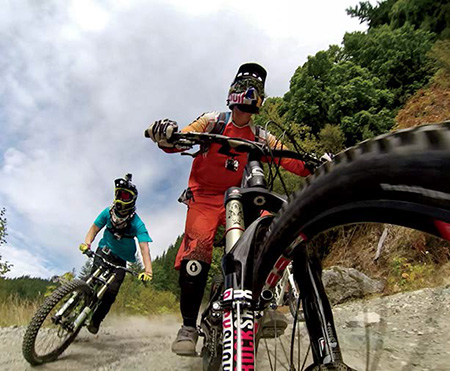
Roll Bar / 960p120 / Aaron Chase, Brian Lopes
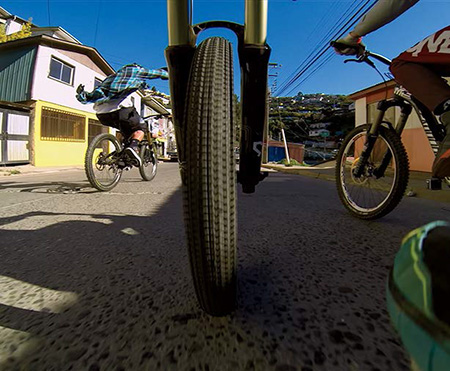
Roll Bar / 1440p60 / Aaron Chase
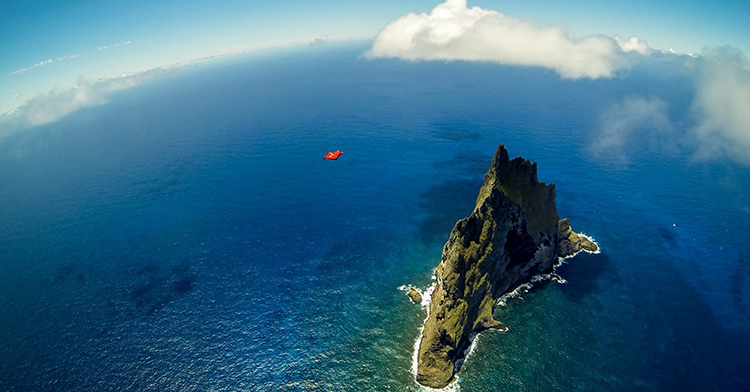
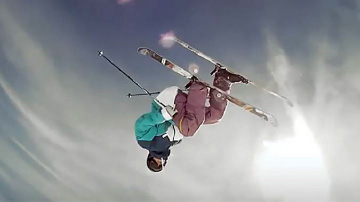
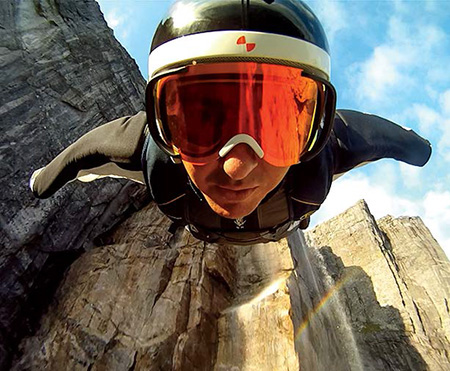
Human Flight
BASE jumpers, skydivers, speed flyers, hang gliders, and wingsuit flyers were early adopters of GoPro, and they developed a multitude of angles and filming techniques. Extensions yield amazing shots, but should be used with extreme caution.
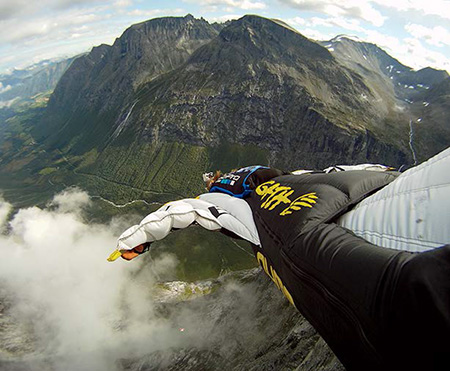
Human flight is obviously dangerous and it requires careful filming. Self-capture and POV form the essential foundation for any human flight video, with follow-cam reserved for the most advanced flyers. Neil Amonson introduced us to the gnarwhal while BASE jumping, and it now applies to almost every activity. A Chesty strung low beneath the parachute chest strap and pointed up toward the chin offers a great perspective. An innovative back-of-hand mount fits like a glove and provides a convenient option for self-capture.
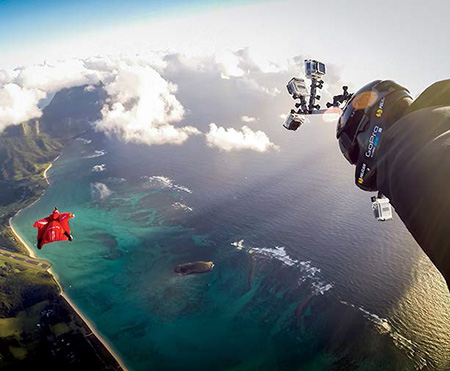
The ankle/leg mount is one of the more unique human flight angles, but it can be the shakiest. The human flight follow-cam is a dangerous art form, and many professionals utilize a precisely aligned eye monocle to achieve perfect framing. Medium and Narrow FOVs are more ideal to capture an even closer perspective of the subject. Hang gliders and speed flyers also tow torpedo-like devices behind them for follow-cam shots.
Close Encounters – Proximity Flying with Jokke Sommer
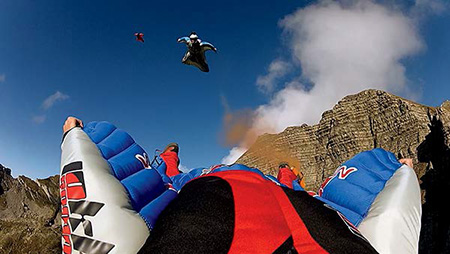

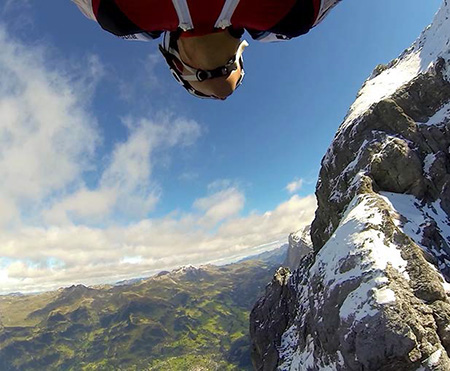
Chesty / 1440p60 / Marshall Miller
Gnarwhal / 1440p60 / Marshall Miller
Hand Mount / 1440p60 / Jeb Corliss, Luigi Cani
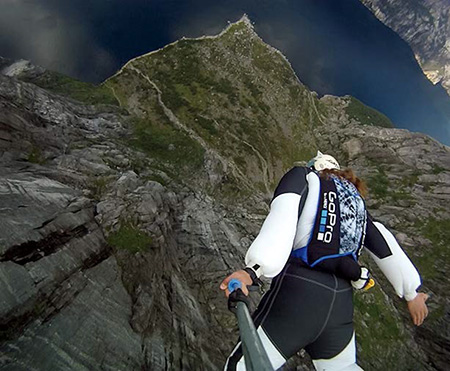
Pole Mount / 1440p60 / Neil Amonson

Shoe Mount / 1440p60 / Neil Amonson
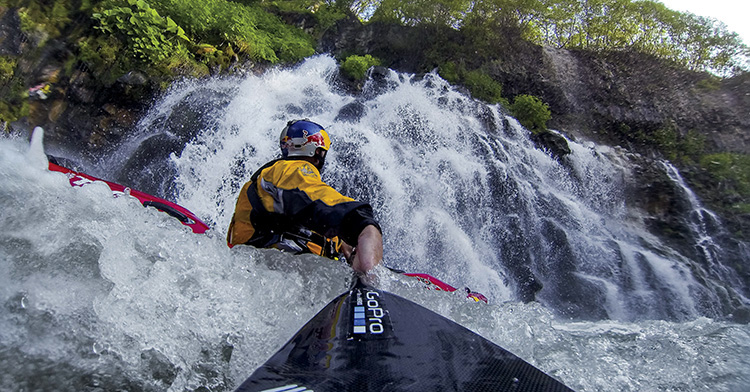
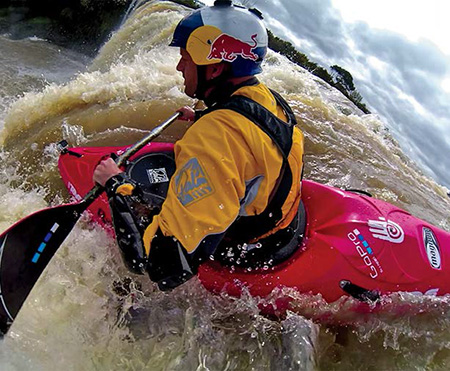
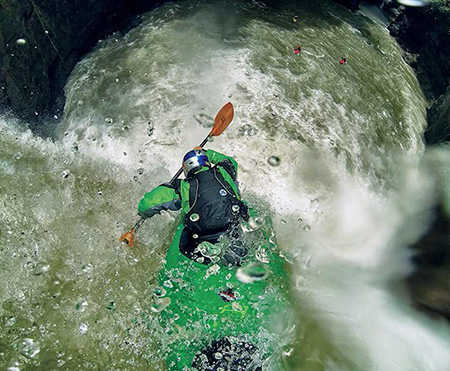
Paddle
Kayaking and stand up paddling (SUP) offer a number of very inventive mounting techniques for documenting activities that are otherwise difficult to capture. A paddle essentially puts a pole-mount in your hands already, which is great for obtaining shots of yourself within your environment. The water and intensity of the action necessitate high frame rates.
On a paddle, using a roll bar mount out of the way of your hands is very simple and effective. Helmet mounts and mouth mounts provide stable and quintessenial POV angles. To give context to the user within the shot, use a surf mount for your SUP or a handlebar mount on the front or rear handle of your kayak. Once you capture these angles, though, you’ll immediately want to push the camera out even more and elevate it with an extension for a better perspective.
Pole extensions off the front and back are particularly unique and stunning angles, but are typically unsafe and suitable only for experts. As with anything in water, we recommend using waterproof housings with antifog strips inside and floaty backdoors attached. Try licking the lens often or pretreating the lens with Rain-X to keep waterdrops from ruining the shot.
Kayak New Zealand


Backpack / 1440p60 / Chuck Patterson
Spinner / 960p120 / Ben Brown

Front Helmet / 1440p60 / Shon Bollock

Side Helmet / 1440p60 / Ben Brown
Roll Bar / 1440p60 / Mike Coots
Rear Extension / 960p120 / Rafael Ortiz
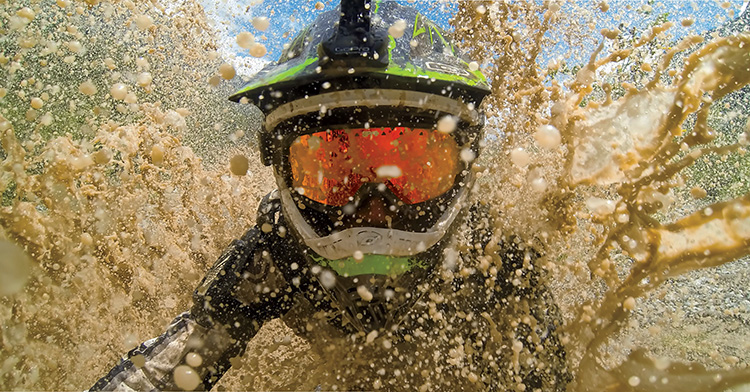
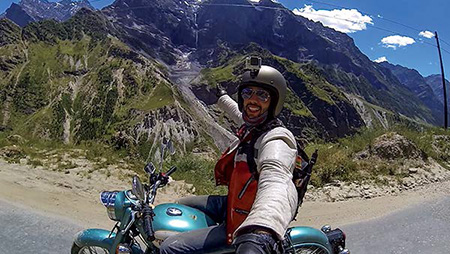
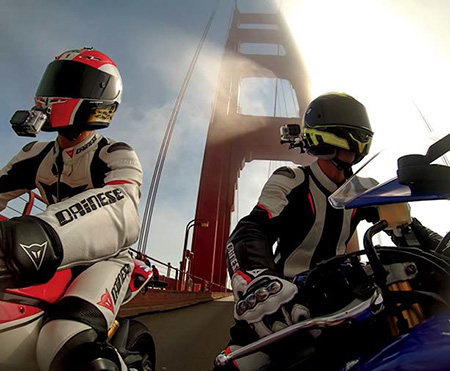
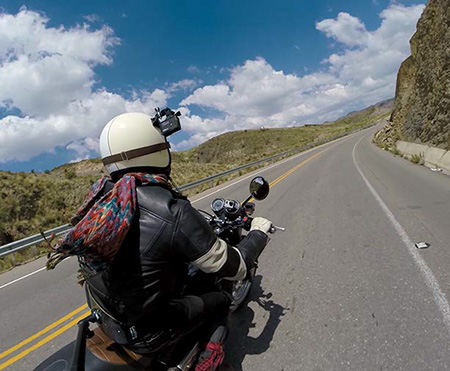
Motorcycle
Choosing a frame rate for motorcycle footage depends on the application. If you’re filming speedbikes on streets or highways, you probably won’t need slow motion. Motocross, jumping, or free-riding in the desert, on the other hand, definitely benefit from slow motion, especially for trick sequences. Using a Frame mount with a protective lens is ideal for capturing sound. However, in muddy or wet conditions, use a waterproof housing.
Front, side, and reverse helmet mounts offer the most stable and versatile angles for motorcycle sports. The Chesty gives the quintessential immersive perspective, but it needs to be cinched down tight to keep the camera from shaking.
A helmet spinner offers a phenomenal angle but must be used with extreme caution by experts only as they can be very dangerous to the rider. Asymmetric positioning of the camera allows the mount to spin and gives the audience a full view. Try mounts on the motorcycle body, backpacks, or a 3-Way extension arm for more interesting perspectives. However, engine vibration and high speeds are the enemy. With these, as well as with the spinner, high frame rates are essential to ensure usable footage.
Highest Road in the World

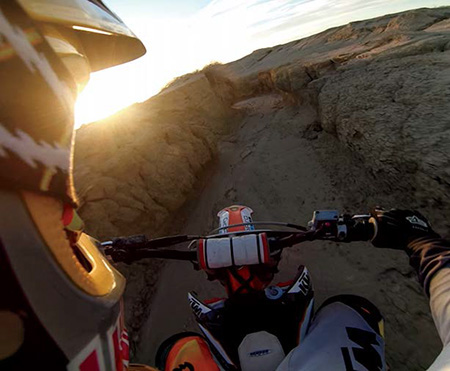
Side Helmet / 2.7K 4:3 / Ronnie Renner
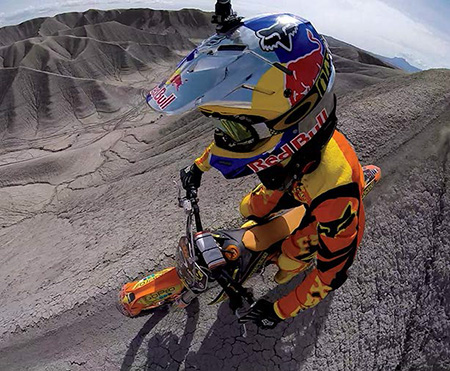
Spinner / 960p120 / Ronnie Renner

Chesty / 2.7K 4:3 / James Kirkham
Backpack / 1440p60 / Joseph Johnson

Adhesive Mount / 1440p60 / Joshua Herrin
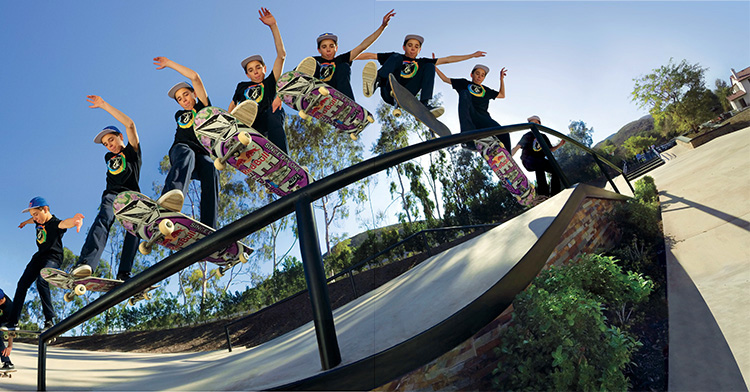
Skate
To film skateboarding, we usually use a Frame mount because a more exposed camera captures better audio. Just take care of your camera and be sure to use the protective lens that comes with it.
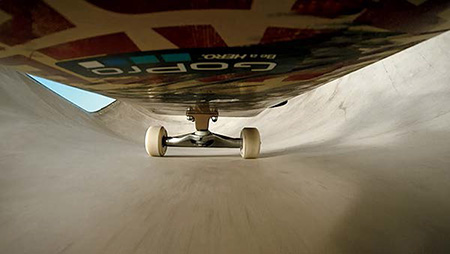
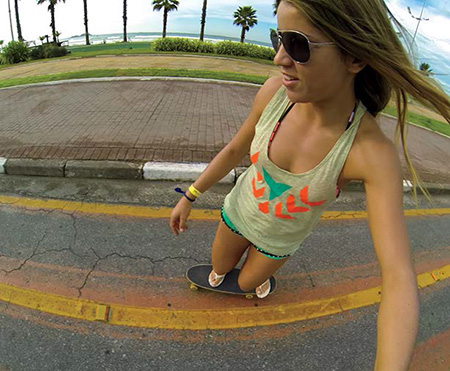
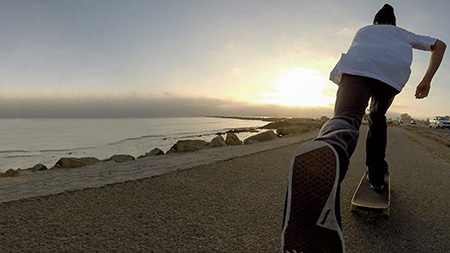
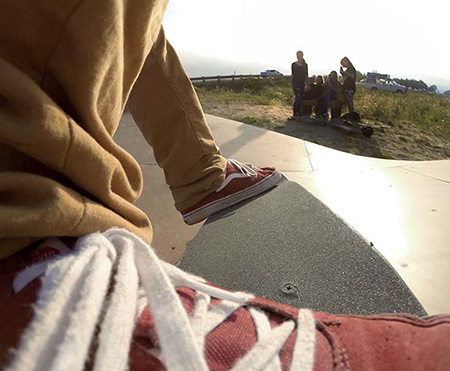
Follow-cam is essential with skateboarding. We use a weighted handheld rig to capture stable follow-cam because it provides a foundational layer for the editing timeline that you can intercut with POV and other interesting angles. The board cam is an easy angle to set up. Place the bare camera down on the deck in front of the rear truck and use a few strips of gaff or duct tape to secure it. Use a protective lens to keep the camera from getting scratched. When filming with POV angles from mounts such as the head strap, Chesty, or speedo cam, point the camera down at the skater’s feet to capture the footwork.
More experimental mounts (such as the shoe cam, 3-Way extension arm, or backpack) can be shaky, so we recommend using higher frame rates. Lowering the 3-Way so the camera is on the level of the board is a good perspective for flip tricks and footwork. A backpack setup offers a unique angle, especially if it’s elevated over the head with an extension.
Skateboarding Bucky Lasek’s Backyard Bowl


Chesty / 1440p60 / Nicholas Lubsen
3-Way Extension Arm / 1440p60 / Leticia Bufoni

Head Strap / 1440p60 / Sean Malto
Follow-Cam / 2.7K48 / Tyler Johnson

Head Strap Speedo / 960p120 / Ryan Sheckler
Shoe Mount / 960p120 / Nicholas Lubsen
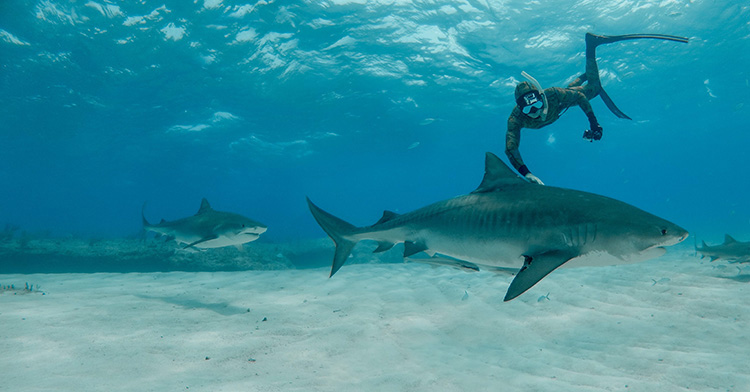
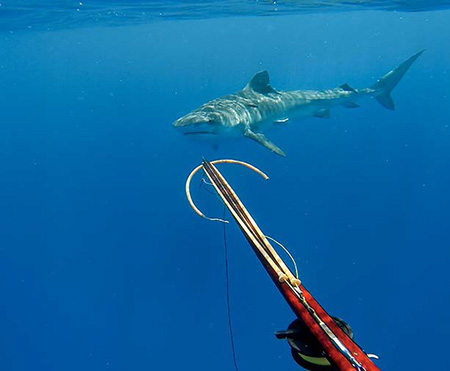
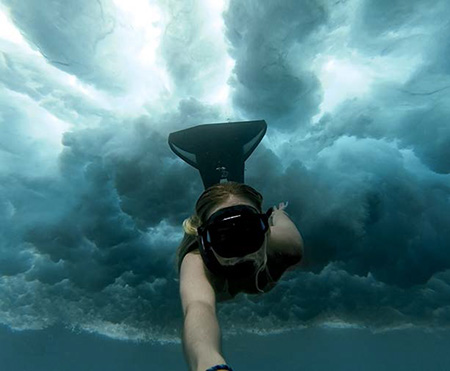
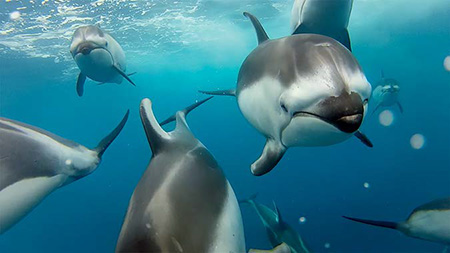
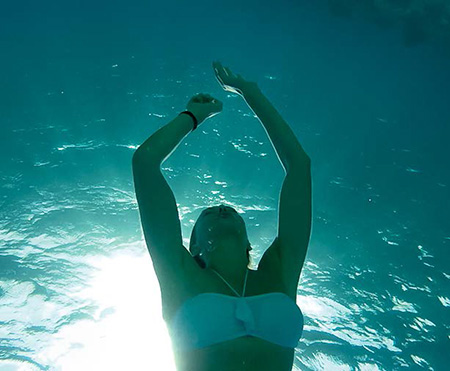
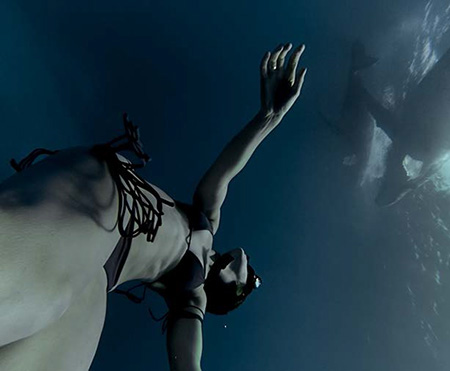
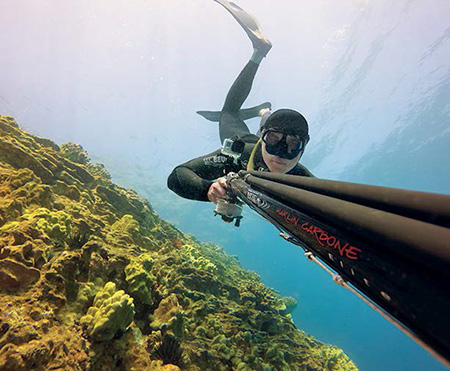
Underwater
The best underwater filming occurs from the surface to about 30 feet deep—beyond that, major color correction is needed to produce decent color. Antifog strips are essential. The more robust GoPro Dive Housing is recommended at depths of more than 90 feet. When shooting underwater, you’ll notice that water magnifies your video and makes objects appear closer. For accurate framing while mounting, you can simulate the magnification effect using an LCD screen with a Medium FOV at the surface, then switch back to Wide before you dive underwater.
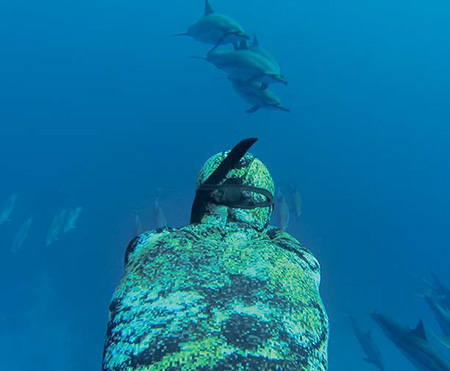
Head straps, mask mounts (Octomask offers a built-in mount), and the 3-Way extension arm offer terrific angles for capturing underwater activity. For smooth filming and total coverage, we use a weighted Norbert with three cameras: one in Medium 2.7K48 FOV (with an LCD BacPac), one in 4K30 Wide FOV, and one shooting .5 second time-lapse. Super slow motion is probably not necessary, depending on the activity, so we tend to shoot as high a resolution as possible while still retaining 48 to 60 fps in case a little slow motion is needed.
Extensions from the weight belt, backpacks, and leg mounts provide unique angles because the diver is usually horizontal. You can reverse the backpack mount to capture a frontal view or invert it with the camera facing up the torso to capture the diver and the wider environment.


Head Strap / 1440p60 / Mark Healey
Backpack / 1440p60 / Mark Healey
3-Way Extension Arm / 1440p60 / Ashleigh Baird
Reverse Backpack / 1440p60 / Roberta Mancino
Thigh Mount / 1440p60 / Erin Magee
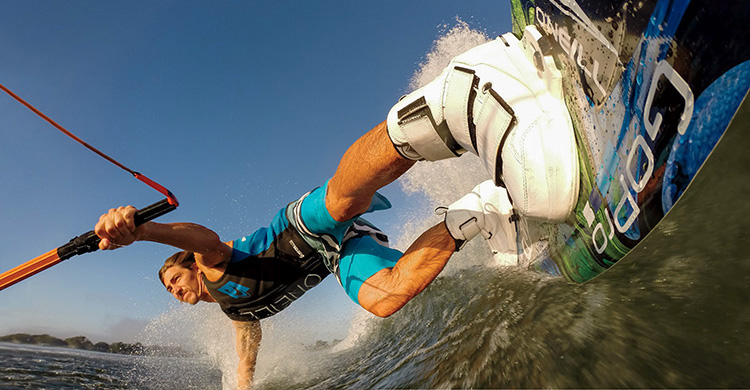
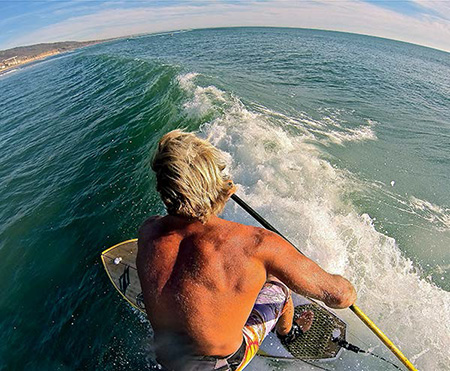
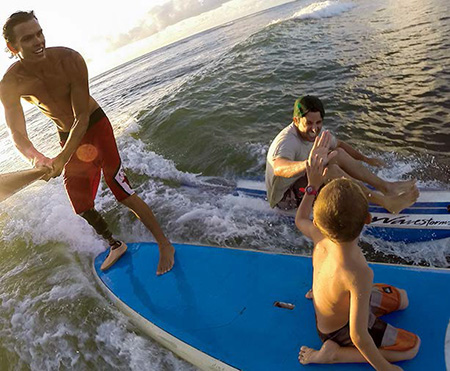
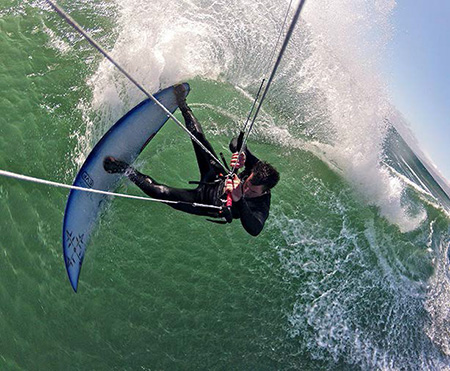
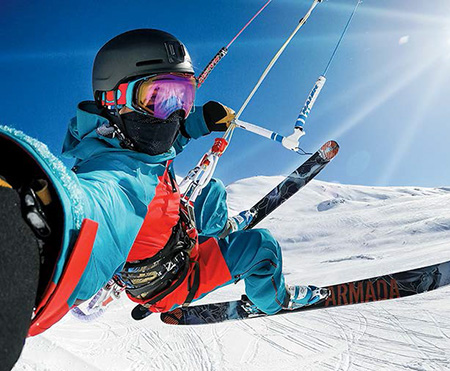
Wake and Wind
As a general rule, anything involving water at speed looks better with slow motion. We recommend using higher frame rates to capture wake and wind activities. As with all watersports, use a floaty backdoor to protect your camera and antifogs to keep the lens clear. Prepare the lens with Rain-X or lick the lens and dunk it periodically to keep water drops from forming.
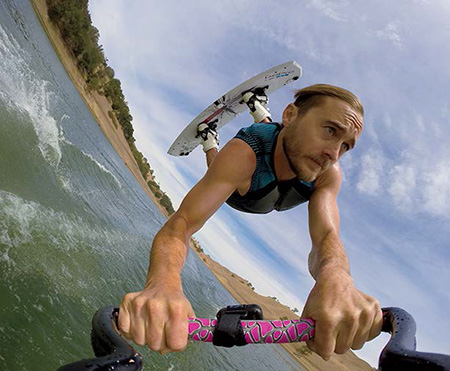
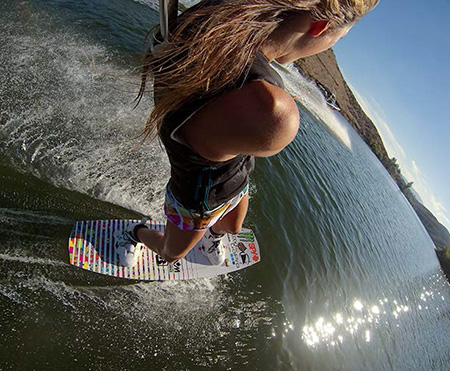
Head, mouth, and chest-mounted angles are staples that make a great foundation for editing. Board or equipment-mounted angles tend to shake at high speeds, so use higher frame rates when the sun is shining. The rope tow mount and kite mount are very unique angles specific to these activities because they allow you to adjust the distance from the subject. Note that these can be unstable, so high frame rates are essential.
Collin Harrington has captured some of the best footage we’ve seen in this category. He films follow-cam with a long pole from the back of a Jet Ski while following another wakeboarder. The closer the better. The shot captures the entire scene with the athlete and the boat.
Melissa Marquardt: Friends, Puppies, and Wakeboarding


Rope Tow / 960p120 / Wes Nobles

Roll Bar / 1440p60 / Caleb Farro
Backpack / 1440p60 / Melissa Marquardt
Handheld / 1440p60 / Chris Farro

Mouth Mount / 1440p60 / Dieter Humpsch
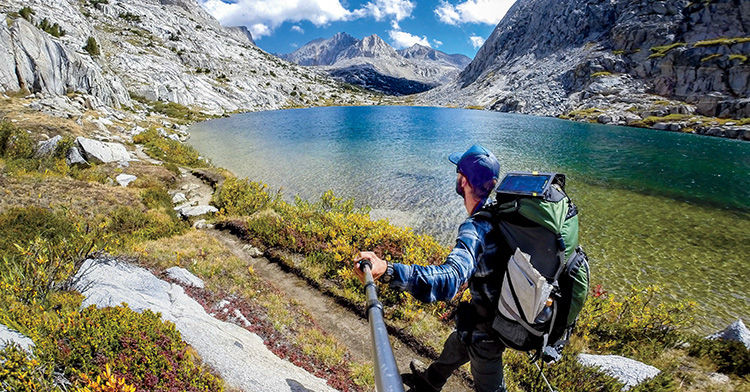
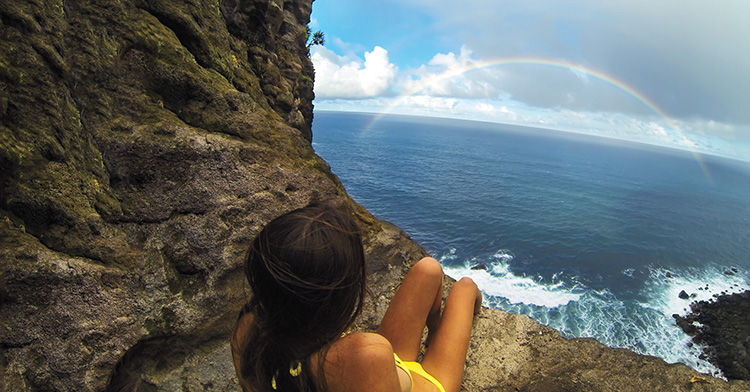
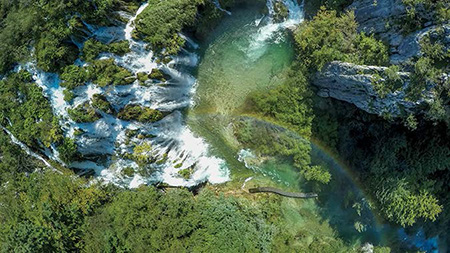
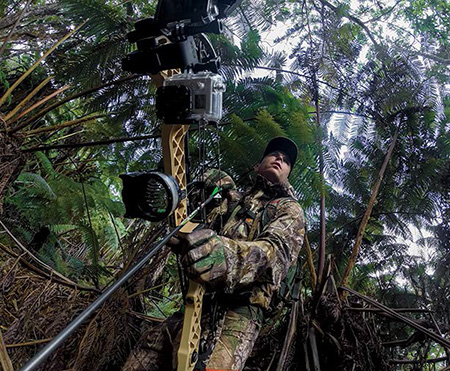
The Outdoors
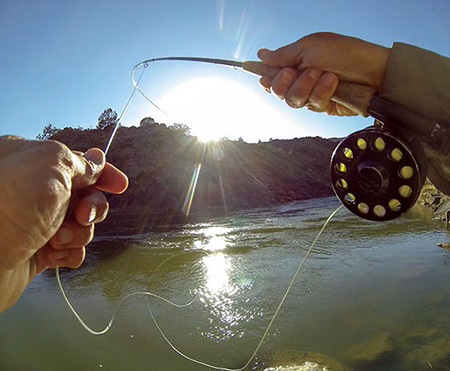
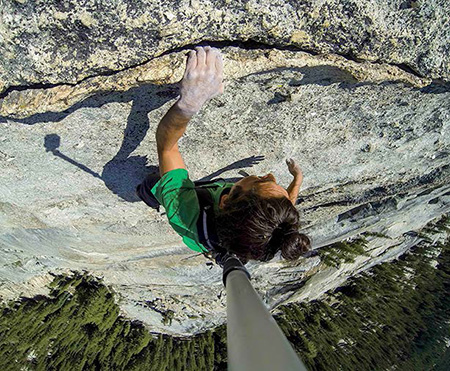
You can use a wide variety of mounts while fiming in the great outdoors because the activities involved are so broad. For hiking and climbing, try anything from the basic head strap to pole-mounts to the Jaws mount. Use the Frame mount with protective lens or a housing with a skeleton backdoor for any activity that doesn’t involve water. If water is involved, as with fishing, cliff jumping, or exploring along a river, use a waterproof housing with antifog strips and a floaty back. Make sure to lick your lens and dip it to keep water drops from ruining your shots.
When using the essential POV mounts, such as the head strap and Chesty, shoot in 4:3 modes and angle the camera down so the lens is pointed about 6 feet in front of the user. For wide shots, try clamping a Jaws mount on trees or rocks for a versatile tripod. A walking stick or branch can transform into a natural pole-mount. And of course, drone shots always look incredible in nature.
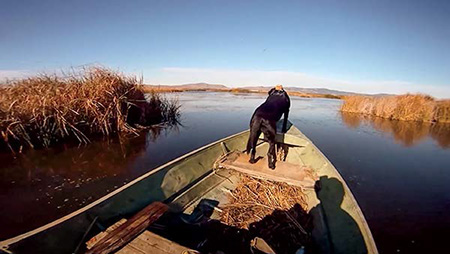
The Sportsman mount is specifically designed for fishing and hunting activities. It features a low profile and makes adjusting the GoPro’s angle easy; both 4:3 and 16:9 modes are applicable depending on your angle of capture. Many other angles discussed in this chapter apply to outdoor activities as well.
Hunting and Fishing

Chesty / 1440p60 / Paul Crandell
Backpack / 1440p60 / Lonnie Kauk

Tripod / 2.7K48 / Angela Payne
Drone / 2.7K48 Medium / Kevin Custer
Sportsman Mount / 1440p60 / Daniel Koval
Jaws Mount / 1440p60 / Shane Dorian
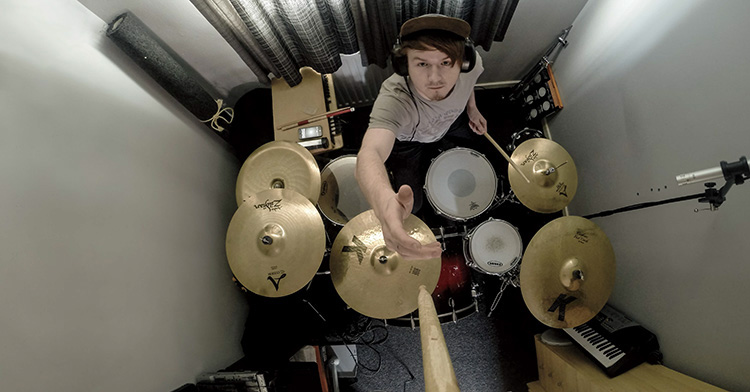
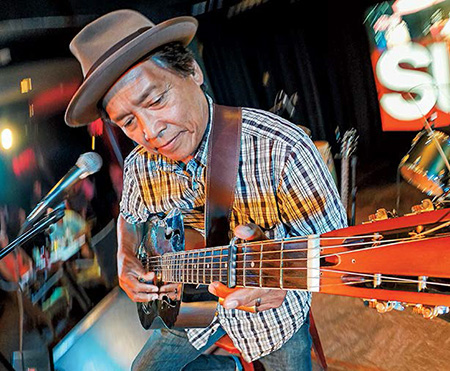
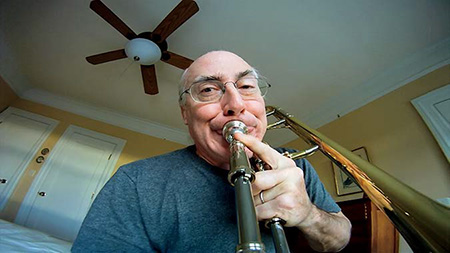
Music
Although the GoPro was originally designed for well-lit outdoor activities, its range of use has expanded since the introduction of The Frame mount and the HERO4’s improved audio recording and low-light performance. Music is typically filmed in low-light environments, so we recommend frame rates of 24 or 30 fps with a Protune ISO setting of 400. GoPro makes a 3.5mm mic jack to USB adapter for recording high fidelity audio from an external mic directly into the camera. If your goal is to record audio from multiple instruments or a band, however, we recommend using a professional audio recording setup.
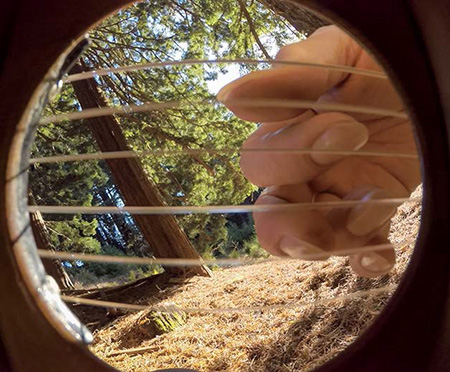
The mic stand mount captures a static wide shot for the foundation of any musical performance edit. Most instruments are played fairly close to the musician, so any kind of extension yields a better contextual shot. The Jaws mount’s adjustable neck makes it indispensable for instrument mounting. However, if you are playing music with lots of fast movement and need a more rigid extension, try linking together several twist 90 accessories and tightening them with a screwdriver for a more rigid setup. A large or elongated instrument, such as a flute or trombone, can also work with the handlebar mount in unique ways. Mounting to any moving part of the instrument yields a dynamic shot.
For any POV or instrument mount close to the musician, use a 4:3 resolution such as 2.7K 4:3. Wide shots, extensions, and instrument mounts that are farther from the musician are all candidates for a 16:9 aspect ratio with higher resolution such as 4K or 2.7K Medium for less distortion.
Radiation City at the Cathedral of Junk


Jaws Mount / 2.7K 4:3 / Danny Fernandez

Head Strap / 2.7K 4:3 / Thomas Himes
Handlebar Mount / 4K30 / David Finlayson


Jaws Mount / 2.7K 4:3 / Danielle Sullivan
Removable Adhesive / 2.7K 4:3 / Freddy Clarke

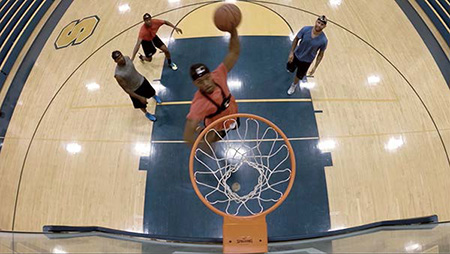
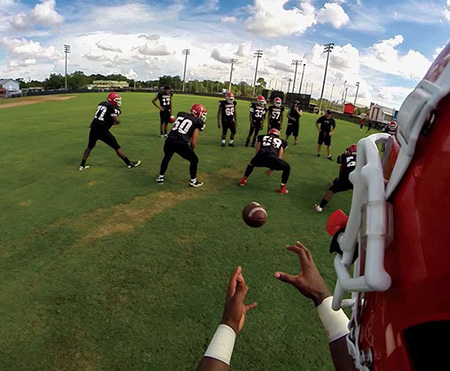
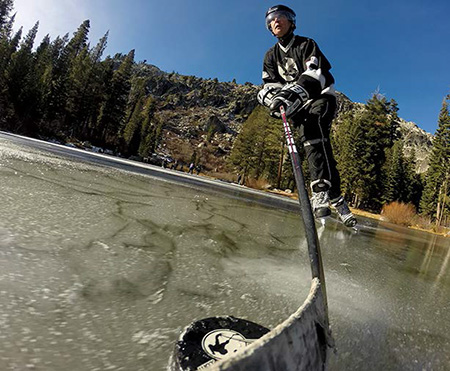
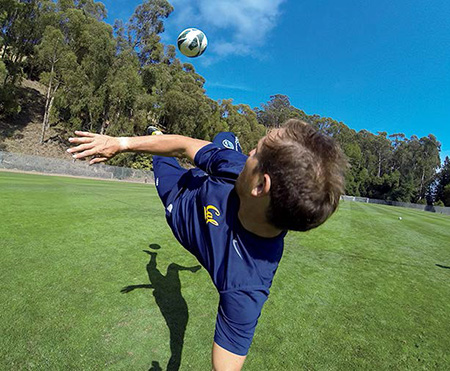
Sports
The introduction of GoPro to team sports is relatively new. Sports that use helmets, such as football, lacrosse, and hockey benefit from the helmet as a natural mounting place for stable POV footage. While the running, sprinting, skating, and quick changes in direction produce an inherent jostle in the footage, when used correctly in editing such motion can add energy to a video. For soccer and basketball, which do not require helmets, head straps are the next best thing. Typically, we use Frame mounts with protective lenses for the lightest camera setup possible. Whether using a helmet or cinched-down head strap, cameras should be well secured to keep shake to a minimum.
Helmet-cams, head straps, and Chesty mounts are almost always in a 4:3 mode with the camera aimed a few degrees farther down to capture the arms, legs, and ball. More experimental mounts such as the gnarwhal, spinner, or stick mounts offer very stunning cinematic shots but are obviously not as practical or safe in actual high-impact game situations.
Why Play Basketball?

Tripod / 1440p60 / Davis Paul

Chesty / 1440p60 / Jordan Reasy
Side Helmet / 1440p60 / Dwayne Lawson
3-Way Extension Arm / 960p120 / Davis Paul

Head Strap / 1440p60 / Soweto Kids
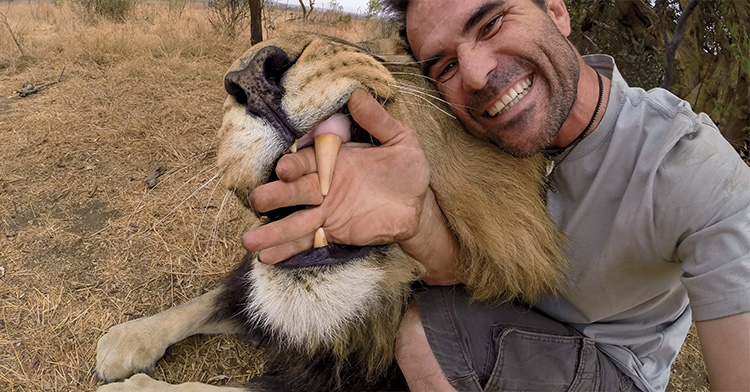
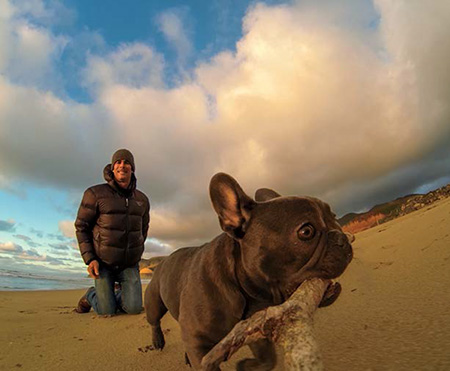
Animal
While Fetch is GoPro’s first official animal mount, our insatiable curiosity for animal POV has been with us from the beginning. With animals, the key is to make the camera as light and secure as possible as it will be going on an unpredictable wild ride! Because of this, we typically use a waterproof housing and antifog strips with the camera set to a 4:3 aspect ratio mode and a high frame rate for slow motion.
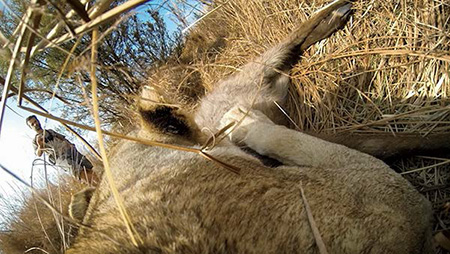
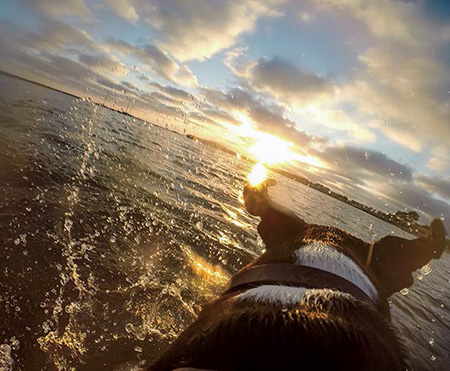
For many animals, a good mounting location tends to be behind the shoulders in the middle of the back looking over the head. This usually requires a harness of some kind. For birds, we have fashioned custom foam padding with nonabrasive string or tubing. For dogs, you can use the Fetch mount or in some cases a Chesty with the straps tightened all the way down. The Fetch harness also has a camera mount that rests on the dog’s chest, pointing forward.
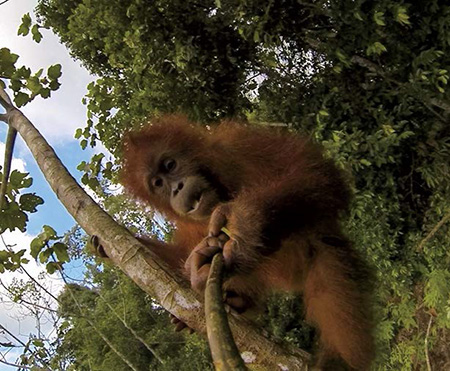
You can also find versatile uses for a handlebar/seatpost mount with animals. We’ve used one to attach a GoPro to a stick for playing with a dog, or even orangutans. The lens tends to get dirty quickly, so try using another GoPro on the other end of the stick for a better chance of getting the shot.
Meg Lion Hunt

Handlebar / 960p120 / Jordan Miller, Willy
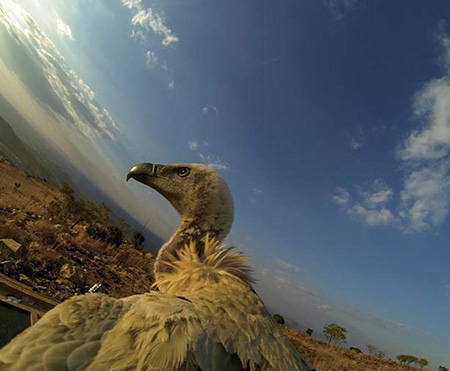
Bird Harness / 960p120 / Bradford Schmidt
Handlebar / 960p120 / Travis Pynn, Chicken
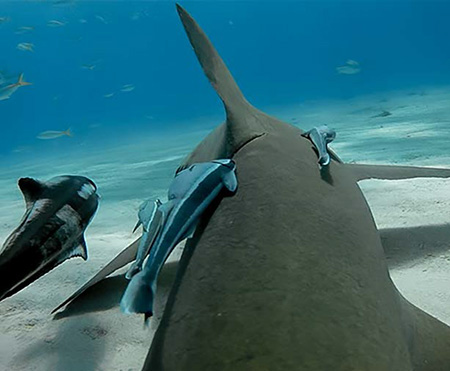
Fin Clamp / 1440p60 / Bradford Schmidt
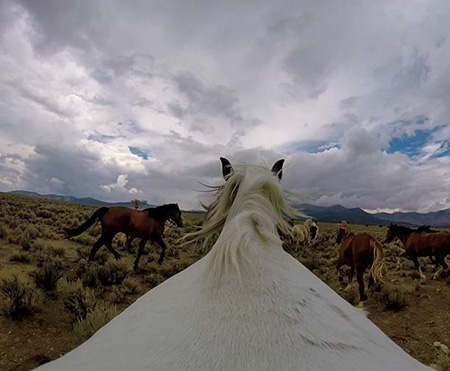
Horse Chesty / 1440p60 / Trenton Pasic