Chapter 4. Capturing a Story
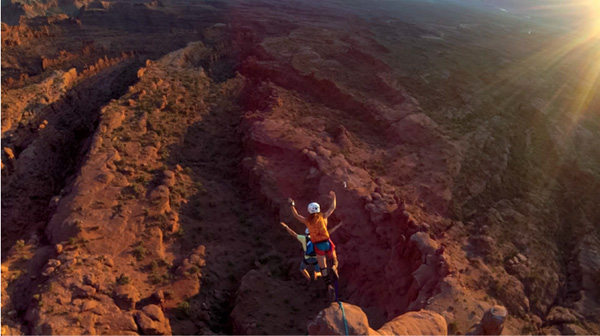
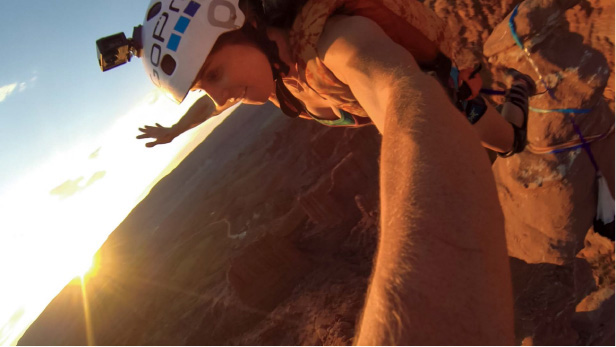
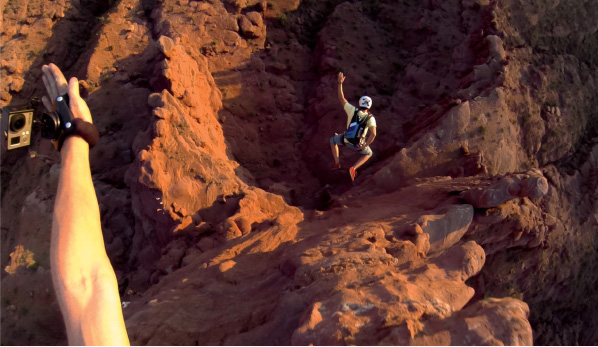
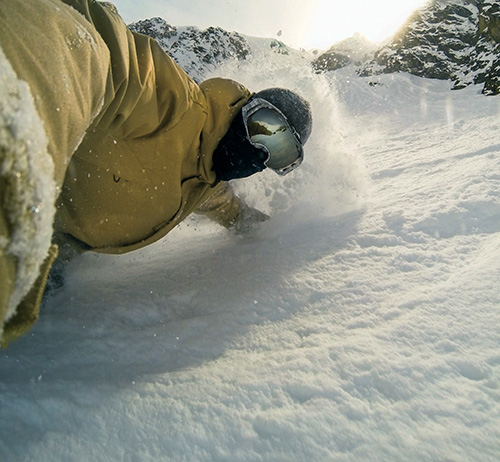
Bradford Schmidt, Kirk Krack / Tonga ![]() Norbert
Norbert ![]() Photo/.5sec
Photo/.5sec
Every time you press record on your GoPro during an experience, you are capturing a story. Every time you play that recording for someone, you are sharing the story. What makes GoPro so powerful is this: That is your story you are sharing.
GoPro is a proactive capture device that allows the filmmaker to experience a moment he or she is passionate about, self-document that moment, and then relive and share that moment as a story with others. A GoPro complements an experience rather than getting in between the filmmaker and the experience itself. In this way, filmmaking with a GoPro differs from traditional methods.
There is a saying in film: A story is told three times. Once in writing. Once in production. Once in editing. This idea can be applied to GoPro filmmaking. Initially, a story begins in your head when you come up with the idea and plan it out, usually by writing it down. When you are shooting, the story morphs and is adapted according to the situation. In editing, the story becomes more precise. With each telling, the story gets better. You eliminate the bad ideas and add better ones.
This chapter and the next walk through each stage of the filmmaking process. This chapter covers the first two stages, planning and production, as well as some theory and lessons we’ve learned in our own filmmaking journey. The final stage, editing, is covered in Chapter 5.

Preparation
Good filmmakers understand the direction of the story and the structure from start to finish, while adapting along the way. This requires planning. Sloppy filmmakers just shoot everything and expect to make sense of it later in the edit. You can always cobble something together in editing, but it’s painful and less elegant. When a story is truly directed from the beginning, it can become far more powerful.
Story Research and Planning
If you want to create a story, the first question you should ask yourself is this: What am I passionate about? What do I want to experience? Maybe you just built a bike jump with your buddy in your backyard. Maybe you always wanted to go to Peru. Maybe you saw a photo of an albino whale off the Great Barrier Reef and you want to swim with it. Finding that passion is the starting point. Proper research and planning can set up the experience to become a great story.
Once you have the idea, explore YouTube and Google to gain knowledge and understanding of the locations and characters. Look at photos and Facebook pages. Research every website on the topic you can find. Listen to interviews of characters you’re interested in—they can provide a sense of depth in your story. Make phone calls or Skype with potential subjects who live in the area or have previously traveled there. Consider logistics: permits, visas, immunizations, weather, and safety. How much time is required to properly experience what you are passionate about—allowing for complications and improvisation?
And then there are aesthetics. In traditional cinema, entire departments handle art direction, costumes, and the like. An audience will quickly judge your characters as authentic and believable or not based on appearance. Spend time figuring out the colors, clothing, and gear—and how they interact with the setting—to make an image sing. If you’re diving underwater, for example, a solid black wetsuit and hood have zero expression and personality. If the gear you want to use is involved or expensive, contact the companies directly to see if they will send or sponsor equipment. This can be one of the most enjoyable parts of the pre-production stage, and it helps your mind start visualizing creative ideas for the film. This visualization can propel you into the stage of writing or sketching the story’s scenarios.
Most importantly, consider what that ultimate moment of your story will be. The moment that will be so amazing you can close your eyes and practically feel it. Because that moment will be the climax—the most important building block of your story.
Story Building Blocks
Story building blocks are the basic foundation on which your story can be built. When preparing for a production, we always plan on capturing the following general building blocks:
![]() Introduce the environment and characters. Including yourself. Who are we and where are we?
Introduce the environment and characters. Including yourself. Who are we and where are we?
![]() Capture the climactic moment. This is what you came here to do and the reason the audience will watch your story. Plan coverage for that moment.
Capture the climactic moment. This is what you came here to do and the reason the audience will watch your story. Plan coverage for that moment.
![]() Document the resolution. This is an easy one to forget. Whether it’s victory or failure, capture it all.
Document the resolution. This is an easy one to forget. Whether it’s victory or failure, capture it all.
The climactic moment is almost always planned, because it’s the whole reason you are telling the story. On an average story shoot, we plan for five days minimum—one day for scouting, three days for filming, and one day as a buffer for the weather. The sooner you can capture the climactic moment, the better. You can spend the remaining days covering the other building blocks.
In preparation, figuring out the climax to aim for and communicating it to everyone beforehand gets you most of the way to success with fewer surprises. When creating the climax, the filmmaker must set up the right scenarios in which genuine and authentic actions occur. Even in traditional scripted filmmaking, the best directors are not the ones who tell actors to stand here and say this exact line. Rather, they try to create a scenario in which characters feel and act naturally. The same principles apply with documentaries or with GoPro filmmaking.
The best climactic scenarios involve a character who overcomes an obstacle. When telling a GoPro story, the obstacle is often inherent to the experience. For example, let’s say you were about to go paragliding with a hawk today, but it’s windy and dangerous and the guide doesn’t speak your language. Capitalize on these buts and document them. With experience, you will learn to adapt your story during production whenever a sudden obstacle might create tension that builds toward the climax.
So, now that you’ve figured out what you’re going to shoot, you need to think about how you’re going to shoot it.
Camera Gear
When assembling gear for a shoot, most of the filmmakers at GoPro (called production artists) begin by making a list of everything they could possibly need for any situation. With GoPro, the temptation is always strong to be an absolute gear hound. Spread all the gear on the floor and look at the empty bag. Then, ask yourself, “Am I really going to use this?” Envision the weight of it all on your shoulders—while carrying it through the airport, loading it into cars, unpacking all the bags, repacking it for early morning wake-ups, reorganizing it late at night after a long day. Sometimes, too much gear will paralyze you. It takes a few productions to understand that it’s not what you might use, but what you are likely to use. If you can narrow down to the essentials, then you’ll have room to throw in a couple of curveball gear ideas for that one shot you’ve always wanted to get.
Novice production artists will spend half the morning looking over gear and debating what they’ll use during the day—meanwhile, the beautiful dawn light is disappearing and your character is sipping coffee, ready to share something poignant while looking out the window at a mountain of fresh powder. All you really needed was a rolling camera. The steadicam that takes an hour to balance might give you a cinematic move, but it won’t bring back the genuine moment you missed, and that could have been the heart of your story.
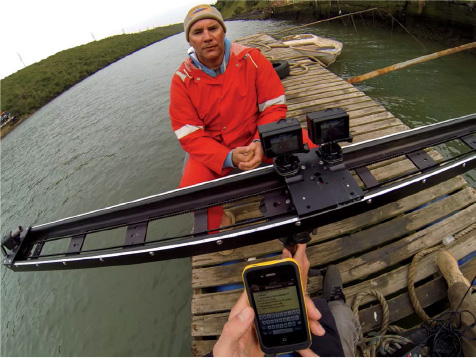
It’s wise to carry a camera, LCD BacPac, and two charged batteries in your pocket on a shoot at all times. Also remember to pack a few mounting extension arms and keep them handy while shooting. These small parts can be useful for mounting to anything and tweaking the camera’s angle. Finally, don’t forget audio gear. Sound is extremely important. Consider whether a waterproof backdoor, skeleton backdoor, or The Frame is the best sound-related accessory for the job. As good as the HERO4’s audio capabilities are, if you’ve got an interview and there’s any wind, an external mic may be the way to go.
Audio Gear
Proper audio gear is essential. Absolutely essential. Good sound is like the air you breathe—you don’t notice it until it’s bad. Depending on how loud the surrounding environment is, the HERO4 has surprisingly good audio when used with a head strap, helmet, a Chesty with The Frame mount. For interviews in a quiet environment, you can often get away with using the camera’s internal audio. However, to guarantee great audio, we always use a lavalier or shotgun mic just in case. We usually stash in the backpack a set of lavaliers for each main character or a shotgun mic in case something unexpected begins to happen.
Currently, the our media production teams use a Countryman waterproof lavalier with an 1/8-inch plug that connects into a USB adapter. It’s decently priced and durable, and it provides great sound when clipped or taped onto a lapel/shirt. In conjunction with a Chesty mount, you can simultaneously capture great audio and POV video during an active interview. If the Chesty mount is not aesthetically pleasing in the shot, simply dedicate the camera to audio. Place the unit in the subject’s pocket and press record. It’ll capture audio for two hours, at which point you can swap the battery if it goes dead.
Always use foam or fur to help with wind noise on the lav mic. K-Tek, creator of the Norbert, also sells great small furs for lavs. It’s wise to back up your interview audio with a shotgun mic, if possible. A number of good short shotgun mics with 1/8-inch plugs are available. Rode makes a great shotgun called the VideoMic Pro, but its rubber shock mounts don’t hold up well to rugged use. For something more durable, Shure makes a great short shotgun mic called the VP83.
If using a dedicated audio camera or multiple cameras during an interview, you may need to sync the sound together in a dedicated sequence on your editing timeline. You can do this manually by lining up the waveforms or by using programs such as PluralEyes. If you are recording music professionally, it goes without saying that it’s best to use dedicated audio recording equipment, rather than camera audio or a lavalier, and then sync that audio with the video on the timeline.
What’s in Your Pack?
Here are the essentials that we as GoPro filmmakers carry in our backpack on any given production:
![]() 4 to 6 cameras in waterproof cases with quick-release (QR) buckles
4 to 6 cameras in waterproof cases with quick-release (QR) buckles
![]() 4 Frame mounts with protective lens covers and QR buckles
4 Frame mounts with protective lens covers and QR buckles
![]() 1 LCD BacPac with backdoor
1 LCD BacPac with backdoor
![]() 1 Battery BacPac with backdoor
1 Battery BacPac with backdoor
![]() 1 Smart Remote and charger
1 Smart Remote and charger
![]() 10 Adhesive Mounts (curved, flat, and surf)
10 Adhesive Mounts (curved, flat, and surf)
![]() 1 grab bag of mounts (quick-release buckles, J-hooks, extension arms, etc.)
1 grab bag of mounts (quick-release buckles, J-hooks, extension arms, etc.)
![]() 1 Chesty (chest harness)
1 Chesty (chest harness)
![]() 1 head strap
1 head strap
![]() 1 mouth mount (experimental)
1 mouth mount (experimental)
![]() 2 gnarwhal long extensions with screws
2 gnarwhal long extensions with screws
![]() 1 Handler grip mount
1 Handler grip mount
![]() 1 handlebar/seatpost mount
1 handlebar/seatpost mount
![]() 1 roll bar mount
1 roll bar mount
![]() 1 Jaws mount
1 Jaws mount
![]() 1 3-Way Extension Arm
1 3-Way Extension Arm
![]() 2 tripod mounts
2 tripod mounts
![]() 1 RPS pole
1 RPS pole
![]() 1 medium JOBY GorillaPod
1 medium JOBY GorillaPod
![]() 1 charger for 2 batteries with cables
1 charger for 2 batteries with cables
![]() 4 extra batteries
4 extra batteries
![]() 4 micro SD cards with readers
4 micro SD cards with readers
![]() 2 anti-fog packs
2 anti-fog packs
![]() 2 GoPro Floaty Backdoors
2 GoPro Floaty Backdoors
![]() 1 laptop (15-inch)
1 laptop (15-inch)
![]() 2 mini hard drives (1 TB each)
2 mini hard drives (1 TB each)
![]() 1 Norbert
1 Norbert
![]() 2 mic adapters (3.5mm)
2 mic adapters (3.5mm)
![]() 2 lavalier mics
2 lavalier mics
![]() 1 shotgun mic
1 shotgun mic
Production
Telling a story with GoPro is an art unto itself. In our media department, we refer to individuals with this skill as production artists. Production artists are like independent directors. While shooting on a production, they must be conscious of camera placement, coverage, sound, light, recording interviews, logging and reviewing footage each day... all while being aware of the story as it evolves around them.
Trapping as Coverage
Nathan Myers, editor for Surfing magazine, first coined the term trapper for how we shoot with the GoPro. During the Bali shoot for the HD HERO2 launch video, Myers observed two of us methodically strapping and sticking multiple GoPros to four surfers, pressing record, and heading out. Two hours later, we all came back in, reviewed the footage, tweaked the setups, and repeated the process. Session after session after session. Myers observed that this was a fundamental difference in content creation. We weren’t chasing shots. We were trapping them. We set up the scenario and waited for the moment to come to us.
Limitation can be the best motivation for creativity when you are forced to invent new ways to get the shots you need to tell the story. As an example, before GoPro, skiing was mainly filmed with a long lens to capture the skier in context with the surroundings. With GoPro, that isn’t an option. The solution is to put a GoPro on the end of a ski pole and go off the jump with the skier. The inventive follow-cam shot is more engaging, and all because of a limitation. This concept applies to most activities and is a big part of how GoPro has created a whole new method of filming.
In classic cinema, coverage is defined as the use of multiple camera setups and shots to comprise or “cover” an entire scene. Traditionally, there is one shot called a master, which is a wide shot covering the entire scene from entrance to exit. And although you can shoot an entire scene in one shot, this doesn’t leave room for changes in the edit. In editing, having more coverage allows flexibility for continuous cutting of an action from one perspective to another, letting the audience digest a moment or scene from multiple perspectives to achieve maximum impact.
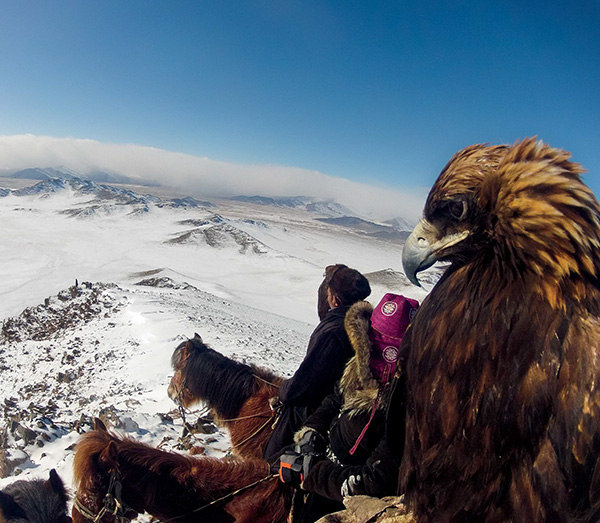
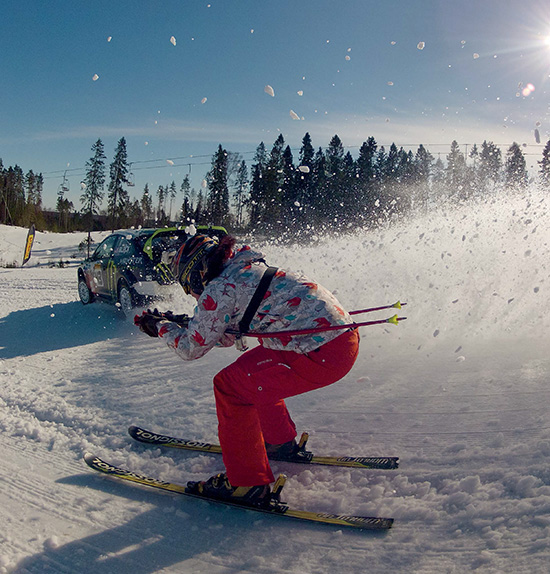
Lauren McGough / Mongolia ![]() Handheld
Handheld ![]() Photo/.5sec
Photo/.5sec
Shot Classification
When planning for coverage, it’s important to understand the different types of shots, what they are capable of capturing, and how they will be used in editing. We use five traditional cinema terms to classify GoPro shots:
Wide shot: The primary focus of a wide shot is the setting and then the character(s) within it. This is standard and typically static. The wide shot is used as reference for the rest of the coverage. For GoPro, a wide means the camera is not usually attached to the character. The tiny camera also allows the filmmaker to transform a static wide to a dynamic moving wide. Steadicams, poles, handheld gyros, or drones are the best tools for this. We typically shoot both a drone and a follow-cam for coverage, usually running the scenario twice so the shots are clean. Statics still have their place for establishing, pacing, and beauty. In the climactic moment, however, a dynamic moving master can be incredibly impactful.
Full shot: The primary focus of a full shot is the character’s full body interacting with the setting. This is achieved by mounting the camera several feet away from any part of the body via equipment or a long extension such as a pole, spinner, surfboard, or ski tip.
Medium close-up shot: As the camera moves closer, the primary focus of a medium close-up shot begins to shift from the setting and character’s body to the face. Sometimes, only half the body is seen and can feel larger than the setting itself. To achieve these, mount the camera either onto or very close to the body using mounts such as the 3-Way extension arm, Handler grip mount, spinners, or backpack mounts. These are some of the most popular GoPro shots.
Close-up shot: The focus of a close-up shot is solely on the character’s face while the setting fades into the periphery. The character’s emotion feels larger than life as it takes over the entire screen. Use mounts such as the gnarwhal or handheld.
POV shot: With a POV shot, the audience is experiencing everything from the subject’s perspective. The inclusion of hands, arms, and legs within the shot gives the best orientation and sense of immersion. Use mounts such as the head strap, helmet, or Chesty. While POV shots are obviously a staple for GoPro, in traditional coverage they were considered a specialty shot and used only on specific occasions.
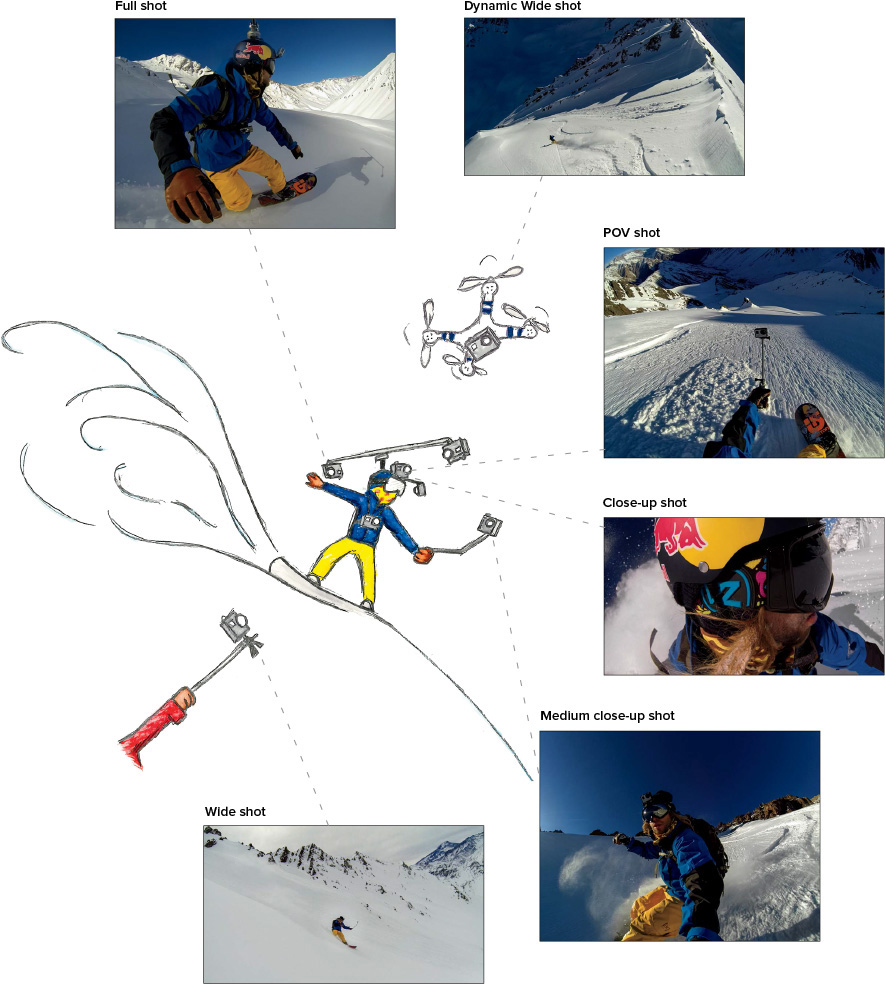
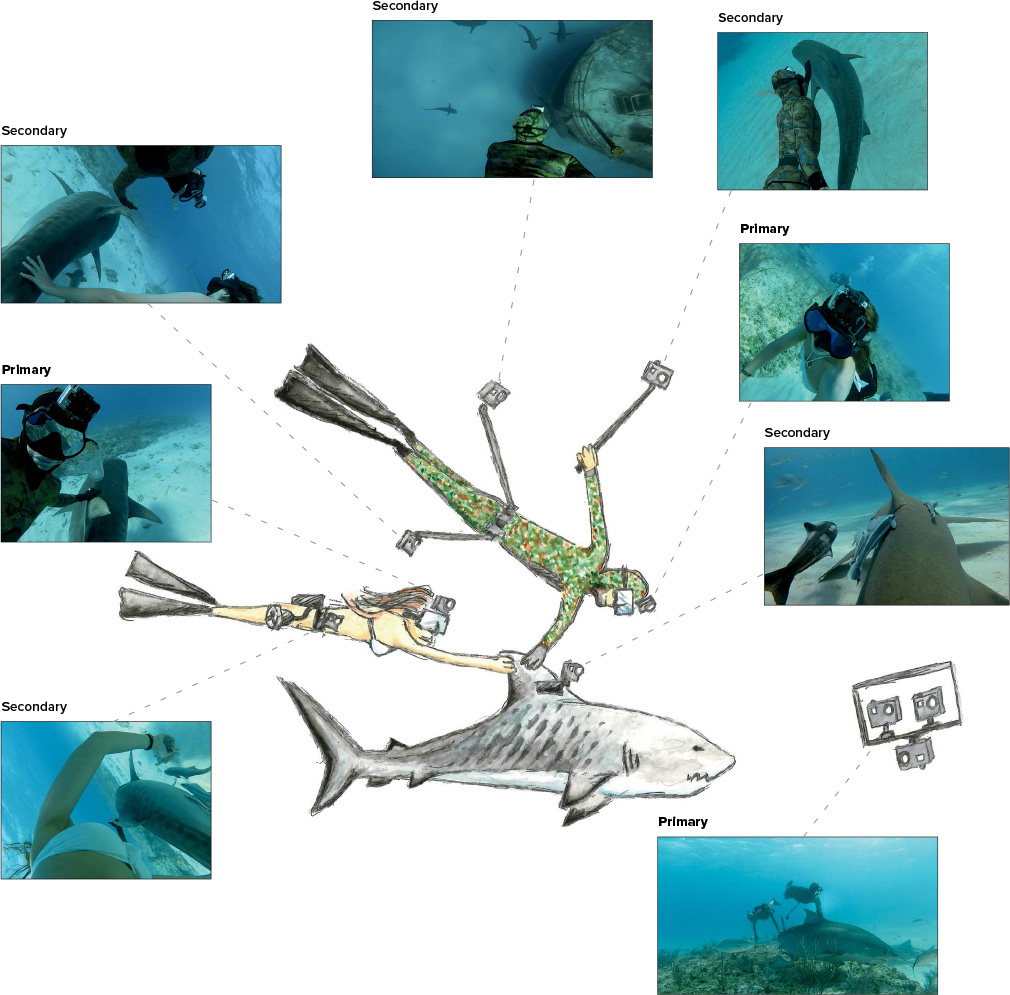
Primaries and Secondaries
Traditionally, directors use storyboards and shot lists to plan their shots. At GoPro, we generally don’t storyboard each sequential shot. If it helps you, however, then by all means do it. We often draw camera and mount setup diagrams for important scenes. Whether a character or vehicle, draw a stick figure with GoPro cameras and all the potential mounting options. Share the drawings with the characters beforehand so that everyone is prepared. This will eliminate surprises and misunderstandings while filming.
We generally shoot what are called primaries and secondaries. Primaries are shot first, especially when the scenario is new and unknown, and they usually consist of wide shots and POV coverage. The primaries provide the essential angles you need—so even if everything else goes wrong, you have these to fall back on when creating the video. Secondary setups involve backpacks, poles, armatures, and gnarwhals—generally, things you don’t want to see on the character within the wide shot. The secondary setups are typically our most inventive and experimental mountings, producing unique angles you’ve never seen.
Well in advance, the filmmaker and character should decide what POV mount is as natural a part of the character’s ensemble as a shirt or a hat would be. Seeing the POV camera in the wide shot is generally fine, and can lend a sense of realism as if the characters are filming everything themselves without any kind of “film crew.” Primaries are usually from head- or chest-mounted cameras. This uncomplicated approach keeps the characters from being distracted as they experience the scenario for the first time. The filmmaker can then watch the action in order to educate himself or herself on where the secondaries should be. Once you’ve thoroughly nailed your wides and primaries, move on to your secondary setups—the money shots. Secondary setups can be awkward, distracting, and sometimes complicated for the character to use, so be willing to adapt and improvise. Often, we’ll repeat our primary angles while filming secondaries, just for additional footage.
As an example, while shooting in the Bahamas for the HD HERO2 Dive Housing launch, we needed to capture a climactic scene where two characters rode a tiger shark together. The primary setup consisted of Mark Healey and Roberta Mancino’s head-mounted GoPros and a single wide shot from cameraman Andy Casagrande. We introduced the secondary setup on the last day, and included a pole mount attached to Healey’s waist and a leg mount on Roberta’s jet boots. The wide shot and POV head-mounted GoPros were great and would’ve made a solid scene, but Healey’s secondary mount intimately captured both athletes simultaneously connecting with the shark and put the magic into the climactic scene.
Before embarking on an adventure, always ask yourself, “What’s my next unique shot?” We always aim for one new type of shot every production, something we haven’t seen or tried before. Sometimes it works, sometimes it doesn’t, but it forces an artist to be progressive and continually improve.
Light
Light plays a crucial role in capturing impactful footage as well as emotion for your story. On productions, we often schedule a specific afternoon or even full day to scout each location and understand what is best for lighting. As in all outdoor photography, dawn and dusk are the most ideal conditions. In the HD3+ shoot “Moab Towers and Magic Backpacks,” the light greatly complicated production planning and execution. We scheduled four days to film the multi-pitch climb up the Fisher towers and then a BASE jump off. This also included time for interviews and establishing shots. On the scout day, we surveyed the towers and divided the story into three building blocks. An Initial Ascent up the tower for the introduction, a Final Ascent up the twisting formation called Ancient Art (which leads to the climax), and a climactic BASE jump off with a floating resolution in the air.
Ancient Art rises nearly a thousand feet above the desert floor, facing west. Each section of the video took place on a different part of the tower and had different lighting requirements. The sandstone chimney that comprised the Initial Ascent only received light from 10 a.m. to noon. The best light for the Final Ascent occurred right after the sun peaked over the surrounding cliffs, at 8:30 a.m. The BASE jump was best filmed at dusk when the sunset illuminated the rock spires to a glowing red and filled the valley with magical light for the climactic beat. This meant that the athletes and crew had to be in position for all these crucial times. When factoring in the wind, weather, and other variables, each successfully filmed scene became something of a logistical miracle.
Capturing the climax was the most difficult of all. During the summer months, the sun drops quickly, limiting our magic hour to, at most, 20 minutes from 7:10 to 7:30 p.m. Wind was an X factor that could make or break the shoot. As the sun dips, the desert cools down, creating gusts and updrafts in the late afternoon. Anything over 10 mph is unsafe for jumping. So at 7:00 p.m., Ashburn and Miller had to be at the top of Ancient Art and poised to jump. The crew needed to be in place with all ten cameras rolling, both quadcopters ready to go, and all of us waiting for the wind to die down before the sun dipped below the horizon.
Why all this work and coordination for only several seconds of freefall? You’ve already committed the effort, time, and money to travel somewhere. This is the climax of the story—the magical moment the audience has been waiting for. Make the moment the most impactful it can be with the best possible light.
Moab Towers & Magic Backpacks

Hayley Ashburn ![]() Hand Mount
Hand Mount ![]() 1440p48
1440p48
Hayley Ashburn ![]() Helmet
Helmet ![]() 1440p48
1440p48
Low Light
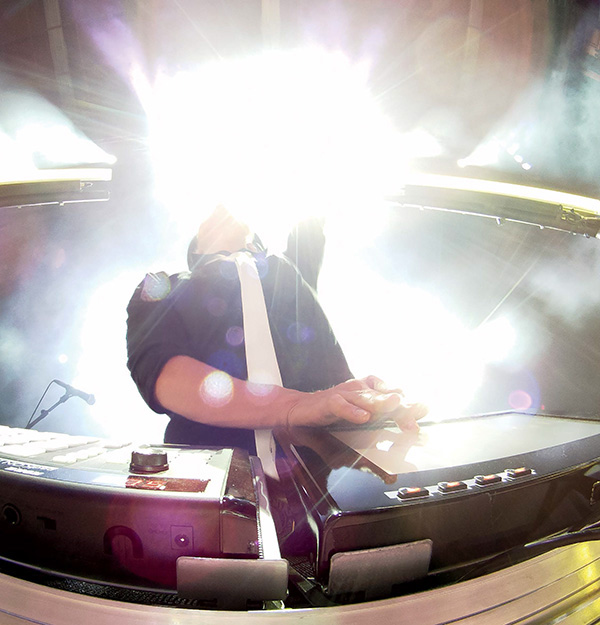
GoPro was conceived with outdoor settings in mind. Our original HD HERO sensor was specifically designed for performance in bright sunlight, not for dark interior lighting. But GoPro’s ability to capture in low light has increased by leaps and bounds since then, and the HERO4 Black leverages its new processor and updated Protune settings to deliver the most stunning low light performance, yet.
At GoPro, we always set the ISO or gain to 400 for video. This will cause the camera to crush the blacks regardless of the lighting conditions, keeping the processor from ramping the gain and creating image noise. The featured Tony Royster video is a great example of how an ISO setting of 400 can be used to create a dramatic scene. The interior lighting setup and projections were controlled with the understanding that this new ISO locking feature would be able to handle the surrounding dark curtains and allow them to fall into black without pumping up the gain and noise.
Frame rate affects footage quality in low light. In essence, the faster the frame rate, the less time each frame has to expose properly. At 24 or 30 fps, each frame has four times the ability to register light than at 120 fps. Shooting high frame rates during lower light or cloudy scenarios yields grainy and blurry images because the camera doesn’t have enough time to expose each frame properly.
GoPro has also introduced an Auto Low Light mode for users who may not be as conscious of light levels and frame rates. In this mode, the camera detects if the light drops below an acceptable level and automatically slows down to 30 fps. For example, if you are recording at 1080p60 and happen to step indoors, the clip will drop to 30 fps to allow for better exposure. The Auto Low Light mode simply duplicates each frame to keep the clip at a constant 60 fps for playback. While this isn’t ideal for editing, precious footage could be salvaged. However, we encourage you to always be aware of lighting conditions and be proactive in changing camera settings as conditions change, rather than using an automatic mode if your goal is the ultimate in image quality.
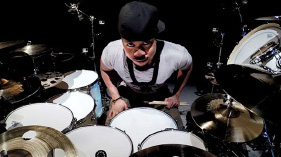
Tony Royster Jr. – Drummer’s Odyssey

Directing the Interview
Everyone has a genuine story to tell. Good interviewing depends on the interviewer’s ability to gain the subject’s trust and help them deliver that story in an authentic way. The easiest way to accomplish this is to make the interview an engaging conversation instead of a question-and-answer session.
A typical GoPro interview setup combines a short shotgun on top of a Norbert with two cameras. Each camera is set to different FOVs, such as 4K Wide and 2.7K Medium. Medium FOV limits any facial distortion and feels more natural. Keeping an interview rig within close reach is good practice because interviews can happen naturally or as a reaction to a situation. Nothing sounds more genuine than the emotion of the moment.
When directing interviews, remember the following principles:
![]() Do your research beforehand. It’s good to ask for explanations and clarity, but don’t arrive clueless. An informed interviewer gains the subject’s trust.
Do your research beforehand. It’s good to ask for explanations and clarity, but don’t arrive clueless. An informed interviewer gains the subject’s trust.
![]() Double-check audio levels and recording. Nothing is worse than doing the same interview twice due to technical issues.
Double-check audio levels and recording. Nothing is worse than doing the same interview twice due to technical issues.
![]() Turn off the blinking red light on the GoPro. It can be distracting and remind the subject they are being recorded, which makes them self-conscious.
Turn off the blinking red light on the GoPro. It can be distracting and remind the subject they are being recorded, which makes them self-conscious.
![]() Keep the lens at eyeline. Too high or too low can be unflattering, unless it is a deliberate thematic choice.
Keep the lens at eyeline. Too high or too low can be unflattering, unless it is a deliberate thematic choice.
![]() Don’t ask questions that can be answered with a “yes” or “no.”
Don’t ask questions that can be answered with a “yes” or “no.”
![]() Tell your interviewee to reformulate your questions as the first part of the answer. This provides needed context to the answers in editing.
Tell your interviewee to reformulate your questions as the first part of the answer. This provides needed context to the answers in editing.
![]() Be conscious of keeping the subject’s audio clean. Don’t interrupt the end of his or her lines when conversing or asking the next question. For encouragement, offer a silent nod or smile.
Be conscious of keeping the subject’s audio clean. Don’t interrupt the end of his or her lines when conversing or asking the next question. For encouragement, offer a silent nod or smile.
![]() Be aware of voice quality, pacing, and energy. If the subject is speaking too fast, calm them down with deep breaths. Do physical exercise to get a flat or bored subject’s heart beating. When someone is energized but speaking slowly, it adds weight to the words.
Be aware of voice quality, pacing, and energy. If the subject is speaking too fast, calm them down with deep breaths. Do physical exercise to get a flat or bored subject’s heart beating. When someone is energized but speaking slowly, it adds weight to the words.
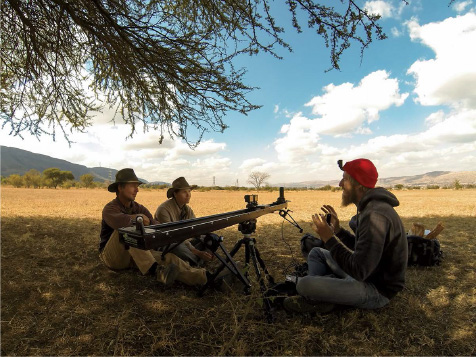
Sam Lazarus, Bradford Schmidt, Kerri Wolter, Walter Neser / South Africa
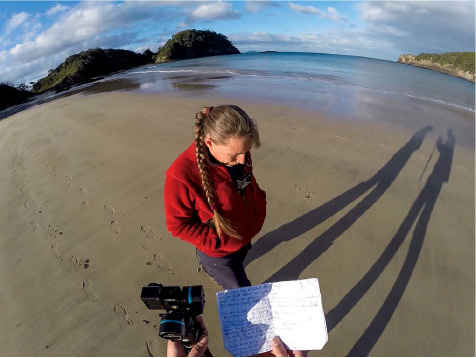
Bradford Schmidt, Ingrid Visser / New Zealand
Bradford Schmidt, Mark Addison / South Africa
![]() Keep response questions clear and concise. Avoid direct address so subjects don’t become self-conscious. For example: “Describe that moment” instead of “Tell me exactly what you were feeling.” This subtly focuses the subject on the experience instead of the present interview with “you” and “me.”
Keep response questions clear and concise. Avoid direct address so subjects don’t become self-conscious. For example: “Describe that moment” instead of “Tell me exactly what you were feeling.” This subtly focuses the subject on the experience instead of the present interview with “you” and “me.”
![]() Keep the GoPros rolling after the interview is “over.” Subjects will relax when the perceived pressure of the interview has ended. Sometimes, you’ll be chasing after a genuine quote and as soon as the interview is over, they casually deliver gold.
Keep the GoPros rolling after the interview is “over.” Subjects will relax when the perceived pressure of the interview has ended. Sometimes, you’ll be chasing after a genuine quote and as soon as the interview is over, they casually deliver gold.
![]() Keep a notepad for reference. Make sure you have covered the five Ws: Who, What, Where, When, and Why.
Keep a notepad for reference. Make sure you have covered the five Ws: Who, What, Where, When, and Why.
Static Interviews
The classic “talking head” is a static interview. Static interviews are a necessity for large heavy cameras that require tripods and are difficult to move around. GoPro production artists try their best to stay away from static interviews, because they are traditional and lack energy. Technological advancement in our 5 oz. cameras easily allows for dynamic and active interviews. That being said, there is something about a beautifully composed portrait of a subject with a gorgeous background. If you are going to shoot a static, shoot it well. A very slight bit of movement from a slider with layered background elements will feel more dynamic. If you don’t have a slider, try to make your static unique. The video example “Masters of Indo” places the main characters, Marlon Gerber and Varun Tanjung, on the ground, lying perpendicular to each other. An interview six inches off the ground is unusual.
The interview is part of your story, so use it to tell even more about the character or the theme. In “Masters of Indo,” we were attracted to the tree during the shoot because it reminded us of what the story was about—a family tree, the inheritance of a surfing dynasty, handed down to each protégé descendant. In the middle of the interview, we asked the nephew, Varun, to go swing on the rope. This allowed the uncle, Marlon, to open up as he was otherwise guarded in his nephew’s company. This also gave us the ability to break up the interview in editing by cutting between the two’s POV cameras, which made the interview childlike and playful. It also offered a great visual metaphor for the story: Marlon is rooted in the family tree, looking up and forward in time at Varun, who now has the same choices (and perhaps fate) as Marlon once did.
The analysis may seem silly or too deep, but the thought the filmmaker puts into a story are the layers the audience may (or may not) read into. If the thought isn’t put in to begin with, then the layers won’t be there.
Active Interviews
Active interviews can open up a world of layered storytelling. Most people have a difficult time being themselves in front of a lens, especially if they are staring right at that lens. GoPro’s size goes a long way in making the camera invisible to the subject. Distraction is the easiest way to help the subject forget the camera is present. Strap the cameras on, turn the blinking red lights off, press record, and walk around with your interview subjects. Let them show you around, interact with things and other people, and they will naturally begin to tell you a story from the past. Once it seems as if they’ve forgotten the cameras are even there, begin to engage in a deeper conversation.
The “World of Gavin Beschen,” featured in Chapter 6, is an example of an active interview. Beschen is a naturally shy person, and placing a camera in his face wasn’t going to create the right atmosphere. Strolling down to his home break and around his garden allowed him to relax. Paying attention to his words and asking open questions led to natural conversations about his passions in life—his family and daughter.
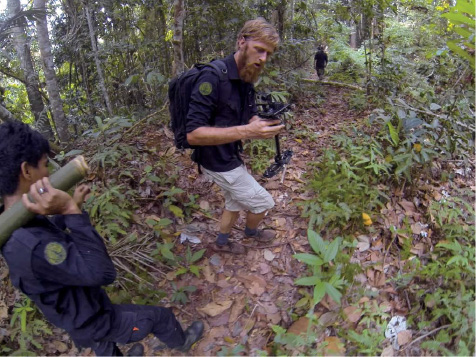
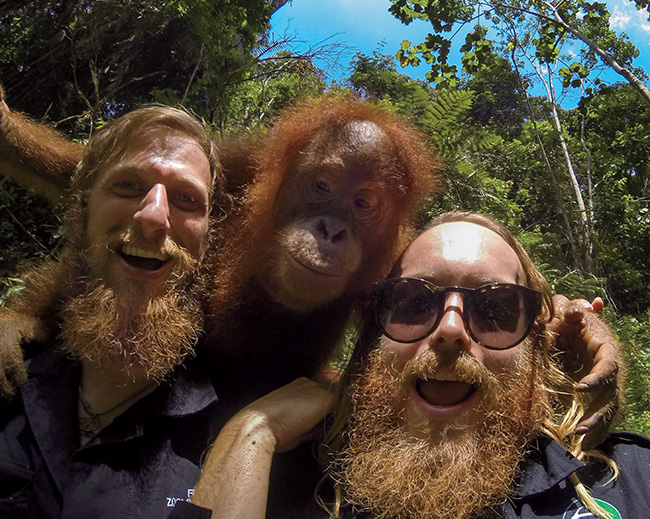
One of the most cinematic techniques for active interviews is using a steadicam or handheld gimbal. Floating around a character as they are in the midst of showing you the surroundings and what they are passionate about can be dynamic and inspiring. “Our Orangutan Brethren,” featured later in this chapter, is a good example of an integrated steadicam interview. This is classically referred to as a “walk and talk,” in which the subject is shot from the front and led by the filmmaker, who is walking backwards. In the final ascent leading up to the freedom of Suri the orangutan, we interviewed Peter Pratje as he brought the crew to the release site.
Walking backwards while filming can be tricky—it usually requires a spotter and decent path. It’s important to be conscious of layering background elements when possible to help create a dynamic sense of movement. In this case, the jungle provides ample layering. Used properly, a technique like this can really emphasize a certain part of the story. Pratje’s walk and talk gave the audience the feeling that the story was moving somewhere important, which it was: toward the final climax of Suri’s release.

Interview Theory
Of the five Ws—who, what, where, when, and why—the “why” is the real question you need answered, and it often serves as an underlying theme of the story. It’s the question we as humans struggle with and try to answer our entire lives—and the audience is no exception. Nevertheless, the direct question, “Why do you do what you do?” is for a subject one of the hardest to answer. Just ask it of yourself. Your answer will probably seem vague, generic, and unsatisfying. Direct “why” questions typically yield indirect answers, but a series of indirect questions can reveal answers that even the subjects themselves are not fully aware of.
Getting to the root of the “why” question starts with earning the character’s trust. Using good communication practices—such as looking the person in the eyes, showing respect, and not interrupting—all help do this. But trust really starts with people being able to identify with one another. The best interviews are those in which the interviewer-interviewee barrier breaks down. Make it a two-way conversation and not an investigation. Come prepared with a story about yourself that your subject can identify with. Maybe you’re talking to a BASE jumper and you tell him about the time you were scared of heights as a child. Making yourself vulnerable compels them to open up as well. Subjects almost always reciprocate with a story of their own. Connection and empathy go a long way toward gaining trust.
You should be interacting and conversing with the subject(s) as much as possible during the first few days of the shoot. Continually ask yourself what makes them tick. Observe them and test them out with a few light inquiries to get a sense of who they are. Jot down notes and begin formulating a list of interview questions. It’s good practice to have the subject begin an interview by stating his or her name, origin, and profession. Then have the subject describe the present situation and purpose. These are good warm-up questions and provide an informed baseline to work from later in the edit when context is needed. Once they are answered, however, it’s best to spend all your time and energy with the most important question: why?
The questions you’ve prepared aren’t set in stone. They are a guide. Always be willing to lead the interviewee along a different line of thought, or to challenge your subject. In the “Supercross New Year 2013” video, Ryan Villapoto is practiced and understated in his interviews. Both he and James Stewart have done plenty of them, so the process must be mechanical for them. During the interview Villapoto states, “I race motorcycles because I grew up doing it. It’s the only thing I know. Now it’s my job.” The interviewer nods and moves on with another question. An opportunity was missed. He could have responded with, “So it used to be fun as a kid, and now it’s just a job for money?” This kind of challenge could have transformed the mechanical Ryan into a passionate Ryan, defending why the sport is meaningful to him.
We all want to be understood, and that innate human need always shows itself in one way or another—tone, body language, analogies, and so on. We are subconsciously telegraphing others in order to be understood. Pay attention to the signals and they will dictate the course of the interview. Maybe the character is trying to express an issue or problem they have but won’t directly say it. When you get to a trusted and deep space with your character, there may be awkward silence or pregnant pauses. Don’t be the one to fill the silence—let them do it. The interviewer’s job is to create a safe place and gain the trust needed for the subject to open up. Trust is earned, not given. And it is the filmmakers’ responsibility in editing to use that trust wisely and be true to that character.
It’s useful to prepare your list of guidance questions over the first few days of a shoot, arrange them with a few warmup questions, and then throw in a challenging one relating to the thematic “why.” Progress the interview in overlapping circles with each new topic touching previous important ones. Continuously loop back and remind the subject of certain ideas or feelings they spoke of earlier. Natural repetition can help arrange sentences cohesively and concisely. As a filmmaker, you will notice the necessity of this in editing, when you have to cut down or rearrange voiceover.
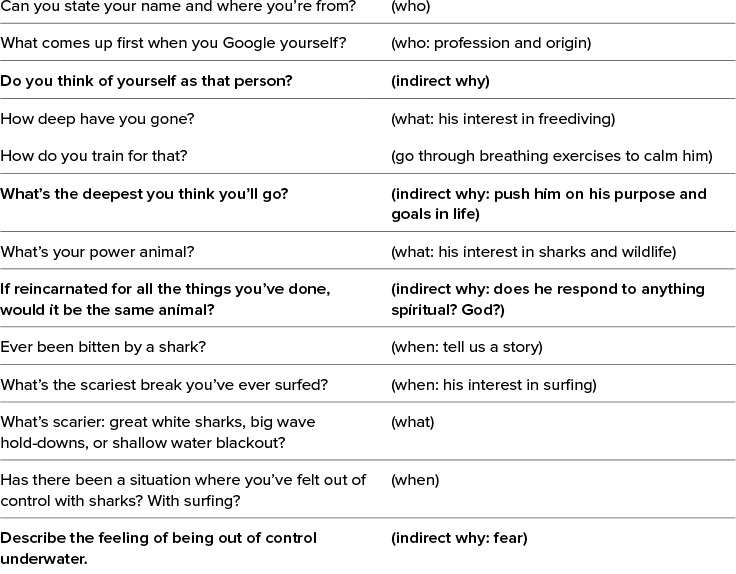
This kind of progressive overlapping technique was used while filming in the Bahamas for the HD HERO2 Dive Housing product launch with Mark Healey and Roberta Mancino. Over the first few days, we noticed a few commonalities between the freediver and the skydiver, which helped us arrange our list of guidance questions. Both feared other humans more than wild animals. Both have issues with loss of control, but derive purpose and pleasure from situations in which nature has total control over their life. Both subjects shared an interesting thematic interplay of euphoria through fear and loss of control which manifested in their dreams. Each interview lasted two-and-a-half hours with many questions adapting to how each was responding to the fear. We have included the following list of guiding questions used while interviewing Mark Healey for “Director’s Cut: Shark Riders” (indirect “why” questions are in bold).

Environmentals and Time-Lapses
Environmentals are shots that depict a story’s location, often also showing the characters within it. They can be used as a video’s opening, resolution, to bridge between story beats, or to convey the passage of time or journey. They can be either video or time-lapses typically shot during the spare moments on location. On the scouting day, always note where the sun rises and sets, and keep an eye out for any features or opportunities to shoot subjects that draw insightful elements into your story.
For video environmentals, set up foreground elements to give depth. If you can get the character in the shot, then all the better. We used this technique in “New York City...a Day in the Life,” featured later in the chapter. We constructed a clothesline on top of a random NYC skyline apartment building, and Ryan Sheckler skated behind on the bridge multiple times while we faked wind by shaking the line. Small details make environmentals shine.
When it comes to time-lapses, there are two different types. One is an actual photo time-lapse shooting at a designated interval, and the other is a video time-lapse sped up. For video, we tend to shoot 4K30, in case something doesn’t look natural when sped up. Windy trees, waves, or rivers can look jittery in a photo time-lapse, so having more frames to work with gives the editor more control. However, we use photo time-lapse mode for sunrise and sunset when good exposure and low light is needed or when shooting over extended periods of time. For extended time-lapses, we usually use a 64 GB memory card and a Battery BacPac or USB power.
Environmentals are best used to introduce and underscore themes in a video, as in “Remembering Sion Milosky.” The opening time-lapse, captured with an egg timer, shows the abrupt appearance and departure of a silhouetted surfer. It’s a nice introduction for a video about loss and the shortness of life. For the final shot, we see a small stream running out into the ocean waves. It’s a peaceful shot, as if we are seeing Sion’s spirit flow back to mother ocean, his home and resting place. This static environmental gives resolution to the story.

Photos
During production, we generally alternate between photo and video on certain mounts when the moment and lighting are right. Usually, the best photos are captured with secondary setups such as a 3-Way extension arm, backpack mount, or gnarwhal mount, which all do a good job of capturing the subject within his or her surroundings. These angles are very unique to GoPro and can tell a complete story in a single shot.
Time-lapse photos captured at 0.5 second intervals is the go-to photo mode for just about every production. There may be a thousand photos to sort through at the end of a session, but .5 second intervals will capture that quick moment of high action. It’s good to remember, however, that in low-light or indoor situations, it’s best to switch to photo every 2 second mode for the best exposure. (The Night-Lapse section in Chapter 1 gives additional information on shooting photos in low light.)
If the activity or action is calculated and brief, such as jumping off a waterfall, then burst is the photo capture mode of choice. Using the Smart Remote or GoPro App can achieve even more precise results when capturing a 30 photo burst over a 1-second period. One thing to keep in mind when timing a burst photo sequence is the 1-second delay that occurs from the remote or app to the camera it triggers. Sometimes, we use 30 photos every 2 or 3 seconds to ensure the moment is not missed.
When framing and mounting for photos, it’s best to think differently from video. For example, turning the camera sideways for a vertical photo is usually more advantageous for self-capture. There is a tendency to point the camera at your face, but with such a wide lens, the upper half of the photo will consist of sky while the bottom half of the body will be cut off. It’s best to aim the camera at your midsection or belly button to achieve proper framing for self-capture. When mounting a camera, stability and vibration are usually major concerns for usable video. However, in .5 sec or burst photo mode, shake or vibration usually don’t matter. We ziptie long poles off vehicles, which bounce around. We even toss the camera high in the air for unique overhead aerial pictures. All you need for a good photo is great light and one split-second where it all comes together.
An ordinary GoPro can achieve extraordinary things. Seeing Felix Baumgartner take several GoPros up to the harsh, freezing environment of Earth’s stratosphere in order to document his free fall from the edge of space was testament to how far a GoPro can go. We are continually astounded by the innovation and creativity we see from our users, professional and amateur alike. Their creative use of GoPro is inspiring and never-ending.
We’ve seen doctors adapt our 3D HERO System to capture a series of magnification mirrors to record 3D endoscopic surgery. Inventive astronomers have mounted GoPros to telescopes to capture pictures of the moon. Rocket scientists have inserted GoPros into a vacuum cryo-chamber to record and study plasma propulsion. Wildlife scientists use GoPros to document animal behavior at night with infrared lights. Biologists use macro lens adapters to place GoPros on feeders to record hummingbirds and insects. Oceanographic researchers combine footage from multiple GoPros to create animated 3D mapped environments of the sea floor. Because of GoPro’s versatile and adaptable nature, the only real limitation is your imagination.
Take a moment and think about the story you are going to capture. Is there a unique way to film it that most people have never seen before? GoPros have the ability to go places where humans cannot. Be inventive and innovative in your filmmaking endeavors. Spend some time researching on YouTube and Google. There are all sorts of forums, websites, tutorials, and videos which explain a vast variety of interesting applications, adaptations, and uses for your GoPro that go far beyond what you normally see.

Bradford Schmidt / San Francisco, California ![]() GoPro + Macro
GoPro + Macro ![]() Photo/.5sec
Photo/.5sec
Downloading and Review
Good organization of video footage starts on-site while the filmmaker is still shooting. When downloading all the footage at the end of the day, we tend to organize GoPro video files by character and by mount. All of Character A’s helmet-cam for a given day goes into one folder, Character B’s helmet-cam into another, and so forth. We then label the folders. You’ll be thanking yourself later when you open up those neatly organized and labeled folders for selecting and editing. It’s also imperative to back up the files on another hard drive on location. At GoPro, we actually back up our daily downloads twice.
For a production, one of the most critical and easily forgotten steps is footage review. This should take place each night when downloading the SD cards. A nightly review lets the filmmaker know what was actually captured and what was missed. Are there any character observations that should be brought up later in the interview? Is there an opening beat for the story? Is there an ending beat? Does the climactic beat even work? Did something go wrong? The review informs shooting decisions for the coming days and can even affect the direction of the story.
Most importantly, as a filmmaker you should use the review to identify what is working and what isn’t. Make sure you are on your way to capturing all the building blocks that will later create a beginning, middle, and end to your story in editing. But it’s also important not to be too attached to the building blocks you imagined. It may cause you to miss a genuine opportunity to improvise and capture something you didn’t think of. The opening or ending of a film can surprise you in the midst of shooting, when something authentic happens with your character. You have to be open to improvisation and ready to let that magic happen.
Improvisation
Improvisation can save a story that is struggling, but it can also get the filmmaker into the most trouble, if solely relied upon. Good improvisers already have a masterful grasp of the tenets of filmmaking. They come prepared, and their experience and skill allow them to recognize when magic is happening and capture it. Novice filmmakers sometimes arrive unprepared and rely only on improvisation, where proper planning and effort would be more suited.
Since the beginning of GoPro, some production artists have consistently produced that certain magic; others have done so with far less consistency. Why? The successful artists are present in the moment. These are the artists in tune with their characters and aware of the potential possibilities at any given moment. A simple example of being in the moment was captured in “Roshambo—Red Bull Rampage 2012.” After a frustrating, dusty day, production artist Trenton Pasic saw Chris Van Dine and Tyler McCaul walking up to the top of the Rampage course. Fortunately, he was prepared with two spare cameras in his pack. Sure, practice was over and the shooting day was done. But Trenton popped the two cameras on their helmets and began rolling. He ended up capturing a funny, natural moment between the two bikers and a great narrative flow that became a successful viral video for GoPro.
Another pillar of improvisation is understanding how to adapt or change direction when things go wrong, even when the climax is planned. This is often figured out during the downloading and review stage of a shoot. Improvising can keep a filmmaker from coming home empty-handed. We experienced this while shooting “Ken Block in Russia.”
The production was supposed to be the first of an interwoven series for the release of our Wi-Fi BacPac in the Spring of 2012. Everything seemed to go wrong on this shoot. Wrong hotel locations, wrong firmware on prototype cameras, wrong weather... wrong climactic beat. We originally planned to have Block jump over a moving train as the climax for the story. On location, we quickly sobered up to the fact that the jump wasn’t realistic. The next climax concept was to build a jump in the woods alongside the running train. The Russian crew spent all night building the jump, but the weather was too warm the next day. The jump didn’t freeze properly and Block nearly ran into a tree at 50 mph. So that idea was scrapped.
Roshambo – Red Bull Rampage 2012

Time was running out on the last day, and we still didn’t have a climax or an ending. For our climactic beat we settled for Block destroying 30 GoPro cameras laid in an arc on the snow. But we knew we needed some kind of payoff to save this video from failure. We playfully matched a Russian skier against Block, who he blasts with a dramatic spray of snow. The rear bumper of his car had been torn off during that scene. Suddenly, we had an idea for a payoff. We improvised an ending where the Russian skier sees Block’s car in the parking lot and kicks the bumper off as payback. Her revenge included the banter of the Italian mechanics, which made it even more humorous. It was our first improvised foray into GoPro comedy. And luckily it worked—the improvisation saved the video.
Some productions require improvisation, such as filming wildlife. When you have no control over the main characters, how you imagine the climax becomes more of a dice roll than a plan. Improvisation is key in understanding how to create optimal scenarios, predict behavior, and adapt to wildlife characters while still capturing a climactic beat for the story.

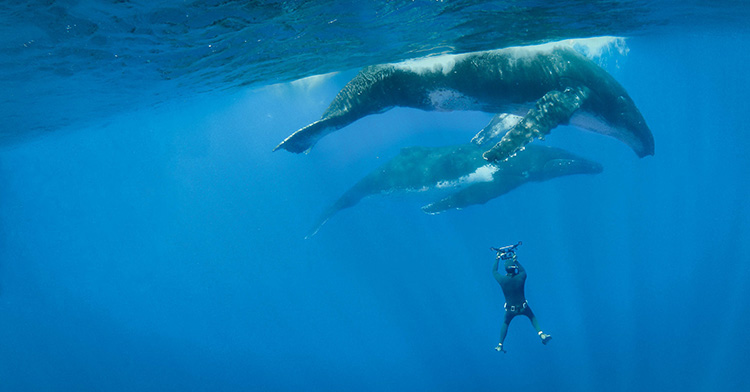
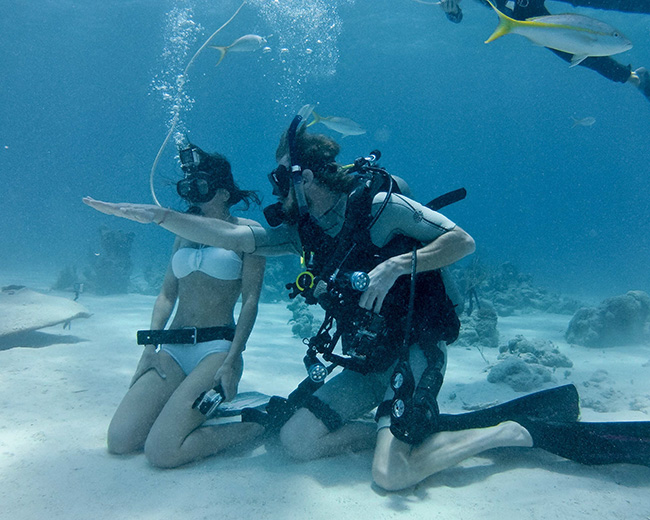
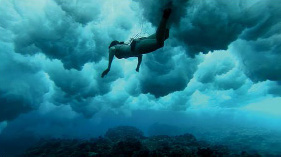
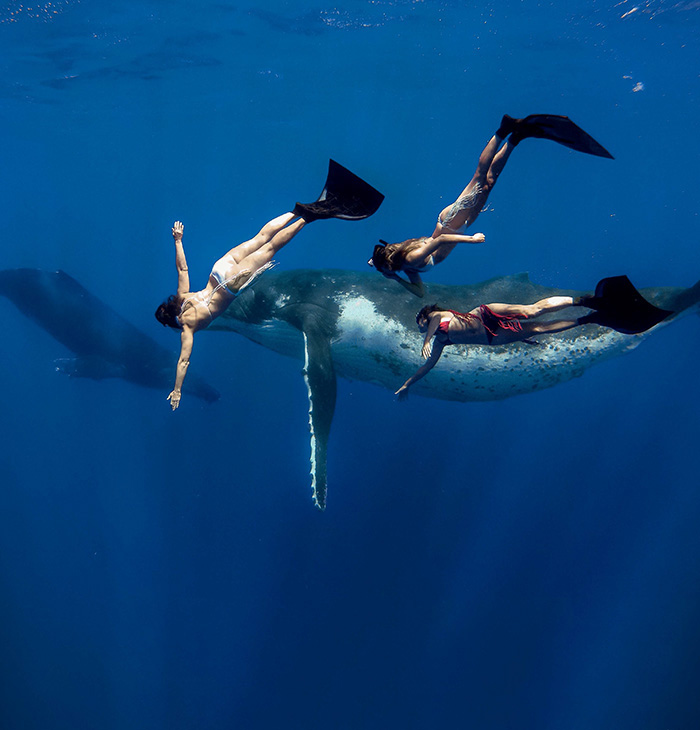
In 2012, the HERO3 was GoPro’s first camera with a flat lens housing, thereby enabling extremely clear underwater footage for the first time from a stock GoPro. An underwater scene was a critical requirement for the launch video and we wanted to show the world something it hadn’t seen before. There are only a few places where humans can legally dive with humpback whales. Tonga is one of them, with tropical water allowing more than 100 feet of visibility. We hired the best freediving coach in the world, Kirk Krack, and three professional freedivers: Ashleigh, Erin, and Mandy. The climactic moment was ambitious: three female characters in the same frame with enormous humpback whales.
Our outfitter in Tonga, Alistair, administered a dose of reality. Normally, the BBC or NatGeo would employ him for something like this with a shooting window of 20 or 30 days. We only had five.
Over the first few days, we followed the whales and learned a few interesting techniques. The animals have to welcome you into their space—you can’t simply run at them. After you calmly swim parallel to them for a while, the whales grow curious and come closer and closer to you. We found out they were as curious about us as we were about them, but the approach had to be on their terms. We captured some beautiful shots, sometimes with one of the girls in the frame, but nothing magic. During review, we noticed one whale had come up underneath us with a big curious eye. One of us turned around and waved an arm. The whale turned and waved in response. Alistair explained that if the whale was curious enough, it would mimic you. That sparked a new idea for the climactic beat: capturing all three girls interacting and spinning with a whale in a single shot. Alistair’s response was bleak: impossible.
On the second-to-last day, we improvised a new plan. At an opportune moment, Kirk would film a close follow behind the girls while Bradford would capture the wide and give the signal. In the late afternoon, it just happened. A large female was resting below the surface. The crew dove down parallel to the whale’s eye level. The humpback and crew drifted closer and closer. The signal was given and the whale watched as the girls began to turn. As if on cue, the humpback turned and spun in sync with the freedivers. Our improvised plan had captured the impossible.
Whale Fantasia

Biography of a Production
GoPro productions take many forms. We encounter various productions from a single camera shoot to a multiple crew production launch involving more than a hundred rolling cameras. Here we outline four distinct types of productions along the spectrum, from simple to complex.
One Man, One Camera
This video was the very first user-generated edit we ever published on the GoPro channel. One morning, Nick came into our Half Moon Bay office, where there were only 12 of us at the time. He was ecstatic about an edit he saw on YouTube...a customer was fulfilling the promise of GoPro! The video was well thought out and beautifully shot by a passionate kid, Brendan Schnurr, who didn’t take himself too seriously. Schnurr was having fun with his one GoPro and he made an awesome piece in the middle of nowhere by himself, with a snowboard and a kite. We contacted him and asked if we could promote it on our channel and send him a camera to stoke him out. And he was stoked. This was the very beginning of what was to become the User Generated Content section of GoPro’s media department.
This video is still one of our favorites and it epitomizes all that is GoPro. Brendan had all the elements to make up a short little story. He composed each shot with his single camera. He started with setting up establishing shots in the snow and an introductory close-up of the character—himself. Static wide shots are interspersed with POV shots from the Chesty mount and handheld. Great funny music and a climax or rather anti-climax that makes you laugh. This is the dream of GoPro realized and it’s a beautiful thing. One man. One camera. And a whole lot of creativity.
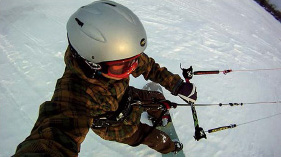
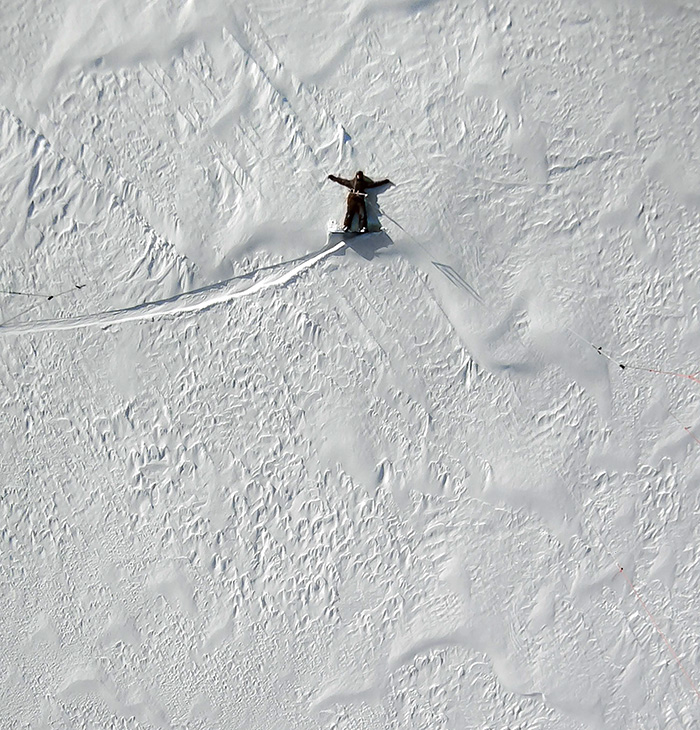
Snowkiting in the Backcountry

Bradford Schmidt, Julius, Jordan Miller / Sumatra, Indonesia ![]() Handheld
Handheld ![]() Photo/.5sec
Photo/.5sec
A Friend and Four Cameras
“Our Orangutan Brethren” was a production by two great friends, Brad Schmidt and Jordan Miller, who had tickets to Sumatra and wanted to hang out with orangutans. It’s an example of how any passionate GoPro user and a buddy equipped with a couple of cameras can yield an incredible heartfelt story. This wasn’t a large production, and it didn’t require much money.
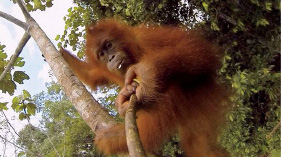
The idea began with a passion for the topic of endangered orangutans. Then came a lot of Google and YouTube research before finding the main character, Peter Pratje, and contacting the Frankfurt Zoological Society through its website. Next came several Skype calls with Pratje to collaborate on the potential building blocks for the story: training at the jungle school, the deforested wasteland, and most importantly, a plan to release a rehabilitated orangutan into the wild, which would naturally be our climax. Despite the necessity of improvisation with wildlife, we were prepared. We tried getting orangutan POV with Chesty mounts and handheld mirrors on the first day, but this failed. On the second day, we tried our handlebar mount on a wooden stick that had some strategically placed fruit drizzled with honey. The idea worked like a charm. We pretended to hide the stick, which made the apes desire it even more. They would snatch the camera stick away from us and carry it up into the trees and share the fruit with each other. This gave the story unique footage no one had ever seen before: orangutans filming themselves.
But just as some aspects necessitated improvisation, other aspects had to be deliberately planned in order for the story to convey specific ideas. The deforested wasteland needed to be personal to the orangutans, thus making it personal for the audience. We planned to film an orangutan on a dead tree, mourning the destroyed homeland. Pratje said orangutans would never climb a tree with no fruit, but we insisted. The single shot took four hours, but that moment became the emotional punch of the piece and served the exact purpose the story needed.
Any filmmaker could’ve made this story. We shot the entire thing with a handful of cameras and a couple of filmmaking toys: a drone, a Kessler Cineslider, a Glidecam, and a Sail System Backpack. Our audio gear included a lavalier mic and a shotgun mic. It was an uncomplicated shoot, simple and realistic for two friends, but it yielded one of the deepest stories we’ve ever told.
Our Orangutan Brethren

Product Launch Production
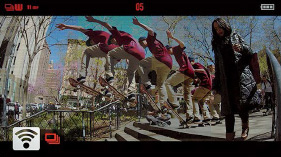
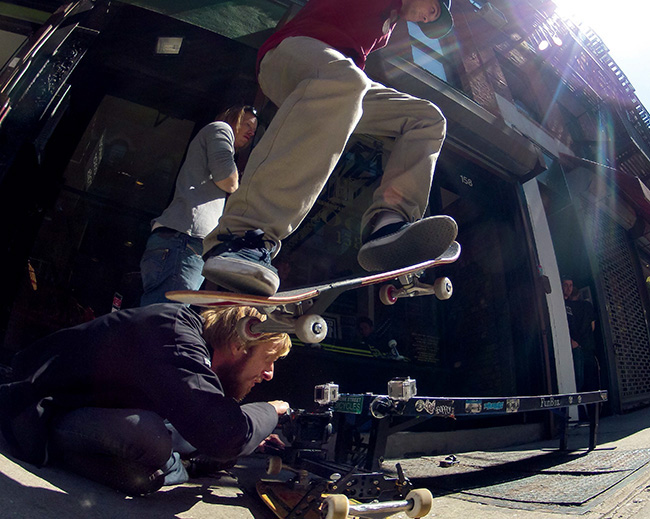
“New York City...A Day in the Life” is a prime example of a GoPro professional production. We had a large crew consisting of five GoPro members, a local producer, a local scout, a professional skate filmer, and the professional skater, Ryan Sheckler. We had never filmed street skating, a big city or a marketing segment for a complicated product like the Wi-Fi BacPac and Remote before, which made this our most calculated production up to that time.
The concept was a skater’s journey over the Manhattan Bridge to the Lower East Side skate park. Sheckler and his filmer, Erik Bragg, were to capture it all themselves with myriad GoPros and our new Wi-Fi products. The building blocks of the story were broken down into three major sections for the skater’s “line” through the city. The introduction, on the Manhattan Bridge and the Chinatown stair set, would build to the climactic moment where Sheckler would kickflip over a taxicab before entering the skate park.
In order to prepare properly, we actually shot the entire film at each location with a local skater on our scout day. The Sun Seeker app uses a phone’s GPS to project the sun’s path while standing at a location. This allowed us to plot out the best time of day when the sun was peeking between tall skyscrapers to light up a location. After the initial scout day, we put a rough cut together that night to see what worked and what didn’t. We realized we would need to depend heavily on graphics to communicate the features of our new Wi-Fi products.
The introduction and middle sections were fairly straightforward, but the finale was not. We arrived at the Lower East Side skate park four hours before sunset to prepare the scene and rig 30 static cameras around the taxicab, brick walls, curbs, and street. Once it was all done, we patiently waited until the light was best. Fending off the gathering crowd around the scene, keeping 30 cameras rolling on a city street, a dozen crew members choreographed, and a professional athlete landing a difficult trick was a feat unto itself. At the end of the day, the major lesson we took away from our professional product shoot in NYC was preparation and scouting saved our asses. But, of course, our job was only half done. The editing was going to be the hard part.
New York City...A Day in the Life – Starring Skate Legend Ryan Sheckler

One Man, 30 Cameras
How has GoPro empowered the individual? “Deepflight Submersible - Searching for Whale Song” was filmed by one professional in a single day. It began when inventor Graham Hawkes invited Nick Woodman to test drive Graham’s new submersible in Hawaii. For the story’s building blocks, we planned (hopefully) for a whale encounter as the climax and a surface breach as the resolution. We drew mounting diagrams complete with a few wild ideas, including an elongated spinner mounted perpendicular to the vehicle’s nose, like a propeller. Upon arrival, the first afternoon was spent preparing the submarine with sticky mounts and extensions using a camera and an LCD BacPac. Most of the cameras couldn’t actually be placed on the submarine until it was floating in the water, so all the mounts had to be prepared beforehand. The extra few hours of preparation are essential so when the time comes, you simply press record and let the cameras do all the work.
In the morning, we found out Woodman wasn’t able to pilot the submersible due to Coast Guard regulations. But we had Hawkes and his copilot Lee outfitted with red beanies, head straps, and lavalier mics in their submarine, all ready to be launched into the sea. All of the GoPros and mount setups were swum out to the floating sub and snapped into place in ten minutes. Hawkes was instructed to talk through everything while he was down at depth, explaining about the whales and the song and how he was recording them. His voice-over would be the spine of the story. The trapper had laid out all the GoPro traps and now had to trust that the magic of Hawkes’s personality and the underwater dive would shine through to the 30 rolling cameras. Though whales were everywhere around us, and the hydrophones picked up whale song, Graham and Lee never visually encountered any underwater. We debated how to handle this in editing—an archive clip from the Tonga production gave a surreal moment of connection between Lee and a whale waving at each other. The climactic scene felt emotionally true to the story.
In this case, proper preparation, solid coverage, and understanding of the building blocks of the story made reconstructing that story on the timeline much easier. The filmmaker had a narrative flow in mind throughout the production, which allowed the editor to focus on making each beat impactful, rather than wasting time trying to conjure a structure out of thin air.


The best stories generally come from an artist who follows an idea throughout the shoot and goes into the editing phase with a map. You won’t know everything that happened if you’ve shot with your GoPros properly, but you laid the best traps during the shoot with your coverage, and now it’s time to find out if there are any golden surprises. Good filmmakers have a narrative flow in mind, which has been growing and adapting throughout production based on the story’s building blocks. When they enter the editing stage, they write this down in what we call a “paper cut.” Good footage is key. Editing is important, but remember: superb editing turns mediocre footage into mediocre footage edited superbly... which only yields a superbly mediocre video. Capture the content pool that will give you the ability to sculpt your masterpiece.
Your story will be as deep and as layered as the thought you put into it. That thought should occur during the shooting phase and the editing phase. Your well-thought-out details may seem trivial sometimes. But the audience will get out only what you put in, even if what they are getting isn’t precisely what you intended...there is substance in it, and that is art.