Chapter 2. Mounts
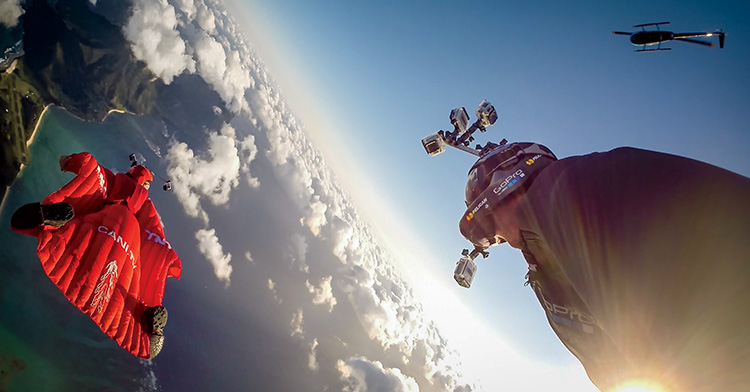
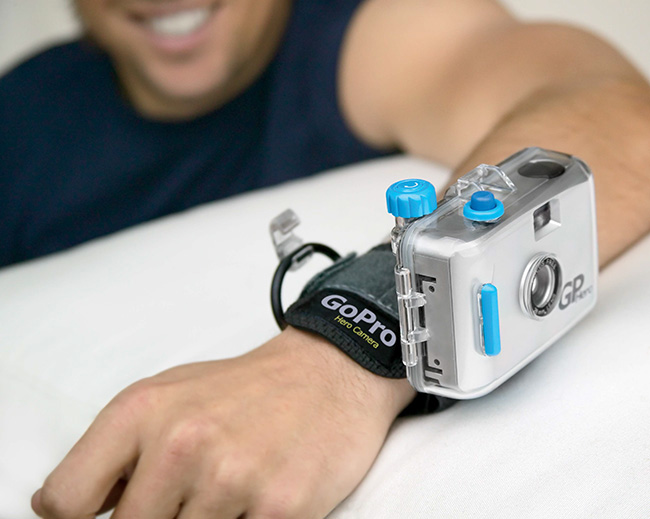
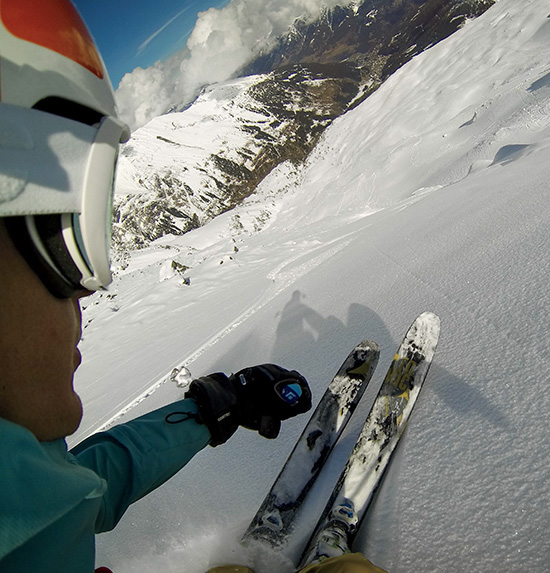
Jeb Corliss, Luigi Cani / Lord Howe Marine Park, Australia ![]() Hand Mount
Hand Mount ![]() 2.7K30
2.7K30
Gopro is Arguably the World’s most versatile camera thanks in large part to its mountability. As the range of available mounts and accessories grows, so does the potential of the camera. Each year we see mounting breakthroughs and innovations that lead to never-before-seen shots. These shots inspire GoPro’s own product design efforts as well as those of third-party manufacturers and garage shop inventors. The growing ecosystem of GoPro-compatible mounts and accessories continues to position GoPro as one of the most capable filmmaking tools of all time.
The first section of this chapter covers many of GoPro’s mounts and accessories. The second section delves into experimental mounts developed by our media team and others over the years. The third section explores some of filmmaking’s more traditional tools and how you can use them in combination with the GoPro. The final section covers the pioneering field of multicamera capture.
GoPro Mounts
We think of GoPro’s broad range of mounts as an enabler to your creativity, a starting point for you to experiment and discover new perspectives of your world. And while each mount has an intended use, the beauty is that they can be repurposed and used in any number of ways. The vented helmet strap can be used to cinch a GoPro around a tree. The Chesty can be double-wrapped around a ski boot. The head strap can be worn like a belt or a Speedo. We’ll mention a few fun variations we’ve discovered, but for every one of our ideas our creative users have come up with dozens more. And that’s what’s so incredible about GoPro!
Wrist Camera: The Beginning
Nick Woodman prototyped the first GoPro wrist camera while preparing for a surf trip to Australia and Indonesia. His vision was that surfers should be able to wear a camera and photograph one another while surfing. GoPro’s first product, the 35mm film-based HERO camera, launched on September 15th, 2004, in San Diego, California at the Action Sports Retailer trade show. The rest, as they say... is history.
Woodman’s original wrist strap design was GoPro’s only mount until late 2007. It wasn’t until Nick strapped an early digital GoPro wrist camera to the roll bar of a racecar that he realized how enabling a GoPro mounting system would be. Several years and dozens of subsequent mounts later, Nick’s original wrist camera design remains a viable solution for capturing active, on-the-go footage.
Wrist Strap Marketing Video – 2005

Head Strap
The human head is an ideal camera-mounting location for multiple reasons. The near eye-level view simulates the human perspective and gives a viewer the immersive sensation of seeing another’s point of view. The head is also the most stable part of the body. It acts like a natural shock absorber—the legs, arms, and spine absorb the spins, jolts, and shakes of athletic activity.
For most activities, the straps should be tightened to the point of slight discomfort—otherwise, the camera will shake. We almost always use the head strap in conjunction with the lightweight Frame mount—the lighter camera will be less likely to fall off. For style points, take the top strap off and wear it under a beanie, hat, or bandana. We constantly film with the head strap during productions—it’s a good way to capture behind-the-scenes footage.
A similar lower profile mount is the QuickClip. It’s useful for putting on a backwards baseball cap, but isn’t as stable for rigorous activity. We also clip the mount upside-down to the front pocket of a collared shirt for a Chesty-like perspective without all the straps, though it is less stable.
Adjusting the head strap camera angle is key. A common mistake is pointing the GoPro straight forward, resulting in video that is framed too high. The camera should be tilted slightly downward so a line can be drawn from the center of the lens to the ground six to ten feet in front of it. Once you have the correct angle, hand-tighten the thumbscrew and then use a Phillips screwdriver to crank down on it so the camera won’t move.
A 4:3 aspect ratio video mode such as 2.7K 4:3, 1440p or 960p works well with the head strap. The extra resolution covers the ground and filmer’s body and helps to anchor the eye through chaotic action.
Crystal Ball Street Performer


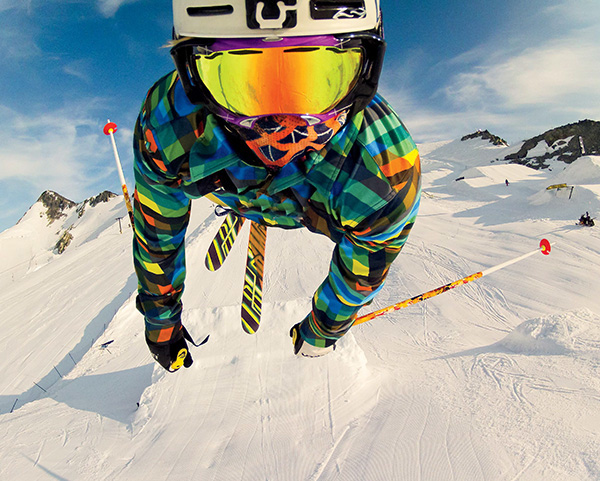
Helmet
The helmet camera offers an essential POV for incredible human feats. It can put the viewer straight into the perspective of jumping off a cliff or over a canyon, for example. The power of the mount lies in its ease of use and unobtrusiveness: users simply click in the camera, turn it on, and then forget about it.
The top-mounted camera should be balanced at the apex of the helmet. The camera can be pointed forward for standard POV, or backward for an interesting rear perspective or a following friend. A popular variation is to place the camera on the frontmost surface of the helmet, just above the forehead. This makes for a lower profile appearance. In combination with The Frame mount, the entire setup is featherweight and barely noticeable. Make sure to use the protective lens accessory. A helmet’s rigid surface is perfect for placing the camera at any angle you wish, so a multitude of variations are possible. As a rule, all but the flattest of helmets will use a curved sticky. Skip ahead to the “Adhesive Mount” section for tips on getting a good bond.
As with the head strap, it’s easy to frame too high. Tilt the camera slightly downward so that a line is projected from the center of the lens to the ground about six to ten feet in front of it. In general, you should frame your shot so the helmet is in view and recognizable (occupying somewhere between a lower sixth and third of the screen). The fixed foreground helps orient the viewer. GoPro App preview or an LCD BacPac are convenient for perfecting your angle. Once you’ve got the correct angle, tighten the thumb screw with a screwdriver. A helmet-mounted shot will only be as steady as the helmet itself. A tight-fitting helmet and snug chin strap go a long way toward making sure your footage isn’t shaky.
For video modes, a 4:3 aspect ratio mode such as 2.7K 4:3, 1440p or 960p works best with the helmet to capture as much of the ground, limbs, and horizon as possible.
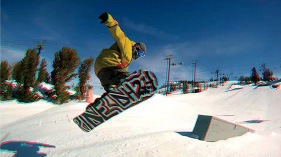
Crankworx Whistler – Mike Montgomery’s Slopestyle Run

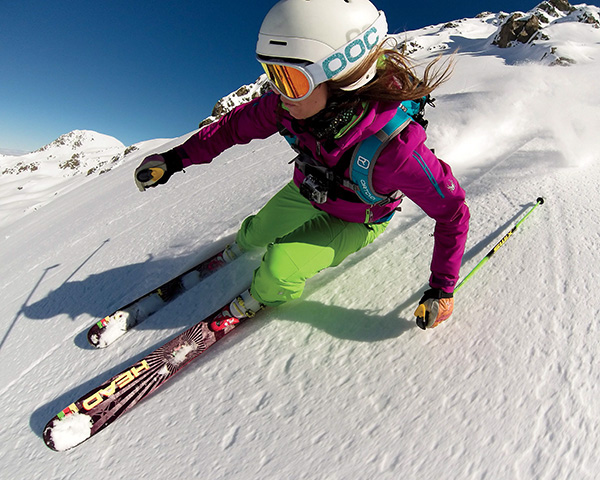
Sidemount
Another staple helmet angle is the sidemount, which can offer a better view but is less frequently used. The sidemount requires a pivoting extension arm accessory to rotate the camera 90 degrees. This angle captures more of the subject’s arms, legs, and body, as well as the ground, and can give a better overall sense of interaction within a photo or video space than the traditional top-mounted helmet camera.
The camera’s fixed focus starts to go soft about a foot or so from the lens. To counteract this, mount it as far out laterally as possible to keep the helmet from becoming a distracting blur. Configure the pivot arm so the long arm is horizontal and the short arm is vertical. We usually shoot with the camera upside-down on the helmet’s right side so the lens is farthest away from the helmet surface. For shaky activities, it’s best to mount the camera upside-down, as this is the most stable configuration. It also helps to use the white rubber quick-release plug to dampen any vibration.
A common mistake is framing too much of the helmet in the shot. It should take up less than a third of the frame. It’s best to use Wi-Fi preview or an LCD BacPac to perfect your framing. A good rule of thumb is to point the camera forward and then swivel it away from the helmet a degree or two to place it in the right position.
A taller 4:3 aspect ratio such as 2.7K 4:3, 1440p or 960p with the extra top-to-bottom resolution is essential for the side helmet orientation, to capture as much of the arms, legs, and body as possible.
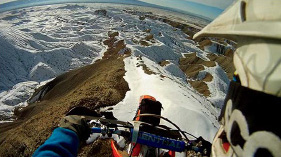
Moto Snowy Ridgeline

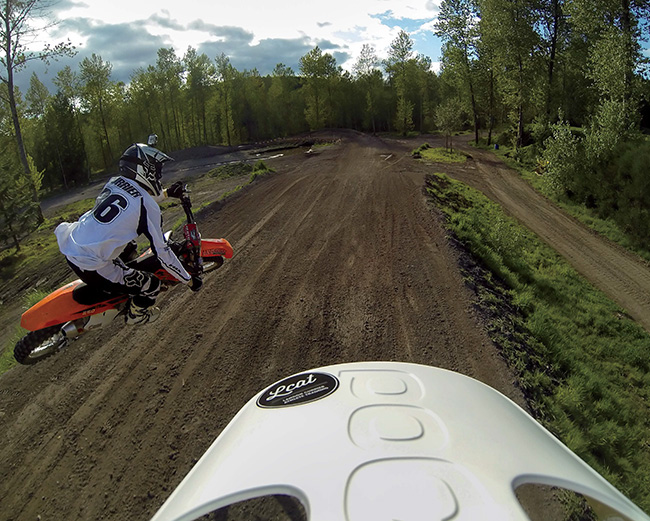
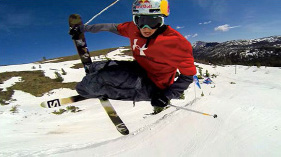
Chesty
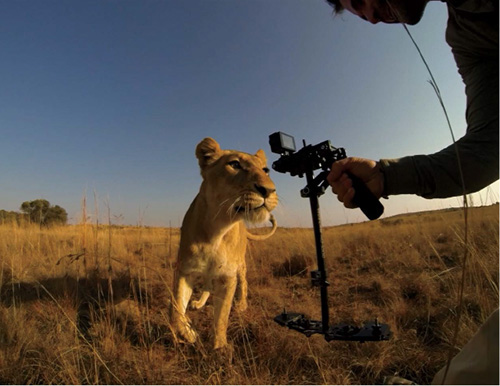
The Chesty is a unique angle made possible by the GoPro’s matchbox design. Such a view would be impossible with a lipstick-style POV camera. A Chesty perspective can sometimes feel more real and immersive than a helmet or head strap, which may seem too high or removed. A properly rigged Chesty best captures the combined motion of a subject’s hands, arms, and legs. It’s a great mount to buckle on and then forget about while filming everyday activities or interactions. GoPro also makes a smaller size for kids. The mount can also be used on large animals such as dogs, or even lions (although GoPro now makes a specific dog mount called Fetch).
The Chesty’s harness should be tight, almost to the point of discomfort, to keep the camera from shifting. If you’re not performing a rigorous activity with lots of gear, sometimes the straps can be unsightly. We often put them under a button-up shirt or a jacket so only the camera shows. In the midst of action, the camera lens can be easily smudged or dirtied. Be sure to check it every so often and keep it clean.
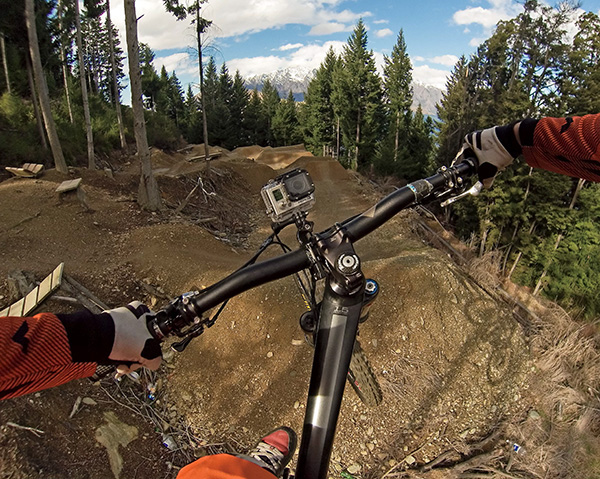
For most activities, the camera should be angled straight out when mounted on the Chesty. Mountain biking, road cycling, and motocross, however, are exceptions because the rider leans forward, making the camera point to the ground. In this case, flip the camera and J-Hook buckle upside-down, lean over the handlebars in a natural position, and tilt the camera 45 degrees so it’s aimed roughly parallel to the ground. You can also wear the Chesty backwards for filming friends who are following behind you.
Chesty footage and 4:3 video modes such as 2.7K 4:3, 1440p or 960p are synonymous. The camera’s close proximity to the body means the frame will be tight on the action and sometimes obstructed by limbs or athletic gear. The extra resolution on the top and bottom anchors the perspective and keeps the audience from becoming too disoriented.
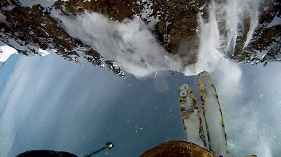
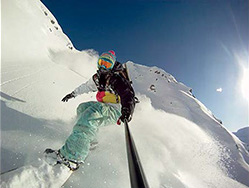
Skiing with Julian Carr – Cliff Flip


Everyone is skeptical...at first. But combining a 5 oz. camera with 3M adhesive will capture a view from just about anywhere. Photographers have used the sticky mount in some pretty improbable places—including attached to the body of deep sea submersibles and on the wingtip of a corkscrewing airplane undergoing serious g-forces. With adhesive mounts, any flat, smooth location can serve as a potential camera mount. The secret is in the application.
The proper application starts with cleaning the intended surface. Use wax remover or acetone for surfboards, an appropriate cleaner/degreaser for other surfaces. Buff the surface with paper towel or cloth to make sure it is dry with no residue. The surface should be at room temperature. If the surface is cold and dewy, the camera and mount will be gone. Mark the intended location with a pencil. Leave the red plastic on the sticky and heat it with a lighter until the plastic begins to shrink and bubble. Carefully remove the plastic and immediately apply pressure to the adhesive mount on the cleaned location. We recommend you allow the mount to sit overnight before using, when possible.
Even when applied perfectly, extremely cold temperatures can freeze an adhesive mount and cause it to fall off. We’ve attached cameras with stickies under weather balloons going into the stratosphere. When we recovered the balloons, all the stickies had fallen off. In those extremes, it is wise to use a tripod mount or screw the adhesive into place.
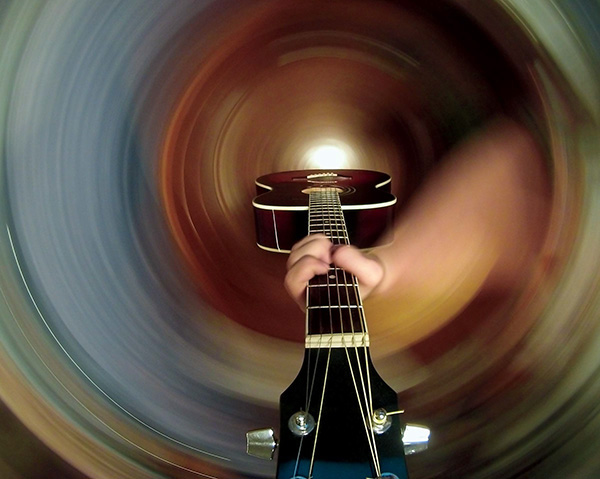
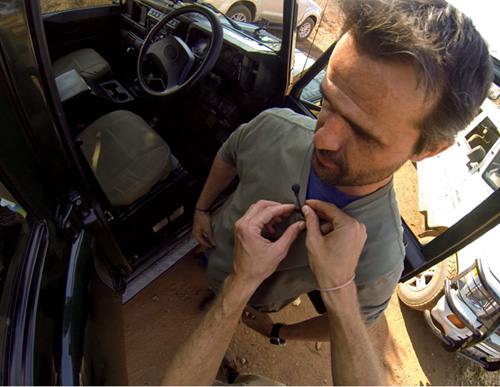
The GoPro Removable Instrument Mount is a new technology variation on the adhesive mount. The Removable Instrument Mount solves the problem of the normal 3M sticky material potentially harming or leaving residue on valuable finishes, such as on a guitar.
When mounted to a helmet, person, or instrument, use 2.7K 4:3, 1440p or 960p video modes. On anything else, we tend to use 16:9 modes such as 4K, 2.7K or 1080p120, especially for slow motion. If you’re getting a lot of foreground element from the mounting surface, try switching to a Medium FOV or tilting the camera up so the surface doesn’t dominate your frame.
Kirby Chambliss Epic Flight
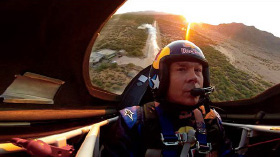

Suction Cup
As one of GoPro’s first mounts, the suction cup has experienced a number of design iterations throughout the years. The most recent version is stiffer and has a flatter profile and comes with several arm options for different camera orientations and higher or lower profiles.
When properly applied to a flat surface, the suction cup can handle speeds of more than 100 miles per hour. The farther the camera is away from the suction cup, the less stable it becomes at higher speeds. Make sure the surface is clean of dirt and debris. The hold of the suction is only as good as the seal the soft plastic makes with the surface. You can test the hold by pulling on it.
The suction cup is a great all-purpose mount with applications beyond its traditional use in auto sports. Like the adhesive mount, the suction cup mount transforms any flat surface into an unexpected perspective. We always bring one on our productions because you never know when it might be useful. Used creatively, a suction cup essentially becomes a versatile tripod that fits in your pocket. Put it on the window of a subway or train for great travel shots and moving time-lapses. Attach it to swinging or sliding surfaces such as doors or windows for on-the-go tracking and dolly shots. Know your surfaces, however. It’s easy to get ambitious and place the suction cup on a surface that looks fine, but is actually porous. Twenty minutes later, the camera falls off.
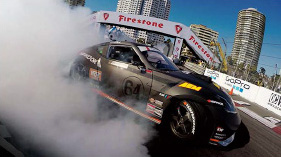
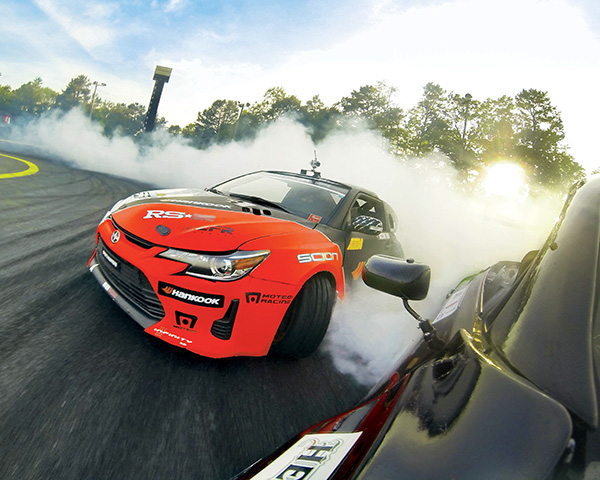
Generally speaking, the suction cup works best with 16:9 modes such as 4K or 2.7K48, if you are looking for slow motion. The Wi-Fi App preview and LCD touchscreen are both great for quickly deciding between modes and FOVs. Try the various arms for rotating the camera to level the horizon and find that perfect shot composition.
Chris Forsberg Wins Round 1 at Formula Drift Long Beach

Handlebar/Seatpost Mount
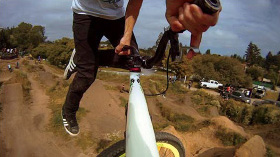
Originally called the Ride Hero, GoPro’s Handlebar/Seatpost Mount offers unexpected applications beyond its original intention. The mount was first designed to clamp onto the seatpost or handlebars of a bike. The current mount fits from .7- to 1.5-inch tubing, with narrower diameters from .43 to .7 inches possible when using the rubber gasket. A tour through the GoPro universe on YouTube shows this mount attaching a camera to all kinds of objects: spatulas, paddles, pens, and more. One of the most popular uses of a handlebar mount is attaching the GoPro to the end of a pole, especially a ski pole. You can then use the pole as a kind of filmer’s extension for getting closer to the action, or for reverse POV shots with the camera pointed back at the user, as in Chris Garside’s “Snowboarding with the Pole Cam Mount.”
Handlebar mounting requires a pivoting extension arm to spin the camera 90 degrees to the front or back. On anything but a smooth paved road, handlebar footage can be shaky. GoPro recommends using the rubber gaskets to help reduce slippage and vibration. This mount is used most often on the seatpost (check out Andrew Taylor’s TV commercial featured here) and other parts of the bike frame, such as the front fork, chain stays, or down tube. Depending on tube width, a roll bar mount may be more applicable.
The handlebar mount, as with all body- and gear-centric mounts, excels with the taller resolution of 2.7K 4:3, 1440p60 or 960p120 modes. If you’re using an outward-facing polecam for following your friends, shoot in a 16:9 aspect ratio. The following section discusses this technique in more detail.

Freestyle Biking with Andrew Taylor – TV Commercial – You in HD

GoPro’s ethos has always been about the photographer/filmer participating in the activity. When GoPro incorporated an ultra-wide lens, this ethos went even deeper, enabling the creators to turn the camera around and document themselves. While holding the camera with a hand works well, the human arm isn’t quite long enough to capture the entire environment and context on a GoPro. Getting the camera just a few more inches past arm’s length makes all the difference. After years of research and prototypes, GoPro finally released the 3-Way extension arm in 2014. The 3-Way is compact, carries a small tripod, and unfolds as a traditional straight pole or a curved one.
For reverse POV, you can curve the 3-Way to frame out the armature while still including feet and the ground. Aiming the lens at belly button height rather than at one’s face ensures that the entire body is in frame. We typically shoot 4:3 aspect ratio modes like 1440p or 960p.
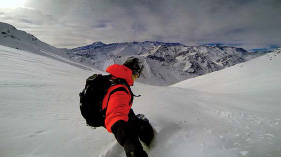
For non-POV or follow-cam, there are many options. You can use the 3-Way, a ski pole with the handlebar mount, or something longer, such as an extension pole by RPS Studio. Filming with long polecams puts the audience right in the midst of the action without risking injury to ourselves.
Follow-cams have become a ski and snowboard filming staple. Filming with the polecam is a subtle science. We teach people to be loose with their knees and wield the pole with their fingertips to minimize camera shake. Your knees and elbows should absorb any vibration as you move. Polecams are also great for putting the camera in low or high positions for unique perspectives.
As mentioned, POV footage is best in 4:3 aspect ratios such as 2.7K 4:3, 1440p60 or 960p120. Non-POV or follow-cam works best in a widescreen 16:9 aspect ratio. 2.7K48 is a good high resolution option, while 1080p120 should be used if super slow motion is a must.
Travis Rice Chilean Powder Run

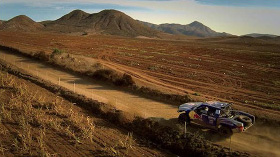
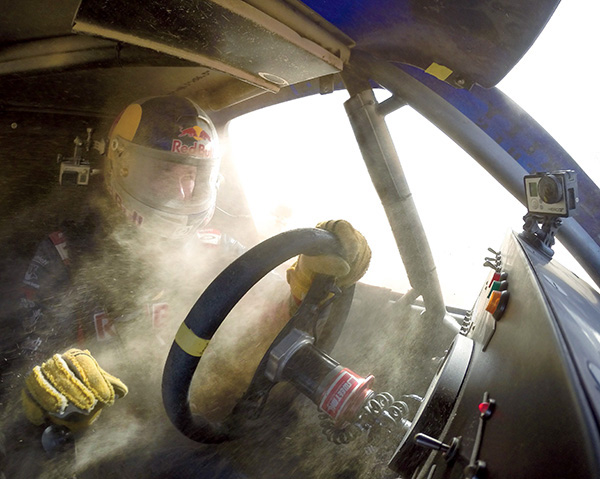
Roll Bar Mount
The roll bar mount works for just about anything: poles, helicopters, boats, bumpers, trees, and, of course, roll bars. It is a larger version of a handlebar mount, and is capable of mounting poles from 1.4 to 2.5 inches. This is another versatile mount that makes a great addition to any shooting kit.
Good mounting requires you to carefully choose a mounting location, since certain parts of cars and motorcycles vibrate more than others. Generally, the closer a camera is mounted to the frame of a vehicle, the less it will shake. We sometimes use duct or gaff tape under the roll bar mount to further dampen vibration. Too much vibration causes rolling shutter, a warbling, Jello-like image distortion that occurs when objects in the frame move faster than the camera’s sensor can scan. One of the most effective ways to reduce rolling shutter is to increase the frame rate. This decreases each frame’s exposure time and thus reduces rolling shutter distortion.
Extensions, especially pivoting extension arms, are good for rotating or orienting the camera for the desired frame, though using more than one increases vibration. The photo of Byce Menzies featured here was taken from a roll bar mount on the central A-pillar.
Vehicle-mounted shots are relatively stable and work well with the GoPro 16:9 video modes. Use 4K at 30 fps for its crisp resolution, or 2.7K48 for the higher frame rate, if rolling shutter is a problem.
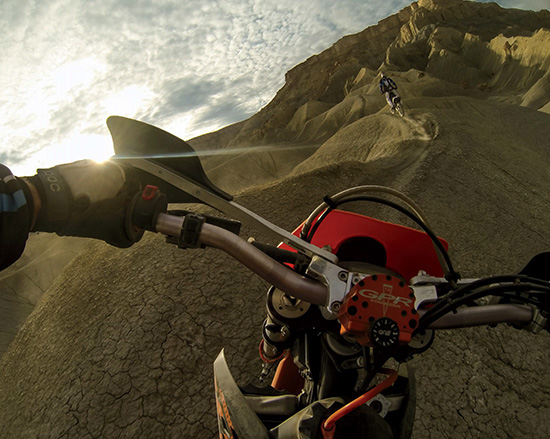
The Baja 1000 with Bryce Menzies

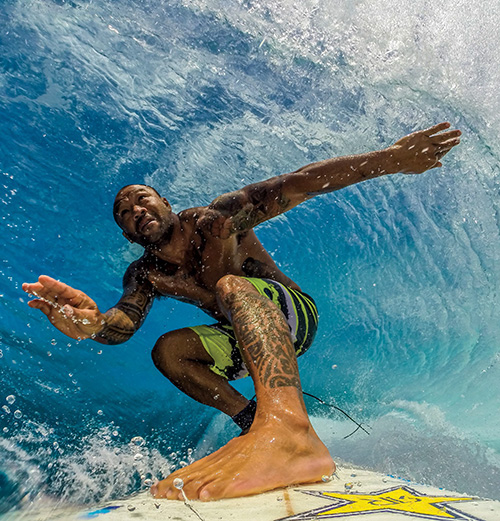
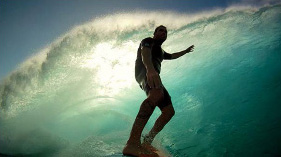
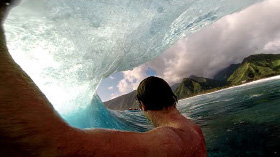
Surfboard Mount
GoPro was born as a wrist camera meant to allow one surfer to film another surfer. The surfboard mount was the logical evolution, enabling surfers to turn the camera around and for the first time film themselves. Older versions of the mount featured a larger adhesive pad, but over time we discovered the extra surface area didn’t contribute significantly to the reliability of the mount. We learned early on that water hitting the back of the camera causes the surfboard mount’s quick-release buckle to eject, which is why the white rubber plug is essential. The mount comes with a camera leash for peace of mind, although we usually forgo these in favor of the floaty backdoor instead. Proper application of the surfboard mount gives you the best chance of protecting your camera in a heavy wipeout (see the “Adhesive Mount” section for how to apply these mounts). GoPro also recently released the Bodyboard Mount, similar to the surf mount except that it installs like a bodyboard leash plug.
Generally, the camera mount should be placed as far forward on the board as possible, and the camera should be swiveled back as far as it will go (roughly 45 degrees). The standard setup centers the camera over the stringer and pointing back down the board. Another option if you are surfing only rights or only lefts is to apply the mount a few inches toward the inside rail, rotating the camera back towards the stringer to capture less of the walled face of the wave and more of the falling lip, which looks great in slow motion.
A properly framed surfboard shot shows just enough of the board and feet to create context, while reserving the rest of the space for the surfer and wave. Use the GoPro App to find the perfect frame. Surfboard-mounted shots work best in 1440p60 or 960p120 modes, because slow motion is essential with surfing. On short boards especially, every extra pixel of vertical resolution is needed to capture the board, surfer, and wave.

Jaws Mount
Jaws—a clamp with an adjustable gooseneck—is one of the most widely used tools in our media team’s inventory. It’s an invaluable mount for filming anything that isn’t moving too fast. The clamp is surprisingly strong and can be attached to just about anything from .25 to 2 inches in diameter. A GoPro can be mounted directly to the clamp or extended using the adjustable gooseneck. Using the gooseneck offers the advantage of allowing you to twist the camera and choose your frame. We often use Jaws for environmentals, time-lapses, static wides, and spontaneous moments because it’s quick and easy to attach.
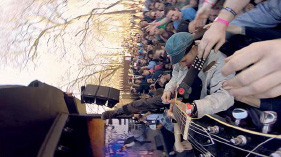
Filming music shows how versatile Jaws can be. Musical instruments are obviously played close to the body, so the camera needs to be extended out to capture both the instrument and player in context. Jaws provides an easily maneuverable extension for drum stands, music stands, the head of a guitar (use extra padding for delicate woods and finishes), and just about anywhere else you can think of. The interior rubber strap can tighten and hold onto a diameter as small as a pencil.
The Jaws mount generally uses 16:9 aspect ratio modes such as 4K or 2.7K48. For instrument mounting, sometimes we use a 4:3 mode such as 2.7K 4:3 or 1440p if the taller frame reveals more of the instrument, musician’s face, or surrounding crowd. Frame rate as always depend on the light conditions. If you are filming in low light, such as a music venue or bar, make sure to set the frame rate to 24 or 30 fps. Lower frame rates increase the exposure time for each frame and make for better quality in darker conditions.
Black Lips Stage Dive at SXSW

Tripod Mount
GoPro’s three-prong mounting system is designed for durability, versatility, and safety. Most other companies don’t use GoPro’s mounting system, however. The tripod mount makes the camera compatible with any standard 1/4inch, 20-thread screw used by industry-standard tripods and other camera accessories. GoPro further improved on this by releasing the Mic Stand Mount, which incorporates the 1/4 inch, 20-thread screw under a GoPro quick-release buckle. The mount can stay attached to the thread screw while easily taking the camera on and off via the quick-release buckle.
The variety of tripods and accessories for cameras in general is staggering. We use a number of different compact tripods, some with fluid heads for panning wides or static shots. Tripod mounts are essential for mounting to these and other tools such as poles, jibs, and extensions.
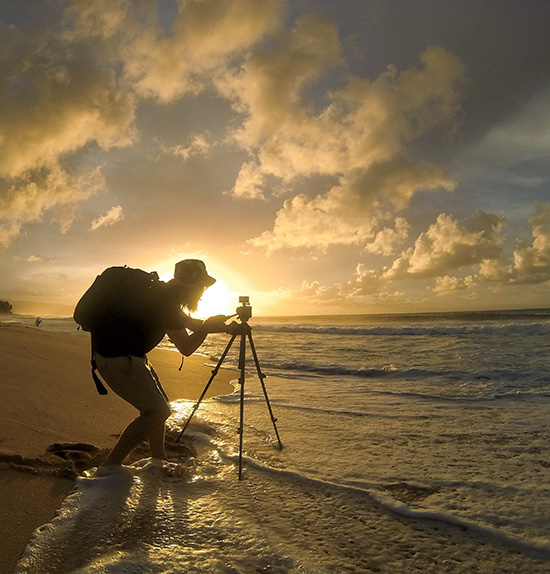
The video example “A Freakin’ Huge Explosion” takes advantage of a tripod mount to capture a close-up static shot where it would be too dangerous for the filmer to stand.
4K, 2.7K48, or 1080p120 modes are popular options for tripod shooting. The inherent stability means you can take advantage of narrower FOV settings: 2.7K Medium or 1080p Narrow. Otherwise, shoot 4K for the high resolution, or 1080p120 if ultra slow motion is needed.


The Handler and Norbert
In the early days of GoPro, it was common to see members of GoPro’s media team running around events with disconnected bicycle handlebars looking fairly ridiculous. Handlebar mounts can attach multiple GoPros to a set of bicycle handlebars along with a shotgun mic. This allowed team members to capture simultaneous video, photos, and high-quality audio. The Handler is GoPro’s floating handheld grip mount and is ideal for most users when shooting with a single camera. For more than one camera, we tend to use a Norbert.
K-Tek introduced us to the Norbert mount at NAB in 2011, and it served as a better, more compact solution than bicycle handlebars. The Norbert is a square frame with grips and multiple 1/4-inch, 20-thread screws and hot shoe mounts. While the 1/4-inch, 20-thread screws can be used in combination with the GoPro tripod mount, we find it easier to mount cameras onto the Norbert using adhesive mounts. More cameras can be mounted onto the Norbert this way, and the cameras can be quickly snapped out via the quick-release buckles. The hot shoe mounts on top are made for mounting a mini-shotgun microphone just out of frame. The 1/4-inch, 20-thread screws or 5/8-inch, 11-thread screws work with LED lights or any other camera accessories.
Over the past few years, small drones have begun using miniature gimbals. Gimbals have other applications as well. For example, we have rigged Norberts with three axis gimbals to smooth out handheld footage. This requires more effort, but the shots are well worth it.
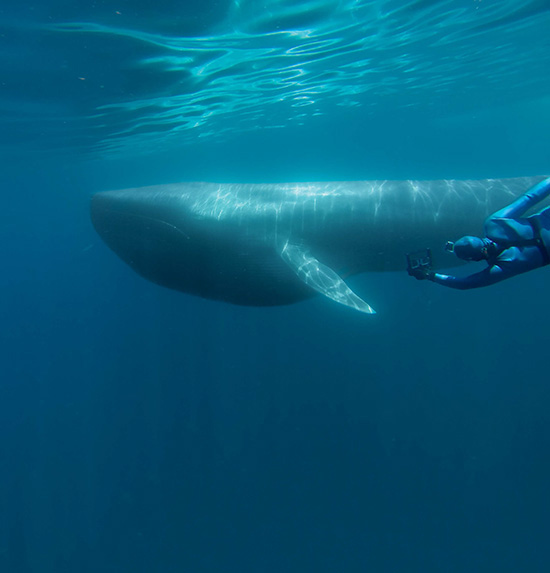
For the best coverage, especially with unrepeatable moments, GoPro’s media teams often mount three cameras to a Norbert: two shooting video at 2.7K48 and 4K, and one shooting photos in .5 second time-lapse mode. Depending on the rarity of what you are capturing (such as the mythic 90-foot blue whale shown here), it’s nice to set one video in wide FOV and one in Medium FOV just in case. For interviews, one of the video cameras can be switched to a narrower FOV mode, usually 2.7K Medium, for a tighter frame on the subject.
Experimental Mounts
The most beautiful aspect of GoPro is that its versatility is only limited by your imagination. We on GoPro’s media team continually learn from watching what other people do and then we try to expand upon their ideas. We push the camera until it breaks—and after it does, we find another way. Each mount described in this section was created by asking the question: “What if...?”
Gnarwhal
Aerial maestro and GoPro Bomb Squad member Neil Amonson first introduced us to the gnarwhal when Amonson threw himself off a cliff in Norway. His “bobblehead,” centered comically in the frame, caused us all to laugh. Over time, the mount took on the name gnarwhal (pronounced “nar-wall”), a combination of the ubiquitous action sports noun gnar, and the elusive horned whale of the Northern Seas, the narwhal.
The gnarwhal offers an intense view of the subject’s face, capturing reactions and emotions like a traditional closeup. If framed well, the athlete’s entire body is in view, along with the surrounding environment. The longer the gnarwhal, the more natural the face and environment will feel. Like any other perspective, however, it can be overdone, so use in moderation. Safety is another factor that should be considered when using this mount.
We keep a number of gnarwhals on hand for our productions. We’ve had custom aluminum ones fabricated, although these days you can buy them on Amazon. You can make short gnarwhals with a couple of extensions, although these tend to foreshorten the face quite a bit. Sometimes, we use additional extensions to drop the camera down so it points directly into the eyes. The angle is less cartoonish than looking down the eyebrows.
Use an LCD BacPac or Wi-Fi-enabled smartphone to compose the shot so the gnarwhal mount is just barely out of the frame and cropping will be minimal in post. Typical to any POV, gnarwhals benefit from taller frames such as 2.7K4:3, 1440p60 or 960p120.
Base Jump Clip


Spinner
Over time, the fixed position gnarwhal evolved into the dynamically rotating helmet spinner. Our first spinner was made by clamping a carbon fiber pole to a roller blade wheel mounted on top of a helmet. The Spinner made its official debut in GoPro’s HERO3 reel, featured in shots with speed bikes, kayaks, skiers, and snowboarders. The majority of the audience scratched their heads, wondering, “How’d they do that?”
The typical helmet spinner requires a curved adhesive mount applied to the apex of the helmet. Any turn or tilt from the subject causes the camera to rotate around the helmet, capturing a seemingly impossible shot. We balance the rig with two cameras, achieving different rotational speeds by moving one of the cameras closer or farther away from center. For a more direct look into the subject’s eyes, use a small downward extension at one end of the pole.
Use an LCD BacPac or Wi-Fi-enabled smartphone to compose the shot so the mount is just barely out of frame. Interestingly enough, the opposite camera will always be blocked by the helmet and face in the center. The only time the audience will be able to tell is in the shadows, as shown by Julia Mancuso’s photo in this section.
You can build your own spinner or buy one from KillerShot, which makes a swivel mount that attaches directly to a GoPro quick-release buckle on top of a helmet. This mount also features convenient detachable carbon fiber poles for traveling. The idea of the spinner has various other applications, such as on auto vehicles or even underwater submarines.
Spinners usually benefit from taller frames and should use modes like 1440p60 or 960p120. High frame rates should be used, as this is a very dynamic perspective that can disorient the audience if it isn’t slowed down. We typically shoot one camera in video and the other in .5 second time-lapse mode.
Art of the Double Cork with Bobby Brown TV Commercial

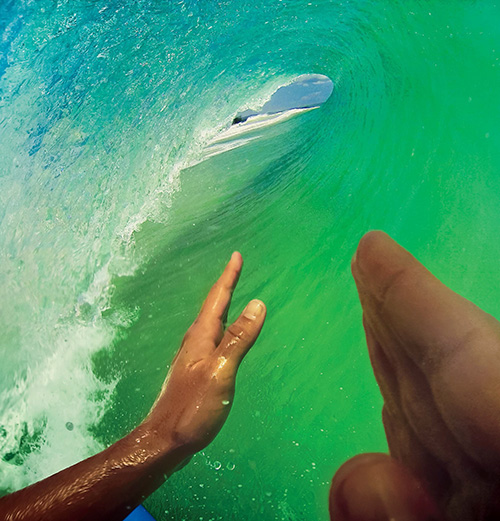
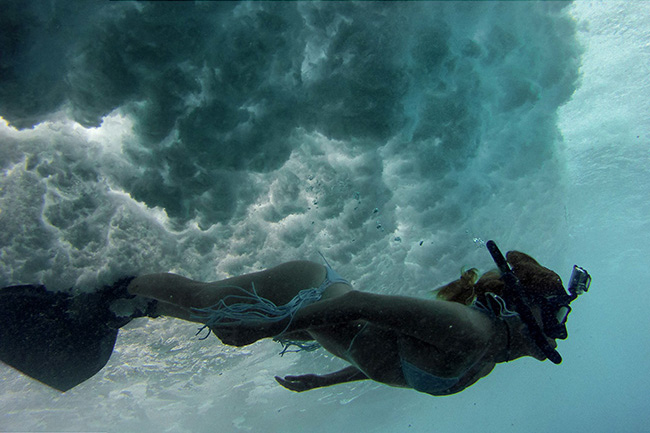
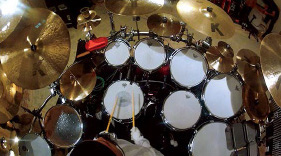
Mouth Mount
In hindsight, we wish we’d have thought of the mouth mount as soon as we took the camera off the wrist. During the HD HERO2 launch shoot in Bali, Mikala Jones would bite down on the floaty back, grab the camera once he dropped into the wave, and hold it behind his head. He felt helmets were awkward and head straps too floppy. We looked at the head strap’s plastic front piece and realized if you put that in your mouth upside-down against your chin....
Revelation.
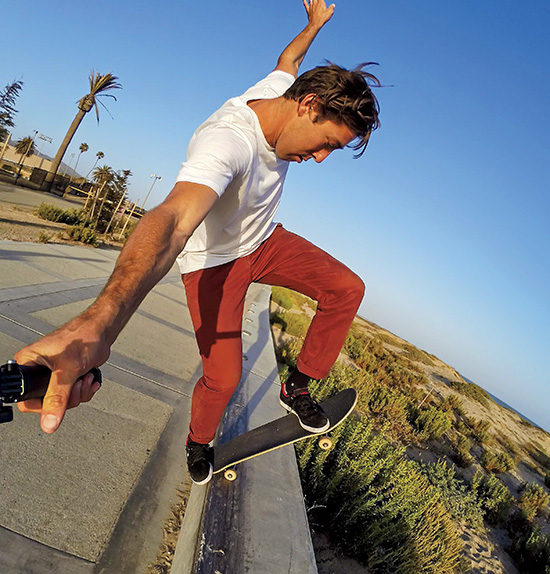
The mouth mount. Something that can be stashed in your pocket on the paddle out and during lulls. This is a versatile mount for direct POV (such as in Alex Smith’s featured photo), handheld over-the-shoulder POV, or a follow-cam behind another surfer. All three are refreshing perspectives, more immersive than the typical long lens surf shot from the beach.
Over time, we noticed that a helmet or head strap always looked a little above the world. The 8 inches from the top of the forehead to the bottom of the chin actually makes a large difference in perspective. In the case of Carter Beauford’s video featured here, it’s 8 inches closer to the arms, hands, sticks, and drums. The mouth mount is more immersive than the head strap and more stable and responsive to the head’s movements than the Chesty.
To build a mouth mount, remove the plastic front piece from the head strap. Wrap a thin piece of foam with electrical tape around the plastic. Be careful to pad correctly so that you protect your teeth. Bite down on the padding so that the camera is oriented upside-down with the floaty back resting against the chin. This mount can be potentially dangerous so use with care.
Angle is very important for the mouth mount. Tilt the camera slightly down toward the chin so the lens points a few degrees below the horizon. A fun trick with the mouth mount is to flip it around and point it directly down at your feet. This was originally devised for skating and has naturally transferred to other activities involving footwork. As with all POV, the mouth mount is best shot in 2.7K 4:3, 1440p60, or 960p120 for super slow motion.
Dave Matthews Band’s Carter Beauford Drum Solo

Appendage Mounts
Different sports demand different perspectives. We first saw the ankle mount used to capture unique shots in human flight. The angle showed both the athlete’s body and where he was headed, which made it especially useful for skydiving and basejumping. Depending on the activity, cameras fixed off appendages are fairly experimental but can offer unique perspectives and cutaway shots in editing. Slowed down with a high frame rate, they have the potential to be incredible moments, as in the Bungee Jumping TV commercial featured here. The final climactic moment was shot with a 6-inch extension from two vented helmet straps cinched around the calf. The shot is unusable for all but 2 seconds of freefall; however, at 60 fps, those 2 seconds were all that were needed to capture the emotion and perspective of the moment.
As far as construction, we have continually experimented with Velcro, straps, shinguards, and extensions coming off all appendages—some successful and some not. Foot mounts can be as simple as tucking a j-hook accessory underneath shoelaces, or as elaborate as David Bengtsson’s photo here, which was captured from a custommade shinguard extension. Ankle and thigh mounts generally look best with the camera pointing up the side of the leg, keeping the lens as far from the leg as possible. The extra distance gives a better view of the environment and reduces foreshortening of the body. A few inches can go a long way toward capturing a more engaging and immersive shot.
When framing these types of mounts, be careful that the foreground (shoe, ankle, leg, thigh) doesn’t dominate the frame. Use the foreground for orientation, but dedicate the majority of the frame to the subject and surrounding environment. Because these shots tend to be shaky, they can benefit from taller frames and higher frame rates. We recommend either 1440p60 or 960p120 for the extra frame rate to reduce shakiness, and the extra resolution to reduce disorientation and allow precise cropping or stretching in editing.
Bungee Jumping – TV Commercial – You in HD

Backpack Mount
We have stubbornly chased after the over-the-shoulder perspective since the HD HERO. We had visions of a surfer wearing a backpack-mounted camera inside a barreling wave. The shot evaded us for years due to frame rate limitations and prototypes that were ripped apart in heavy surf. But something unexpected happened for the HERO3 launch shoot in Tahiti. Anthony Walsh donned a new rugged version of the backpack mount (built by our R&D specialist, Travis Pynn) on a fun-sized day at Teahupo’o and got knocked off his feet a couple of times. As the session progressed, Walsh figured out how to brace himself properly if the camera happened to get caught by the lip of the wave. Unbeknownst to us, he had captured magic. The footage would later blow the minds of all those present, including Kelly Slater, who exclaimed, “That’s the most f*cked up shot I’ve ever seen. Can I give that backpack thing a try?” The shot realized something first glimpsed in Morning of the Earth—the internal anatomy of a barreling wave.
The backpack mount design went through three or four different iterations over the years. The version Walsh wore was a robust windsurfing harness. It was drilled and mounted with a carbon fiber baseplate supporting an extendable RPS pole, with two reinforcing extensions clamped to the pole for further support.
Around the time of the HERO3 release, a company called Sail Systems Video developed a backpack mount of their own: a similar windsurf harness, and a more popular, less rugged version that works for everything else. The human midsection is naturally stable and makes for good mounting. The best part is that the mount’s arm is adjustable so you can place the camera in any position. We bring several of these backpack mounts on most of our shoots, and they are incredibly useful for all kinds of activities.
You can adjust the backpack mount for other perspectives besides over-the-shoulder. Inverting the arm or turning the entire apparatus around to the belly unlocks a whole new set of angles, some of which are shown here. Most configurations will use a 4:3 aspect ratio mode such as 2.7K 4:3, 1440p60 or 960p120.
Anthony Walsh Tahiti – TV Commercial

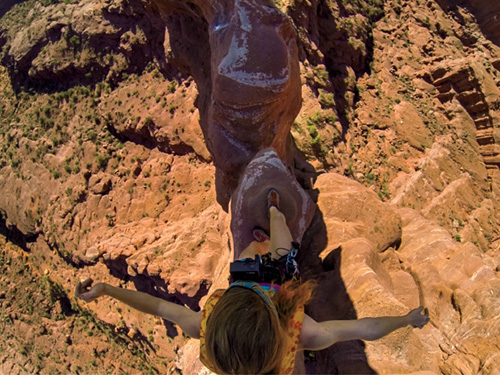
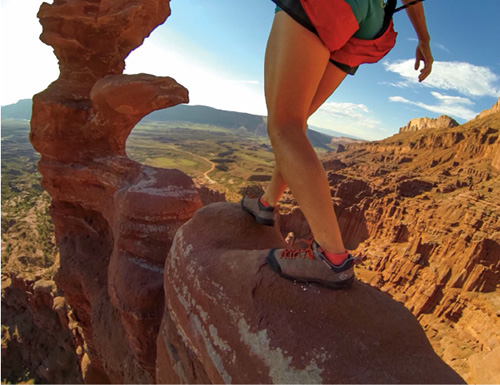
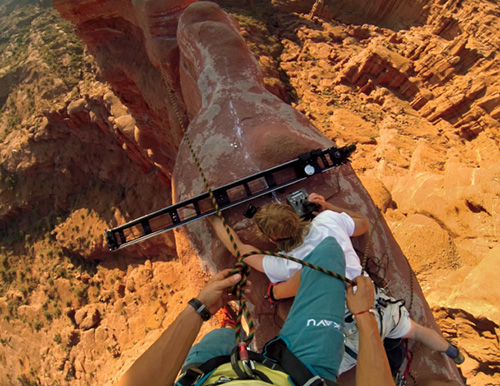
Hayley Ashburn / Moab, Utah
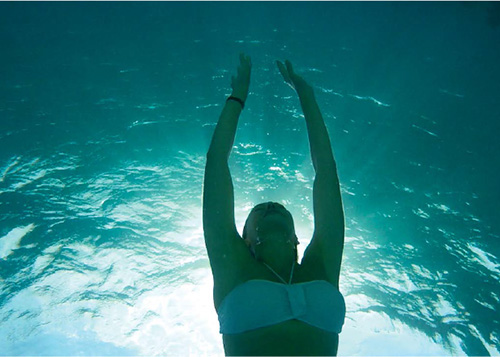
Roberta Mancino / Nassau, Bahamas
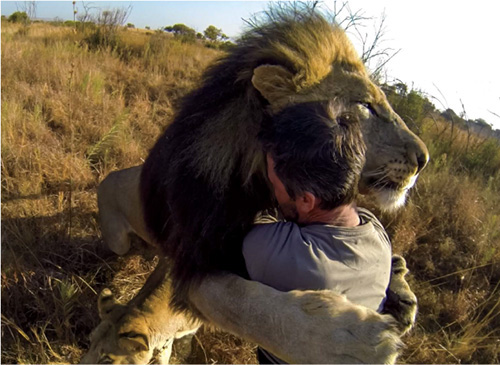
Kevin Richardson / Pretoria, South Africa
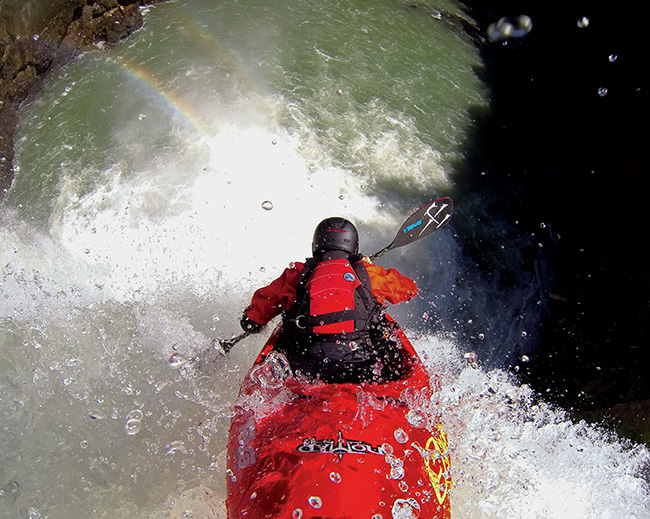
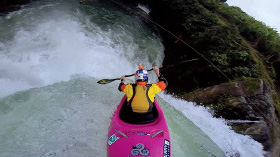
Extensions
One of the challenges of mounting the GoPro to larger objects is projecting the camera out far enough to define the object and give context within its surroundings. In the featured photo from Rush Sturges, mounting the camera directly to the tail would have made the kayak an abstract red blob in the foreground. As with the 3-Way extension arm, sometimes bringing the camera out a few inches can make a world of difference.
Building an extension varies according to the application. Generally speaking, triangulation equals stability. We often use a long telescoping pole such as the RPS supported by two smaller extensions. We drill holes in the ends of the poles and extensions, then use screws or zipties to attach the poles to our standard quick-release buckles, which click into adhesive mounts affixed to the desired surface. The entire apparatus forms something like an elongated pyramid. The triangulation helps fight vibration and movement. When mounting for auto sports, it’s important to place the adhesive mounts closest to the frame of the vehicle where vibration is minimal.
An extension mounted to the back of a vehicle provides great coverage, showing not only the vehicle but the road ahead. Like the backpack, the extension can be flipped around for a frontal view by mounting off the nose. We have used these nose mounts on everything from Ken Block’s car in Russia to deep sea submersibles. A kayak mount like Rush’s is constructed with a piece of 1-inch steel tubing going through a flange bolted into the kayak body itself. Oahu photographer Pete Hodgson has used a similar technique for surfing, using steel or carbon fiber poles glassed into the back of surfboards. Fixed mounts like these are good for going over waterfalls or in heavy surf, but take extreme care. In an accident, you want the entire apparatus to break away instead of remain rigid, which is why we often use adhesive mounts.
Use the LCD BacPac or Wi-Fi App to carefully choose your frame before securing all screws and quick-release buckles. Extensions go well with either a 4:3 or 16:9 aspect ratio, depending on your framing and the need for high frame rates.
Dane Jackson’s 60-foot Waterfall Drop

Filmmaker Toys
The GoPro excels at more than just capturing POV footage. You can take the camera off body and vehicle mounts, and use it in conjunction with traditional filmmaking tools such as drones, steadicams, jibs, sliders, and more to capture dynamic wide shots. These shots are especially useful for providing coverage and establishing continuity of time and space on the editing timeline.
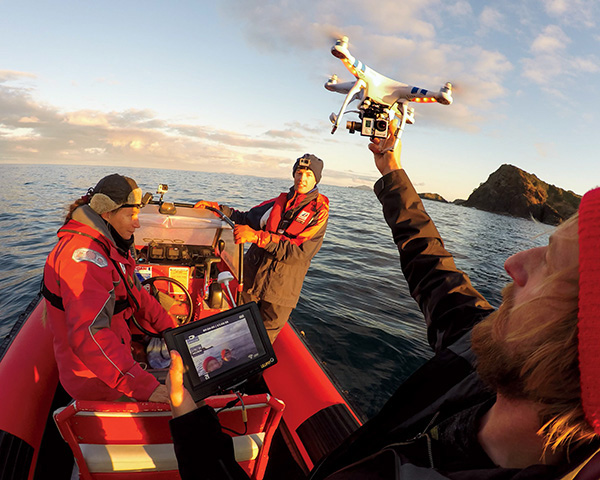
Aerial Photography
Drones have brought aerial photography to the masses. An affordable quadcopter and gimbal coupled with a GoPro allows you to get high-quality cinematography that normally would cost a hundred times more, all packed into a bag the size of your average carry-on.
You can learn the basics of flying a drone in a single day. There are a number of tutorials and information to be found online, and it’s well worth investing the time if you are serious about aerial filmmaking. Most of the people in our media department now know how to fly drones, and we use them on most major productions.
Shakiness can be an issue with aerial video. Shooting 48 to 60 fps will allow for smoother footage through slow motion. A drone’s three-axis gimbals go a long way toward stabilizing the camera, but try using Adobe’s Warp Stabilizer to smooth out any shakes in your footage. Filming in 4K or 2.7K will ensure enough resolution for any cropping applied by stabilization. A Medium FOV can help if you are catching the copter’s blades or landing gear in the periphery of the frame. A narrower FOV also has the added benefit of bringing a subject closer.
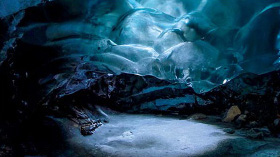
Ice Caves

Steadicams and Gimbals
Steadicam has been revolutionary in photography since the mid-1970s. Larger film cameras required a complicated body harness with spring-loaded arms for stabilization. Today’s smaller, lighter cameras can achieve the same results with an entirely handheld rig. A number of different companies make them today. Most designs use a combination of weights to increase the camera’s rotational inertia, thereby decreasing its tendency to shake or rotate while moving. Steadicams can be expensive and bulky, especially for a GoPro. Three-axis gimbals, like those used in drones, have recently become a popular, cheaper alternative.
The most dynamic steadicam or gimbal shots include foreground, midground, and background elements, with the camera weaving smoothly between close objects in frame—the closer, the better. We sometimes use them for interviews when sitting in one place feels stifling and one-dimensional. These “walk-and-talks” can help the interviewee feel more comfortable and make an interview more dynamic. We almost always shoot 16:9 video when using steadicams or gimbals. Filming in 4K or 2.7K48 allows for extra resolution if additional motion stabilization is required in post-production.
Sliders and Jibs
Sliders and jibs add cinematic movement to an otherwise static frame. Traditionally, Kessler makes some of the best sliders and jibs on the market, although they are built for heavier cameras than the GoPro. We mount multiple cameras on the baseplate: one in 2.7K Medium or 1080p Narrow FOV, and one shooting Ultra Wide, usually 4K. For interviews, the narrower FOVs distort the face less and feel more intimate, while the wide FOV captures the whole environment. We almost always use 16:9 video when filming with sliders or jibs.
Slider shots require some forethought. A good slider shot is composed with foreground, midground, and background elements so the audience really feels the change in perspective as the camera moves. You can also spin the slider 90 degrees with the camera facing forward for smooth push-ins or pull-backs. Combined with extensions, this technique can be especially useful for reveals, such as the 4-foot slider used in the opening and closing shots of Our Orangutan Brethren (see “Short Feature” in Chapter 6). Another variation is to hold the entire slider vertical for ascents or descents; we’ve done this a number of times to reveal a subject either above or below water.
Motorized sliders can be pricey. If you’re on a budget, GoPro Studio software director David Newman has adapted a small toy train and track with a step-down motor that easily mounts a GoPro for slider-like shots and time-lapses. They are available for sale online. Jibs can be large and pricey as well. Aviator makes compact and lightweight jibs that you can pair with most standard tripods.
Marshall Miller, Bradford Schmidt / Moab, Utah

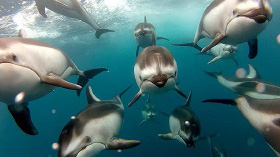
Ingrid Visser / New Zealand
Bradford Schmidt, Kevin Richardson / Pretoria, South Africa
Tow Cams
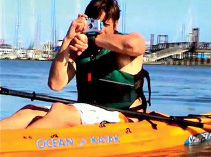
We first discovered the tow cam when watching a viral video posted by Mark Peters, a fisherman from Santa Cruz. Peters had built a torpedo-like tube with a GoPro to tow from the back of his boat. When coming home from fishing one day, he spotted a few dolphins playing in his boat’s wake. He dropped his invention in the water and captured surreal footage that many would later claim was fake. It wasn’t.
We became good friends with Peters, and he let us borrow his setup for filming whales in Tonga. It has since become indispensable for all our underwater wildlife shoots. A number of companies now make similar units. Torpedos with stabilizing fins tend to keep the camera steadier as it is towed through the water.
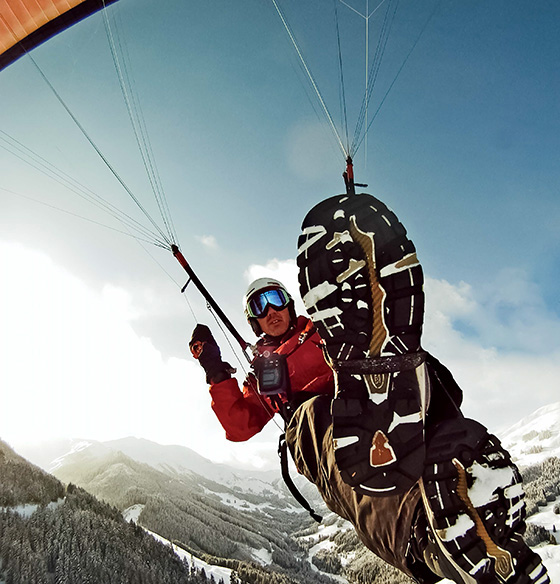
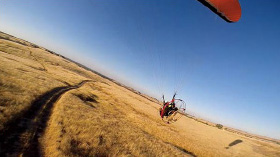
Aerial towing is another testament to the ingenuity of GoPro’s users. For paragliding, speedflying, or paramotoring, a thin cord coming off the flyer’s body or canopy pulls a small camera-mounted tube with stabilizing fins. The tube and camera trail along behind the flyer and capture a unique follow-cam shot. The results, as seen in the paramotoring video here, can be breathtaking. A quick search online finds a number of companies, such as WingmanCam, that manufacture these devices.
Both 16:9 and 4:3 aspect ratio modes can be used with tow cams, depending on the application. We recommend shooting at least 60 fps, however, to fully enjoy the floating sensation.
3rd Person Paramotor

Swimming with Dolphins – Santa Cruz, CA

Sound
When people think about a camera, they only think of the visual aspect. For most camera manufacturers, sound is an afterthought. But sound can be just as important and impactful. In filmmaking, sound is half the story. The first GoPro Digital HERO’s ten-second video recordings didn’t even capture sound. Three years later, the HD HERO’s sound profile was developed by Nicholas Woodman himself, who spent hours testing with his electric motorcycle and racecar. Woodman tuned the audio to capture the roaring engine while decreasing wind noise at high speeds. We’ve come a long way since then. The HERO4 has twice the dynamic range compared to the HERO3+. The Frame mount gives the camera’s internal microphone better exposure to natural sound. Still, for capturing low-decibel noises or the subtle tones of the human voice, nothing beats a dedicated mic. To accommodate this need, GoPro sells a USB adapter for an 1/8-inch audio jack.
Lavaliers and Shotguns
Using The Frame mount the HERO3 and HERO4’s audio quality is amazing. But a lavalier can make it really crisp when recording interviews and other activities in which genuine reactions from people will help build the story. We tend to use a long lav plugged into a camera specifically dedicated for audio. This camera is then tucked into the subject’s pocket or jacket, becoming an audio recording device that can go unnoticed.
Countless laveliers are on the market, and they range in price. We use a lavalier from Countryman that features an 1/8-inch plug that goes into our 3.5mm USB adapter. It’s waterproof, durable, and not too expensive. Run the lavalier underneath the shirt and clip or tape the microphone at the collar, making sure it won’t rub against the clothing during movement. Remember that even a little bit of wind will blow out an uncovered microphone, ruining the audio. Cover the lavalier with foam or fur to help reduce wind noise.
Shotgun microphones are specifically designed for directional audio capture. Internal camera microphones or lavaliers are omni-directional and don’t compare for isolating targeted voices. Typically, the longer the shotgun the more directional the capture. The trick is to have one strong enough to reach a subject 6 feet away, but also physically short enough not to be seen in the GoPro’s wide lens. We’ve found the Shure VP83 and the Rode Micro Shotgun pair nicely with the camera using the Norbert. Most shotgun mics have a setting to limit the wind, but it is essential to cover the shotgun with good foam or fur to eliminate the chance of spoiling the hard-earned audio. Be sure also to check the connections between the camera, adapter, and microphone. Shotguns usually require separate batteries. Make sure the batteries are fresh and the microphone is turned on, otherwise you risk losing all audio as the GoPro’s internal audio is disabled when an external mic is plugged into the USB.
Multi-Camera
GoPro has fueled interest in creative multicamera solutions. Our early developments in GoPro 3D served as a primer for an expanded experimentation in multi-camera applications. If two cameras can be in frame-sync together, why not 10? Why not 50? GoPro 3D, array, and spherical technologies all require camera sync. Sync can be achieved in two ways: true frame sync or jam sync. True frame sync means all cameras are in exact sync in-camera when capturing each frame. Jam sync means each camera records independently and will thus be a little off from frame to frame, requiring manual syncing in post-production.
Dual and 3D
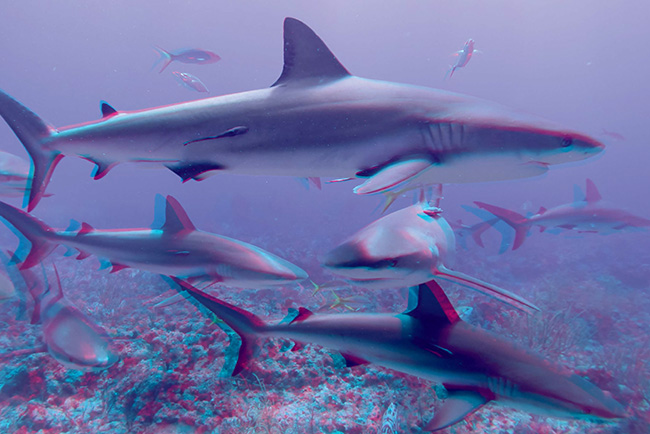
GoPro’s Dual HERO System frame-syncs two regular GoPro cameras together with a cable and combines them in a dual-housing. You can use the system to take photos and video simultaneously, or for capturing stereoscopic 3D images. 3D takes advantage of the human brain’s natural ability to perceive depth from two different viewpoints. Just as each of your eyes sees a slightly different perspective of the world, each camera in a 3D rig captures video at a slightly different angle. The difference between these observed angles is known as parallax. The greater the parallax, the closer an object is percieved to be by the brain.
3D video is truly realized only upon playback, when the right and left images are presented simultaneously to their corresponding eyes. The viewer wears special glasses so that the left-side image is viewable only by the left eye, and the right-side image by the right eye. The brain does the rest of the work. The photo featured here, shot by renowned shark photographer Andy Casagrande, requires red and cyan glasses to view.
How much the two images overlap, or converge, is what simulates depth in a 3D image. To process 3D images, use GoPro Studio to overlay the two images and adjust their convergence in a process known as muxing. The basic steps for muxing images are pretty straightforward. Use the color correction tools to adjust the images so they have similar exposure and color tone. Then, adjust the convergence, positioning the images so that the objects in the foreground overlap perfectly. In most cases, this is all you need to do. GoPro offers a number of 3D tutorials on gopro.com to walk users through the whole 3D workflow.
GoPro 3D: Highlight Reel 2011

Array
“The GoPro array allows you to experience the world in four dimensions: the three dimensions of space, and the dimension of time... blending these together creates a unique and powerful perspective.”
—Tim Macmillan
In the early 1980s, Tim Macmillan was studying fine arts at University College, London. Macmillan placed a 35mm film strip into a plank of wood with tiny pinholes drilled at the center of each frame. He had all of his classmates jump in the air at the same time, while simultaneously exposing every frame on the filmstrip. Then he turned the strip of film into a loop and projected it. Tim had invented the first camera array for freezing objects in time while moving through space! Two decades later, the Wachowskis popularized the same technique in The Matrix.
An array consists of three or more synchronized cameras grouped together and recording simultaneously. There are many types of arrays, but the most well known today is the linear or arc. In a linear array, cameras are placed as close together as possible along a mounting bar. After capture, each video is stacked in order on a separate layer in the editing timeline. The editor starts at one end of the array and displays a frame from each camera, moving down the line. This creates virtual camera movement, in which the subject is normally frozen. If the subject moves during the virtual pan, it is called phased movement. This is done by letting each camera advance a single frame at a time, and only works with high frame rates such as 120 fps or more.
We almost always use motion interpolation software like GoPro Studio’s Flux to slow down the array pan and allow the audience to take it in. We also use Warp Stabilizer to help smooth out any minute differences from camera to camera.
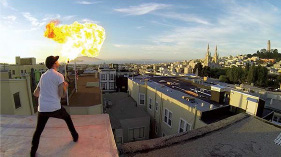
It is possible to build and jam sync your own array. GoPro production artist Tyler Johnson did just this with 24 GoPros in the video featured here. Jam syncing works best with scenes that don’t have a lot of motion, but be prepared to spend time in After Effects cleaning things up. If the scene has a lot of motion in it, then true frame sync is a must.
Fire Breathing with a 24 GoPro Array

Spherical
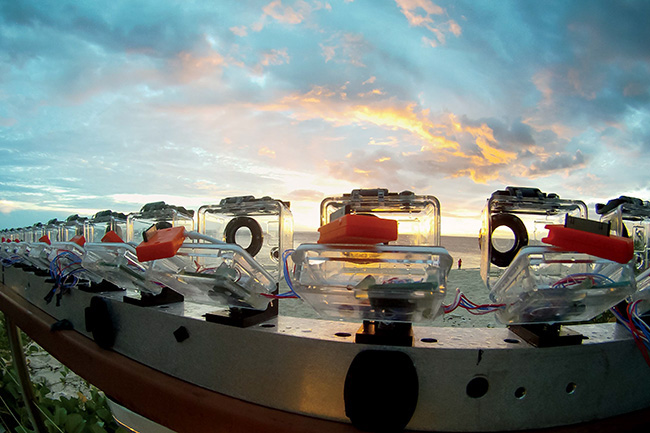
Whereas a conventional GoPro in Ultra Wide FOV setting captures 170 degrees of the world, spherical video captures the entire 360 degrees. A spherical rig of GoPros uses anywhere from four to fourteen cameras, arranged on a ball and facing outward. Cameras on opposite sides of the rig are positioned relative to each other so that lines projected through all the lenses converge on a single nodal point at the center of the rig.
Once captured, the separate videos must be combined into a single image. The individual video files from each camera are synced, stitched together, and displayed. There are different programs for stitching and editing spherical video—PTgui, Videostitch, and Kolor, for example. The final stitched spherical image will have a very high resolution, so a powerful computer is recommended.
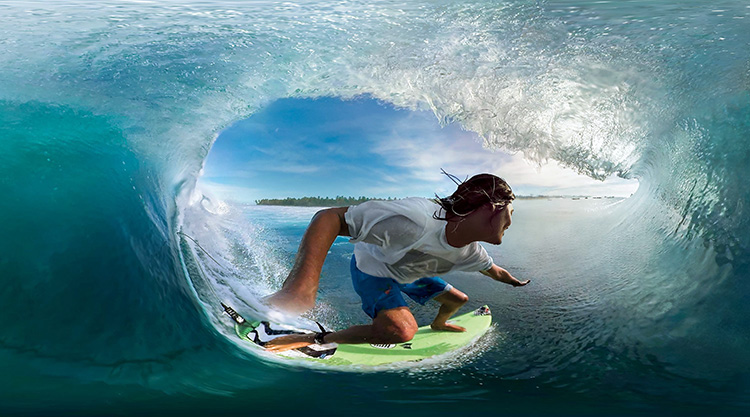
Spherical arrays have many variations and methods of display. As a standard, most spherical players today accept videos with equirectangular projection, which preserves vertical lines in an image while keeping the horizon straight. The featured image of Mikala Jones is an equirectangular image stitched from six GoPros on a spherical rig.
There are many ways to interact with a spherical image. Most use a virtual camera with a limited FOV to map part of the image onto a traditional video screen. The user can then rotate the virtual camera with a variety of devices: a headset such as Occulus Rift, a smartphone with a spherical app, or by simply clicking and dragging the video screen with a mouse. Another unique way is to project the spherical content on to the inside of a dome. Like a conventional star dome or planetarium, this allows the user to stand inside and watch as the video experience unfolds around them.