Chapter 5. Art of Editing

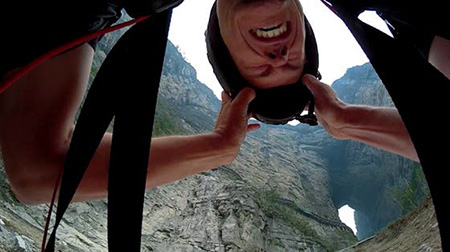
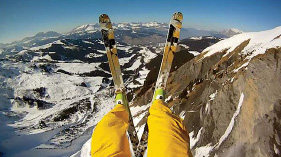
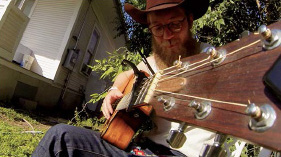
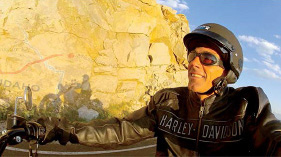
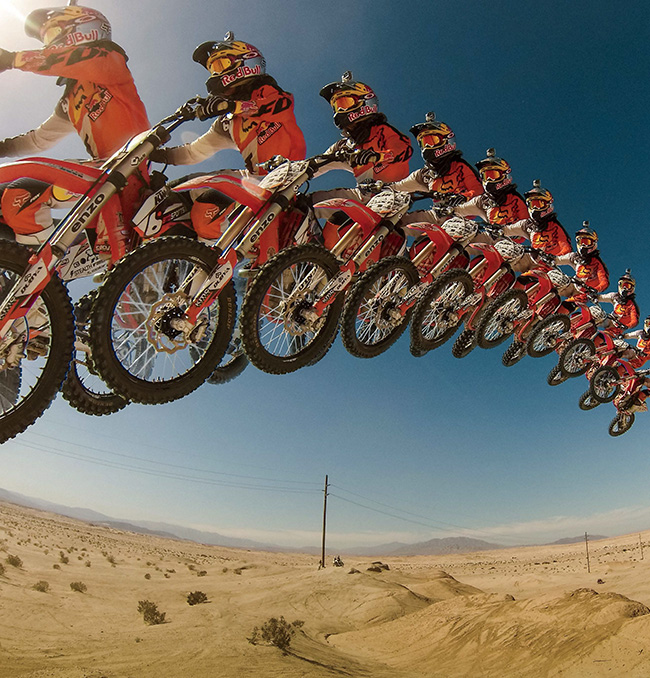
Andy “Godders” Godwin / Netheravon, England ![]() Top Helmet
Top Helmet ![]() Photo/1sec
Photo/1sec
The edit. The third and final time a story is retold.
During this stage, the filmmaker discovers which shots worked, which didn’t, and what surprises were caught along the way. Surprises are the best part of filming with GoPro because the camera is out of the filmmaker’s hands, capturing unexpected moments and creating a life of its own. In editing, the filmmaker searches through gigabytes or even terabytes of footage for important moments, unexpected or not. The filmmaker then brings these moments to the forefront by carefully ordering them on an editing timeline so that a meaningful story emerges.
Editing is something of a silent art. Realized well, the editor’s work is usually invisible. Editors must keep the audience immersed in the video experience at all times. They do this by sequencing story events, cutting unnecessary action, and maintaining continuity in time and space. This isn’t to say that editing can’t be a powerful form of expression. Images often imply deeper ideas or metaphors, and the human mind is naturally inclined to seek connection between images presented in sequence. A masterful editor understands this and juxtaposes imagery so those deeper ideas and metaphors are brought to light.
This chapter, like those preceding, contains references to GoPro’s online videos. To become a good editor is to become aware of the art itself—to understand what motivates decisions and to judge both successes and failures. Although by no means perfect, these referenced videos highlight what we, as learned amateurs, consider to be the essentials of GoPro editing.
Getting Started
Technology changes rapidly, and the video industry is no exception. In this book, we decided to focus less on the specifics of any single editing platform and more on the nuts and bolts of editing theory. Unfortunately, running into difficulties with hardware/software is inevitable. The Internet is a vast, dynamic resource for tackling technical difficulties: Googling problems almost always leads to a blog or forum where other users have dealt with the same issue. Nevertheless, in this section we discuss a few technical considerations.
Gear
Editing can be expensive. Here are a few of the things you’ll need:
![]() Computer: The more powerful your processor and graphics card, the less time you’ll spend waiting around for video/graphics to render.
Computer: The more powerful your processor and graphics card, the less time you’ll spend waiting around for video/graphics to render.
![]() Editing software: A number of quality editing platforms are available to you. Options include GoPro Studio, Adobe Premiere Pro, Apple Final Cut Pro, and Sony Vegas. Adobe After Effects and Apple Motion are good for graphics and text. At GoPro, we use GoPro Studio and Adobe Premiere Pro for editing and After Effects for graphics.
Editing software: A number of quality editing platforms are available to you. Options include GoPro Studio, Adobe Premiere Pro, Apple Final Cut Pro, and Sony Vegas. Adobe After Effects and Apple Motion are good for graphics and text. At GoPro, we use GoPro Studio and Adobe Premiere Pro for editing and After Effects for graphics.
![]() Transcoding software: The high compression of GoPro’s native video will cause some editing platforms to hiccup or lag. Use the free GoPro Studio to convert your MP4s into the GoPro Cineform codec, an editing codec that allows for a much smoother editing workflow.
Transcoding software: The high compression of GoPro’s native video will cause some editing platforms to hiccup or lag. Use the free GoPro Studio to convert your MP4s into the GoPro Cineform codec, an editing codec that allows for a much smoother editing workflow.
![]() External hard drive: This is mandatory. This will give you a dedicated location to back up your raw video and store your projects. We recommend USB 3.0 or Thunderbolt compatibility if editing from an external hard drive.
External hard drive: This is mandatory. This will give you a dedicated location to back up your raw video and store your projects. We recommend USB 3.0 or Thunderbolt compatibility if editing from an external hard drive.
![]() Headphones/earbuds/speakers: Unless you’re editing for television or film, something low-dollar will probably work just fine. This will give you an idea of how the edit will sound from computer speakers or headphones, which are the primary listening devices for online video today.
Headphones/earbuds/speakers: Unless you’re editing for television or film, something low-dollar will probably work just fine. This will give you an idea of how the edit will sound from computer speakers or headphones, which are the primary listening devices for online video today.
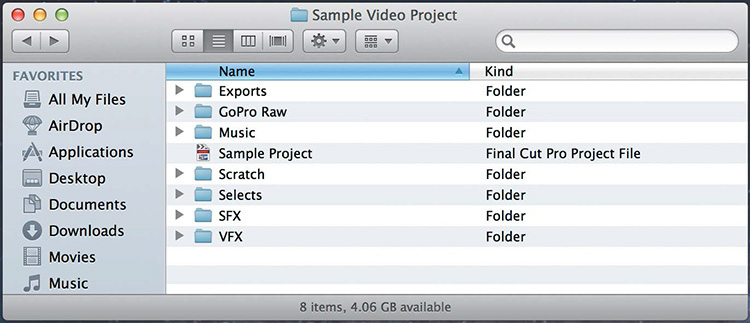
Organization
Organizing a project before you’ve even begun will save you hours in editing. It also helps you find important files later and keeps you from accidentally deleting something imporant. We typically create a root folder with the name of the shoot or project and then place the following folders inside:
![]() Exports: Contains the exported finished product of your video, as well as any compressed versions for upload to the web.
Exports: Contains the exported finished product of your video, as well as any compressed versions for upload to the web.
![]() GoPro Raw: All the video files, straight from the camera in .mp4 format with the original GoPro file names (i.e. eGOPR0001), that you will be using for the edit. Never delete your raws!
GoPro Raw: All the video files, straight from the camera in .mp4 format with the original GoPro file names (i.e. eGOPR0001), that you will be using for the edit. Never delete your raws!
![]() Music: Music files you might use for the edit.
Music: Music files you might use for the edit.
![]() Scratch: Editing and visual effects programs usually require a space to store temporary data when rendering. Instruct the program to save those here.
Scratch: Editing and visual effects programs usually require a space to store temporary data when rendering. Instruct the program to save those here.
![]() Selects: If you are transcoding, this folder will contain the best moments of footage, transcoded to the editing codec and renamed for clarity.
Selects: If you are transcoding, this folder will contain the best moments of footage, transcoded to the editing codec and renamed for clarity.
![]() SFX: Any sound effects files you will use.
SFX: Any sound effects files you will use.
![]() VFX: Project files, temporary files, and exports for any visual effects you will be doing in another program, such as Adobe After Effects.
VFX: Project files, temporary files, and exports for any visual effects you will be doing in another program, such as Adobe After Effects.
Workflow Overview
So, all of your raw GoPro footage is loaded in the appropriate folder on your external hard drive. Now the temptation is to throw a few clips on the timeline and start cutting. It can’t hurt, right? Just a cut here, a ripple there, add a little music, and you start to get excited. Before you know it, you’re jump cutting an intro sequence up through the build just in time for the music to hit on an epic slowmo action cutting into a trick montage ramping into a match cut into a-ahahahHAHAA yes, yes, YE-...
Wait.
Don’t fall into the trap of cutting before you have a plan. Or trying to force a story before understanding what story the footage is trying to tell. It’s easy to become so focused on a single shot or sequence that, over time, you lose sight of a video’s larger structure. In our media department, we have a special expression for this because it happens all the time, especially to us. We call it getting lost in the woods. You don’t know what direction you are going because you can’t see over the tops of the trees.
Over the years we’ve developed a workflow that helps editors avoid getting lost in the woods through proper planning and direction. We tend to break the editing process into five stages:
1. Selects
2. Paper cut
3. Rough cut
4. Second pass
5. Final pass
This flow isn’t mandatory, and creative minds tend to go about this process in different ways. The workflow is a helpful tool, though. It is efficient and effective, producing results no matter your skill level or creative style.
Selects
The first and arguably most important step of the editing flow is making selects, which are the best moments in your footage with all the unusable or uninteresting parts trimmed out. The selecting process is where the editor begins to understand the story being told by the footage. Upon completion, you should have every shot you need for the eventual finished edit. Selects are the building blocks of the story. In the paper cut stage, you will decide which building blocks best tell that story.
The selecting process is also the moment of truth when you find out the difference between what you think you shot and what you actually shot. A dead battery, wrong mode, poor framing, ruined audio...a lot can go wrong. But buried within the footage you will almost always find those beautiful moments where everything went right.
It’s useful to categorize your selects according to function: action shots, establishing shots, interviews, transitions, time-lapses, and so on. Depending on the amount of footage and complexity of the edit, the selecting process can take anywhere from a few hours to days. In general, we select almost everything that is potentially usable. You don’t want to end up going back to the raws later, just to find that one shot you missed. It’s also useful to not trim your selects too tightly. Leaving an extra 3–5 seconds on the head and tail of each shot ensures flexibility on the timeline later.
Transcoding
GoPro video files are encoded using H.264, a video codec. H.264 compresses video file sizes for transfer onto memory cards. Some editing programs, however, cannot decode H.264 for real-time editing. GoPro Studio can transcode your footage into the intermediate Cineform codec that plays smoothly in editing, at the expense of larger file sizes. You can choose the best moments of your raw files, trim them, and transcode them to a new file with a new name.
If you are editing in a program such as Adobe Premiere Pro, transcoding is not necessary because the program can handle GoPro’s H.264 compression. However, you should still go through the selecting process. Do this by creating timelines with appropriate names, setting in and out points in your footage, and dragging selected clips onto the corresponding timeline. For further clarity, rename the new clips or use markers.
The Paper Cut
A paper cut is basically an outline of the most essential moments or beats in your story. This might consist of a half-dozen frame grabs accompanied by relevant notes on each beat with music and important quotes. A paper cut gives you a good starting place and keeps you from getting lost in the forest during the editing process—because it provides a roadmap and directions. A paper cut keeps you from falling victim to major holes and pitfalls.
Consider two editing scenarios:
In the first scenario, an editor was working on an auto race edit. The editor started cutting before knowing what the structure might be. For days he cut a beautiful introduction full of great titles and stylized color. Before the editor knew it, he had a six-minute video that was all intro...the race hadn’t even started yet! For a short YouTube video, six minutes is a long time to wait for what you wanted to see.
As the project unfolded, it was painful for the editor to cut the introduction down after he’d spent so much time laboring over it. If he had completed a paper cut beforehand, he likely would have decided that the introduction need only be two minutes.
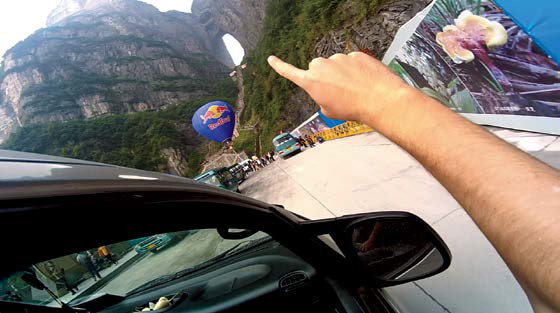
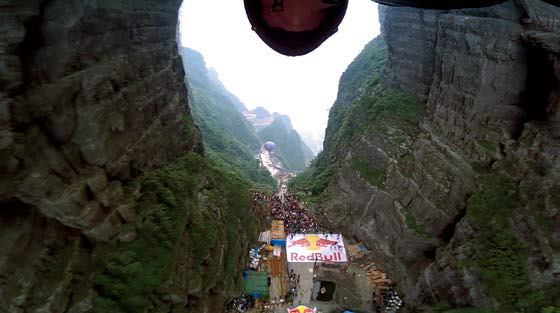
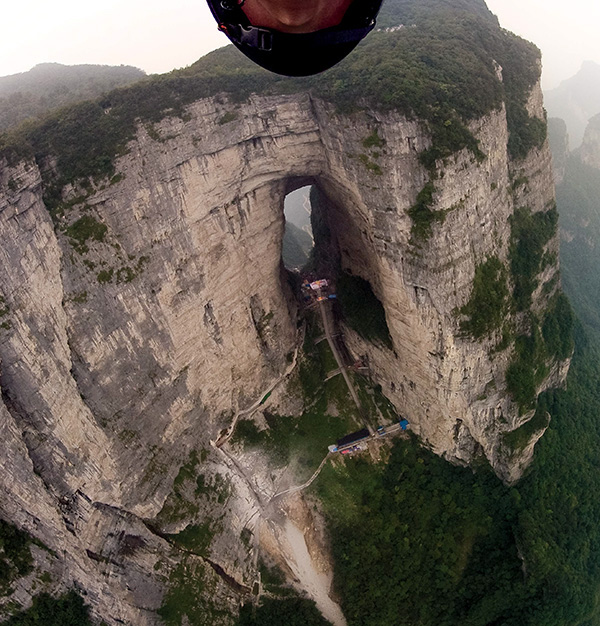
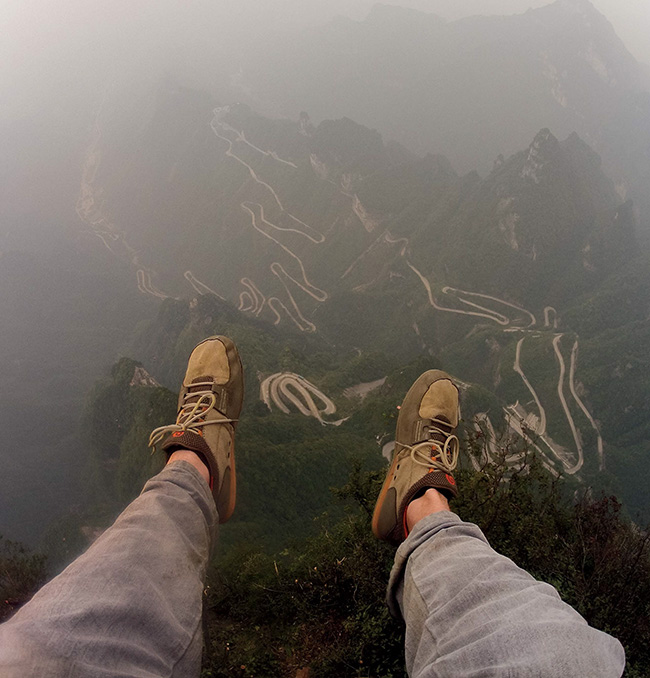
In an alternate scenario, another editor was tackling the “Jeb Corliss Flies Through Tianmen Cave” story. The footage featured two main events: Jeb’s aborted jump and then his later successful flight through the cave. In the editor’s paper cut, she noted plans to use the first half of Corliss’s successful jump as the introduction. In a sense, this created tension by asking the question, “Is he going to make it?” She then introduced the characters and showed the aborted jump, before revisiting his successful jump in the second half.
Her instincts were good. Creating tension in the introduction hooks the audience. But the proposed structure felt long and circuitous. Looking at the paper cut, we quickly realized that the editor was manufacturing tension with a false opening when she didn’t have to. The “Is he going to make it?” tension already existed in the aborted jump. So the manufactured opening got axed and the edit started with the aborted jump, setting up the theme of human perseverance: “You only fail if you give up.” The paper cut saved days of what would have been a frustrating revision after the first rough cut.


Paper Cut: Jeb Corliss Tianmen Cave
Opening Sequence: Jeb’s failure: Start in Jeb’s head-cam, on the helicopter with voiceover. Just raw audio with no music. He jumps and flies, heading for Heaven’s Gate. He’s going... going... and just when we think he’s gonna make it he pulls his chute. Fail. Jeb frustrated at the bottom of the stairs.
Character Introduction: Rewind. Freeze frames of Jeb and his crew, eating together, traveling, and jumping. Classic kung-fu music.
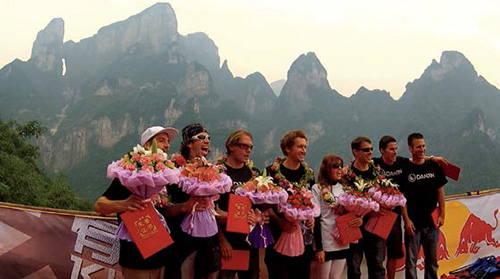
Introduce the Obstacle: Jeb talks about the technical aspects of the jump. We travel up the mountain as Jeb says: “If you want to do something special, you have to work for it.” They begin practice jumps to the somber/spooky music, “Ghostly Chatter” by Insightful. Douggs says, “I get more scared every time.” Joby crashes. We feel the danger.
Preparation for the Climax: Jeb prepares for his final jump. He explains that failure is a conscious choice to give up, that if you never give up then you will never fail. You are in the process of succeeding. We see flashbacks of his first failed jump. Then he steps off the helicopter. Tension builds. Music: “Diamond” by Lorn.
Climax and Resolution: Jeb flies through the Cave. We see the people looking on in awe and wonder. Success! Jeb sums it up: “My time in this world is limited, but the things I can do are not.”
Story
Humans are all different, and we go about life in very different ways. But at the core of our humanity lies a shared world of common emotion and experience. Exploring this world can give a video powerful meaning that communicates to more than just a small subset of people or a niche genre. It opens up the video to anyone who has shared in the emotion or experience portrayed onscreen.
Although GoPro was originally designed with the sports enthusiast in mind, sports are only a small facet of the overall human experience. We believe the reason our videos earn such a large viewership is because we try to tell a story with each one.
In filmmaking, stories usually involve a character who must overcome a problem. The story will have a beginning, middle, and end. These three stages unfold through beats: moments when an event, decision, or discovery moves the story’s narrative forward, usually bringing the character closer to overcoming the problem.
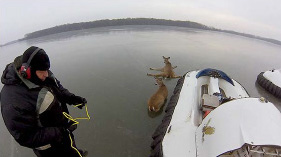
GoPro videos and good stories complement each other. The camera inherently captures someone’s perspective, so telling that person’s story feels very natural. The video featured in this section, “Hovercraft Deer Rescue,” exemplifies a simple POV story. James and his father encounter a pair of deer trapped on a frozen lake. The video could’ve just started with a head-cam of James already towing the deer, but the story is much more impactful when the editor takes time to set up the problem. In this case, the two men discuss what to do, search for the right tools, try to rig the deer, and so on. All this setup creates anticipation for the moment when the problem is overcome. This video is about more than deer or hovercrafts—it’s about saving something or someone that is helpless. This situation has powerful emotions that come with it, and it’s something that we all experience in life.
What’s neat is that these ideas about story aren’t anything new. Whether through pictures, signs, or spoken word, the tradition of storytelling has probably been around as long as humans themselves. The elements required to tell a good story are simple, universal, and timeless. Whether it’s a tale around a fire, ancient Greek theater, thousand-page Russian novels, or a two-minute GoPro video on YouTube, the same unifying principles apply.


Characters and Conflict
We’ve all come across those people in life who make us laugh and say, “That person is a character!” They’re interesting and usually likable. We want to spend time around them, to figure out what makes them tick. Obviously, these are the kinds of characters you want in a good video. And while such a video might be entertaining, it’s not a story. Story happens when an interesting character is given a problem to solve or an obstacle to overcome.
As in life, actions are the true proof of someone’s character inside a story. The best way for the audience to learn about characters is by watching them. This is where the problem comes in. Problems and obstacles require the character to take action. They create tension, leading the audience to question whether the character will overcome the obstacles or fail. It is this interplay between character, obstacle, and audience expectation that creates a dramatic story.
Classically, four kinds of problems exist in stories and they are usually framed as conflicts:
![]() Human versus nature: A human versus nature conflict is arguably the most common, whether it’s a snowboarder taking on the mountain, a surfer pitted against the power of the ocean, or a BASE jumper defying gravity.
Human versus nature: A human versus nature conflict is arguably the most common, whether it’s a snowboarder taking on the mountain, a surfer pitted against the power of the ocean, or a BASE jumper defying gravity.
![]() Human versus human: Human versus human conflict is most notably seen in racing and competitions.
Human versus human: Human versus human conflict is most notably seen in racing and competitions.
![]() Human versus society: Human versus society conflict often drives our conservation pieces, where we address problems created by larger human society.
Human versus society: Human versus society conflict often drives our conservation pieces, where we address problems created by larger human society.
![]() Human versus self: Human versus self conflict is a little more nuanced. Often, conflicts in the other three categories reveal internal conflicts inside the character. The human versus self conflict pits a character against some aspect of himself or herself that must be overcome. You can see a good example in the “Jeb Corliss and Roberta Mancino: Wingsuit Flyers” video featured here, as the athletes conquer their own fears in order to perform death-defying stunts.
Human versus self: Human versus self conflict is a little more nuanced. Often, conflicts in the other three categories reveal internal conflicts inside the character. The human versus self conflict pits a character against some aspect of himself or herself that must be overcome. You can see a good example in the “Jeb Corliss and Roberta Mancino: Wingsuit Flyers” video featured here, as the athletes conquer their own fears in order to perform death-defying stunts.

Structure
With film, the viewer has an intrinsic desire to make connections from shot to shot, sequence to sequence, and beat to beat, thus deriving meaning from a story. Structure is the filmmaker’s map, which outlines how and in what order important beats unfold so the viewer will feel the story’s meaning in the most impactful way. The longer the story, the more intricate that structure needs to be to retain the audience’s attention. But whether a 30-second TV commercial or a feature-length 90-minute film, all story structures must contain a beginning, middle, and end.
![]() Beginning: The character is introduced in the beginning of the edit.
Beginning: The character is introduced in the beginning of the edit.
![]() Middle: The character faces obstacles, which lead eventually to the greatest obstacle, or climax. Here, the character either overcomes or fails to overcome the greatest obstacle.
Middle: The character faces obstacles, which lead eventually to the greatest obstacle, or climax. Here, the character either overcomes or fails to overcome the greatest obstacle.
![]() End: The characters react to their success, or failure, in the end of the edit.
End: The characters react to their success, or failure, in the end of the edit.
The beauty of this structure is that, even if you don’t have a story with a defined conflict, concentrating on these stages will give a consistent, logical flow that viewers can instinctively grasp. As stories become longer, these stages are built from beats. Beats are those key moments you identify in the paper cut, when an event, decision, or discovery moves the story forward. If the structure is the roadmap, then beats are the waypoints. These beats are connected with supporting sequences to form the narrative of the story.
The featured “Pelican Learns to Fly” video is a great example of how structure builds a story. The beginning introduces the character of the abandoned pelican, as well as the obstacle: the pelican cannot fly. In the middle section, the pelican practices flying with a friendly human. The climax comes as the pelican takes off and soars over the water, conquering the obstacle. The end beat occurs later in the same shot, as the pelican comes back to where it started and lands safely. This simple, beautiful story is conveyed in a total of six shots. One of the interesting things about working with short format videos such as this, is it requires you to be concise: You only have a handful of shots to tell a story. And while you may find yourself wishing you had more, learning to embrace limitations like this will hone your sense of structure, and make you more creative as an artist.


Music
Music can be a powerful tool for the editor, perhaps second only to the images themselves. Music taps straight into human emotion. Excitement, happiness, suspense, sadness, dread...there are no limits to the emotions a good song can impart to viewers. That said, you should only use music to enhance an emotion already inherent in the footage. As soon as music starts to dictate the emotion to the audience, without being motivated by the story, the editor has gone too far.
Finding the right music is a daunting task that requires significant time and effort. Because of this, we tend to gravitate toward our favorite songs—ones we’ve already heard, know, and love. This can be a mistake. It’s hard to be objective when you’re already attached to a song.
One of the lucky constraints we had in our early days at GoPro’s media department was that there was no music budget, meaning that we couldn’t edit to any song we wanted. So, we contacted less-well-known artists and negotiated trades for cameras. Limitations like these forced us to be selective, and spend time finding new music and making sure it fit the intended videos.
Today, we have a Music Supervision department dedicated to helping editors find music that speaks to the footage and procuring those songs from artists. The first question our music supervisor asks an editor is this: “Is music necessary?”
Silence can be just as powerful as Mozart. A pure, raw clip can be instantly immersive and demand audience attention, all the more so if the footage is unbelievable. The “Avalanche Cliff Jump with Matthias Giraud” video featured in this section captures the power of the video’s own sound perfectly. The straight helmet-cam introduction leads us to believe we are watching a run-of-the-mill POV skiing video. Natural in-camera audio only reinforces the realism. The understatement of the intro and lack of music make Giraud’s climactic moment all the more powerful. Music would only pull us out of the moment, telling us what to feel when the footage already does so—perfectly.

On the other hand, there are times when you find the perfect song. The mood and tempo go right with the images. The action feels electrified and energized by the music. It’s as if the characters are dancing onscreen. The “Human Flight - TV Commercial” video showcases a perfect match of imagery and music. We acquired the 2011 TV commercial’s content from the original creator, who had edited his own video and chosen music by Alex Khaskin. We experimented with other kinds music, but nothing came close to this original pairing, so it stayed.
“Las Vegas Grand Finale - Monster Energy Supercross 2011” is a classic example from GoPro’s early action sports days. Weeks before shooting, we selected a track that embodied the madness of Vegas. We wanted to show the motocross world through the eyes (or helmet) of a champion. We borrowed Ryan Sipes’s helmet and celebrated with it all weekend, forming a dream-like narrative that thumped along with the beat and brash lyrics of Wallpaper.
During this stage, it’s important not to get bogged down trying to find the perfect song. Music selection is an ongoing process throughout the edit. You can move or delete songs entirely as the structure and story of an edit change. So just find something that has the right tone or feeling, and get ready to start cutting. In the second pass stage, we revisit music.
Human Flight – TV Commercial

Las Vegas Grand Finale – Monster Energy Supercross 2011


The Rough Cut
At last. You’re ready to begin cutting. In the rough cut, the editor assembles sequences that connect the beats outlined in the paper cut. The rough cut stage focuses on the more mechanical facets of editing. This includes configuring the timeline, maintaining continuity, using different types of cuts, speed changes, time-lapses, and voiceover.
Just how you proceed is up to you. Different editors go about structuring their edits differently. Some start at the beginning and work sequentially. Others put together the climax sequence first, so they fully understand what they are building toward. Just get started and you’ll naturally find the flow that works best.
Timeline Settings
Correctly configuring the timeline in your editing program is essential, and will ensure the highest possible image quality. The basic settings include:
![]() Resolution: While the GoPro shoots a number of different resolutions, you need to choose one for the timeline. Clips with the same resolution as the timeline’s resolution will fit perfectly, while smaller resolutions will be scaled up and larger resolutions scaled down to best fit inside the timeline’s player. A good rule of thumb is to set timeline resolution to the resolution of the intended playback device. If you are editing for web, 1920×1080 is a good choice for online video players such as YouTube and Vimeo. Since the HERO4 launch reel, we use a 4K timeline in Adobe Premiere, although this requires a top-of-the-line computer.
Resolution: While the GoPro shoots a number of different resolutions, you need to choose one for the timeline. Clips with the same resolution as the timeline’s resolution will fit perfectly, while smaller resolutions will be scaled up and larger resolutions scaled down to best fit inside the timeline’s player. A good rule of thumb is to set timeline resolution to the resolution of the intended playback device. If you are editing for web, 1920×1080 is a good choice for online video players such as YouTube and Vimeo. Since the HERO4 launch reel, we use a 4K timeline in Adobe Premiere, although this requires a top-of-the-line computer.
![]() Frame rate/timebase: Like resolution, frame rate should be set to the fps speed of the intended playback device. Set this to 29.97 fps if you are editing for web or for television broadcast in North America or parts of South America or Asia. Other options include 24, 23.98, and 25 fps (for European television broadcast or film).
Frame rate/timebase: Like resolution, frame rate should be set to the fps speed of the intended playback device. Set this to 29.97 fps if you are editing for web or for television broadcast in North America or parts of South America or Asia. Other options include 24, 23.98, and 25 fps (for European television broadcast or film).
![]() Pixel aspect ratio: This determines the shape of the pixels in the frame. GoPro shoots square pixels, so this should be set to Square.
Pixel aspect ratio: This determines the shape of the pixels in the frame. GoPro shoots square pixels, so this should be set to Square.
![]() Fields/field dominance: This applies only to interlaced video, not to GoPro’s progressive footage. This should be set to Off or No Fields.
Fields/field dominance: This applies only to interlaced video, not to GoPro’s progressive footage. This should be set to Off or No Fields.
![]() Compressor/codec: This tells the editing software how to decode the compression of your video files. If you’ve transcoded using GoPro Studio, set it to the GoPro Cineform 422 codec. If you’re editing native video straight from the camera (such as in Premiere Pro), use the H.264 setting.
Compressor/codec: This tells the editing software how to decode the compression of your video files. If you’ve transcoded using GoPro Studio, set it to the GoPro Cineform 422 codec. If you’re editing native video straight from the camera (such as in Premiere Pro), use the H.264 setting.
Continuity of Space and Time
The video experience is, in essence, a contract. Audience members agree to relinquish control over how they observe the world, in exchange for the video creator’s deliverance of a coherent and meaningful experience. A good story ensures that a video will be meaningful. But how do you ensure the audience can make sense of what they are watching? Continuity describes the flowing, connected aspect of video. A single clip of a skier’s helmet-cam is perfectly continuous. We stay in the same perspective from the top to the bottom of the mountain. The editor’s primary tool, the cut, violates continuity. This isn’t necessarily a bad thing. A sequence with many carefully made cuts can feel more real and continuous than a one-take shot. By introducing new perspectives, the editor can give the audience a wider sense of the world.
Continuity in space means that audience members have a good sense of a video’s environment, and where characters are. One easy way to establish continuity in space is to begin a sequence with wide shots before cutting in closer to introduce the characters and action. This principle applies throughout a video. Any time a major environmental change occurs, the editor should take a moment to make sure the audience knows where they are. Continuity in time ensures that the audience can follow what is happening, especially between cuts. The most common way to maintain time continuity is to match the action, a technique discussed later in this chapter. Time continuity is also affected by light. Our perception of time is intrinsically related to the time of day and how it affects the quality of light. Cutting from a golden hour shot with dramatic shadows to a midday shot with flat light will break continuity for viewers and tell them that a sequence is manufactured.
In “Combing Valparaiso’s Hills,” continuity played a key role in sculpting the final video. The editor’s rough cut bounces spatially from one location to the next: sometimes at the top of the hill, sometimes at the bottom, then back to the middle, with the time of day changing all the while. During the second pass, special attention was paid to continuity. Shots with similar location and lighting were grouped together and ordered. Although the footage was filmed over a week’s time within very separate geographical locations in the city, the final version gives the impression of a smooth, seamless journey down the hill in a single day.
Rough Cut: Combing Valparaiso’s Hills


Aether Industries / Texas ![]() Weather Balloon
Weather Balloon ![]() Photo/.5sec
Photo/.5sec
Final Cut: Combing Valparaiso’s Hills

The Cut
By far the editor’s greatest tool is the ability to cut, thereby breaking continuity of space and time. This tool should not be taken lightly. Ideally, every cut is purposeful: it serves some function that relates locally to its particular sequence, or globally to the overall structure of the edit.
There are plenty of reasons not to cut. Novice editors are often beholden to the idea that faster, more frequent cutting equals more excitement in video and thus badass editing. While this might be true in some contexts, it should never be a guiding principle. If a shot is crucial and best tells the story, the editor should have confidence in that shot, letting it breathe until the natural action within is complete. On the other hand, editors often try to include too much, especially if they’ve grown attached to what they’ve shot. It’s better to let go of mediocre shots and repeated beats, using only the best imagery to tell the story, than to cram everything on the timeline simply because you filmed it.
When is a cut motivated and useful? When it shows the action better from a different angle, changes time or location to advance the story, removes nonessential or uninteresting footage to speed things up, shows something that is referenced or implied in the shot before (as in a cutaway), or conincides with major music cues. Music cues—including huge hits; changes in mood, tempo, or instrumentation; beginnings and ends of verses, choruses, and bridges—can serve as natural cutting points, especially in montages. The cut can also serve subtler, more artistic functions, such as juxtaposing two seemingly unrelated images to imply meaning or metaphor between them.


Action Cut
The action cut (traditionally called match on action) takes advantage of two different angles of the same action by cutting between them. Continuity between angles is maintained by the action of the subject and the setting itself. The added perspective lends depth to an otherwise straightforward POV sequence.
Action cuts can occur before, during, or at the end of the action. For extreme sports, things happen so fast that it’s best to overlap time and action between cuts, or even repeat the same action. This maintains continuity and extends the moment so the audience can fully enjoy it.
Good coverage while shooting will ensure the most flexibility with action cutting. The video “Skiing Cliff Jump with Jamie Pierre” is a useful example. Jamie Pierre rigged himself with multiple cameras on his chest, backpack, ski poles, and skis before dropping a massive cliff. The multitude of angles inspired the edit’s silly over-the-top style and allowed us to action cut liberally to the music. It also helped to elongate Jamie’s air time by replaying the cliff jump from multiple angles.
Skiing Cliff Jump with Jamie Pierre


Match Cut
Action cuts are actually a specific form of the more general idea of match cutting. As its name implies, a match cut “matches” similarities between two shots. Match cuts create a flow that keeps the viewer engaged in the video even when cutting between very different times and locations. The similarities between shots may be subtle and only perceived on a subconscious level, giving the masterful match cut a surreal or hypnotic feel.
The filmstrip above shows frame grabs from a sequence in the HERO3 launch video, a product reel that relies heavily on match cutting to create a seamless interweaving of images. The sequence starting at 2:50 illustrates some of the most common elements for match cutting:
![]() Composition: POV arms diving to POV arms swimming underwater.
Composition: POV arms diving to POV arms swimming underwater.
![]() Motion: Forward motion from bike wheel to running POV.
Motion: Forward motion from bike wheel to running POV.
![]() Texture: Water spray to snow spray.
Texture: Water spray to snow spray.
![]() Color: Underwater blue POV hands to underwater blue wave.
Color: Underwater blue POV hands to underwater blue wave.
![]() Wipe: Water’s surface wipes frame between POV diving shots.
Wipe: Water’s surface wipes frame between POV diving shots.
The wipe is a special form of match cutting in which movement across the frame or obstruction of the lens is matched between shots. We use them often due to the interactive nature of GoPro. We fondly call them portals. Also, it’s good to note that most editing programs include a cross-dissolve function. Bad cross dissolves are one of the hallmarks of novice editing. They work best when used to fuse shots that are already match cut; otherwise, it’s best to avoid using them.
GoPro HERO3: Almost as Epic as the HERO3+


Jump Cut
With the jump cut, the same perspective is retained from shot to shot but the action jumps in time. A smooth jump cut will keep the difference between shots relatively minimal. Usually, the subject changes position while the background stays the same, or vice versa. GoPro mounted shots are especially easy to jump cut, as the mounting apparatus (helmet, bike frame, surfboard, what have you) provides a stable foreground against which both the subject and environment can change without disorienting the audience. This can be a good way to transition into new locations or incorporate shots from different locations into the same action sequence.
The primary use of jump cutting is to compress time. This is handy when a certain section unfolds too slowly or when shortening a sequence to hit a musical cue later on the timeline. As with all cuts, you can use a masterful jump cut to convey an idea. You can see a good use of this in the “‘Misdirected Man,’ by Hip Hatchet” video featured here. The final jump cut, made poignantly on the last pluck of strings, signals the video’s end and takes the viewer back to the porch where it all began. The cut literally and symbolically “brings the viewer home,” which is what his song is all about. In this case, a simple editing technique becomes poetry.


Smash Cut
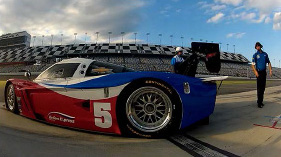
The whole purpose of smash cutting is to draw attention to the cut. In this sense, it is the exact opposite of match cutting. The smash cut takes advantage of contrasting imagery, action, or sound to startle the audience. Smash cuts have many uses. They can serve a structural purpose, abruptly transitioning the video from one sequence to another. They can be used to emphasize the difference between two environments, such as shown in “Rolex 24 at Daytona Teaser,” where abrupt shifts between tranquil scenery and roaring POV racing footage intensify the action. Smash cuts can also be used metaphorically, to underscore an idea that is present inside the story.
Cutaway and Crosscutting
A cutaway does just what it says: cuts away to another shot to show something implied or referenced in the first. In interviews, characters often discuss ideas or actions for which you have footage. A popular technique is to cut away from the interviewee to show what he or she is talking about as the interview audio carries on underneath.
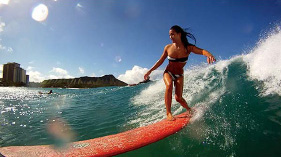
Crosscutting is cutting from a shot or sequence to show a parallel shot or sequence. This is useful when you want to connect multiple ideas or stories simultaneously. In the featured video, the sequence starting at 2:30 shows aspiring surf grommet Lily Richards’s interview with Roxy surfer Kelia Moniz. The edit crosscuts between the interview and sequences of both girls surfing and enjoying the water. Paired with the music and voiceover, these crosscuts symbolize Lily’s dream, conveying to the audience her desire to grow up and be a cool pro surfer, just like Kelia.
Dreams with Kelia Moniz

Time Manipulation
The manipulation of time is inherent in most forms of storytelling. In filmmaking, this manipulation is upfront and quite literal, and thus can be an extremely effective tool to use. Slow motion, fast motion, reverse motion, and speed ramping are all tools that editors can use to enhance a story. As with any editing technique, the use of time manipulation should be wise and deliberate.
Slow Motion
High frame rates are a mainstay for GoPro. Along with the wide lens, slow motion provided by the camera’s high frame rates make the vast majority of POV footage watchable. You can use slow motion to highlight a particular trick or action, control pacing, elongate a video’s climax, smooth out or reinforce changes in music tempo or quality, create time for text overlay or voiceover, stabilize shaky footage, and more. And, of course, there is the aesthetic. Everything looks good in slow motion.
Slow motion tends to work with certain activities more than others. The normal, fast motion of moto and auto footage is part of what makes racing videos so exciting. Here, you should generally avoid slow motion, except for key moments when things happen too fast, such as in collisions or crashes. The inherently slow pace of human flight makes slow motion unnecessary, although launches, landings, and intricate aerial maneuvers are good exceptions. Slower motion shines with bike, snow, surf, wake, skateboard, and just about any other sport where trick sequences play a major role.
Another great use for slow motion is footage stabilization. You can greatly smooth out shaky handheld, pole, drone, or POV footage by dropping the speed. The trade-off is a decrease in pacing, which may or may not be appropriate to the sequence you are cutting. In general, footage speed should match the music tempo and intensity, as well as the video’s pacing.
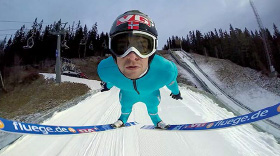
Ski Flying with Anders Jacobsen

Motion Interpolation
Downconverting footage from capture frame rate to a lower playback frame rate, such as 24, 25, or 30 fps, will give you the maximum amount of slow motion for any clip inside a project. Trying to slow a clip beyond this point will cause the editing program to duplicate frames to occupy the extra space created. The duplicated frames cause visual “stairstepping,” which looks awful. Using a motion interpolation program such as GoPro Studio’s Flux allows you to drastically slow footage by calculating motion vectors of individual pixels between frames to create new, intermediate frames. This can result in a much slower effect that can simulate the slow motion produced by high-speed cameras of 1000 fps or more. Motion interpolation programs inevitably produce artifacting and warping, even more so the greater the distance between pixels in subsequent frames. You can find many tricks and tutorials online, but in general, shoot in 60 fps or above and avoid fast motion and complicated foregrounds/backgrounds to get the best results.
Speed Ramping
Speed ramping occurs when the speed of footage accelerates or decelerates, often unnoticed by the audience. It is best to understand speed ramping as a function before implementing it as a style. For POV footage especially, we often hide speed ramps in launches and landings of a jump to slow down time in the air and emphasize the athlete’s weightless performance. When implemented correctly, speed ramping flows with the story rather than calling attention to itself in an obvious way. When used stylistically, speed ramping dramatically accelerates the audience into a climactic moment instead of just cutting to it. The change in speed is often rapid and paired with sound effects or big beats and rising/falling pitches in the music. Transitionally, a speed ramp to fast speed with a little bit of motion blur can “portal” or wipe from one setting to the next. Most editing programs have variable speed control built into them, so ramping can be as easy as keyframing a starting and ending speed. In the “Kelly F*cking Slater” video in this section, the editor displays functional and stylistic speed ramps. Slater’s handheld camera was shaky at times, but the editor combined an epic track, text, and speed ramps into and out of slow motion to extract a great moment.

Fast Motion
Just as slow time captures something we couldn’t quite catch with our eyes at real speed, fast time reveals aspects of the world we wouldn’t see otherwise. The most notable use of sped-up footage is to compress time, as in the example video of Ravi Fernando, “The Rubik Juggler.” Even though Ravi’s feat is amazing, it’s doubtful the audience would sit through five-and-a-half minutes to see it. For POV or moving shots, accelerating footage works well with upbeat or fast music. Often, we use a little motion blur and a vignette to give the audience a sense of warping through time.
Reverse Motion
Reverse motion is a tricky technique to use well, as it calls attention to editing. Find the right place for a reverse, however, and the results can be very rewarding. The final shot in the featured video “Surfing with Mikey Bruneau” uses reverse time to great comical effect. Most often, reverse time is used functionally as opposed to stylistically. More than once, we have salvaged an important reveal in an establishing introduction where the smoothest part of a drone shot was the pull-back instead of the push-in. We simply reversed the footage, and voilà. In the same way, a reversed sunset time-lapse can give you the sunrise you didn’t capture, or vice versa. Just be mindful of unnatural movements such as people walking backwards, objects defying gravity, and the like.


Time-lapses
Time-lapses on the editing timeline generally serve three functions: establishing, pacing, and passage of time. They are often seen in the beginning of a video or particular sequence, where they introduce an environment. They can be introduced at critical points in the edit to control a story’s pacing. Finally, time-lapses convey time’s passage and can be used to emphasize the amount of time between one event and another. The HD HERO2 reel, featured here, uses time-lapses to establish environments, both at the beginning and throughout the edit inside individual sequences.
GoPro Studio does an excellent job of processing time-lapses. The program gives users the option of downscaling photo time-lapses or leaving them at full resolution. Full size time-lapses are data heavy and require more rendering, but the extra resolution gives editors additional options. They can crop in to choose a frame, or even perform virtual camera movements such as pans and zooms. These movements can add a cinematic feel to an otherwise static or lackluster time-lapse. It’s good to note that subtlety is key to techniques like these. A little bit of virtual camera movement goes a long way.
In low light conditions, photo time-lapses may require additional work in post-production. We use the denoiser in DaVinci Resolve or After Effects if noise is an issue. Because the camera is taking exposure readings at interval, flickering can sometimes be a problem in variable light conditions. We recommend using a deflickering plug-in to smooth out problem time-lapses.
The HD HERO2: Almost as Rad as the HERO3


Interviews and Voiceover
Proper use of interview audio, sound bytes, and voiceover starts during the selects stage and influences the structure of the paper cut. Interview audio tracks are often very long. A good workflow is to import these tracks directly into your editor, create a new timeline, and listen through the newly imported audio, trimming the audio track so only those clips pertaining to the story remain. Most editing programs have a marker function that allows you to mark and label these newly selected clips so you can find them later.
A raw audio track will almost always need adjustment for pacing. Depending on the inherent speed of your edit, you will find people speaking slower or faster than you want to cut. Space out the line delivery to slow things down, or trim dead air in between sentences to speed things up.
We all tend to speak in a stuttered or roundabout manner. Filler words—uh, like, and you know—all sound natural in real life and when a character is onscreen. In voiceover, however, fillers tend to stand out, making the speaker seem more inarticulate than he or she may be. Chopping out the filler words ensures that the audience focuses on what’s really important: the meaning of the words and accompanying imagery. Also, in interviews, ideas are often expressed circuitously and out of order. Don’t be afraid to cut and reorder phrases if you are confident that doing so stays true to the character and what he or she meant to convey.
Interview audio and voiceover require quite a bit of audience attention. Be aware of how the audio is interacting with the images. If it feels too chaotic or busy, the action is probably too intense and the voiceover should be placed elsewhere. Otherwise, the audience will not be able to digest important information or beats in the story. Frequently, the rough cut has too much audio laid over the images and the second pass whittles these down to only the essential words. Once you start cutting a lot of interviews and voiceover, you will develop a sense of rhythm, of how the words and cuts can work together.
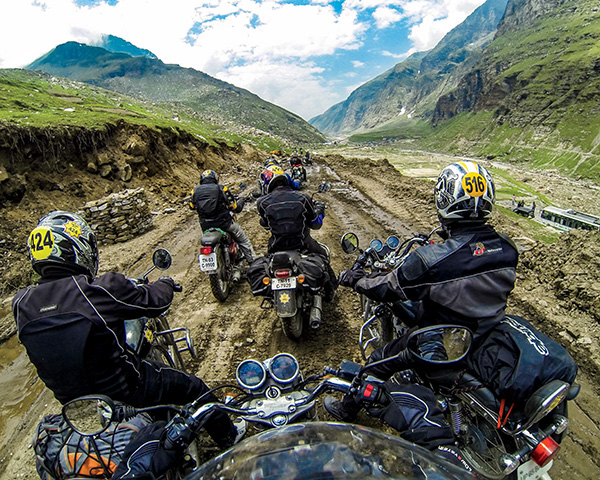
Himalayan 4,500 km Adventure

The Second Pass
When you get to the second pass, you’ve finished the rough cut and are deep in the woods. You’re probably a little cross-eyed and you’ve listened to the same music track so many times you could hum it in your sleep. Now is a good time to take a break. Step outside. The second pass stage requires objectivity. You’ll review your structure and story flow, both by yourself and, more importantly, with others. Decide which beats work and which don’t. Re-evaluate the music and start thinking about increasingly subtle dynamics, such as how the action, story, music, and cutting speed affect the edit’s pace.
Peer Review
Most videos are passion projects. More than likely, you will spend long hours by yourself cutting, tweaking, and watching your edit over and over again. Sometimes it’s easy to forget that your edit needs an audience—that your own vision, while important, matters only as much as it can be conveyed to others. This, after all, is the purpose of video, and perhaps of art itself.
Before you screen, make sure the story is complete and you aren’t missing beats. The video should be watchable, but not perfect. Don’t worry about seamless transitions or color. The review is about structure and communicating an idea with your story, not about little details that will be polished later.
Find someone you trust—someone who is familiar with the filmmaking process. Ideally this trusted person has created videos and understands what makes a good story. Once that person has seen the cut, you can ask questions such as:
![]() Do you know who the characters are and what they want?
Do you know who the characters are and what they want?
![]() Do the sequences and beats lead to a climax?
Do the sequences and beats lead to a climax?
![]() Is the ending earned?
Is the ending earned?
![]() Does it feel as if the character has overcome something or learned something?
Does it feel as if the character has overcome something or learned something?
Now brace yourself. Remember: You are not your film. Your film should be personal, yes, but don’t take responses to it personally. At the end of the day, if the audience hasn’t realized something essential, then the artist isn’t doing their job correctly. No amount of convincing the audience in person is going to make a video any better. Our advice is, be confident but open. What you will receive are only comments and suggestions. You know your film best.

Pacing
The inherent intensity at any given point in a video is referred to as pacing. Many things contribute to pacing: frequency of cuts, the speed and intensity of action within the frame, music tempo and instrumentation, and much more.
In general, the pacing of a video should be smooth, increasing and decreasing gradually. Abrupt changes in pacing draw attention to the editor’s work. Perhaps more importantly, the pacing should directly follow the story. As the characters encounter obstacles and tension mounts progressively through each beat, the pace of the video should gradually increase, until pacing reaches a maximum right before or during the climax. Of course, not every video rises directly in tension from beginning to climax. Rapid or discontinuous cuts, aggressive music, speed ramping, and other tools used to accelerate pacing have the side effect of fatiguing the audience. Over time, this can desensitize them to the very tension such tools are meant to create. This is why it is useful to stairstep the pacing somewhat, slowing down now and again to let the audience breathe before continuing onward and upward. In a story, these stairsteps often coincide with your beats.
The “Monster Energy Supercross Highlights” video featured in this section offers a phenomenal example of how acceleration in cutting speed affects the pacing of a sequence. The video opens with slow wide shots and the cuts quicken with the music and action. The cutting speed stairsteps once or twice before the final ascent. The video ends at the point of maximum tension, both musically and on the timeline, as the cuts are almost too fast for the eye to follow. The video is an event teaser, but the same principles apply to building toward beats and an eventual climax inside a story.
Once you’ve finished your first rough cut, rewatch the video with only pacing in mind. Keep some paper handy and note where the video feels slow and where it feels rushed. Are there places where you think the audience might be confused, overwhelmed, or on the verge of losing interest? If so, rework the problem sections and watch the video again.


Music Redux
A common editing practice is to choose temporary tracks during the rough cut stage that may not be perfect, but still work emotionally and tonally. This is so the editor can start cutting the video without getting bogged down by music selection. Once the rough cut is finished, the editor can swap out temp tracks and start thinking more about how the music interacts with the images and affects the pacing and flow of a story.
Pacing and music are intimately related. As you adjust an edit for pacing and music during the second pass stage, you will start to see sections where the music stands out or feels out of sync with the video. There may be a number of reasons for this: the song is too fast or slow for the edit’s action or cutting speed, the music volume is too high or low, music may not be necessary for the given sequence, or the music may be emotionally over-the-top for a given beat. A common pitfall is to use music too heavy handedly, hitting the audience over the head with an orchestral hammer when all they need is a minimal arrangement to tease out an emotion already inherent in the story.
Even at this stage, it’s not too late to try something different. Used properly, music can breathe life into otherwise formulaic genres. The “Hangtown AMA Motocross” teaser in this section was initially edited to bagpipe music to be silly—but it created an idea association that stuck. You can’t deny that dozens of motocross riders revving and slamming into each other as they jockey for position resembles something of a slowmo battle sequence straight out of Braveheart.
Lyrics can be tricky. The appropriateness of lyrics in music is dependent on narrative purpose. If the lyrics give insight into the characters, then by all means use the song. If they don’t, then the music will probably just distract the audience from the story and characters. The “Sturgis: 110th Anniversary of Harley-Davidson” video featured here contains a poignant lyrical moment at 1:50, which provides emotional insight into one of the characters. The close-up of Chad Kagy’s face shows that he is tired and hungover. The lyrics emphasize this bittersweet beat, and help convey the idea that Chad is homesick and lonely on the last leg to Sturgis.

Sometimes you’ll find that the music you chose in the paper cut stage isn’t working for the story that has developed over the editing process. Perhaps the song is right for one beat but not another. Adding additional music tracks can help ensure that each beat of a story has the correct emotional tone. In “Danny MacAskill’s Imaginate,” the editor originally cut the entire piece to the brooding Lorn track featured at the end of the video. It felt too dark. During peer review, we temped in Saint-Saëns’ Aquarium movement from The Carnival of the Animals and everyone gasped. We were all desperate to feel the magic of Danny’s imagination. The piece was recut with a more evocative track for the beginning, with Lorn coming in after Danny falls off the bike, to introduce the consequence beat.
The marriage of music and images is one of the most important—and difficult—decisions the editor will face. You’ll know when you’ve chosen the right track. The imagery and rhythm of the music flow together. The emotion emanating from each story beat is emphasized, but not forced, by the accompanying songs. Overall, the music should feel appropriate to the action, cutting speed, and emotion contained in each sequence.


Final Pass
So you’ve listened to enough critique. You’ve wandered down a few rabbit holes and come out again. You’ve got a standout character. You’ve got music that flows. The story makes sense and everyone loves it. You’ve locked down a solid structure and finalized all the beats necessary to earn a climactic ending and a cathartic resolution.
Watch the edit a few more times. Feel out and massage each cut. Trim a few frames here, a few frames there. Be certain each shot is the best one for that particular sequence. Tighten it all up. This is your last chance to make the edit sing.
Because now...it’s time to polish.
This can be hard. When you’re impatient to release your video into the world, it takes a lot of discipline to buckle down and spend time working on what may seem like trivial details—things like color, sound, titles, and stretching. But these aspects aren’t trivial. All these things add polish to a video and can be pivotal storytelling tools.
Cropping and Stretching
Placing 4:3 aspect ratio footage on a 16:9 timeline will result in black bars on either side of the video. In the GoPro workflow, we usually leave the footage in this state until the final pass stage of an edit. During the earlier stages of editing, an editor’s time is best spent on building the story rather than waiting around for image transformations to render.
The editor has two options for dealing with 4:3 footage: dynamic stretching or cropping. If you don’t want to lose any pixels or important information at the top or bottom of the frame, dynamic stretching is the best option. In the media department, we generally employ a little bit of both cropping and stretching to gain a good balanced image.
Dynamic stretching first pulls the footage horizontally so it fills the 16:9 frame, then stretches the sides to retain proper proportions in the center. The stretch is usually applied more at the left and right sides of the image, where it is less likely to be noticed. In essence, the editor chooses a “protected” vertical area, stretching pixels inside the area less and those outside more. The area can be moved side to side and the width adjusted so that the best possible stretch is obtained. GoPro Studio offers dynamic stretching for GoPro clips. Andy’s Elastic Aspect is another useful program that functions as a plug-in for editing software.
Cropping, on the other hand, enlarges the footage until the black bars disappear. In one sense, this defeats the purpose of shooting in 4:3 in the first place, as you lose those extra pixels you gained. However, it gives leeway in choosing the frame. You can slide the footage up or down to find the best part of the image, cropping out too much sky at the top, or cropping out the ground and mounting apparatus at the bottom of the frame. This principle extends to any image with greater resolution than the resolution setting of your timeline. You can use a good crop to focus audience attention on a particular object or area of the image, or get closer to a character’s face to convey emotion in an interview. The editor can also keyframe image scaling and movement to create virtual pans and zooms over time. This can give otherwise static shots a dynamic and cinematic feel.
4:3 on 16:9 Timeline
Cropped
Non-Dynamic Stretching
Dynamic Stretching
Graham Hawkes / Hawaii ![]() Adhesive Mount
Adhesive Mount ![]() 1440p48
1440p48
Sound
Editors have a tendency to focus so much on the visual that they overlook an equally crucial aspect of video: sound. Good audio can feel as real and visceral as any combination of imagery. It fully immerses an audience in the onscreen environment and helps them identify with a character by conveying that character’s aural experience.
The time for working on sound is usually right after the editor has locked the visual cut. In this stage of editing, you focus on mixing raw camera audio, voiceover, and music levels; applying audio filters; and even adding sound effects to make the action onscreen more impactful.
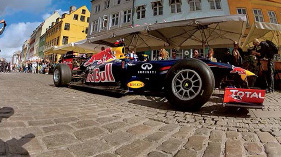
Proper mixing of sound is crucial to making sure the audience understands the story. The viewer should be able to watch the video from start to finish without having to adjust the volume. If you find the volume varying too much within a certain clip, most editing programs have a pen tool for adjusting volume over time. Human speech should take precedence in the mix. While characters are speaking, adjust music and any other audio so the audience doesn’t have to struggle to understand what is being said. Music levels can vary throughout an edit, depending on how integral the music is to what is happening onscreen. In quieter sections of a video, consider adding subtle background or ambient noise to keep the mix from feeling empty. The “Red Bull F1 Showrun” video featured here uses mixing as a stylistic and narrative tool, by juxtaposing ambient audio of quiet city streets with the roaring of F1 engines.
Many editing applications have filters to impact the way an audio track sounds. Using a hi-pass, low-pass, or bandpass filter can reduce the amplitude of undesired audio frequencies inside a clip, such as wind noise, traffic noise, or camera impacts. Reverb is another useful filter. It simulates the echoing of sound in larger spaces, and has many uses stylistic uses.
Red Bull F1 Showrun Copenhagen with David Coulthard

Often, the camera isn’t in the best position to capture the best possible audio. Hollywood studios employ massive sound departments to create and mix all the sound effects in their movies. Why not take a page out of their book? You can record your own sound effects or find them online. There are many websites that act as open source audio archives. When using sound effects from these sites, make sure that you obtain permission from their owners, or that they are licensed for use in the public domain.
Motion Stabilization
Camera shake isn’t always bad. Shakiness in perspective is a hallmark attribute of POV footage. Shake contributes to the authenticity and realism of what is happening onscreen. A fine line exists, however, beyond which too much shake will fatigue or even disorient the viewer.
Motion stabilizers have become a standard feature in many editing and visual effects programs. Motion stabilization works by analyzing the overall motion of an image and then compensating by cropping in and moving the entire image in the direction opposite the camera shake. These features work best when the shakiness is relatively minimal. They cannot correct for those times when the image itself becomes deformed by motion, such as with rolling shutter caused by high-frequency vibration.
Applying motion stabilization is time-consuming, so you should only use it to salvage shots that are crucial to sequences or a story. You won’t want to apply it to every single clip on the timeline. There are easier, more efficient ways to get smooth video. It all starts in shooting. Using the appropriate mounts while filming does wonders, as does capturing multiple takes. Over the years, we’ve counted many YouTube comments debating whether GoPro uses secret in-camera stabilizers or overboard motion stabilization in videos. Not necessary. We simply mount cameras properly, shoot loads of footage, and then choose the best, shake-free clips for our videos.
Filming at high frame rates is another stabilization technique. It gives you the option to slow down footage, thus decreasing how shaky the video feels for the audience. Isolated shakes and jars can even be hidden in plain sight, so to speak, if they are paired with hits and beats in the music. This can add style and energy to an edit, although as a technique it’s best used in moderation.
Graphics
In filmmaking, graphics refer to any text or effect overlaid on a video, or even used within it as a standalone sequence. Like all aspects of good video, graphics are used best when they blend naturally with the other elements of the edit and serve to create or enhance a story. For both text and graphics, After Effects is the program of choice for GoPro’s media department.
Text is most often used to title a video, introduce characters, or explain to the audience something that cannot be conveyed otherwise (usually because the footage doesn’t exist). We often deal with user-generated content where the shooter captured the middle part of the story and climax, but didn’t get any introductory or ending footage. The easiest way to create context or a resolution for these pieces is to overlay a little paragraph of text that introduces the characters or explains the results of their story, as the situation requires.
Placement is crucial. In general, graphics should not obscure important actions taking place onscreen. A good understanding of alpha layers and the compositing modes used in your editing program will help you seamlessly integrate graphics over video images. Music and sound do wonders to integrate graphics as well, especially if they are cued to the effects taking place. The hardest thing with graphics is making them feel organic, so they do not draw the audience out of the video experience. There is a certain elegance in simplicity, and the best graphics are designed according to this principle. The featured video “Mind the Gap with Jesper Tjäder” uses simple text overlays, blurs, and a subtle keyframing of After Effect’s Optics Compensation (a lens correction plug-in) to enhance the story without overshadowing it.
Graphics can quickly turn into the most time-consuming part of an edit, so it’s best to plan ahead and know the particular effect you want to create. You can find hundreds of tutorials online that will walk you through creating almost any imaginable effect. Once you master a few effects, you’ll find yourself combining them to produce novel effects. Experimentation is key. You’d be surprised how far you can get by just fiddling with something until it looks cool.


Color Correction
Many videos are filmed over a number of days in different locations and lighting conditions, but the footage is edited together to present a story in which sequences take place in the same time and space. Audience members can be very aware of how the quality of light determines time and location, especially when differing clips are placed side by side. The primary job of the color corrector is to balance images so that differences in exposure and color don’t break continuity for the audience.
Most editing programs have color correction modules for adjusting your images. At GoPro, we often use DaVinci Resolve, which offers a powerful free version available for anyone to download. It’s a standalone application available for Windows or Mac. Color correction is a deep science, but the basics are easy to learn. You can achieve phenomenal results by adjusting two simple aspects of an image.
The first aspect is contrast. Adding contrast increases the range of brightness in an image by darkening the shadows and lightening the highlights. While working with contrast, we recommend using a waveform to make sure you don’t push the shadows or highlights too far, resulting in clipping and a loss of definition.
The second aspect of an image to adjust is color balance. This refers to adjusting the overall hue of the image. Shots filmed at sunset can be overly red or orange. Overcast shots are often a little blue. Water scatters red light, so anything filmed at more than a few feet underwater will be bluish-green. Color balancing all of these shots can make them look more natural, and is done by adding opposing colors into the image. Many color correction applications have a dropper tool that adjusts color balance automatically.
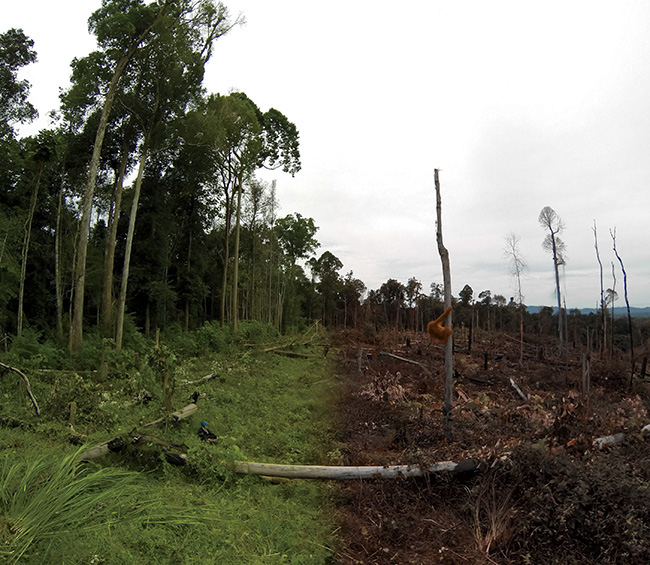
As you work with color, you’ll get an idea for its many uses. We often use subtle vignettes to focus the viewer’s eye on what is important in frame. You can use color stylistically to create a tone, look, and feel for a video. In the “Our Orangutan Brethren” video described in Chapter 6, we wanted to convey to the audience the effects of palm oil production on the orangutan habitat. The section of jungle we filmed was destroyed over a year before we got there, but had since turned green with small plant growth. Using masks and selective color in DaVinci Resolve, we were able to recreate what the area looked like right after it had been slashed and burned.
Editing and post-production in general are all about working within constraints—the availability of footage, music, time limits, and so on. Your storytelling will always be limited in some sense. Learning to embrace limitations can make you more creative as an artist and push your work to new levels.
The unique combination of light, sound, and language in video makes for infinite possibilities in storytelling. The techniques presented in this chapter are best practices that, when employed correctly, create stories. They can turn a day of shooting into a polished edit, a mountain of raw footage into a concise and well-told tale, and an aimless montage into a powerful and immersive experience that carries meaning for more than just the individual creator.
These techniques are only guiding principles. They are a base, a frame of reference from which experienced artists can strike out in entirely new directions... bending the rules, breaking them, and inventing new rules of their own.