One of the most popular open source continuous integration tools is Jenkins. The good news is that Jenkins has support for Gradle via the Gradle plugin. Let's see how to use the plugin to add our little Java project to Jenkins.
To install Jenkins on our computer, we must first download the installation files from the Jenkins website. A native installer is available for Mac OS X, Windows, and Linux. We can simply run the installer software to install Jenkins on our computer. We can also download a WAR file and deploy it to a Java web container to install Jenkins. The WAR file is also a Java executable archive. This means that we can simply run the WAR file with the java -jar command to execute Jenkins.
- First, we must install the Gradle plugin in Jenkins.
- We will launch a web browser and access
http://localhost:8080. From the Jenkins main page, we will select the Manage Jenkins link, which takes us to the appropriate page, as shown in the following image:
Overview of options to manage Jenkins
- Here, we will select Manage Plugins.
- On the Plugin Manager page, we can use the Filter box at the top-right corner to search for Gradle Plugin:

Search results for Gradle plugin
- We select the plugin and click on the Install without restart button. After the installation of the plugin, we see the following screen:
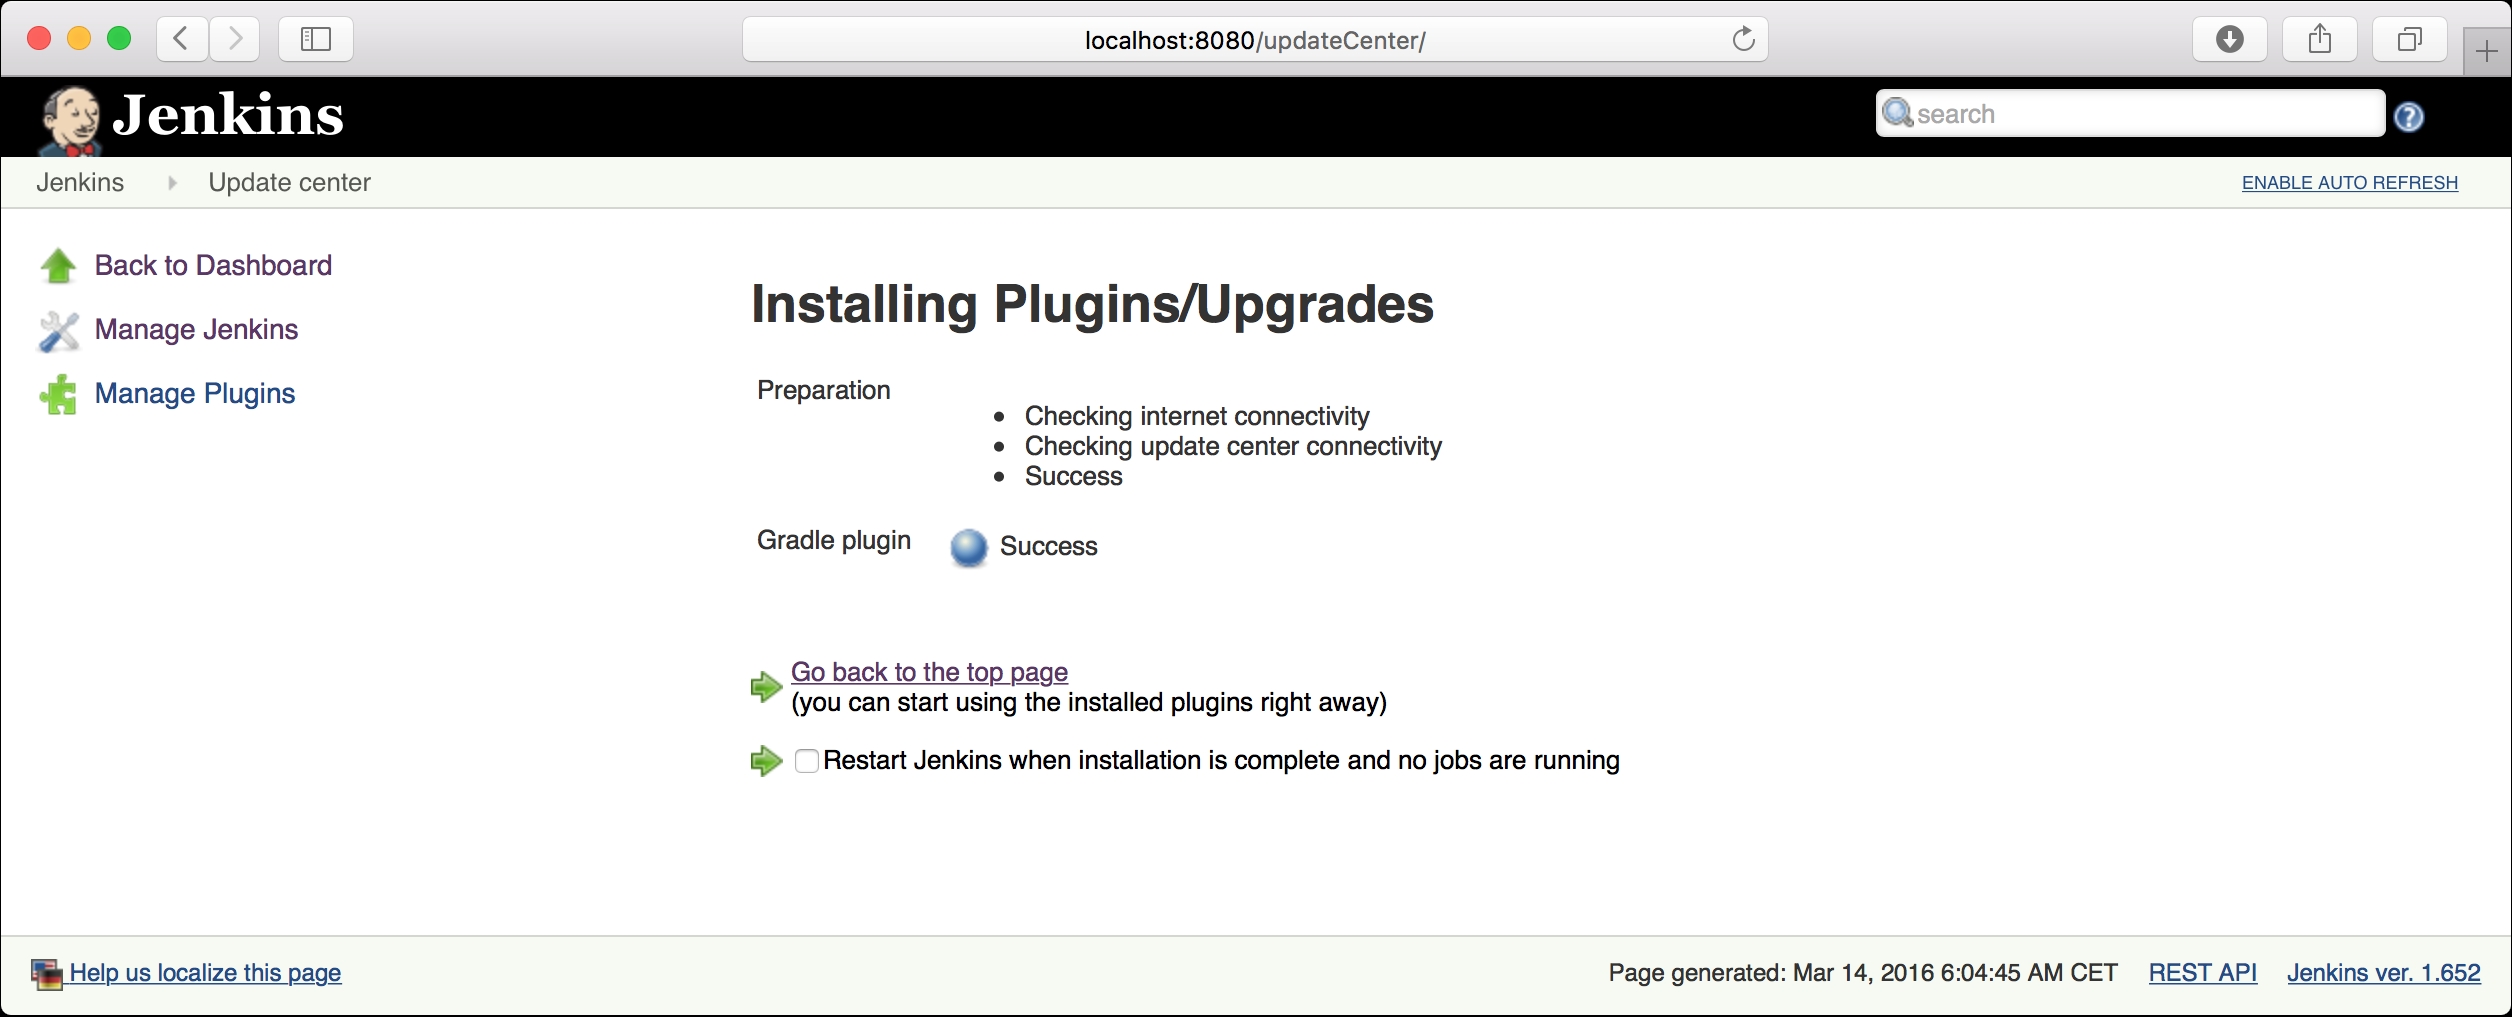
Result after successful installation of the Gradle plugin
- We need to restart Jenkins to make the plugin active and usable for our Jenkins projects.
Jenkins is now set up with the Gradle plugin and it is time to create a job:
- From the main page, we select the New job link.
- We get a screen, where we can fill in a name for the job and select the Freestyle project radio button:

Creating a new job in Jenkins
- If we have filled in the name and selected the radio button, we can click on the OK button. We will go to the configuration page of our job. The name of the job is already filled with the value from the previous screen:

Configuring a Jenkins job
- We must at least define our Git repository in the Source Code Management section.
- Also, we must add a build step in the Build section.
- We select the Git radio button to define the location of our Git repository in the URL of the repository field. Note that the Git is not supported by default. We must install the Git client plugin in Jenkins to have Git support.
- If we select the Add build step button in the Build section, we can see the Invoke Gradle script option. Thanks to the Gradle plugin, we now have this option highlighted in the following screenshot:
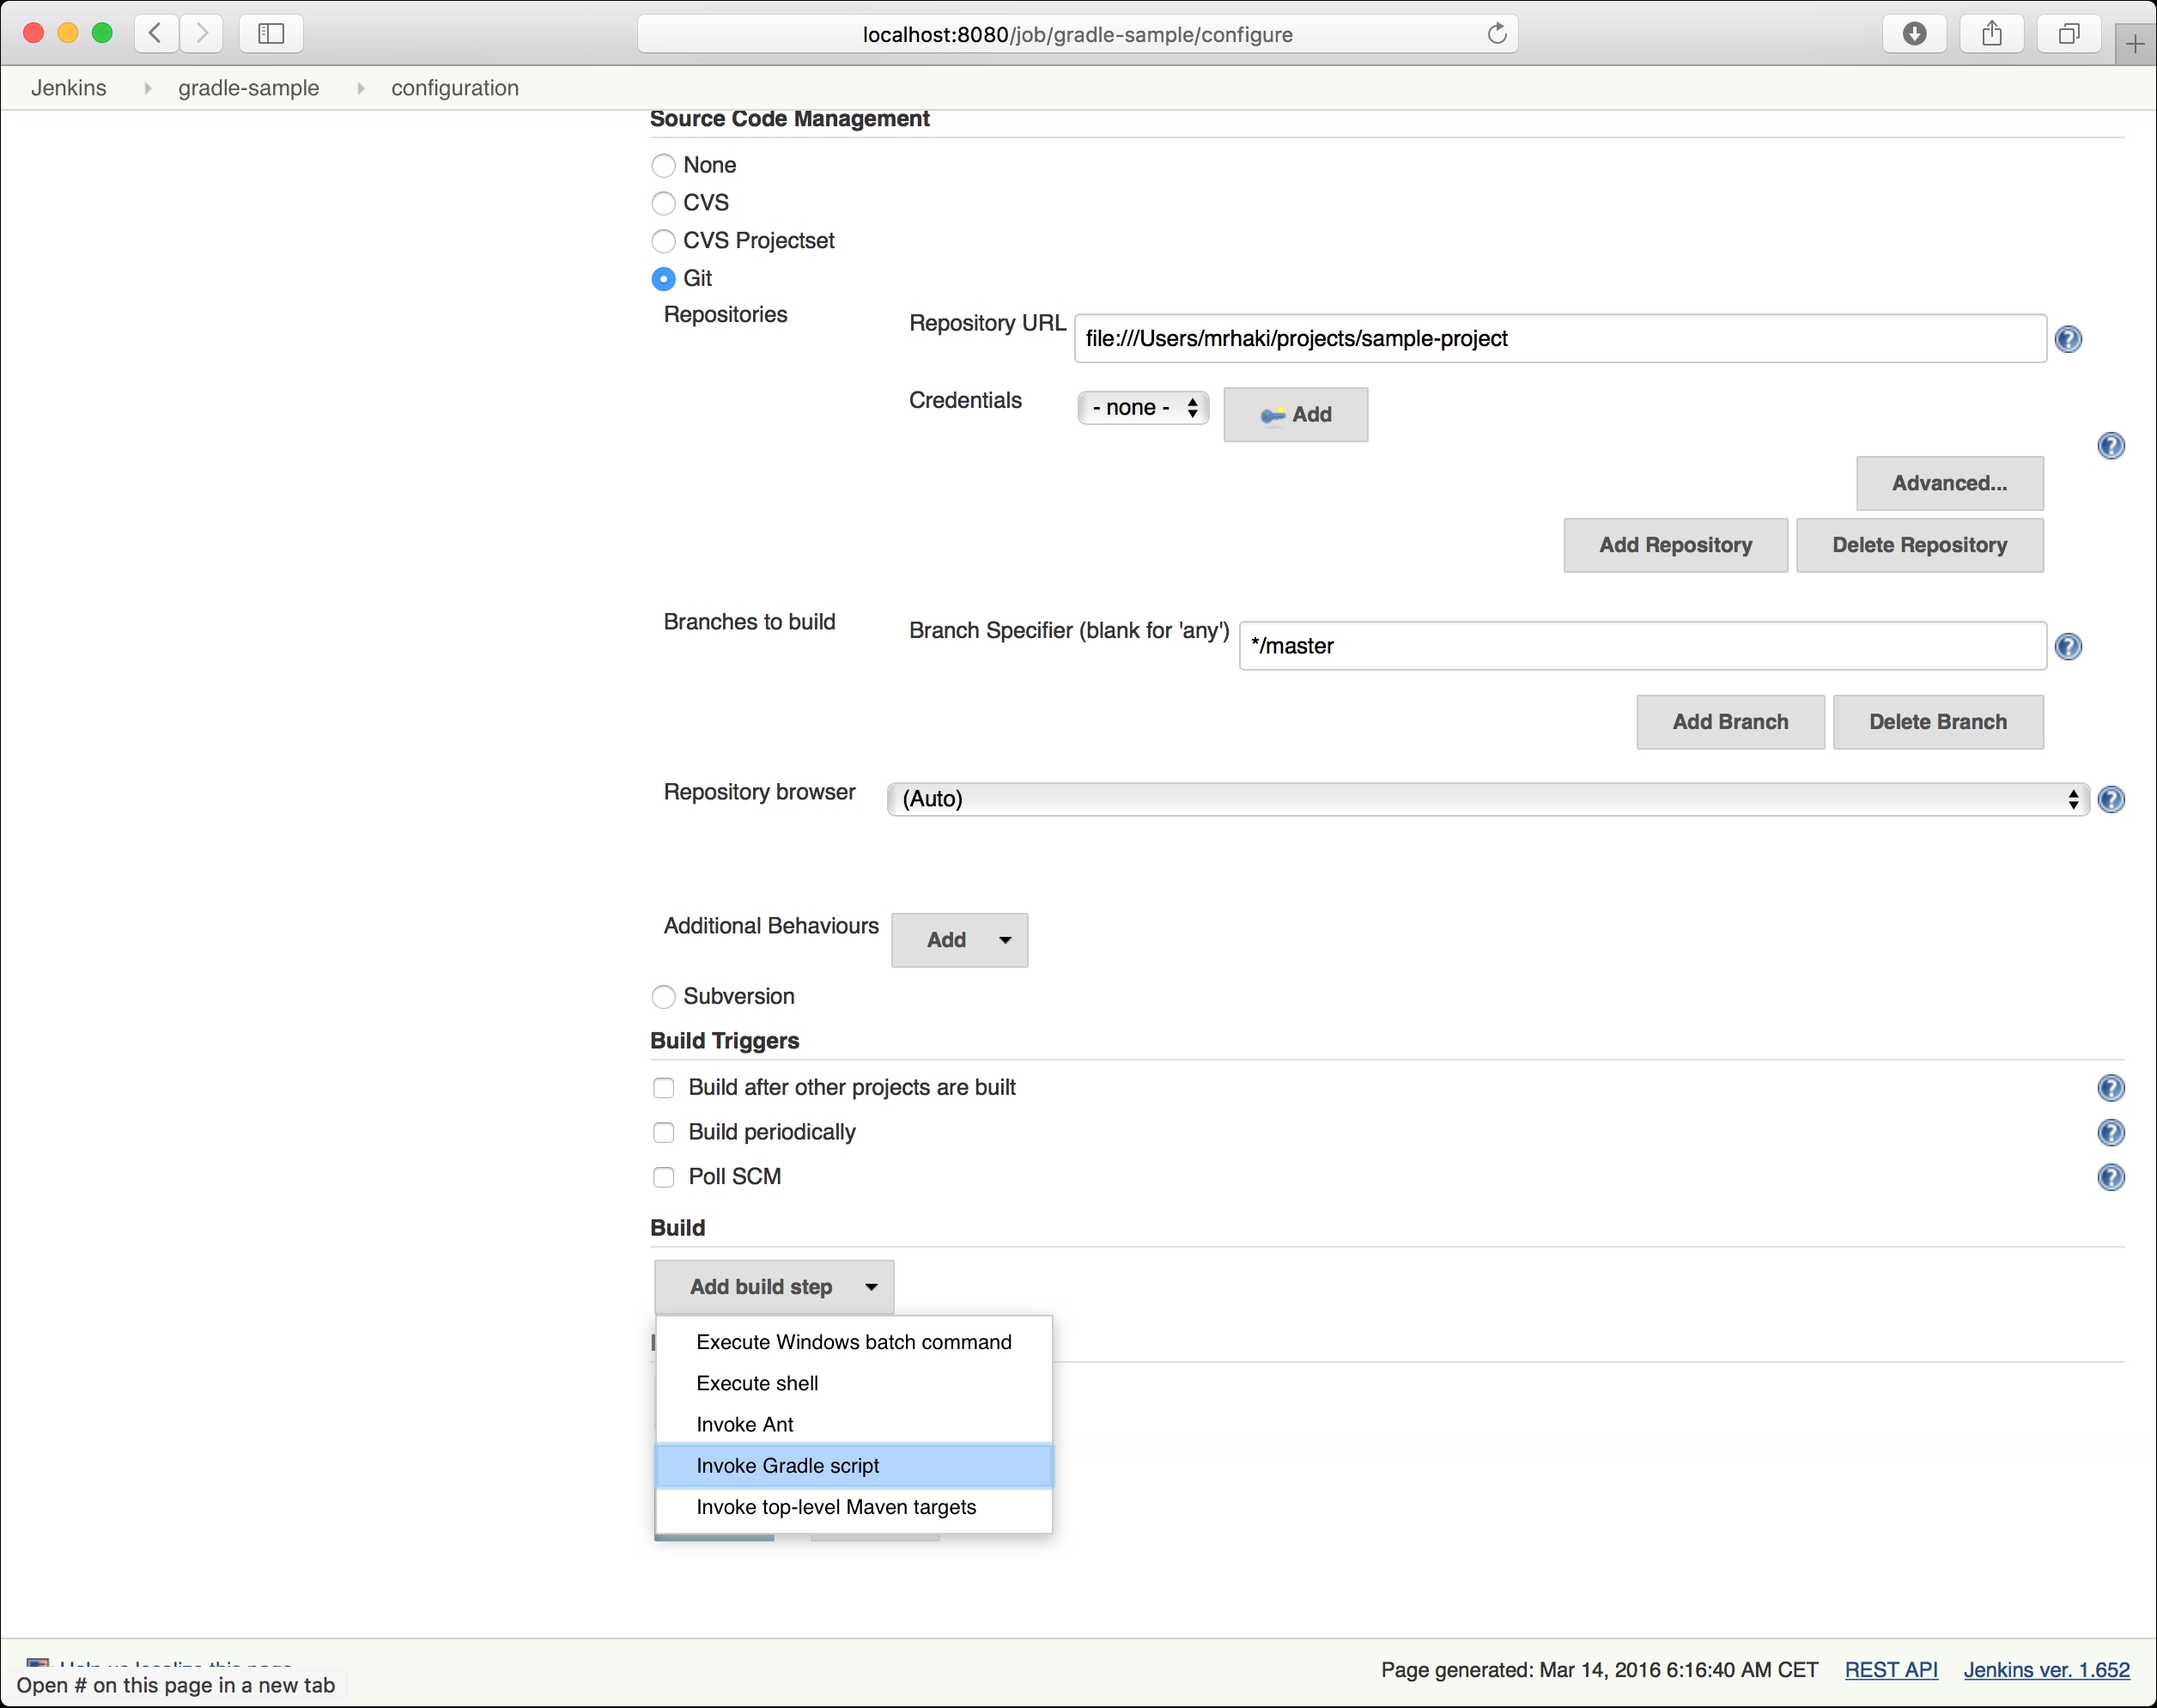
Adding a build step to invoke Gradle
- We will select the
Invoke Gradle script option, and Jenkins adds new fields to configure our Gradle build:

Details for a Gradle build step
- First, we can choose whether we want to use the Gradle Wrapper for this project. We don't need it for our project, so we leave this unchecked.
- Next, we can choose Gradle Version. We can install multiple Gradle versions for Jenkins, and we can choose the version that we want to use. The default version is the one that is available on the system path. We will discuss how to add more Gradle versions to Jenkins later.
- We can give our build step a short description in the Build step description field.
- The Switches field can contain the Gradle command-line options that we want to use. For example, to exclude a task, we can set the value for the Switches field to
-x <taskName>. - The Tasks field must contain the tasks that we want to execute. If our project has default tasks set and we want to run those, we can leave the Tasks field empty. For our project, we want to invoke the
cleanandbuildtasks, so we will set the value toclean build. - The Root Build script field is for a multi-project build, where the root script is not in a default location. We can define the custom location here.
- If a Gradle project has a build file name other than the default
build.gradle, we can set the value in the Build File field.
We have the basic setup for running our Gradle project:
- We will click on the Save button and close the configuration.
- We will return to the job page. On the left-hand side, we can see a menu with the Build Now link. We will click on the link and Jenkins will start the job:

Overview of the Gradle job we have configured
Our code will be checked from the Git repository, and the
cleanandbuildGradle tasks are run. - If the job is done, we can see the build result. From the build result page, we can see the console output when we click on the Console Output link:

Console output for running Gradle job in Jenkins
On the left-hand side, we can also see all the Gradle tasks that have been executed. We can click on the links and jump directly to any output of the task.
To see the generated artifacts and test results, we must add the following two post-build actions to the job configuration:
- First, we will select the configure job link. In the Post-build Actions section, we will click on the Add post-build action button. Here, we will first select Archive the artifacts:

Adding build step for archiving artifacts
- Next, we will select Publish JUnit test result report:

Adding build step to publish test results
- The artifacts are saved in the
build/libsdirectory of our project. So, in the Files to archive field, we will enterbuild/libs/.jar. We will also set the value for the Test report XMLs field tobuild/test-results/.xml:
Configuration for the build steps
- The configuration is done, so we click on the Save button. We can run the job again, and this time, we will see the artifacts of our projects as downloadable links on the job page. The test results are also shown, and we can even see more details if we click on the Test Result link:

Job overview page with published test results and archived artifacts
We can add extra Gradle versions to Jenkins. If, for example, some projects rely on Gradle 2.10 and others on Gradle 2.11, we can add other Gradle versions to Jenkins. Let's see how we can add another Gradle version to Jenkins:
- From the Manage Jenkins page, we will select Configure System. The page has a Gradle section, where we can add new Gradle installations:

Option to add a new Gradle version in Jenkins
- If we click on the Add Gradle button, we can define a name for our Gradle installation in the Gradle name field.
- We will also see an Install automatically checkbox. If this is checked, Jenkins will download a Gradle version for us from the Internet. We can select the version from the Version drop-down box:

Configuration to automatically install Gradle version
- If we want to use a locally-installed instance of Gradle, we must uncheck the Install automatically checkbox. Now, we can set the Gradle location in the GRADLE_HOME field:

Configuration for existing Gradle installation
- We must click on the Save button to save the changes. Now, we can choose the correct Gradle version in the jobs.